


When and How to Use the BIOS Setup Utility
When to Use
You need to run the BIOS Setup Utility when:
zYou see an error message on the screen requesting you to run Setup.
zYou want to restore the factory default settings.
zYou want to modify some specific settings according to the hardware.
zYou want to modify some specific settings to optimize system performance.
Starting BIOS Setup
NOTE:
1.The Setup screens shown in this chapter are for your reference only. The actual items or settings on your computer may differ.
2.The Setup utility may have been updated after the publication of this user guide.
3.The settings you select in your operating system might override similar settings in the Setup.
To run BIOS Setup, press F2 when the prompt appears in the lower left corner of the screen during system startup. The prompt shows up on the screen for only a few seconds. You must press F2 quickly. The BIOS Setup menu appears as shown next.
Moving Around and Making Selections
A brief description of keyboard usage is listed next:
5-2 |
BIOS Setup Utility & MLUA |
Key |
Function |
|
|
F1 |
General Help |
|
|
F2 |
General Help |
|
|
F9 |
Load optimal defaults |
|
|
F10 |
Save and Exit |
|
|
← → |
Select Screen |
|
|
↑ ↓ |
Select Item |
|
|
┼ ─ |
Change Field/Option |
|
|
Enter |
1) Brings up the sub-menu when available. |
|
2) Opens or closes the options window when an item is selected. |
|
|
Tab |
Jumps from one item to another. |
|
|
Esc |
1) Exits the BIOS Setup Utility. |
|
2) Returns to the previous menu if in a sub-menu. |
|
3) Closes the options window if one is open. |
|
|
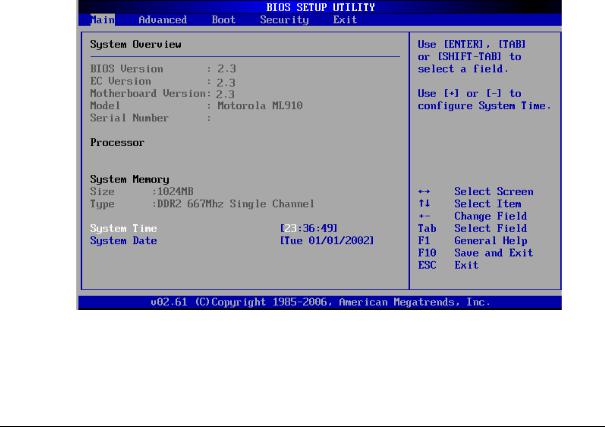
Main Menu
BIOS Setup Utility & MLUA |
5-3 |
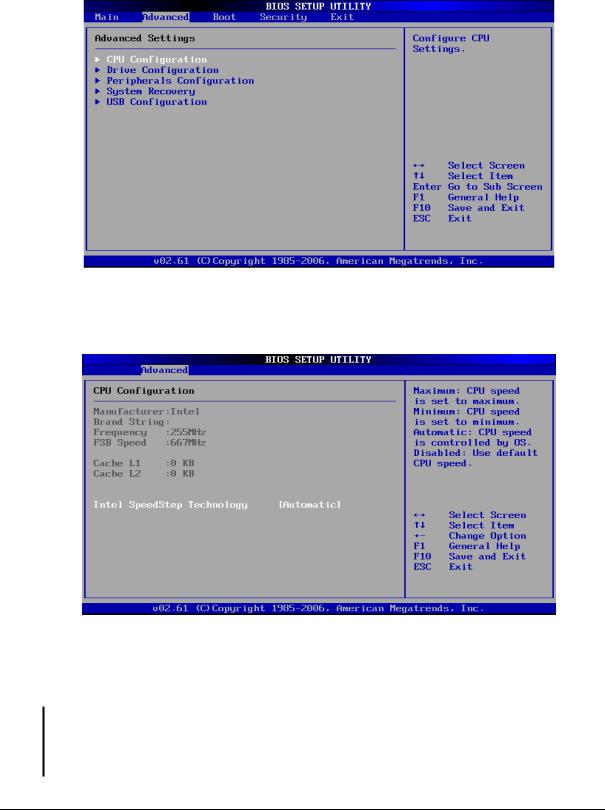
Advanced Menu
CPU Configuration
Setup function of “Intel SpeedStep Technology“: Under the slide of “Advanced”, use ÏÐ key to move cursor on the string of “Intel SpeedStep Technology” and you will find the option of “Maximum”, “Minimum”, “Automatic” & “Disabled” on the right top corner of screen.
zMaximum: CPU speed is set to maximum.
zMinimum: CPU speed is set to minimum.
zAutomatic: CPU speed is controlled by OS.
zDisabled: Use default CPU speed.
5-4 |
BIOS Setup Utility & MLUA |

Drive Configuration
While entering setup, BIOS auto detects the presence of devices. This displays the status of auto detection of devices.
Information of Device
BIOS Setup Utility & MLUA |
5-5 |

Peripherals Configuration
Enables or disables the feature of “Peripherals Configuration”:
Under the slide of “Advanced”, use ÏÐ key to move cursor on the string of peripherals and enable or disable peripherals configuration as you need.
System Recovery
System Recovery Hotkey:
Enable or Disable System Recovery Hotkey by (Ctrl+F9).
System Recovery Password:
The BIOS support the recovery of the HDD with a Ctrl+ F9 during POST by using one to six character password.
5-6 |
BIOS Setup Utility & MLUA |

Set and Change Password:
Select Change Password from the System recovery password Setup menu and press <Enter>.
Enter New Password:
Appears. Type the password and press <Enter>. The screen does not display the characters entered. Retype the password as prompted and press <Enter>. If the password confirmation is incorrect, an error message appears. The password is stored in NVRAM after completes.
USB Configuration
BIOS Setup Utility & MLUA |
5-7 |
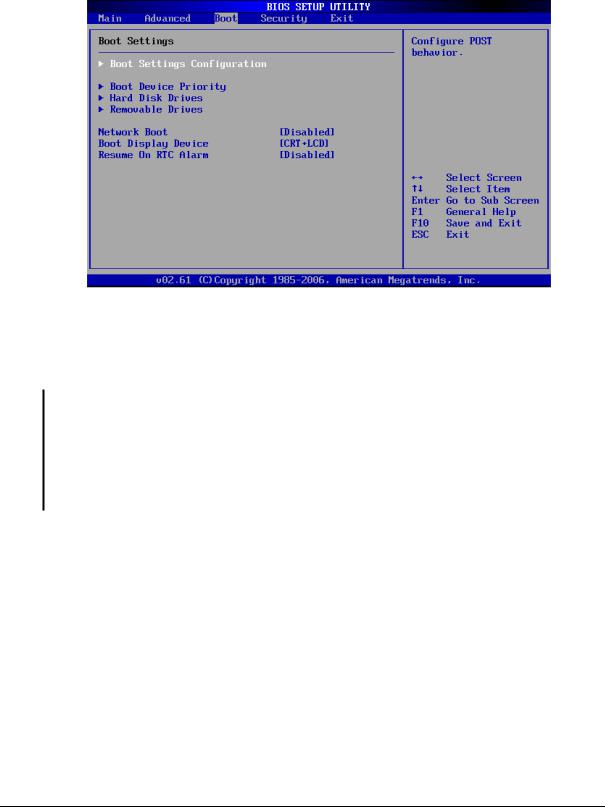
Boot Settings
Boot Settings:
Under the slide of “Boot”, use ÏÐ key to move cursor on the string of “Boot Settings Configuration”, “Boot Device Priority”, “Hard Disk Drives” & “Removable Drives” for following features.
zBoot Setting Configuration: Configure POST behavior.
zBoot Device Drives: Set the Boot Device Priority Sequence.
zHard Disk Drives/Removable Drives/CD & DVD Drives: Set the Boot Device Priority Sequence from available Drives.
zNetwork Boot: Enables or Disables Network Boot.
zBoot Display Device: Set Display Device used when system boots.
zResume On RTC Alarm: Enable or Disable System wake up on RTC Alarm.
5-8 |
BIOS Setup Utility & MLUA |
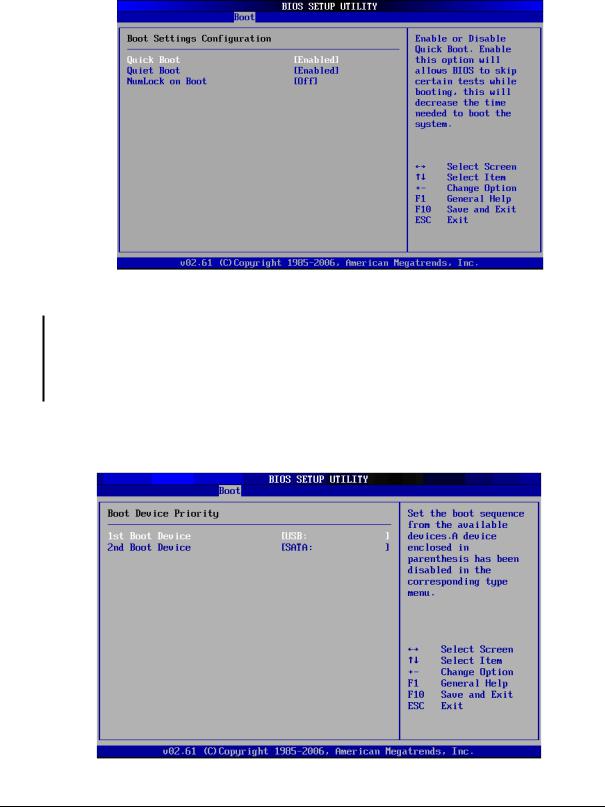
Boot Settings Configuration
Under the Slide of “Boot” use ÏÐ key to move cursor on the string of “Quick Boot”, “Quiet Boot” & “NumLock on Boot” for the features enable or disable.
zQuick Boot: Enable or Disable Quick Boot. Enable this option will allows BIOS to skip certain tests while booting, this will decrease the time needed to boot the system.
zQuiet Boot: Enable this option will shows logo screen instead of POST messages.
zNumLock on Boot: set status & NumLock when system boot.
Boot Device Priority
Set the boot sequence from the available devices. A device enclosed in parenthesis is has been disabled in the corresponding type menu.
BIOS Setup Utility & MLUA |
5-9 |
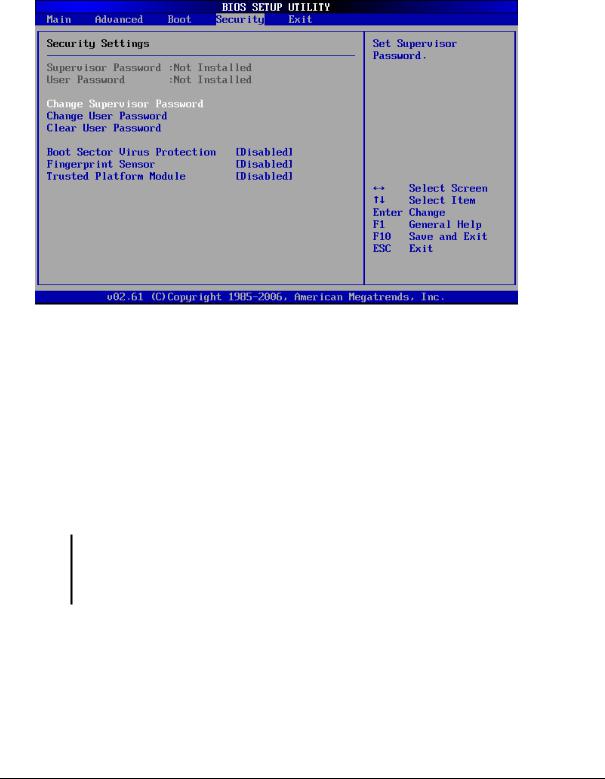
Security Settings
BIOS Password Setup
Provide both a Supervisor and a User password. If you use both passwords, the Supervisor password must be set first. The system can be configured so that all users must enter a password every time the system boots or when Setup is executed, using either or either the Supervisor password or User password. The Supervisor and User passwords activate two different levels of password security. If you select password support, you are prompted for a one to six character password. Type the password on the keyboard. The password does not appear on the screen when typed. Make sure you write it down. If you forget it, you must drain NVRAM and reconfigure. Select Security Setup from the Setup main BIOS setup menu. All Security Setup options, such as password protection and virus protection, are described in this section. To access the sub menu for the following items, select the item and press <Enter>:
zChange Supervisor Password
zChange User Password
zClear User Password
zSupervisor Password
Indicate whether a supervisor password has been set. If the password has been installed, Installed displays. If not, Not Installed displays.
User Password
Indicate whether a user password has been set. If the password has been installed, Installed displays. If not, Not Installed displays.
Change Supervisor Password:
Select Change Supervisor Password from the Security Setup menu and press <Enter>.
5-10 |
BIOS Setup Utility & MLUA |
Enter New Password:
Appear Type the password and press <Enter>. The screen does not display the characters entered. Retype the password as prompted and press <Enter>. If the password confirmation is incorrect, an error message appears. The password is stored in NVRAM after completes.
Change User Password:
Select Change User Password from the Security Setup menu and press <Enter>.
Enter New Password:
Appear Type the password and press <Enter>. The screen does not display the characters entered. Retype the password as prompted and press <Enter>. If the password confirmation is incorrect, an error message appears. The password is stored in NVRAM after completes.
Clear User Password:
Select Clear User Password from the Security Setup menu and press <Enter>.
Clear New Password:
[Ok] [Cancel]
Appear Type the password and press <Enter>. The screen does not display the characters entered. Retype the password as prompted and press <Enter>. If the password confirmation is incorrect, an error message appears. The password is stored in NVRAM after completes.
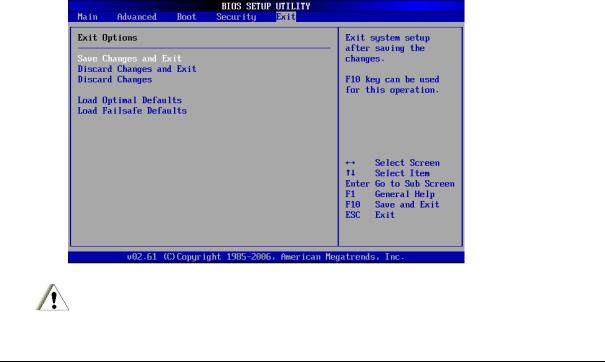
Exit Options
CAUTION:
It will conflict with ML910™ Com Ports resource and there is a work-around to fix it if you use I/O resources is "2F8h","3F8h","2E8h" or "3E8h" to PCMCIA card.
BIOS Setup Utility & MLUA |
5-11 |
Please enter "BIOS Setup Utility" menu and refer following procedure to setup:
1.Click “Advanced “.
2.Select “Peripherals Configuration”.
3.To disable "Serial Port 1".
("Serial Port 1" is located on the left side of the notebook, when you disable it, this Serial Port1 will be no function.)
5-12 |
BIOS Setup Utility & MLUA |

ML User Application (MLUA)
As previously described the MLUA is designed for users to configure the parameters of various functions in the notebook. By using these configuration parameters, you can change the default configuration that automatically loads when you turn on the computer.
ML User Application is automatically launched every time you boot your notebook into Windows Operating System, this can be indicated by the ML User Application icon on the taskbar. Double-click on the ML User Application icon will bring up the application window.
ML User Application is presented in a tab-based user interface, which consists of below tabs:
•About tab displays the following system information:
oMotherboard Version
oBIOS Version
oEC Version
oApplication Version
•GPS tab displays the name of the built-in GPS module, and it allows user to turn ON or OFF the built-in GPS module. Default setting is OFF.
•General Purpose I/O tab allows user to turn ON or OFF the GPIO port 0 and GPIO port 1 when notebook is docked to a Vehicle Dock. Default setting is OFF both GPIO ports.
•Monitor tab displays the following information:
oProcessor Temperature
o Battery Capacity
o Car Voltage
o Docking Board Temperature
oDocking Fan Speed
•WWAN Device tab displays the name of the built-in WWAN module, and it allows user to turn ON or OFF the built-in WWAN module. Default setting is OFF.
BIOS Setup Utility & MLUA |
5-13 |

•Temperature tab displays the following temperature readings from different sensors located on the system:
o Processor Temperature
o LCD Display Temperature
o System Temperature
o Hard Disk Drive Temperature
o Primary Battery Temperature
oSecondary Battery Temperature
•Battery tab allows user to select the most frequently used battery charger profile which defines the battery calibration cycle.
•This WLAN Device tab displays the name of the built-in WLAN module, and it allows user to turn ON or OFF the built-in WLAN module. Default setting is OFF.
•This Speaker Output tab allows user to define the notebook speaker behavior.
General Guidelines
Below are the general guidelines on how to use the ML User Application:
•Click on the OK button to save changes and close the ML User Application window.
•Click on the Cancel button to discard changes and close the ML User Application.
•Click on the Apply button to save changes and keep the ML User Application window remained open.
•Click on the Get Default Value button to reset option to its default value.
•Click on the Help button to show the Help Content for the ML User Application.
Note:
Changing on ML User Application parameters will impact the ML Administrator Application configuration that has connection with ML User Application and vice versa
Specific details on the MLUA application and the setting that can be addressed are explained in more detail in the On-line Help that accompanies the application.
5-14 |
BIOS Setup Utility & MLUA |

ML Administrator Application (MLAA)
This application is designed for administrator to configure the parameters of various functions in the notebook. By using these configuration parameters, you can change the default configuration that automatically loads when you turn on the computer.
Every time you start the ML Administrator Application, the current configuration parameters saved in EC is loaded and displayed in the ML Administrator Application window.
For specific details on this application and the various parameters that can be adjusted please refer to the On-line for the application.
CAUTION:
It is recommended the any changes made using the MLAA application only be performed by a System Administrator.
BIOS Setup Utility & MLUA |
5-15 |

This page intentionally left blank
5-16 |
BIOS Setup Utility & MLUA |

CHAPTER 6
Installing Software Drivers
To take full advantage of the unique features of your computer, some operating systems require customized software, known as drivers, to be installed.
If you purchased the computer with Windows pre-installed, your dealer may have already installed the drivers. If not, you need to install the drivers using the driver CD supplied with your computer.
This chapter describes how to install the drivers.
Installing Software Drivers |
6-1 |

How to Use the Driver CD
NOTE:
1.The drivers may have been updated after this user guide was published. For latest driver updates, please contact your dealer.
2.You can always find README or document files in the folders for the LAN, TPM, Touch , Bluetooth, WLAN, HD Audio and Chipset on the driver CD. These files contain the latest information from the software supplier.
3.The available items may differ according to your computer model and operation system.
4.In order to access the User Guide on this CD you will need to have a copy of ADOBE Acrobat Reader on the computer or access to the Internet by the computer to use the ADOBE hot link icon to down load the reader.
An Autorun program is provided on the driver CD to help you easily install the drivers. When the driver CD is inserted, the Autorun program automatically starts. If you need to start the program manually, run the AutoRun.exe program from the root directory of the driver CD.
6-2 |
Installing Software Drivers |
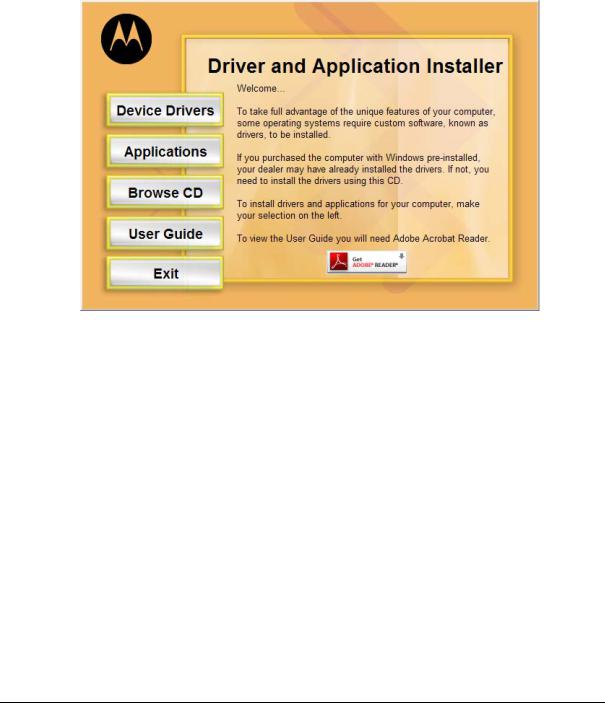
Main Menu
The Main Menu Screen:
To install drivers and applications for your computer, make your selecting the right.
Device Drivers |
Provides access to the available drivers selections |
|
Applications |
Provides access to the available applications selections |
|
User Guide |
Allows you to access the electronic version of the User Guide |
|
Browse CD |
Allows you to browse the contents of this CD. Requires the ADOBE |
|
Reader |
||
|
||
Get ADOBE |
This is a hot link to the ADOBE web site in order to access and |
|
download the ADOBE Reader for viewing the ML910™ User Guide |
||
Reader Icon |
||
on this CD |
||
|
Installing Software Drivers |
6-3 |
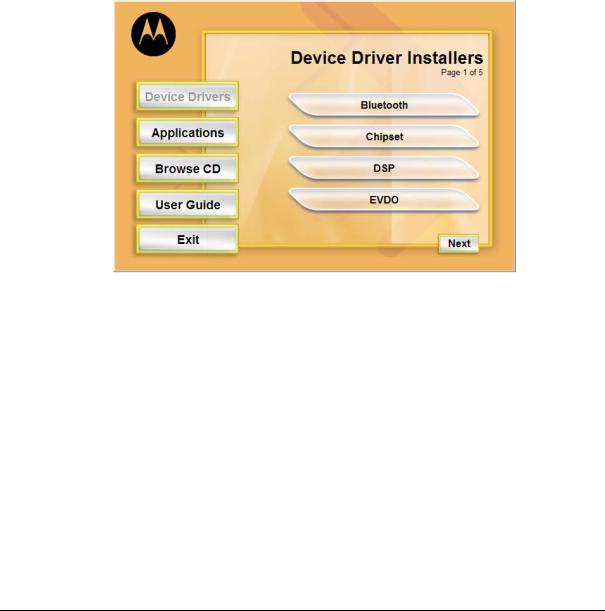
Installing Device Drivers
1.Click “Device Drivers” in the “Main Menu”.
2.To install the necessary driver, just click on the particular option and follow the onscreen instructions to continue and complete installation.
•Device Driver Installers Menu Screen
There are 5 screens located in the Device Driver Installers menus. You can use the Next and Back buttons to navigate back and forth in the screens.
Bluetooth |
Click on the Bluetooth button to install both the driver & application |
Chipset |
Click on the Chipset button to install the Chipset driver |
DSP |
Click on the DSP button to install the DSP driver |
EVDO |
Click on the EVDO button to access the Driver and Watcher installs |
6-4 |
Installing Software Drivers |
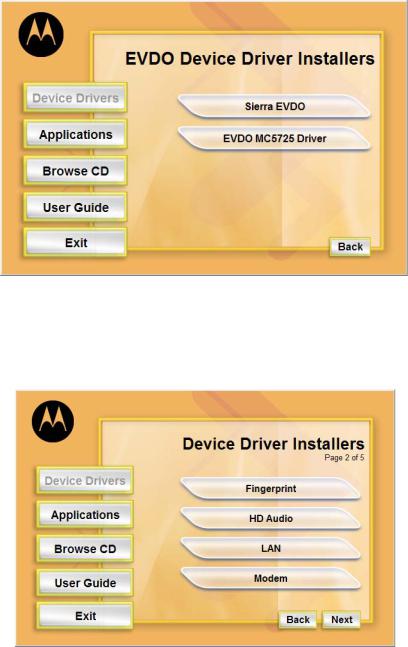
•EVDO Device Driver Installers Menu Screen
EVDO |
Click on the EVDO button to install Watcher |
|
EVDO MC5725 |
Click on the EVDO MC5725 Driver button to install the EVDO driver |
|
Driver |
||
|
•Device Driver Installers Page 2 of 5
|
Fingerprint |
Click on the Fingerprint button to installs the Fingerprint driver. |
|
|
HD Audio |
Click on the HD Audio button to installs the HD Audio driver. |
|
|
LAN |
Click on the LAN button to installs the LAN driver. |
|
|
Modem |
Click on the HD Modem button to installs the Modem driver. |
|
|
|
|
|
Installing Software Drivers |
6-5 |
||
•Device Driver Installers Page 3 of 5
MotoMesh |
Click on the MotoMesh button to both the MotoMesh driver & |
|
application. |
||
|
||
Serial Mouse |
This is neither driver or app but is a required patch for GPS |
|
Patch for GPS |
Operation |
|
TouchPad |
Click on the TouchPad button to installs the LAN driver. |
|
TouchPanel |
Click on the TouchPanel button to installs the TouchPanel driver. |
•Device Driver Installers Page 4 of 5
|
TPM |
Click on the TPM button to install the Trusted Platform Module driver. |
|
|
UMTS |
Click on the UMTS button to installs both the UMTS driver and |
|
|
application. |
|
|
|
|
|
|
|
USB – LAN1 |
Click on the USB – LAN1 button to installs the USB – LAN1 driver. |
|
|
USB – LAN2 |
Click on the USB – LAN2 button to installs the USB – LAN2 driver. |
|
|
|
|
|
6-6 |
|
Installing Software Drivers |
|

•Device Driver Installers Page 4 of 5
Video |
Click this button to access ATI video Driver Installer and NET |
|
Framework 2.0 |
||
|
||
WDE1000 |
Click on the WDE1000 button to install both the WDE1000 driver & |
|
application |
||
|
•Video Device Driver Installers
|
ATI Video |
Click on the ATI Video to install the ATI video Driver |
|
|
|
|
|
|
NET Framework |
Click on the NET Framework 2.0 button to install the NET |
|
|
2.0 |
Framework 2.0 which required for the ATI video driver |
|
|
|
|
|
Installing Software Drivers |
6-7 |
||

Installing Applications
1.Click “Applications” in the “Main Menu”.
2.Click on the application program you want to install.
ML Service |
Click on the ML Service button to install the ML admin |
|
Application |
||
|
||
ML User Application |
Click on the ML User Application button to install the ML User |
|
Application |
||
|
||
MW800 Display Utilities |
Click on the MW800 Display Utilities button to install the MW800 |
|
Display Application Utilities |
||
|
6-8 |
Installing Software Drivers |

CHAPTER 7
Caring for the Computer
Taking good care of your computer ensures trouble-free operation and also reduces the risk of damage to your computer.
This chapter gives you guidelines covering these areas of maintenance:
zHow to protect the computer.
zWhat to note when using and storing the computer.
zHow to clean the computer.
zWhat to note when using the battery pack.
zWhat to note when traveling with the computer.
Caring for the Computer |
7-1 |

Protecting the Computer
To safeguard the integrity of your computer data as well as the computer itself, you can protect the computer in several ways as described in this section.
Using the Password
The power-on password protects your computer against unauthorized use. If the password is set, the prompt requesting for the password appears on the screen whenever the computer is turned on.
The password is set via the SCU program. See “Security Settings” in Chapter 5 for instructions.
Using an Anti-Virus Strategy
The Security feature of the SCU program protects the boot sector of the hard disk from virus attacks..
It is recommended that you install a virus-detecting program to keep your computer secure from potential viruses that could damage your files and system.
7-2 |
Caring for the Computer |

Taking Care of the Computer
Location Guidelines
zUse the computer where the temperature is between -20 °C (-4 °F) and 50 °C (122 °F).
zAvoid placing the computer in a location subject to high humidity, extreme temperatures, mechanical vibration, direct sunlight, or heavy dust.
zDo not cover or block any ventilation openings on the computer. For example, do not place the computer on a bed, sofa, rug, or other similar surface. Otherwise, overheating may occur which could result in damage to the computer.
zKeep the computer at least 13 cm (5 inches) away from electrical appliances that can generate a strong magnetic field such as a TV, refrigerator, motor, or a large audio speaker.
zDo not move the computer abruptly from a cold to a warm place. A temperature difference of more than 10 °C (18 °F) will cause condensation inside the unit, which may damage the storage media.
zDo not place the computer on an unsteady surface.
General Guidelines
zDo not place heavy objects on top of the computer as this may damage the display.
zThe screen surface can be easily scratched. Do not use paper towels to clean the display. Avoid touching it with a ballpoint pen or pencil.
zTo maximize the life of the backlight in the display, use the system’s power management feature to automatically turn off the backlight. Avoid using a screen saver or other software that prevents the power management from working.
Cleaning Guidelines
zNever clean the computer with its power on.
zUse a soft cloth moistened with water or a non-alkaline detergent to wipe the exterior of the computer.
zGently wipe the display with a soft, lint-free cloth. Do not use alcohol or detergent on the display.
zDust or grease on the touchscreen can affect its sensitivity. Clean the touchscreen by using adhesive tape to remove the dust and grease on its surface.
Caring for the Computer |
7-3 |

Battery Pack Guidelines
Optimal Use of the ML910 RUGGED NOTEBOOK Battery
The battery is a consumable product and its performance will gradually degrade based on usage. To minimize battery degradation and ensure longer life, limit the number of charges and ensure the battery is not exposed to high ambient temperatures. If possible, the battery pack should only be recharged when it is nearly fully discharged. It is recommended to store the battery removed from the ML910™RUGGED NOTEBOOK with a nominal charge to prevent over-discharge. A full charge is recommended if the battery is to be stored in the ML910™RUGGED NOTEBOOK.
For optimal use, users should avoid the following:
•Use on battery power for short periods of time then repeatedly charging
•Using or storing in a place with high temperature.
Charging
Charge and discharge time will differ depending on the computer’s power status and temperature. Battery charging time increases when the computer’s power is on and is also dependent on the battery’s temperature. To charge the battery more quickly, power off the computer or place it in the standby or the hibernation mode. Battery charging time also increases when in low or high temperature environments below 10ºC, (50ºF) or above 30ºC (86ºF). During normal charging (between 32ºF and 113ºF) the battery indicator will glow amber. When full the indicator will glow green. The ML910™’s battery will not be charged if its temperature is outside the allowable range of 0º to 45ºC (32ºF to 113ºF). During this condition, the battery indicator will not be illuminated.
•The battery should be charged in a temperature range of 10°C to 35°C (50°F to 95°F).
When the outside air temperature is high (35ºC or above), the temperature inside the battery will be higher. Avoid charging the battery where the temperature is high, such as inside a vehicle, with all its windows closed and/or exposed to the hot sun or other places where the ambient temperature is high. Although the battery can also be charged down to 0ºC, the charging time will be greatly increased and the battery capacity will be greatly reduced.
•It is not recommended to charge the battery more than once per day.
Constant recharging of the battery after every use accelerates battery degradation. To increase battery life it is recommended to recharge the battery no more than once per day or when the remaining charge drops below 20%. To increase battery life, the computer will not charge the battery immediately after it has been fully charged unless the remaining charge has fallen to less than 95%
•If possible, charge the battery while the computer is powered off.
When the computer’s power is on, the temperature inside the battery will increase due to the heat generated by the internal electronic components. Charging the battery at higher temperatures will degrade the battery more quickly. It is highly recommended
7-4 |
Caring for the Computer |
 Loading...