


 Loading...
PT 8257 WP
PT 8337 WP
en Operating and installation instructions Commercial heat-pump dryer
nl Gebruiksaanwijzing en opstellingsinstructies Professionele warmtepompdroger
M.-Nr. 07 986 863

en - Contents |
|
Caring for the environment ................................................................................................ |
4 |
Tips for saving energy ........................................................................................................... |
4 |
Warning and Safety instructions........................................................................................ |
5 |
Appropriate use..................................................................................................................... |
5 |
Technical safety..................................................................................................................... |
6 |
Correct use............................................................................................................................ |
7 |
Using accessories ................................................................................................................. |
8 |
Description of the machine ................................................................................................ |
9 |
PT 8257/8337 WP ................................................................................................................. |
9 |
Controls............................................................................................................................... |
10 |
Function buttons ................................................................................................................. |
11 |
Operator programme card................................................................................................... |
11 |
Drying ................................................................................................................................. |
13 |
Before commissioning......................................................................................................... |
14 |
Switching on the tumble dryer ............................................................................................ |
14 |
Loading laundry into the tumble dryer ................................................................................ |
14 |
Load capacities (dry weight) ............................................................................................... |
15 |
Closing the drum door ........................................................................................................ |
15 |
Selecting a programme ....................................................................................................... |
15 |
Selecting the additional “Block+” function ................................................................... |
16 |
Starting a drying programme without making changes ...................................................... |
16 |
Making changes to the drying programme before starting it .............................................. |
16 |
Changing the load capacity ........................................................................................... |
17 |
Changing the temperature.............................................................................................. |
17 |
Changing the residual moisture target ........................................................................... |
18 |
Starting a drying programme ......................................................................................... |
18 |
End of programme............................................................................................................... |
18 |
Removing the laundry ......................................................................................................... |
19 |
Checking the fluff filter ........................................................................................................ |
19 |
Switching off the tumble dryer ............................................................................................ |
19 |
Drying in programme card or coin operation mode....................................................... |
20 |
Programme card operation mode ....................................................................................... |
20 |
Resolving programme card errors....................................................................................... |
21 |
Laundry load card operation ............................................................................................... |
21 |
Drying with payment system C 4060/C 4065/C 4070......................................................... |
21 |
Additional functions .......................................................................................................... |
22 |
Changing the language ....................................................................................................... |
22 |
Setting a start time .............................................................................................................. |
22 |
Setting the start time...................................................................................................... |
23 |
Setting the start date...................................................................................................... |
23 |
Starting the programme at the set start time ................................................................. |
23 |
Cancelling the start time ................................................................................................ |
23 |
Stopping a programme ....................................................................................................... |
23 |
Cancelling a programme ..................................................................................................... |
24 |
Skipping a programme (skipping programme blocks) ........................................................ |
24 |
Displaying programme information ..................................................................................... |
25 |
Programme overview ........................................................................................................ |
26 |
Standard programmes ........................................................................................................ |
26 |
2

|
en - Contents |
Special programmes for duvets .......................................................................................... |
26 |
Special programmes for contract cleaners ......................................................................... |
27 |
Special programmes for the fire brigade............................................................................. |
27 |
Special programmes for dry cleaners ................................................................................. |
27 |
Special programmes for riding stables ............................................................................... |
28 |
Optional modules .............................................................................................................. |
29 |
Operating data..................................................................................................................... |
29 |
Total data menu option................................................................................................... |
30 |
Programme data menu option........................................................................................ |
30 |
Delete data menu option ................................................................................................ |
31 |
Information on peak-load negotiation ................................................................................. |
32 |
Problem solving guide ...................................................................................................... |
33 |
Error messages ................................................................................................................... |
33 |
Fault diagnosis .................................................................................................................... |
33 |
Service................................................................................................................................. |
35 |
Cleaning and maintenance............................................................................................... |
36 |
Fluff filter.............................................................................................................................. |
36 |
Tumble dryer........................................................................................................................ |
37 |
Heat exchanger ................................................................................................................... |
38 |
Installation and connection .............................................................................................. |
40 |
Installation requirements ..................................................................................................... |
40 |
General operating conditions .............................................................................................. |
40 |
Transport ............................................................................................................................. |
40 |
Installing the heat-pump ..................................................................................................... |
41 |
Installation ........................................................................................................................... |
43 |
Securing the machine.......................................................................................................... |
44 |
Electrical connection ........................................................................................................... |
45 |
Air intake vent...................................................................................................................... |
46 |
Air outlet vent ...................................................................................................................... |
47 |
Condensate drainage .......................................................................................................... |
47 |
Optional accessories ........................................................................................................ |
48 |
Payment system .................................................................................................................. |
48 |
XKM RS 232 communication module ................................................................................. |
48 |
Dimensions ........................................................................................................................ |
49 |
Technical data.................................................................................................................... |
50 |
Short instructions PT 8257/8337 WP ............................................................................... |
51 |
1. Preparing the laundry ...................................................................................................... |
51 |
2. Switching on the tumble dryer and loading the laundry ................................................. |
51 |
3. Selecting the drying programme ..................................................................................... |
51 |
4. Starting a drying programme .......................................................................................... |
51 |
5. Removing the laundry at the end of the programme ...................................................... |
52 |
6. Switching off the tumble dryer ........................................................................................ |
52 |
3

en - Caring for the environment
Tips for saving energy
This heat-pump tumble dryer offers the latest technological features. These help reduce its energy consumption during drying by about 50 % compared to the energy consumption of conventional electrically heated tumble dryers.
The following tips will help you to make further savings in energy consumption:
–Make sure your laundry is spun in the washing machine at the maximum spin speed.
–Carry out the final rinse in the washing machine with hot water. This results in a lower residual moisture content and increased residual heat in the laundry after washing. This reduces the time required for drying and thus saves energy.
–Sort the laundry:
-by fibre and weave,
-by the required level of drying,
-by residual moisture.
–Dry the maximum amount specified for the drying programme whenever possible. Energy consumption is more economical for a full load. Partial loads are not economical. Over loading the drum hampers drying results and affects the finish.
–The drying process is more efficient with a clean fluff filter and heat-exchanger. This reduces the time it takes to dry the laundry as well as the amount of energy required.
–Ensure sufficient room ventilation.
4

en - Warning and Safety instructions
Appropriate use
This tumble dryer is intended only for use in a commercial environment.
This tumble dryer complies with current safety requirements. Inappropriate use can, however, lead to personal injury and damage to property.
It is essential to read these operating instructions before using the tumble dryer for the first time. They contain important information for your safety, as well as information on using and maintaining the tumble dryer. This prevents both personal injury and damage to the machine.
This tumble dryer is only intended for drying fabrics which have been washed in a water solution, and marked on the manufacturer's care label as being suitable for tumble drying. Any other applications may be dangerous. Miele cannot be held liable for damage resulting from incorrect or improper use or operation.
To prevent the risk of fire, do not dry the following items in the tumble dryer:
–Items that have not been washed.
–Items that have not been thoroughly cleaned and are still soiled with grease, oil or other deposits (such as cooking oils, cosmetics, lotions, etc). If items have not been thoroughly cleaned, there is a danger that they might ignite when heated, even after they have been removed from the tumble dryer at the end of the programme.
–Items (e.g. mops and floor cloths) that have been treated with inflammable cleaning agents or which contain residues of acetone, alcohol, benzene, petrol, kerosene, stain remover, turpentine, wax and wax remover or other chemicals.
–Items that have been cleaned using industrial chemical agents (e.g. professional drycleaning agents).
–Items that have been splashed with hair lacquer, hair spray, nail varnish remover or similar substances.
Heavily soiled laundry must be washed particularly thoroughly to prevent a risk of fire. Increase the cleaning agent dosage and select a higher wash temperature.
Wash the laundry several times if necessary.
If the tumble dryer is to be operated in an area accessible to the public, the supervisor must ensure that it can be operated safely without risk of danger to others.
The tumble dryer must not be used in a non-stationary location (e.g. on a ship).
5

en - Warning and Safety instructions
Technical safety
This tumble dryer must only be set up and commissioned by a Miele Service technician or authorised Miele Service Dealer.
Before installation check the tumble dryer for any obvious damage. A damaged tumble dryer must not be installed and/or used.
The electrical safety of this tumble dryer can only be guaranteed when correctly earthed. It is essential that this standard safety requirement is met. If in any doubt, please have the on-site wiring system tested by a qualified electrician. Miele cannot be held liable for the consequences of an inadequate earthing system (e.g. electric shock).
The tumble dryer is only electrically disconnected from the power supply, if
–the plug has been disconnected from the socket.
–it is switched off at the main switch, or the mains electrical fuse is disconnected (on site).
Tumble dryers with damage to the control panel or wire insulation must not be used until they have been repaired.
Unauthorised repairs could result in unforeseen dangers for the user, for which Miele cannot accept liability. Repairs should only be undertaken by a Miele approved service technician, otherwise any subsequent damage will not be covered by the guarantee.
Faulty components must only be replaced by genuine Miele original spare parts. The safety standards of the tumble dryer are guaranteed only when these parts are fitted.
Do not operate the tumble dryer in a room where cleaning machines operate with solvents containing CFCs. During combustion, any vapours that are emitted will break down into hydrochloric acid, leading to consequential damage affecting laundry and the machine. Air exchange must not take place between rooms if machines are set up in separate rooms.
Only allow clean, fresh air to be fed into the tumble dryer. Air entering the machine must not contain vapours with chlorine, fluorine or other solvents.
The air intake vent is found on the rear of the tumble dryer. The exhaust vent is found in the lid. Under no circumstances should these vents be sealed or covered by objects (e.g. laundry baskets, blankets or towels) (see installation instructions).
Never use or store benzine, petrol or any easily flammable liquid near to the tumble dryer. Otherwise, there is a risk of fire and explosion.
The tumble dryer must be serviced in a timely and professional manner. Otherwise, there is a potential risk of loss in performance, faults and fire.
This tumble dryer contains fluorinated greenhouse gases as a refrigerant. They are hermetically sealed. Designation: R 134a
Do not damage, remove or bypass the safety features and control elements of the tumble dryer.
Only operate the tumble dryer when all removable outer panels are in place so that it is impossible to touch an electrical component or moving part.
6

en - Warning and Safety instructions
Correct use
The tumble dryer may only be operated when the heat-pump module is installed and connected to the tumble dryer.
Always ensure sufficient room ventilation (see installation instructions).
Ensure that the heat-pump is connected to the tumble dryer correctly and without any gaps. It should not be possible to gain access between the machines. This will otherwise pose a danger of injury.
This tumble dryer can only be used by people with reduced physical, sensory or mental capabilities, or lack of experience or knowledge, if they are supervised whilst using it or have been shown how to use it in a safe way by an authorised person.
Children under 8 years of age must be kept away from the tumble dryer unless they are constantly supervised.
Children aged eight and older may only use the tumble dryer without supervision if they have been shown how to use it in a safe manner. Children must be able to understand and recognise the possible dangers caused by incorrect operation.
Children must not be allowed to clean or maintain the tumble dryer unsupervised.
Children should be supervised in the vicinity of the tumble dryer. Never allow children to play with the tumble dryer.
Always close the tumble dryer door after each drying cycle. This will prevent:
–Children climbing into the tumble dryer or hiding things in it.
–Pets or other small animals climbing into the tumble dryer.
During the drying process, the door glass and the frame around the drum door will get hot. Please be aware that the laundry may also be hot if it is removed from the tumble dryer before the end of the drying programme.
7

en - Warning and Safety instructions
Safety measures in the event of leaking refrigerant
The heat-pump coolant circuit contains a non-toxic, odourless refrigerant (R134a). If released into the atmosphere it is rapidly volatised. Because it is heavier than air, it can displace oxygen and pose a danger of asphyxiation in small unventilated rooms.
If any damage is found on the copper pipes on the heat-pump, stop using the machine and vacate the room immediately.
–Warn other people present of the danger.
–Please see the safety data sheet for further information on how to handle this refrigerant.
–Call Service.
Preventing problems
Empty all pockets to prevent the risk of flammable items such as lighters, matches, candles and cosmetics getting into the tumble dryer.
Always make sure that the tumble dryer drum is stationary before reaching in to remove laundry. Do not touch a drum that is still rotating. Reaching into a moving drum poses a significant danger of injury.
Many drying programmes include a cooling phase for the laundry. These drying programmes are only finished once the cooling phase is complete. This ensures that the laundry items do not remain at a high temperature and do not become damaged.
Only unload the tumble dryer once the drying programme has come to a complete finish. Otherwise, a fire risk is posed by hot laundry self-igniting when it is stored or packaged.
Never use the tumble dryer without the fluff filters in place. Otherwise there is a risk of fire.
A damaged fluff filter must be replaced immediately. Otherwise, the air paths and heating may become clogged with fluff. If this is the case, it is no longer possible to guarantee that the tumble dryer will operate without issues.
Using accessories
Only use genuine original Miele accessories and spare parts with this appliance. Using accessories or spare parts from other manufacturers will invalidate the warranty and Miele cannot accept liability.
8
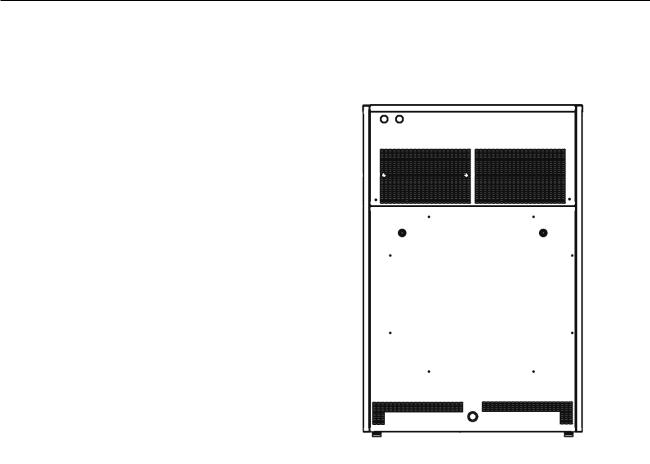
en - Description of the machine
PT 8257/8337 WP
|
|
|
|
|
|
|
|
|
|
|
|
|
||
|
|
|
|
|
|
|
|
|
aEmergency off switch
The emergency off switch should only be activated in the event of danger or in order to prevent danger. When this switch is activated, the machine is immediately switched off and put in a safe condition. Once the danger has been averted, the switch can be unlocked again by turning the knurled washer to the right.
bFascia panel
cDrum door
The drum door is opened by pulling on the door handle.
dFluff filter compartment cover
The fluff filter compartment cover is opened by pulling on the handle.
eMachine feet (4 units)
To ensure that the tumble dryer is aligned horizontally and evenly, its height can be adjusted by turning the machine feet.
fElectrical connection
The permitted supply voltage is specified on the data plate of the tumble dryer.
gAir outlet vent
The hot air that is blown out from the heat exchanger to cool it warms the room air.
hAir intake vent
iCondensate drainage
9

en - Description of the machine
Controls
aDisplay
When the tumble dryer is switched on, the welcome screen will appear briefly followed by the programme list. The most recently started programme is pre-selected (highlighted).
bFunction buttons
These buttons are allocated specific functions, which vary according to the machine status. The current functions of these buttons are shown in the display via the buttons. After the button is activated, the selected function remains highlighted in the display. Alternatively, the function buttons can be reprogrammed to “Direct button assignment”. In this case, the first 6 programmes in the programme list can be selected directly using buttons 1–6.
cbutton
The light ring around the button flashes when a selected programme can be started. The selected programme starts when the start button is pressed. After a programme has been started, the display content can be shown as before by pressing the start button again.
dPC optical interface
Using PC software, data can be transmitted to and from the controls to a PC.
eSelector dial
The outer ring is used to select the display and input fields. Pressing the inner button allows changes to be made to the display selection and input fields and also confirms these changes.
fCard reader
If the machine is programmed for card operation, only drying programmes on the card can be selected. The card must be inserted into the card reader in the direction of the arrow.
gbutton
Switches the machine on.
hbutton
Switches the machine off.
10
en - Description of the machine
Function buttons
Stop/end
Pressing this function button stops the current programme or ends the currently stopped programme.
Block plus
The corresponding programme block (e.g. Pre-drying) is added to the programme.
Functions
Another language can be temporarily selected by pressing this button.
Start time
If this button is pressed before the programme is started, the start time can be set individually for the programme.
Information
Programme information is shown in the display after this button is pressed.
Skip
Pressing this button allows the current programme to be skipped or a programme block to be repeated.
Back to previous display
The previous display is shown by pressing this button.
Information on previous/next line
Some of the messages in the display are more than one line long. Touch the or arrow button to read them in full.
Save
Any saved settings are accepted by pressing this button.
Programme locked
The current programme is locked by pressing this button. After 1 minute, the locked programme can no longer be stopped or cancelled by pressing the Stop/end button .
Programme unlocked
Pressing this button unlocks a locked programme.
Operating data
The operating data is displayed when this button is pressed.
Data transfer
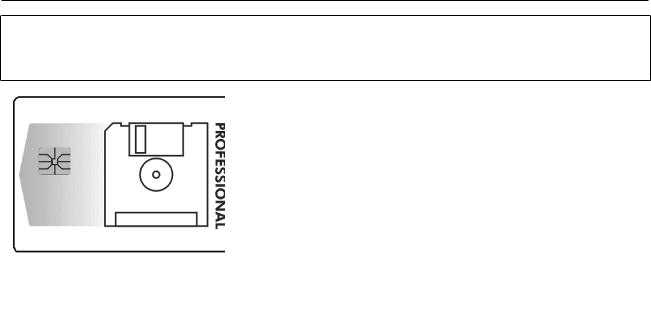
Operator programme card
Initially, there are no programmes on this card. Please refer to the programming instructions for information on how data is transferred from the controls to the card.
11
en - Description of the machine
If a card with saved programmes is placed in the card reader before the programme is started, the controls no longer access the internal programme memory. The content of the card is read and displayed as a programme list with the reference “Card operation”.
The card can hold a maximum of 30 programmes consisting of 6 blocks each. The back of the card can be labelled.
12

en - Drying
Not all fabrics are suitable for drying in a tumble dryer. Please observe the symbols on the fabric care label.
Symbols on care labels:
–Dry at normal temperature
–Dry at low temperature
–Do not tumble dry
Tip: For even drying results and to avoid damaging fabrics, sort the laundry by fibre and weave.
Only tumble dry items that have a care label stating that they are suitable for tumble drying.
Tumble drying unsuitable fabrics poses a fire hazard.
The following fabrics must not be tumble dried:
–Fabrics which contain a large proportion of rubber, foam rubber or rubber-like materials.
–Fabrics treated with inflammable detergents.
–Items which have been splashed with hair lacquer, hair spray, nail varnish remover or similar substances.
–Items soiled with oil, grease and similar residues, e.g. kitchen linen and linen used in beauty clinics.
–Items such as mop heads and floor cloths containing residual wax or chemicals.
–Damaged items that contain fillings, e.g. pillows and jackets.
–Fabrics contaminated by greases and oils that have not been adequately washed. Use a heavy-duty detergent for very heavily soiled items (e.g. workwear). Please seek advice from the detergent manufacturer in this regard.
Drying woollen or linen fabrics
Woollen items and fabrics containing wool have a tendency to become matted.
Use the “Woollens” programme only to dry woollen items and fabrics containing wool. Pure linen has a tendency to roughen if tumble dried.
Please follow the manufacturer's instructions.
Protect the drum from damage (scratches and dents).
Before placing items in the tumble dryer wrap any large metal parts such as buckles, hooks, clasps and zips etc. with a cloth.
Items with closed metal zips can cause the moisture sensing electrodes in the drum ribs to be bridged. This can lead to the drying process running on for too long or to not finish at all.
Dry these items with the zip open.
Loopknit and woven textiles (e.g. t-shirts) have a tendency to shrink depending on quality. This can be made worse by over-drying.
Do not use the “Cottons Extra Dry” programme for these items.
13

en - Drying
Starched laundry can be machine dried. Select the most appropriate programme for ironing by hand.
Sort the laundry according to the level of dryness required.
It is not necessary to sort according to size.
Small items can find their way into duvet covers and pillow cases during the drying programme.
Close or fasten duvet covers and pillow cases before drying them.
Underloading is uneconomical. Overloading will impair the drying result and the laundry finish.
Dry using the maximum load for the programme whenever possible.
Rinse laundry in the washing machine using hot water in the final rinse.
This reduces the residual moisture level and maintains heat in the laundry which helps keep processing time down, thus saving energy.
Before commissioning
Wipe the inside of the drum with a soft, dry cloth before loading the tumble dryer with laundry.
Switching on the tumble dryer
Switch the machine on at the main switch (on site).
Press the button on the tumble dryer.
The welcome screen will be displayed.
PROFESSIONAL
PT 8xx7
Welcome
After the welcome screen, the programme list appears in the display. The most recently started programme is pre-selected (highlighted).
1 |
Cottons extra dry |
0% |
|
|
|
|
|
2 |
Cottons dry |
0% |
|
|
|
|
|
3 |
Cottons damp |
20% |
|
|
|
|
|
Loading laundry into the tumble dryer
Open the drum door on the tumble dryer.
Unfold the pre-sorted laundry and place loosely into the drum.
The laundry must not contain any objects (e.g. dispenser containers).
14

en - Drying
Load capacities (dry weight)
PT 8257 WP |
PT 8337 WP |
|
Drum volume |
250 l |
325 l |
|
|
|
1, 2, 3, 4, 5 Cottons |
10–13 kg |
13–16 kg |
|
|
|
6, 7, 8 Minimum iron |
5 kg |
6.6 kg |
|
|
|
9 Woollens |
4 kg |
5.2 kg |
|
|
|
10 Delicates |
2 kg |
2.6 kg |
|
|
|
11, 12 Timed drying programme |
10–13 kg |
13–16 kg |
|
|
|
13, 14 Proofing, Outerwear |
5–6.6 |
6.6–9 |
Closing the drum door
Shut the drum door with a gentle swing.
Be careful not to trap any items in the door when closing it.
Fabrics could be damaged if they are trapped.
Selecting a programme
The tumble dryer is equipped with an electronic scanning system that constantly monitors the moisture content of the laundry. As soon as the selected drying level is reached, the laundry is cooled and the drying process is ended automatically. Different drying programmes can be selected for different types of fabric and depending on the further treatment required.
1 |
Cottons extra dry |
0% |
|
|
|
|
|
2 |
Cottons dry |
0% |
|
|
|
|
|
3 |
Cottons damp |
20% |
|
|
|
|
|
Select the required drying programme by rotating the selector dial. The selected drying programme remains highlighted.
Confirm the selected drying programme by pressing the inner button on the selector dial.
15

en - Drying
Selecting the additional “Block+” function
(Not for standard programmes)
2 |
Cottons dry |
|
10,0 / 13,0 kg |
0 % |
Drying |
|
|
|
70 °C |
||
|
Cooling down |
|
|
|
|
|
Example display after programme confirmation
Press the function button to add the required programme block to the drying programme (e.g. Pre-drying).
The field remains highlighted after the function button is pressed.
2 |
Cottons dry |
|
10,0 / 13,0 kg |
|
0 % |
Drying |
|
70 °C |
|
|
|
Cooling down |
|
|
|
|
|
|
|
Example display with Block+ function selected
The function can be de-selected by pressing the function button again.
Starting a drying programme without making changes
If you do not want to make any further changes to the drying programme:
Press the button to start the drying programme.
The drying programme is now running.
Making changes to the drying programme before starting it
The following steps describe how to make changes to the parameters, such as load capacity, temperature or residual moisture, before the programme starts.
First press the selector dial to confirm the selected programme.
2 |
Cottons dry |
|
10,0 / 13,0 kg |
0 % |
Drying |
|
|
70 °C |
|||
|
Cooling down |
|
|
|
|
|
|
The maximum load capacity appears in the top right-hand side of the display. You now
have the option of making changes to the drying programme.
16

en - Drying
Changing the load capacity
Before the programme starts, you can enter the corresponding load manually by taking the following steps:
Rotate the selector dial until the entry field for the load capacity is selected.
2 |
Cottons dry |
|
10,0 |
13,0 kg |
0 % |
Drying |
|
|
|
70 °C |
||||
|
Cooling down |
|
|
|
|
|
|
|
|
Press the selector dial to confirm the selection.
The load capacity can now be changed by rotating the selector dial.
Rotate the selector dial until the corresponding load has been set.
Press the selector dial again to confirm the set load.
You have now changed the load capacity.
Changing the temperature
Before the programme starts, you can individually set the temperature for the drying programme by taking the following steps:
The temperature can be set in 1 °C intervals from cold, 30–80 °C.
Rotate the selector dial until the entry field for the temperature is selected.
2 |
Cottons dry |
|
13,0 kg |
0 % |
Drying |
|
|
70 °C |
|
||
|
Cooling down |
|
|
|
|
|
|
|
|
|
|
|
|
|
|
Press the selector dial to confirm the selection.
The temperature can now be changed by rotating the selector dial.
Rotate the selector dial until the required temperature has been set.
Press the selector dial again to confirm the set temperature.
You have now changed the temperature for the drying programme.
17

en - Drying
Changing the residual moisture target
Before the programme starts, you can individually set the residual moisture target for the fabrics by taking the following steps:
The residual moisture target can be set in 1 % intervals from -4 % to 40 %.
Rotate the selector dial until the entry field for the residual moisture target is selected.
2 |
Cottons dry |
13,0 kg |
|
|
|
0 % |
Drying |
70 °C |
|
Cooling down |
|
|
|
|
|
|
|
|
|
|
Press the selector dial to confirm the selection.
The residual moisture target can now be changed by rotating the selector dial.
Rotate the selector dial until the required residual moisture target has been set.
Press the selector dial again to confirm the set residual moisture target.
You have now changed the residual moisture target for fabrics.
Starting a drying programme
Once you have made all the required changes, you can start the modified drying programme.
Press the button.
The drying programme is now running. The programme sequence is shown in the display.
2 |
Cottons dry |
|
|
0 % |
Drying |
>40 % |
|
|
Cooling down |
Finish at |
12:35 |
|
|
|
|
|
|
|
|
Example of programme sequence display
In the second display line (Drying in the above example display), the current residual moisture (>40 %) and the symbol (= heating activated) are also displayed. The next programme block is shown in the 3rd display line.
The time for the end of programme is shown to the right of the display (here: Finish
at 12:35).
The end of programme display has an autonomous learning function. Several programme sequences are therefore required for the exact time.
End of programme
2 |
Cottons dry |
|
|
|
Programme finished |
|
|
|
|
Anti-crease |
|
Finish at |
12:35 |
|
|
|
|
|
|
Example of end of programme display
18

en - Drying
The end of programme is indicated by a message in the display. At the same time, a buzzer sounds for several seconds. The anti-crease phase is then started.
In the anti-crease phase, the drum will rotate at brief intervals to keep the laundry from creasing.
Removing the laundry
The laundry may only be removed from the tumble dryer once the drying programme has come to a complete finish (i.e. not before the end of the cooling phase).
Hot laundry can self-ignite and cause a fire when folded or put away.
Pull the door handle to open the drum door.
Remove the laundry.
Ensure that you do not leave any items of laundry in the drum.
Otherwise, these items of laundry could be damaged by overdrying when the tumble dryer is next used.
Checking the fluff filter
The fluff filter must be checked for contamination after each drying process.
Pull the door handle to open the fluff filter compartment.
Check whether the fluff filter is dirty and clean it if necessary.
Close the fluff filter compartment again.
An opened fluff filter compartment poses a trip hazard.
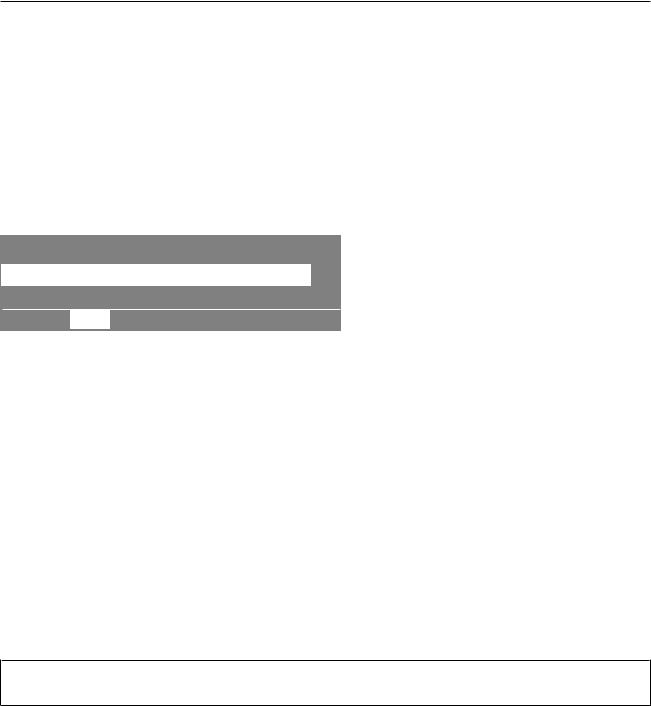
2 Cottons dry
Programme finished
Warning: lint filter blocked.
Example display when fluff filter is dirty
The following message appears in the display when the fluff filter is dirty: Warning: lint filter blocked.. In such a case, the fluff filter must be cleaned immediately after the end of programme.
If the message is still displayed after the fluff filter has been cleaned, the heat exchangers must be checked via the rear service panel and cleaned if necessary (see “Cleaning and maintenance”).
Switching off the tumble dryer
Switch off the tumble dryer if no further drying programmes are to be run.
Close the drum door.
Press the button.
The tumble dryer is now switched off.
Then switch off at the main switch (on site).
19
en - Drying in programme card or coin operation mode
Programme card operation mode
Cards with one programme are intended for a particular model of machine. Blank cards can be used in any machine.
Press the button to switch on the tumble dryer.
The welcome screen will appear in the display.
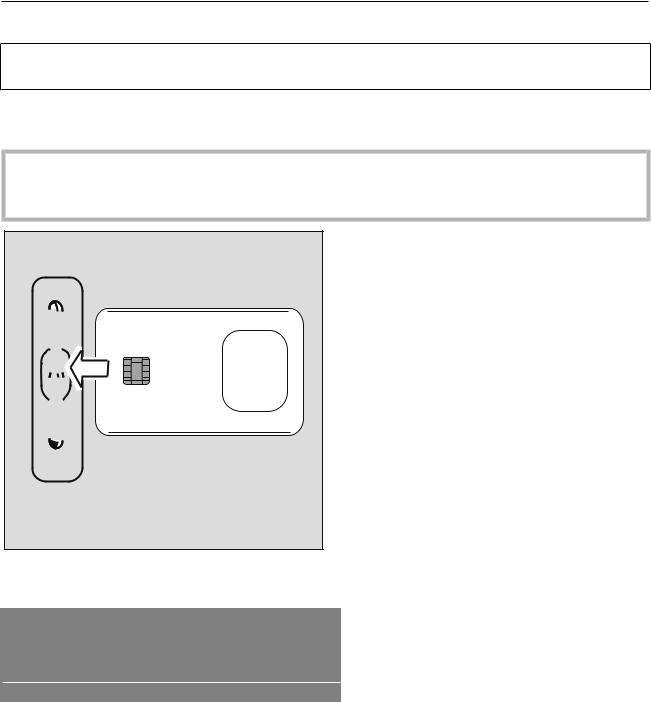
Only one suitable programme card may be inserted into the card reader. Do not use any other objects.
Otherwise, the card reader can become damaged.
Inserting the programme card into the card reader
Insert the card into the card reader.
Card operation
17 |
Fire service |
45 °C |
|
|
|
|
|
18 |
Minimum iron |
60 °C |
|
|
|
|
|
Example display: programme list in card operation
A list with the programmes on the card now appears in the display.
Selecting a programme
Select the required drying programme by rotating the selector dial. The selected drying programme remains highlighted.
Confirm the selected drying programme by pressing the inner button on the selector dial.
Press the button to start the programme.
The selected drying programme is now running.
After the button has been pressed, the programme card can be removed from the card reader. The programme will be deleted at the end of the programme.
20
en - Drying in programme card or coin operation mode
Resolving programme card errors
If the programme card is inserted into the slot the wrong way round, the following message will appear in the display:
Card fault
Card incorrectly inserted in card reader.
Remove the programme card from the card reader.
Reinsert the right side of the programme card into the card reader.
If the programme card is not suitable for this model of machine, the following message will appear in the display:
Card operation
Programmes on the card are only suitable for machine type ??.
Example display: programmes unsuitable for this model of machine on the programme card
Remove the programme card from the card reader.
Use a programme card suitable for the available machine model.
Laundry load card operation
A laundry load that requires a special process is assigned to a card with the corresponding programme. Only this one programme is found on this programme card.
This function can be activated via the Card access menu option in the Supervisor level. The tumble dryer controls will then only accept programme cards for laundry loads (on which there is one programme). The internal programmes in the tumble dryer can no longer be accessed.
Drying with payment system C 4060/C 4065/C 4070
When drying with a payment system, the following operating steps must be observed in the same order to avoid losing money or tokens.
1.Load the laundry and close the drum door.
2.Press the button.
3.Select a programme
4.Insert money or token into the payment system.
5.Press the button.
21

en - Additional functions
Changing the language
Before starting the programme, the language can be changed temporarily with the
function button.
1 |
Cottons extra dry |
0% |
|
|
|
|
|
2 |
Cottons dry |
0% |
|
|
|
|
|
3 |
Cottons damp |
20% |
|
|
|
|
|
Press the function button.
The following will appear in the display:
Settings |
Back <- |
||
|
|
|
|
Main menu |
|
Language |
|
|
|
|
|
|
|
Supervisor level |
|
|
|
||
Press the selector dial to confirm the Language option.
Settings |
Back |
<- |
|
|
|
||
Language |
|
english (GB) |
|
|
|
|
|
|
español |
|
|
|
|
||
|
|
|
|
Select the required language by rotating the selector dial.
Press the selector dial to confirm the selected language.
If the machine is not operated for 5 minutes, or if a programme is not started within this time, the language is reset to the original language setting.
Setting a start time
A later drying start time can be allocated to a programme using the function button.
Once the programme has been selected, the start time can be selected via the function button.
2 |
Cottons dry |
|
10,0 kg |
||
0 % |
Drying |
|
70 °C |
||
|
Cooling down |
|
|
||
|
|
|
|
|
|
Example display after the programme selection |
|||||
Press the function button. |
|
||||
|
|
|
|
|
|
2 |
Cottons dry |
|
13,0 kg |
||
|
|
|
|||
Start time: |
16 |
:10 |
Start date: |
2.9.2017 |
|
|
|
|
|
||
After selection press the start button. |
|
||||
|
|
|
|
|
|
22

en - Additional functions
The current time and date are now shown in the display. The entry field for hours is highlighted.
Setting the start time
Press the selector dial to select the hour. The start time (hour) can now be modified.
Rotate the selector dial to change the hour.
Press the selector dial to confirm your selection.
Rotate the selector dial until the field for minutes is highlighted.
Press the selector dial to select the minutes.
The start time (minutes) can now be modified.
Rotate the selector dial to change the minutes.
Press the selector dial to confirm your selection.
Setting the start date
Rotate the selector dial until the Start date: (day) entry field is highlighted.
Press the selector dial to select the day.
The start date (day) can now be modified.
Rotate the selector dial to change the day.
Press the selector dial to confirm your selection.
Change the month and year of the start date if necessary. The required start time is now set.
Starting the programme at the set start time
Press the button.
2 |
Cottons dry |
|
|
13,0 kg |
0 % |
Drying |
|
|
|
16:15-2.9.2017 |
Start: |
6:00-3.9.2017 |
||
|
|
|
|
|
|
|
|
|
|
Example display: current time, date and set start time
The programme will start at the time set.
If the drum door is then opened again, the button must be pressed again.
Cancelling the start time
If you do not want to accept the set start time, press either the or function button again.
Stopping a programme
Press the button to stop the current drying programme.
23

en - Additional functions
2 Cottons dry
Programme stop
Press the start button.
|
|
The programme is stopped. The programme can be continued by pressing the button.
Cancelling a programme
Press the button twice in succession to cancel the current drying programme. The programme is cancelled.
Skipping a programme (skipping programme blocks)
Parts of the programme can be skipped or repeated by taking the following steps:
Press the function button to stop the current drying programme. The programme is stopped.
2 Cottons dry
Programme stop
Press the start button.
|
|
Press the function button. |
|
The current programme area or programme block is shown in the display.
Change order |
-> 2Cottons dry |
|
Programme stop |
|
|
Area 1 |
Drying |
|
|
|
|
Select the Area menu option by rotating the selector dial. The Area menu option is now highlighted.
Press the selector dial to confirm the selection.
Select Area 1 Drying or Area 2 Cool down using the selector dial.
Press the selector dial to confirm the selection.
Area 1 |
Drying |
Block 1 |
Drying |
Select the Block menu option by rotating the selector dial. The Block menu option is now highlighted.
Select Block 1–10 Drying or Block 1–10 Cool down using the selector dial.
Press the selector dial to confirm the selection.
Press the function button to save the settings.
24

en - Additional functions
Now press the button to skip or press the function button to cancel skipping and to return to the programme stop.
Displaying programme information
2 |
Cottons dry |
|
|
|
|
|
|
|
|
Start date and time 10.9.2017 |
|
|
|
|
|
|
|
|
|
Start time 9:47 |
|
|
||
|
|
|
|
|
|
|
|
|
|
Press the function button during the programme sequence.
Further information on the drying programme is now shown in the display:
Time after start |
0 h 23 min |
|
|||
Time left |
0 h |
11 min |
|
|
|
Programme finished 10:21 Clock |
|
||||
|
|
|
|
|
|
Area 1 |
|
Drying |
|
|
|
Block 1 |
|
Drying |
|
|
|
Actual exhaust air temp. |
59°C |
|
|||
|
|
|
|
|
|
Peak load |
No |
|
|
|
|
Anti-crease |
3 s /87s /60 min |
|
|||
Recirculation/vent baffle |
Recirc. air |
|
|||
2 |
Cottons dry |
|
|
||
|
|
|
|
||
|
Block end signal |
Yes |
|||
|
|
|
|
|
|
Press the function button to return to the programme sequence.
25

en - Programme overview
Standard programmes
Drying programme |
Suitable fabrics |
Maximum load size |
|
|
(dry weight) |
|
|
|
1 Cottons extra dry 0 % |
Multi-layer and especially thick fabrics made from cotton/ |
|
(Normal ) |
linen that are not fully dried with the Cottons dry pro- |
|
|
gramme. |
|
|
|
|
2 Cottons dry 0 % |
Single and multi-layer cotton/linen fabrics. |
|
(Normal) |
|
|
|
|
PT 8257: 10–13 kg |
3 Cottons damp 20 % |
|
|
|
PT 8337: 13–16 kg |
|
(Machine iron) |
|
|
|
|
|
|
|
|
4 Cottons damp 25 % |
Cotton and linen fabrics that are to be ironed. |
|
(Machine iron) |
|
|
|
|
|
|
|
|
5 Cottons damp 40 % |
|
|
(Machine iron) |
|
|
|
|
|
6 Minimum iron dry 0 % |
|
|
(Normal) |
|
|
|
|
|
7 Minimum iron damp 10 % |
Minimum iron fabrics made of synthetic, cotton or mixed |
PT 8257: 5.0 kg |
(Machine iron) |
fibre. |
PT 8337: 6.6 kg |
|
|
|
8 Minimum iron damp 20 % |
|
|
(Machine iron) |
|
|
|
|
|
9 Woollens handcare |
Woollen fabrics. |
PT 8257: 4.0 kg |
(5 minutes) |
|
PT 8337: 5.2 kg |
|
|
|
10 Delicates 20 % |
Delicate synthetic, cotton or mixed fibre fabrics. |
PT 8257: 2.0 kg |
|
|
PT 8337: 2.6 kg |
|
|
|
11 Timed drying cool air |
Fabrics that need airing. |
|
(15 minutes) |
|
PT 8257: 10–13 kg |
|
|
|
12 Timed drying hot air |
For drying small loads or for airing individual items. |
PT 8337: 13–16 kg |
|
||
(20 minutes) |
|
|
|
|
|
13 Proofing |
Fabrics suitable for tumble drying, e.g. microfibre fabrics, |
|
(Normal) |
skiwear, outerwear, fine, close weave cotton garments |
|
|
(poplin), tablecloths. |
|
|
This programme includes an additional proofing fixing |
|
|
phase. Only use proofing agents which are suitable for use |
PT 8257: 5.0–6.6 kg |
|
on membrane textiles. These agents contain fluorochem- |
PT 8337: 6.6–9.0 kg |
|
ical compounds. |
|
|
|
|
|
Caution: fire hazard! Fabrics proofed with paraffinic |
|
|
agents must not be tumble dried. |
|
|
|
|
14 Outerwear |
Outerwear which is suitable for tumble drying. |
|
|
|
|
Special programmes for duvets
Drying programme |
Suitable fabrics |
Maximum load size |
|
|
|
(dry weight) |
|
|
|
|
|
Down duvets |
Down duvets and pillows. |
|
|
(Drying to 0 % residual moisture, |
|
|
|
airing, cooling down) |
|
PT 8257: 10 kg (ap- |
|
|
|
||
|
|
||
Synthetic duvets |
Synthetic duvets and pillows. |
prox. 1 duvet or 2 pil- |
|
(Drying to 0 % residual moisture, |
|
lows) |
|
airing, cooling down) |
|
PT 8337: 13 kg (ap- |
|
|
|
prox. 3 pillows or |
|
Natural fibre blankets |
Natural fibre duvets and blankets. |
||
1 pillow + 1 duvet) |
|||
(3 minutes drying, cooling down) |
Natural fibre duvets must not be fully dried in the tumble |
||
|
|||
|
dryer, as otherwise there is a risk of the fibres becoming |
|
|
|
matted. We recommend only partial drying. |
|
|
|
|
|
26

en - Programme overview
Special programmes for contract cleaners
There is a risk of fire if items are not cleaned sufficiently and if they are contaminated by residues (wax or chemicals).
Wash heavily soiled items thoroughly: use sufficient detergent and select a high temperature.
If in doubt, wash the laundry items several times.
Drying programme |
Suitable fabrics |
Maximum load size |
|
|
(dry weight) |
|
|
|
Mops |
Cotton mops |
|
(Drying to 0 % residual moisture, |
|
PT 8257: 10 kg |
cooling down) |
|
|
|
PT 8337: 13 kg |
|
|
|
|
Microfibre mops |
Microfibre mops |
|
|
|
|
Cleaning cloths |
Microfibre cloths, dusters |
PT 8257: 5.6 kg |
(Drying to 0 % residual moisture, |
|
|
|
PT 8337: 7.0 kg |
|
cooling down) |
|
|
|
|
|
|
|
|
Special programmes for the fire brigade
Drying programme |
Suitable fabrics |
Maximum load size |
|
|
|
Face masks |
Face masks with head straps |
PT 8257: 4 hold- |
45 minutes drying, cooling down |
Face masks may only be tumble dried if they are held in |
ers/8 masks |
|
place in the drum by special holders (optional accessor- |
PT 8337: 4 hold- |
|
ies). |
ers/12 masks |
|
|
|
Protective clothing |
Protective suits (e.g. Nomex® fire-fighting apparel), over- |
PT 8257: approx. 1– |
Drying to 0 % residual moisture, |
alls, jackets, trousers |
2 suits (1 jacket + |
airing, cooling down |
For an optimised drying result, rotate the items to the left. |
2 pairs of trousers or |
|
|
2 jackets) |
|
|
PT 8337: approx. |
|
|
2 suits (2 jackets + |
|
|
2 pairs of trousers or |
|
|
3 jackets) |
|
|
|
Reproof protect. clothing |
Fabrics treated with a proofing agent. |
|
Drying to 0 % residual moisture, |
Only use proofing agents which are suitable for use on |
|
airing, cooling down |
membrane textiles. These agents contain fluorochemical |
PT 8257: 5.0–6.6 kg |
|
compounds. |
PT 8337: 6.6–9.0 kg |
|
Caution: fire hazard! Fabrics proofed with paraffinic |
|
|
agents must not be tumble dried. |
|
|
|
|
Special programmes for dry cleaners
Drying programme |
Suitable fabrics |
Maximum load size |
|
|
(dry weight) |
|
|
|
WetCare sensitive |
For non-washable outerwear |
PT 8257: 4–5 kg |
3 minutes loosening, cooling down |
|
PT 8337: 5–6.6 kg |
|
|
|
WetCare silks |
Non-washable outerwear which creases easily |
PT 8257: 4–5 kg |
Drying to 15 % residual moisture, |
|
|
|
PT 8337: 5–6.6 kg |
|
cooling down |
|
|
|
|
|
|
|
|
WetCare intensive |
Washable outerwear |
PT 8257: 5–6.6 kg |
Drying to 0 % residual moisture, |
|
|
|
PT 8337: 6.6–9 kg |
|
cooling down |
|
|
|
|
|
|
|
|
27

en - Programme overview
Special programmes for riding stables
Metal buckles, hook and eye fasteners must be removed before tumble drying begins. If they are not, the fabrics and tumble dryer drum could become damaged.
Drying programme |
Suitable fabrics |
Maximum load size |
|
|
|
(dry weight) |
|
|
|
|
|
Horse blankets |
Horse blankets, saddle-cloths, gaiters, hoof boots, band- |
PT 8257: 10 kg (ap- |
|
Drying to 0 % residual moisture, |
ages, textile halters |
prox. 7 saddle-cloths |
|
airing, cooling down |
|
or 2 summer blankets |
|
|
|
or 1 winter blanket) |
|
Woollen horse blankets |
Horse blankets containing a high proportion of wool |
||
PT 8337: 13 kg (ap- |
|||
5 minutes drying, cooling down |
|
||
|
prox. 9 saddle-cloths |
||
|
|
||
|
|
or 2–3 summer |
|
|
|
blankets or 1–2 winter |
|
|
|
blankets) |
|
|
|
|
28
en - Optional modules
Operating data
Operating data can be read or deleted with the Operating data module. To do so, the
function button must be pressed before a programme starts or after it ends.
1 |
Cottons extra dry |
|
0% |
|
|
|
|
|
|
2 |
Cottons dry |
|
0% |
|
|
|
|
|
|
3 |
Cottons damp |
|
20% |
|
|
|
|
||
After the function button has been pressed, the following message appears in the display:
Operating data module
Total data
Programme data |
|
|
|
You now have the following options:
– Total data
Show data that is collected and added together from all programmes.
– Programme data
Show data that is recorded during the course of a programme.
– Delete data
– Module
Delete total data and programme data.
– Total data
Only delete total data.
– Programme data
Only delete programme data.
The function can be de-selected by pressing the function button again.
If the data storage capacity in the Operating data module is full, a message appears when the button is pressed to inform you that operating data will be overwritten.
The display returns to the previous menu without starting a programme when
–the function button is pressed.
–the button is not activated within 30 seconds.
29

en - Optional modules
Total data menu option
Operating data module
Total data
Programme data |
|
|
|
After the Total data menu option has been selected and confirmed with the selector dial, the data is displayed in a list:
Operating data module Total data
Total time power on 200.987 h
Operating hours 123456 h |
|
|
|
Example display: Total data
The following data is displayed in this list:
– Total time power on
– Operating hours
– Duration heating active
– Duration drive motor active
– Programme starts
– Programme stops
– Programme cancellations
– Load
– Energy
Programme data menu option
Operating data module
Programme data
Delete data |
|
|
|
After the Programme data menu option has been selected, the following appears in the dis-
play:
Operating data module Programme data
1 |
Cottons extra dry |
0 % |
|
|
|
|
|
|
|
2 |
Cottons dry |
0 % |
|
|
|
|
|
|
|
Example display: Programme data
Rotate the selector dial to select the programme for which data is to be displayed. When the selector dial is pressed, the list of all programme starts appears with date and start time (here: programme 1 Cottons extra dry).
30
Loading...