


MD 40920
2
1 LINE: Socket for telephone cable
2 DC 9 Volt: Socket for AC adaptor
3 HI-LO: Volume for ringing sound
4 Volume Control: Volume for messages on answering machine
5 RING and count backward
6 CODE and count forward
7 Display for answering machine
8 ON/OFF: Switch answering machine on and off
9 MEMO: Record and play memos
10 OGM1: Out-going message type 1
11 OGM2: Out-going message type 2
12 2 WAY: Record the current conversation
13 SPEAK:
On: OGM’s and ICM’s are heard / OFF: Mute OGM’s and ICM’s
14 STOP/TIMER
15 X/II Play and pause
16 DEL: Delete
17 MEM: Press for indirect memory (before pressing numeric key)
18 STORE: Store
19 PAUSE: Pause
20 FLASH: Call waiting function (depending on telephone provider)
21 REDIAL: Repeat last entered telephone number
22 H/F: "Hands free" key
23 Number keys
24 Loudspeaker
25 M1, M2, M3: Direct memory
Tel+AM_MD40920_UK.fm Seite 2 Mittwoch, 7. April 2004 9:52 09

MD 40920 3
TABLE OF CONTENTS
Safety Instructions . . . . . . . . . . . . . . . . . . . . . . . . . . . . . . . . 4
Installation . . . . . . . . . . . . . . . . . . . . . . . . . . . . . . . . . . . . . . 5
Inserting the back-up batteries . . . . . . . . . . . . . . . . . . . . . . . . . . . . . 5
Installing the answering machine . . . . . . . . . . . . . . . . . . . . . . . . . . 5
Telephone Operation . . . . . . . . . . . . . . . . . . . . . . . . . . . . . . 6
Making phone calls . . . . . . . . . . . . . . . . . . . . . . . . . . . . . . . . . . . . . . 6
Storing number . . . . . . . . . . . . . . . . . . . . . . . . . . . . . . . . . . . . . . . . . 6
Other functions . . . . . . . . . . . . . . . . . . . . . . . . . . . . . . . . . . . . . . . . . 6
Operation of Answering Machine . . . . . . . . . . . . . . . . . . . . 8
Setting the clock . . . . . . . . . . . . . . . . . . . . . . . . . . . . . . . . . . . . . . . . 8
Recording messages . . . . . . . . . . . . . . . . . . . . . . . . . . . . . . . . . . . . . 8
Setting the unit to answering mode ANSWER/RECORD MODE . . . 10
Recording a personal memo . . . . . . . . . . . . . . . . . . . . . . . . . . . . . . 11
Playing back incoming messages (ICM’s) . . . . . . . . . . . . . . . . . . . 11
Deleting incoming messages or personal memos . . . . . . . . . . . . . 12
Remote function . . . . . . . . . . . . . . . . . . . . . . . . . . . . . . . . . . 13
Changing the security code . . . . . . . . . . . . . . . . . . . . . . . . . . . . . . 13
Turning on the answering machine . . . . . . . . . . . . . . . . . . . . . . . . 13
Playing OGM1 or OGM2 . . . . . . . . . . . . . . . . . . . . . . . . . . . . . . . . 13
Recording a new OGM . . . . . . . . . . . . . . . . . . . . . . . . . . . . . . . . . . 13
Playing incoming messages (ICM's) . . . . . . . . . . . . . . . . . . . . . . . . 14
Recording a memo . . . . . . . . . . . . . . . . . . . . . . . . . . . . . . . . . . . . . 14
Erasing one or all messages . . . . . . . . . . . . . . . . . . . . . . . . . . . . . . 14
Remote room monitoring . . . . . . . . . . . . . . . . . . . . . . . . . . . . . . . . 14
Selecting the answer mode . . . . . . . . . . . . . . . . . . . . . . . . . . . . . . 15
Ending the remote function . . . . . . . . . . . . . . . . . . . . . . . . . . . . . . 15
Cleaning the unit . . . . . . . . . . . . . . . . . . . . . . . . . . . . . . . . . 15
Technical Data . . . . . . . . . . . . . . . . . . . . . . . . . . . . . . . . . . . 16
Remote Access Code Card . . . . . . . . . . . . . . . . . . . . . . . . . . 17
Tel+AM_MD40920_UK.fm Seite 3 Mittwoch, 7. April 2004 9:52 09
4
SAFETY INSTRUCTIONS
Setting the product up safely
Choose a flat, firm surface to set the product on. Make sure that
no foreign bodies or fluids get into the unit
the unit does not get into contact with dripping or splash water
the unit is not exposed to sunlight or other direct heat
no open fire sources, such as candles, are placed on the unit
Keep the mains connections accessible
Connect the unit to an easily accessible power socket (230 V ~ 50 Hz) close
to the unit. In case the unit has to be disconnected quickly, the plug has to
be within easy reach.
Do not carry out repairs
In case the AC adaptor or the unit is damaged, pull out the plug immedi-
ately.
Under no circumstances attempt to open or repair the unit
yourself. There is danger of electric shock!
Refer all servicing to our Service Centre or to another qualifed
workshop.
Battery disposal
Empty batteries do not belong in the household refuse. The batter-
ies must be disposed of at a designated disposal/recycle point.
About this manual
Please observe the following safety instructions carefully be-
fore putting the unit into operation. Take note of the warnings
in this manual.
Always keep the instruction manual near at hand. If you sell or pass on
the product, make sure to include this manual together with the unit.
Tel+AM_MD40920_UK.fm Seite 4 Mittwoch, 7. April 2004 9:52 09
MD 40920 5
INSTALLATION
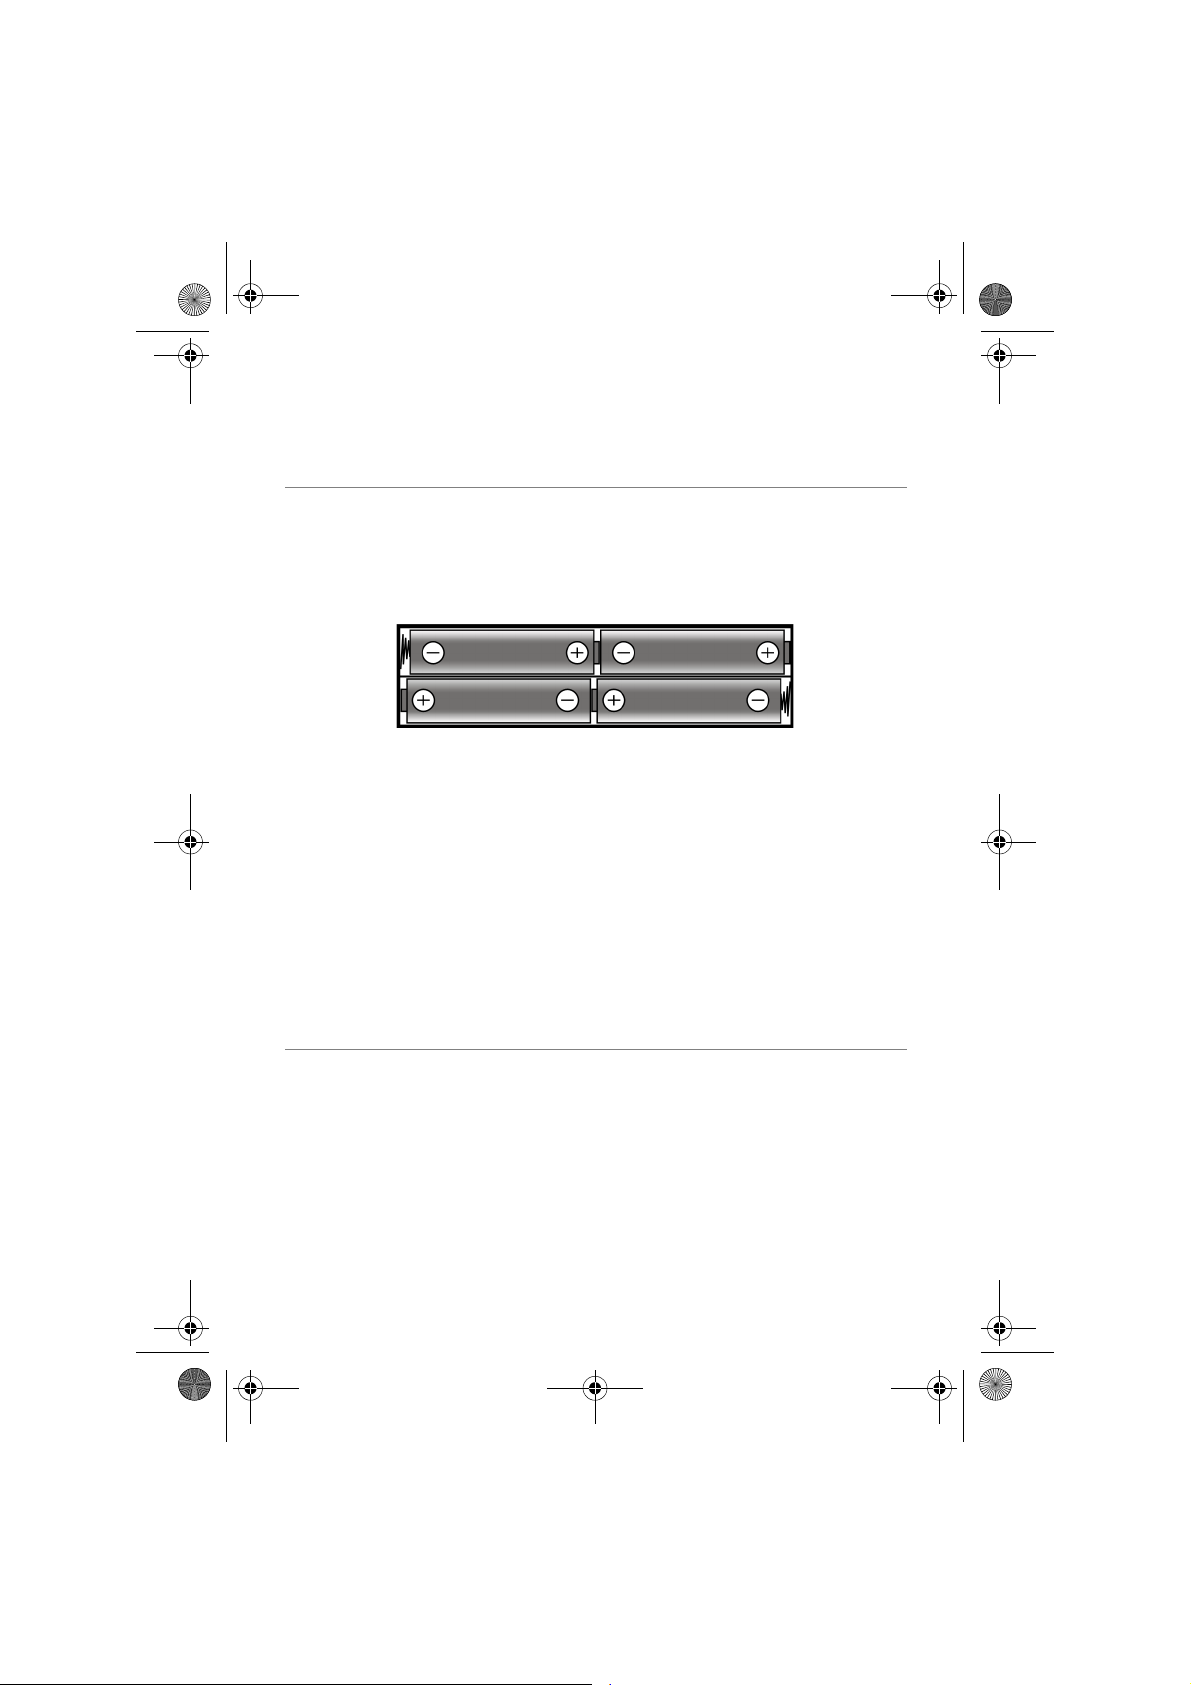
Inserting the back-up batteries
You can insert 4 LR-06 (SUM4, AAA) batteries as back-up batteries. They are
only needed if you want to save the memory when you unplug the device:
a. Remove the battery cover located on the bottom of the unit by removing the
phillips screw.
b. Insert the batteries into the compartment, observing the polarity (+/–):
Reversed batteries may cause damage to the device.
c. Replace the battery cover.
Battery precautions
Follow these precautions when using batteries in this device:
1. Use only LR-06 (SUM4, AAA) batteries.
2. Be sure to install the batteries in correct polarity.
3. If the device is not to be used for a long period of time, remove the battery
to prevent damage or injury from possible battery leakage.
4. Do not try to recharge batteries not intended to be recharged; they can over-
heat and rupture.
Installing the answering machine
` Connect the small plug of the AC adaptor with the 9 V jack on the back of
the unit.
` Plug the AC adaptor into the wall outlet.
` Connect the telephone line cord to the line socket.
Tel+AM_MD40920_UK.fm Seite 5 Mittwoch, 7. April 2004 9:52 09
6
TELEPHONE OPERATION
Making phone calls
` To answer the phone, pick up the handset or press the H/F button.
` To make a phone call, pick up the handset or press the H/F button and listen
for a dial tone. Then dial the phone number in one of the three ways:
– Press the keys for the numbers you wish to call, or
– Press the RE-DIAL button to call previously dialled number, or
– Press the MEM button & followed by any of the ten numeric keys (0, 1, 2,
.. 9) designating the memory location containing the number you wish to
dial or press the memory buttons M1, M2, or M3.
` To end a call, return the handset to the cradle or press the H/F button again.
Storing numbers
You can store three numbers under the buttons M1, M2 or M3 and ten more
under the numerical keys.
` Lift the handset.
` Press the STORE button.
` Enter the desired phone number; if necessary, add a pause with the PAUSE
button.
` Press the STORE button again.
` Press direct memories buttons M1, M2 or M3 or press a numerical key (0, 1,
2 , ...9) for 10 indirect memories.
` Put back the handset on the cradle.
Other functions
Re-dial Function
When the handset is lifted from the cradle or the speaker phone is turned on
and the REDIAL button is pressed, the last number entered will automatically
be dialled again.
Flash Function
With the flash or call-waiting function, a alarm tone is heard when a call comes
in during a conversation. The unit gives a short bleep every 15 seconds while a
second caller is waiting.
Tel+AM_MD40920_UK.fm Seite 6 Mittwoch, 7. April 2004 9:52 09
 Loading...