


®
Pilot’s Guide
Manuel de pilotage
Pilotenhandbuch
Pilotenhandboek
Manual del Piloto
An in-depth exploration of the technologies and pulsing tonal pleasures of Floor POD Plus.
Electrophonic Limited Edition available @ www.line6.com/manuals 40-00-0116 Rev A
The serial number can be found on the bottom of your Floor POD Plus. It’s the number that begins with “(21)”. Please note it here for future reference:
SERIAL NO:
WARNING: To reduce the risk of fire or electric shock, do not expose this appliance to rain or moisture.
CAUTION: To reduce the risk of fire or electric shock, do not remove screws. No user-serviceable parts inside. Refer servicing to qualified service personnel.
CAUTION: This equipment has been tested and found to comply with the limits for a Class B digital device pursuant to Part 15 of FCC Rules. Operation is subject to the following two conditions: (1) This device may not cause harmful interference, and (2) this device must accept any interference received, including interference that may cause undesired operation.
The lightning symbol within a triangle means “electrical caution!” It indicates the presence of information about operating voltage and potential risks of electrical shock.
The exclamation point within a triangle means “caution!” Please read the information next to all caution signs.
You should read these Important Safety Instructions
Keep these instructions in a safe place
Before using your Floor POD Plus, carefully read the applicable items of these operating instructions and safety suggestions:
1.Obey all warnings on the Floor POD Plus and in this Basic Features Guide.
2.Do not place near heat sources, such as radiators, heat registers, or appliances which produce heat.
3.Guard against objects or liquids entering the enclosure.
4.Connect only to AC power outlets rated 100-120V or 230V 47-63Hz (depending on the voltage range of the included power supply).
5.Do not step on power cords. Do not place items on top of power cords so that they are pinched or leaned on. Pay particular attention to the cord at the plug end and the point where it connects to the unit.
6.Unplug your Floor POD Plus when not in use for extended periods of time.
7.Do not perform service operations beyond those described in this Basic Features Guide. In the following circumstances, repairs should be performed only by qualified service personnel:
•liquid is spilled into the unit
•an object falls into the unit
•the unit does not operate normally or changes in performance in a significant way
•the unit is dropped or the enclosure is damaged
8.Prolonged listening at high volume levels may cause irreparable hearing loss and/or damage. Always be sure to practice “safe listening.”
Floor POD Plus Pilot’s Guide © 2007, Line 6, Inc.
Please Note:
Line 6 and POD are trademarks of Line 6, Inc. All product names, trademarks, and artist names are the property of their respective owners, which are in no way associated or affiliated with Line 6.Product names, images, and artist names are used solely to identify the products whose tones and sounds were studied during Line 6’s sound model development.The use of these products, trademarks, images and names does not imply any cooperation or endorsement.

Controls & Connections
Controls & Connections
1•1
1 Amp Models – This knob selects one of 32 Amp Models originally from the famous Line 6 POD 2.0. There are two Models for each category silk-screened around the knob, for example, Black Panel has two Models, one indicated by a Red light and one by a Green light. Refer to Chapter 2 for a detailed listing of each Model.
When you choose an Amp Model, a Cabinet Model is also loaded automatically. For example, when you choose the Brit Hi Gain Model (based on* the Marshall® JCM 800), a Cabinet Model based on* a Marshall® 4x12 will be loaded too. You can mix ’n’ match different cabs by pressing in the Amp Models knob, holding it down, and spinning it to select a different cabinet. You can also select a different cabinet by holding the Manual button and turning the Amp Models knob. Chapter 2 lists cabinet options.
The Amp Models button also acts as a “shift” key – press and hold to access secondary functions on many controls.
* All product names are trademarks of their respective owners, which are in no way associated or affiliated with Line 6. These product names, descriptions and images are provided for the sole purpose of identifying the specific products that were studied during Line 6’s sound model development. MARSHALL® is a registered trademark of Marshall Amplification Plc.

Controls & Connections
2 Effects – This knob selects one of 16 different Effect Models. From standard chorus and flange effects to the more unique Comet Trails and Ring Modulator, you’ll find a diverse variety to meet your needs. Red lights around the knob show your effects selection. See Chapter 3 for details.
1•2
3 Delay – The Delay knob selects one of 6 different Delay effects; Tape, Multi-Tap, Digital, Reverse, Sweep Echo, and Analog. Red lights around the knob show your delay selection. See Chapter 3 for details.
4 Drive – This knob controls how hard you’re driving the input of a chosen Amp Model, and just like the input volume control on a non-master volume guitar amp, higher settings give you more “dirt.”
Drive Boost can be turned on by holding down the Manual button or Amp Models knob and turning the Drive knob past twelve o’clock. This will give you the kind of extra “dirt” that you’d expect from a distortion pedal with the distortion control set low and the output control set high. It boosts your guitar signal before it reaches the Amp Model so you hit the Model harder and get a dirtier sound.
5 Tone Controls – From left to right we have Bass, Mid, and Treble just like a regular guitar amp, except that when you change Amp Models, the response and interactivity of the controls changes too. For example, when you select Black Panel the tone controls operate like the original amp that Model was based on*, the Fender® Deluxe Reverb®.
A Presence bump, which brightens your tone, can be switched on and off when you hold the Manual button or Amp Models knob and turn the Treble knob; fully left and the Presence is off, while fully right sets the Presence on.
You can adjust Delay Time and Delay Adjust by holding down the Manual button or Amp Models knob and turning the Bass and Mid knobs, respectively. See Chapter 3 for details.
6 Channel Volume – This knob controls the relative volume level of the “channel” you are playing through. Use this to balance levels between the sounds you store in two different Floor POD Plus Channel Memory locations. In general, you want to set the ChannelVolume as high as possible to ensure you’re getting the best signal-to- noise ratio.
* All product names are trademarks of their respective owners, which are in no way associated or affiliated with Line 6. These product names, descriptions and images are provided for the sole purpose of identifying the specific products that were studied during Line 6’s sound model development. FENDER® and DELUXE REVERB® are registered trademarks of Fender Musical Instruments Corporation.

Controls & Connections
You can access a Volume Boost by holding down the Manual button or Amp Models knob and turning the Channel Volume knob past twelve o’clock. This boosts volume without any extra “dirt”. Useful for a lead boost.
7 Compressor – This knob is the sole control for the Compressor. Turn it all 1•3 the way to the left for “off” (the Compressor light turns off). Turning the knob from left
to right gives you increasing Compression Ratio or amounts of compression. The state of this knob, for example off or full max, is stored with each Channel Memory when the Save button is pressed. See Chapter 3 for more info.
8 Gate – This knob controls the Noise Gate. Turn it all the way counterclockwise for “off” which is indicated when the Gate light turns off. Turning the knob from left to right gives you increasing amounts of gating. Press and hold the Manual button or Amp Models knob and turn this knob to adjust Gate Decay. The state of this knob is stored with each channel memory when the Save button is pressed. See Chapter 3 for more info.
9 EffectTweak – This knob selects the Amount of whatever effect is selected; left for min and right for max. Press and hold the Manual button or Amp Models knob while turning this knob to Adjust various secondary parameters for each effect. See Chapter 3 for more info.
10 Delay – This knob sets the mix level of the Delay; left for min and right for max. Press and hold the Manual button or Amp Models knob while turning this knob to adjust Delay Feedback. See Chapter 3 for more info.
11 Reverb – This knob controls the reverb; left for off and clockwise for maximum reverb. The light above the knob is on if the reverb is on. Press and hold the Manual button or Amp Models knob while turning this knob to adjust Reverb Decay. See Chapter 3 for more info.
12 Save – When you want to store your own tweaked up sounds, press this button. More info on how to save can be found in Chapter 4.
13 Manual – Press this button once to enter Manual Mode. In this mode, the sound of the Floor POD Plus always reflects the knob settings. Move knobs around to change sounds. This button also acts as a “shift” key – press and hold while turning a knob to access the secondary functions labeled for many controls.
14 Channel Memories – Displays the selected Channel Memory from 1A-

Controls & Connections
31D. Each Channel Memory is a complete preset of the Amp and Effects Model settings.
15 Tuner Lights – The middle light illuminates when the tuner is on (activated by pressing and holding the Tap footswitch). The note you’re playing is shown in the display 1•4 while the corresponding flat or sharp lights are lit. All three lights will be lit when you are
in tune.
16 Bank Up/Down – These footswitches select banks 1-31. To scroll through banks quickly, hold a footswitch down until you get to the bank you want. Press both footswitches together to choose modes as we’re about to describe...
17 Footswitches A-D – There are two footswitch modes; Channel Memory and On/Off. To toggle between modes press both bank up and down simultaneously.
•Channel Memory Mode: In this mode Bank Up and Bank Down selects a bank while Footswitches A-D select a Channel Memory within that bank. In this mode, the footswitch lights will illuminate Red when the footswitch is pressed.
•On/Off Mode: This mode lets you to turn effects or the Amp Model on and off with your feet. Footswitches A-D now turn on and off the Amp Model, Solo boost, FX, and Delay respectively. In this mode, the footswitch lights will illuminate Green to indicate the On state of each function.
18On/Off Functions Light – Lights when On/Off mode is active.
19Tap/Hold For Tuner – Tap this footswitch a couple of times and the delay
speed will match the speed you tapped. The light will blink at the current delay rate. Even if delay is off, you can still tap to set the delay rate. When you turn delay back on, the delay will be ready to rock at the new rate.
Press and hold this footswitch for more than 2 seconds to activate the tuner. Press again to exit tuner mode. See Chapter 4 for details.
20 Pedal and Wah Light – The onboard pedal can control volume and wah. When operating the pedal, you can press hard with your toe at the top of the pedal and the wah – as well as the wah lights to the left of the pedal – will switch on and off.
Note that some Amp Model selections place the volume pedal before the Amp Model (Pre) while some place the volume pedal after the Amp Model (Post). See Appendix A for the breakdown.

Controls & Connections
21 Input – Dude, plug in here. |
|
22 Aux Input – This is where you plug the output of your CD or MP3 player into |
|
Floor POD Plus so you can jam along to your favorite tunes. To balance the music with |
|
your guitar you’ll need to adjust the output volume on your CD player or MP3 player. |
1•5 |
23 Output Level – Controls the overall level of the Left and Right Output as well as the level of the headphones.
24 Amp/Direct – Set this switch to Direct when connecting Floor POD Plus directly to recording equipment, a mixing board, etc. This activates Line 6’s acclaimed A.I.R.(AcousticallyIntegratedRecording)technologywithadvancedspeaker-microphone- room tone simulation. Set this switch to Amp when plugging Floor POD Plus into the front of your guitar amp. This defeats the A.I.R. processing.
25 Left and Right Outputs – OK, this should be easy. Use the Left Output for a mono output to your amp or recording device. Use both left and right for your stereo output to either two amplifiers or a stereo input on your recording device.
26 Phones – This jack was designed for 1/4-inch phones. Make sure you turn the Output Level down all the way and then slowly turn it up to adjust the listening level of your headphones. Yes, you can use 1/8-inch phones with an adapter, too.
27 MIDI In & Out – Connect Floor POD Plus to your MIDI equipment to select Channel Memories (via Program Change messages), automate settings (via Continuous Controller messages) and back up your tones (via SysEx). All the details are online at www.line6.com/manuals, in the downloadable MIDI Reference document.
28 Power – Please only use the Line 6 power supply that came with your unit. Thanks.
Modeled Amps & Cabs
Which Amps and Cabs Are Modeled?
Modeled Amps & Cabs
2•1
There are 32 Amp Models living within your Floor POD Plus and 16 Cab Model selections. The following is a list of all Amp Models and Cabinet Models available, along with a description of the original equipment that inspired them. See Appendix A for a summary.
Line 6 Clean
RED:“Line 6 Clean”. To create this Amp Model, we essentially grafted the crisp top end of a solid state amp to a rich, satisfying tube amp-style bottom.
GREEN:“Line 6 Twang”. Glassy high end, plus the snap and bite of a vintage tube amp. Things don’t really get too crunchy until you get to the top range of the Drive knob.
Line 6 Crunch
RED:“Line 6 Crunch”.Our “boutique” sound. Not too clean, but not too raging. Great for modern blues or jazz, this sound should be like a fiine cognac, smooth and warm going down, but with a nice kick. The Mid control is located before the Amp Model’s Drive, but the Bass and Treble controls are placed after the Drive for maximum range.
GREEN: “Line 6 Crunch #2”. Looking for a 50 watt tube head tone with better EQ? Scoop out the mids even at high drive settings.
Line 6 Drive
RED: “Line 6 Drive”. Our version of the modern, super-saturated, high gain, lead amp; smooth, yet biting. All the tone controls here are post-Amp Model for maximum control with minimum muddiness. It’s like playing through a collection of amps simultaneously
– a studio technique that has made possible some of the greatest guitar tones of modern recordings.
GREEN: “Line 6 Blues”. This tone is based on* the ’65 Marshall® JTM-45 Bluesbreaker but incorporates wider range tone controls. Once you get into higher Drive settings, this Amp Model begins to transition into a variant of the Budda Twinmaster (a high end boutique amp) for sweeter overdrive tonality.
* All product names are trademarks of their respective owners, which are in no way associated or affiliated with Line 6. These product names, descriptions and images are provided for the sole purpose of identifying the specific products that were studied during Line 6’s sound model development. MARSHALL® is a registered trademark of Marshall Amplification, Plc.

Modeled Amps & Cabs
Line 6 Insane
RED:“Line 6 Insane”.Our goal here was to provide you with as much input gain distortion as possible short of complete meltdown. You get ridiculous, rich tube drive to shame the distortion of pretty much any amp on the planet while still retaining tonal definition and
2•2 character. As a result, you get lots of bottom end and cabinet character with tons of wideranging tone shaping. Crank up the Drive control and take no prisoners!
GREEN:“Line 6 Layer”. Line 6 Clean meets Line 6 Drive. As we’ve already mentioned, many guitarists and producers have experimented with running multiple amps simultaneously, with each amp making a contribution to the overall tone. The Drive knob acts as a blender control – fully left you’ve got big bottom 21st Century Clean, and fully right you’ve got paint-peeling ultra-drive. Set it anywhere in between, and you get to have your cake and smear it all over your audience, too.
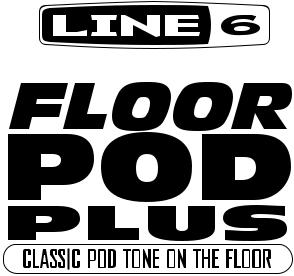
Small Tweed
RED: “Small Tweed”. Based on* a 1952 “wide panel” Fender® Tweed Deluxe Reverb®. This Amp Model will snarl with the best of them. The original
amp had only a single tone control, essentially a treble roll off. We set up the Treble knob to give you this treble roll off when using this Amp Model, which left us with the Bass and Mid knobs just sitting there. That just didn’t seem right, so we figured out a way to put those knobs to work without mucking about with the authenticity of this Amp Model’s treble tone control. We set up the Bass and Mid as post-Amp Model controls, which essentially lets you EQ up your tone as you would do on a mixing console after recording your amp. Set the Bass and Mid knobs at halfway to put
them in “neutral,” and try the Treble knob somewhere above halfway for a classic Tweed sound.
* All product names are trademarks of their respective owners, which are in no way associated or affiliated with Line 6. These product names, descriptions and images are provided for the sole purpose of identifying the specific products that were studied during Line 6’s sound model development. FENDER® and DELUXE REVERB® are registered trademarks of Fender Musical Instruments Corporation.
Modeled Amps & Cabs
GREEN: “Small Tweed #2”. Based on* the 1960 Fender® Tweed Champ®. This is a great sound when the Drive is cranked (not bad clean, either). These amps were originally designed to be sold to beginners, but rock and rollers quickly discovered that you could get a great distorted sound at fairly low volume levels. Many of the
classic guitar solos of the 50’s were recorded through a Champ®. 2•3 The Champ® had no tone control, only volume. With your Floor
POD Plus, it’s easy to get a classic Champ® tone. Just leave all the Bass, Mid, and Treble controls parked at 12 o’clock, which means they are “fllat,” making no contribution to the tone. Still, we’d hate to waste those things, so we fiigured out a way to put the Bass, Mid, and Treble controls to work without mucking about with the authenticity of this Amp Model. When using this Amp
Model, all these tone controls are applied after the Amp Model processing, which essentially lets you EQ up your tone as you would do on a mixing console after recording your amp. Remember, for the authentic emulated sound of the Champ®, set all the tone controls at 12 o’clock.
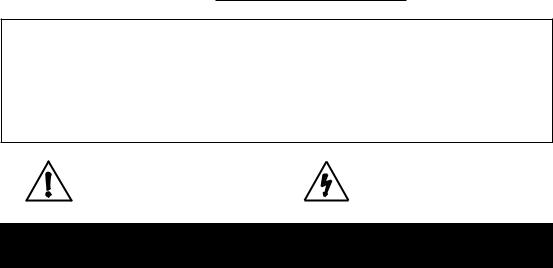
Tweed Blues
RED:“Tweed Blues”. Based on* the classic ’59 Fender® Bassman® 4x10 combo. The amp that started it all – instant rock and roll tone. Originally a bass guitar amp, the Bassman® became a Blues staple for 6-string guitarists. It has the fat bottom
end you’d expect from a bass amp but also has the Fender® twang on the top. The Bassman® was the “blueprint” for Floor POD Plus’s Tweed Blues. Incidentally, when Jim Marshall built his fiirst amps with Ken Bran they were heavily inflluenced by the early Bassman®. One of the interesting things about the Bassman® is just how interactive the Mid and Treble controls are. The Mid control isn’t a bandpass, as in most tone control setups. Instead, it’s almost like a second treble control. The two are additive, so if you’re running the Mid knob higher than halfway up, you’ll fiind
that the Treble control might give you more bright than you really want. On the other hand, when you turn the Mid knob down, you’ll probably want to boost the Treble. The Bassman®, like many of the amps modeled for Floor POD Plus, didn’t have a master volume.
* All product names are trademarks of their respective owners, which are in no way associated or affiliated with Line 6. These product names, descriptions and images are provided for the sole purpose of identifying the specific products that were studied during Line 6’s sound model development. FENDER®, CHAMP® and BASSMAN® are registered trademarks of Fender Musical Instruments Corporation.

Modeled Amps & Cabs
So to get the kind of tone that the Bassman® can deliver at higher gain settings, you had to crank it up loud enough to do some serious damage to anyone who might be standing close by. With Floor POD Plus, you can get that kind of tone at a bedroom or studio level
– or through your headphones even! Try a Drive setting of about 4 or 5 – it’s guaranteed to 2•4 dredge up the best R&B licks you know.
GREEN:“Boutique #3”. Based on* a Budda Twinmaster head. The Budda philosophy is all about power tube distortion. Simplicity is the key. With relatively low front end gain, highly interactive tone controls, and tube rectifier “sag” it’s great at getting a classic cranked sound for small gigs and recording. Once again, since the Twinmaster has no mid control, we’ve added a little bonus in the form of some post-Amp Model mid contouring available via the Mid control. As usual, set this control to 12 o’clock to get groovy with the unadorned Budda-style vibe.
Black Panel
RED: “Black Panel”. Based on* the blackface Fender® Deluxe Reverb®. The Holy Grail for many blues, country, and “roots” players has been a blackface Fender® Deluxe Reverb®. After listening to quite a few candidates for modeling,
we stumbled upon an extremely cool amp from 1964. Most players love a Deluxe Reverb® when it’s turned up to about 7 for a nice gritty sound that cleans up when you back off your guitar’s volume knob just a little. Notice how the tone control response changes as this Amp Model’s Drive is changed; clean settings are crisp and present, while more driven settings will mellow the high end, which is similar to the response of an actual amplifier. We’ve set up the Mid knob for this model, so you can add some post-Amp
Model midrange contouring for a little more fllexibility. Once again, set the Mid knob to its “neutral” 12 o’clock position for the classic sound of a Fender® Deluxe Reverb®.
* All product names are trademarks of their respective owners, which are in no way associated or affiliated with Line 6. These product names, descriptions and images are provided for the sole purpose of identifying the specific products that were studied during Line 6’s sound model development. FENDER®, DELUXE REVERB® and BASSMAN® are registered trademarks of Fender Musical Instruments Corporation.

Modeled Amps & Cabs
GREEN:“Black Panel #2”. Based on* a 1965 blackface Fender® Twin Reverb®. A real workhorse, everybody used it, from jazz and country players to serious rockers. I remember seeing Johnny Winter at a concert where both he and Rick Derringer – am I
dating myself or what? – were using six Twins stacked in a pyramid 2•5 each. We were in the second balcony and it was REALLY loud
even all the way back there. The Twin has a lot of tonal flexibility and is at home in a great many different situations. It never gets extremely overdriven and dirty, mostly just louder; a lot louder.
This is the amp for the classic surf sound. Dial up the spring reverb, switch on the tremolo, crank up the volume, and look out for bikinis.
Modern Class A
RED:“Modern Class A”. Based on* a Matchless Chieftain. The ’96 Matchless Chieftain, which was studied for the Modern Class A selection, is a very expensive handmade amp. The Matchless has an EL34-powered “modern class A” design – hence this model’s name – and a unique tone (largely due to the complicated EQ scheme). The sound is sort of “future retro.” Its soft clipping is
typical of Class A amplifiiers; almost a “hi-fii” sound in a great rock and roll amplifier. GREEN: “Brit Class A #3”. Based on* Channel 1 of a wonderful 1960 Vox® AC 15. Here’s another Vox-inspired Amp Model. The sound is similar to
that of the Vox® AC 30s that were studied for Floor POD Plus’s Brit Class A and Brit Class A #2 Amp Models, but this is a smaller amp (one, instead of two, 12” speakers) with a warmer, more “woody” sound. Once again, the original amp had only a single tone control – a treble cut. We faithfully modeled that and then slipped in some post-Amp Model bass and mid contouring. Set the Bass and Mid in neutral (12 o’clock, or halfway up) and play with the Treble control to get yourself some of those classic British invasion sounds.
* All product names are trademarks of their respective owners, which are in no way associated or affiliated with Line 6. These product names, descriptions and images are provided for the sole purpose of identifying the specific products that were studied during Line 6’s sound model development. FENDER® and TWIN REVERB® are registered trademarks of Fender Musical Instruments Corporation. VOX® is a registered trademark of Vox R&D Limited.
Modeled Amps & Cabs
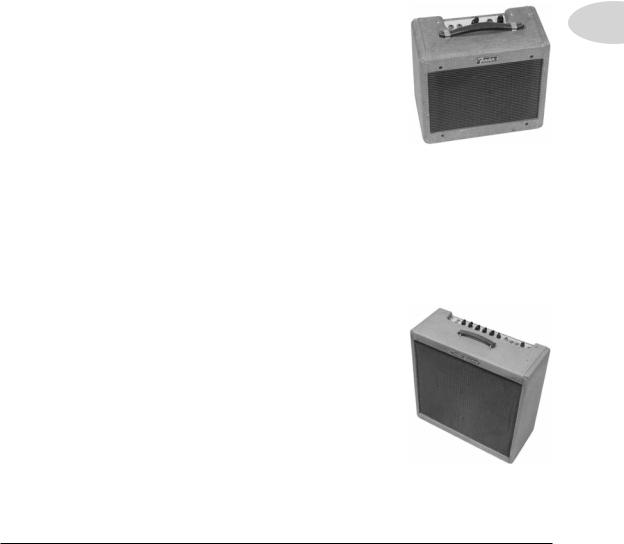
Brit Class A
RED: “Brit Class A”. Based on* the Vox® AC 30. Music was changing in the early 60’s and guitarists were asking for more brilliance & twang. So the Jennings Company, makers of Vox® amps, decided to add Treble and Bass controls (and an extra 12AX7 gain stage,
2•6 incidentally); this additional circuit became known as Top Boost. The AC 30 with Top Boost was the amp made famous by many British invasion bands. Much of the unique character of the Vox® sound can be attributed to the fact that Class A amps overdrive in a very different way than Class AB. Brian May of Queen, Mike Campbell of Tom Petty’s Heartbreakers, and The Edge of U2 have also used classic AC 30s to make their music. On this Amp Model, Floor POD Plus’s Mid control acts like the Cut knob on the AC 30. Although usually played fairly clean, a cranked AC 30 has a great saturated lead tone, a la Brian May on the early Queen albums.
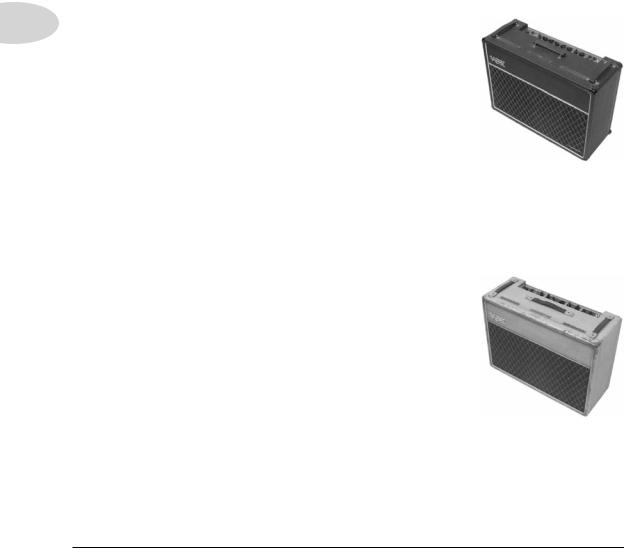
GREEN:“Brit ClassA #2”. Based on* the Normal Channel of a Non-Top Boost Vox® AC30. As we mentioned, the early Vox® amps were the fiirst designed especially for electric guitar (Hey, some early amps from other manufacturers have Accordion inputs! Polka, anyone?), and used Class A power amp designs, rather than the much more common Class AB type. We were lucky enough to fiind what we are told was one of Bryan
Adams’ favorite AC 30s for recording. Lenny Kravitz happened to be using it the week before we began testing. It was one of the gems in a great collection of vintage amplifiiers offered for rental in Los Angeles, where Line 6 is located. We later bought this amp, and continued to hone our emulation of it to bring you the Amp Model it inspired in the Floor POD Plus. This is defiinitely a good place to start to get yourself some of those classic British invasion sounds. Like the AC 15, the AC 30 NTB has only a single treble
control, so POD’s Bass and Mid controls here are set up for boost after the Amp Model processing to add a little extra fllexibility without compromising the accuracy of the model. The 12 o’clock setting on these controls is fllat response.
* All product names are trademarks of their respective owners, which are in no way associated or affiliated with Line 6. These product names, descriptions and images are provided for the sole purpose of identifying the specific products that were studied during Line 6’s sound model development. VOX® is a registered trademark of Vox R&D Limited.

Brit Blues
RED: “Brit Blues”. Based on* the Marshall® 1964-65 JTM-45 head. Although the sound normally associated with Marshall® Plexi amps comes from the 100-watt models of the late 60’s, it is the 50-watt JTM-45 that was the inspiration for the next in Floor POD Plus’s line up of Amp Models. Complete with block logo (predates the “scrolled” Marshall® logo) and a gold Plexiglas (Plexi) front panel, the JTM-45 marked the beginning of Marshall’s transition from a mellower Fender®-like tone to the distinctive bright “crunchy” sound of the later Marshalls.
GREEN: “California Crunch #1”. Based on* a Mesa/Boogie® Mark II-C+. The fiirst of the “boutique” amp makers was probably Mesa/Boogie®. Boogie made their mark in the late 70’s and early 80’s by adding master volumes and more gain stages to amps with Fender®-style circuitry. You can hear the Fender® heritage but with more “punch” in the mids. This model is based on the Clean Channel of the classic Mesa/Boogie® Mark II-C, with the enhancements of the “+” version of the Mark II-C circuitry design.
Modeled Amps & Cabs
2•7
Brit Classic
RED: “Brit Classic”. Based on* the infamous Marshall® Plexi. Coveted by tone connoisseurs the world over. By this time (ca. 1968) Marshall® had completely changed the circuitry away from the Fender® 6L6 power tube heritage and moved to an EL34 tube; another major tone difference was due to the necessary output & power supply transformer changes. (See, we told you we spent some time looking into all this stuff.) All this mucking about added up to create a tone forever linked with Rock Guitar. Amps of this era didn’t have any sort of master volume control, so to get this sound you’d have to crank your “Mark III Super Amp” to max – just the thing to help you really make friends with the neighbors. Hendrix used Marshalls of this era; 20 years later Van Halen’s fiirst two records
* All product names are trademarks of their respective owners, which are in no way associated or affiliated with Line 6. These product names, descriptions and images are provided for the sole purpose of identifying the specific products that were studied during Line 6’s sound model development. MARSHALL® is a registered trademark of Marshall Amplification Plc. MESA/BOOGIE® is a registered trademark of Mesa/Boogie, Ltd. FENDER® is a registered trademark of Fender Musical Instruments Corporation.

Modeled Amps & Cabs
owed their “brown sound” to a 100-watt Plexi. In order to get a crunch sound out of a Plexi you would likely crank up the input volume and the tone controls (to 10!). You’ll fiind that the Brit Classic, in keeping with our basic “make-it-sound-a-whole-lot-like-the-original” concept, is set up to do pretty darned near the same thing. Max out the Mid and Treble
2•8 knobs and turn Bass to about 9 or 10 o’clock on your Floor POD Plus when using this Plexiinspired Amp Model and you can treat those nice neighbors to a tasty slice of fat rock tone. GREEN: “California Crunch #2”. Based on* the Drive Channel of the Mesa/Boogie® Mark II-C+. Try your Santana licks here.
Brit Hi Gain
RED:“Brit Hi Gain”. Based on* the Marshall® JCM 800. Turn to this Amp Model to conjure up tones of the coveted JCM 800, one of Marshall’s most universally-acclaimed modern amps. This updated version of the Plexi continued Marshall’s heritage with added gain and edge for a new generation of rock guitarists. One of the biggest differences here is that the tone controls are located after the preamp tubes. We worked with a 1990 JCM 800 with Master Volume to develop this model. Incidentally, some versions of JCM800s get their distortion from clipping a diode. The amp we modeled uses a tube for distortion. This is the metal sound
Marshall made famous. Although not many people play Marshalls clean, it’s a great tone; so you should also be sure to check out this model with a low Drive setting, too. Of course, you can always pump up the drive and rage....
GREEN:“Boutique #1”. Based on* the Clean Channel of the Dumble® Overdrive Special. The Dumble® Overdrive Special is one of those incredibly expensive, custom amps that most people never get a chance to actually get close to in this lifetime. Each incarnation of the Dumble® magic is a little bit different, because each of these amps is hand built for a specifiic customer, and voiced to match their playing and desires. With that in mind, we based this Amp Model on the analysis of several different Dumble® Overdrive Specials. Despite this tuning to the individual owner, these amplifiiers tend to have a number of features in common; the clean channel is very sensitive to attack and dynamically responsive, and the drive channel has a thick, liquid, singing sustain that doesn’t lose string defiinition when driven hard. Floor POD Plus’s tone controls on this Amp Model are quite subtle, like those of the Dumble® itself.
* All product names are trademarks of their respective owners, which are in no way associated or affiliated with Line 6. These product names, descriptions and images are provided for the sole purpose of identifying the specific products that were studied during Line 6’s sound model development. MESA/BOOGIE® is a registered trademark of Mesa/Boogie, Ltd. MARSHALL® is a registered trademark of Marshall Amplification Plc. DUMBLE® is a registered trademark of Howard Alexander Dumble.

|
Modeled Amps & Cabs |
TreadPlate |
|
RED: “TreadPlate”. Based on* a 1994 Mesa/Boogie® Dual |
|
Rectifiier® Tremoverb. You can use this Amp Model to get that |
|
tight, high gain sound used by bands like Dream Theater or |
2•9 |
Metallica. Mesa/Boogie® made their mark in the late 70’s and early |
|
80’s by adding master volumes and more gain stages to amps with |
|
Fender®-style circuitry. You can hear the Fender® heritage but with |
|
more “punch” in the mids. The Dual Rectifiier’s tone controls are |
|
post-distortion and, as with the tone sections of most of the amps |
|
we based our models on, the individual controls interact with each |
|
other and with the Drive. With high drive settings, you can scoop |
|
the mids and crank the bottom end for some great Seattle grunge |
|
sounds. |
|
GREEN: “TreadPlate #2”. Based on* a 1995 Mesa/Boogie® Dual Rectifiier® head. As with the Tremoverb combo that was modeled for the TreadPlate Amp Model, the Dual Rectifiier® was part of Boogie’s more modern, high gain approach for that “big hair” sound. In contrast to the earlier Boogies, the Dual Rectifiier’s tone controls have more inflluence at high gain settings, so you can scoop the mids and increase the bottom end.
Modern Hi Gain
RED:“Modern Hi Gain”. Based on* the Soldano X88R. The Soldano sound is intensely overdriven, and also has EQ after the preamp distortion. This oversaturated tone is wellsuited to thrash metal and grunge bands, but has also been used more subtly by artists like Eric Clapton. This is a good Amp Model to use if you want to get a Van Halen or Joe Satriani sound. The Floor POD Plus Modern Hi Gain Amp Model is based on one of Mike Soldano’s rackmount preamps. Talk about high gain preamp tube distortion! The X88R we studied to create this Amp Model would have been the rage for Los Angeles studio use in the late ‘80s.
* All product names are trademarks of their respective owners, which are in no way associated or affiliated with Line 6. These product names, descriptions and images are provided for the sole purpose of identifying the specific products that were studied during Line 6’s sound model development. MESA/BOOGIE® and RECTIFIER® are registered trademarks of Mesa/Boogie, Ltd. FENDER® is a registered trademark of Fender Musical Instruments Corporation.

Modeled Amps & Cabs
|
GREEN: “Modern Hi Gain #2”. Based on* a Soldano SLO |
|
– Super Lead Overdrive – head. Unlike the X88R preamp used |
|
for the Floor POD Plus Modern Hi Gain Amp Model, the SLO |
2•10 |
includes a presence control, plus other little details that give it a |
bit of a different sound. With the Drive control cranked way up, |
you’ll get sustain for days.... Go out’n’ave a bite – when you come back it’ll still be sustaining!
Fuzzbox
RED:“Fuzzbox”. Based on* the Arbiter® Fuzz Face. Although not technically an amp, we felt that the unique tonal qualities of the classic 1960’s Arbiter® Fuzz Face earned it a place among the amps studied to create Floor POD Plus’s Amp Models.
This fuzz box used broad-frequency transistor-based clipping. The result is a buzzing kind of distortion that has become popular again with the alternative and grunge set. Jimi Hendrix was among the fiirst guitarists to popularize the Fuzz Face in the States, but our Model is considerably dirtier than the tones found on “Are You Experienced.” Try playing “Satisfaction” by the Stones, or the lead from “American Woman” by The Guess Who. Liberal use of the Bass, Mid, and Treble controls will let you go beyond the tones
that the Fuzz Face could deliver, enabling you to discover your own unique recipe for those elusive fuzz tones in your head. Just a note: when recording “Purple Haze”, Jimi didn’t even use an amp – he just went straight from a Fuzz Face to an Orange® power amp to a 4x12 cabinet. Which is the same sort of tone you fiind here....
GREEN: “Boutique #2”. Based on the Dumble® Overdrive Special Drive Channel (described earlier). If you like the Dumble® sound, you might also want to check out the Line 6 Crunch model – it was created to deliver a similar kind of tone.
* All product names are trademarks of their respective owners, which are in no way associated or affiliated with Line 6. These product names, descriptions and images are provided for the sole purpose of identifying the specific products that were studied during Line 6’s sound model development. ARBITER® is a registered trademark of Arbiter Group, Plc. ORANGE® is a registered trademark of Orange Personal Communications Services, Limited. DUMBLE® is a registered trademark of Howard Alexander Dumble.
Modeled Amps & Cabs
Tube Preamp
RED:“Tube Preamp”. Not even close to being a guitar amp, but once we got started, we just couldn’t stop ourselves. The thinking went like this: ‘Once people get this Floor POD Plus, it’s gonna be so great that they’re gonna wish they could use it for everything – warming
up keyboards, crunching up drums, fuzzing up vocals. We’ve gotta give ’em something to do 2•11 that!’ So we did. The Tube Preamp Amp Model lets you warm up any sound source the
way producers and engineers often do in the studio with vintage tube gear. For more “edge” on vocals, try running your vocal tracks through Floor POD Plus. Or punch up (or munch up) a synth bass track by sending it through Floor POD Plus and cranking up the Drive and EQ controls to suit your taste. Although this is not actually a guitar amp model, you can even get some great guitar tones out of it. Also try using it as a direct box for bass. When you do this stuff, you want to use the Drive control like a mix knob on a reverb to control how much processing you want to hear. You generally don’t want to mix the pre-Floor POD Plus sound with the post-Floor POD Plus sound because of the comb filtering that results. Instead, jack the sound source right into Floor POD Plus and then only monitor it post-Floor POD Plus processing. With the tone controls at 12 o’clock, the EQ is “fllat.”
GREEN: “Jazz Clean”. Based on* the classic Roland® JC-120. This transistor amp was known for a strident clean sound and built-in stereo chorus. When using the Jazz Clean Amp Model, try cranking up the Treble for a shimmering clean sound that’ll cut through just about any mix. It’s also perfect for that 80’s “new wave” sound. Alternatively, try backing off on the Treble and turn up the Bass and Mid for a darker jazz tone. It’ll give you an essentially fllat response, providing a balanced tone across the fret board for jazz chord melodies or single-line phrasing.
* All product names are trademarks of their respective owners, which are in no way associated or affiliated with Line 6. These product names, descriptions and images are provided for the sole purpose of identifying the specific products that were studied during Line 6’s sound model development. ROLAND® is a registered trademark of Roland Corporation.
Modeled Amps & Cabs
Cabinet Models
The following Cabinet Models are available on Floor POD Plus. When you turn the Amp Models knob, you select an Amp/Cab combination. You can then mix ’n’ match
2•12 different cabs with the amp by pressing in the Amp Models knob, holding it down, and spinning it to select a different cabinet. You can also select a different cabinet by holding
the Manual button and turning the Amp Models knob. Amber lights around the knob will indicate the cabinet selection.
|
Cab Model |
Based on* |
Knob Label |
|
|
|
1x8 |
1960 |
Fender® Tweed Champ® |
Line 6 Clean |
|
|
1x12s |
1952 |
Fender® Tweed Deluxe Reverb® |
Line 6 Crunch |
|
|
|
1960 Vox® AC-15 |
Line 6 Drive |
|
|
|
|
1964 |
Fender® Blackface Deluxe Reverb® |
Line 6 Insane |
|
|
|
Line 6 1x12 |
Small Tweed |
|
|
|
2x12s |
1965 |
Fender® Blackface Twin Reverb® |
Tweed Blues |
|
|
|
1967 Vox® AC-30 |
Black Panel |
|
|
|
|
1995 |
Matchless Chieftain |
Modern Class A |
|
|
|
Line 6 2x12 |
Brit Class A |
|
|
|
4x10s |
1959 |
Fender® Bassman® |
Brit Blues |
|
|
|
Line 6 4x10 |
Brit Classic |
|
|
|
4x12s |
1996 |
Marshall® with Vintage 30s |
Brit Hi Gain |
|
|
|
1978 |
Marshall® with stock 70s |
TreadPlate |
|
|
|
1968 |
Marshall® Basketweave with Greenbacks |
Modern Hi Gain |
|
|
|
Line 6 4x12 |
Fuzz Box |
|
|
|
No Cab |
You will probably want to use this Cabinet |
Tube Preamp |
|
|
|
|
model with the Tube Preamp model for non- |
|
|
|
|
|
guitar sources. It is selected by default when |
|
|
|
|
|
you pull up the Tube Preamp Amp Model. |
|
|
|
|
|
|
|
|
|
* All product names are trademarks of their respective owners, which are in no way associated or affiliated with Line 6. These product names, descriptions and images are provided for the sole purpose of identifying the specific products that were studied during Line 6’s sound model development. FENDER®, CHAMP®, DELUXE REVERB®, TWIN REVERB®, and BASSMAN® are registered trademarks of Fender Musical Instruments Corporation. VOX® is a registered trademark of Vox R&D Limited. MARSHALL® is a registered trademark of Marshall Amplification Plc.

Modeled Amps & Cabs
CabinetTuning Mode
Your Floor POD Plus can be tuned for optimal performance with a variety of systems when the Amp/Direct switch is set to its Amp position. By default, your Floor POD
Plus expects to be plugged in before an open-backed cabinet. If you want to plug in to 2•13 something else, you’ll want to change the Cabinet Tuning Mode. To do this, do the following:
•Press and hold the Save button while plugging in the power supply.
•After startup, the display will show “Cab” to indicate Cabinet Tuning Mode.
•The display will show current cabinet bank selection.
•Press the Bank Up or Bank Down footswitches to change selection as follows:
...Use Mode |
...when Floor POD Plus is |
...& your speaker cabs are |
C-a |
feeding power amp |
closed back (ideal for 4x12 cab) |
C-b |
feeding power amp |
open back (ideal for 1x12) |
C-c (default) |
in front of combo/head |
open back (ideal for 1x12 or 2x12) |
C-d |
in front of combo/head |
closed back (ideal for 4x12) |
•Press Save to store the selection.

Effects
Effects
In addition to all the great Amp Models built into Floor POD Plus, there are some great sounding effects. To pick which effect you want to hear, turn the Effects knob. When you first select the effect you want, your helpful Floor POD Plus will preset the effect’s
parameters so you’re instantly ready to go with a great sound. You can adjust the character 3•1 of the effect you’ve chosen by turning the EffectTweak knob.
Reverb – Reverb is the effect that makes your guitar sound like it is in a room. With Floor POD Plus, reverb is always available. You can control the Reverb Level with the Reverb knob. Press and hold the Manual button or Amp Models knob while turning the Reverb knob, and now you can adjust the Reverb Decay Time. This allows you to adjust the apparent size of the reverberant space. To turn the reverb off, rotate the knob all the way to the left. Reverb is on when this control’s light is lit.
There are two basic reverbs, both from the original POD®; a spring reverb Model and a standard digital room reverb. The reverb type is automatically chosen when you select an Amp Model and generally speaking, if the amp that inspired a given Amp Model had a spring reverb, we give you a spring reverb. If the amp did not have a reverb, we’ve given you the room reverb. Below is a list of reverbs that are loaded with each Amp Model:
Knob Label and Light Color |
Reverb Type |
|
Knob Label and Light Color |
Reverb Type |
|
|
|
|
|
Line 6 Clean - RED |
Room |
|
Brit Class A - RED |
Room |
|
|
|
|
|
Line 6 Clean - GREEN |
Spring |
|
Brit Class A - GREEN |
Room |
|
|
|
|
|
Line 6 Crunch - RED |
Spring |
|
Brit Blues - RED |
Room |
|
|
|
|
|
Line 6 Crunch - GREEN |
Room |
|
Brit Blues - GREEN |
Spring |
|
|
|
|
|
Line 6 Drive - RED |
Room |
|
Brit Classic - RED |
Room |
|
|
|
|
|
Line 6 Drive - GREEN |
Room |
|
Brit Classic - GREEN |
Spring |
|
|
|
|
|
Line 6 Insane - RED |
Room |
|
Brit Hi Gain - RED |
Room |
|
|
|
|
|
Line 6 Insane - GREEN |
Room |
|
Brit Hi Gain - GREEN |
Room |
|
|
|
|
|
Small Tweed - RED |
Room |
|
TreadPlate - RED |
Room |
|
|
|
|
|
Small Tweed - GREEN |
Room |
|
TreadPlate - GREEN |
Room |
|
|
|
|
|
Tweed Blues - RED |
Spring |
|
Modern Hi Gain - RED |
Room |
|
|
|
|
|
Tweed Blues - GREEN |
Room |
|
Modern Hi Gain - GREEN |
Room |
|
|
|
|
|
Black Panel - RED |
Spring |
|
Fuzz Box - RED |
Room |
|
|
|
|
|
Black Panel - GREEN |
Spring |
|
Fuzz Box - GREEN |
Room |
|
|
|
|
|
Modern Class A - RED |
Spring |
|
Tube Preamp - RED |
Room |
|
|
|
|
|
Modern Class A - GREEN |
Room |
|
Tube Preamp - GREEN |
Room |
|
|
|
|
|

Effects |
|
|
Delay – Sometimes referred to as echo or slap back, delay essentially repeats your sound |
|
in interesting and groovy ways. There are six (6) delay Models in the Floor POD Plus: |
|
Tape gives you classic tape echo warmth. The high end will deteriorate with each repeat, |
3•2 |
in vintage tape echo style. And you never have to change tapes! |
|
Multi-Tap is voiced similar to Tape, but has a tap pattern based on* the Roland® Space |
|
Echo. |
|
Digital gives you straight up echoes, with crystal clear digital fidelity. |
|
Reverse is a reverse version of Digital. |
|
Sweep Echo is a tape delay emulation with a sweeping filter effect added to the delay |
|
repeats to give you unique new creative possibilities for adjusting the tone of your delays. |
|
Analog is designed to give a vintage analog bucket brigade delay sound, with its darker |
|
distorted tone. |
|
For all delay Models, the Delay knob controls the Delay Level and the Tap footswitch |
|
controls the DelayTime. To use the Tap footswitch, just tap it at the tempo want and the |
|
delays will change to match the tempo that you tapped. You can fine-tune the DelayTime |
|
by pressing and holding the Manual button or Amp Models knob while turning the |
|
Bass knob. When you are using quicker delay times, we cut down the number of repeats |
|
so you can get those rockabilly and surf slap back sounds. Holding down the Manual |
|
button or Amp Models knob while turning the Delay knob allows you adjust the Delay |
|
Feedback. By the way, we let you set the maximum delay level high enough that your |
|
delay’s echoes can actually be louder than your direct signal. You may find this handy for |
|
getting delay effect setups like U2’s The Edge is known for. To turn the delay off, use the |
|
DLY footswitch when in On/Off Mode. See Chapter 1 for more info. |
|
Press and hold the Manual button or Amp Models knob while turning the Mid knob to |
|
adjust various Model-specific parameters, as outlined on the next page: |
* All product names are trademarks of their respective owners, which are in no way associated or affiliated with Line 6. These product names, descriptions and images are provided for the sole purpose of identifying the specific products that were studied during Line 6’s sound model development. ROLAND® is a registered trademark of Roland Corporation.

|
|
Effects |
|
|
|
Delay Model |
Delay Adjust |
|
|
|
|
Tape |
Wow and flutter depth |
|
|
|
|
Multi-Tap |
Modulation depth |
|
|
|
3•3 |
Digital |
Pitch shift in 1/2 steps from -12 to +12 with ring |
|
|
modulation |
|
|
|
|
Reverse |
Modulation depth |
|
|
|
|
Sweep Echo |
LFO speed for sweep |
|
|
|
|
Analog |
Modulation depth |
|
|
|
|
Compressor – A Compressor “squeezes” your sound so that the softer sounds are louder and louder sounds won’t jump out at you. In other words, it decreases the dynamic range. Compression is often expressed in ratios, such as 3:1 or 6:1. The higher the ratio, the less difference there is between your softest and loudest playing. The Compressor knob controls compression ratio. There are six settings: off, 1.4:1, 2:1, 3:1, 6:1, and ∞:1. With the Compressor knob set to max, you get infinite compression, which is similar to having a limiter. Note that the compressor is pre-Amp Model, so it acts like a compression pedal. Compression is active when this control’s light is lit.
Gate – A Gate is intended to reduce the hiss and noise guitar systems tend to put out when you’re not playing, especially when using a high gain setting. You can control the gate threshold with the Gate knob – turn the Gate knob to the right for more gating and left for off. Press and hold the Manual button or Amp Models knob while turning the Gate knob, and now you can adjust the Gate DecayTime. The gate is active when this control’s light is lit.

Effects |
|
|
Chorus – You’ll find two different chorus effects in Floor POD Plus. Chorus 1 is |
|
modulated by a square wave, so it sounds more like a “rackmount” type chorus. Chorus 2 is |
|
modulated by a sine wave with more feedback, so it has richer harmonic content. Chorus |
3•4 |
2 was massaged to closely approximate* the classic tone of an old Roland® CE-1 box. The |
EffectTweak knob controls the Depth and Speed of the chorus. |
|
|
Flanger – Flanging is that familiar “jet airplane taking off sound” you’ve heard on |
|
countless recordings from the 70’s; just listen to “Barracuda”, by Heart for example. |
|
Originally the effect was rarely used, since engineers had to use finger pressure on one |
|
of the tape reels. This pressure slowed the speed of the tape in tiny increments creating |
|
this effect. The part of the tape reel they pressed on is called the “flange”, so you can see |
|
how the effect got its name. Eventually, the effect could be produced electronically and |
|
when it became available in guitar stomp boxes, it became standard equipment for most |
|
guitarists. |
|
Two flangers are available in Floor POD Plus. Flange 1 is a light flange with no pre-delay, |
|
and is subtler than Flange 2, which is inverted, and has a deeper depth. The EffectTweak |
|
knob controls the Depth and Speed of the flanging effect. |
|
Rotary – This effect simulates* the effect of a mic’d, rotating high frequency speaker |
|
horn, like on a Leslie®. Rotary speakers have two speeds: slow and fast. We’ve set up Floor |
|
POD Plus’s Rotary Speaker emulation to select a fixed slow speed when the EffectTweak |
|
knob is in its minimum position, and a fixed fast speed when the EffectTweak knob is past |
|
the 12 o’clock position. When you switch from one speed to the other, you’ll notice that |
|
the speed doesn’t change immediately, but gradually changes from one speed to the other, |
|
just as a real rotating speaker’s speed would ramp from one setting to the other. The Effect |
|
Tweak knob controls the Speed and Depth of Doppler effect (pitch modulation). |
|
Phaser – The phaser is based on* the MXR® Phase 90, a relatively subtle phaser that |
|
becomes part of the overall tone. This lush, organic, and groovy swirl is heard on countless |
|
albums from the 70’s, 80’s, 90’s, and 2000’s. The Effect Tweak knob controls the Speed |
|
and Depth of the effect. |
|
U-Vibe – The legendary Uni-Vibe was put on the map in 1969 by Jimi Hendrix. |
|
Essentially a four-stage phase shifter, the Uni-Vibe is best known for its watery texture and |
|
sultry tones. The EffectTweak knob controls the Speed and Level of the effect. |
* All product names are trademarks of their respective owners, which are in no way associated or affiliated with Line 6. These product names, descriptions and images are provided for the sole purpose of identifying the specific products that were studied during Line 6’s sound model development. ROLAND® is a registered trademark of Roland Corporation. LESLIE® is a registered trademark of Suzuki Musical Instrument Manufacturing Co. Ltd. MXR® is a registered trademark of Dunlop Manufacturing, Inc.

Effects
Obi-Wah – This is a sample and hold filter is based on* the classic Oberheim® Voltage Controlled Filter. It creates changes in tone by rhythmically emphasizing certain frequencies. The EffectTweak knob controls the Speed and Q (frequency range) of the
effect.
3•5
Tron Up – Part auto-wah, part triggered filter, this effect is based on* the Mu-Tron® III envelope follower and gives you everything you need for that 70’s funk sound. The EffectTweak knob controls the Sensitivity and Q of the effect.
Octave Fuzz – The Octave Fuzz is a Line 6 rendition of a fuzz+octave effect, which was first used by guitarists such as Jimi Hendrix from the late 60’s. Listen to “Little Sister” by Queens of the Stone Age to hear a taste of what this effect can do. The EffectTweak knob controls the Level and Tone of the effect.
Sub Octave – This Model is an Octave Fuzz with an octave below! It’s just what you need to give those Moog players fits – deep, fat square wave distortion with enough grind and glory to shame any analog synth. The EffectTweak knob controls the Mix and Tone of the effect.
CometTrails – A Line 6 original effect from the FM4 Filter Modeler, this one gives you seven filters, all chasing each other around and looping back and forth across the great expanse of sonic space. The EffectTweak knob controls the Speed and Q of the effect.
Ring Modulator – Ring modulators are for those special times when you want different, weird, distinctive, strange, and otherwise non-traditional guitar sounds. This effect is very percussive sounding and sounds almost as if you’re changing the signal in a torturing-the-computer sort of way. The EffectTweak knob controls the Frequency and Mix of the effect.
Otto Phase – Part phaser part vocal box, this effect is an envelope follower that drives a phaser. Think of it as a phased-up version of Tron Up. The Effect Tweak knob controls the Sensitivity and Feedback of the effect.
Swell – This effect is like an automatic volume pedal that will give you a very even volume swell with each note or chord you play. The EffectTweak knob controls the Rise Time of the effect.
* All product names are trademarks of their respective owners, which are in no way associated or affiliated with Line 6. These product names, descriptions and images are provided for the sole purpose of identifying the specific products that were studied during Line 6’s sound model development. OBERHEIM® is a registered trademark of Gibson Guitar Corp. MUTRON® is a registered trademark of Mark Simonsen.
Effects
3•6
Tremolo – Modeled after* the classic Fender® tremolo. The Effect Tweak knob controls Speed and Depth.
EffectTweak
A summary of the various effect-model-specific parameters that can be adjusted using the EffectTweak knob is shown below:
Effect Model |
Effect Amount |
Effect Adjust |
|
|
|
Tremolo |
Speed |
Depth |
|
|
|
Chorus 1 |
Depth |
Speed |
|
|
|
Chorus 2 |
Depth |
Speed |
|
|
|
Flange 1 |
Depth |
Speed |
|
|
|
Flange 2 |
Depth |
Speed |
|
|
|
Rotary |
Speed |
Depth |
|
|
|
Phaser |
Speed |
Depth |
|
|
|
U-Vibe |
Speed |
Level |
|
|
|
Obi-Wah |
Speed |
Q |
|
|
|
Tron-Up |
Sensitivity |
Q |
|
|
|
Octave Fuzz |
Level |
Tone |
|
|
|
Sub Octave |
Mix |
Tone |
|
|
|
Comet Trails |
Speed |
Q |
|
|
|
Ring Modulator |
Frequency |
Mix |
|
|
|
Otto Phase |
Sensitivity |
Feedback |
|
|
|
Swell |
Rise Time |
none |
|
|
|
You can tweak the Effect Amount parameter by turning the knob. To tweak the Effect Adjust parameter, press and hold the Manual button or Amp Models knob while turning the knob.
To turn the effects off, use the C / FX footswitch when in On/Off Mode. See Chapter 1 for more info.
* All product names are trademarks of their respective owners, which are in no way associated or affiliated with Line 6. These product names, descriptions and images are provided for the sole purpose of identifying the specific products that were studied during Line 6’s sound model development. FENDER® is a registered trademark of Fender Musical Instruments Corporation.

Presets,Tuner & Pedal
Presets,Tuner & Pedal
Recalling Presets
The Floor POD Plus includes 124 presets to cover a wide range of tones and styles. 4•1 These presets, or “channels”, store a variety of complete amp-and-effect selections preprogrammed by the tone mavens at Line 6. The channels are arranged in 31 banks of 4 channels each. The four channels are called A, B, C and D.
To recall a channel, make sure you’re in Channel Memory Mode (see Chapter 1), use the Bank Up/Down footswitches to select a bank, then use Footswitches A-D to select a channel. When recalling a channel, note that its settings will not be reflected by the present knob positions – like you may have left the Bass knob at minimum whereas the just-recalled channel has this control set to max.
To change anything, just grab a knob and tweak.
Saving Presets
You can edit any of the Floor POD Plus presets or create one of your own and store it to whatever location you want. You’ll notice that when you adjust or change something in a dot (.) is shown to the right of the channel letter in the display. To save follow these steps:
•Press the Save button. The Save light will now flash.
•Use the arrow Bank Up/Down footswitches to select the Bank (1-31) where you want to store the new preset.
•If you want to save the preset to a different Channel (A, B, C or D) than is currently displayed, press the desired Footswitch to select the channel. Press that Footswitch again or press the Save button to execute the save.
•If you want to save the preset to the same Channel (A, B, C or D) that is currently displayed, press that Footswitch or press the Save button to execute the save.
•All user controls are saved at their current state.
To cancel a save, turn a knob or allow the unit to have 5 seconds of inactivity since the last press of a footswitch or the Save button.
 Loading...