

®
Pilot’s Guide
Manuel de pilotage
Pilotenhandbuch
Pilotenhandboek
Manual del Piloto
40-00-0118 Electrophonic Limited Edition available @ www.line6.com/manuals Rev A


Line 6, POD and LowDown are trademarks
of Line 6, Inc. All other product names,
trademarks, and artists’ names are the
property of their respective owners, which
are in no way associated or affiliated
with Line 6. Product names, images and
artists’ names are used solely to identify
the products whose tones and sounds
were studied during Line 6’s sound model
development for this product. The use
of these products, trademarks, images
and artists’ names does not imply any
cooperation or endorsement.
You should read these Important Safety Instructions.
Keep these instructions in a safe place.
Before using your Bass Floor POD, carefully read the applicable items of these operating instructions and the safety suggestions.
1. Obey all warnings on the unit and in the manual.
2. Connect only to AC power outlets rated 100-120V or 200-240V 47-63Hz (depending on voltage range of the unit; refer to back panel).
3. Do not perform service operations beyond those described in the manual. Service is required when the apparatus has been damaged in any way, such as:
• power-supply cord or plug is damaged
• liquid has been spilled or objects have fallen into the apparatus
• the unit has been exposed to rain or moisture
• the unit does not operate normally or changes in performance in a significant way
• the unit is dropped or the enclosure is damaged.
4. The bottom of the metal chassis can get hot during operation. Do not touch during operation or shortly after.
5. Do not place near heat sources, such as radiators, heat registers, or appliances which produce heat. Keep the rear of the unit at least three inches from
walls or other items that might block heat radiation.
6. Do not block any of the ventilation openings or use in an enclosed space.
7. Guard against objects or liquids entering the enclosure. Do not use or place unit near water.
8. Do not step on power cords. Do not place items on top of power cords so that they are pinched or leaned on. Pay particular attention to the cord at the
plug end and the point where it connects to the amp.
9. Unplug the amp when not in use for extended periods of time. Unplug the amp during lightning storms.
10. Clean only with a damp cloth.
11. Do not defeat the safety purpose of the grounding type plug. A grounding type plug has two blades and a third grounding prong. The third prong is
provided for your safety. When the provided plug does not fit into your outlet, consult an electrician for replacement of the obsolete outlet.
12. Only use attachments/accessories specified by the manufacturer.
13. Prolonged listening at high volume levels may cause irreparable hearing loss and/or damage. Always be sure to practice “safe listening”.
NOTICE: This equipment has been tested and found to comply with the limits for a Class B digital device pursuant to Part
15 of FCC Rules. Operation is subject to the following two conditions: (1) This device may not cause harmful interference,
and (2) this device must accept any interference received, including interference that may cause undesired operation.
WARNING: To reduce the risk of fire or electric shock,
do not expose this appliance to rain or moisture.
CAUTION: To reduce the risk of fire or electric shock,
do not remove screws. No user-serviceable parts inside.
Refer servicing to qualified service personnel.
Bass Floor POD Pilot’s Guide © 2007, Line 6, Inc.
The exclamation point within a triangle means
“caution!” Please read the information next to all
caution signs.
The lightning symbol within a triangle means “electrical
caution!” It indicates the presence of information
about operating voltage and potential risks of electrical
shock.
This symbol within a triangle means “caution! hot
surface!” It is placed in areas that may become too hot
to touch when device is in operation.


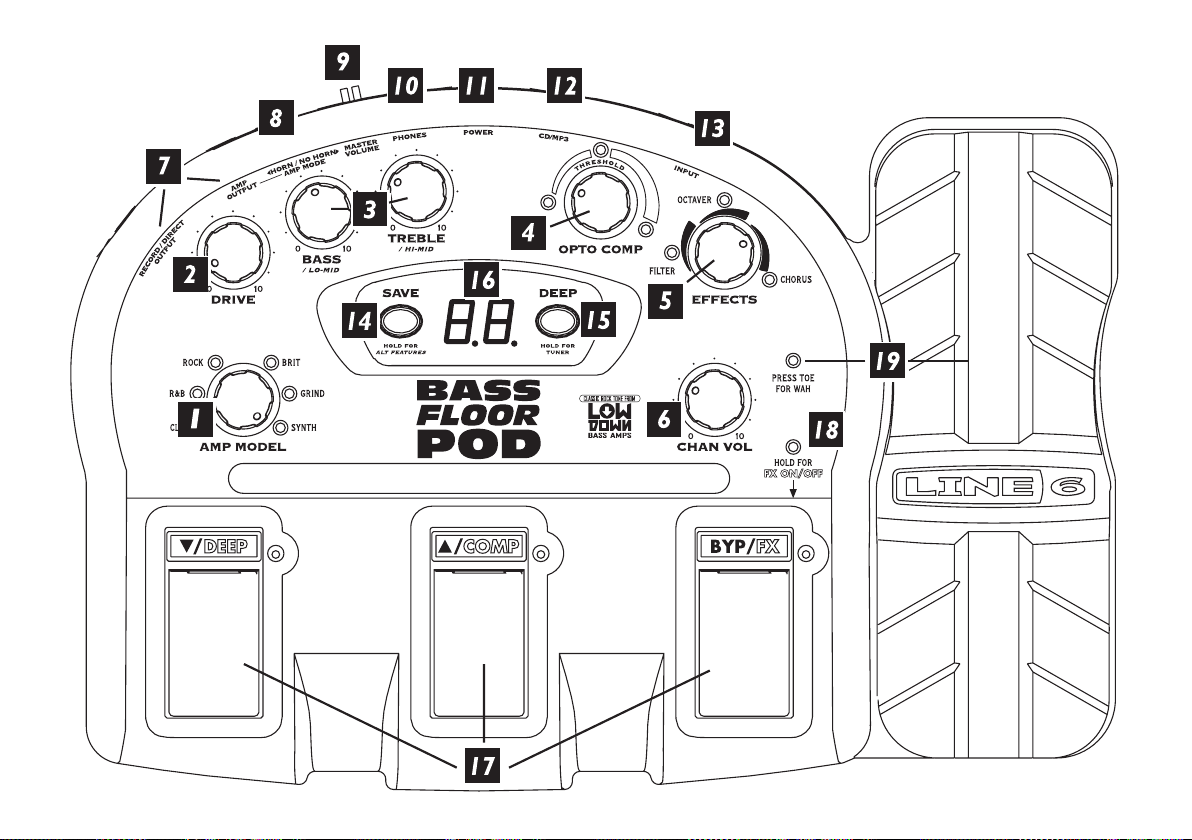
Controls
1. Amp Model
Spin this knob to select one of 5 groovalicious Amp
Models or Synth Bass. All the Bass Floor POD
controls will automatically dial in to sound great
with that Amp Model, so you can just play!
2. Drive
Like the volume or gain knob on other amps;
controls how much “dirt” you get in your sound.
3. Tone Controls
Bass, Low Mid, Hi Mid and Treble controls are
customized for each Amp Model to give you optimal
tonal control.
4. Opto Comp
Turn clockwise to even out your playing dynamics
(more compression). Watch for the Threshold lights
and set the knob so that the second light comes on
just at the point where you play with your typical
intensity. This is a good place to start.
5. Effects
Spin this knob to get great FX, fast and easy: This
knob selects Envelope Filter, Octaver or Chorus,
with a range of settings – from subtle to overpowering
– for each effect. The lights show the active effect.
6. Chan Vol
This control helps you balance the volumes of
different amp-and-effect setups that you store in your
Bass Floor POD’s channel memories (see control
16). Start with the knob at 2 o’clock, adjust the
Drive and Tone Controls to get the sound you want,
then use Channel Volume to make your presets even
in volume.
7. Outputs
Record/Direct Output – Use this output to send
your sound to a PA or multitrack recorder. This gives
the live sound man or studio engineer a simulation
of a miked up cabinet that is Amp Model-specific.
Amp Output – Use this output to send your sound
to a bass amp or power amp.

8. Amp Mode Switch
Depending on what speaker cabinet your signal
is headed for, use this switch to select Horn (for a
cabinet with a tweeter or compression driver) or No
Horn (for a cabinet without a tweeter or compression
driver).
9. Master Volume
This knob controls the overall level of the Record/
Direct Output and Amp Output, as well as the level
of the Phones. This control is not saved with preset
amp-and-effect setups.
10. Phones
Use this output to listen in stereo with headphones.
Make sure you turn the Master Volume down all the
way and then slowly turn it up to adjust the level
of your headphones. This jack was designed for 1/8inch phones you’d connect to an MP3 player, but
1/4-inch phones will also work with an adapter (not
included).
11. Power Jack
Please only use the Line 6 power supply that came
with your Bass Floor POD. Using a different power
supply could damage the unit.
12. CD/MP3
Plug the output of your CD or MP3 player into this
jack so you can jam along to your favorite tunes. To
balance the music with your guitar, adjust the output
volume on your CD player or MP3 player.
13. Input
Dude, plug your bass in here.
14. Save / Hold for Alternate Features
Press this button to save a Channel Memory (preset
amp-and-effects setup) you’ve created or edited. You
can save 64 different Channel Memories in your
Bass Floor POD. Press and hold this button to adjust
the alternate features of the Bass and Treble knobs.

15. Deep / Hold for Tuner
Selecting Deep will kick in a special tone shaping
feature that enhances the selected Amp Model for
supreme fatness. Press and hold this button to access
the chromatic Tuner.
FX On/Off Mode: This mode allows you to
•
turn effects on and off within a preset. The DEEP
footswitch turns the low end enhancement on
and off, while COMP and FX turn the Opto
Comp and Effects on and off, respectively.
16. Channel Memories (Display)
Displays the current Channel Memory (preset ampand-effects setup). Bass Floor POD has 64 Channel
Memories to choose from.
17. Footswitches
There are two footswitch modes; Channel Memory
and FX On/Off. To toggle between modes press and
hold the BYP footswitch for 1 second.
•
Channel Memory Mode: The s and t
footswitches allow you to select a preset Channel
Memory. Scroll through Channel Memories by
pressing and holding one of these footswitches.
The BYP (bypass) footswitch does just that,
bypassing all Amp Models and Effects - including
the pedal.
18. FX On/Off Light
This is only lit when you’re in FX On/Off mode. If
NOT lit, you’re in Channel Memory mode.
19. Pedal
To switch the pedal between Volume and Wah
control, press the pedal fully forward to click the
toe-switch. The Wah light is lit when Wah effect is
on. If NOT lit, your pedal is controlling Volume.
The Bass Floor POD Legacy
Hey. Thanks for choosing the Line 6 Bass Floor
POD. We’re excited to welcome you to the Line
6 community. POD is known around the world as
THE way to bring great tone in a small package
into the studio and on live gigs. In order to deliver
a fabulous range of exacting bass tones, we spent
tons of time with artists and technicians dialing in
the tone available in the critically-acclaimed Line 6
LowDown series of bass amplifiers. That same tone
lives inside the Bass Floor POD.
The LowDown was inspired by some classic bass amps
that shaped the tone of rock and roll, such as the
Ampeg® SVT®, Ampeg® B-15 and the Marshall®
Super Bass – amps that deliver tone to rearrange
your insides! These were, and still are, the standard
for professional bass players the world over (or at
least the ones without a LowDown). Unfortunately,
many of these amps are incredibly heavy and can
very quickly empty your checking account or max
out your credit card. As a result, most of us working
stiffs had to gravitate to one of the many portable
multi-effects pedals with fairly generic tone to try
and spice up our rigs. Until now…
With Bass Floor POD, we put everything we learned
from LowDown into an affordable, portable pedal.
We have spent countless hours modeling the best
of the best amps and effects and incorporating those
models into the very pedal you’re probably staring at
right now. Whether you are looking for that mindbending funk tone or that classic rock tone heard
’round the world, Line 6’s Bass Floor POD brings
it to you. The endless search for the perfect small
gigging/recording pedal has come to an end.
Now let’s get started!
All product names are trademarks of their respective owners, which are in no way associated or affiliated with Line 6. These product names, descriptions
and images are provided for the sole purpose of identifying the specific products that were studied during Line 6’s sound model development. AMPEG® and
SVT® are registered trademarks of St. Louis Music, Inc. MARSHALL® is a registered trademark of Marshall Amplification Plc.

Amp Model Details
Just as a great artist has many colors to paint with,
you, too, will be able to paint your music in many
colors, thanks to the wide range of tone available
in the Bass Floor POD. Each of these Models, when
selected, automatically dials up a great useable default
sound that you can then change to your liking and
save into a preset using the Channel Memories.
Drive
This control is used to overdrive the virtual preamp
circuitry of the Amp Model in order to get various
distorted sounds. The fully counter-clockwise
position is the cleanest, least distorted sound and as
you turn it clockwise you bring in distortion. Adjust
to your taste.
Tone Controls
Bass, Low Mid, Hi Mid and Treble controls are
customized for each Amp Model to give you optimal
tonal control. These controls will help you create
and shape the tone you hear in your head.
Opto Comp
This adjusts the threshold of the compressor.
The farther the control is rotated clockwise, the
more dramatic the compression becomes which
brings a more even dynamic to your sound. When
completely in the counter-clockwise position, the
compressor circuit is off. As you turn the knob
clockwise, the threshold at which the compressor
kicks in is lowered. The lights around this control
will light when the compressor hits different levels
(approximately 3, 6 and 9 dB) of gain reduction. As
a starting point, set the knob so the second light
comes on just at the point where you play with your
typical intensity.

Some Helpful Hints
Remember that the tone controls will act differently
for each Amp Model, faithfully emulating the kind
of tone range you would get from the original amp
that model is based on. For instance, turning the
Treble up all the way is a very different experience
on each Model. When first getting friendly with a
particular Amp Model and its tone controls, be sure
to use your ears to discover what you like best about
the tone possibilities of each Model.
If you want more low end, ask yourself whether you
want more round, thick low end or punchy low
end. This will help you determine if you should add
Bass or Low Mid to your sound. Sometimes adding
Low Mid gives you the bottom you want with a
punchier sound. The same goes for the high end: are
you looking for clarity for your note or a percussive
attack? If you want clarity, many times Hi Mid will
give that to you without adding the percussive
attack. Experiment with the tone controls because
we’ve given you a range of vintage bass tone that has
never been so authentic in a floor pedal.
Amp Model Descriptions
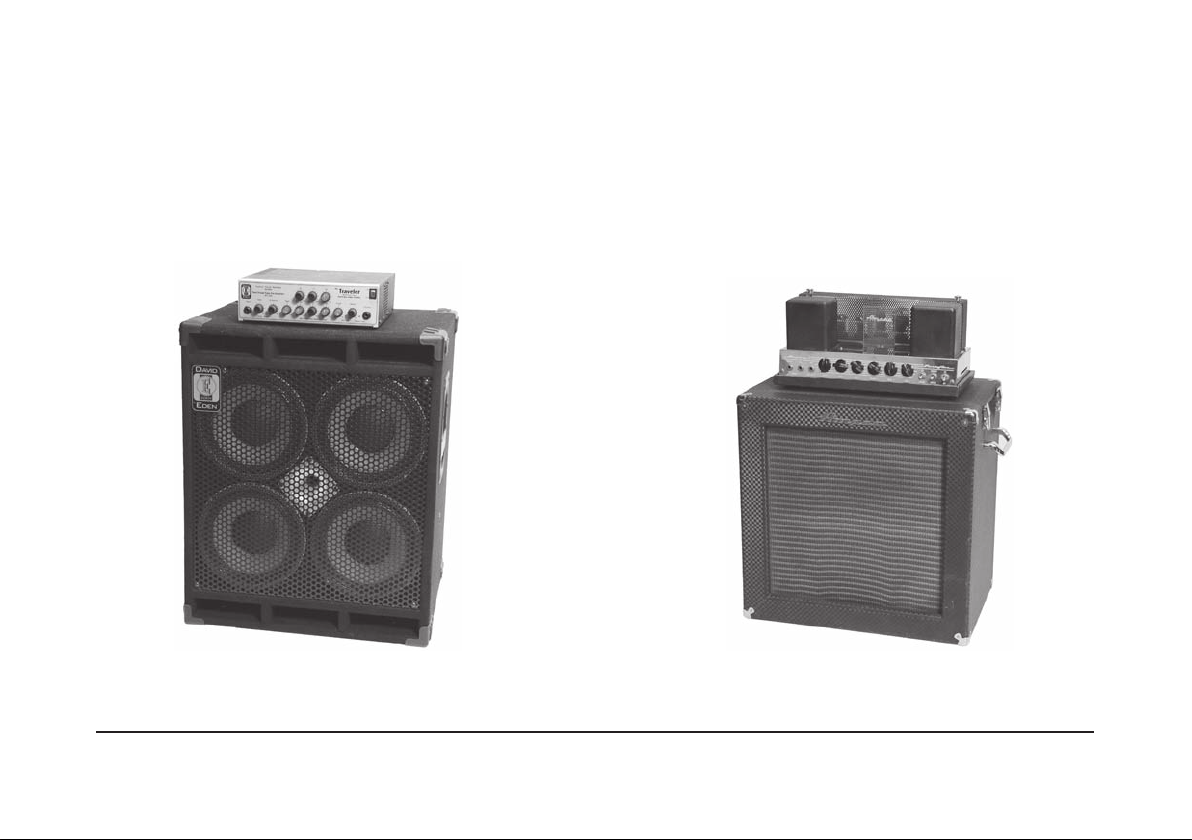
Clean – This model is all about clean, funk and
fusion bass tone. It’ll give you all the warm lows
and punchy highs you need. This sound is modeled
after* the Eden Traveler.
R & B – This Amp Model is a tribute to those late
60’s and early 70’s clean, fat bass tones. It’s the kind
of tone you hear on most Motown recordings, as
played by a pioneering young James Jamerson. This
Amp Model is based on* the 1968 Ampeg® B-15
Flip Top.
* All product names are trademarks of their respective owners, which are in no way associated or affiliated with Line 6. These product names, descriptions
and images are provided for the sole purpose of identifying the specific products that were studied during Line 6’s sound model development. AMPEG® is
a registered trademark of St. Louis Music, Inc.
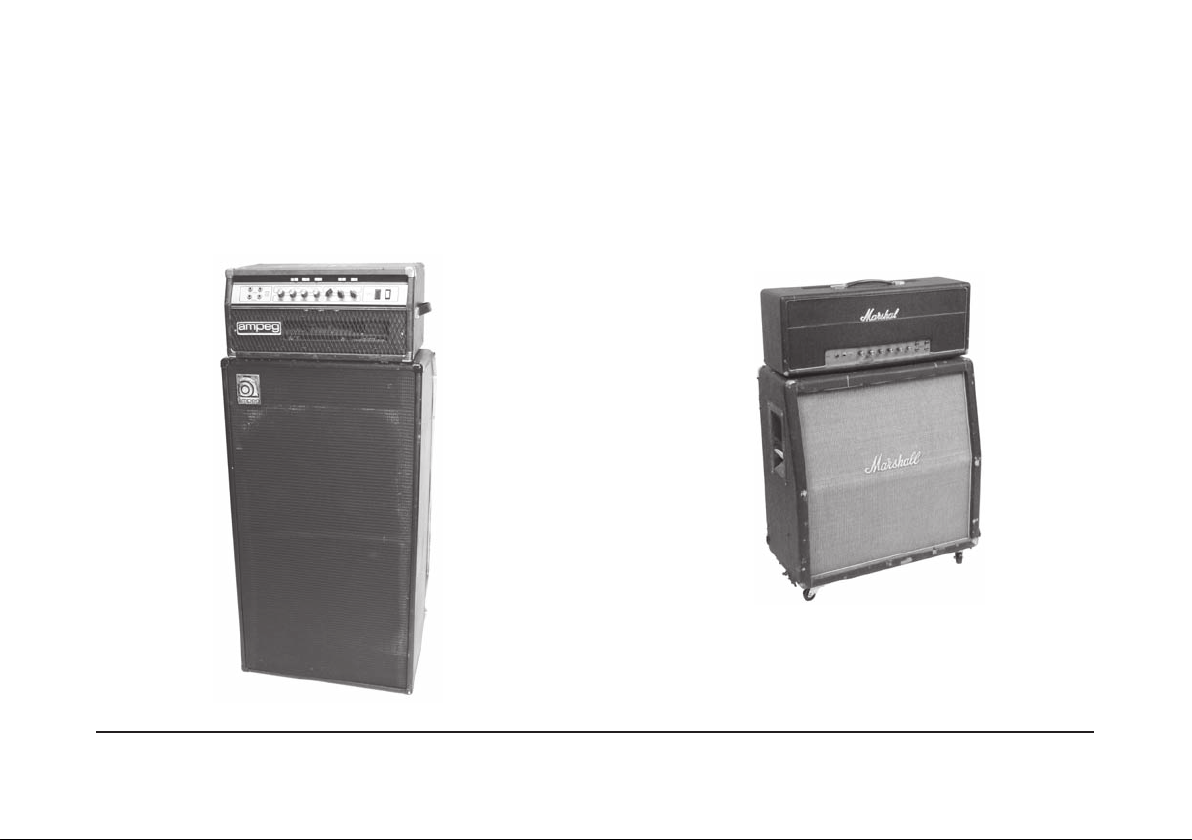
Rock – Modeled after* a ’74 Ampeg® SVT®. This
workhorse has appeared on innumerable recordings
and arena stages worldwide. Now, all the tone of the
300-pound behemoth 8x10 cab plus head is available
in a floor pedal!
Brit – Based on* the ’68 Marshall® Super Bass.
Enough said. This Model covers the kind of
overdriven bass sound brought to us by late ’60’s
British rock pioneers such as Cream and The Who,
as well as ’70’s giants Yes and Rush.
* All product names are trademarks of their respective owners, which are in no way associated or affiliated with Line 6. These product names, descriptions
and images are provided for the sole purpose of identifying the specific products that were studied during Line 6’s sound model development. AMPEG® and
SVT® are registered trademarks of St. Louis Music, Inc. MARSHALL® is a registered trademark of Marshall Amplification Plc.

Grind – As the name would suggest, this is for you
modern rock lovers. Alice in Chains, Mudvayne and
Rage Against the Machine...’nuff said. This model
is based on* a distorted SansAmp PSA-1 into an
Ampeg® SVT® with direct clean bass signal mixed
in for that angry, clear and punchy aggression that
takes your sound to DEFCON 1.
Synth – Remember the Gap Band or the Dazz
Band? How bout Marilyn Manson or NIN? They all
incorporate Synth Bass into their music and now
you can too with this synth that we based on the
classic synths of the ’70’s. See the About the Synth
section for a breakdown on Synth controls.
* All product names are trademarks of their respective owners, which are in no way associated or affiliated with Line 6. These product names, descriptions
and images are provided for the sole purpose of identifying the specific products that were studied during Line 6’s sound model development. AMPEG® and
SVT® are registered trademarks of St. Louis Music, Inc.

Effects
The Effects knob gives you a trio of the most popular
and usable bass effects known to man:
Chorus
Modeled after* the much loved T.C. Electronic®
Chorus, this is the most transparent, smooth and
Envelope Filter
Modeled after* an Electro-Harmonix® Q-Tron, this
is the baddest envelope filter on the planet. You have
expressive bass chorus ever built. Using it does not
reduce your low end. It is especially beautiful on
fretless bass.
heard this on your favorite P-Funk and Red Hot Chili
Peppers recordings. An envelope filter is a wah-wah
type effect that is controlled by the dynamics of your
bass note instead of being controlled by your feet.
For each of these effects you can choose anything
from a subtle hint of change to total tone-bending
sounds. While turning the knob, Bass Floor POD
adjusts all the individual controls of the modeled
Octaver
Based on* the EBS® OctaBass®, this effect produces
a single note one octave below the pitch of the
played note, adding a powerful new vibe to your
effect to automatically give you a complete range of
sounds without having to mess with multiple knobs
and switches. We figured you would appreciate
making music instead.
sound.
* All product names are trademarks of their respective owners, which are in no way associated or affiliated with Line 6. These product names, descriptions
and images are provided for the sole purpose of identifying the specific products that were studied during Line 6’s sound model development. ELECTROHARMONIX® is a registered trademark of New Sensor Corp. EBS® and OCTABASS® are registered trademarks of EBS Holding HB. T.C. ELECTRONIC®
is a registered trademark of T.C. Electronic A/S.
About the Synth
Selecting the Synth re-works the amp controls to
give you Analog Synth control over the Bass Synth.
For easy reference, a diagram describing the Synth
controls is printed on the bottom panel of the unit.
Here’s what happens:
Drive
Adds post filter distortion. Start with this knob at 10
o’clock for a little dirt.
Cutoff (Bass)
Filter Frequency Cutoff. Start with this at 10 o’clock
for deeper synth tones.
Resonance (Low Mid)
As you turn this knob clockwise you bring in
resonance. Think laser sounds.
Envelope (High Mid)
Filter Envelope Depth. The Filter Envelope is
triggered every time you play a new and clear note.
The Envelope amount controls how much the filter
will open each time you play a note.
Attack/Decay (Treble)
Filter Envelope Rate. Controls the speed of the Filter
envelope from fast to slow. Start with this control at
9 o’clock for typical Synth bass sounds.
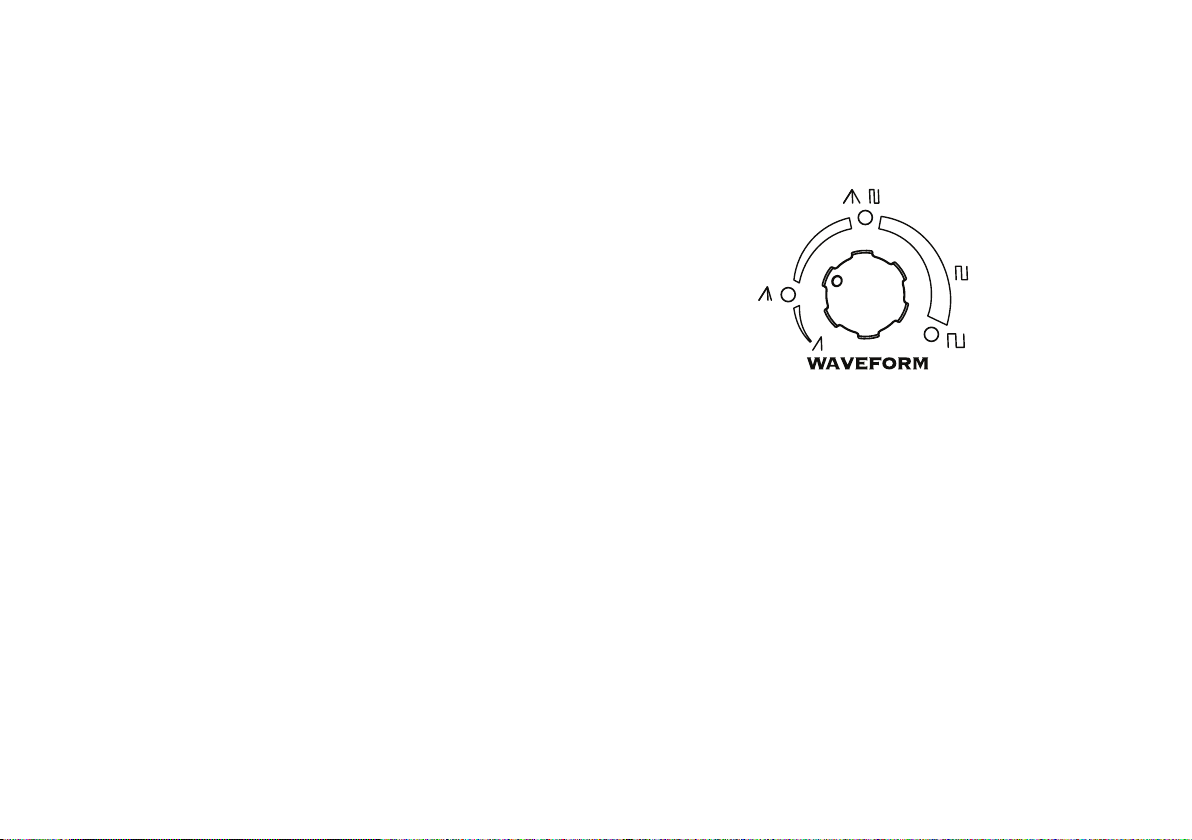
Waveform (Opto Comp)
A number of Waveforms are offered on this knob:
The waveforms are split into 2 parts. Part 1 goes from
sawtooth to triangle. Part 2 square wave to square
wave with lots of pulse width modulation. The LEDs
will indicate which waveform you’ve selected. Start
at 9 o’clock for a fat tone.
Effects
Each of the Bass Floor POD’s Smart FX unlocks lots
of hidden features and tonal secrets buried in the
Bass Synth. Do take some time to dial around to
uncover the tonal riches within!
Deep
Adds an octave down triangle wave for even fatter
Synth bass tone.

Editing and Saving Presets
Tuner
You can edit any of Bass Floor POD’s preset Channel
Memories and store it to whatever location you
want. To edit, just turn the knobs to adjust the sound
to your liking. You’ll notice that when you adjust or
change something in a preset the SAVE LED is lit
solid. To save your sound, follow these steps:
• Press the SAVE button
• The SAVE light will now flash. Use the arrow up/
down footswitches to select the preset location
you want to store the new preset in.
• Press SAVE a second time and you’ll notice the
preset number will blink off and on confirming
you have saved.
• All top panel settings are saved in their current
state.
Press and hold the DEEP button for 2 seconds to
enter tuner mode. Note that while in tuner mode
the output of Bass Floor POD is muted. You can
press any button or footswitch to exit tuner mode.
Play a note on your bass and Bass Floor POD will
show you its pitch by displaying the note name in
the display. All notes are displayed as naturals or
flats, so you’ll see Ab instead of G# (and so on).
The LEDs around the Amp Model knob tell you if
the note is sharp or flat. Red lights on the left hand
side of the knob tell you the note you’re playing is
flat. Red lights on the right tell you the note is sharp.
The string is in tune when both Rock and Brit lights
turn green.

Performing a Factory Reset
To reset your Bass Floor POD and restore factory
default settings – including original preset sounds,
overwriting any presets you may have saved – hold
down the COMP and FX footswitches while plugging
the power in. Once “01” shows up in the display,
unplug the power then plug it back in. You’re done!
Calibrating the Wah/Vol Pedal
To calibrate the pedal on your Bass Floor POD,
unplug the power, press and hold the toe-switch on
the Vol/Wah pedal, and connect the power while
that switch is pressed. Once “PC” appears in the
display, press and hold the DEEP footswitch until a
number flashes in the display. Move the pedal from
toe-down to heel-down position and back up to the
toe-down position, clicking the toe-switch. Wait
5 seconds, unplug the power then plug it back in.
You’re there!

®
Manuel de pilotage
40-00-0118 Disponible en édition électrophonique limitée sur www.line6.com/manuals. Version A


Line 6, POD et LowDown sont des marques
commerciales de Line 6, Inc. Tous les autres
noms de produits, marques déposées et
noms d’artistes sont la propriété de leurs
détenteurs respectifs. Ceux-ci ne sont
nullement associés ou affiliés à Line 6. Ces
noms et images servent exclusivement à
décrire certains sons modélisés par Line
6 d’après les sons célèbres de ces produits
ou artistes. L’utilisation de ces produits,
images, marques déposées et noms d’artistes n’implique aucune coopération ni
sponsorisation.
Lisez attentivement ces informations importantes liées à la sécurité.
Conservez ce manuel dans un lieu sûr.
Avant d’utiliser votre Bass Floor POD, lisez attentivement les consignes d’utilisation et de sécurité ci-dessous.
1. Respectez tous les avertissements imprimés sur l’appareil et dans le mode d’emploi.
2. Branchez l’appareil à une prise de courant de 100~120V ou de 200~240V/47~63Hz (selon la tension d’utilisation de l’appareil; voyez son panneau
arrière).
3. N’effectuez aucune opération d’entretien autre que celles préconisées dans le mode d’emploi. Faites réparer ce produit s’il a subi un dommage,
notamment:
• si le cordon d’alimentation ou sa fiche est endommagé
• si du liquide a été renversé ou des objets sont tombés dans l’appareil
• si l’appareil a été exposé à la pluie ou à l’humidité
• si l’appareil ne fonctionne pas normalement ou ses performances baissent de manière significative
• si ce produit est tombé ou si son boítier est endommagé.
4. Le fond du châssis métallique peut chauffer durant le fonctionnement. Evitez de le toucher durant ou juste après le fonctionnement.
5. Evitez les emplacements situés à proximité de sources de chaleur comme des radiateurs, des poêles ou tout autre appareil produisant de la chaleur.
L’arrière de l’appareil doit être à une distance d’au moins 10cm de murs ou d’autres obstacles pouvant obstruer la ventilation.
6. N’obstruez pas les orifices de ventilation et évitez les endroits clos.
7. Veillez à ne jamais laisser d’objet ni de liquide pénétrer dans le boítier de l’appareil. Evitez les endroits à proximité d’eau.
8. Ne marchez pas sur le cordon d’alimentation. Évitez de coincer le cordon d’alimentation sous des objets lourds. Faites particulièrement attention au
cordon au niveau de la prise secteur et du point de connexion au produit.
9. Débranchez l’ampli du secteur si vous ne comptez pas l’utiliser durant un bon moment. Débranchez aussi l’ampli en cas d’orage.
10. Utilisez exclusivement un chiffon mouillé pour le nettoyage.
11. Ne perdez pas le bénéfice de fiche avec borne de terre. Une telle fiche est équipée de deux bornes d’alimentation et d’une borne de terre. Cette troisième
borne est là pour votre sécurité. Si la fiche n’entre pas dans votre prise secteur, faites remplacer cette prise obsolète par une prise respectant les normes
de sécurité.
12. Utilisez exclusivement les fixations/accessoires préconisés par le fabricant.
13. Une écoute prolongée à volume élevé peut provoquer une perte d’audition et/ou des dommages irréversibles de l’ouïe. Consommez toujours les décibels
avec modération.
NOTICE: Ce produit a fait l’objet de tests et a été déclaré conforme aux normes des appareils numériques de classe B,
conformément à la partie 15 des réglementations FCC. Son fonctionnement est soumis aux deux conditions suivantes: (1)
L’appareil ne peut pas causer d’interférences nocives et (2) doit accepter toute interférence reçue, même des interférences
susceptibles d’entraíner un fonctionnement indésirable.
AVERTISSEMENT: Pour éviter tout risque d’incendie ou
d’électrocution, n’exposez jamais ce produit à la pluie ni
à l’humidité.
PRUDENCE: Pour réduire les risques d’incendie et
d’électrocution, ne retirez jamais aucune vis. Ce produit
ne contient aucune pièce pouvant être réparée par
l’utilisateur. Confiez toute réparation à un technicien
qualifié.
Bass Floor POD Pilot’s Guide © 2007, Line 6, Inc.
Le point d’exclamation dans un triangle signifie
“Prudence!”. Lisez toujours les informations précédées
de ce symbole.
Le symbole d’éclair dans un triangle signifie “danger
d’électrocution!”. Il attire votre attention sur des
informations relatives à la tension de fonctionnement
et à des risques d’électrocution.
Ce symbole inscrit dans un triangle signifie “Attention!
Surface chaude!”. Il est présent aux endroits susceptibles
de chauffer fortement pendant l’utilisation et qu’il faut
donc éviter de toucher.

Commandes
1. Amp Model
Tournez cette commande pour sélectionner un des
5 modèles d’amplis ou de synthé de basse. Les autres
commandes du Bass Floor POD sont alors automatiquement réglées en fonction du modèle choisi:
il ne vous reste qu’à jouer!
2. Drive
Appelée commande de volume ou de gain sur
d’autres amplis, elle détermine le niveau de “crasse”
envoyé au son.
3. Commandes de timbre
Les commandes Bass, Low Mid, Hi Mid et Treble
sont optimisées pour chaque modèle d’ampli choisi.
4. Opto Comp
Tournez la commande vers la droite pour ajouter
plus de compression. Guettez le témoin Threshold
et réglez la commande pour qu’il s’allume juste au
point correspondant à l’intensité avec laquelle vous
jouez normalement. C’est un bon point de départ.
5. Effects
Actionnez cette commande pour accéder rapidement
et facilement à d’indispensables effets. La commande
sert à choisir l’effet Envelope Filter, Octaver ou
Chorus dont les réglages s’échelonnent du “subtil”
au “renversant”. Le témoin de l’effet actif s’allume.
6. Chan Vol
Cette commande permet de régler le volume des
configurations ampli+effet sauvegardées dans les
mémoires du Bass Floor POD (voyez le point 16).
Commencez par un réglage à 2h puis réglez les
commandes de timbre et Drive. Après un certain
réajustement, vos presets devraient avoir un volume
plus constant.
7. Sorties
Record/Direct Output – Cette sortie permet
d’envoyer vos signaux à la sono ou à un enregistreur
multipiste. Cette sortie offre à l’ingénieur du son une
simulation d’enceinte captée avec un micro variant
selon le modèle.
Amp Output – Cette sortie permet d’envoyer vos
signaux à un ampli de basse ou de puissance.

8. Sélecteur Amp Mode
Selon le type d’enceinte utilisé, ce sélecteur permet
de sélectionner “Horn” (pour une enceinte avec
tweeter ou pavillon à compression) ou “No Horn”
(pour une enceinte sans tweeter ou pavillon à
compression).
9. Master Volume
Cette commande pilote le niveau global du signal
aux sorties Record/Direct Output et Amp Output
ainsi que Phones. Ce réglage n’est pas mémorisé
avec les réglages de la configuration ampli & effets.
10. Phones
Branchez un casque à cette prise et profitez du son
stéréo. Vérifiez que la commande Master Volume est
au minimum puis augmentez progressivement son
réglage pour ajuster le volume du casque. La prise
est conçue pour fiche 1/8” (pour écouteurs de lecteur
MP3) mais vous pouvez utiliser un casque avec fiche
1/4” moyennant un adaptateur.
11. Prise d’alimentation
Utilisez exclusivement l’adaptateur Line 6 fourni
avec le Bass Floor POD. Le recours à un autre
adaptateur risque d’endommager l’appareil.
12. CD/MP3
Branchez la sortie d’un lecteur CD ou MP3 à cette
prise pour jouer en accompagnant vos morceaux
favoris. Pour équilibrer le niveau de la musique et de
l’instrument, réglez le niveau de sortie sur le lecteur
CD ou MP3.
13. Input
Branchez votre basse ici.
14. Save/Hold for Alternate Features
Appuyez sur ce bouton pour sauvegarder les
réglages d’ampli et d’effets créés ou modifiés dans
une mémoire. Le Bass Floor POD vous propose
64 mémoires. Maintenez ce bouton enfoncé pour
accéder à la fonction alternative des commandes
Bass et Treble.

15. Deep/Hold for Tuner
“Deep” lance une égalisation spéciale conférant une
profondeur suprême au modèle. Maintenez le bouton
enfoncé pour accéder à l’accordeur chromatique.
16. Mémoires (Affichage)
Affiche la mémoire sélectionnée (contenant des
réglages d’ampli et d’effets). Le Bass Floor POD met
64 mémoires à votre disposition.
17. Commutateurs au pied
Les commutateurs au pied peuvent avoir deux modes:
sélection de mémoire et “FX On/Off”. Pour alterner
entre ces deux modes, maintenez le commutateur
BYP enfoncé durant 1 seconde.
• Mode de sélection de mémoire: Les commutateurs au pied s et t permettent de
sélectionner une mémoire. Vous pouvez faire
défiler les mémoires en maintenant un de ces
commutateurs enfoncé. Le commutateur BYP
(bypass) contourne tous les modèles d’amplis et
d’effets, y compris la pédale.
Mode FX On/Off: Ce mode active et coupe les
•
effets d’une mémoire. Le commutateur au pied
DEEP active et coupe l’accentuation des graves
tandis que COMP et FX activent et coupent
respectivement le compresseur (Opto Comp) et
les effets.
18. Témoin FX On/Off
Il ne s’allume qu’en mode “FX On/Off”. S’il
est ETEINT, vous êtes en mode de sélection de
mémoire.
19. Pédale
Pour alterner entre le pilotage de l’effet wah et du
volume, enfoncez cette pédale jusqu’en bout de
course pour actionner son commutateur. Le témoin
Wah est allumé quand l’effet wah est activé. S’il est
ETEINT, la pédale pilote le volume.

L’héritage du Bass Floor POD
Bonjour et merci d’avoir opté pour le Bass Floor POD
de Line 6. Nous sommes heureux de vous accueillir
au sein de la communauté Line 6. Le POD est connu
dans le monde entier: ce petit boítier apporte des
sons géants sur scène comme au studio. Nous avons
passé beaucoup de temps avec des artistes et des
techniciens pour que les amplis de basse de la série
LowDown de Line 6 délivrent les plus grands sons de
basse. Ces mêmes sons animent le Bass Floor POD.
Le LowDown est basé sur d’incontournables classiques à l’origine du son du rock & roll comme les
Ampeg® SVT®, Ampeg® B-15 et le Marshall®
Super Bass. Ces amplis délivrent un son à vous
réagencer les tripes. Ils restent aujourd’hui encore
la référence pour bassistes professionnels du
monde entier (du moins pour ceux qui n’ont pas
de LowDown). Malheureusement, le poids de la
plupart de ces amplis n’a d’égal que leur prix qui vous
nettoie un compte en banque en moins de deux. Le
commun des mortels devait donc se contenter d’un
des nombreux pédaliers multi-effets portatifs aux
sons passe-partout pour tenter d’épicer la sauce. Du
moins, jusqu’à présent…
Avec le Bass Floor POD, nous avons mis tout
ce que nous avons appris du LowDown dans un
pédalier abordable et portatif. Nous avons passé
d’innombrables heures à modéliser les meilleurs
amplis et effets et à en reproduire fidèlement les sons
dans le pédalier que vous avez en face de vous. Quel
que soit le son de basse recherché, allant d’un funk
déjanté à un rock classique, le Bass Floor POD de
Line 6 vous l’amène sur un plateau. La longue quête
du petit pédalier de concert et de studio parfait à
tous égards est enfin terminée…
Et maintenant, au boulot!
Tous les noms de produits sont des marques commerciales de leurs détenteurs respectifs. Ceux-ci ne sont nullement associés ni affiliés à Line 6. Les noms
de produits, descriptions et illustrations servent uniquement à faciliter l’identification des produits étudiés par Line 6 pour élaborer ses modèles. AMPEG®
et SVT® sont des marques déposées de St. Louis Music, Inc. MARSHALL® est une marque déposée de Marshall Amplification Plc.

Description des modèles d’amplis
Comme les grands peintres qui exploitent une
vaste palette de couleurs, vous voilà prêt à jouer
avec les nuances et tonalités du large éventail
de sonorités du Bass Floor POD. Chaque modèle
charge automatiquement les réglages nécessaires
pour obtenir un son touchant à la perfection. Vous
pouvez encore l’affiner puis sauvegarder le résultat
dans une des mémoires.
Drive
Cette commande sature le préampli virtuel du
modèle d’ampli pour obtenir diverses distorsions.
Tournée à gauche toute, elle produit le son le plus
clair. Plus vous allez vers la droite, plus la distorsion
augmente. Réglez-la selon vos goûts.
Commandes de timbre
Les commandes Bass, Low Mid, Hi Mid et Treble
sont optimisées pour chaque modèle d’ampli choisi.
Ces commandes vous permettent de créer et de
peaufiner le son que vous avez en tête.
Opto Comp
Cette commande règle le niveau seuil du compresseur.
Plus vous la tournez vers la droite, plus la compression
augmente et plus la dynamique s’uniformise. Si vous
la tournez à fond à gauche, le compresseur est coupé.
En la tournant vers la droite, vous diminuez le seuil
de déclenchement du compresseur. Les témoins
autour de cette commande s’allument lorsque le
compresseur atteint différents niveaux d’atténuation
(environ 3, 6 et 9dB). Comme point de départ,
réglez la commande pour que le deuxième témoin
s’allume juste au point correspondant à l’intensité
avec laquelle vous jouez normalement.

Quelques astuces utiles
Lorsque vous changez de modèle d’ampli, la réponse
et l’interactivité des commandes de timbre sont
modifiées en conséquence. Ces commandes peuvent
ainsi reproduire fidèlement le rôle des commandes
“physiques” sur l’ampli ayant inspiré le modèle en
question. Ainsi, le fait de tourner la commande
Treble à fond donne des résultats très différents
pour chaque modèle. Quand vous vous familiarisez
avec un nouveau modèle d’ampli et ses commandes
de timbre, tendez l’oreille et choisissez les réglages
que vous préférez parmi les possibilités offertes par
chaque modèle.
Si, par exemple, vous voulez plus de grave, déterminez
si ce grave doit être épais et rond ou doit plutôt
avoir du punch. Cela vous permet de choisir entre
les commandes Bass et Low Mid. La commande
Low Mid peut parfois vous fournir le grave que vous
recherchiez mais avec plus de punch. Il en va de
même pour l’aigu: vous faut-il de la transparence
pour la note ou une attaque percutante? S’il vous
faut de la clarté, la commande Hi Mid vous la donne
sans ajouter d’attaque percutante. Prenez le temps
de jouer avec les commandes de timbre car la palette
sonore disponible n’a jamais été aussi authentique
dans un pédalier.

Les modèles d’amplis
Clean – Ce modèle offre un superbe son de basse
clair, funk et fusion. Vous retrouverez ces graves
chaleureux et ces aigus percutants si caractéristiques.
Ce modèle est basé sur* un Eden Traveler.
R & B – Ce modèle rend hommage aux sons de
basse clairs et épais de la fin des années 1960 et du
début des années 1970. C’est le son des glorieuses
années du label Motown et du bassiste pionnier
James Jamerson. Ce modèle est basé sur un Ampeg®
B-15 Flip Top de 1968.
* Tous les noms de produits sont des marques commerciales de leurs détenteurs respectifs. Ceux-ci ne sont nullement associés ni affiliés à Line 6. Les noms
de produits, descriptions et illustrations servent uniquement à faciliter l’identification des produits étudiés par Line 6 pour élaborer ses modèles. AMPEG®
est une marque déposée de St. Louis Music, Inc.

Rock – Modélisé d’après* un Ampeg® SVT® de
1974. Cette bête s’est distinguée sur d’innombrables
albums et les scènes du monde entier. Aujourd’hui,
tous les sons de ce monstre 8x10 plus tête pesant dans
les 150 kilos sont disponibles dans un pédalier!
Brit – Basé sur* un Marshall® Super Bass de 1968.
Que dire de plus? Ce modèle restitue ce son de basse
saturée des pionniers du rock britannique, genre
Cream et Who, de la fin des années 1960 et des
géants des années 1970 comme Yes et Rush.
* Tous les noms de produits sont des marques commerciales de leurs détenteurs respectifs. Ceux-ci ne sont nullement associés ni affiliés à Line 6. Les noms
de produits, descriptions et illustrations servent uniquement à faciliter l’identification des produits étudiés par Line 6 pour élaborer ses modèles. AMPEG®
et SVT® sont des marques déposées de St. Louis Music, Inc. MARSHALL® est une marque déposée de Marshall Amplification Plc.

Grind – Comme son nom le suggère, il est destiné
aux amateurs de rock contemporain. Alice in
Chains, Mudvayne et Rage Against the Machine…
inutile d’en dire plus. Ce modèle est basé sur* un
SansAmp PSA-1 avec distorsion alimentant un
Ampeg® SVT®, le tout mixé à un signal direct de
basse clean et produisant un son d’une agressivité
dévastatrice.
Synth – Vous vous souvenez des Gap Band ou
Dazz Band? Et Marilyn Manson ou NIN? Ils ont au
moins un point commun: l’intégration du synthé de
basse dans leur musique. Vous pouvez maintenant
les imiter avec ce synthé, véritable quintessence des
synthés des années ‘70. Voyez la section “A propos
du modèle Synth” pour en savoir plus sur les
fonctions des commandes.
* Tous les noms de produits sont des marques commerciales de leurs détenteurs respectifs. Ceux-ci ne sont nullement associés ni affiliés à Line 6. Les noms
de produits, descriptions et illustrations servent uniquement à faciliter l’identification des produits étudiés par Line 6 pour élaborer ses modèles. AMPEG®
et SVT® sont des marques déposées de St. Louis Music, Inc.

Effets
La commande EFFECTS vous donne accès à un trio
d’effets de basse indispensables:
Chorus
Basé sur le Chorus de T.C. Electronic®, ce chorus
pour basse est le plus transparent, velouté et expressif
Envelope Filter
Modélisé d’après un Electro-Harmonix® Q-Tron, ce
jamais réalisé. Loin de réduire le grave, cet effet rend
une basse fretless tout simplement irrésistible.
filtre à enveloppe est le plus redoutable de la planète.
Vous l’avez entendu mille fois sur des enregistrements
de P-Funk et des Red Hot Chili Peppers. Un filtre à
enveloppe est un effet de type wah-wah contrôlé par
la dynamique de votre note de basse au lieu de l’être
par votre pied.
Pour chacun de ces effets, vous pouvez choisir un
réglage allant du soupçon d’effet au remodelage sonore
complet. Quand vous tournez cette commande, le
Bass Floor POD règle automatiquement tous les
paramètres de l’effet modélisé pour vous fournir une
palette sonore complète, vous épargnant la corvée
Octaver
Basé sur* l’EBS® OctaBass®, cet effet ajoute une
d’interminables réglages manuels. Nous avons pensé
préféreriez faire de la musique.
note plus basse d’une octave à tout ce que vous jouez
et confère ainsi une puissance infernale à votre son.
* Tous les noms de produits sont des marques commerciales de leurs détenteurs respectifs. Ceux-ci ne sont nullement associés ni affiliés à Line 6. Les noms
de produits, descriptions et illustrations servent uniquement à faciliter l’identification des produits étudiés par Line 6 pour élaborer ses modèles. ELECTROHARMONIX® est une marque déposée de New Sensor Corp. EBS® et OCTABASS® sont des marques déposées de EBS Holding HB. T.C. ELECTRONIC®
est une marque déposée de T.C. Electronic A/S.

A propos du modèle Synth
La sélection du synthé change complètement le rôle
des commandes afin de vous donner un contrôle
analogique de votre synthé de basse. Vous trouverez
un schéma décrivant les commandes “synthé” sur la
face inférieure de l’appareil. Voici ce qui se passe:
Drive
Ajoute de la distorsion après le filtre. Commencez
par régler la commande à 10h pour une légère
saturation.
Cutoff (Bass)
Fréquence du filtre. Commencez par régler la
commande à 10h pour obtenir des sons synthés plus
graves.
Resonance (Low Mid)
Tournez la commande vers la droite pour augmenter
la résonance. Songez “sons laser”.
Envelope (High Mid)
Spécifie la profondeur de l’enveloppe du filtre. L’enveloppe du filtre est déclenchée chaque fois que vous
jouez une note claire. L’enveloppe du filtre détermine
le degré d’ouverture pour chaque note jouée.
Attack/Decay (Treble)
Attaque/chute de l’enveloppe du filtre. Cette
commande détermine la vitesse de l’enveloppe du
filtre et passe d’un réglage rapide à lent. En réglant
la commande à 9h, vous obtenez des sons typiques
de synthé de basse.
Forme d’onde (Opto Comp)
Cette commande propose plusieurs formes d’onde:
Les formes d’onde sont divisées en 2 parties. La
partie 1 passe d’une forme d’onde en dents de scie
à une forme d’onde triangulaire. La partie 2 passe
d’une forme d’onde carrée simple à une forme
d’onde carrée à modulation de largeur de pulsation.
Les témoins indiquent la forme d’onde sélectionnée.
Commencez à 9h pour un son gras.
Effets
Les effets “Smart” du Bass Floor POD combinés au
synthé de basse vous ouvrent des horizons encore
plus vastes et révèlent des secrets insoupçonnés.
Prenez le temps de triturer vos commandes et de
découvrir des richesses cachées!

Deep
Ajoute une forme d’onde triangulaire une octave
plus bas pour produire un son de synthé de basse
encore plus corsé.
Modifier et sauvegarder des
réglages
Vous pouvez changer n’importe quelle configuration
préprogrammée dans les mémoires du Bass Floor
POD ou en créer de votre cru et les sauvegarder où
vous le voulez. Pour l’édition, actionnez simplement
les commandes pour régler le son selon vos goûts.
Quand vous changez un réglage, le témoin SAVE
s’allume. Pour sauvegarder vos changements, effectuez les opérations suivantes:
• Appuyez sur le bouton SAVE.
• Le témoin SAVE clignote. Utilisez les commutateurs au pied fléchés haut/bas pour choisir la
mémoire de destination de vos réglages.
• Appuyez une seconde fois sur SAVE: le numéro
de la mémoire clignote pour confirmer la sauvegarde.
• Les réglages de toutes les commandes en façade
sont mémorisés dans leur état actuel.
Tuner
Maintenez le commutateur DEEP enfoncé 2 secondes
pour activer l’accordeur. Tant que l’accordeur est
activé, la sortie du Bass Floor POD est coupée.
Appuyez sur n’importe quel bouton ou commutateur
au pied pour quitter le mode accordeur.
Jouez une note sur la basse: l’écran du Bass Floor
POD indique sa hauteur en affichant le nom de la
note. Toutes les notes sont affichées sous forme de
bécarres ou de bémols: vous verrez donc “Ab” au lieu
de “G#” etc.
Les témoins autour de la commande AMP MODEL
indiquent que la note est trop haute ou trop basse. Les
témoins rouges à gauche de la commande indiquent
que la note est trop basse. Les témoins rouges à
droite signifient que la note est trop haute. La corde
est bien accordée quand les témoins “Rock” et “Brit”
s’allument en vert.

Rétablir les réglages d’usine
Pour initialiser votre Bass Floor POD et rétablir
les réglages d’usine, y compris les presets originaux
(ce qui efface tous les réglages que vous avez
sauvegardés), maintenez les commutateurs COMP
et FX enfoncés et branchez l’appareil au secteur.
Quand “01” apparaít à l’écran, débranchez l’appareil
puis rebranchez-le. Terminé!
Calibrer la pédale Vol/Wah
Pour calibrer la pédale du Bass Floor POD, débranchez
ce dernier du secteur, maintenez le commutateur
avant de la pédale Vol/Wah enfoncé et branchez
l’appareil au secteur. Quand “PC” apparaít à l’écran,
maintenez le commutateur DEEP enfoncé jusqu’à ce
qu’un numéro clignote à l’écran. Actionnez la pédale
en enfonçant successivement l’avant puis l’arrière
et en enfonçant de nouveau l’avant pour actionner
le commutateur. Attendez 5 secondes, débranchez
l’appareil puis rebranchez-le. C’est fait!


®
Pilotenhandbuch
40-00-0118 Limitierte elektrophone Ausgabe verfügbar unter www.line6.com/manuals Version A


Line 6, POD und LowDown sind Warenzeichen
der Line 6, Inc. Alle erwähnten Produktnamen,
Warenzeichen und Künstlernamen sind
Eigentum der betreffenden Hersteller
oder Rechtspersonen, die in keiner Weise
mit Line 6 verbunden sind. Produktnamen,
Fotos und Künstlernamen werden nur zur
Veranschaulichung bestimmter Modelle
verwendet, damit man weiß, welches Gerät
oder welcher Künstler dafür Pate gestanden
hat. Die Erwähnung dieser Produkt- und
Künstlernamen bzw. Warenzeichen weist
nicht auf eine Zusammenarbeit oder gar
Empfehlung der jeweiligen Eigentümer hin.

Bitte die folgenden wichtigen Sicherheitshinweise durchlesen.
Bewahre diese Anleitung an einem sicheren Ort auf.
Vor dem Einsatz des Bass Floor POD musst du dir alle zutreffenden Punkte und Sicherheitshinweise durchlesen.
1. Beachte alle auf dem Gerät selbst und in der Bedienungsanleitung erwähnten Warnungen.
2. Verbinde das Gerät nur mit einer 100~120V- bzw. 200~240V/47~63Hz-Steckdose (je nachdem, welche Spannung dein Modell benötigt; siehe das
Typenschild auf der Rückseite).
3. Führe nur die in der Anleitung erwähnten Bedienvorgänge aus. In folgenden Fällen muss das Produkt zur Reparatur eingereicht werden:
• wenn das Netzkabel oder der Stecker beschädigt ist
• wenn Flüssigkeiten oder Fremdkörper in das Geräteinnere gelangt sind
• wenn das Produkt Regen oder Feuchtigkeit ausgesetzt war
• wenn sich das Gerät abnormal oder nicht mehr in vollem Umfang erwartungsgemäß verhält
• wenn das Produkt hingefallen ist und das Gehäuse Schäden aufweist
4. Die Unterseite des Metallchassis’ wird während des Betriebs heiß. Berühre es niemals, solange das Gerät eingeschaltet ist bzw. unmittelbar danach.
5. Stelle das Produkt niemals in die Nähe von Wärmequellen, z.B. Heizkörpern, Öfen oder anderen Geräten, die starke Hitze erzeugen. Zwischen der
Rückseite des Geräts und einer Wand bzw. anderen Gegenständen, welche die Lüftung beeinträchtigen könnten, muss ein Freiraum von mindestens
10cm gelassen werden.
6. Versperre niemals die Lüftungsschlitze und stelle das Produkt während des Betriebs nie in einen geschlossenen Behälter.
7. Sorge dafür, dass weder Fremdkörper noch Flüssigkeiten in das Geräteinnere gelangen. Verwende dieses Produkt niemals in der Nähe von Wasser.
8. Laufe niemals auf dem Netzkabel. Stelle keine schweren Gegenstände darauf, damit es nicht gequetscht oder anderweitig beschädigt wird. Besonders
in der Nähe der Steckdose und der Anschlussbuchse am Verstärker muss das Kabel mit äußerster Vorsicht behandelt werden.
9. Löse den Netzanschluss, wenn du das Gerät längere Zeit nicht verwenden möchtest. Im Falle eines Gewitters muss der Netzanschluss gelöst werden.
10. Reinige dieses Produkt nur mit einem feuchten Tuch.
11. Versuche niemals, das Erdungssystem des Netzsteckers zu umgehen. Ein geerdeter Stecker weist zwei Stifte und eine Erdungsöffnung auf. Die Erdung dient
deiner Sicherheit. Wenn der beiliegende Stecker nicht in die Netzsteckdose passt, musst du einen Elektriker bitten, die Steckdose auszuwechseln.
12. Verwende nur Halterungen/Zubehörteile, die vom Hersteller ausdrücklich empfohlen werden.
13. Setze dich niemals über längere Zeiträume hohen Schallpegeln aus, weil das zu Gehörverlust führen kann. Achte immer auf einen auch aus medizinischer
Warte “vernünftigen” Pegel.

ACHTUNG: Dieses Gerät entspricht den Grenzwerten von “Part 15” der FCC-Bestimmungen für Digital-Geräte der Klasse
B. Die Bedienung unterliegt folgenden beiden Bedingungen: (1) Das Gerät darf keine schädlichen Interferenzen verursachen;
(2) das Gerät muss alle empfangenen Interferenzen akzeptieren, darunter auch Interferenzen, die Funktionsstörungen
verursachen könnten.
WARNUNG: Um Brand- und Stromschlaggefahr
zu vermeiden, dieses Produkt niemals Regen oder
Feuchtigkeit aussetzen.
VORSICHT: Um Brand- und Stromschlaggefahr zu vermeiden, niemals die Schrauben entfernen. Das Produkt
niemals selbst warten. Überlasse das einem qualifizierten
Wartungstechniker.
Bass Floor POD – Pilotenhandbuch © 2007, Line 6, Inc.
Das Ausrufezeichen in einem Dreieck bedeutet
“Vorsicht!” Lies dir alle Informationen neben solchen
Symbolen sorgfältig durch.
Der Blitz in einem Dreieck stellt eine “elektrische
Warnung” bezüglich der benötigten Stromspannung
bzw. einer denkbaren Stromschlaggefahr dar.
Dieses Symbol in einem Warndreieck verweist auf eine
heiße Oberfläche, die man nicht berühren darf. Solche
Symbole befinden sich an und auf Komponenten, die
man während des Betriebs nicht berühren darf.


Bedienelemente
1. Amp Model
Mit diesem Regler wählst du eines der 5 Verstärkermodelle oder die Synthesizer-Bassfunktion. Die
übrigen Regler des Bass Floor POD werden dann
automatisch so eingestellt, dass du sofort loslegen
kannst!
2. Drive
Entspricht dem Lautstärke- oder Gain-Regler anderer
Verstärker: Hiermit stellst du den “Bratgehalt” des
Sounds ein.
3. Klangregler
Das genaue Verhalten von Bass, Low Mid, Hi
Mid und Treble richtet sich nach dem gewählten
Verstärkermodell.
4. Opto Comp
Drehe ihn nach rechts, um die Dynamik deines
Spiels zu verringern (stärkere Signalkomprimierung).
Behalte die Threshold-Dioden im Auge, während du
diesen Regler so einstellst, dass die zweite Diode erst
leuchtet, wenn du deine “normale” Spielintensität
erreichst. Das ist immer ein guter Ausgangspunkt.
5. Effects
Mit diesem Regler kann man sofort den gewünschten
Effekt-Sound einstellen. Als Effekte stehen ein Filter
(mit Hüllkurve), ein “Octaver” und ein Chorus
zur Verfügung. Die Intensität reicht von “dezent”
bis “umwerfend” – für jeden Effekt. Die Diode des
aktiven Effekts leuchtet jeweils.
6. Chan Vol
Mit diesem Regler kannst du dafür sorgen, dass alle
im Bass Floor POD gespeicherten Sounds (siehe
Regler 16) ungefähr die gleiche Lautstärke haben.
Drehe ihn zuerst auf “2 Uhr” und stelle mit dem
Drive- und den Klangreglern den gewünschten
Sound ein. Danach kannst du den Pegel bei Bedarf
mit Chan Vol korrigieren.
7. Ausgänge
Record/Direct Output – Dieser Ausgang kann
mit einer Beschallungsanlage oder einem Mehrspurrecorder verbunden werden. Das Signal wird
mit einer für das gewählte Modell typischen
Mikrofonsimulation versehen und klingt entsprechend lebendig.
Amp Output – Dieser Ausgang kann mit einem
Bassverstärker oder einer Endstufe verbunden
werden.

8. Amp Mode-Schalter
Je nach der Lautsprecherbestückung deines
Verstärkers musst du diesen Schalter entweder auf
“Horn” (Box mit Tweeter oder Hochtontreiber) oder
“No Horn” (Box ohne Tweeter/Hochtontreiber)
stellen.
9. Master Volume
Hiermit regelst du den Pegel der an den Buchsen
Record/Direct Output und Amp Output sowie
Phones anliegenden Signale. Die Einstellung dieses
Reglers wird nicht gespeichert.
10. Phones
Hier kannst du einen Stereo-Kopfhörer anschließen.
Stelle Master Volume anfangs auf den Mindestwert
und erhöhe die Einstellung danach allmählich.
Hierbei handelt es sich um eine 1/8”-Klinkenbuchse,
die man z.B. mit einem MP3-Player verbinden kann.
Bei Verwendung eines (optionalen) Adapters lässt
sich aber auch ein 1/4”-Kopfhörer nutzen.
11. Netzanschluss
Schließe hier nur das zum Lieferumfang des Bass
Floor POD gehörige Line 6-Netzteil an. Mit
einem anderen Netzteil könntest du das Gerät
beschädigen.
12. CD/MP3
Mit dieser Buchse kann der Ausgang eines CD- oder
MP3-Players verbunden werden, so dass du dich von
deinen Helden begleiten lassen kannst. Die Balance
zwischen deinem Instrument und der Musik musst
du mit dem Lautstärkeregler des CD- oder MP3Players einstellen.
13. Input
Hier muss der Bass angeschlossen werden.
14. Save/Hold for Alternate Features
Drücke diesen Taster, um deine Einstellungen
(Verstärker- und Effekt-Sound) zu speichern. Der
Bass Floor POD bietet 64 Speicher. Halte diesen
Taster gedrückt, während du an einem Regler mit
Alternativfunktion (Bass und Treble) drehst.

15. Deep/Hold for Tuner
Mit “Deep” kann ein spezieller EQ aktiviert werden,
der den Sound superfett macht. Halte den Taster
gedrückt, um den Tuner zu aktivieren.
16. Speicheranzeige
Hier erscheint die Nummer des aktuell gewählten
Speichers (Verstärker- und Effekteinstellungen).
Der Bass Floor POD bietet 64 Speicher.
17. Fußtaster
Es gibt zwei Fußtastermodi: Speicherwahl und “FX
On/Off”. Um vom einen zum anderen zu wechseln,
musst du den BYP-Fußtaster 1 Sekunde lang gedrückt
halten.
•
Speicherwahlmodus: Mit den Fußtastern s
und t kannst du Sound-Speicher wählen. Halte
einen Fußtaster gedrückt, um schneller zu einem
weiter entfernten Speicher zu gehen. Der BYPFußtaster (“Bypass”) erlaubt das Umgehen des
Verstärkermodells, der Effekte und des Pedals.
FX On/Off-Modus: In diesem Modus kannst du
•
die für den Speicher gewählten Effekte ein- und
ausschalten. Mit dem DEEP-Fußtaster aktivierst
du die Subbassverstärkung, mit COMP den
optischen Kompressor und mit FX die Effekte.
18. ‘FX On/Off’-Diode
Wenn der “FX On/Off”-Modus aktiv ist, leuchtet
diese Diode. Wenn sie NICHT leuchtet, befindest
du dich im Speicherwahlmodus.
19. Pedal
Drücke dieses Pedal vollständig hinunter, um
entweder die “Wah”- oder die “Volume”-Funktion
zu wählen. Wenn die “Wah”-Diode leuchtet, ist die
gleichnamige Funktion aktiv. Leuchtet sie nicht, so
dient das Pedal zum Einstellen der Lautstärke.

Über den Bass Floor POD
Hallo. Vielen Dank für deine Entscheidung zu einem
Bass Floor POD von Line 6. Line 6 freut sich ganz
diebisch, nun auch dich zu seinen Anwendern zählen
zu können. Der Begriff “POD” gilt in Musikerkreisen
mittlerweile als DIE Adresse für einen Super-Sound
für Live- und Studioanwendungen. Gemeinsam mit
mehreren Toningenieuren und Künstlern haben
wir dein Gerät mit den tollen Bass-Sounds der
LowDown-Verstärker von Line 6 versehen. Der Bass
Floor POD enthält folglich dieselben Sounds.
Die LowDown-Serie wurde von mehreren
“klassischen” Bassverstärkern inspiriert: ein Ampeg®
SVT®, Ampeg® B-15 und Marshall® Super Bass
haben nämlich den Druck, mit dem man beim
Publikum und den übrigen Musikern ankommt.
Jene Amps gelten bei professionellen Bassisten seit
langem als Standard (sofern sie sich nicht bereits für
einen LowDown entschieden haben). Leider sind sie
aber auch sehr schwer und belasten ein Bankkonto
oftmals über Gebühr. Deshalb entscheiden sich viele
Bassisten für eine Pedaleinheit, die soundmäßig eher
unverbindlich klingt und nicht viel hermacht. Zum
Glück gibt es jetzt eine Alternative…
Der Bass Floor POD enthält das für die LowDownSerie gesammelte Fachwissen in einer ebenso
erschwinglichen wie praktischen Pedaleinheit. Wir
haben uns ganz intensiv mit dem Studium der besten
Verstärker befasst, damit deine Bodenleiste so genial
wie möglich klingt. Ob du nun jenen abgedrehten
Funk- oder den ultimativen Rock-Sound bevorzugst,
spielt eigentlich keine Rolle, weil der Bass Floor
POD dank der Line 6-Technologie beides und
noch viel mehr beherrscht. Ab sofort brauchst du
also nur noch eine kompakte Pedaleinheit für alle
Lebenslagen…
Jetzt aber los!
Alle Produktnamen sind Warenzeichen der betreffenden Hersteller, die in keiner Weise mit Line 6 verbunden sind. Die Produktnamen, Beschreibungen und
Fotos dienen nur dem Zweck einer leichteren Identifizierung der Geräte, die als Ausgangspunkt für die Line 6-Modelle verwendet wurden. AMPEG® und
SVT® sind eingetragene Warenzeichen der St. Louis Music, Inc. MARSHALL® ist ein eingetragenes Warenzeichen der Marshall Amplification Plc.

Über die Verstärkermodelle
Der Bass Floor POD ist für dich als Bassisten, was
der Tuschkasten für Maler ist – hiermit bringst du
Farbe in deine Musik. Bei Anwahl eines Modells
werden sofort die Optimaleinstellungen gewählt,
die du aber ändern und sogar speichern kannst.
Drive
Mit diesem Regler erzeugst du eine Übersteuerung
des Vorverstärkers, die den Sound anzerrt. Drehe
den Regler ganz nach links, wenn du einen “cleanen”
Sound benötigst. Ganz rechts befindet sich hingegen
das Brat-Fegefeuer. Geschmackssache.
Klangregler
Das genaue Verhalten von Bass, Low Mid, Hi
Mid und Treble richtet sich nach dem gewählten
Verstärkermodell. Hiermit näherst du dich dem
Sound, den du schon so lange in deinem Kopf
hörst.
Opto Comp
Hiermit stellst du die Pegelschwelle des Kompressors
ein. Je weiter du ihn nach rechts drehst, desto stärker
werden die Noten komprimiert, was deinen Sound
vorrangig kompakter macht. Wenn du den Regler
ganz nach links drehst, ist der Kompressor aus.
Je weiter du ihn nach rechts drehst, desto stärker
wird die Pegelschwelle, an welcher der Kompressor
einsetzt, herabgesetzt. Die Diode links neben
diesem Regler leuchtet, wenn der Kompressor eine
bestimmte Pegelreduzierung (ca. 3, 6 oder 9dB)
erreicht. Stelle diesen Regler anfangs so ein, dass
die Diode erst leuchtet, wenn du deine “normale”
Spielintensität erreichst.

Ein paar Tipps
Die genaue Wirkung der Klangregler richtet sich
nach dem gewählten Verstärkermodell. Mithin
verhalten sie sich genau wie die Klangregelung des
modellierten Verstärkers. So beeinflusst der TrebleRegler z.B. jedes Modell anders. Beim Anspielen
der einzelnen Modelle solltest du ein wenig mit der
Klangregelung “spielen”, um akustisch zu erkunden,
wie sie den Sound beeinflussen.
Wenn dir etwas Bass fehlt, musst du dich fragen, ob
der Sound rund und fett oder eher druckvoll sein
soll. Das hilft dir nämlich bei der Entscheidung,
ob du die Bass- oder Low Mid-Einstellung ändern
musst. Oftmals liefert dir Low Mid die tiefen Töne
UND jenen gewünschten Druck. Das gleiche gilt für
die hohen Frequenzen: Willst du kristallin definierte
Note oder einen leicht knallenden Effekt? Mit Hi
Mid erzielst du oftmals die benötigte Definition,
ohne gleich einen allzu perkussiven Anschlag
zu fabrizieren. Experimentiere einfach mit den
Klangreglern, bis du “deinen” Sound gefunden hast.
Du wirst merken, dass sich fast jede Vorstellung
realisieren lässt.

Die Verstärkermodelle
Clean – Dieses Modell ist “clean”, “funky” und eben
mit Leib und Seele “Fusion”. Der Bass ist warm, die
Höhen präsent – was will man mehr? Dieses Modell
beruht* auf einem Eden Traveler.
R & B – Dieses Modell frönt den späten 1960ern und
frühen ‘70ern mit einem “cleanen” aber fetten BassSound. Diesen Sound kennst du von den goldenen
Motown-Platten, wo oftmals James Jamerson die
Bass-Saiten zupfte. Dieses Modell beruht auf einem
1968er Ampeg® B-15 Flip Top.
* Alle Produktnamen sind Warenzeichen der betreffenden Hersteller, die in keiner Weise mit Line 6 verbunden sind. Die Produktnamen, Beschreibungen und
Fotos dienen nur dem Zweck einer leichteren Identifizierung der Geräte, die als Ausgangspunkt für die Line 6-Modelle verwendet wurden. AMPEG® ist ein
eingetragenes Warenzeichen der St. Louis Music, Inc.

Rock – Inspiriert* von einem 1974er Ampeg® SVT®.
Jenes Arbeitstier ist auf unzähligen Aufnahmen
zu hören und wird auch heutzutage noch auf die
Bühne vieler Arenen und Stadien gekarrt. Ab sofort
befindet sich dieses 150kg-Ungetüm (8x10”-Box
mit Top) in deiner Pedaleinheit!
Brit – Basierend auf* dem 1968er Marshall®
Super Bass. Du verstehst? Das Modell erzeugt
jenen angezerrten Bass-Sound, auf den britische
Rockpioniere vom Schlage der Cream und Who
Ende der 1960er sowie die Bombastiker von Yes und
Rush in den ‘70ern abfuhren.
* Alle Produktnamen sind Warenzeichen der betreffenden Hersteller, die in keiner Weise mit Line 6 verbunden sind. Die Produktnamen, Beschreibungen und
Fotos dienen nur dem Zweck einer leichteren Identifizierung der Geräte, die als Ausgangspunkt für die Line 6-Modelle verwendet wurden. AMPEG® und
SVT® sind eingetragene Warenzeichen der St. Louis Music, Inc. MARSHALL® ist ein eingetragenes Warenzeichen der Marshall Amplification Plc.

Grind – Der Name ist Programm – dieses Modell
bedient die neue Rock-Generation. Alice in
Chains, Mudvayne, Rage Against the Machine…
Damit steht die Marschrichtung fest. Basierend* auf
einem angezerrten SansAmp PSA-1, der mit einem
Ampeg® SVT® verbunden wurde –und hier mit dem
“cleanen” Direktsignal angereichert wird–, liefert
dir dieses Modell die amtliche Hyperaggression.
Synth – Sagen dir ‘Gap Band’ und ‘Dazz Band’ etwas?
Aber dann doch bestimmt ‘Marilyn Manson’ und
‘NIN’… Ihnen allen ist die Verwendung eines BassSynthesizers gemein. Und dir demnächst auch, weil
dir die Synthiklassiker der 1970 frei Haus geliefert
werden. Unter “Über den Synthi” erfährst du,
welche Regelfunktionen zur Verfügung stehen.
* Alle Produktnamen sind Warenzeichen der betreffenden Hersteller, die in keiner Weise mit Line 6 verbunden sind. Die Produktnamen, Beschreibungen und
Fotos dienen nur dem Zweck einer leichteren Identifizierung der Geräte, die als Ausgangspunkt für die Line 6-Modelle verwendet wurden. AMPEG® und
SVT® sind eingetragene Warenzeichen der St. Louis Music, Inc.

Effekte
Mit dem Effects-Regler hast du Zugriff auf die drei
beliebtesten Basseffekte aller Zeiten:
Chorus
Dieses Modell eines T.C. Electronic® Chorus’ ist
der mit Abstand filigranste und expressivste Effekt,
Envelope Filter
Basierend* auf einem Electro-Harmonix® Q-Tron,
ist dieses Modell das wohl phatteste Envelope-Filter
der jemals für die Bassgitarre entwickelt wurde. Er
schwächt die tiefen Frequenzen nämlich nicht ab und
macht einen Fretless-Bass noch unwiderstehlicher.
der Geschichte. Den Sound kennst du garantiert von
P-Funk und den Red Hot Chili Peppers. Ein Filter
mit Hüllkurve erzeugt anhand deines Anschlags
einen automatischen WahWah-Effekt.
Octaver
Dieser Effekt basiert* auf dem EBS® OctaBass®
und versieht jede gespielte Einzelnote mit ihrem
Pendant in der darunter liegenden Oktave. Da kann
Alle Effekte können entweder dezent hinzugefügt
oder für brachiale Sound-Verbiegungen verwendet
werden. Beim Drehen an diesem Regler stellt der
Bass Floor POD automatisch mehrere Parameter
ein und sorgt sofort für einen optimalen Sound.
Schließlich willst du ja vor allem Musik spielen,
nicht?
man mit Fug und Recht von einem donnernden
Bass sprechen…
* Alle Produktnamen sind Warenzeichen der betreffenden Hersteller, die in keiner Weise mit Line 6 verbunden sind. Die Produktnamen, Beschreibungen
und Fotos dienen nur dem Zweck einer leichteren Identifizierung der Geräte, die als Ausgangspunkt für die Line 6-Modelle verwendet wurden. ELECTROHARMONIX® ist ein eingetragenes Warenzeichen der New Sensor Corp. EBS® und OCTABASS® sind eingetragene Warenzeichen der EBS Holding HB.
T.C. ELECTRONIC® ist ein eingetragenes Warenzeichen der T.C. Electronic A/S.

Über den Synthi
Bei Anwahl des Synthis übernehmen die Klangregler
die Reglerfunktionen eines Analog-Synthesizers. An
der Unterseite der Einheit findest du ein Schema,
das die Synthesizerfunktionen verdeutlicht. Das
funktioniert so:
Drive
Versieht das gefilterte Signal mit Verzerrung. Ab “10
Uhr” beginnt der Sound zu kratzen.
Cutoff (Bass)
Grenzfrequenz des Hochpassfilters. Ab “10 Uhr”
wird der Sound angenehm fett.
Resonance (Low Mid)
Je weiter du ihn nach rechts drehst, desto betonter
wird die Filterresonanz. Das erinnert irgendwie an
“Laser-Sounds”.
Envelope (High Mid)
Intensität der Filterhüllkurve. Die Hüllkurve wird
bei jeder Note neu gestartet. Mit “Intensität” ist
gemeint, wie weit sich das Filter jeweils öffnet.
Attack/Decay (Treble)
Geschwindigkeit der Filterhüllkurve. Hiermit
bestimmst du, wie schnell/träge die Hüllkurve anspricht. Um “9 Uhr” herum entspricht der Sound
einem “echten” Bass-Synthesizer.
Wellenform (Opto Comp)
Mit diesem Regler hast du Zugriff auf unterschiedliche
Wellenformen.
Das Angebot ist in 2 Hälften unterteilt. Teil “1”
reicht von Sägezahn bis Dreieck. Teil “2” erzeugt
Rechteckwellen und Pulsbreitenmodulation. Die
Dioden zeigen jeweils an, welche Wellenform du
gewählt hast. Der absolut fette Sound befindet sich
bei “9 Uhr”.
Effekte
Mit den Effekten des Bass Floor POD kannst du
die Synthipalette noch erheblich erweitern. Es
lohnt sich also, etwas Zeit mit dem Schrauben zu
verbringen!
Deep
Hiermit fügst du eine um eine Oktave tiefer gestimmte Dreieckswelle hinzu.

Editieren und Speichern von
Sounds
Die im Bass Floor POD gespeicherten Sounds kann
man editieren und überschreiben. Verwende die
gebotenen Regler zum Einstellen des gewünschten
Sounds. Sobald du eine Einstellung änderst, leuchtet
die SAVE-Diode konstant. Das bedeutet, dass es
etwas zu speichern gibt. Und das geht so:
• Drücke den Save-Taster.
• Die Save-Diode blinkt jetzt. Wähle mit den
Pfeilfußtastern den gewünschten Zielspeicher.
• Drücke Save erneut. Die Speichernummer
blinkt kurz, um zu bestätigen, dass dein Sound
gespeichert wurde.
• Die speicherbaren Einstellungen sind jetzt gesichert.
Tuner
Um den Tuner zu aktivieren, musst du den DeepFußtaster mindestens 2 Sekunden lang gedrückt
halten. Im Tuner-Modus gibt der Bass Floor POD
keinen Laut von sich. Drücke einen beliebigen Fußtaster, um den Tuner-Modus wieder zu verlassen.
Spiele eine Note – der Bass Floor POD zeigt an, wie
sie heißt und ob sie richtig gestimmt ist. Alle Noten
werden bei Bedarf einen Halbton tiefer angezeigt
(also “Ab” statt “G#” usw.).
Die Farbe der Dioden rund um den Amp ModelRegler zeigen an, ob die Saite zu tief oder zu hoch ist.
Rote Dioden auf der linken Reglerseite bedeuten,
dass die Note zu tief ist. Rote Dioden auf der rechten
Reglerseite bedeuten, dass die Note zu hoch ist.
Wenn die “Rock”- und “Brit”-Diode grün leuchten,
ist die Saite richtig gestimmt.

Laden aller Werksvorgaben
Um wieder die Werkseinstellungen des Bass Floor
POD zu laden (und deine eigenen Sounds zu überschreiben), musst du den Comp- und FX-Fußtaster
gedrückt halten, während du das Netzteil anschließt.
Warte, bis “01” erscheint und löse den Netzanschluss.
Schließe das Netzteil danach wieder an. Das war’s
auch schon.
Kalibrieren des Wah-/Volumenpedals
Um das Pedal des Bass Floor POD zu kalibrieren,
musst du den Netzanschluss lösen und den
Zehenschalter des Pedals gedrückt halten, während
du das Netzteil wieder anschließt. Wenn “PC” im
Display erscheint, musst du den Deep-Fußtaster
so lange gedrückt halten, bis eine Zahl im Display
blinkt. Bewege das Pedal von der Vollgasposition
zum hochgeklappten Zustand und wieder zurück.
Dabei muss der Zehenschalter “klicken”. Warte
5 Sekunden, löse dann den Netzanschluss und
schließe das Netzteil danach wieder an. Ende der
Durchsage.


®
Pilotenhandboek
40-00-0118 Beperkte elektrofone uitgave verkrijgbaar @ www.line6.com/manuals Versie A


Line 6, POD en LowDown zijn handelsmerken
van Line 6, Inc. Alle andere productnamen,
handelsmerken en namen van artiesten zijn
eigendom van de betreffende bedrijven en
personen, die op geen enkele manier aan
Line 6 verbonden zijn. De productnamen,
afbeeldingen en artiestennamen worden
alleen gehanteerd als verwijzing naar de
producten wier geluiden Line 6 tijdens
de ontwikkeling van de modellen in dit
product bestudeerd heeft. Het gebruik van
productnamen, handelsmerken, afbeeldingen
en namen van artiesten impliceert geen
medewerking of ondersteuning.

Lees de volgende belangrijke veiligheidsinstructies door.
Bewaar deze instructies op een veilige plaats op.
Alvorens met de Bass Floor POD aan de slag te gaan moet je het volgende doornemen en alle punten en suggesties behartigen:
1. Volg alle waarschuwingen op het apparaat zelf en in deze handleiding.
2. Sluit dit product alleen aan op een stopcontact met een netspanning van 100~120V of 200~240V/47~63Hz (zie het merkplaatje op het
achterpaneel).
3. Voer alleen de in deze handleiding uitdrukkelijk vermelde handelingen uit. In de volgende gevallen moet het product door een erkende herstellingsdienst
nagekeken worden:
• als het netsnoer of de stekker beschadigd is
• als er vloeistoffen of andere voorwerpen in het inwendige terechtgekomen zijn
• als dit product in de regen heeft gestaan of nat is geworden
• als dit product niet meer naar behoren lijkt te werken
• als het product gevallen of de ombouw beschadigd is.
4. Tijdens het gebruik wordt de onderkant van het chassis heet. Raak het dus nooit tijdens of onmiddellijk na het gebruik aan.
5. Zet het product nooit in de buurt van warmtebronnen, zoals radiatoren, stoven of andere apparaten die tijdens het gebruik heet worden. Laat een
afstand van minstens 10cm tussen de achterkant van het product en de muur of andere voorwerpen die de verluchting versperren.
6. Blokkeer nooit de ventilatieopeningen en zet het product nooit in een hermetisch afgesloten behuizing.
7. Voorkom dat er vloeistoffen of kleine voorwerpen in dit product terechtkomen. Zet het nooit in de buurt van water.
8. Ga nooit op het netsnoer staan. Zet geen zware voorwerpen op het netsnoer om te voorkomen dat het gekneusd of beschadigd wordt. Wees met name
voorzichtig in de buurt van de aansluiting op het apparaat.
9. Verbreek de aansluiting op het lichtnet, als je dit product langere tijd niet wilt gebruiken. Tijdens een onweer moet je de aansluiting op het lichtnet
verbreken.
10. Maak het product met een vochtige doek schoon.
11. Probeer nooit de aarding van de netstekker te omzeilen. Een geaarde stekker heeft twee pinnen en een opening. De uitsparing is er voor je veiligheid.
Als de bijgeleverde stekker niet in het stopcontact past, moet je aan een elektricien vragen het contact te vervangen.
12. Gebruik uitsluitend houders/accessoires die door de fabrikant uitdrukkelijk worden aanbevolen.
13. Het luisteren op een pittig volume kan leiden tot gehoorverlies – en zoiets is onomkeerbaar. Zet het volume dus nooit overdreven hard.

OPGELET: Dit product werd uitvoerig getest. Daarbij is gebleken dat het, volgens “Part 15” van de Amerikaanse FCC Rules,
beantwoordt aan de vereisten voor “Class B”-apparaten. Meer bepaald moet het product aan de volgende eisen voldoen: (1)
Het mag geen schadelijke interferenties veroorzaken en (2) het moet bestand zijn tegen eventueel ontvangen interferenties
die de werking van het product op een onvoorspelbare manier zouden kunnen beïnvloeden.
WAARSCHUWING: Om het risico op brand en
elektrocutie te beperken mag je dit product niet
blootstellen aan regen of vochtigheid.
VOORZICHTIG: Om het risico op brand en elektrocutie
te beperken mag je nooit de schroeven verwijderen. Dit
product bevat geen onderdelen die door de gebruiker
hersteld mogen worden. Laat dit werk over aan een
erkende technische dienst.
Bass Floor POD – Pilotenhandboek © 2007, Line 6, Inc.
Het uitroepteken in een driehoek betekent
“voorzichtig”. Lees alle met dit symbool gemerkte
dingen aandachtig door.
De bliksemschicht in een driehoek slaat op elektrische
waarschuwingen. Meer bepaald maakt het symbool je
attent op de aanwezigheid van instructies i.v.m. het
voltage en mogelijke elektrocutie.
Dit symbool in een driehoek wijst op hete oppervlakken.
Het bevindt zich meestal in de buurt van onderdelen
die je tijdens het gebruik niet mag aanraken.


Bedieningsorganen
1. Amp Model
Met deze regelaar kies je één van de 5 versterkermodellen of activeer je de bassynthesizer. De
overige regelaars van de Bass Floor POD worden dan
automatisch zo ingesteld dat je meteen met de juiste
sound kunt beginnen!
2. Drive
Deze regelaar komt overeen met de volume- of
gainregelaar op andere versterkers: hiermee bepaal
je de hoeveelheid “scheur”.
3. Toonregelaars
De precieze werking van Bass, Low Mid, Hi
Mid en Treble verschilt naar gelang het gekozen
versterkermodel.
4. Opto Comp
Draai deze regelaar naar rechts om de dynamiek te
verminderen (het signaal sterker te comprimeren).
Houd de Threshold-indicators in de gaten en stel
de regelaar zo in dat het tweede lampje pas bij je
typische speelintensiteit oplicht. Deze instelling
vormt een goed uitgangspunt.
5. Effects
Hiermee kun je vliegensvlug het gewenste
effectgeluid instellen: je kiest er het “Envelope
Filter”-, “Octaver”- of “Chorus”-effect mee. Verder
bepaal je er de effectintensiteit mee – van subtiel tot
druipnat. De indicator van het gekozen effect licht
op.
6. Chan Vol
Met deze regelaar zorg je dat de in de Bass Floor
POD opgeslagen sounds ongeveer hetzelfde volume
hebben (zie ook regelaar 16). Zet hem aanvankelijk
op “2 uur” en stel de toonregelaars en Drive naar
smaak ik. Vervolgens kun je het volume in functie
van overige sounds met Chan Vol bijregelen.
7. Uitgangen
Record/Direct Output – Deze uitgang kun
je op een ingang van de PA of een multitrack
aansluiten. Het hier aanwezige signaal wordt
voorzien van een voor het gekozen model geschikte
microfoonsimulatie.
Amp Output – Deze uitgang kun je op je
basversterker of eindtrap aansluiten.

8. Amp Mode-schakelaar
Naar gelang de luidsprekers van je versterker
moet je hier “Horn” (speakerkast met tweeter of
compressiedriver) of “No Horn” (speaker zonder
tweeter/compressiedriver) kiezen.
9. Master Volume
Met deze regelaar bepaal je het volume van de via
Record/Direct Output, Amp Output en de Phonesconnector weergegeven signalen. De instelling van
deze regelaar wordt niet opgeslagen.
11. Stroomaansluiting
Gebruik uitsluitend de bij de Bass Floor POD
geleverde Line 6-adapter. Andere adapters zouden
het apparaat kunnen beschadigen.
12. CD/MP3
Hier kun je de uitgang van je CD- of MP3-speler
aansluiten om je door je favoriete bands te laten
begeleiden. De balans tussen de muziek en het
instrument moet je met de volumeregelaar van de
CD- of MP3-speler instellen.
10. Phones
Hierop kun je een stereo-hoofdtelefoon aansluiten.
Zet de Master Volume-regelaar op nul alvorens de
hoofdtelefoon aan te sluiten en verhoog het volume
dan geleidelijk aan. Op deze 1/8”-jackconnector
kun je een MP3-speler e.d. aansluiten. Mits een
(optioneel) verloopstuk kun je hier echter ook een
hoofdtelefoon met 1/4”-jack aansluiten.
13. Input
Hier moet je de bas aansluiten.
14. Save/Hold for Alternate Features
Druk op deze knop om je instellingen (versterkermodel
en effecten) op te slaan. De Bass Floor POD biedt
64 geheugens. Houd deze knop ingedrukt om de
alternatieve regelfuncties van de Bass- en Trebleregelaar in te stellen.

15. Deep/Hold for Tuner
Met “Deep” activeer je een speciale EQ die de sound
van het gekozen model nóg vetter maakt. Houd hem
ingedrukt om de chromatische tuner te activeren.
16. Geheugens (display)
Beeldt het nummer van het momenteel gekozen
geheugen af (versterkermodel en effectinstellingen).
De Bass Floor POD bevat 64 geheugens.
17. Voetschakelaars
Er zijn twee voetschakelaarmodes: geheugenkeuze
en “FX On/Off”. Om van de ene naar de andere
te gaan moet je de BYP-voetschakelaar 1 seconde
ingedrukt houden.
•
Geheugenkeuze: Met s en t kun je het
benodigde geheugen kiezen. Om sneller naar een
verder verwijderd geheugen te gaan kun je één
van de twee voetschakelaars ingetrapt houden.
Met de BYP-voetschakelaar (“Bypass”) schakel
je het versterkermodel en alle actieve effecten
uit.
‘FX On/Off’-mode: In deze mode kun je de
•
effecten van het momenteel gekozen geheugen
in- en uitschakelen. Met de DEEP-voetschakelaar
schakel je de boost van de lage frequenties in of
uit, met COMP bedien je de compressor en met
FX de effecten.
18. ‘FX On/Off’-indicator
Licht alleen op, wanneer de “FX On/Off”-mode
actief is. In de geheugenkeuzemode licht hij dus
NIET op.
19. Pedaal
Trap dit expressiepedaal helemaal in om de Wahof volumefunctie te kiezen. Als de “Wah”-indicator
oplicht, is de gelijknamige functie beschikbaar. Licht
hij NIET op, dan dient het pedaal voor het instellen
van het volume.

De Bass Floor POD in een notendop
Hallo. Bedankt voor je keuze van een Bass Floor
POD van Line 6! Fijn dat je nu (opnieuw) deel
uitmaakt van de Line 6-familie. Elke muzikant weet
inmiddels dat het begrip “POD” op de beste en
meest compacte manier slaat om zowel live als in
de studio met gelikte sounds uit te pakken. Samen
met een aantal bekende bassisten en ingenieurs
van elke rechtgeaarde professionele bassist (die nog
geen LowDown bezit). Daar staat echter tegenover
dat de bewuste amps niet alleen loodzwaar, maar
bovendien pittig geprijsd zijn. Dat verklaart waarom
zoveel bassisten dan toch maar voor een pedalenbak
met veruit minder overtuigende sounds kiezen. Het
was dus de hoogste tijd voor een alternatief.
hebben we de populairste basversterkersounds voor
je klaargestoomd, die je ook in de LowDown-serie
van Line 6 aantreft. De Bass Floor POD bevat dus
precies dezelfde sounds.
De Bass Floor POD bevat al onze voor de LowDownserie vergaarde kennis en sounds. We hebben de
beste versterkers ontleed, bestudeerd en met behulp
van onze modeling in je pedalenbak gepropt. Van
knallende funksounds tot klassieke rock’n’roll…
de Bass Floor POD van Line 6 kan gewoon alles.
En eindelijk heb je voldoende aan één compacte
pedalenbak voor je sessies en liveklussen.
De LowDown-versterkers putten hun inspiratie
uit klassieke rock-basversterkers, zoals de Ampeg®
Maar laten we beginnen!
SVT®, Ampeg® B-15 of Marshall® Super Bass.
De sound van die versterkers geldt nog steeds als
referentie. Ze vormen zowat het standaardgereedschap
Alle productnamen zijn handelsmerken van de betreffende eigenaars, die op geen enkele manier aan Line 6 verbonden zijn. De productnamen, omschrijvingen en foto’s
worden alleen gehanteerd als verwijzingen naar de producten wier geluiden Line 6 tijdens de ontwikkeling van de modellen bestudeerd heeft. AMPEG® en SVT® zijn
geregistreerde handelsmerken van St. Louis Music, Inc. MARSHALL® is een geregistreerd handelsmerk van Marshall Amplification Plc.

Over de versterkermodellen
De Bass Floor POD is voor bassisten wat olieverf
voor een kunstschilder is – hiermee geef je kleur
aan je muziek. Wanneer je één van de beschikbare
modellen kiest, worden de toonregeling en de overige
functies automatisch optimaal ingesteld. Ben je het
daar niet mee eens, dan kun je de nodige wijzigingen
doorvoeren en opslaan.
Drive
Met deze regelaar kun je de voorversterker oversturen
en zorgen dat het geluid begint te scheuren. Draai
hem helemaal naar links voor een “cleane” sound.
Hoe verder je hem naar rechts draait, hoe meer het
geluid begint te vervormen. Kies zelf maar.
Toonregelaars
De precieze werking van Bass, Low Mid, Hi
Mid en Treble verschilt naar gelang het gekozen
versterkermodel. Met deze regelaars kun je het
geluid naar smaak bijkleuren en de sound van je
leven instellen.
Opto Comp
Met deze regelaar stel je de niveaudrempel van de
compressor in. Hoe verder je hem naar rechts draait,
hoe sterker het signaal gecomprimeerd wordt. Dat
zorgt voor een compacter (gelijkvormiger) niveau.
Draai hem helemaal naar links om de compressor
uit te schakelen. Door de regelaar naar rechts te
draaien verlaag je de drempel (“Threshold”), zodat
ook betrekkelijk lage niveaus al gecomprimeerd
worden. De indicators rond deze regelaar lichten
op, wanneer de compressor het signaalniveau met
een bepaalde waarde (3, 6 en 9 dB) afzwakt. Om
te beginnen zou je de regelaar zo moeten instellen
dat de tweede indicator oplicht, wanneer je op je
normale niveau zit te spelen.

Een paar tips
De respons en wisselwerking van de toonregelaars
wordt bepaald door de Amp Model-keuze. Hun
werking komt altijd overeen met de toonregeling
van de gemodelleerde versterker. Zo verschilt de
karakteristiek van de Treble-regelaar bv. aanzienlijk
naar gelang het model. Tijdens de kennismaking
met de verschillende modellen moet je wat met
de toonregelaars stoeien om te achterhalen wat ze
precies doen.
Wil je bv. meer laag, dan moet je je eerst afvragen
of dat van het wollige type moet zijn of eerder voor
meer punch moet zorgen. In functie daarvan regel
je dan Bass of Low Mid bij. Soms bereik je met wat
meer lage middentonen een goede basrespons en
meer punch. Dito voor de hoge frequenties: wil je
een betere definitie of een percussieve attack? De
definitie kun je vaak met Hi Mid verbeteren en op
die manier voorkomen dat de aanslag echt begint
te kletsen. Hoe dan ook: experimenteer wat met de
toonregeling, omdat, naast echte “vintage”-sounds,
alles kan, indien je er de tijd voor neemt.

De versterkermodellen
Clean – Dit model heeft alles te maken met funk en
fusion, wat dus gepaard gaat met een “cleane” bas.
Veel warmte in het laag en voldoende punch in het
hoog. Dit model berust op* een Eden Traveler.
R & B – Dit model is een emulatie van de “cleane”
en vette basgeluiden die eind de jaren 1960, begin
de jaren ‘70 in trek waren. Deze sound hoor je op tal
van Motown-platen. De meeste van die nummers
werden door ene James Jamerson ingespeeld. Dit
model berust op* een Ampeg® B-15 Flip Top uit
1968.
* Alle productnamen zijn handelsmerken van de betreffende eigenaars, die op geen enkele manier aan Line 6 verbonden zijn. De productnamen, omschrijvingen
en foto’s worden alleen gehanteerd als verwijzingen naar de producten wier geluiden Line 6 tijdens de ontwikkeling van de modellen bestudeerd heeft.
AMPEG® is een geregistreerd handelsmerk van St. Louis Music, Inc.

Rock – Ziehier een model van* een Ampeg® SVT®
uit 1974. Dat werkpaard is op tal van opnamen te
horen en nog steeds op de grootste concertpodia te
zien. En vanaf heden zit dit 150kg zware monster
(8x10” speaker met top) gewoon in je pedalenbak!
Brit – Gebaseerd op* de Marshall® Super Bass uit
1968. Meer hoeven we niet te zeggen. Dit model
heeft dat licht vervormde basgeluid waar de Britse
rockpioniers (bv. The Cream en The Who) eind de
jaren 1960 en de bombasten van Yes en Rush in de
jaren ‘70 dol op waren.
* Alle productnamen zijn handelsmerken van de betreffende eigenaars, die op geen enkele manier aan Line 6 verbonden zijn. De productnamen, omschrijvingen en foto’s
worden alleen gehanteerd als verwijzingen naar de producten wier geluiden Line 6 tijdens de ontwikkeling van de modellen bestudeerd heeft. AMPEG® en SVT® zijn
geregistreerde handelsmerken van St. Louis Music, Inc. MARSHALL® is een geregistreerd handelsmerk van Marshall Amplification Plc.

Grind – De benaming maakt al duidelijk dat deze
sound voor recenter werk is bedoeld. Alice in Chains,
Mudvayne, Rage Against the Machine… ga zo maar
door. Dit model berust op* een vervormde SansAmp
PSA-1, die we op een Ampeg® SVT® hebben
aangesloten en waar we het cleane basgeluid dan
nog eens hebben bijgemixt. Dit is pas bikkelhard.
Synth – Ken je de ‘Gap Band’ of de ‘Dazz Band’? Of
misschien Marilyn Manson, of NIN? Die gebruiken
allemaal een bassynthesizer. Vanaf heden kun jij
dat ook – en nog wel met de vette geluiden van de
jaren 1970. Zie “Over de synthesizer” voor meer
details i.v.m. de regelfuncties.
* Alle productnamen zijn handelsmerken van de betreffende eigenaars, die op geen enkele manier aan Line 6 verbonden zijn. De productnamen, omschrijvingen
en foto’s worden alleen gehanteerd als verwijzingen naar de producten wier geluiden Line 6 tijdens de ontwikkeling van de modellen bestudeerd heeft.
AMPEG® en SVT® zijn geregistreerde handelsmerken van St. Louis Music, Inc.

Effecten
Met de Effects-regelaar heb je toegang tot de
populairste baseffecten aller tijden:
Chorus
Dit model* van de populaire T.C. Electronic® Chorus
is net zo transparant, fluweelzacht en expressief als
Envelope Filter
Dit model werd geïnspireerd* door een ElectroHarmonix® Q-Tron, het gaafste envelopefilter ter
het origineel. Het effect heeft geen nadelige invloed
op de laagweergave. Fretless-bassen worden hiermee
onweerstaanbaar.
wereld. Zijn sound ken je van o.m. P-Funk en de
Red Hot Chili Peppers. Een envelopefilter is een
WahWah-effect dat via de aanslag van de noten
wordt gestuurd (dus niet met de voet).
Octaver
Dit model* van een EBS® OctaBass® voorziet de
gespeelde noten van een kopie die één octaaf lager
staat gestemd. Het geluid heeft navenant meer
Voor elk van deze effecten kun je traploos kiezen
tussen een “vleugje” en een “erg effectief” geluid.
Wanneer je aan deze regelaar draait, stelt de Bass
Floor POD automatisch verschillende parameters
in. Je beschikt dus meteen over een gelikte sound
zonder enige instellingsmoeite. Tenslotte wil jij
vooral spelen, nietwaar?
“power”.
* Alle productnamen zijn handelsmerken van de betreffende eigenaars, die op geen enkele manier aan Line 6 verbonden zijn. De productnamen, omschrijvingen
en foto’s worden alleen gehanteerd als verwijzingen naar de producten wier geluiden Line 6 tijdens de ontwikkeling van de modellen bestudeerd heeft.
ELECTRO-HARMONIX® is een geregistreerd handelsmerk van New Sensor Corp. EBS® en OCTABASS® zijn geregistreerde handelsmerken van EBS
Holding HB. T.C. ELECTRONIC® is een geregistreerd handelsmerk van T.C. Electronic A/S.

Over de synthesizer
Wanneer je het Synth-model kiest, fungeren de
regelaars op het frontpaneel als bedieningsorganen
van je analoge bassynthesizer. Aan de onderkant
van het apparaat vind je een handig overzicht van
de instellingsfuncties van de synthesizer. Ziehier hoe
het allemaal werkt:
Drive
Voegt vervorming achter het filter toe. Vanaf “10
uur” begint het geluid te scheuren.
Cutoff (Bass)
Filterfrequentie (“cutoff”). Rond de “10 uur”instelling wordt de synthesizer lekker rond.
Zet de regelaar op “9 uur” voor dat typische bassynthesizergeluid.
Golfvorm (Opto Comp)
Met deze regelaar kun je kiezen uit een groot aantal
golfvormen:
Resonance (Low Mid)
Draai hem verder naar rechts om meer resonantie,
d.w.z. een “sci-fi”-tintje, toe te voegen.
Envelope (High Mid)
Envelope-intensiteit van het filter. De filterenvelope
wordt bij elke gespeelde noot opnieuw gestart. Met
de envelope bepaal je hoe ver de filterfrequentie
tijdens het spelen op en neer gaat.
Attack/Decay (Treble)
Snelheid van de filterenvelope. Hiermee bepaal
je hoe snel de filterenvelope op je noten reageert.
De golfvormen zijn in 2 groepen onderverdeeld. Groep
1 gaat van zaagtand tot driehoek. Groep 2 bestrijkt
het gebied tussen een blokgolf en pulsmodulatie (die
stevig kan pulseren). De indicators geven aan welke
golfvorm er momenteel geselecteerd is. Rond “9 uur”
heb je een heerlijk vette sound te pakken.
Effecten
Met de verborgen effectfuncties van je Bass Floor POD
kun je nóg meer variatie in je bassynthesizergeluid
brengen. Het loont echt de moeite om daar wat mee
te experimenteren!

Deep
Hiermee voorzie je de synthesizer van een
driehoeksgolf die één octaaf lager staat gestemd.
Wijzigen en opslaan van sounds
De instellingen in de geheugens van de Bass
Floor POD kun je wijzigen en door eigen sounds
vervangen. Draai gewoon zo lang aan de regelaars
tot je de gewenste sound te pakken hebt. Je zal
merken dat de Save-indicator oplicht, zodra je ook
maar één instelling wijzigt. Ga als volgt tewerk om
je instellingen op te slaan:
• Druk op de Save-knop.
• De Save-indicator knippert nu. Kies met de
pijlvoetschakelaars het geheugens waarin je de
sound wilt opslaan.
• Druk opnieuw op Save. Het nummer van het
gekozen geheugen knippert even om te bevestigen
dat je instellingen opgeslagen zijn.
• Alle instellingen op het frontpaneel worden
opgeslagen.
Tuner
Houd de Deep-knop minstens 2 seconden ingedrukt
om de tunermode te activeren. Zolang de tuner actief
is, geeft de Bass Floor POD geen signaal weer. Druk
op eender welke voetschakelaar om de tunermode
weer te verlaten.
Sla een snaar van je bas aan. In het display van
de Bass Floor POD verschijnt nu de naam van de
herkende noot. Indien nodig, worden de noten als
mollen afgebeeld (bv. “Ab” i.p.v. “G#” enz.).
De indicators rond de Amp Model-regelaar vertellen je of de herkende noot te hoog, te laag of goed
gestemd is. Rode indicators links van de regelaar
betekenen dat de snaar te laag staat gestemd. Rode
indicators rechts betekenen dat de snaar te hoog
staat. Wanneer de Rock- en Brit-indicator in het
groen oplichten, staat de snaar goed gestemd.

Laden van de fabrieksinstellingen
Om weer de voorgeprogrammeerde Bass Floor PODsounds te laden (en je eigen geluiden te overschrijven)
moet je de Comp- en FX-voetschakelaar ingedrukt
houden, terwijl je het apparaat op het net aansluit.
Wacht tot “01” in het display verschijnt en verbreek
de aansluiting op het lichtnet weer. Meer hoef je
niet te doen!
Kalibreren van het wah-/volumepedaal
Om het pedaal van de Bass Floor POD te kalibreren,
moet je de adapter afkoppelen en de teenschakelaar
van het wah-/volumepedaal ingedrukt houden,
terwijl je de adapter weer aansluit. Als het display
“PC” afbeeldt, moet je de Deep-voetschakelaar
ingedrukt houden tot er een getal in het display
verschijnt. Beweeg het pedaal van de teen- naar
de hielpositie en weer terug (de teenschakelaar
moet duidelijk klikken). Wacht 5 seconden, trek
het netsnoer even uit en sluit het daarna weer aan.
Klaar is Kees.


®
Manual del Piloto
40-00-0118 Edición electrofónica limitada disponible en www.line6.com/manuals Rev. A


Line 6, POD y LowDown son marcas comerciales
de Line 6, Inc. El resto de los nombres de productos,
marcas comerciales y nombres de artistas son
propiedad de sus respectivos propietarios, y no
están asociados ni afiliados de ninguna forma
con Line 6. Los nombres de productos, imágenes
y nombres de artistas se utilizan únicamente
con la finalidad de identificar los productos
cuyos tonos y sonidos se estudiaron durante el
desarrollo del modelo de sonido de Line 6 para
este producto. La utilización de estos productos,
marcas comerciales, imágenes y nombres de
artistas no implica ningún tipo de cooperación ni
endoso.

Deberías leer estas Instrucciones de Seguridad Importantes.
Guarda estas instrucciones en un lugar seguro.
Antes de utilizar el Bass Floor POD, lee con atención los puntos aplicables de estas instrucciones de funcionamiento y las sugerencias de seguridad.
1. Sigue todas las indicaciones de atención que aparecen en el equipo y el manual.
2. Conéctalo sólo a tomas de corriente de CA de 100~120V ó 200~240V/47~63Hz (en función de la gama de voltaje del equipo; consulta el panel
posterior).
3. No intentes realizar ningún proceso de reparación, excepto los que se describen en el manual. La reparación será necesaria cuando se dañe el equipo,
como por ejemplo:
• cuando se dañe el cable de alimentación
• cuando se derrame algún líquido o caigan objetos en el equipo
• cuando el dispositivo se haya expuesto a la lluvia o humedad
• cuando el dispositivo no funcione correctamente o cambie su rendimiento de forma significativa
• cuando el dispositivo se caiga o se dañe la carcasa.
4. La parte inferior de la carcasa metálica puede calentarse durante el funcionamiento. No la toque durante el funcionamiento ni al cabo de poco
tiempo.
5. No lo sitúes cerca de fuentes de calor como radiadores, registradores de calor u otros dispositivos que generen calor. Coloca la parte posterior de la
unidad como mínimo a unos 8 cm de la pared o de otros elementos que puedan bloquear la radiación de calor.
6. No bloquees ninguna abertura de ventilación ni utilices el equipo en un espacio cerrado.
7. Protégelo de objetos o líquidos que puedan entrar en el mueble. No utilices ni sitúes el dispositivo cerca de agua.
8. No pises los cables de alimentación. No coloques objetos encima de los cables de alimentación de forma que queden apretados u oprimidos. Ten cuidado
especialmente con el cable en el extremo del conector y en el punto donde se conecta al amplificador.
9. Desconecta el amplificador cuando no vayas a utilizarlo durante periodos de tiempo prolongados. Desconecta el amplificador durante tormentas
eléctricas.
10. Límpialo sólo con un paño húmedo.
11. No olvides la finalidad de seguridad del conector de derivación a masa. Un conector de derivación a masa tiene dos clavijas y una tercera clavija de
derivación a masa. La tercera clavija tiene un propósito de seguridad. Si el conector no encaja en la toma de corriente, haz que un electricista sustituya
la toma obsoleta.
12. Utiliza sólo los elementos/accesorios especificados por el fabricante.
13. Escuchar a niveles de volumen muy altos durante periodos prolongados, puede causarte pérdidas auditivas irreparables o algún otro tipo de lesión. Te
recomendamos practicar a “niveles seguros”.

AVISO: Este equipo ha sido testado y cumple con los límites establecidos para los dispositivos digitales Clase B de acuerdo
con la Parte 15 de la normativa FCC. El funcionamiento está sujeto a las dos condiciones siguientes: (1) Es posible que este
dispositivo no produzca interferencias graves y (2) este dispositivo debe aceptar cualquier interferencia recibida, incluyendo
interferencias que puedan causar un funcionamiento no deseado.
ATENCIÓN: Para reducir el riesgo de incendio o
descargas eléctricas, no expongas este dispositivo a la
lluvia o a la humedad.
PRECAUCIÓN: Para reducir el riesgo de incendios o
de descargas eléctricas, no extraigas los tornillos. En
el interior no hay ningún componente reparable por
el usuario. El mantenimiento debe realizarlo personal
técnico cualificado.
Bass Floor POD Manual del Piloto. © 2007, Line 6, Inc.
El signo de exclamación dentro de un triángulo significa
“¡precaución!” Por favor, lee la información contigua a
todos los signos de precaución.
El símbolo de un rayo dentro de un triángulo significa
“¡precaución eléctrica!” Indica la presencia de
información acerca del voltaje de funcionamiento y los
riesgos potenciales de descargas eléctricas.
Este símbolo dentro de un triángulo significa,
“¡Precaución! ¡Superficie caliente!” Se muestra en
áreas que pueden estar muy calientes al tocarlas cuando
el dispositivo está en funcionamiento.


Controles
1. Amp Model
Gira este mando para seleccionar uno de los 5
increíbles modelos de amplificador o bajo sintetizado. El resto de los controles de Bass Floor POD
se adaptarán automáticamente para conseguir un
sonido fantástico con el modelo de amplificador en
cuestión, así que... ¡toca y ya está!
2. Drive
Al igual que el mando de volumen o ganancia
de otros amplificadores; controla la cantidad de
“suciedad” del sonido.
3. Controles de tono
Los controles Bass, Low Mid, Hi Mid y Treble están
personalizados para cada modelo de amplificador
para ofrecerte un control óptimo de los tonos.
4. Opto Comp
Gíralo en sentido horario para equilibrar las dinámicas
de tu interpretación (más compresión). Controla los
indicadores Threshold y ajusta el mando de forma
que el segundo indicador se ilumine sólo en el punto
en el que toques con la intensidad habitual. Éste es
un buen punto por el que empezar.
5. Effects
Gira este mando para conseguir efectos fantásticos,
de forma rápida y fácil: Este mando selecciona
Envelope Filter, Octaver o Chorus, con una amplia
gama de ajustes (tanto sutiles como abrumadores)
para cada efecto. El indicador muestra el efecto
activo.
6. Chan Vol
Este control te ayuda a balancear los volúmenes de
distintas configuraciones de amplificador y efecto
que puedes guardar en las memorias de canal de tu
Bass Floor POD (consulta el control 16). Empieza
con el mando a las 2 en punto, ajusta los controles
Drive y Tone para conseguir el sonido deseado y,
luego, utiliza Channel Volume para que los preajustes
tengan el mismo volumen.
7. Salidas
Record/Direct Output – Utiliza esta salida para
enviar el sonido a un PA o a un grabador multipista.
Esto proporciona al técnico de sonido en directo o al
ingeniero de estudio una simulación de mueble con
micro específico para el modelo de amplificador.
Amp Output – Utiliza esta salida para enviar el
sonido a un amplificador de bajo o a un amplificador
de potencia.

8. Conmutador Amp Mode
Según el mueble de altavoz al que está destinada la
señal, utiliza este conmutador para seleccionar Horn
(para un mueble con un tweeter o un controlador
de compresión) o No Horn (para un mueble sin un
tweeter ni controlador de compresión).
9. Master Volume
Este mando controla el nivel general de la salida
directa/de grabación y de la salida de amplificador,
así como el nivel de los auriculares. Este control no se
guarda con los ajustes predefinidos del amplificador
y de los efectos.
11. Jack de potencia
Utiliza sólo la fuente de alimentación de Line 6 que
se entrega con el Bass Floor POD. Si utilizas otra
fuente de alimentación podrías dañar el equipo.
12. CD/MP3
Conecta la salida del reproductor de CD o MP3 a
este jack, y podrás improvisar con tus tonos favoritos.
Para balancear la música con la guitarra, ajusta el
volumen de salida del reproductor de CD o MP3.
13. Input
Conecta el bajo aquí, amigo.
10. Phones
Utiliza esta salida para escuchar en estéreo con los
auriculares. Asegúrate de bajar al máximo el Master
Volume y luego súbelo progresivamente para ajustar
el nivel de los auriculares. Este jack está diseñado
para auriculares de 1/8”, como los que se conectan a
un reproductor MP3, aunque también puedes utilizar
auriculares de 1/4” con un adaptador (no incluido).
14. Save/Hold for Alternate Features
Pulsa este botón para guardar una memoria de
canal (ajustes predefinidos del amplificador y de los
efectos) que hayas creado o editado. Puedes guardar
64 memorias de canal diferentes en el Bass Floor
POD. Mantén pulsado este botón para ajustar las
funciones alternativas de los mandos Bass y Treble.

15. Deep/Hold for Tuner
Si seleccionas Deep se introducirá una función de
modelado de tono especial que mejora el modelo de
amplificador seleccionado para un grosor supremo.
Mantén pulsado este botón para acceder al afinador
cromático.
Modo FX On/Off: Este modo te permite activar
•
y desactivar los efectos dentro de un preajuste. El
conmutador de pedal DEEP activa o desactiva la
mejora de la gama baja, mientras que COMP y
FX activan y desactivan Opto Comp y los efectos,
respectivamente.
16. Memorias de canal (pantalla)
Muestra la memoria de canal actual (ajustes
predefinidos del amplificador y de los efectos). Bass
Floor POD dispone de 64 memorias de canal entre
las que elegir.
17. Conmutadores de pedal
Hay dos modos de conmutador de pedal; Channel
Memory y FX On/Off. Para pasar entre los modos,
mantén pulsado el conmutador de pedal BYP
durante 1 segundo.
• Modo de memoria de canal: Los conmutadores
de pedal s y t te permiten seleccionar una
memoria de canal predefinida. Pasa por las
memorias de canal manteniendo pulsado uno de
estos conmutadores de pedal. El conmutador de
pedal BYP (bypass) simplemente omite todos los
efectos y modelos de amplificador, incluyendo el
pedal.
18. Indicador FX On/Off
Está iluminado sólo cuando estás en modo FX
On/Off. Si NO está iluminado, estás en modo de
memoria de canal.
19. Pedal
Para que el pedal cambie de control Volume a Wah,
púlsalo completamente hacia delante hasta que el
conmutador de pie haga clic. El indicador Wah está
iluminado cuando el efecto Wah está activado. Si
NO está iluminado, el pedal está controlando el
Volumen.

La herencia del Bass Floor POD
Eh. Gracias por elegir el Line 6 Bass Floor POD.
Tenemos el placer de darte la bienvenida a la
comunidad de Line 6. POD es conocido en todo el
mundo como LA forma de introducir un fantástico
tono en un pequeño paquete para el estudio o para
actuaciones en directo. Para proporcionarte una
fabulosa gama de tonos de bajo minuciosos, pasamos
mucho tiempo con artistas y técnicos introduciendo
el tono disponible en la serie de amplificadores de
bajo Line 6 LowDown tan aclamada por la crítica.
Este mismo tono reside dentro del Bass Floor POD.
El LowDown se ha inspirado en algunos
amplificadores de bajo clásicos que modelaron el tono
del rock and roll, como los amplificadores Ampeg®
SVT®, Ampeg® B-15 y el Marshall® Super Bass que
proporcionan un sonido que conmoverá tu interior.
Éstos fueron y son todavía el estándar para bajistas
profesionales de todo el mundo (o al menos para los
que no tienen un LowDown). Desgraciadamente,
la mayoría de ellos son muy robustos y pueden
llegar a vaciar tu cuenta corriente o llenar el cargo
de tu tarjeta de crédito. Como resultado, muchos
de nosotros teníamos que decantarnos por alguno
de los muchos pedales multiefectos fácilmente
transportables con un tono genérico aceptable para
probar en nuestras actuaciones. Hasta ahora…
Con el Bass Floor POD, hemos puesto todo lo que
aprendimos de LowDown en un pedal asequible
y portátil. Hemos pasado muchísimas horas
modelando lo mejor de los mejores amplificadores y
efectos, y hemos incorporado estos modelos en cada
pedal frente a los que probablemente te encuentras
ahora. Tanto si buscas ese tono funk que te perturba
la mente como ese tono de rock clásico escuchado
en todo el mundo, el Bass Floor POD de Line 6 te
lo ofrece. La búsqueda interminable del perfecto
pedal para grabación y pequeñas actuaciones ha
terminado.
Ahora, ¡empecemos!
Todos los nombres de los productos son marcas comerciales de sus respectivos propietarios, que no están asociados ni afiliados de ninguna forma con
Line 6. Los nombres, descripciones e imágenes de estos productos se citan con el único fin de identificar los productos específicos estudiados durante
el desarrollo del modelo de sonido de Line 6. AMPEG® y SVT® son marcas comerciales registradas de St. Louis Music, Inc. MARSHALL® es una marca
comercial registrada de Marshall Amplification Plc.

Detalles del modelo de amplificador
Al igual que un gran pintor dispone de muchos
colores con los que pintar, tú también podrás pintar
tu música con muchos colores, gracias a la amplia
gama de tonos disponibles en el Bass Floor POD.
Cada uno de estos modelos, cuando lo selecciones,
introducirá automáticamente un sonido por defecto
que puedes utilizar perfectamente, y que luego
podrás cambiar a tu gusto y guardar en un preajuste
utilizando las memorias de canal.
Drive
Este control se utiliza para saturar los circuitos de
preamplificador virtuales del modelo de amplificador
para conseguir varios sonidos distorsionados. En
la posición totalmente antihoraria se encuentra el
sonido nítido menos distorsionado y a medida que
lo giras en sentido horario se introduce la distorsión.
Ajústalo a tu gusto.
Controles de tono
Los controles Bass, Low Mid, Hi Mid y Treble están
personalizados para cada modelo de amplificador
para proporcionarte un control tonal óptimo. Estos
controles te ayudarán a crear y modelar el tono que
oyes en tu cabeza.
Opto Comp
Esto ajusta el umbral del compresor. Cuanto más
en sentido horario se encuentre, más espectacular
resulta la compresión, lo que hace el sonido aún
más dinámico. Cuando está completamente en
sentido antihorario, el circuito del compresor está
desactivado. A medida que gires el mando en sentido
horario, disminuye el umbral en el que se introduce
el compresor. Los indicadores alrededor de este
control se iluminarán cuando el compresor llegue
a distintos niveles (aproximadamente 3, 6 y 9dB)
de reducción de ganancia. Como punto de inicio,
ajusta el mando de forma que se ilumine el segundo
indicador, justo en el punto en el que tocas con tu
intensidad típica.

Algunos consejos útiles
Recuerda que los controles de tono actuarán de
forma diferente para cada modelo de amplificador,
emulando fielmente el tipo de gama de tonos que
conseguirías del amplificador original en el que está
basado el modelo. Por ejemplo, subir los agudos al
máximo proporciona un efecto distinto en cada
modelo. Cuando empieces a familiarizarte con un
modelo de amplificador en particular y sus controles
de tono, usa tus oídos para descubrir lo que más te
gusta de las posibilidades del tono de cada modelo.
Si quieres más gama baja, pregúntate si quieres poner
una gama baja gruesa o una gama baja acentuada. Esto
te ayudará a determinar si deberías añadir Bass o Low
Mid al sonido. A veces, al añadir Low Mid consigues
los bajos que quieres con un sonido más acentuado.
Lo mismo pasa para la gama alta: ¿quieres claridad
para la nota o un ataque de percusión? Si deseas
claridad, en general puede proporcionártela Hi Mid
sin añadir el ataque de percusión. Experimenta con
los controles de tono ya que te proporcionamos una
gama de tonos de bajo clásicos que nunca habían
sido tan auténticos en un pedal.

Descripciones de los modelos de amplificador
Clean – Este modelo es un sonido de bajo totalmente
nítido, de funk y fusión. Conseguirás los graves
cálidos y los agudos enérgicos que necesitas. Este
sonido se ha modelado según* el Eden Traveler.
R & B – Este modelo de amplificador es un tributo
a aquellos tonos de bajo gruesos y nítidos de finales
de los 60 y principio de los 70. Es el tipo de sonido
que oímos en la mayoría de grabaciones de Motown,
interpretadas por un joven y pionero James Jamerson.
Este modelo de amplificador se basa en* el 1968
Ampeg® B-15 Flip Top.
* Todos los nombres de los productos son marcas comerciales de sus respectivos propietarios, que no están asociados ni afiliados de ninguna forma con
Line 6. Los nombres, descripciones e imágenes de estos productos se citan con el único fin de identificar los productos específicos estudiados durante el
desarrollo del modelo de sonido de Line 6. AMPEG® es una marca comercial registrada de St. Louis Music, Inc.

Rock – Modelado según* un Ampeg® SVT® del 74.
Esta bestia ha aparecido en incontables grabaciones
y escenarios de todo el mundo. ¡Ahora, todo el
sonido de esta bestia de 136 kg con mueble de 8x10
y cabezal está disponible en un solo pedal!
Brit – Basado en* el Marshall® Super Bass del 68.
Nada más que decir. Este modelo cubre el tipo de
sonido de bajo saturado incorporado a finales de los
60 por los pioneros del rock británico como Cream y
The Who, así como por los gigantes de los 70 como
Yes y Rush.
* Todos los nombres de los productos son marcas comerciales de sus respectivos propietarios, que no están asociados ni afiliados de ninguna forma con
Line 6. Los nombres, descripciones e imágenes de estos productos se citan con el único fin de identificar los productos específicos estudiados durante
el desarrollo del modelo de sonido de Line 6. AMPEG® y SVT® son marcas comerciales registradas de St. Louis Music, Inc. MARSHALL® es una marca
comercial registrada de Marshall Amplification Plc.

Grind – Como el nombre sugiere, éste es para
apasionados del rock moderno. Alice in Chains,
Mudvayne y Rage Against the Machine… basta
con lo dicho. Este modelo se basa* en un SansAmp
PSA-1 distorsionado en un Ampeg® SVT® con una
señal de bajo nítida y directa mezclada para una
agresividad potente y demoledora que llevará tu
sonido hasta DEFCON 1.
Synth – ¿Recuerdas a Gap Band o Dazz Band? ¿Y a
Marilyn Manson o NIN? Todos incorporan el bajo de
sintetizador en su música y ahora tú también puedes
hacerlo con este sintetizador que hemos basado en los
sintetizadores clásicos de los 70. Consulta la sección
Acerca del sintetizador para ver un análisis sobre
los controles del sintetizador.
* Todos los nombres de los productos son marcas comerciales de sus respectivos propietarios, que no están asociados ni afiliados de ninguna forma con
Line 6. Los nombres, descripciones e imágenes de estos productos se citan con el único fin de identificar los productos específicos estudiados durante el
desarrollo del modelo de sonido de Line 6. AMPEG® y SVT® son marcas comerciales registradas de St. Louis Music, Inc.

Efectos
El mando Effects te proporciona un trío de efectos
de bajo de los más populares y utilizables jamás
conocidos:
Chorus
Modelado según* el deseado T.C. Electronic®
Chorus, éste es el chorus de bajo más transparente,
suave y expresivo jamás conseguido. Si lo utilizas no
Envelope Filter
Modelado según* un Electro-Harmonix® Q-Tron,
se reduce la gama baja. Es especialmente increíble
en bajos sin traste.
éste es el mejor filtro de envolvente del mundo.
Lo has oído en tus canciones favoritas de P-Funk y
Red Hot Chili Peppers. Un filtro de envolvente es
un tipo de efecto wah-wah que se controla con las
dinámicas de tu nota de bajo en lugar de controlarse
con el pie.
Para cada uno de estos efectos puedes seleccionar
desde un cambio sutil hasta una modificación total
del sonido. Mientras giras el mando, Bass Floor POD
ajusta todos los controles individuales del efecto
modelado para proporcionarte automáticamente
una gama completa de sonidos sin tener que mezclar
Octaver
Basado en* el EBS® OctaBass®, este efecto produce
múltiples mandos y conmutadores. Creemos que en
lugar de esto prefieres dedicarte a la música.
una única nota una octava por debajo de la afinación
de la nota reproducida, añadiendo una nueva y
potente vibración al sonido.
* Todos los nombres de los productos son marcas comerciales de sus respectivos propietarios, que no están asociados ni afiliados de ninguna forma con
Line 6. Los nombres, descripciones e imágenes de estos productos se citan con el único fin de identificar los productos específicos estudiados durante el
desarrollo del modelo de sonido de Line 6. ELECTRO-HARMONIX® es una marca comercial registrada de New Sensor Corp. EBS® y OCTABASS® son
marcas comerciales registradas de EBS Holding HB. T.C. ELECTRONIC® es una marca comercial registrada de T.C. Electronic A/S.

Acerca del sintetizador
Al seleccionar el sintetizador se reordena a los
controles del amplificador que proporcionen un
control de sintetizador analógico sobre el sintetizador
de bajo. Para una referencia fácil, en el panel inferior
del equipo se ha impreso un diagrama que describe
los controles de sintetizador. Esto es lo que pasa:
Drive
Añade distorsión post-filtro. Empieza con este
mando a las 10 en punto para conseguir un poco de
“suciedad”.
Cutoff (Bass)
Filtra el corte de la frecuencia. Empieza con éste a
las 10 en punto para conseguir tonos de sintetizador
más profundos.
Resonance (Low Mid)
Mientras giras este mando en sentido horario
introducirás resonancia. Piensa en sonidos láser.
Envelope (High Mid)
Profundidad de envolvente de filtro. La envolvente
de filtro se dispara cada vez que tocas una nueva nota
clara. La cantidad de envolvente controla cuánto se
abre el filtro cada vez que tocas una nota.
Attack/Decay (Treble)
Frecuencia de envolvente de filtro. Controla la
velocidad de la envolvente de filtro de lenta a
rápida. Empieza con este control a las 9 en punto
para sonidos de bajo típicos de un sintetizador.
Waveform (Opto Comp)
Este mando ofrece un gran número de formas de
onda:
Las formas de onda se dividen en 2 partes. La parte 1
va de diente de sierra a triángulo. La parte 2 de onda
de cuadro a onda de cuadro con mucha modulación
de anchura del pulso. Los LEDs indicarán la forma
de onda seleccionada. Empieza a las 9 en punto para
un tono grueso.
Efectos
Cada uno de los Smart FX del Bass Floor POD
desbloquea muchas funciones ocultas y secretos
tonales introducidos en el sintetizador de bajo.
¡Tómate algún tiempo para probar y descubrir las
riquezas tonales que hay dentro!

Deep
Añade una onda de triángulo una octava inferior
para un tono de bajo sintetizado aún más grueso.
Editar y guardar preajustes
Puedes editar cualquier memoria de canal predefinida
del Bass Floor POD y guardarla en la ubicación que
desees. Para editar, simplemente gira los mandos
para ajustar el sonido a tu gusto. Cuando ajustes o
cambies algo en un preajuste, verás como el LED
SAVE se ilumina permanentemente. Para guardar el
sonido, sigue estos pasos:
• Pulsa el botón Save
• El indicador Save parpadeará. Utiliza los
conmutadores de pedal con la flecha arriba/abajo
para seleccionar la ubicación predefinida donde
quieres guardar el nuevo preajuste.
• Pulsa Save una segunda vez y verás como el
número de preajuste parpadeará para confirmar
que lo has guardado.
• Todos los ajustes del panel superior se guardan en
su estado actual.
Tuner
Mantén pulsado el botón Deep durante 2 segundos
para entrar en el modo del afinador. Ten en cuenta
que mientras estás en el modo del afinador la salida
del Bass Floor POD se enmudece. Puedes pulsar
cualquier botón o conmutador de pedal para salir
del modo de afinador.
Toca una nota en el bajo y el Bass Floor POD
mostrará su afinación mostrando el nombre de la
nota en la pantalla. Todas las notas se visualizan
como si estuvieran afinadas demasiado bajas, por lo
que verás Ab en lugar de G# (etc.).
Los LEDs alrededor del mando Amp Model te
indican si la nota está afinada demasiado alta o
demasiado baja. Los indicadores rojos de la parte
izquierda del mando indican si la nota que tocas está
afinada demasiado baja. Los indicadores rojos de la
derecha indican si la nota está afinada demasiado
alta. La cuerda está afinada cuando los indicadores
Rock y Brit se iluminan en verde.

Volver a los ajustes originales
Para recuperar los ajustes originales del Bass Floor
POD, (incluyendo los sonidos de preajustes originales,
con lo que se sobrescribirán todos los preajusets que
haya guardado), mantén pulsados los conmutadores
de pedal COMP y FX al activar el equipo. Cuando
aparezca “01” en la pantalla, desactiva el equipo y,
luego, vuelve a activarlo. ¡Listo!
Calibrar el pedal Wah/Vol
Para calibrar el pedal en el Bass Floor POD, desactiva
el equipo, mantén pulsado el conmutador de pie del
pedal Vol/Wah y activa el equipo mientras pulsas el
conmutador. Cuando aparezca “PC” en la pantalla,
mantén pulsado el conmutador de pedal DEEP hasta
que un número parpadee en la pantalla. Mueve el
pedal de la posición pulsada a no pulsada y vuelve a
la posición pulsada, haciendo clic en el conmutador
de pie. Espera 5 segundos, desactiva el equipo y
vuelve a activarlo. ¡Listo!
 Loading...