


CT60
Table of contents
 Loading...
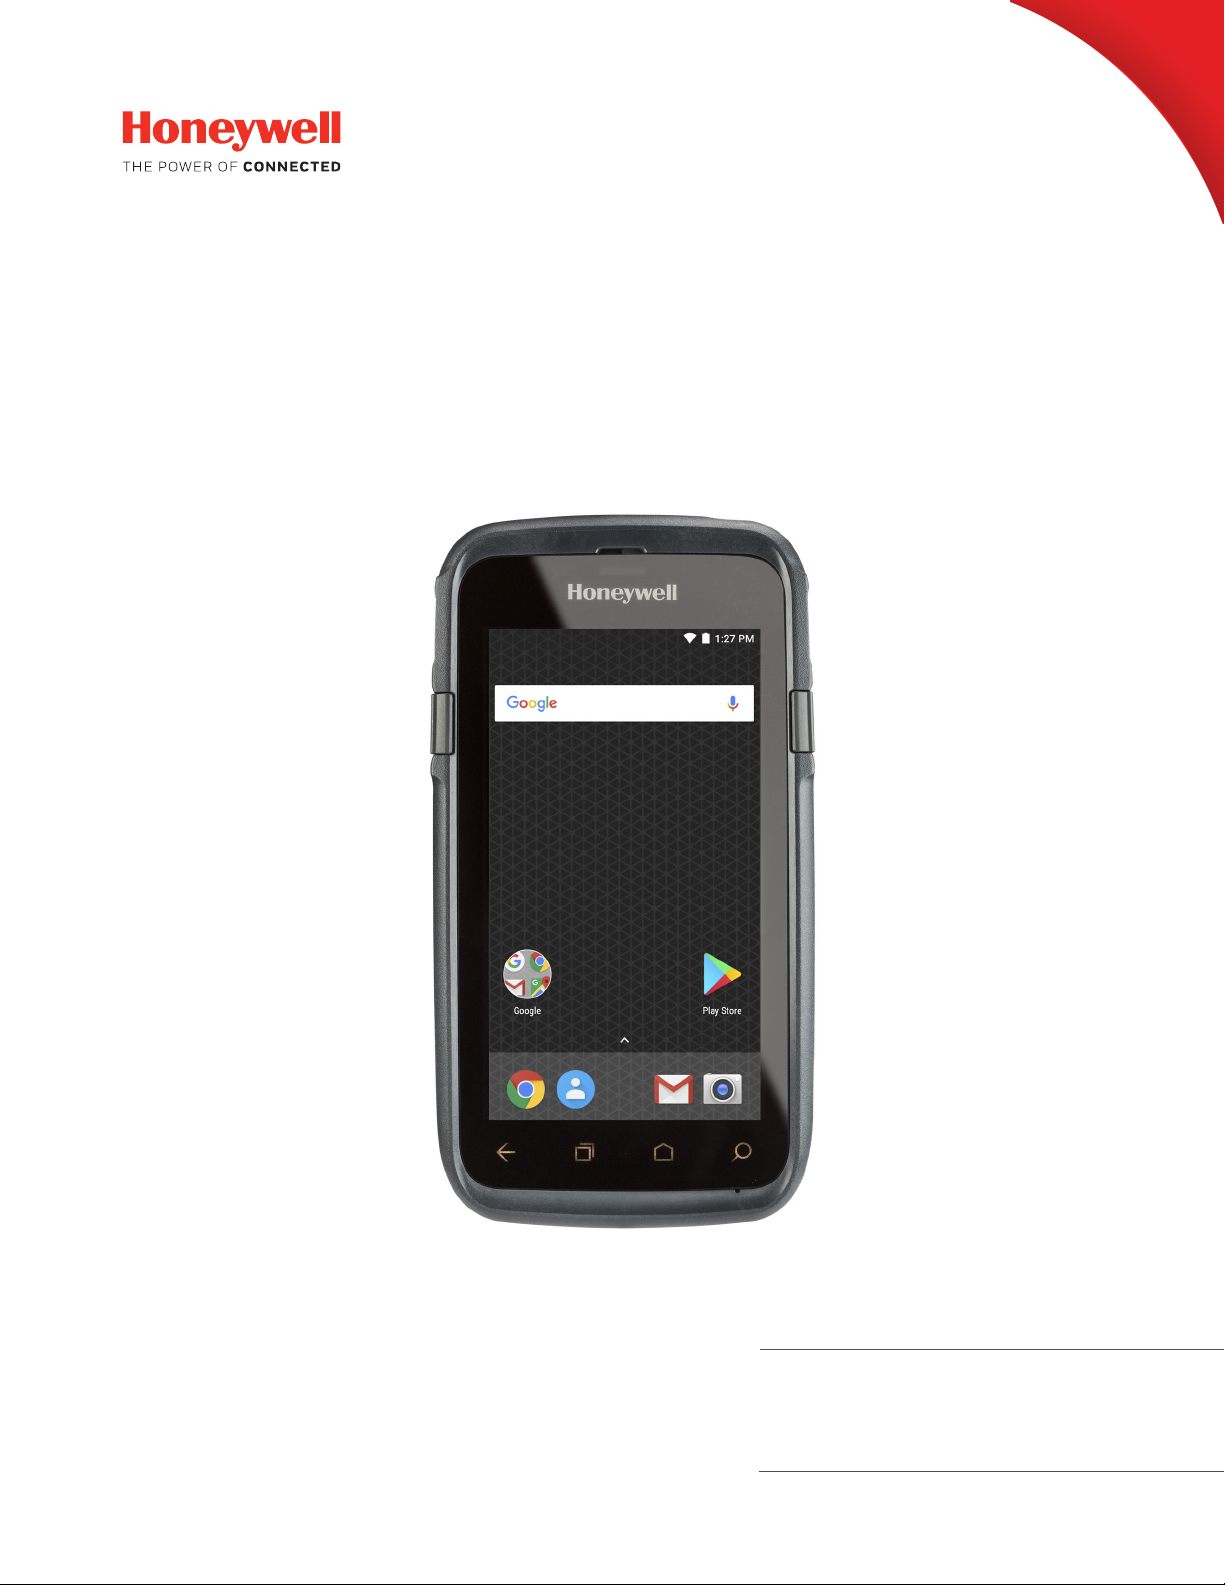
Dolphin™ CT60
Mobile Computer
powered by Android™ 7
User Guide

Disclaimer
Honeywell International Inc. (“HII”) reserves the right to make changes in specifications and other information contained in
this document without prior notice, and the reader should in all cases consult HII to determine whether any such changes
have been made. The information in this publication does not represent a commitment on the part of HII.
HII shall not be liable for technical or editorial errors or omissions contained herein; nor for incidental or consequential
damages resulting from the furnishing, performance, or use of this material. HII disclaims all responsibility for the selection and use of software and/or hardware to achieve intended results.
This document contains proprietary information that is protected by copyright. All rights are reserved. No part of this document may be photocopied, reproduced, or translated into another language without the prior written consent of HII.
Copyright 2018 Honeywell International Inc. All rights reserved.
Web Address:
www.honeywellaidc.com
Trademarks
Google, Google Play store, Google Pay and Android are trademarks of Google LLC.
Bluetooth trademarks are owned by Bluetooth SIG, Inc., U.S.A. and licensed to Honeywell.
microSD is a registered trademark of SD-3C, LLC.
Qualcomm and Snapdragon are registered trademarks or trademarks of Qualcomm Incorporated in the United States
and/or other countries.
Other product names or marks mentioned in this document may be trademarks or registered trademarks of other compa-
nies and are the property of their respective owners.
Patents
For patent information, refer to www.hsmpats.com.

TABLE OF CONTENTS
Customer Support ........................................................................................................................ ix
Technical Assistance ............................................................................................................. ix
Product Service and Repair ................................................................................................ ix
Limited Warranty .................................................................................................................... ix
Chapter 1 - About the Computer Features...................................................1
About the Dolphin CT60 Mobile Computer ......................................................................... 1
Model Overview ........................................................................................................................ 1
Features of the CT60.............................................................................................................. 2
About the Battery ........................................................................................................................... 4
Charge the Battery Before Use........................................................................................... 4
Replace the Battery................................................................................................................. 4
About the Battery Status....................................................................................................... 6
Change the Battery Status LED Behavior...................................................................... 7
Check the Battery Level and Usage ................................................................................. 8
About Battery Life and Conservation .............................................................................. 8
Battery Recommendations and Safety Precautions ................................................. 9
Enable Airplane Mode ........................................................................................................... 9
Power On the Computer ...........................................................................................................10
Welcome Screen.................................................................................................................... 10
Unlock the Screen ....................................................................................................................... 10
Change the Screen Lock to Protect the Computer........................................................ 10
Select a Touch Screen Profile to Optimize Performance............................................. 11
Configure the Screen Backlight ............................................................................................ 12
About the Good Read LED....................................................................................................... 12
Dolphin CT60 Mobile Computer iii

About the Audio Features.........................................................................................................12
Adjust Speaker Volume ....................................................................................................... 13
Enable Vibrate Mode............................................................................................................13
Audio Settings ........................................................................................................................14
Insert a microSD Card................................................................................................................ 15
How to Transfer Files..................................................................................................................18
Configure USB Connection and Transfer Files .........................................................18
Accessories for the Computer.................................................................................................18
Chapter 2 - About the User Interface and Applications......................... 21
About the User Interface...........................................................................................................21
Navigation and Function Buttons.................................................................................. 22
About Status Bar Icons .......................................................................................................23
Remap a Button .....................................................................................................................23
Restore Default Button Action .........................................................................................24
View and Manage Notifications ......................................................................................24
Open Quick Settings ............................................................................................................24
Customize the Home Screen ............................................................................................25
Customize the Favorites Tray ........................................................................................... 25
Use Google™ Search.............................................................................................................25
About Screen Gestures .......................................................................................................26
Set the Time Zone..................................................................................................................26
About Honeywell Applications................................................................................................ 27
Applications You Can Download to the Mobile Computer..........................................28
About Honeywell Enterprise Browser .....................................................................28
About Honeywell Launcher ........................................................................................28
About Enterprise Terminal Emulator ...................................................................... 29
Unlock Developer Options .......................................................................................................29
Chapter 3 - Use the Image Engine .............................................................. 31
About the Image Engine ...........................................................................................................31
About the Scan Wedge Feature .......................................................................................31
Change the Scanner Settings.................................................................................................32
iv Dolphin CT60 Mobile Computer

Restore Default Scan Settings .........................................................................................32
Default Scan Settings ..........................................................................................................33
Data Processing Settings.............................................................................................33
Symbology Settings .......................................................................................................34
Decode Settings ..............................................................................................................35
Imager Settings ...............................................................................................................36
Trigger Settings................................................................................................................36
Notification Settings......................................................................................................36
Add a Scan Setting Profile..................................................................................................37
Delete a Scan Setting Profile ............................................................................................37
About the Optional Digital Scan Button .............................................................................37
Enable and Configure the Digital Scan Button .........................................................37
Scan Bar Codes.............................................................................................................................39
About Scanning Configuration Bar Codes ..................................................................39
Use the Scan Demo App............................................................................................................40
Change the Scan Demo Symbology Settings ............................................................40
Use the Imager as a Flashlight ...............................................................................................41
Chapter 4 - Use the Phone.............................................................................43
About the Phone...........................................................................................................................43
Add or Switch Between Network Carriers ...........................................................................44
Select a SIM Card Slot .........................................................................................................44
Activate the UMTS Phone...................................................................................................45
Activate the CDMA Phone ..................................................................................................48
Make a Phone Call .......................................................................................................................49
Answer the Phone ........................................................................................................................49
Switch Apps During a Phone Call....................................................................................50
Make an Emergency Phone Call ............................................................................................50
Configure Phone Settings ........................................................................................................50
Chapter 5 - Use the Camera ..........................................................................51
About the Color Camera ............................................................................................................51
How to Zoom ..................................................................................................................................51
Dolphin CT60 Mobile Computer v

Take a Photo...................................................................................................................................51
Change Camera Settings..........................................................................................................52
Record a Video ..............................................................................................................................53
Change Video Settings ..............................................................................................................53
Chapter 6 - Configure the Computer.......................................................... 55
How to Configure the Computer............................................................................................ 55
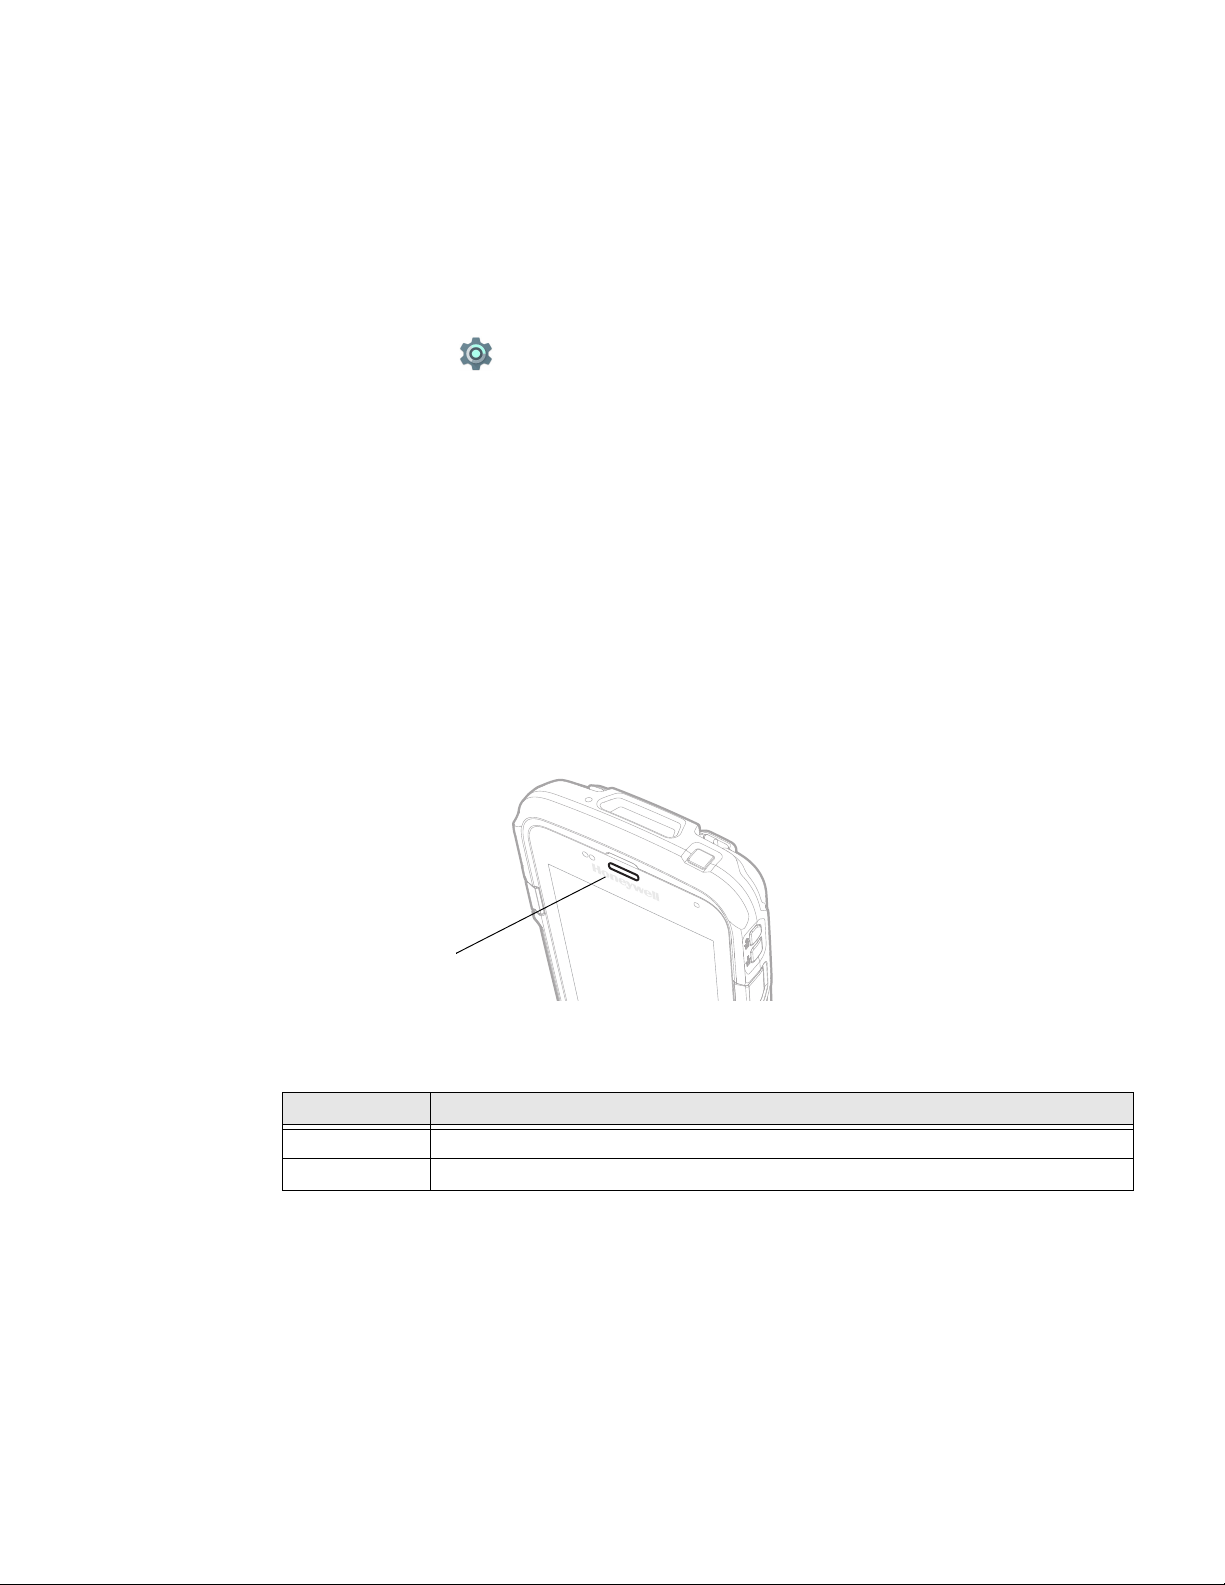
Start the Settings App .........................................................................................................55
About the Structure of the Settings App ......................................................................56
About Network Communications ..........................................................................................61
Connect to a Wi-Fi Network ..............................................................................................61
Configure Proxy Settings for a Wi-Fi Network ....................................................62
Disable Wi-Fi Notifications and Set WLAN Radio Sleep Parameter ..........62
Connect to an Ethernet Network.....................................................................................62
How to Connect to Virtual Private Networks .............................................................. 63
Add a VPN ..........................................................................................................................63
Connect to a VPN............................................................................................................63
Edit VPN Information....................................................................................................64
About Wireless Security.............................................................................................................64
About Certificates .................................................................................................................64
Load a Certificate ...........................................................................................................65
Disable or Remove Certificates ................................................................................. 65
About Bluetooth Communications.......................................................................................66
Connect a Bluetooth Device .............................................................................................66
Rename the Computer and View File History ............................................................ 67
Rename or Unpair a Paired Device.................................................................................68
About Serial and USB Communications.............................................................................68
USB Troubleshooting........................................................................................................... 68
How to Share Your Mobile Data Connection ....................................................................69
Share the Data Connection Through USB or Bluetooth........................................69
About Near Field Communication (NFC) ...........................................................................69
Developer Information............................................................................................................... 70
About Provisioning Mode .........................................................................................................70
vi Dolphin CT60 Mobile Computer

Enable or Disable Provisioning Mode...........................................................................71
Chapter 7 - Manage and Maintain the Computer ....................................73
About Software Updates ...........................................................................................................73
About Transferring Files via USB Connection............................................................73
Install Software Updates with AutoInstall..........................................................................74
Optional microSD Card Method ......................................................................................74
About the Honeywell Upgrader ..............................................................................................75
Install OTA Updates..............................................................................................................75
Reboot (Restart) the Computer..............................................................................................76
About an Enterprise Data Reset.............................................................................................77
Before You Begin....................................................................................................................77
Enterprise Data Reset the Computer.............................................................................77
About a Factory Data Reset......................................................................................................78
Before You Begin....................................................................................................................78
Factory Data Reset the Computer...................................................................................78
Clean the Computer....................................................................................................................79
Appendix A - Specifications ..........................................................................81
Computer Agency Information ...............................................................................................81
Label Locations......................................................................................................................81
Physical and Environmental Specifications .....................................................................82
Bar Code Symbologies...............................................................................................................82
N6600 Slim Imager Engine Reading Distances..............................................................83
N6600 Slim Imager Engine Field of View/Resolution............................................84
Dolphin CT60 Mobile Computer vii

viii Dolphin CT60 Mobile Computer

Customer Support
Technical Assistance
To search our knowledge base for a solution or to log in to the Technical Support
portal and report a problem, go to www.hsmcontactsupport.com.
For our latest contact information, see www.honeywellaidc.com/locations.
Product Service and Repair
Honeywell International Inc. provides service for all of its products through service
centers throughout the world. To find your service center, go to
www.honeywellaidc.com and select Support. Contact your service center to obtain
a Return Material Authorization number (RMA #) before you return the product.
To obtain warranty or non-warranty service, return your product to Honeywell
(postage paid) with a copy of the dated purchase record. To learn more, go to
www.honeywellaidc.com and select Service & Repair at the bottom of the page.
For ongoing and future product quality improvement initiatives, the mobile computer comes equipped with an embedded device lifetime counter function. Honeywell may use the lifetime counter data for future statistical reliability analysis as
well as ongoing quality, repair and service purposes.
Limited Warranty
For warranty information, go to www.honeywellaidc.com and click Get Resources >
Product Warranty.
Dolphin CT60 Mobile Computer ix

x Dolphin CT60 Mobile Computer

CHAPTER
1
ABOUT THE COMPUTER FEATURES
This chapter introduces the Dolphin CT60 Mobile Computer with the Android 7
operating system. Use this chapter to learn about the basic computer features,
functions, and accessories.
About the Dolphin CT60 Mobile Computer
Dolphin CT60 mobile computers, built on the Mobility Edge™ platform, deliver realtime connectivity, advanced data capture, and future-proof investment protection.
All CT60 models come equipped for fast Wi-Fi connectivity with a WLAN 802.11 a/
b/g/n/ac radio and Bluetooth (v5.0) technology that includes Bluetooth Low
Energy (BLE) support. CT60L1N models provide additional connectivity with a
wireless WWAN radio for high speed data and quality voice support across all
network technologies. CT60 WWAN models also include an integrated global
positioning satellite (GPS) receiver that supports GPS protocols including,
Simultaneous GNSS Receiver Support for GPS, GLONASS, Galileo and Beidou GPS.
Note: Throughout this manual, all versions of the mobile computer are referred to as the
CT60 unless information is specific to a particular model.
Model Overview
Dolphin CT60 Mobile Computer 1
:
Standard Feature
Android 7 operating system x x
2.2 GHz Qualcomm Snapdragon™ 660 octacore processor x x
3 GB/4 GB DDR4 RAM, 32 GB flash memory x x
Large, high definition, bright color, outdoor-readable display with
responsive multi-touch capacitive touch panel. Automatic switching
between glove and finger modes.
Integrated ambient light sensor, proximity sensor, accelerometer,
gyroscope, magnetometer, and pressure sensor
High performance 2D imager with ergonomic scan buttons x x
Model
CT60L0N
xx
xx
Model
CT60L1N
Standard Feature
Scan Buttons
Microphone
Power
Button
Battery Status /
Notification LED
Good Read LED
Speaker
Touch Panel
Volume Buttons
Navigation Panel
WLAN IEEE 802.11a/b/g/n/ac radio; Wi-Fi certified x x
Bluetooth™ V5.0 and Bluetooth Low Energy (BLE) technology support x x
NFC technology for short-range wireless data exchange x x
Wireless WWAN radio for high speed data and quality voice support
across all network technologies
Dual micro-SIM slots x
Integrated GPS receiver; GPS Supported Protocols: Simultaneous
GNSS Receiver Support for GPS, GLONASS, Galileo and Beidou
Mid-tier rugged specifications with IP67 sealing x x
Customer-accessible microSD™ slot for removable memory cards up
to 512 GB (SDXC/SDHC/SDIO-compliant)
Value-added software components supporting specialized imaging
and OCR functions
13-megapixel color camera, 4K video with image stabilization and
advanced software features for enhanced exposure control
Model
CT60L0N
xx
xx
xx
Note: To learn mor e, see Appendix A: Specifications beginning on page 81.
Model
CT60L1N
x
x
Features of the CT60
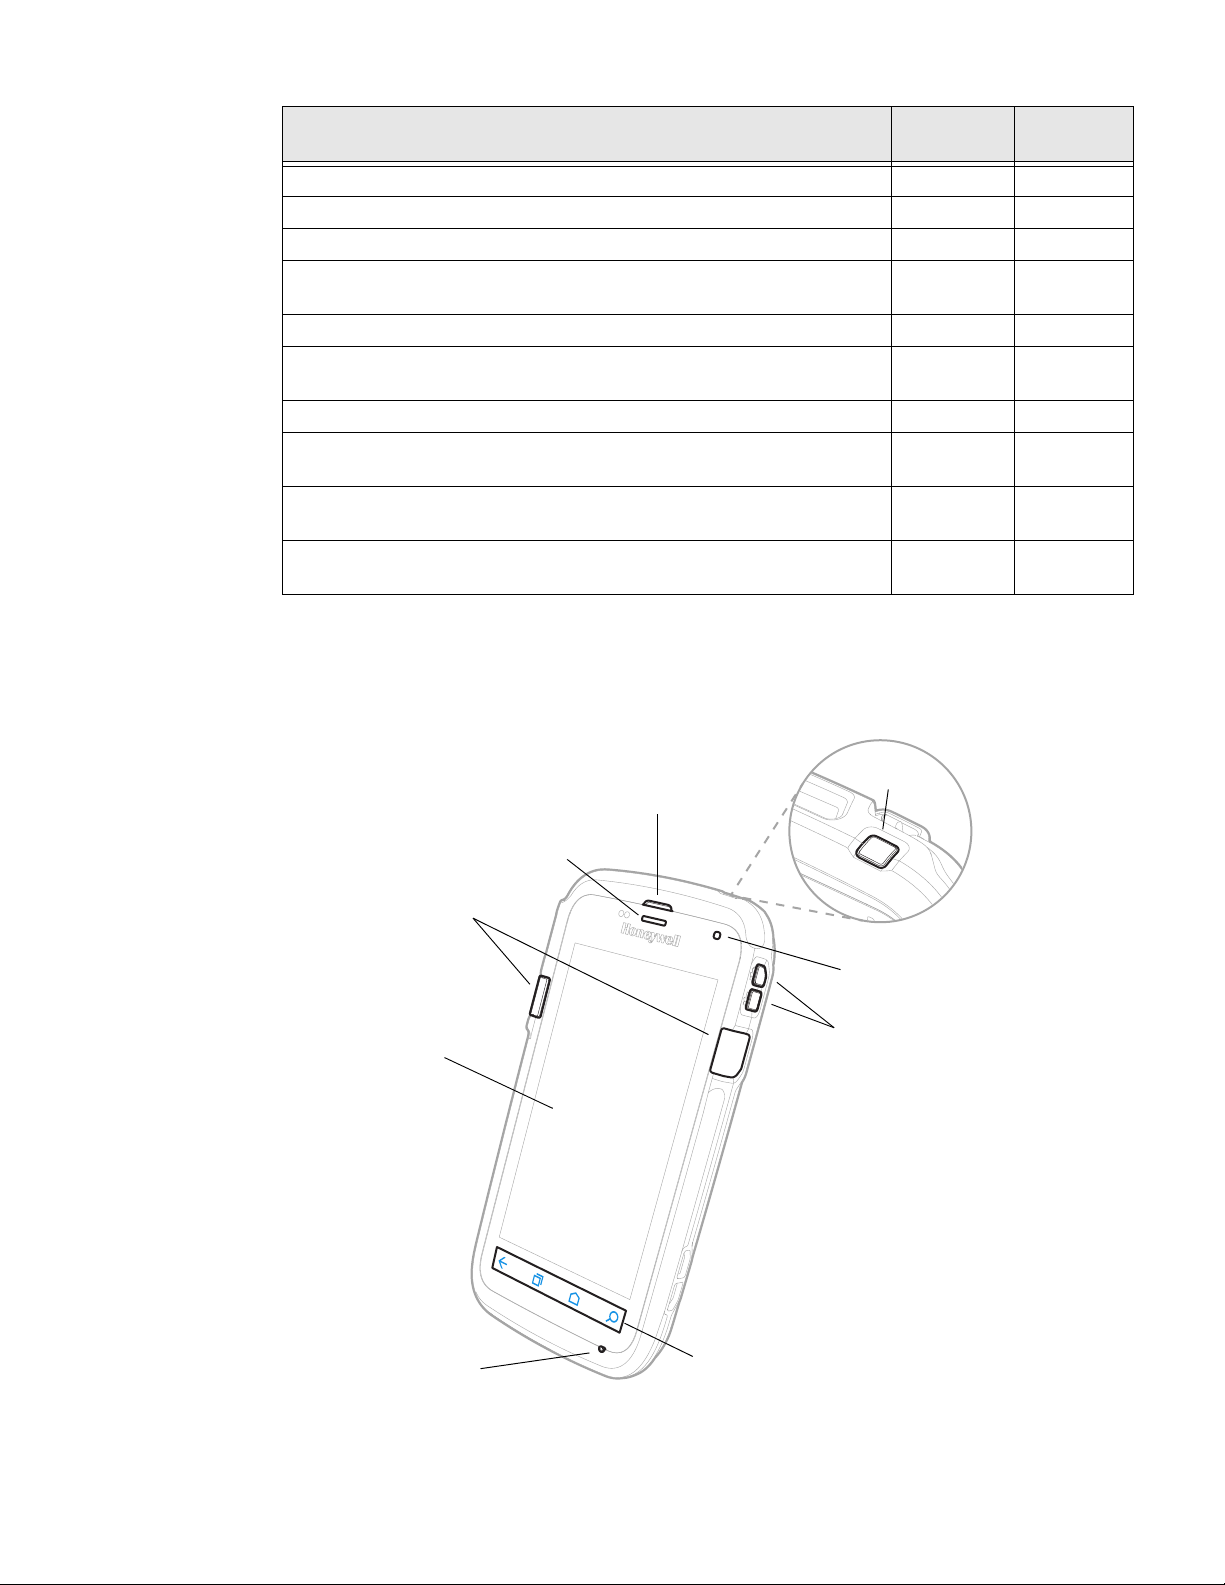
2 Dolphin CT60 Mobile Computer
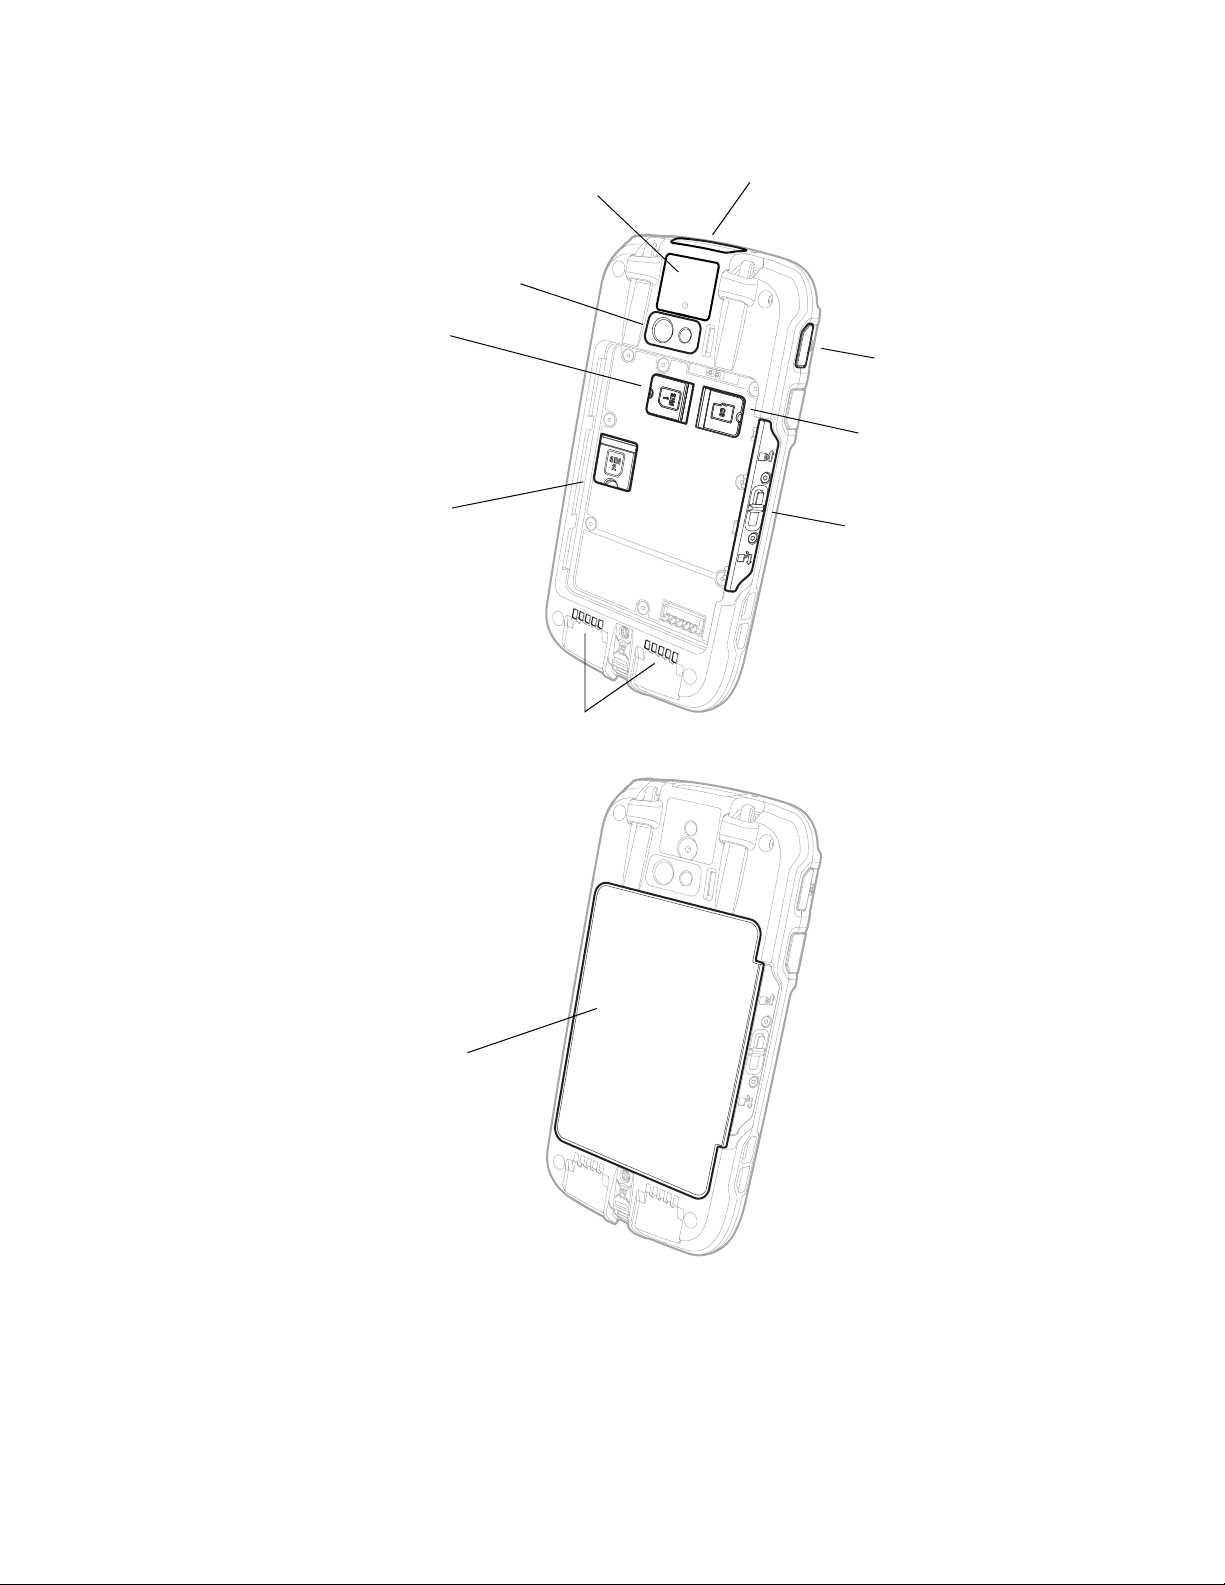
Note: Hand strap not shown.
Camera Lens
Battery
Camera Button
Battery Latch
Imager (LED / Laser Aperture)
SIM Card 2 Door*
microSD Card Door
Laser Safety Label Location
I/O Connector
SIM Card 1 Door*
* Phone feature is available only on CN80L1N models. When using a UICC card for NFC Secure Element
NFC link encryption, install the card in SIM slot 1. SIM 2 feature is available only on CN80L1N models.
Dolphin CT60 Mobile Computer 3

About the Battery
The computer uses a rechargeable 3.6 V Li-ion battery as its main power source.
The battery has a 14.6 watt hour capacity. Several factors determine the life of your
battery, such as display brightness, display timeout, input device, extreme
temperature, and your usage. Honeywell recommends that you keep the battery
charged at all times to prevent data loss.
Dolphin CT60 computers are designed for use with battery model CT50-BTSC
(p/n 318-055-001 and 318-055-005) manufactured for Honeywell International
Inc. Contact your local sales representative for replacement batteries.
Caution: Read Battery Recommendations and Safety Precautions on page 9
and all cautionary markings on the battery, charging peripheral, and
device using the battery before attempting to install, use, or charge
the battery.
Charge the Battery Before Use
Dolphin CT60 computers ship with the battery significantly discharged of power.
Fully charge the battery before using your computer for the first time.
You can charge the battery with a Dolphin CT50 series charging accessory before
or after you install the battery in the computer. A fully discharged battery charges
in approximately 6 hours.
To charge the battery before you install it in the computer:
• Insert the battery into the Honeywell Quad Battery Charger or the battery well of
a CT50 HomeBase or eHomeBase.
To charge the battery after installing it in the computer:
• Insert the computer into a CT50 HomeBase, eHomeBase, ChargeBase, NetBase,
USB Adapter, or Vehicle Power Adapter.
Note: Using the computer while charging the battery increases the time required to reach
a full charge.
Replace the Battery
If your battery power is low, you need to either charge the battery in the computer,
or replace it with a charged battery.
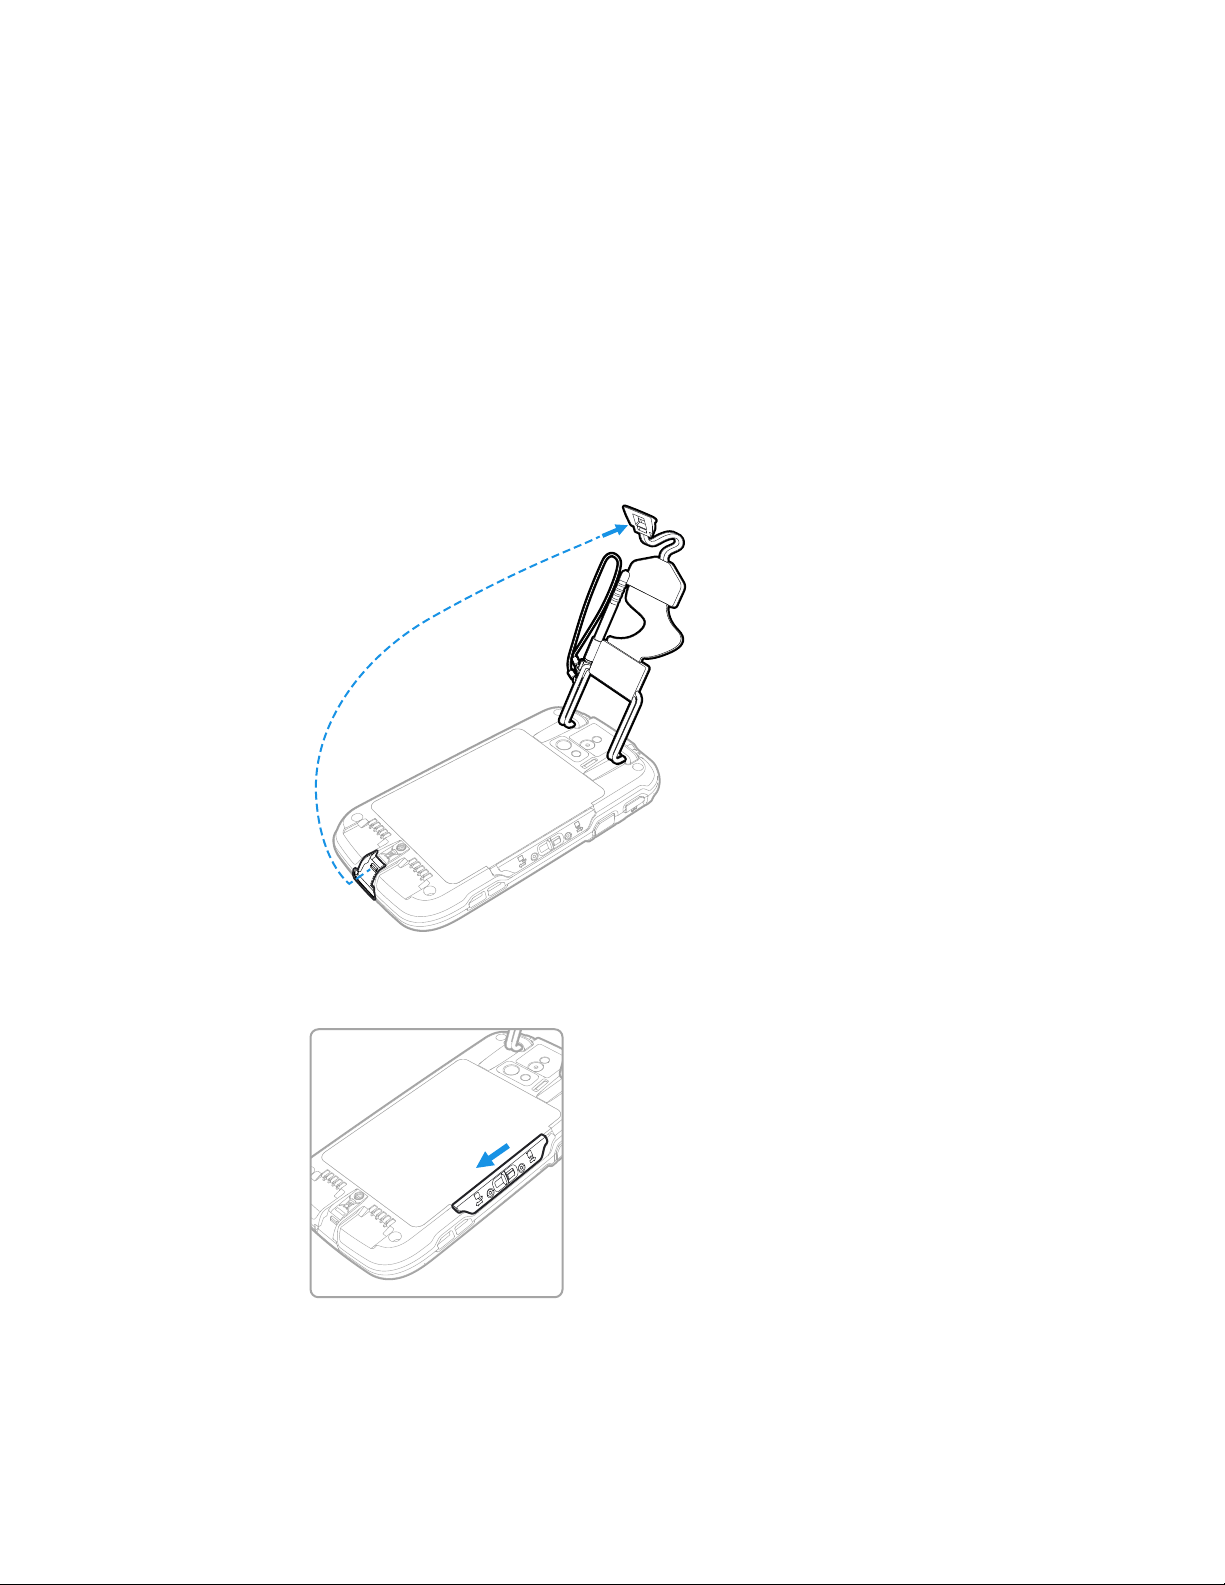
To replace the battery:
1. Save your files and close any open applications.
2. Press and hold the Power button until the options menu appears.
3. Tap Power Off and then OK to verify.
4 Dolphin CT60 Mobile Computer
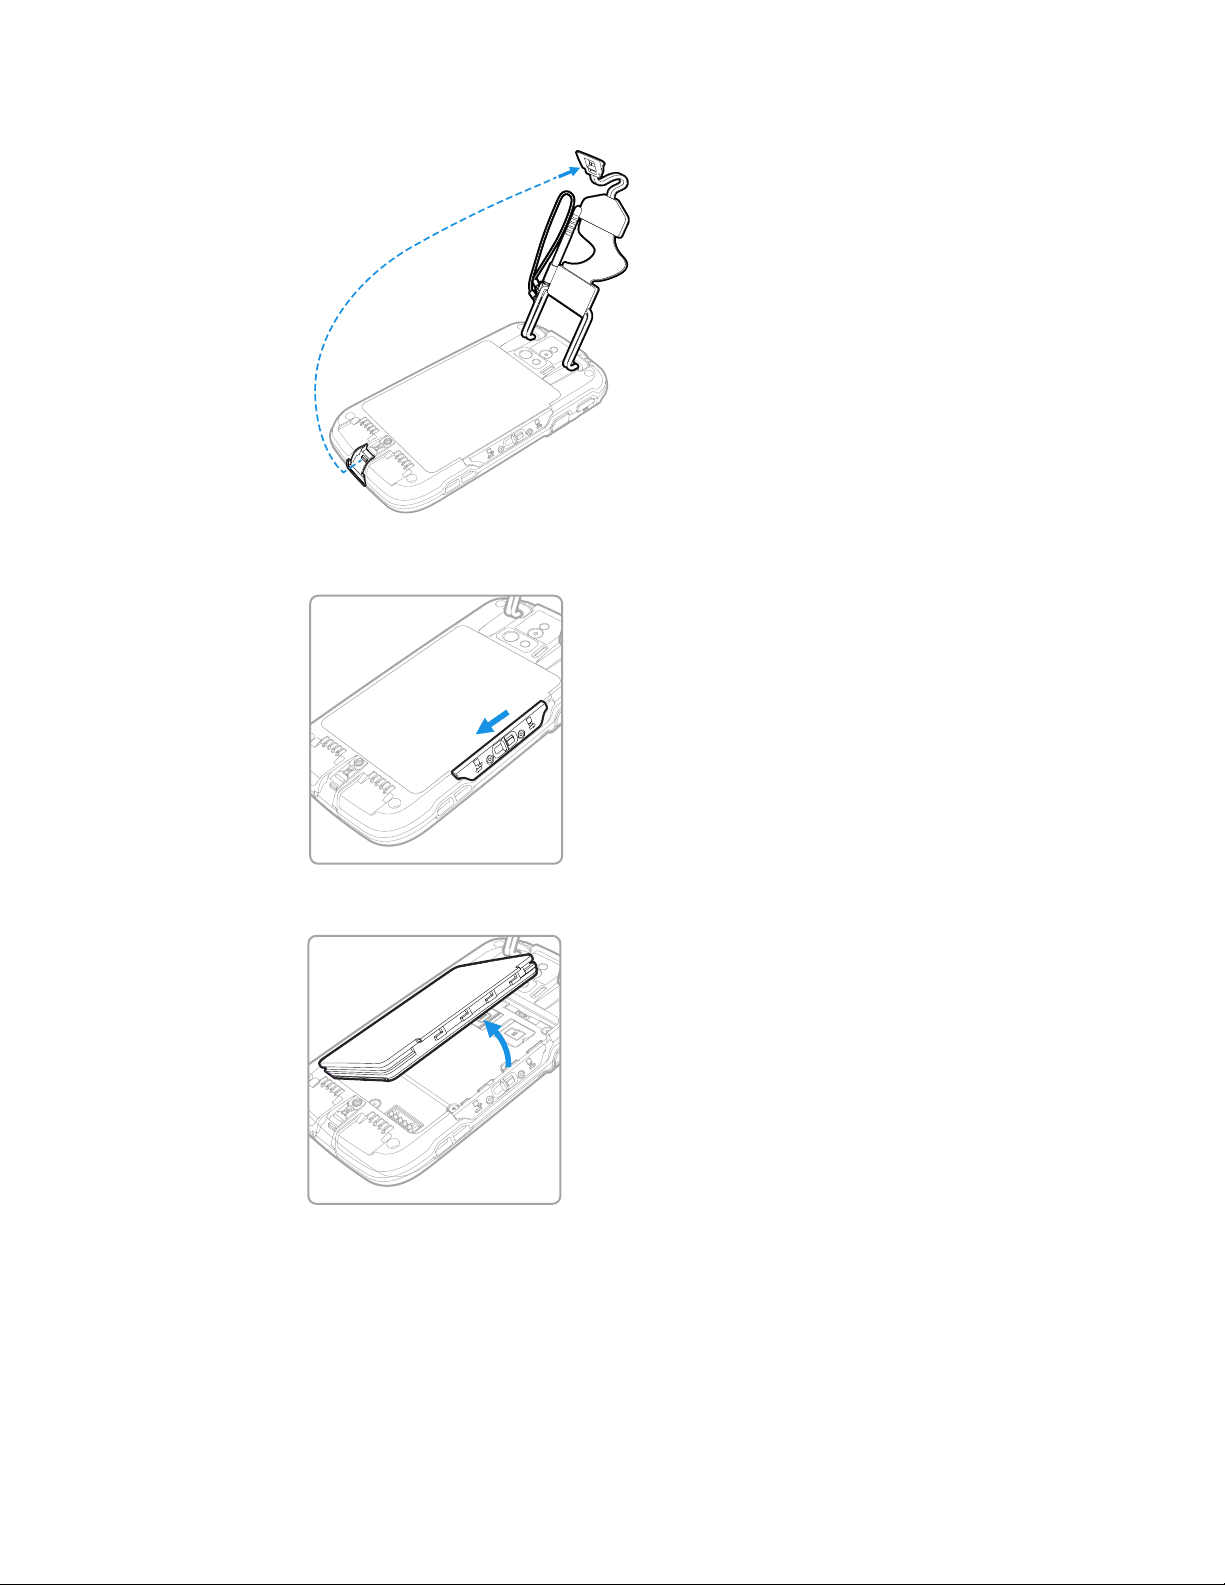
4. Disconnect one end of the hand strap from the computer.
5. Press and hold down the small button on the battery latch, and then slide the
latch toward the bottom of the computer to unlock the battery.
6. Lift up on the edge of the battery and remove it from the computer.
7. Insert the charged battery into the computer.
8. Apply pressure to the battery and slide the lock toward the top of the computer
into the locked position.
9. Attach the hand strap.
10. Press the Power button.
Dolphin CT60 Mobile Computer 5

About the Battery Status
Battery LED
Use the battery icon in the Status bar to see the charge level of your battery.
If you want more detailed information on your battery, such as usage time,
charge remaining on the battery, or battery health information, open the
Settings app and tap either Battery or Battery Monitor.
Battery Status Icons
Icon Status
The battery charge is at 100%.
The battery charge is at 50%.
The battery charge is low. You need to charge or replace the battery soon.
The battery is critically low. You need to replace the battery now or connect the computer
to a charging accessory.
The computer is connected to external power and the battery is charging.
There is a battery error. Install another battery. If the problem persists, call Honeywell
Technical Support.
The Battery status LED in the upper right corner of the computer indicates the
charging status of the battery.
Out-of-Box Battery Status LED (Honeywell Battery LED) Behavior
Connected to Power LED State Description
No Blinking amber Battery level is below 20%
No Off Battery level is more than 20%
Yes Steady amber Battery level is between 0% and 60%
Yes Blinking green Battery level is between 60% and 95%
Yes Steady green Battery level is above 95%
Either Blinking red Battery error
6 Dolphin CT60 Mobile Computer

Change the Battery Status LED Behavior
You can change the behavior of the Battery status LED if the out-of-box behavior
for a charging battery (blinking green) is not acceptable to your environment.
You can choose one of three options:
• Default Battery LED
• Honeywell Battery LED (out-of-box setting)
• No Battery LED
Use the Default Battery LED setting if you want the status LED to turn on steady
amber and then steady green when charging. To learn more about this option, see
Default Battery LED Descriptions.
Select the No battery LED setting if you want to use the LED as a notification LED
for applications or device management solutions. For more information on how to
use the LED as a notification LED, see http://developer.android.com/guide/
topics/ui/notifiers/notifications.html.
Default Battery LED Descriptions
Connected to Power LED State Description
No Blinking red Battery level is below 15%
No Off Battery level is 15% or more
Yes Steady red Battery level is below 15%
Yes Steady amber Battery level is between 15% and 90%
Yes Steady green Battery level is 90% or more
To change the battery status LED behavior:
1. Swipe up from the bottom of the Home screen to access all apps.
2. Tap Settings > Battery LED.
3. Choose one of these options:
• Default Battery LED
• Honeywell Battery LED (out-of-box setting)
• No Battery LED
Dolphin CT60 Mobile Computer 7

Check the Battery Level and Usage
In addition to the Battery status icon and LED, you can monitor the battery status
from the Settings app.
1. Swipe up from the bottom of the Home screen to access all apps.
2. Tap Settings > Battery.
The current percentage of battery power remaining and the amount of usage
time left on the battery appear on the screen. A list shows the battery usage for
individual apps and services. For usage details, select one of the apps or services in the list. You can also access the Battery saver feature from the battery
screen.
About Battery Life and Conservation
If you store the batteries outside of the computer for long periods of time, they
slowly discharge. To maintain battery performance, storing the battery in a charger
is recommended.
When You Want to: Do this to Save Battery Power:
Use the computer and the low
battery status icon appears or
the battery light turns on.
Stop using the computer for 5
minutes or more.
Store the computer for more
than a day.
Store the battery outside of the
computer.
• Connect the computer to a charging accessory.
• Replace the battery. Press and hold the Power button and
then select Power off from the menu. Tap OK to verify. After
the computer turns off, remove the battery and insert a fully
charged battery.
Make sure that the low battery status icon is not on the screen
and that the battery status LED is not on. Press the Power button
to suspend the computer.
• If you are storing the computer for a few days (such as over
the weekend), install a fully charged battery or connect the
computer to a power source.
• If you are storing the computer for a longer period of time,
remove and charge the battery. When the battery is done
charging, store both the battery and the computer is a cool
location.
• If you store the battery for several months, recharge the
battery periodically to keep it at peak performance.
Store the batteries in a charger.
8 Dolphin CT60 Mobile Computer

Battery Recommendations and Safety Precautions
Caution: Improper battery replacement or incompatible device usage may
result in risk of burns, fire, explosion, or other hazard. Dispose of
lithium-ion batteries according to local regulations. Risk of fire and
burns if improperly handled. Do not open, crush, heat above 60°C
(140°F), or incinerate.
• For maximum battery life, charge the battery at 20 °C (68 °F) to 25 °C (77 °F)
and store at 20 °C (68°F) with a 50% charge.
• Do not store the battery at temperatures above 60 °C (140 °F). Storage above
60 °C (140 °F) may damage the battery.
• Charge the battery before use. Battery ships with only a partial charge.
• See Charge the Battery Before Use on page 4 for approved charging methods.
Use of this battery in other devices could result in damage to the device or
battery.
• Avoid dropping the battery or computer. If you suspect that the battery or
computer is damaged, send it to Honeywell service center for inspection.
• Replace the battery only with another CT50-BTSC model battery. This battery
has been tested in accordance with applicable safety standards. Contact your
Honeywell sales representative or distributor if this battery is no longer
available.
• Discarded batteries may create a safety hazard. Before disposal, cover the
battery contacts with electrical insulating tape.
• Do not modify the battery or attempt to insert foreign objects into it.
• Do not solder directly to the battery contacts.
• Do not drop the battery or apply mechanical shocks or pressure to it.
• Do not disassemble or open, crush, bend or deform, puncture, shred or burn the
battery.
• Do not immerse the battery in water or get the battery wet.
Enable Airplane Mode
If you do not need to connect to any wireless networks, you can enable Airplane
mode to turn off the radios and save battery power.
1. Swipe up from the bottom of the Home screen to access all apps.
2. Tap Settings .
3. In the Wireless & Networks section, choose More.
4. Tap the toggle button next to Airplane mode. An airplane icon appears in the
status bar to indicate Airplane mode is turned on.
Dolphin CT60 Mobile Computer 9

Power On the Computer
After you have fully charged and installed a battery, power on the computer for the
first time:
• Press and release the Power button.
Welcome Screen
The first time you power on the computer, a Welcome screen appears. Follow the
prompts on the screen as the setup wizard has you:
• set the default language.
• set up the Wi-Fi network connections.
• set the time, date, and time zone.
• personalize (name) the computer.
• set up security and privacy options.
Once you complete the Setup Wizard, the Welcome screen no longer appears when
you power on the computer and Provisioning mode is automatically turned off
(disabled). Scanning a bar code to install of applications, certificates,
configuration files, and licenses on the computer is restricted. To learn more About
Provisioning Mode, see page 70.
Unlock the Screen
The screen lock automatically activates every time the computer is turned on or
when the computer wakes from sleep mode.
• Swipe up from the lock icon at the bottom of the screen.
The level of security provided depends on the type of lock set (e.g., Swipe, Pattern,
PIN, or Password). The default setting (Swipe) provides no protection against
unauthorized access to your computer.
Change the Screen Lock to Protect the Computer
After you start using the computer, you should change the screen lock to prevent
unauthorized persons from accessing the computer without a password, pin, or
pattern to unlock the touch screen once it has been locked.
10 Dolphin CT60 Mobile Computer

The recommended setting for the Screen Lock is to enable a Password lock. Use a
strong password value (e.g., include numbers, characters, special characters, and
mix character case).
1. Swipe up from the bottom of the Home screen to access all apps.
2. Tap Settings > Security > Screen lock.
3. Choose one of the following options:
• None
• Swipe
• Pattern
• PIN
• Password
4. Follow the on-screen prompts to complete the setup.
5. Exit the Settings app.
Select a Touch Screen Profile to Optimize Performance
Optimize screen interactions by selecting a touch screen profile designed
specifically for your use case. For example, if you wear gloves, set the touch screen
profile to Glove use enhanced for the best touch screen response.
Note: Maximum glove thickness of 2 mm (0.08 inches) for touch screen response.
1. Swipe up from the bottom of the Home screen to access all apps.
2. Tap Settings > Touch Screen Profiles.
3. Choose one of the following options:
•Default
• Touch enhanced
• Glove use enhanced
• Stylus enhanced
4. Exit the Settings app.
Dolphin CT60 Mobile Computer 11
Configure the Screen Backlight
Good Read LED
The display has an ambient light sensor that automatically adjusts the backlight
intensity to conserve power and ensure the display is readable. You can also
manually set the backlight intensity if you do not want to use the automated
adaptive brightness feature.
1. Swipe up from the bottom of the Home screen to access all apps.
2. Tap Settings > Display.
3. Choose one of the following options:
• To have the computer automatically adjust the brightness for your work
environment, turn on the Adaptive brightness setting. You can tap Adaptive
brightness to toggle the feature on or off.
To set the brightness level manually, verify the Adaptive brightness feature is
turned off, and tap Brightness level. Adjust the slider to set the brightness level.
About the Good Read LED
The Good Read LED indicates the status of the scanner. To learn more about how
to use and configure the imager engine for scanning, see Chapter 3: Use the Image
Engine beginning on page 31.
About the Audio Features
12 Dolphin CT60 Mobile Computer
Good Read LED Descriptions
LED Color Description
Green Good read of a bar code.
Blinking green The data collection engine is processing or starting up.
The CT60 has a speaker, a microphone, and several software tools to configure
sound volume or enable vibration feedback.
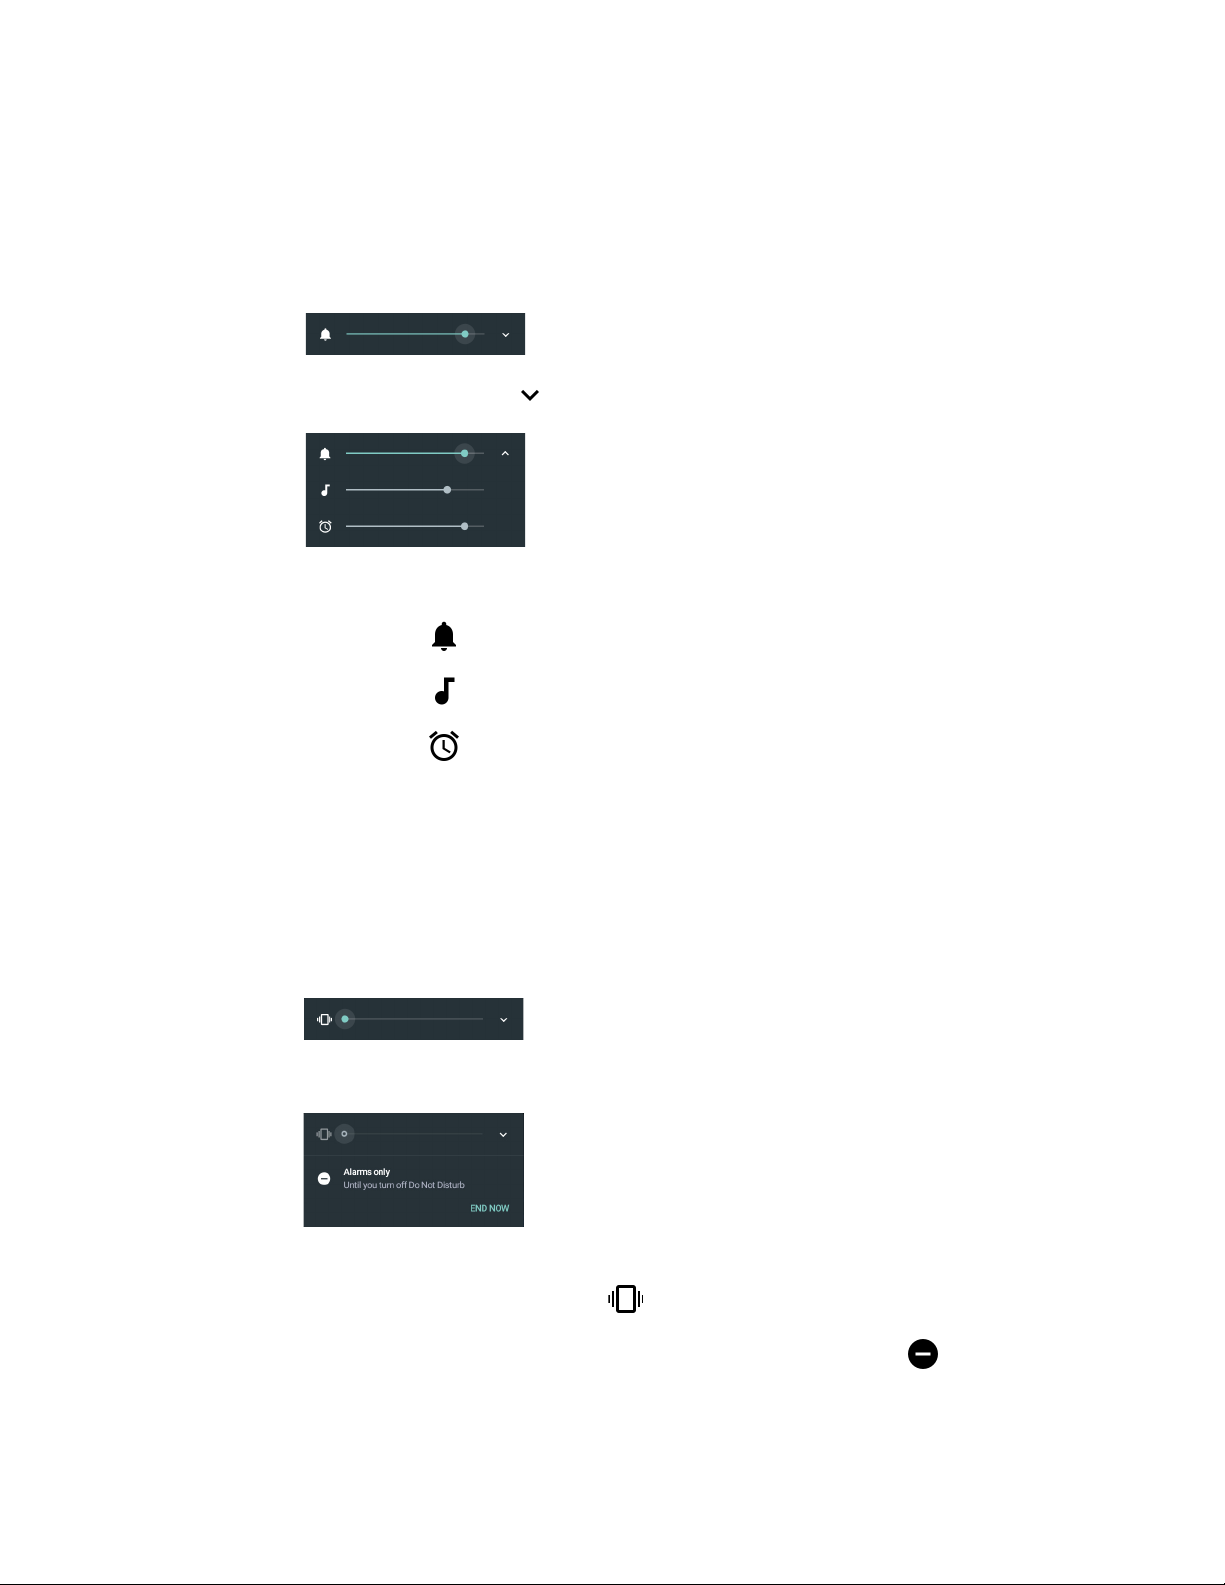
Adjust Speaker Volume
Use the volume buttons on the right side of the computer to adjust the volume of
ringtones, media, notifications or alarms.
1. Press either the Volume Up or Volume Down button. The volume slider
appears.
2. Tap the down arrow to expand the options.
Use the stylus or the Volume buttons to adjust each volume type.
• Use the slider for notifications and rings.
• Use the slider for media (e.g., music, videos and other media).
• Use the slider for alarms.
Enable Vibrate Mode
You can use the Volume down button to quickly enable Vibrate mode so the
computer vibrates instead of emitting sound for notifications and rings. If you still
want to hear alarms, turn on the Alarms only feature.
1. Press the Volume down button until the computer vibrates.
2. To turn on the Alarms only feature, press the Volume Down button again with
the volume slider open.
The status bar at the top of the screen indicates the active mode:
• When Vibrate mode is active, appears.
• When Alarms only mode is active, the Do Not Disturb icon appears.
Dolphin CT60 Mobile Computer 13

Audio Settings
This section describes the audio and sound settings you can configure in the
Settings app.
• To change audio settings, start the Settings app and tap Sound.
Sound Settings
Setting Description
Media Volume
Alarm Volume
Ring Volume
Also Vibrate for calls Select to enable vibrate mode when the phone is ringing.
Do not disturb Select to set which notifications to let through when you have Do
Phone ringtone Select a default ringtone.
Default notification ringtone Select a notification sound.
Default alarm ringtone Select a alarm sound.
Emergency broadcasts Select to configure Emergency alert settings. Turn alerts on or off,
Other sounds
Screen locking sounds Enable or disable an audio tone when the screen is locked.
Charging sounds Enable or disable an audio tone when the computer is charging.
Touch sounds Enable or disable audio sounds when you use the touch screen.
Vibrate on tap Enable or disable vibrate mode when you touch the screen.
Use the sliders to set the volume for media (e.g., music, videos, and
games), alarms and rings (notifications and ringtones).
not disturb turned on and when you want to be left alone.
specify tone, vibrate or text-to-speech.
14 Dolphin CT60 Mobile Computer
Insert a microSD Card
You can use a microSD card to increase file storage capacity or to install software.
Honeywell recommends the use of Single Level Cell (SLC) industrial grade
microSD or microSDHC memory cards with the computer for maximum
performance and durability.
Note: Format the memory card before initial use.
1. Save your files and close any open applications.
2. Press and hold the Power button until the options menu appears.
3. Tap Power Off and then OK to verify.
4. Disconnect one end of the hand strap from the computer.
5. Press and hold down the small button on the battery latch, and then slide the
latch toward the bottom of the computer to unlock the battery.
Dolphin CT60 Mobile Computer 15
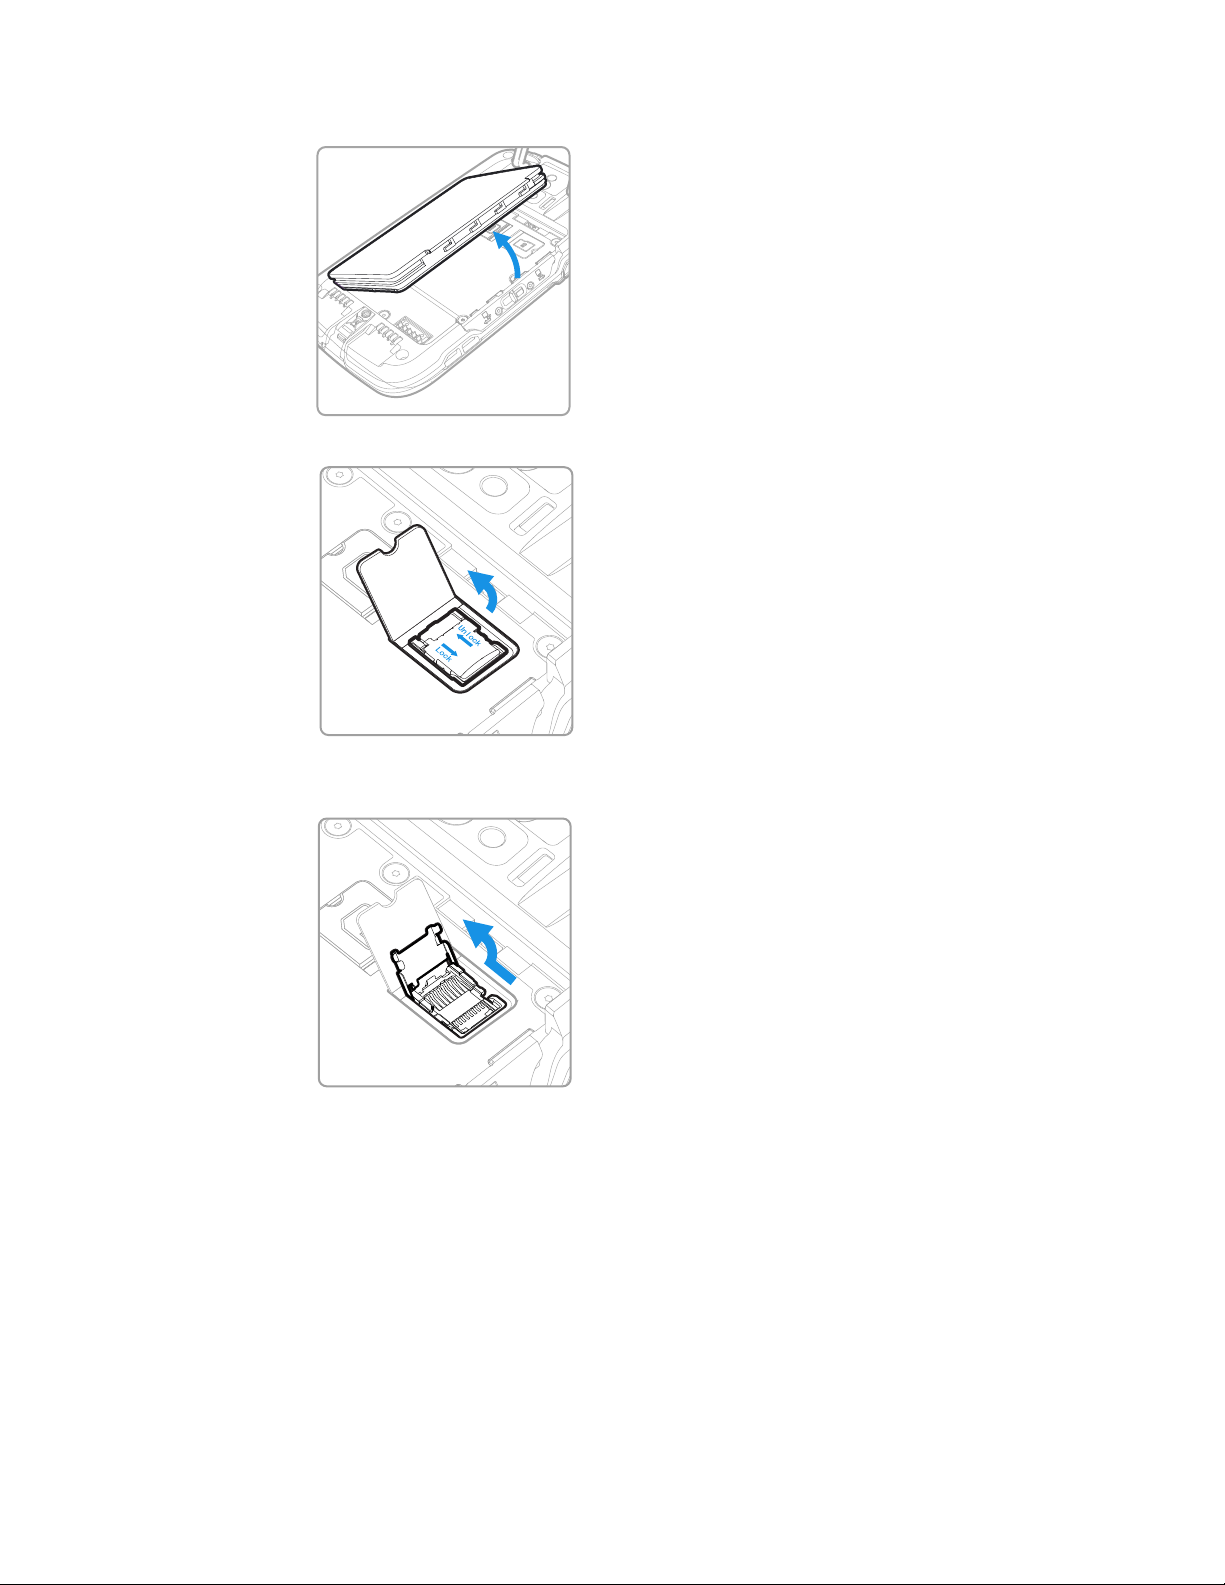
6. Lift up on the edge of the battery and remove it from the computer.
7. Lift up the edge of the SD card access door.
8. Press down gently and slide the card holder toward the open access door. Lift
the edge of the holder up.
16 Dolphin CT60 Mobile Computer

9. Insert the microSD card into the card holder with the contacts facing out.
10. Close the holder with the card inserted. Press down gently on the card holder
and slide it into the locked position.
11. Close the SD card access door.
12. Install the battery and slide the battery latch toward the top of the computer
to engage the lock.
13. Install the hand strap, and then turn on the computer.
Dolphin CT60 Mobile Computer 17

How to Transfer Files
To transfer files you need to physically connect the CT60 mobile computer to your
workstation (e.g., laptop or desktop computer) through a USB connection.
When the mobile computer is connected and USB is configured for file or photo
transfer, use a file browser (e.g., File Explorer or Windows Explorer) on your
workstation to transfer files between the two computers. If you are transferring files
to and from a Mac, use the Android File Transfer application (available from
www.android.com/filetransfer).
Note: File transfer through a USB connection is disabled by default. You need to configure
the USB connection for transferring files or photos.
You can use these accessories to connect your mobile computer to your
workstation:
• HomeBase or eHomeBase, and a standard USB Type B to A cable
•USB adapter
Configure USB Connection and Transfer Files
Note: The CT60 supports Hi-Speed USB communications (USB 2.0) with a maximum data
transfer rate of 480 Mbps.
1. Connect the CT60 to your workstation.
2. On the CT60, swipe down from the top of the screen to see the notifications.
3. Tap USB charging this device.
4. Select either Transfer files or Transfer photos (PTP).
5. Open the file browser on your workstation
6. Browse to the CT60. You can now copy, delete, or move files between the CT60
and your workstation.
Accessories for the Computer
The Dolphin CT60 ships with a battery, hand strap and stylus. All other accessories
are ordered and shipped separately. For help, contact your local sales
representative.
Note: Dolphin CT60 mobile computers are compatible with most Dolphin CT50
accessories. Check with your local sales representative about accessory compatibility
before ordering.
18 Dolphin CT60 Mobile Computer

Accessory Description
Battery
(Model CT50-BTSC)
eHomeBase
(Model CT50-EB)
HomeBase
(Model CT50-HB)
ChargeBase
(Model CT50-CB)
NetBase
(Model CT50-NB)
Vehicle Power Adapter
(Model CT50-MC)
Vehicle Dock
(Model CT50-MB)
Quad Charger
(Model CT50-QBC)
USB Adapter
(Model CT50-USB)
Scan Handle Attach the scan handle to the CT60 mobile computer for easier grip
DEX Adapter
(Model DEX-BLE-1)
Holster Use the holster to carry the computer hands-free in the work
Replacement or spare 3.6 V Li-ion rechargeable battery for the CT60
(P/N 318-055-001 and 318-055-005).
Use the eHomeBase to hold a computer with a battery installed, charge
a spare battery pack, charge the main battery pack, and provide power
to the mobile computer. The eHomeBase has a USB client connector
(Type B) as well as an Ethernet connector.
Use the HomeBase to hold a computer with a battery installed, charge
a spare battery pack, charge the main battery pack, and provide power
to the mobile computer. The HomeBase has a USB client connector
(Type B).
The ChargeBase is a 4-slot charging cradle that can power four
computers, and charge their main batteries in 6 hours.
The NetBase enables up to four computers to communicate with a
host device over an Ethernet network. The Net Base also provides a
second RJ45 Ethernet port for connection to an additional device such
as a printer, workstation, or another Net Base.
Use the vehicle power adapter to charge the battery installed in the
computer from the accessory port in your vehicle.
Use the vehicle docks to hold and charge the computer while using it
on a vehicle. The vehicle dock also contains a USB host port.
Use the quad charger to charge up to four batteries.
Use this snap-on adapter to connect to a USB port for transferring data
or charging your computer.
and trigger action when scanning labels.
Use the DEX adapter to easily connect to direct store delivery (DSD)
receiving systems including DEX/UCS store systems, vending
machines, and other retail equipment.
environment. You can choose between three different holsters.
Dolphin CT60 Mobile Computer 19
Loading...