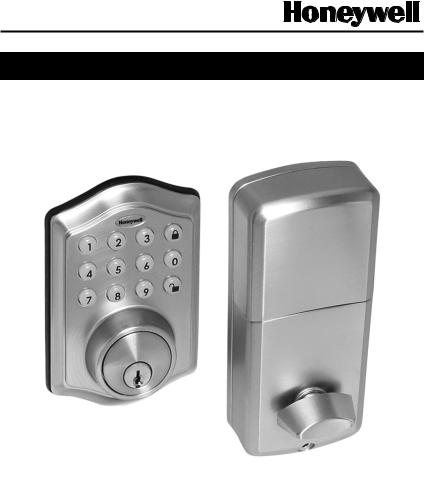
Honeywell Ddbkp User Manual

ENGLISH
Installation & Operation Guide
Digital Deadbolt
Model DDBKP
Read this manual carefully before installing and operating!
Page 1

Index
INSTALLATION INSTRUCTIONS
Package Contents / Tools Required.......................................................... |
Page 1 |
Prepare Door and Jamb............................................................................. |
Page 2 |
Adjusting Deadbolt Latch Set.................................................................. |
Page 3 |
Installing Deadbolt Latch Set..................................................................... |
Page 4 |
Installing Exterior Assembly........................................................................ |
Page 5 |
Installing Interior Assembly........................................................................ |
Page 6-8 |
OPERATION INSTRUCTIONS
Digital Keypad Overview............................................................................. |
Page 9 |
Locking and Unlocking / Changing Programming Code / |
Page 10 |
Adding User Codes...................................................................................... |
|
Deleting User Codes / Automatic Lock Function / |
|
Sound On and Off........................................................................................ |
Page 11 |
Secure Lock-out Period / Restore Factory Settings / |
Page 12 |
Low Battery Warning / Consumer Friendly Message Guide.................... |
|
Installation Trouble Shooting............................................................... |
Page 13 |
Customer Service........................................................................................ |
Page 14 |
Template....................................................................................................... |
Page 15-16 |
Programming Record.................................................................................. |
Page 17 |
Limited Warranty................................................................................. |
Back |
|
Cover |
Page 2

INSTALLATION INSTRUCTIONS
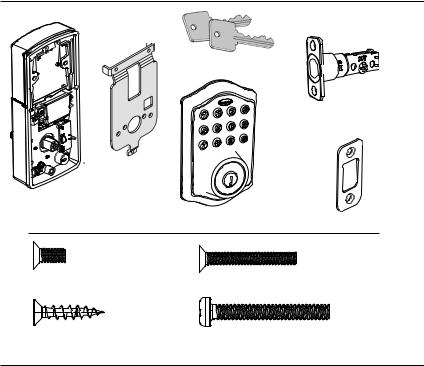
Package Contents
Entry keys (2 ea.)
Deadbolt Latch Set (Adjustable) 2-3/8” (60mm) to 2-3/4” (70mm)
Mounting Plate
Interior Assembly
|
Exterior Assembly |
Deadbolt Strike Plate |
|
|
|
5/16” (8mm) Screws - 2 ea. |
1” (25mm) Screws - 2 ea. |
|
3/4” (19mm) Screws - 5 ea. |
1-3/8” (35mm) Screws - 1 ea. |
|
Tools Required |
|
|
Tools Required for Installation |
Tools Required for Installation |
|
on Pre-drilled Doors: |
on Doors That Require Drilling: |
|
• Phillips Screwdriver |
• Drill |
|
|
• Tape Measure |
|
|
• Pencil |
|
|
• 2-1/8” (54mm) Drill Hole Saw |
|
|
• 1” (25mm) Drill |
|
|
• 1/16” (2mm) Drill |
|
• Chisel
• Hammer
• Phillips Screwdriver
DO NOT RETURN TO STORE! If any parts are missing or damaged, please call Customer Service toll free at 1-877-354-5457 (M-F 7am – 5pm PST)
Page 1

ADJUSTABLE DEADBOLT LATCH SET
NOTE: Deadbolt Latch Set is shipped with the backset set at 2-3/8” (60mm)
Measure the backset (backset is distance between edge of the door and the center of Lock).
1.TO CONVERT FROM 2-3/8” (60mm) BACKSET TO 2-3/4” (70mm) BACKSET
a.Hold latch with numbers facing forward and thumb pressing on the bolt (Figure 1a).
b.Rotate the cylinder cover clockwise (Figure 1b).
c.Pull and twist the extension plate all the way out (Figure 1c).
d.Rotate the cylinder cover counter clockwise so that the marking aligns with the 2-3/4” (70mm) position indicator (Figure 1d).
 NOTE: Do not extend Cylindrical Cover past 2-3/4” (70mm)
Figure 1a |
Figure 1b |
2-3/4” |
Figure 1c |
Your latch is now set |
|
|
(70mm) |
|
2-3/4” (70mm) backset |
2-3/8” |
|
2-3/8” |
|
|
(60mm) |
Extension plate |
(60mm) |
|
|
Cylindrical cover |
|
|
|
|
|
|
|
|
|
|
Figure 1d |
|
|
|
2.TO CONVERT FROM 2-3/4” (70mm) BACKSET TO 2-3/8” (60mm) BACKSET
a.Hold latch with numbers facing forward and thumb pressing on the bolt (Figure 2a).
b.Rotate the cylinder cover clockwise (Figure 2b).
c.Push and twist the extension plate all the way in (Figure 2c).
d.Rotate the cylinder cover counter clockwise so that the marking aligns with the 2-3/8” (60mm) position indicator (Figure 2d).
Figure 2a |
Figure 2b |
Figure 2c |
Your latch is now set |
|
|
|
|
|
|
|
2-3/8” (60mm) backset |
2-3/4” |
|
2-3/8” |
|
(70mm) |
Extension plate |
(60mm) |
|
Cylindrical cover |
|
|
Figure 2d
Page 2

PREPARE DOOR AND JAMB
NOTE: For installation on doors with pre-drilled holes skip to page 4.
1. TEMPLATE a. Cut out template printed on page 15 of this Manual
(Figure 1a). b. Fold template and place on door 36” (925mm) from
the ground as marked (Figure 1b).
2.MARK THE DOOR FOR DRILLING
b. Mark center hole on door edge through guide on
template for 1” (25mm) latch bolt (Figure 2a).
a.Mark center hole on door face through guide on template for 2-3/8” (60mm) or 2-3/4” (70mm) backset (Figure 2b).
3.DRILL AND CHISEL DOOR
a.Drill 2-1/8” (54mm) hole through door face as marked for lock set (Figure 3a).
b.Drill 1” (25mm) hole in center of door edge for Deadbolt Latch Assembly (Figure 3b).
c.Insert Deadbolt Latch Assembly in hole keeping it parallel to face of door. Mark outline and remove latch (Figure 3c).
d.Chisel 1/8” (3mm) deep or until latch face is flush with door edge (Figure 3d).
Figure 1a |
Figure 1b |
|
|
Figure 2a |
Figure 2b |
|
|
Figure 3a |
Figure 3b |
Figure 3c Figure 3d
 NOTE: For Drive in Latch, drill hole size indicated on template and press until it is flush with door edge.
4.MARK AND DRILL DOOR JAMB
a.Mark center hole on edge of jamb even with the center of the Latch Bolt on door edge. (Figure 4a).
b.Drill 1” (25mm) hole 1-3/16” (30mm) deep in door jamb on center mark (Figure 4b).
c.Outline outside edges of Strike Plate (Figure 4c).
d.Chisel 1/8” (3mm) deep for Strike Plate or until flush (Figure 4d).
e.Install Strike Plate using two 3/4” (19mm). screws provided (Figure 4e).
Figure 4a |
Figure 4b |
Figure4c |
Figure 4d |
Figure 4e |
Page 3

INSTALLING DEADBOLT LATCH SET
1.INSTALLING THE DEADBOLT LATCH SET (need phillips head screwdriver)
a.Insert Deadbolt Latch Set into door edge hole with the word “UP” and the arrow on the extension plate facing UP. Cross shaped spindle connector will be at the bottom of the Deadbolt Latch Set (Figure 1a).
b.Make sure the face plate sits flush with the door. Do not force
the latch into the mortise flush. Chisel out excess material if |
Figure 1a |
necessary for a flush fit. |
|
c.Using two 3/4” (19mm). screws provided, screw the latch into the door with a hand held screwdriver. DO NOT OVER TIGHTEN.
 NOTE: Deadbolt Latch must be retracted when installing
Deadbolt Latch Retracted
Deadbolt Latch Extended
2. IDENTIFYING YOUR DOOR HANDING
Stand outside the door
a.If the hinges are on the left your door is Left Handed (Figure 2a).
b.If the hinges are on the right your door is Right Handed (Figure 2b).
OUT SWING DOOR |
IN SWING DOOR |
||
Left Handed Door |
Right Handed Door |
Left Handed Door |
Right Handed Door |
Hinges are on the left side |
Hinges are on the right side |
Hinges are on the left side |
Hinges are on the right side |
Figure 2a |
Figure 2b |
 NOTE: You are standing outside the door
Page 4
 Loading...