Garmin GSC10 Manual

Install the GSC10 Sensor
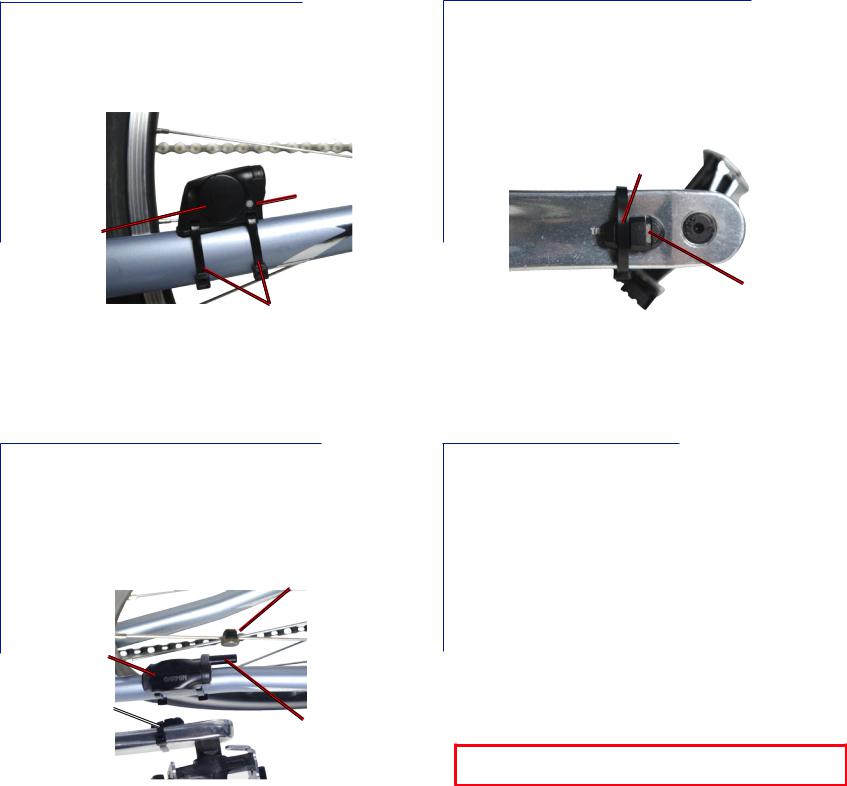
Place the GSC10 on the rear chain stay (the side opposite of the drive train). Loosely attach the GSC10 using two cable ties.
GSC10 on rear chain stay
reset button
indication line
cable ties
Install the Spoke Magnet
Attach the spoke magnet by unscrewing the magnet from the plastic piece. Then place the spoke in the groove of the plastic piece and tighten slightly. The magnet can face away from GSC10 if there is not enough room between the sensor arm and spoke. Make sure the magnet is aligned with the sensor arm indication line.
spoke magnet
GSC10
pedal magnet
sensor arm indication line
Install the Pedal Magnet
Attach the pedal magnet to the crank arm using the adhesive mount and a cable tie. Make sure the pedal magnet is within 5 mm of the GSC10, and the indication line on the pedal magnet is aligned with the indication line on the GSC10.
Pedal magnet on crank arm
cable tie
indication line
Adjust and Test
1.Unscrew and move the sensor arm to within 5 mm of the spoke magnet. You can also tilt the GSC10 closer to either magnet for improved alignment.
2.Press the Reset button on the GSC10. The LED light turns red, then green. Pedal to test the sensor alignment. The red
LED blinks each time the crank arm passes the sensor, and the green LED blinks each time the wheel magnet passes the sensor arm.
Note: The LED blinks for the first 60 passes after a reset. Press Reset again if you require additional passes.
3.When everything is aligned and working correctly, tighten the cable ties, sensor arm, and spoke magnet.
For more information on using the GSC10 with your compatible GPS device, refer to your owner’s manual.
 Loading...