


IMPORTANT SAFEGUARDS Symbols used in these instructions
Important warnings are identified by these symbols. It is vital to respect these warnings.
 Danger!
Failure to observe the warning could result in life threatening injury by electric shock.
 Important!
Failure to observe the warning could result in injury or damage to the appliance.
 Danger of burns!
Failure to observe the warning could result in scalds or burns.
 Please note:
This symbol identifies important advice or information for the user.
Fundamental safety warnings
 Danger!
This is an electrical appliance and may cause electrical shocks. You should therefore follow these safety warnings:
•Never touch the appliance with damp hands or feet.
•Never touch the plug with damp hands.
•Make sure the socket used is freely accessible at all times, enabling the appliance to be unplugged when necessary.
•Unplug directly from the plug only.
Never pull the power cable as you could damage it.
•To disconnect the appliance completely you must unplug it from the mains socket.
•If the appliance is faulty, do not attempt to repair.
Turn it off, unplug from the mains socket and contact Customer Services.
If the plug or power cable is damaged, it must be replaced by De’Longhi Customer Services only to avoid all risk.
During cleaning, never immerse the coffee maker in water. It is an electrical appliance.
•Before cleaning the outside of the appliance, turn it off, unplug from the mains socket and allow to cool.
 Important:
Keep all packaging (plastic bags, polystyrene foam) away from children.
 Important:
This appliance can be used by children aged from 8 years and above and persons
with reduced physical, sensory or mental capabilities or lack of experience and knowledge if they have been given supervision or instruction concerning use of the appliance in a safe way and understand the hazards involved.
Children shall not play with the appliance. Cleaning and user maintenance shall not be made by children without supervision.
 Danger of burns!
This appliance produces hot water and steam may form while it is in operation.
Avoid contact with splashes of water or hot steam.
When the appliance is in operation, please be aware that the cup warmer shelf becomes hot.
Surfaces marked with this symbol become hot during use (the symbol is present in certain models only).
Designated use
This appliance is designed and made to prepare coffee and heat drinks.
This is a household appliance only.
It is not intended to be used in:
•staff kitchen areas in shops, offices and other working environments
•farm houses
•by clients in hotels, motels and other residential type environments
•bed and breakfast type environments.
Any other use is considered improper and thus dangerous.
The manufacturer is not liable for damage deriving from improper use of the appliance.
Instruction for use
Read this Instruction for Use carefully before using the appliance. Failure to follow this Instruction for Use may result in burns or damage to the appliance.
The manufacturer is not liable for damage deriving from failure to respect this Instruction for Use.
6
 Please note: Keep this Instruction for Use.
If the appliance is passed to other persons, they must also be provided with this Instruction for Use.
Checking the appliance
After removing the packaging, make sure the product is complete and undamaged and that all accessories are present. Do not use the appliance if it is visibly damaged.
Contact De’Longhi Customer Services.
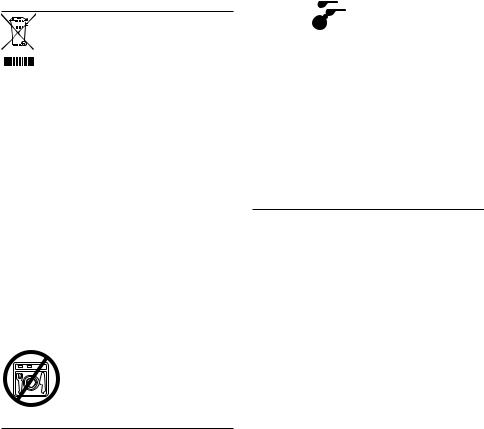
DISPOSAL
In compliance with European directive 2002/96/EC, the appliance must not be disposed of with household waste, but taken to an authorised waste separation and recycling centre.
TECHNICAL DATA
Mains voltage.......................................... |
220-240V~50/60Hz |
Absorbed power.......................................................... |
1350 W |
Pressure......................................................................... |
15 bar |
Water tank capacity.............................................................. |
1 l |
Dimensions WxHxD............................. |
149x305x330 (414)mm |
Weight........................................................................ |
4,04 Kg |

 The appliance complies with the following EC directives:
•Low Voltage Directive 2006/95/EC and subsequent amendments;
•EMC Directive 2004/108/EC and subsequent amendments;
•European Stand-by Regulation 1275/2008;
•Materials and accessories coming into contact with food conform to EC regulation 1935/2004.
None of the components or accessories is dishwasher safe.
DESCRIPTION
The terminology below will be used repeatedly on the following pages.
Description of the appliance
(see page 3)
A.Water tank lid
B.Tank extraction handle
C.Water tank
D.Cup warmer
E.Boiler outlet
F.ON/OFF switch
G.Cup tray
H.Drip tray full indicator
I.Drip tray
J.Hot water/steam spout
K.Hot water/steam connection nozzle
L.Hot water/steam connection tube
M.Steam dial
N.Filter holder
O.Measure/presser
P.1 cup filter (  symbol under filter)
Q. |
2 cup filter ( |
symbol under filter) |
R. |
Pod filter ( |
symbol under filter) |
S.Water softener filter (*not included, can be purchased from authorised Customer Services)
Control panel description
T.One cup button
T1. ON light on button (white)
U.Two cups button
U1. ON light on button (white)
V.Steam button
V1. ON light on button (white)
V2. Descale light (orange)
INSTALLING THE APPLIANCE
 Important!
When you install the appliance, you should respect the following safety warnings:
•Water penetrating the appliance could cause damage. Do not place the appliance near taps or sinks.
•The appliance could be damaged if the water it contains freezes.
Do not install the appliance in a room where the temperature could drop below freezing point.
•Arrange the power cable in such a way that it cannot be damaged by sharp edges or contact with hot surfaces (e.g. electric hot plates).
•The appliance gives off heat. After positioning the appliance on the worktop, leave a space of at least 3 cm between the surfaces of the appliance and the side and rear walls and at least 15 cm above the coffee maker.
Connecting the appliance
 Danger!
Check that the mains power supply voltage corresponds to that indicated on the rating plate on the bottom of the appliance. Connect the appliance to an efficiently earthed and correctly installed socket with a minimum current rating of 10A only. If
7

the power socket does not match the plug on the appliance, have the socket replaced with a suitable type by a qualified professional.
FILLING THE WATER TANK
1.Extract the tank by pulling it upwards (fig. 1).
2.Open the lid and fill the tank with fresh clean water, taking care not to exceed the MAX level (fig. 2).
Put the tank back in the appliance, pressing lightly to open the valves located on the bottom of the tank.
3.More simply, the tank can also be filled without extracting it by pouring the water directly from a jug.
 Important:
Never operate the appliance without water in the tank or without the tank.
 Please note:
It is normal for there to be water in the space under the tank. This should therefore be dried regularly with a clean sponge.
SETTING UP THE APPLIANCE
•Turn the appliance on by pressing the ON/OFF switch (fig. 3). The appliance performs a self-diagnosis cycle, indicated by sequential flashing of the three buttons.
•The  and
and  lights flash to indicate the appliance is heating up.
When the lights stop flashing and remain on steadily, the appliance is ready for use.
•Place a container with a minimum capacity of 100 ml under the hot water/steam spout (fig. 4).
• Turn the hot water/steam dial to the 
 position (fig. 5) and deliver about 100 ml of water, then close the dial again (○symbol).
•Attach the filter holder to the appliance. To attach correctly, align the filter holder handle with the INSERT symbol (fig. 9), attach the filter holder and rotate the handle towards the right until aligned with the CLOSE symbol.
•To rinse the machine’s internal circuits, place a con-
tainer under the coffee spout and press the  key. Repeat this procedure 5 times.
•Then proceed with rinsing the “steam” circuit: place a container under the hot water spout and turn the
dial to the 
 position. Hot water is delivered. When the appliance automatically stops the hot water delivery, close the dial (○symbol). Repeat this procedure 1 more time (If necessary, refill the tank).
 Please note:
The first time you use the coffee maker, you need to make 4/5 cups of coffee or 4/5 cappuccinos before it starts to give satisfactory results.
PROGRAMMING THE SETTINGS MENU
To access the menu, make sure the appliance is ready for use,
then press and hold the  button for 10 seconds until the three buttons flash in sequence:
The appliance is now in programming mode.
Set the coffee maker as you wish, then exit the settings menu by waiting for 15 seconds.
 Please note:
If no selections are made for 15 seconds, the appliance automatically exits programming and is ready for use again.
Setting coffee temperature
To modify the temperature of the water used to make the coffee, proceed as follows:
1.Access the settings menu;
2.Press the  button to enter the coffee temperature selection mode.
The lights corresponding to the current selection come on:
 low
low
 medium
  high
high
3.The lights start flashing in sequence;
4.Press the button corresponding to the required temperature:
low |
medium |
high |
5. The button |
flashes to indicate that the selection has |
|
been saved. |
|
|
The appliance exits the menu and is ready for use.
Setting water hardness
The light (V2) indicating that the appliance needs descaling comes on after a period of operation established according to water hardness.
The appliance can also be programmed according to the hardness of the mains water in the various regions so that descaling needs to be performed more or less frequently.
Proceed as follows:
1. Access the settings menu;
8
 Loading...