


|
|
Register |
your |
|||
|
|
|||||
|
|
|||||
|
|
|
and |
|||
|
|
new |
|
|
|
|
|
|
|
device on |
|||
|
|
MyBosch now |
|
|||
|
|
get free |
benefits: |
|||
|
|
|||||
|
|
bosch- |
|
|||
|
|
home. |
|
|||
|
|
|
|
|
com/ |
|
|
|
welcome |
|
|||
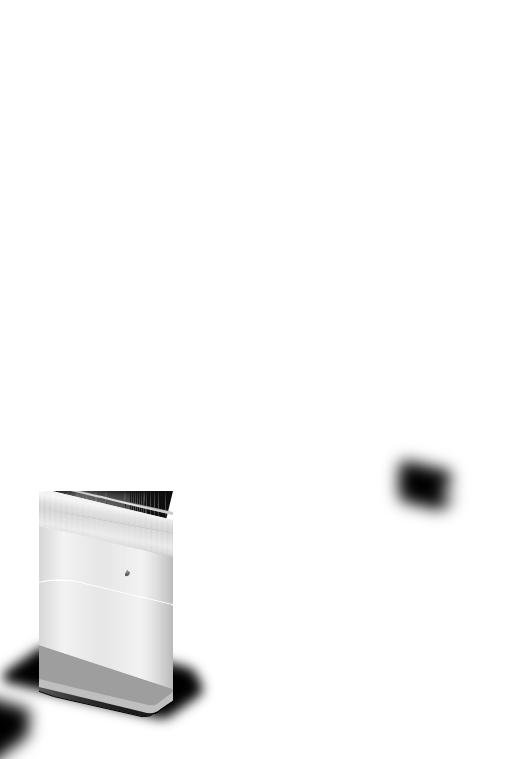
Fully automatic espresso machine
TIS65...
[en] |
Instruction manual |
Fully automatic espresso machine |
6 |
[fr] |
Mode d’emploi |
Machine à expresso entièrement automatique |
31 |
[ru] |
Инструкция по эксплуатации |
Полностью автоматическая эспрессо-машина |
57 |
[tr] |
Kullanım kılavuzu |
Tam Otomatik Espresso Makinesi |
84 |
[kk] |
Пайдалану нұсқаулығы |
Толық автоматты кофе демдегіш |
111 |
[pt] |
Instruções de serviço |
Máquina de café totalmente automática |
138 |
[ar] |
مادختسلاا تاداشرإ |
لماكلاب ةيكيتاموتوأ وسيربسإ ةنيكام |
189 |

A
Included in delivery (see page 9) Contenu de l’emballage (voir page 34)
Объем поставки (см. стр. 60)
Teslimat kapsamı (bkz. sayfa 87)
Бірге жеткізіледі (мына бетті қараңыз: 114)
Âmbito de fornecimento (ver página 141)
\186 ةحفص رظنا\ ميلستلا يف نمضم
A
B
C
E-Nr. ……… FD… …
D |
E F |
G* |
H* |
I* |

B
C
6
5
2
3
4
1
17
10
11
9
12
13
19
D |
8 |
|
7
18
E |
F |
17a |
17c |
|
|
17d
4e
4b
4c |
17b |
|
4d 


G
14b 16
16
14

13
2
 1
1
14a
15

en
Dear Coffee Connoisseur, Congratulations on purchasing this fully automatic coffee machine from Bosch.
This instruction manual describes a number of versions of the appliance with minor differences.
Please also take note of the enclosed Quick reference guide, which you can then keep in the specially provided compartment 16 until you need it again.
These instructions also show display texts and symbols in a special way so that you can clearly see where we refer to texts displayed by the appliance or symbols that are marked on it.
Example of display texts: Espresso Example of control elements: C
Contents
Intended use 7 Important safety information 7 Included in delivery 9 Overview 9 Overview of control elements 10 Display 11 Initial use 11 Own settings “Favourite” 13 Childproof lock 13 Preparing drinks 13
Preparing coffee drinks............................. |
14 |
Preparation using milk............................... |
15 |
Special beverages..................................... |
15 |
Preparation using ground coffee............... |
16 |
Adjusting the grind setting......................... |
17 |
Menu |
17 |
Care and daily cleaning |
20 |
Cleaning the milk system.......................... |
21 |
Cleaning the brewing unit (Figure G)........ |
22 |
Service programmes |
22 |
Cleaning the milk system.......................... |
23 |
Descaling.................................................. |
23 |
Cleaning.................................................... |
24 |
calc‘nClean ................................................ |
24 |
Tips on energy saving |
25 |
Frost protection |
25 |
Storing accessories |
25 |
Accessories |
26 |
Disposal |
26 |
Guarantee |
26 |
Simple troubleshooting |
27 |
Technical specifications |
30 |
6

Intended use
This appliance is intended for domestic use only.
Only use the appliance indoors at room temperature and up to 2000 m above sea level.
Important safety information
Please read and follow the operating instructions carefully and keep them for later reference! Enclose these instructions when you give this appliance to someone else.
This appliance can be used by children aged from 8 years
and above and by persons with reduced physical, sensory or mental capabilities or lack of experience and knowledge if they have been given supervision or instruction concerning use of the appliance in a safe way and if they understand the hazards involved. Keep children under 8 years of age away from the appliance and connecting cable and do not allow them
to use the appliance. Children shall not play with the appliance. Cleaning and user maintenance shall not be made by children unless they are older than
8 years and supervised.
Intended use |
en |
W Warning
Risk of electric shock!
■The appliance may only be connected to a power supply with alternating current via a correctly installed socket
with earthing. Ensure that the protective conductor system of the domestic supply has been correctly installed.
■Connect and operate the appliance only in accordance with the specifications on the rating plate.
■Do not use the appliance if the power cord and/or appliance are damaged.
■Only our customer service may repair the appliance, e.g. by replacing a damaged power cord, in order to avoid hazards.
■Never immerse the appliance or mains cord in water.
■If there is a fault, pull out the mains plug immediately or switch off the power supply.
■Avoid spillage on the connector.
■Please note the special information on cleaning in the instructions.
7
en Important safety information
W Warning
Hazard due to magnetism!
The appliance contains permanent magnets which can affect electronic implants such as pacemakers or insulin pumps. Persons wearing electronic implants must maintain a minimum distance of 10 cm from the appliance and from the following parts upon removal: milk container, milk system, water tank, drip tray and brewing unit.
W Warning
Risk of suffocation!
■Do not allow children to play with packaging material.
■Store small parts safely as they can be easily swallowed.
W Warning
Risk of injury!
■Do not reach into the grinding unit!
■Improper use of this appliance may result in injury.
W Warning
Risk of fire!
■The appliance gets hot.
■Never operate the appliance in a cupboard.
W Warning
Risk of burns!
■The milk system becomes extremely hot. After use, always let it cool down before you touch it.
■After use the surfaces of the heating element or hotplate can remain hot for some time.
■Freshly prepared beverages are very hot. Leave to cool a little if necessary.
8

Included in delivery en
Included in delivery
(Figure A)
A Fully automatic coffee machine |
F Measuring spoon |
B User Manual |
G Water filter * |
C Quick reference guide |
H Milk container with “FreshLock” lid * |
D Milk tube and suction pipe |
I Descaling tablets * |
E Water hardness testing strip |
|
Overview
(Figures B, C, D, E, F and G)
1 |
Mains switch J |
10 |
Aroma cover |
2 |
Control panel (see next page) |
11 |
Dial selector for grinding level |
3 |
Display |
12 |
Drawer |
4 |
Drinks outlet (coffee, milk, hot water), |
13 |
(for ground coffee/cleaning tablet) |
|
height-adjustable |
Door to brewing unit |
|
|
a) Cover |
14 |
Brewing unit |
|
b) Milk system /coffee outlet (two-part) |
|
a) Locking mechanism |
|
c) Milk tube |
15 |
b) Cover |
|
d) Suction pipe |
Eject lever |
|
|
e) Milk system holder |
16 |
Storage compartment |
5 |
Removable water tank |
17 |
for quick reference guide |
6 |
Lid for water tank |
Drip tray |
|
7 |
Storage compartment for measuring |
|
a) Drip tray panel |
|
spoon |
|
b) Drip tray (two-section) |
8 |
Measuring spoon |
|
c) Coffee grounds container |
|
(insertion aid for water filter) |
18 |
d) Floater |
9 |
Bean container |
Compartment for power cord |
|
|
|
19 |
Rating plate (E number, FD) |
* These user instructions describe a number of appliance versions. Items marked * are not present in all models.
9
en Overview of control elements
Overview of control elements
(Figure B)
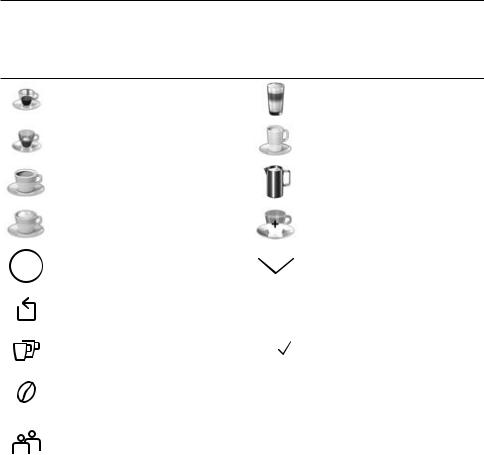
F The following symbols are visible or backlit depending on the appliance’s current operating mode:
|
|
|
|
|
|
Espresso |
|
Latte Macchiato |
|
|
|
|
|
|
|
|
|
|
|
|
|
|
|
Espresso Macch. |
|
Caffe Latte |
|
|
|
|
|
|
|
|
|
|
|
|
|
|
|
Coffee |
|
Milk froth |
|
|
|
|
|
|
|
|
|
|
|
|
|
|
|
Cappuccino |
|
Special beverages (see the |
|
|
|
|
|
|
|
section “Special beverages”). |
|
|
|
|
|
|
|
|
|
|
|
|
|
|
|
|
|
|
|
|
startstop |
C– Start/stop button |
|
I– Selection down |
||||
|
|
|
|
|
|
|
|
|
|
|
|
|
|
|
F– Back |
menu |
A– Open menu |
|
|
|
|
|
|
|
|
|
|
|
|
|
|
|
G– Dispense two cups |
ok |
B– Confirm / Store |
|
|
|
|
|
|
simultaneously |
|
|
|
|
|
|
|
|
H– Set coffee strength |
ml |
D– Select cup size |
|
|
|
|
|
|
|
|
|
|
|
|
|
|
|
R– Call up Favourite |
|
|
|
|
|
|
|
|
(touch briefly) and Childproof lock |
|
|
|
|
|
|
|
|
(touch for at least 3 seconds). |
|
|
|
|
|
|
|
|
|
|
|
10
Mains switch J
The mains switch Jis used to switch the appliance on or off. The appliance rinses itself automatically when it is switched on and off.
The appliance does not rinse if:
■it is still warm when switched on, or
■no coffee was dispensed before it was
switched off.
The appliance is ready for use when the symbols and the display on the control panel are lit.
Control panel (touch field)
In the control panel you can easily navigate the controls just by touching the symbols and characters.
You will hear an audible signal.
These audible signals can be switched on or off (see the section “Menu – Key tones”).
Drink selection
Touching the corresponding symbol selects the desired drink (see the section “Preparing drinks”).
Display en
“Favourite” and Childproof lock
Briefly touching Rcalls up personalised beverages (see the section “Own settings Favourite”).
Touching Rfor 3 seconds or more activates or deactivates the childproof lock (see the section “Childproof lock”).
Display
The display shows the selected drinks and settings plus messages reporting the appliance’s operating status.
Espresso
Regular |
medium |
Please refill water tank
Start/stop button
Touching Ceither begins preparing a drink or launches a service programme. If you touch Cagain while the drink is being prepared, dispensing will be prematurely halted.
Menu
Touching Acalls up the menu, the navigation symbols will be activated and light up. Touch I, Band Fto navigate through the menu and call up information or change settings (see the section “Menu”).
Drink options
Touching Hor Dadjusts the strength or size of the drink, touching Gprepares two cups simultaneously as soon as you touch Cto begin dispensing (see the section “Preparing drinks”).
These messages are cleared as soon as the action has been carried out.
Initial use
General
Fill the appropriate container using only pure, cold, uncarbonated water and solely roasted beans. Do not use coffee beans that have been glazed, caramelised or treated with other additives containing sugar, since they will block the brewing unit. The water hardness setting on the appliance can be adjusted. The factory setting for the water hardness is 4. Use the enclosed test strip to determine the hardness of your water supply. If this shows a value other than 4, you will need to programme the appliance appropriately after it has been taken into service (see section “Menu – Water hardness”).
11
en Initial use
Setting up the appliance
■ Remove any protective plastic film.
■ Place the fully automatic coffee machine on a level, waterproof surface that is able to support its weight.
■ The appliance’s ventilation slits must not Fbe covered or obscured.
■Connect the power supply (cable storage compartment 18) to the socket. You can adjust the length of the cable by pulling it further out or pushing it back in. To do this, place the appliance with its back flush with the edge of the work surface and either pull the cable out downwards or push it in upwards.
■Flip up the lid of the water tank 6.
■Remove the water tank 5, rinse it out and fill it with fresh cold water. Do not fill it past the “max” mark.
■Replace the water tank 5, making sure that it is straight, and push it right down into place.
■Reclose the lid of the water tank 6.
■Fill the bean container 9 with coffee beans.
■Use the main switch J1 to switch on the appliance.
The control panel and the display will be activated. The display will show the previously specified language, which will also be used for all subsequent display
texts. A number of different languages are available.
■Touch Irepeatedly until the display indicates the desired language.
Deutsch 
English
Français
The chosen language is now stored.
The brand logo will light up on the display 3. The appliance will heat up and rinse itself, a small amount of water will run out of the drink outlet 4.
The appliance is ready for use when the symbols and the display on the control panel are lit.
F The factory settings of the fully automatic coffee machine are programmed for optimal performance. The appliances switches off automatically after a configured time (see the section “Menu – Automatic shut-down”).
F When the appliance is used for the first time, after a service program has been run and when it has not been operated for a long period, the first beverage will not have the full aroma and should not be consumed.
F When the fully automatic coffee machine is first used, you will achieve a suitably thick and stable “crema” only after the first few cups have been dispensed.
F If the appliance is in use for a long period of time, water droplets will form on the ventilation slits. This is normal.
■Touch Cto confirm your selection.
12

Own settings “Favourite”
The number of Favourites depends on the model of the appliance. The menu item “Favourite” can be used to store and change individual (personalised) beverages (see the section “Menu – Favourite”).
Call up individual beverage
■Briefly touch R.
■Select one of the Favourites already stored with your own settings.
■Touch Cto begin dispensing the beverage.
Childproof lock
The appliance can be locked to protect children against scalding and burns. ■ Touch Rfor at least 3 seconds. A key symbol appears on the display 3. The childproof lock is now active.
It is no longer possible to operate the appliance.
■ Touch Rfor at least 3 seconds. The key symbol disappears from the display 3. The childproof lock is now
deactivated. The appliance can be used in the usual way.
Preparing drinks
This fully automatic coffee machine grinds fresh beans for every brewing. For optimum quality, store the beans in a cool place in
sealed containers.
F
F Cups should be prewarmed, e.g. with hot water. This applies particularly to small thick-walled espresso cups.
F For a number of settings, coffee is prepared in two stages (see
“aromaDouble Shot”). Please wait until the process is completely finished.
Own settings “Favourite” en
Different beverages can be prepared just by touching a key.
Drink selection
Touching the appropriate symbol selects the desired drink. Your selection is indicated by lines above and below the symbol. The name of the drink and the currently active values for strength and cup size are shown in display 3.
You can choose from the following drinks:
Espresso |
Latte Macchiato |
Espresso Macch. |
Caffe Latte |
Coffee |
Milk froth |
Cappuccino |
|
Touch the “special beverages” button several times to select different drinks one after the other:
Hot water |
Americano * |
Warm milk * |
Flat White * |
Coffee pot * |
Cafe Cortado * |
Kleiner Brauner * |
|
Items marked * are not present in all models.
Adjusting the strength, selecting ground coffee
Touch Hto set the strength of your coffee individually or to specify that ground coffee is to be used.
The following settings are possible:
very mild |
very strong |
mild |
doubleshot strong |
regular |
doubleshot strong+ |
strong |
Ground coffee |
■Touching the appropriate symbol selects the desired drink.
■Touch Hrepeatedly until the desired setting e.g. strong or Ground coffee (see the section “Preparation using ground coffee”) appears on the display.
13

en Preparing drinks
aromaDouble Shot
The longer the coffee is brewed, the more bitter substances and undesired aromas are released. This has a negative effect on the taste and makes the coffee less easily digestible. So for extra strong coffee, the appliance has a special aromaDouble Shot function. When half the quantity has been prepared, it grinds and brews fresh coffee beans so that only the pleasant, aromatic
scents are released.
F
Select cup size
Touching Dindividually selects the beverage volume desired.
The following settings are possible:
small |
medium |
large |
■ Touching the appropriate symbol selects the desired drink.
■ Touch Drepeatedly until the display Findicates the desired setting.
Two cups at once
Once you have selected a black coffee or milky coffee drink (for some appliances, this applies only to black coffee), touching G prepares two cups simultaneously as soon as you touch Cto begin dispensing. The setting is shown on the display.
■Touching the appropriate symbol selects the desired drink.
■Touch G.
■Place two prewarmed cups at left and right underneath the beverage outlet 4.
■Touch Cto begin dispensing the beverage.
The selected drink will be brewed and will
then be dispensed into the two cups.
F
F Depending on the type of appliance the function “Two cups at once” may be available only for black coffee, not for milky coffee drinks.
Preparing coffee drinks
The appliance must be ready for use.
■Place a prewarmed cup underneath the beverage outlet 4.
■Touch the appropriate symbol to select the desired drink, Espresso or Coffee.
The name of the drink and the currently active values for strength and cup size are shown in display.
|
Coffee |
Regular |
medium |
F You can change the cup size and coffee strength by touching Dand H. If you select Ground coffee, follow the procedure described under “Preparation using ground coffee”.
For example:
■Touch Drepeatedly until the display shows large.
■Touch Hrepeatedly until the display shows mild.
■Touch Cto begin dispensing the beverage.
The coffee is brewed and then dispensed
into the cup.
F
14
Preparation using milk
This fully automatic coffee machine possesses an integrated milk system that enables you to prepare coffee with milk or
milk froth or warm milk alone.
F
F
B
F Caution!
Dried milk residues are difficult to remove, therefore always clean (see the section “Cleaning the milk system”).
F While milk is being prepared you may hear a whistling sound. This is due to the technical nature of the milk system 4b.
F Touch Cagain to
prematurely halt dispensing.
The appliance must be ready for use. The milk tube and suction pipe must be connected.
■Insert the suction pipe 4d into the milk container.
■Place a prewarmed cup or glass underneath the beverage outlet.
Coffee-based drinks with milk
■ Touch the appropriate symbol to select
Espresso Macch., Caffe Latte, Latte
Macchiato or Cappuccino.
The name of the drink and the previously specified values for strength and cup size are shown in display.
Preparing drinks en
F You can change the cup size and coffee strength by touching Dand H. If you select Ground coffee, follow the procedure described under “Preparation using ground coffee”.
■Touch Cto begin dispensing the beverage.
The milk or milk froth is dispensed into the cup or glass first. Then the coffee is brewed and runs into the cup or glass.
You can touch Cagain to prematurely halt dispensing of the milk or coffee, touching Ctwice stops the entire dispensing process.
Milk froth
■Touch the symbol to select Milk froth.
■Touch Dto select the cup size.
■Touch Cto begin dispensing
the beverage.
Milk froth is dispensed from the beverage outlet.
Special beverages
Touch the “special beverages” button several times to select different drinks one after the other.
Items marked * are not present in all models.
Hot water
Before hot water is dispensed, the milk system should be cleaned and the milk tube removed (see the section “Cleaning the milk system”). If the milk system is not cleaned, small amounts of milk may be dispensed
together with the hot water.
B
The appliance must be ready for use.
■Place a cup or glass underneath the beverage outlet 4.
■Touch the “special beverages” symbol repeatedly until Hot water appears on the display.
15
en Preparing drinks
■ Touch Dto select the cup size.
■ Touch Cto begin dispensing Fthe beverage.
■ Take off the milk tube 4c and then touch Cagain.
Hot water will flow out of the outlet 4.
F You can touch Cagain to prematurely halt dispensing.
Warm milk *
Please read through first and take note of the section “Preparation using milk”. Then:
■Touch the “special beverages” symbol repeatedly until Warm milk appears on the display.
■Touch Dto select the cup size.
■Touch Cto begin dispensing the beverage.
Warm milk will flow out of the outlet 4.
F You can touch Cagain to prematurely halt dispensing.
Americano *
■Place a prewarmed cup underneath the beverage outlet 4.
■Touch the “special beverages” symbol repeatedly until Americano appears on the display.
■Select settings such as the cup size and strength as described in the section “Preparing coffee drinks”.
■Touch Cto begin dispensing the beverage.
The coffee is brewed and then dispensed
into the cup.
F
Flat White *, Cafe Cortado * or Kleiner Brauner *
Please read through first and take note of the section “Preparation using milk”.
Then:
■Place a cup or glass underneath the beverage outlet 4.
■Touch the “special beverages” symbol repeatedly until Flat White, Cafe Cortado or
Kleiner Brauner appears on the display.
■Select settings such as the cup size and strength as described in the section “Preparing coffee drinks”.
■Touch Cto begin dispensing
the beverage.
The coffee is brewed and runs into the cup or glass. Milk or milk froth is dispensed depending on the beverage. The sequence
of coffee/milk depends on the beverage.
F
Pot function *
■Place a pot underneath the beverage outlet 4.
■Touch the “special beverages” symbol repeatedly until Pot function appears on the display.
■Touch Hto select the desired coffee strength.
■Touch D to select the desired quantity (4 or 6 cups).
■Touch Cto begin dispensing the beverage.
The coffee is brewed and then dispensed
into the pot.
F
Preparation using ground coffee
This fully automatic coffee machine can also be operated using ground coffee
(but not instant coffee).
F
The appliance must be ready for use.
16

■ Place a prewarmed cup underneath the beverage outlet 4.
■ Touch the appropriate symbol to select a black or milky coffee drink.
■ Touch Hrepeatedly until the display shows Ground coffee.
■ Open the ground coffee drawer 12.
■ Place no more than two level measuring Fspoons of ground coffee in the drawer.
■Close the ground coffee drawer 12.
■Touch Cto begin dispensing the
beverage.
The coffee is brewed and then dispensed
into the cup.
F
Adjusting the grind setting
You can use the rotary selector 11 to adjust
the grind setting from coarse to fine.
F
A
■With the grinding unit running, adjust the selector 11 from fine (a: turn anticlockwise) to coarse (b: turn clockwise).
a |
b |
F The new setting will not become apparent until after the second cup of coffee.
Menu en
F For dark roast coffee beans, choose a finer grind, for lighter beans a coarser grind.
Menu
The menu is used for changing individual settings, accessing information and launching processes.
■ Touch Ato open the menu. In the display you will see the various
setting options, the navigation symbols light up. The current setting is marked on the display.
Navigating through the menu:
I = move down B = confirm / store F = go back A = open the menu /
exit from the menu
F Touching Idisplays each setting or selection option in order. After you reach the lowest menu item the topmost one is shown again.
For example:
Setting the coffee temperature to max. :
■Touch A. The menu is opened.
■Touch Irepeatedly until the display shows Coffee temperature.
■Touch B, the display shows e.g. high.
■Touch Irepeatedly until the display shows max.
■Touch Bto store the setting. The display shows the confirmation.
■The menu item Coffee temperature appears.
■Touch Fto exit from the menu.
You can specify the following settings:
Cleaning and care
Starting the special service programmes. You can select Rinse the milk system,
Descale, Clean or calc’nClean.
17

en Menu
■ Use Ito choose the desired programme and touch Bto confirm your choice.
■ Touch Cto begin running Fthe programme.
Info Service programmes
(depending on the type of appliance) Display how many beverages can still be prepared before it will be necessary to run one of the service programmes.
■ Use Ito display Clean after --- cor
Descale after --- c.
■FTouch Fto exit from the display.
Coffee-milk ratio *
The coffee-milk mixing ratio set in the factory can be adjusted in several steps.
■Use Ito select the beverage (only for coffee drinks with milk) and confirm with B.
■Use Ito select the desired mixing ratio (setting of milk content in %) and confirm with B.
■The setting is saved.
Example: If a value of 30% is selected, 30% milk and 70% coffee will be dispensed.
Items marked * are not present in all models.
Favourite
The menu item Favourite can be used to create or change personalised beverages. The number of Favourites depends on the model of the appliance.
■Use Ito select a new or existing profile and confirm with B
■Touch the desired beverage and confirm with B.
■Your selection for the beverage settings appears on the display depending on the beverage, e.g. ml or Coffee-milk ratio.
■Make your settings and confirm with Beach time.
■The beverage is now saved in the profile.
Set cup size
Set up the volume dispensed for each drink and each size of cup. The volumes set up in the factory can be adjusted stepwise.
■Use Ito choose a drink and touch Bto confirm your choice.
■Use Ito choose the desired volume and touch Bto confirm your choice.
The setting is then saved.
Water hardness
Set this to the hardness of the local water supply.
Level 1, 2, 3, 4 or Softening system can be selected. The preset level of water hardness is level 4.
■ Use Ito choose the desired water hardness and touch Bto confirm Fyour choice.
You can check the water hardness using the enclosed test strip or by asking your local water supplier. If a water softening system is installed in the house, please select the Softening system setting.
■Briefly dip the test strip in the water and check the result after one minute.
Level Water hardness
|
German (°dH) |
French (°fH) |
1 |
1-7 |
1-13 |
2 |
8-14 |
14-25 |
3 |
15-21 |
26-38 |
4 |
22-30 |
39-54 |
Automatic shut-down
Setting how long the appliance should wait after the last drink was prepared before it automatically switches itself off.
You can specify values from 15 minutes to 3 hours. The factory setting is 30 minutes.
18
■Use Ito choose the desired interval and touch Bto confirm your choice.
Coffee temperature
Specifying the temperature for coffee drinks and hot water.
You can choose normal, high, or max. The setting applies to all types of drink preparation.
■Use Ito choose the desired temperature level and touch Bto confirm your choice.
Water filter
Specifying whether a water filter should be activated or whether no filter is used. You can choose Activate new filter or
NoFfilter.
Water filters are available from retail outlets or from customer services (see the section
“Accessories”).
F
■Immerse the water filter with the opening facing upwards in a container filled with cold water.
■Gently compress the sides of the filter until no more air bubbles rise to the surface and the water filter rests on the base of the container.
Menu en
■Use the measuring spoon 8 to press the water filter firmly into the water tank 5.
■Fill the water tank with water up to the “max” mark.
■Connect the milk tube 4c to the milk system 4b and the suction pipe 4d.
■Insert the end of the suction pipe 4d into the drip plate 17b.
■Touch Aand use Ito select
Water filter.
■Touch Band use Ito select
Activate new filter.
■Empty the drip tray and re-insert.
■Touch Bto confirm.
Water will now flow through the filter to rinse it.
■ Then empty the drip tray and re-insert.
The appliance is ready for use again.
F
If you do not intend to insert a new filter, select the setting No filter and touch B
to confirm.
F
en Care and daily cleaning
Languages
Setting up the language to be used for display texts.
■Use Ito choose the desired language and touch Bto confirm your choice.
Frost protection
Service programme to prevent frost damage during transportation and storage. This programme completely empties the
appliance.
F
■Touch Cto begin running the programme.
■Remove the water tank; the appliance automatically empties all its pipes and then switches itself off.
■Empty the water tank5 and the drip tray17.
Key tones
Switches on or off the tones that you hear when you touch the control panel.
■Touch Bto confirm your choice.
■Use Ito choose Key tones ON
or Key tones OFF and touch Bto confirm your choice.
Beverage statistics
(depending on the type of appliance) Shows the volume of drinks dispensed since the appliance was taken into service. ■ Touch Fto exit from the display.
Factory settings
Resets your own settings to the condition when delivered.
■Touch Cto clear all your own settings.
Care and daily cleaning
ERisk of electric shock!
Before cleaning the appliance, unplug it from the mains. Never immerse the appliance in water. Do not use a steam cleaner.
■Wipe the outside of the appliance with a soft, damp cloth.
■Clean the control panel with a microfibre cloth.
■Do not use any cleaning agents containing alcohol or spirits.
■Do not use abrasive cloths or cleaning agents.
■Always immediately remove any limescale, or residues of coffee, milk, cleaning or descaling solution. It is possible for corrosion to form underneath such deposits.
■New sponge cloths may contain salts that can cause rust films to form on stainless steel, so such cloths should always be thoroughly rinsed before use.
■Pull the drip tray 17 and coffee grounds container 17c towards the front and remove them. Take off the panel 17a and drip plate 17b. Empty and clean the drip tray and coffee grounds container.
■Wipe out the inside of the appliance (holder, trays) and the drawer for ground coffee (this cannot be removed).
■Remove the float 17d and clean it with a moist cloth (depends on the type of appliance).
LDo not put the following parts in the dishwasher:
Panel of drip tray 17a, cover 4a, brewing unit 14, water tank 5 and aroma cover 10.
MThe following parts may be cleaned in the dishwasher:
Drip tray 17, drip plate 17b, coffee grounds container 17c, measuring spoon 8 and the upper and lower parts of the milk system 4b.
20
F Important: The drip tray 17 and coffee grounds container 17c should be emptied and cleaned every day in order to prevent deposits.
F If the appliance is cold when switched on, or if it is switched off after dispensing coffee, it rinses automatically. The system is therefore self-cleaning.
F Important: If the appliance is not used for a lengthy period (e.g. while you are on holiday), clean the entire appliance thoroughly, including the beverage dispenser 4, milk system 4b, drip tray 17 and brewing unit 14.
Cleaning the milk system
F The milk system 4b is automatically cleaned with a short jet of steam directly after preparing a milk drink. Clean the milk system manually once a week or more frequently if required. For particularly thorough cleaning, the milk system 4b can be automatically rinsed with the programme
“Cleaning the milk system” (see the section “Service programmes – Cleaning the milk system”).
Cleaning by hand
BRisk of burns!
The milk system 4b becomes extremely hot. After use, always let them cool down before you touch them.
Take the milk system 4b apart to clean it: ■ Push the beverage outlet 4 right down.
Care and daily cleaning |
en |
■Take off the cover 4a towards the front and pull off the milk tube.
■Remove the milk system 4b by pulling it straight forward.
■Clean the milk system holder 4e thoroughly to remove any coffee residues.
■Take apart the upper and lower parts of the milk system 4b.
■Separate the milk tube from the suction pipe.
■Clean the individual parts with washingup liquid and a soft cloth.
21

en Service programmes
■ Rinse all parts with clean water and dry Fthem.
■ Reassemble the individual parts.
■Place the milk system 4b back in the appliance from the front, making sure it is straight.
■Replace the cover 4a.
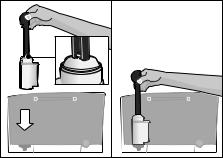
Cleaning the brewing unit (Figure G)
F See also the Quick reference guide in the storage compartment 16.
In addition to the automatic cleaning programme, the brewing unit 14 should be removed regularly for cleaning.
■ Use the main switch J1 to switch the appliance completely off.
■ Open the door 13 to the brewing unit. ■ Slide the red latch 14a on the brewing unit 14 all the way to the left.
■ Press the eject lever 15 right down. The brewing unit will be released.
■ Take hold of the brewing unit 14 by the Frecessed grips and carefully remove it.
■Remove the cover 14b and thoroughly clean the brewing unit 14 under running water.
■Thoroughly clean the strainer of the brewing unit under the water jet.
■Thoroughly clean the inside of the appliance with a moist cloth, removing any coffee residues.
■Allow the brewing unit 14 and the inside of the appliance to dry.
■Replace the cover 14b on the brewing unit and then push the brewing unit 14 back into the appliance until it latches into place.
■Press the eject lever 15 right up.
■Slide the red latch 14a all the way to the right and close the door 13.
Service programmes
F See also the Quick reference guide in the storage compartment 16.
Following prior notification, either
Descaling necessary or Cleaning necessary or
calc’nClean necessary.
appears in display 3 at certain intervals.
22
Service programmes |
en |
Cleaning the milk system
Takes about 1 minute.
Touch Ato open the menu.
■Use Ito choose Cleaning and care and touch Bto confirm your choice.
■Use Ito choose Rinse the milk system and touch Bto confirm your choice.
■Touch Cto begin running the programme.
The display 3 will indicate the progress of the programme:
■Place an empty glass under the beverage outlet 4 and stand the end of the suction pipe 4d in it.
■Touch C. The milk system will now clean itself automatically.
■Then empty the glass and clean the suction pipe 4d.
You should also regularly clean the milk system manually (dishwasher or by hand, see the section “Care and daily cleaning”).
Descaling
Takes about 30 minutes.
The line at the bottom of the display indicates the progress of the descaling
process.
F
■Touch Ato open the menu.
■Use Ito choose Cleaning and care and touch Bto confirm your choice.
■Use Ito choose Descale and touch Bto confirm your choice.
■Touch Cto begin running the
programme.
he display 3 will indicate the progress of the programme:
■ Empty and re-insert the drip tray 17.
F
■Remove the filter and then touch Cagain.
23
en Service programmes
■Pour lukewarm water into the empty water tank 5 up to the “0.5 l” mark and then dissolve one Bosch descaling tablet TCZ8002N in it.
■Touch C.
■Place a container with a capacity of 0.5litre under the beverage outlet 4.
■Place the end of the suction pipe 4d in the container.
■Touch C.
The descaling programme will now run for
about 20 minutes.
F
■Add more descaling solution and then touch Cagain.
■Rinse the water tank 5 and refill it with fresh water up to the “max” mark.
■If you use a filter, replace it now.
■Touch C.
The descaling programme will now run for about 1 minute and rinse the appliance. ■ Empty and re-insert the drip tray 17.
F Important: Wipe over the appliance with a soft damp cloth to ensure that you immediately remove any traces of descaling solution. It is possible for corrosion to form underneath such deposits. New sponge cloths may contain salts that can cause rust films to form on stainless steel, so such cloths should always be thoroughly rinsed before use. Clean the suction pipe 4d of the drinks outlet particularly carefully.
The appliance has finished descaling and is ready for use again.
Cleaning
Takes about 9 minutes.
The line at the bottom of the display indicates the progress of the descaling process.
■Touch Ato open the menu.
■Use Ito choose Cleaning and care and touch Bto confirm your choice.
■Use Ito choose Clean and touch Bto confirm your choice.
■Touch Cto begin running the programme.
The display 3 will indicate the progress of the programme:
■Empty and re-insert the drip tray 17.
■Open the ground coffee drawer 12.
■Drop one Bosch cleaning tablet in the drawer 12 and close it.
■Touch C.
The cleaning programme will now run for about 7 minutes.
■ Empty and re-insert the drip tray 17. The appliance has finished cleaning and is ready for use again.
calc‘nClean
Takes about 43 minutes. calc’nClean combines the functions Descale and Clean.
If both programmes are due to be carried out close together the fully automatic coffee machine will automatically suggest this service programme.
The line at the bottom of the display indicates the progress of the descaling
process.
F
■Touch Ato open the menu.
■Use Ito choose Cleaning and care and touch Bto confirm your choice.
■Use Ito choose calc’nClean and touch Bto confirm your choice.
■Touch Cto begin running the
programme.
The display 3 will indicate the progress of the programme:
■ Empty and re-insert the drip tray 17. ■ Open the ground coffee drawer 12. ■ Drop one Bosch cleaning tablet in the drawer 12 and close it.
■ Touch C.
F
24

■Remove the filter and then touch Cagain.
■Pour lukewarm water into the empty water tank 5 up to the “0.5 l” mark and then dissolve one Bosch descaling tablet TCZ8002N in it.
■Touch C.
■Place a container with a capacity of 1 litre under the beverage outlet4.
■Place the end of the suction pipe 4d in the container.
■Touch C.
The descaling programme will now run for
about 28 minutes.
F
■Add more descaling solution and then touch Cagain.
■Rinse the water tank 5 and refill it with fresh water up to the “max” mark.
■If you use a filter, replace it now.
■Touch C.
The descaling programme will now run for about one more minute, and then the cleaning programme will run for about 7 minutes and rinse the appliance.
■ Empty and re-insert the drip tray 17.
F Important: Wipe over the appliance with a soft damp cloth to ensure that you immediately remove any traces of descaling solution. It is possible for corrosion to form underneath such deposits. New sponge cloths may contain salts that can cause rust films to form on stainless steel, so such cloths should always be thoroughly rinsed before use. Clean the suction pipe 4d of the drinks outlet particularly carefully.
The appliance has finished descaling and is
ready for use again.
F
Tips on energy saving |
en |
■Rinse the water tank 5 and refill it with fresh water up to the “max” mark.
■Touch C.
The appliance will be rinsed for approx. 2 minutes for safety reasons.
■ Empty and re-insert the drip tray 17. The aborted service programme must be restarted.
Tips on energy saving
■When the fully automatic coffee machine is not in use, use the mains switch J1 on the front of the appliance to switch it off.
■In the menu, set the Automatic shut-down period to 15 minutes.
■If possible, do not interrupt the dispensing of coffee or milk froth. Stopping a process prematurely results in higher energy consumption and the drip tray fills up more quickly.
■Descale the appliance regularly to avoid a build-up of limescale. Limescale residues cause higher energy consumption.
Frost protection
F Caution!
To prevent frost damage during transportation and storage, completely empty the appliance beforehand.
See the section “Menu – Frost protection”.
Storing accessories
The fully automatic coffee machine has special compartments to hold the measuring spoon and the Quick reference guide.
■To store the measuring spoon 8, lift off the water tank 5 and place the spoon in the preformed recess 7.
■To store the Quick reference guide, open the door to the brewing unit 13 and insert the guide into the space provided 16.
25

en Accessories
Accessories
The following accessories are available from retailers or from customer service:
Accessories |
Order number |
|
Retail / |
|
Customer service |
Cleaning tablets |
TCZ8001A / 00312096 |
Descaling tablets |
TCZ8002A / 00312093 |
Water filter |
TCZ7003 / 00575491 |
Care set |
TCZ8004A / 00312107 |
Milk container with TCZ8009N / 00576165 “FreshLock” lid
Disposal
Dispose of packaging in an environ
J mentallyfriendly manner. This appliance is labelled in accordance with European Directive 2012/19/EU concerning used electrical and electronic appliances (waste electrical and electronic equipment – WEEE). The guideline determines the frame work for the return and recycling
of used appliances as applicable throughout the EU. Please ask your specialist retailer about current disposal facilities.
Guarantee
The guarantee conditions for this appliance are as defined by our representative in the country in which it is sold. Details regarding these conditions can be obtained from the dealer from whom the appliance was purchased. The bill of sale or receipt must be produced when making any claim under the terms of this guarantee.
Changes reserved.
26

Simple troubleshooting en
Simple troubleshooting
Problem |
Cause |
Remedial action |
The appliance no longer |
Fault in the appliance |
Pull out the mains plug, wait |
responds. |
|
10 seconds, plug it back in. |
The grinder will not start. |
The appliance is too hot. |
Disconnect the appliance from |
|
|
the mains and leave to cool for |
|
|
one hour. |
Coffee or milk froth quality |
Build-up of limescale in the |
Descale the appliance |
varies widely. |
appliance. |
according to the instructions. |
Milk froth quality varies |
The quality of the milk |
Optimise the result through the |
widely |
froth depends on the type |
selection of the type of milk or |
|
of milk or the plant-based |
plant-based drink. |
|
alternative used. |
|
No hot water dispensed. |
The milk system or the |
Clean the milk system or the |
|
intake of the milk system is |
intake (see the section “Care |
|
soiled. |
and daily cleaning”). |
Too little milk froth, none |
The milk system or the |
Clean the milk system or the |
at all, or the milk system |
intake of the milk system is |
intake (see the section “Care |
is not taking in any milk. |
soiled. |
and daily cleaning”). |
|
Milk not suitable. |
Do not use milk that has been |
|
|
boiled. Use cold milk with a fat |
|
|
content of at least 1.5%. |
|
The milk system is assem- |
Moisten the upper and lower |
|
bled incorrectly. |
sections and fit them together. |
|
Build-up of limescale in the |
Descale the appliance |
|
appliance. |
according to the instructions. |
The milk/blended milk |
The milk used is too cold. |
Use lukewarm milk. |
drinks are too cold. |
|
|
The personally selected per-cup quantity is
not reached. Coffee dispensing slows to a trickle or stops completely.
Coffee is ground too finely. |
Adjust the grinding level to a |
Pre-ground coffee is too |
coarser setting. Use a coarser |
fine. |
ground coffee. |
Heavy build-up of lime- |
Descale the appliance |
scale in the appliance. |
according to the instructions. |
Coffee has no “crema”. |
Unsuitable type of coffee. |
Use a type of coffee with a |
|
|
higher proportion of robusta |
|
|
beans. |
|
The beans are no longer |
Use fresh beans. |
|
fresh. |
|
|
The grinding setting is not |
Adjust the grinding unit to a finer |
|
suitable for the beans. |
setting. |
If you are unable to solve the problem, always call the hotline!
You will find the telephone numbers at the back of these instructions.
27

en |
Simple troubleshooting |
|
|
|
|
|
|
Problem |
Cause |
Remedial action |
|
Coffee is too “acidic”. |
The grinding setting is too |
Adjust the grinding unit to a finer |
|
|
|
coarse or the pre-ground |
setting or use finer pre-ground |
|
|
coffee is too coarse. |
coffee. |
|
|
Unsuitable type of coffee. |
Use a darker roast. |
Coffee is too “bitter”. |
The grinding setting is |
|
too fine or the pre-ground |
|
coffee is too fine. |
Adjust the grinding unit to a coarser setting or use coarser pre-ground coffee.
Unsuitable type of coffee. Change the type of coffee.
The coffee tastes “burnt”. The brewing temperature is Reduce the temperature, see too high the section “Menu – Coffee
temperature”.
The grinding setting is |
Adjust the grinding unit to a |
too fine or the pre-ground |
coarser setting or use coarser |
coffee is too fine. |
pre-ground coffee. |
Unsuitable type of coffee. |
Change the type of coffee. |
The appliance is not |
Air in the water filter. |
dispensing drinks |
|
Dip the water filter in water until no more air bubbles escape, then replace the filter.
The appliance is not |
Residues of limescale |
dispensing drinks |
remover are blocking the |
|
water tank. |
Remove the water tank and clean thoroughly.
The water filter does not |
The water filter is not fitted |
Firmly press the water filter |
stay in position in the |
correctly. |
straight down into the tank |
water tank. |
|
connection. |
The coffee grounds are |
The grinding setting is too |
Adjust the grinding unit to a |
not compact and are too |
fine or too coarse, or not |
coarser or finer setting, or use |
wet. |
enough ground coffee has |
2 level measuring spoons of |
|
been used. |
ground coffee. |
Water dripped onto the |
Drip tray removed too |
Wait a few seconds after the |
inner floor of the appli- |
early. |
last drink was dispensed before |
ance when the drip tray |
|
removing the drip tray. |
was removed. |
|
|
Display shows Please |
Beans are not falling into |
Gently tap the bean container. |
refill bean container |
the grinding unit (beans too |
Possibly change the type of |
although the container is |
oily). |
coffee. When the bean container |
already full, or the grinder |
|
is empty, wipe it with a dry cloth. |
is not grinding any beans. |
|
|
Display |
Emptying is not detected |
When the appliance is switched |
Empty drip tray |
when the appliance is |
on, remove and re-insert the |
despite empty drip tray. |
switched off. |
drip tray. |
|
The drip tray is soiled. |
Clean the drip tray thoroughly. |
If you are unable to solve the problem, always call the hotline!
You will find the telephone numbers at the back of these instructions.
28

|
|
Simple troubleshooting |
en |
|
|
|
|
Problem |
Cause |
Remedial action |
|
Display |
Water tank inserted |
Insert water tank correctly. |
|
Fill with uncarbonated |
wrongly. |
|
|
water or change filter |
Carbonated water in the |
Fill the water tank with fresh tap |
|
|
water tank. |
water. |
|
|
Float is stuck in the water |
Remove the tank and clean |
|
|
tank. |
thoroughly. |
|
|
New water filter not |
Rinse the water filter according |
|
|
rinsed according to the |
to the instructions and switch on. |
|
|
instructions. |
|
|
Air in the water filter.
Dip the water filter in water until no more air bubbles escape, then replace the filter.
|
Water filter is old. |
Insert a new water filter. |
Very frequent display that |
Water is too hard. |
Insert a water filter and activate |
descaling is necessary. |
|
(see chapter “Menu – Water |
|
|
filter”). |
|
Beverage dispenser |
Clean the beverage dispenser |
|
blocked. |
and the milk system intake (see |
|
|
the section “Care and daily |
|
|
cleaning”). |
Display |
Brewing unit is soiled. |
Clean the brewing unit. |
Please clean brewing unit, |
Too much pre-ground |
Clean the brewing unit. Place |
then replace it |
coffee in the brewing unit. |
no more than 2 level measuring |
|
|
spoons of ground coffee in the |
|
|
drawer. |
|
The mechanism of the |
Clean the brewing unit (see |
|
brewing unit is stiff. |
the section “Care and daily |
|
|
cleaning”). |
Display |
Brewing unit is soiled. |
Clean the brewing unit. |
Restart appliance |
|
|
Display |
Incorrect or insufficient |
Perform descaling programme |
Appliance not sufficiently |
descaler or excessive |
again |
descaled. Repeat the |
scale on appliance. |
|
process |
|
|
Display |
Appliance is too hot. |
Switch off appliance for 30 |
Leave the appliance to cool |
|
minutes. |
down |
|
|
Display |
The appliance has a fault. |
Please contact the hotline. |
Error |
|
|
Please contact the hotline |
|
|
If you are unable to solve the problem, always call the hotline!
You will find the telephone numbers at the back of these instructions.
29

en Technical specifications
Technical specifications
Power connection (voltage – frequency) |
220-240 V – 50/60 Hz |
Power rating |
1500 W |
Maximum static pump pressure |
15 bar (TIS654..) |
|
19 bar (TIS656..) |
Maximum water tank capacity (without filter) |
1.7 l |
Maximum capacity of the coffee bean container |
~300 g |
Length of power cable |
100 cm |
Dimensions (H x B x D) |
385 x 280 x 468 mm |
Weight, empty |
10-12 kg |
Type of grinding unit |
Ceramic |
|
|
30
 Loading...