


AXCL10M
Axis AXCL10M, AXCL06M, AXCL06D, AXCL10D, AX824RHD User Manual
...
COMBI OVENS
CONVECTION OVENS
FOURS COMBINÉS
FOURS À CONVECTION
Instruction Manual
Manuel d'instructions
50LIB032

ATTENTION
Read this instruction manual carefully and fully understand the information
contained in it.
Such information is provided for the purpose of carrying out the installation,
use, maintenance and cleaning phases in a proper manner.
Operations carried out incorrectly may cause damages and injuries
(including serious ones) to people, animals and/or property.
ATTENTION
For your own safety, do not use or store any type of flammable substance near
the appliance, during both the installation phase and the operating phase.
EN

DELIVERY OF THE APPLIANCE
The oven you have purchased has been thoroughly tested for the purpose of guaranteeing the
highest quality.
When you receive the oven, check carefully that it has not been damaged during transport, by
carefully verifying the intactness of the packing in which the oven was delivered.
In case the packing shows significant damage, immediately contact the courier and the retailer
where you purchased the oven, indicating the name of the product and its serial number and
enclosing photographic evidence.
Keep all the documentation supplied with the oven, so as to ensure easy referral to information
about maintenance, use and cleaning of the appliance itself.
Prior to installing and using the appliance, all information contained in this instruction manual must
have been fully understood.
INSTALLATION OPERATIONS
To ensure proper installation, all operations need to be carried out by authorised and qualified
personnel, according to the instructions provided in this manual and in compliance with regulations
in force in the of installation.
Failure to comply with said instructions may cause damages and injuries (including serious
ones) to people and/or property.
TRANSPORTING THE DEVICE
The appliance you purchased may be quite heavy.
In order to prevent any type of damage to installation personnel, always use a
suitable number of qualified workers and/or equipment (forklift truck) when
handling the device.
Use special safety gloves when handling, positioning and installing the
appliance.
Failure to use such safety equipment may cause injury to installation
personnel.
Make sure the passageway for the transport and the entrance door to the installation room are
large enough.
Do not drag or tilt the appliance in order to move it. Instead, lift it up straight from the ground,
moving it horizontally.
Prior to handling the appliance, always make sure that there are no cutting and/or delicate
edges that may be damaged.

UNPACKING THE DEVICE
- Carefully remove the appliance from its packing Keep the cardboard box and all packing
material until the appliance has been completely checked and tested.
- Carefully read all information contained in this manual prior to installing and using the
appliance.
Operations other than the ones indicated in this manual may cause damages (including
serious ones) to people, animals and/or property, in addition to causing the appliance
warranty to be forfeited and relieving the manufacturing company from any and all
responsibility.
- The instruction manual is considered integral part of the appliance, hence it must be kept
for future reference.
- Remove all protective film packing material and any accessories from the appliance prior to
plugging it into the mains.
Store any accessories in a suitable place.
POSITIONING THE DEVICE
- The place of installation must be indoors and well ventilated.
The oven is not suited for outdoor installation.
- The ambient temperature of the place of installation of the appliance must be at least +4° C.
- Make sure the installation surface (table) is suited to withstand the weight of the appliance
(also consider the additional weight when the oven is completely full).
- Make sure that the place intended for the oven installation is such as to allow the oven door
to be opened all the way, for the purpose of working safely.
- The installation surface of the appliance must be made of fireproof material.
- The appliance must be positioned on top of a flat surface.
Check the flatness of the appliance once it is positioned, using the special measuring
instruments.
The appliance is equipped with adjustable feet: in case the support surface is not flat, they
can be unscrewed or screwed to adjust the oven height.
- It is advisable to position the appliance in such a way as to make it easy to carry out any
maintenance and/or cleaning on the appliance itself.
- Do not obstruct or reduce the air flow rate of the natural ventilation openings
provided on the oven.
These openings have been especially provided to allow cooling of the electrical
components of the oven.
Failure to comply with this instruction may cause the internal oven components to break.
Failure to comply with this instruction shall cause the warranty on the appliance to
be forfeited and shall relieve the manufacturing company from any and all
responsibility.
- In case maintenance and/or cleaning operations require the appliance to be moved, at the
end of such operations be especially careful to correctly reposition the appliance, according
to the criteria provided above.
- Do not place the appliance near flammable materials or containers of flammable materials
(walls, furniture, screens, gas canisters) as this can create a fire hazard.
- The oven is not suited for flush mounting, and its positioning has to comply with the
minimum distances from the walls of the installation room (there is a label affixed to the
appliance that specifies such distances:)
non-combustible walls: 50 mm from the sides and back of the oven.
combustible walls: 500 mm from the sides and 700 mm from the back of the oven.
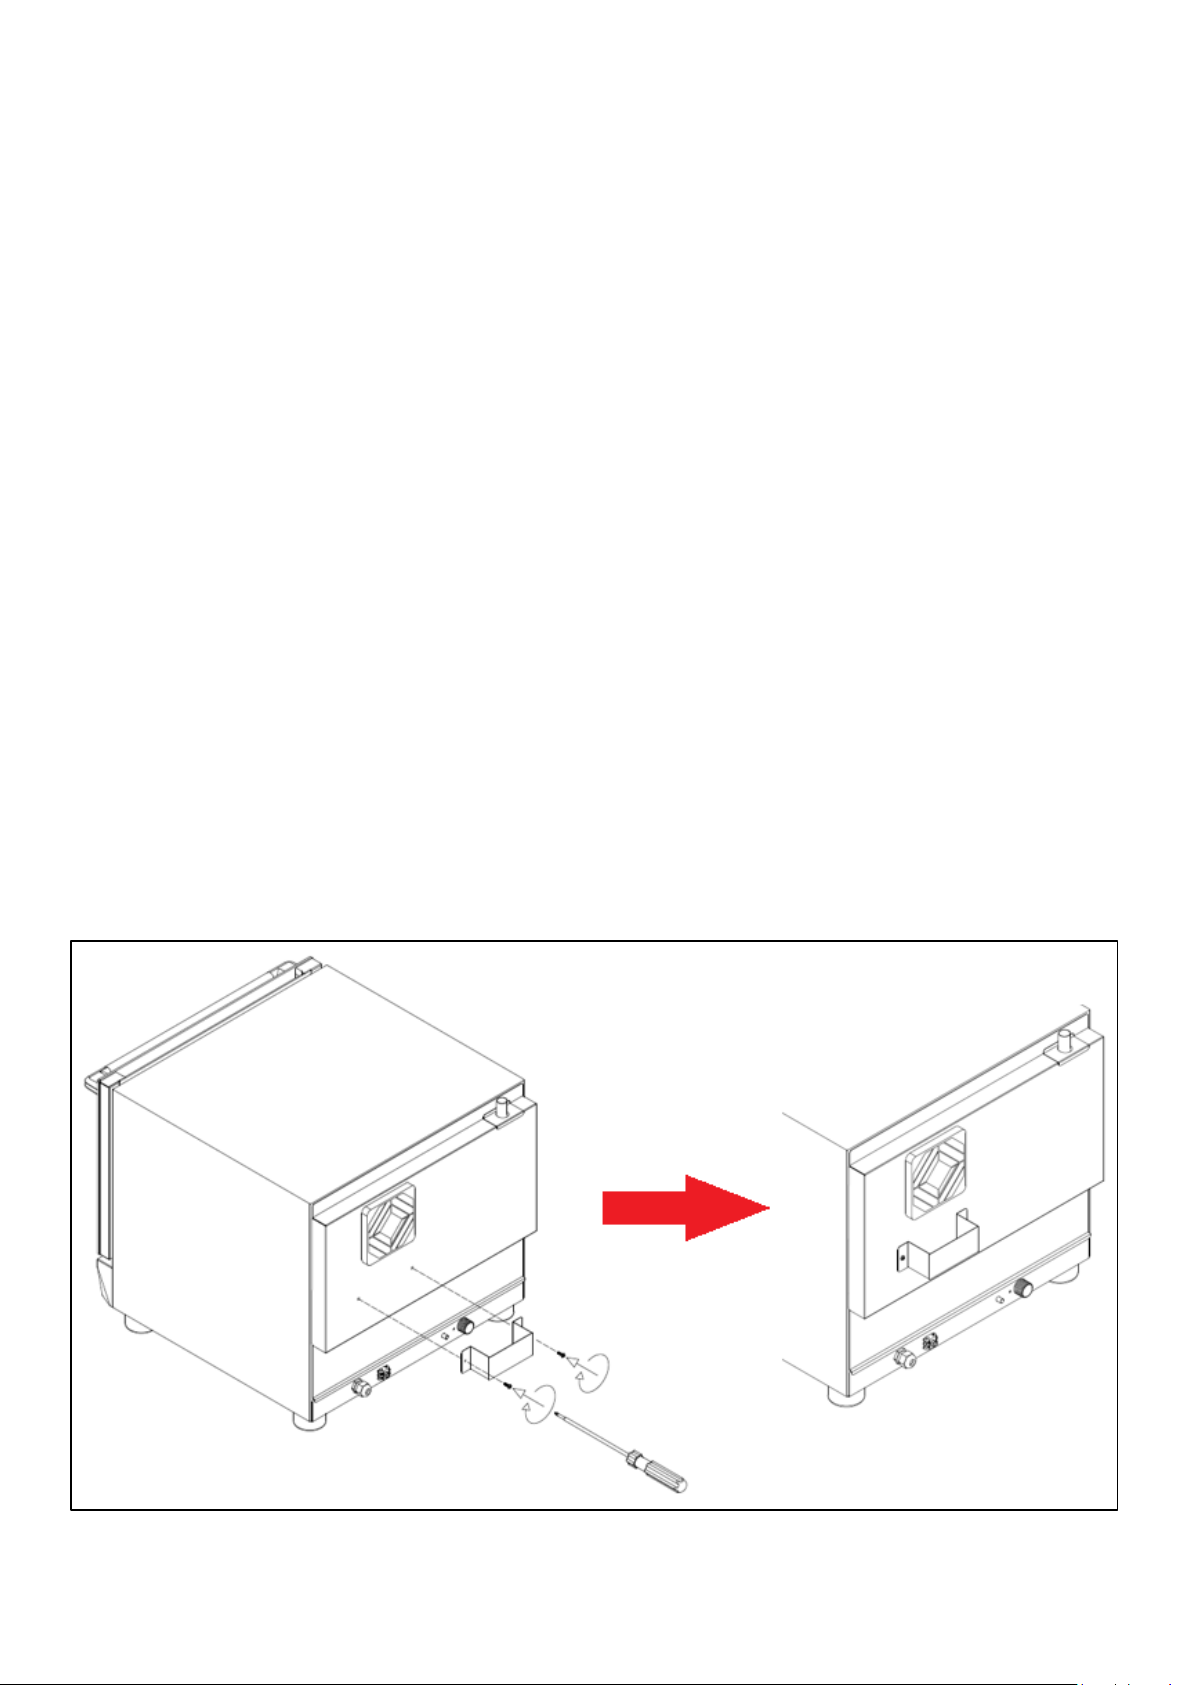
FOR THE PURPOSE OF KEEPING A PROPER DISTANCE FROM THE
SURROUNDING WALLS, THE SPECIAL SPACER MUST BE MANDATORILY
INSTALLED.
SUPPLIED TOGETHER WITH THE OVEN, THE SPACER MUST BE SCREWED
TO THE REAR PANEL BY MEANS OF THE 2 SELF-THREADING SCREWS,
ALREADY PRESENT ON THE REAR PANEL OF THE OVEN AND LOCATED
IMMEDIATELY BELOW THE COOLING MOTOR PROTECTION, WHICH IS
BLACK IN COLOUR.
(SEE ILLUSTRATIVE IMAGE PROVIDED HERE BELOW).
IN ADDITION TO CAUSING THE PRODUCT WARRANTY TO BE FORFEITED,
FAILURE TO INSTALL THE SPACER PREVENTS SAFE OPERATION OF THE
OVEN.
THIS TYPE OF WORKING CONDITIONS MAY CAUSE DAMAGES (INCLUDING
SERIOUS ONES) TO PEOPLE, ANIMALS AND/OR PROPERTY.
THEREFORE, YOU ARE KINDLY REQUESTED TO COMPLY WITH THE
INSTALLATION INSTRUCTIONS CONTAINED IN THIS MANUAL.
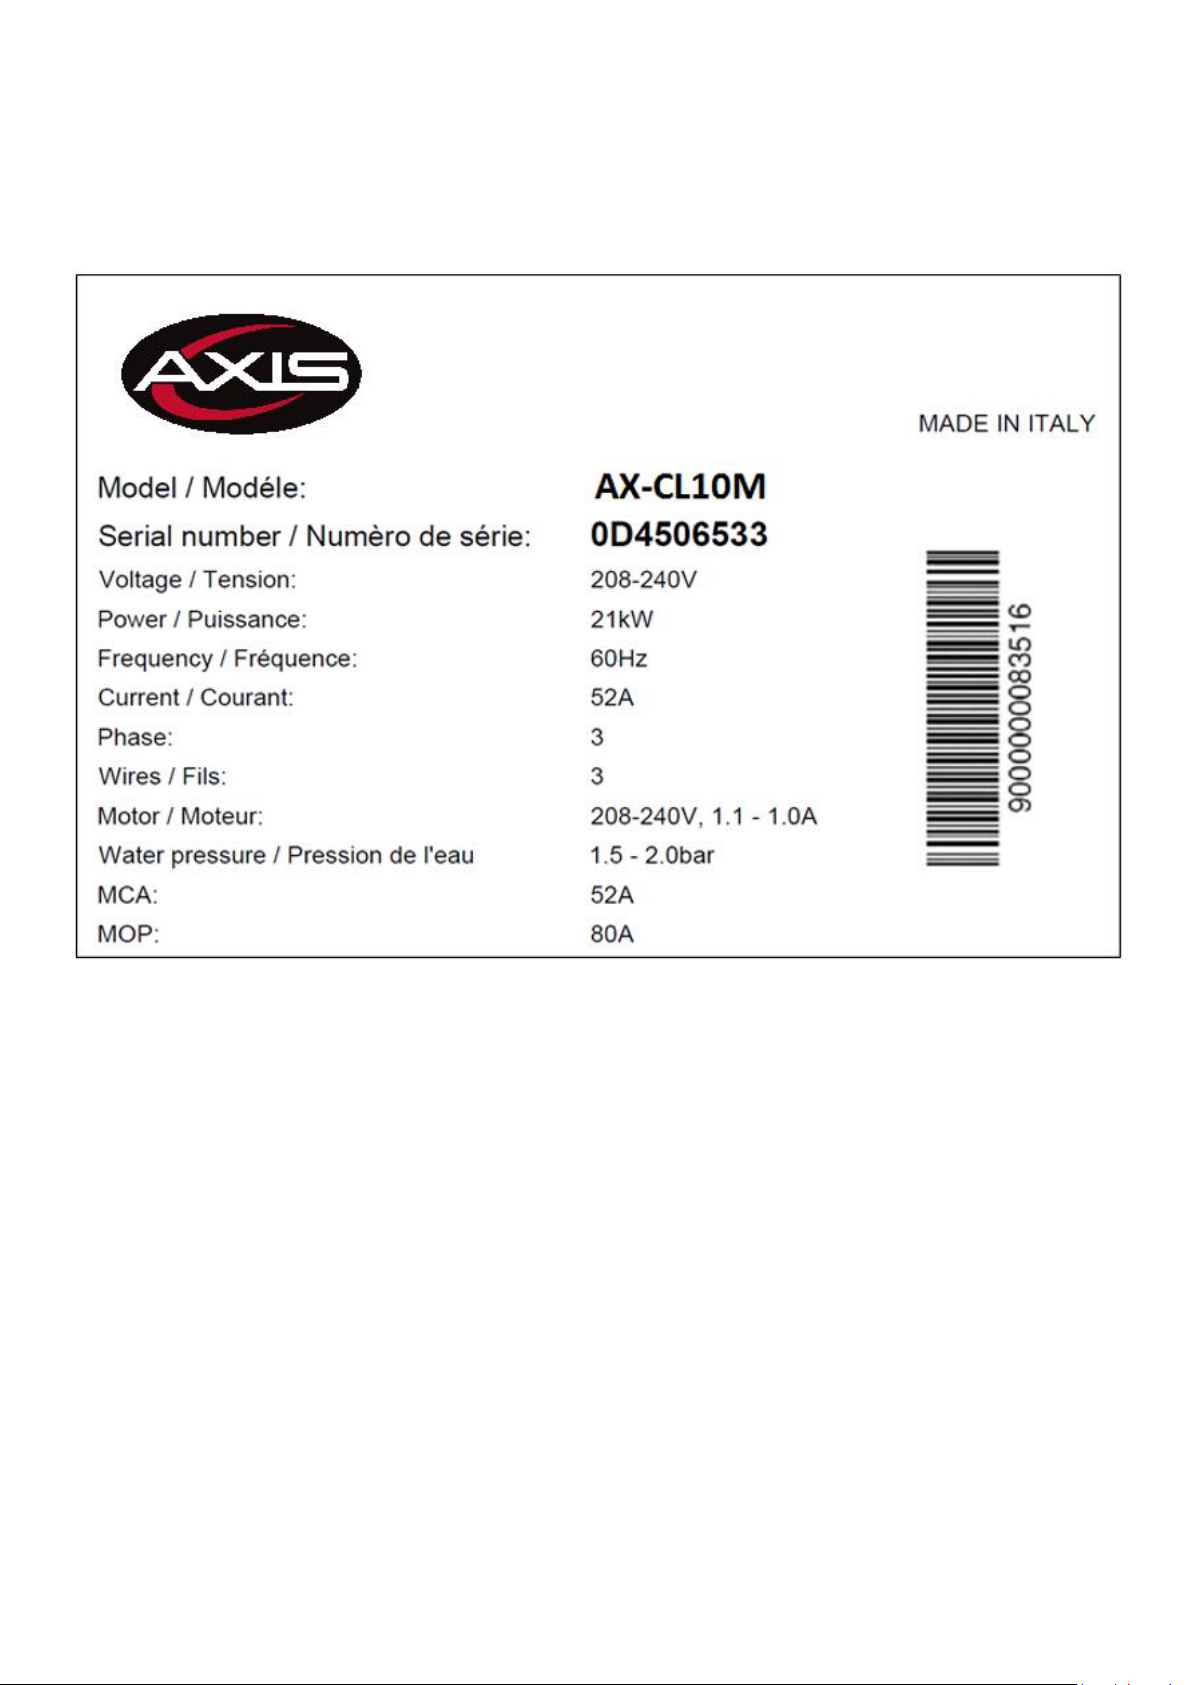
READING THE TECHNICAL DATA PLATE - example
Before you proceed with the subsequent installation operations, carefully read the technical data
label affixed on the right side of the oven (looking at it from the front).

ELECTRICAL CONNECTION – VALID FOR LIDO/GIUDECCA OVENS
ATTENTION
All electrical connections must be carried out by qualified and authorised
personnel, in compliance with the laws in force.
Operations carried out incorrectly may cause damages and injuries
(including serious ones) to people, animals and/or property.
Read this instruction manual carefully and fully understand the information
contained in it prior to carrying out the installation.
The power supply must comply with the voltage and frequency specified in the
technical data plate.
The technical data label indicated information useful for wiring the appliance;
consequently, it must not be removed, ruined or altered in any way.
The appliance must be connected to an earthing system, in compliance local
regulations in force.
In the absence of regulations governing the earthing of the device, please refer
to the “National Electrical Code ANSI/NFPA No.70”.
In Canada, all electrical connections must be performed according to
standards CSA C22.1
ATTENTION
To prevent any damages (including serious ones) to people, animals and/or
property, unplug the appliance from the mains prior to carrying out any type of
maintenance, installation and/or cleaning operations.
The terminal strip is positioned on the right side of the appliance (looking at it from the front).
To access the terminal strip, you need to remove the side panel of the oven, unscrewing the 2
screws located in the oven base (directly underneath the side panel).
If necessary, also remove the back panel of the oven to facilitate the wiring operations, by
unscrewing the self-threading screws the secure this panel.
On the rear panel of the oven, there is a wiring label you can refer to, since it illustrates the proper
wiring to be carried out on the terminal strip.
Carefully follow the wiring instructions provided on the label.
Prior to using the oven, make sure that all cables and connectors are properly secured, since they
can become loose during transport.
After having completed all the connections (electrical and water), check once again the proper
fixing of all electrical connections.
WATER CONNECTION – inlet water (for preset ovens)
ATTENTION
Using a type of water with unsuitable characteristics may cause considerable
damage to the heating elements, to the fans and to the cooking chamber of the
oven.
It is recommended to use a type of water with suitable characteristics, as
indicated in the paragraph below.
To supply the oven, always use cold drinking water, having the following characteristics:
Free chlorine Less than 0.1ppm (mg / L)
Hardness 30-70ppm
Chloride Less than 30ppm (mg / L)
pH 7.0 to 8.5
Silica Less than 12ppm (mg / L)
Total dissolved solids (tds) 50-125ppm
The owner of the oven is always and solely responsible for checking the quality of the
water used-
Any damages caused by poor quality water shall also be ascribable to the owner of the
oven.
Any damages caused by failure to comply with the water characteristics provided above
are not covered by the Manufacturer’s warranty.
Any operation aimed at verifying the quality of the water and any treatments carried out for the
purpose of making it qualitatively acceptable shall be the full responsibility of the owner of the
oven.
Install a tap between the appliance and the water supply of the installation room so that you can
close the water inlet in manual mode.
Prior to carrying out the water connection to the appliance, allow some water to flow out so as to
make sure there is no dirt or impurities in the piping.
The water connection was always be carried out by hooking up the water inlet pipe to the
threaded fitting G¾”.
The inlet water must have a pressure value included between 150 kPa (1.5 bar) and 200 kPa (2.0
bar).
To prevent the water piping from bursting, it is recommended to close the water tap when
the water is not being used.

WATER CONNECTION – water discharge (for preset ovens)
ATTENTION
Depending on how the oven is used, the liquids flowing out of the water
discharge may reach extremely high temperature values.
The reference standard does not allow values exceeding 140°F (60°C).
Therefore, in case the measured temperature value of the discharged fluids
exceed such limit, a suitable cooling system will need to be installed, in
compliance with the provisions of the Standard.
The appliance must be installed using a suitable anti-backflow system, in accordance with
federal, state and local standards.
The drain pipe is in the rear part of the oven and is to be connected with a rigid or flexible pipe and
directed to an open or siphoned drain. Its diameter must not be less than that of the discharge
coupling of the oven.
It is recommended to insert a suitable siphon between the oven and the mains drain water system
in order to prevent vapours from coming out of the oven and bad odours from entering from the
mains drain water.
Avoid bends on the flexible pipes and rigid pipe elbows along the entire drain.
The pipe must have a minimum 5% gradient along the section in order to ensure adequate
outflow.
The oven must have its own connection to the drains.
If several pieces of equipment or appliances are connected to the same pipe, make sure its size
enables normal outflow without any issues.
Local regulations and standards must be complied with.
Once the discharge water connection of the oven has been carried out,
verify its efficacy in a suitable manner, in order to identify any leaks that
may cause damages (including serious ones) to people, animals and/or
property.
USE OPERATIONS
ATTENTION
Read this instruction manual carefully and fully understand the information
contained in it.
Such information is provided for the purpose of carrying out the installation,
use, maintenance and cleaning phases in a proper manner.
Operations carried out incorrectly may cause damages and injuries
(including serious ones) to people, animals and/or property.
- The appliance was designed to cook food in closed environments and must be used solely
for this purpose. Any other use must be avoided since it is considered improper and
dangerous.
- The device is intended for professional use and should be used by qualified personnel only.
- People with reduced physical or mental abilities or unskilled and untrained people should
not use the oven, unless they are supervised or have been instructed on how to operate the
appliance by people in charge of their safety.
- Do not leave the appliance unattended in the presence of children, and make sure they do
not have access to the appliance or use it as a toy.
- It is not recommended to position the appliance near sources of heat.
- Do not leave easily flammable material next to the appliance for any reason: it can cause a
fire.
- The food containers, accessories or other items can reach high temperatures during and
after cooking. Be careful when handling in order to prevent burns.
Only touch them when using heat-protection equipment such as thermal clothing.
Danger of burns!
- Be careful when opening the oven door: danger of burns from high-temperature
steam coming out.
- The oven is equipped with a safety system that automatically disables the operation of
heating elements, fans and steam supply when the door is opened.
- In the case of cooking using the core probe, use caution when removing the trays from the
oven: make sure the probe is extracted from the food being cooked and that it does not get
in the way.
- Do not place flammable objects or alcohol-based foods in the oven: they cause
combustion and fire that could give rise to explosive phenomena.
- Do not put salt on food inside the cooking chamber of the oven.
This can damage the cooking chamber. If it cannot be avoided, clean the appliance as soon
as possible.
- Use your fingers to adjust the control panel options. Using any other object can damage the
appliance and thus cause the warranty to be forfeited.

FIRST USE – TESTING PROCEDURE
Prior to starting the oven for the first time, make sure there are no plastic bags, instruction
manuals, informative material or plastic film inside the cooking chamber.
Make sure the tray support structures positioned inside the cooking chamber are well secured to
the chamber walls.
The oven must be tested by carrying out a trial cooking session to check that the appliance is
working properly and that there are no problems or malfunctions.
Following the setting instructions provided in the following pages, turn o the oven and set a
cooking cycle with the temperature at 300°F (approx. 150°C), time at 10 min. and average steam
(50%), (steam for preset ovens).
Check every item in the list below:
1) The cooking chamber light is ON.
2) The oven stops (heating elements, steam, motors) when the door is opened
and resumes operation when the door is closed again.
3) On reaching the set temperature, the cooking temperature thermostat (or the probe in case
of oven with digital control) turns the heating elements off.
4) The fans of the motors reverse their direction of rotation every 2 minutes. The steam turns
off briefly for 20 seconds during the motor stop, necessary for reversal of the direction of
rotation.
5) The cooking chamber fans spin in the same direction.
6) Check that water is being discharged towards the fan from the steam inlet ducts
into the cooking chamber (for preset oven models).
While using the oven and at the end of a cooking process, the oven walls may exceed, depending
on how the oven is used, a temperature of 140°F (60°C).
It is therefore recommended to refrain from touching the areas marked with the special “hot
surface” label.
FIRST USE – FIRST CLEANING OF THE COOKING CHAMBER
Before cleaning, disconnect the device from the power supply and wait until it has cooled
down completely.
The cooking chamber must not have any solvent or detergent residue.
They should be removed by rinsing thoroughly using a damp cloth and using appropriate eye, mouth
and hand protection.
Possible danger of corrosion.
Heat the empty oven to 400°F for about 30 minutes in order to eliminate any odour from the
thermal insulation.
Clean the walls of the cooking chamber using hot water and soap, then rinse; never use
aggressive or acidic products.

CONTROL PANELS – MECHANICAL FOR CONVECTION OVENS
TIMER ADJUSTMENT
When the manual option is selected, the oven always stays on until the operator turns it off.
When a certain value is selected, the oven stays on for the set amount of time (maximum value
120 minutes).
TEMPERATURE ADJUSTMENT
This knob can be used to select the desired cooking temperature, from a minimum value of 200°F
up to a “MAX” value (corresponding to approximately 480-500°F)
THERMOSTAT LIGHT
This light is on when the oven heating elements are working and therefore the internal
temperature of the cooking chamber is lower than the value set by means of the thermostat knob.
When the light goes off it means that the heat is off and that the cooking chamber has reached the
set temperature.
STEAM BUTTON (for preset ovens)
This button activates the steam function.
The steam stays on during the entire time the button is pressed.

CONTROL PANELS – DIGITAL FOR CONVECTION OVENS
SWITCHING ON THE OVEN
When the oven is powered on, the control panel will be in standby mode. To access the oven
features, press . The upper display will show the actual temperature of the cooking chamber.
From now on it is possible to proceed with the settings of a manual cooking or with a program.
MANUAL COOKING
To create a cooking program in manual mode, proceed with the setting of the following necessary
values:
- Temperature
- Timer
- Steam (optional)
TEMPERATURE
To set the desired temperature, press : the temperature display will show the set value in
flashing mode.
Afterwards, use buttons or to choose the desired parameters.
Press once again to confirm: the display will now show the actual value of the temperature
inside the cooking chamber.
The values can be set between 86°F (30°C) to 500°F (260°C).
During the cooking, the upper display shows the actual temperature inside the chamber; press
to display the set temperature instead.
is lit up with a red LED when heating is activated, and the heating elements are used.
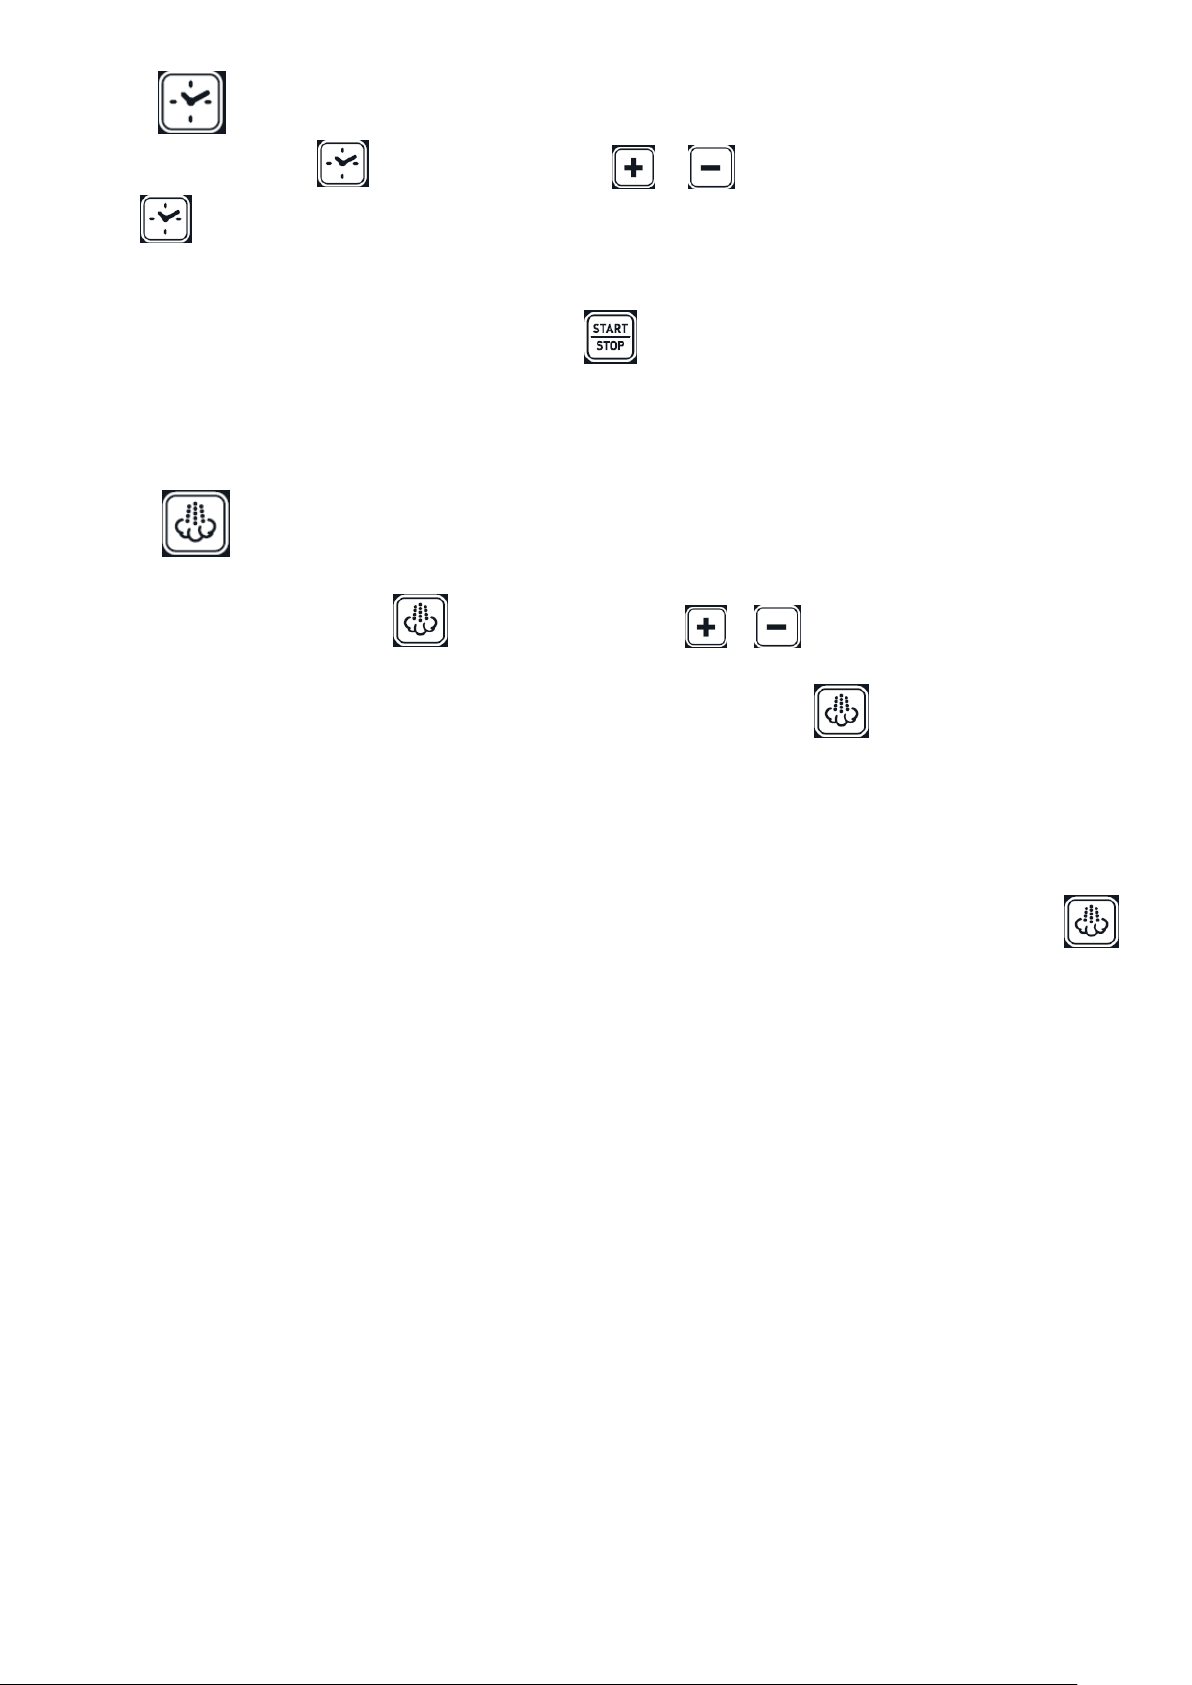
TIMER
To set the timer, press and then use buttons or .
Press to confirm the set time.
The time setting range goes from “---” (infinite) to 999 minutes.
By choosing an infinite cooking time, the oven will keep on working with the set parameters until the
cooking is stopped in manual mode by pressing .
During a cooking for an infinite time, the lower display shows the time of use in minutes in order to
determine ho long the oven has been working, whereas when cooking with a set time, the lower
display shows the time countdown to the automatic stop.
STEAM
This feature can be used to set a steam value during manual or program cooking.
To set the steam value, press and then use buttons or .
The range of humidity that can be set is as follows: OFF – 20% - 40% - 60% - 80% - 100%.
During programming the values flash on the display, and by pressing again this value will be
saved.
During the cooking, as steam is generated in the cooking chamber, the LED adjacent to the steam
button lights up.
In case of steams with motor rotation reversal system, the steam supply stops momentarily, for the
entire duration of the reversal.
The set of humidification is allowed only before running a cycle. During the cooking, pressing
generates vapour in the cooking chamber for the entire time it is pressed.
AUTOMATIC PREHEATING
The pre-heating function is automatic in both manual cooking and program cooking.
It consists in preheating the oven to a temperature that is 20% higher than the temperature set in
the first cooking phase. This function is necessary to compensate for the loss of heat when opening
the door to put food in.
When a program starts, the oven first starts this preheat cycle (the upper display shows “PRE” while
on the lower display you can see the actual temperature of the cooking chamber). At the end of the
program, a beep is emitted which stops only when the door is opened.
The previously selected program starts automatically when the door is closed.
The beeping can be stopped by pressing any button.
During the pre-heating phase, it is not possible to use steam.
After the opening and subsequent closing of the oven door, the cooking previously set is started
automatically.
 Loading...