


AXIS Q6128-E PTZ Network Camera
User Manual
About this Document
This manual is intended for administrators and users of
AXIS Q6128-E PTZ Network Camera, and is applicable to firmware 5.85 and later. It includes instructions for using and managing the product on your network. Previous experience of networking will be of use when using this product. Some knowledge of UNIX or Linux-based systems may also be useful when developing shell scripts and applications. Later versions of this document will be posted at www.axis.com. See also the product’s online help, available through the web-based interface.
Legal Considerations
Video surveillance can be regulated by laws that vary from country to country. Check the laws in your local region before using this product for surveillance purposes.
This product includes one (1) H.264 decoder license. To purchase further licenses, contact your reseller.
Liability
Every care has been taken in the preparation of this document. Please inform your local Axis office of any inaccuracies or omissions. Axis Communications AB cannot be held responsible for any technical or typographical errors and reserves the right to make changes to the product and manuals without prior notice. Axis Communications AB makes no warranty of any kind with regard to the material contained within this document, including, but not limited to, the implied warranties of merchantability and fitness for a particular purpose. Axis Communications AB shall not be liable nor responsible for incidental or consequential damages in connection with the furnishing, performance or use of this material. This product is only to be used for its intended purpose.
Intellectual Property Rights
Axis AB has intellectual property rights relating to technology embodied in the product described in this document. In particular, and without limitation, these intellectual property rights may include one or more of the patents listed at www.axis.com/patent.htm and one or more additional patents or pending patent applications in the US and other countries.
This product contains licensed third-party software. See the menu item “About” in the product’s user interface for more information.
This product contains source code copyright Apple Computer, Inc., under the terms of Apple Public Source License 2.0 (see
www.opensource.apple.com/apsl). The source code is available from https://developer.apple.com/bonjour/
Equipment Modifications
This equipment must be installed and used in strict accordance with the instructions given in the user documentation. This equipment contains no user-serviceable components. Unauthorized equipment changes or modifications will invalidate all applicable regulatory certifications and approvals.
Trademark Acknowledgments
AXIS COMMUNICATIONS, AXIS, ETRAX, ARTPEC and VAPIX are registered trademarks or trademark applications of Axis AB in various jurisdictions. All other company names and products are trademarks or registered trademarks of their respective companies.
Apple, Boa, Apache, Bonjour, Ethernet, Internet Explorer, Linux, Microsoft, Mozilla, Real, SMPTE, QuickTime, UNIX, Windows, Windows Vista and WWW are registered trademarks of the respective holders. Java and all Java-based trademarks and logos are trademarks or registered trademarks of Oracle and/or its affiliates. UPnPTM is a certification mark of the UPnPTM Implementers Corporation.
SD, SDHC and SDXC are trademarks or registered trademarks of SD-3C, LLC in the United States, other countries or both. Also, miniSD, microSD, miniSDHC, microSDHC, microSDXC are all trademarks or registered trademarks of SD-3C, LLC in the United States, other countries or both.
Regulatory Information
Europe

 This product complies with the applicable CE marking directives and harmonized standards:
•Electromagnetic Compatibility (EMC) Directive 2004/108/EC. See
Electromagnetic Compatibility (EMC) on page 2 .
•Low Voltage (LVD) Directive 2006/95/EC. See Safety on page 2 .
•Restrictions of Hazardous Substances (RoHS) Directive 2011/65/EU. See Disposal and Recycling on page 3 .
A copy of the original declaration of conformity may be obtained from Axis Communications AB. See Contact Information on page 3 .
Electromagnetic Compatibility (EMC)
This equipment has been designed and tested to fulfill applicable standards for:
•Radio frequency emission when installed according to the instructions and used in its intended environment.
•Immunity to electrical and electromagnetic phenomena when
installed according to the instructions and used in its intended environment.
USA
This equipment has been tested using a shielded network cable (STP) and found to comply with the limits for a Class A digital device, pursuant to part 15 of the FCC Rules. These limits are designed to provide reasonable protection against harmful interference when the equipment is operated in a commercial environment. This equipment generates, uses, and can radiate radio frequency energy and, if not installed and used in accordance with the instruction manual, may cause harmful interference to radio communications. Operation of this equipment in a residential area is likely to cause harmful interference in which case the user will be required to correct the interference at his own expense.The product shall be connected using a shielded network cable (STP) that is properly grounded.
Canada
This digital apparatus complies with CAN ICES-3 (Class A). The product shall be connected using a shielded network cable (STP) that is properly grounded. Cet appareil numérique est conforme à la norme NMB ICES-3 (classe A). Le produit doit être connecté à l'aide d'un câble réseau blindé (STP) qui est correctement mis à la terre.
Europe
This digital equipment fulfills the requirements for RF emission according to the Class A limit of EN 55022. The product shall be connected using a shielded network cable (STP) that is properly grounded. Notice! This is a Class A product. In a domestic environment this product may cause RF interference, in which case the user may be required to take adequate measures.
This product fulfills the requirements for emission and immunity according to EN 50121-4 and IEC 62236-4 railway applications.
This product fulfills the requirements for immunity according to EN 61000-6-1 residential, commercial and light-industrial environments.
This product fulfills the requirements for immunity according to EN 61000-6-2 industrial environments.
This product fulfills the requirements for immunity according to EN 55024 office and commercial environments.
Australia/New Zealand
This digital equipment fulfills the requirements for RF emission according to the Class A limit of AS/NZS CISPR 22. The product shall be connected using a shielded network cable (STP) that is properly grounded. Notice! This is a Class A product. In a domestic environment this product may cause RF interference, in which case the user may be required to take adequate measures.
Japan
A (STP)
Korea
(A ) ,. STP (shielded twisted pair) .
Safety
This product complies with IEC/EN/UL 60950-1 and IEC/EN/UL 60950-22, Safety of Information Technology

Equipment. The product shall be grounded either through a shielded network cable (STP) or other appropriate method.
Battery
The Axis product uses a 3.0 V BR2032 lithium battery as the power supply for its internal real-time clock (RTC). Under normal conditions this battery will last for a minimum of five years.
Low battery power affects the operation of the RTC, causing it to reset at every power-up. When the battery needs replacing, a log message will appear in the product’s server report. For more information about the server report, see the product´s setup pages or contact Axis support.
The battery should not be replaced unless required, but if the battery does need replacing, contact Axis support at www.axis.com/techsup for assistance.
Lithium coin cell 3.0 V batteries contain 1,2-dimethoxyethane; ethylene glycol dimethyl ether (EGDME), CAS no. 110-71-4.
 WARNING
•Risk of explosion if the battery is incorrectly replaced.
•Replace only with an identical battery or a battery which is recommended by Axis.
•Dispose of used batteries according to local regulations or the battery manufacturer's instructions.
Disposal and Recycling
When this product has reached the end of its useful life, dispose of it according to local laws and regulations. For information about your nearest designated collection point, contact your local authority responsible for waste disposal. In accordance with local legislation, penalties may be applicable for incorrect disposal of this waste.
Europe
 This symbol means that the product shall not be disposed of together with household or commercial waste. Directive 2012/19/EU on waste electrical and electronic equipment (WEEE) is applicable in the European Union member states. To prevent potential harm to human health and the environment, the product must be disposed of in an approved and environmentally safe recycling process. For information about your nearest designated collection point, contact your local authority responsible for waste disposal. Businesses should contact the product supplier for information about how to dispose of this product correctly.
This product complies with the requirements of Directive 2011/65/EU on the restriction of the use of certain hazardous substances in electrical and electronic equipment (RoHS).
China
 This product complies with the requirements of the legislative act Administration on the Control of Pollution Caused by Electronic Information Products (ACPEIP).
Contact Information
Axis Communications AB Emdalavägen 14
223 69 Lund Sweden
Tel: +46 46 272 18 00 Fax: +46 46 13 61 30
www.axis.com
Support
Should you require any technical assistance, please contact your Axis reseller. If your questions cannot be answered immediately, your reseller will forward your queries through the appropriate channels to ensure a rapid response. If you are connected to the Internet, you can:
•download user documentation and software updates
•find answers to resolved problems in the FAQ database. Search by product, category, or phrase
•report problems to Axis support staff by logging in to your private support area
•chat with Axis support staff
•visit Axis Support at www.axis.com/techsup/
Learn More!
Visit Axis learning center www.axis.com/academy/ for useful trainings, webinars, tutorials and guides.

AXIS Q6128-E PTZ Network Camera |
|
Table of Contents |
|
Safety Information . . . . . . . . . . . . . . . . . . . . . . . . . . . . . . . . . . . . . . . . . . |
6 |
Hazard Levels . . . . . . . . . . . . . . . . . . . . . . . . . . . . . . . . . . . . . . . . . . . . . . . . . . . |
6 |
Other Message Levels . . . . . . . . . . . . . . . . . . . . . . . . . . . . . . . . . . . . . . . . . . . . |
6 |
Hardware Overview . . . . . . . . . . . . . . . . . . . . . . . . . . . . . . . . . . . . . . . . . . |
7 |
Connectors and Buttons . . . . . . . . . . . . . . . . . . . . . . . . . . . . . . . . . . . . . . . . . . |
7 |
LED Indicators . . . . . . . . . . . . . . . . . . . . . . . . . . . . . . . . . . . . . . . . . . . . . . . . . . |
8 |
Access the Product . . . . . . . . . . . . . . . . . . . . . . . . . . . . . . . . . . . . . . . . . . |
9 |
Access from a Browser . . . . . . . . . . . . . . . . . . . . . . . . . . . . . . . . . . . . . . . . . . . |
9 |
Access from the Internet . . . . . . . . . . . . . . . . . . . . . . . . . . . . . . . . . . . . . . . . . . |
9 |
Set the Root Password . . . . . . . . . . . . . . . . . . . . . . . . . . . . . . . . . . . . . . . . . . . |
10 |
The Live View Page . . . . . . . . . . . . . . . . . . . . . . . . . . . . . . . . . . . . . . . . . . . . . . |
10 |
Media Streams . . . . . . . . . . . . . . . . . . . . . . . . . . . . . . . . . . . . . . . . . . . . . |
13 |
How to Stream H.264 . . . . . . . . . . . . . . . . . . . . . . . . . . . . . . . . . . . . . . . . . . . . |
13 |
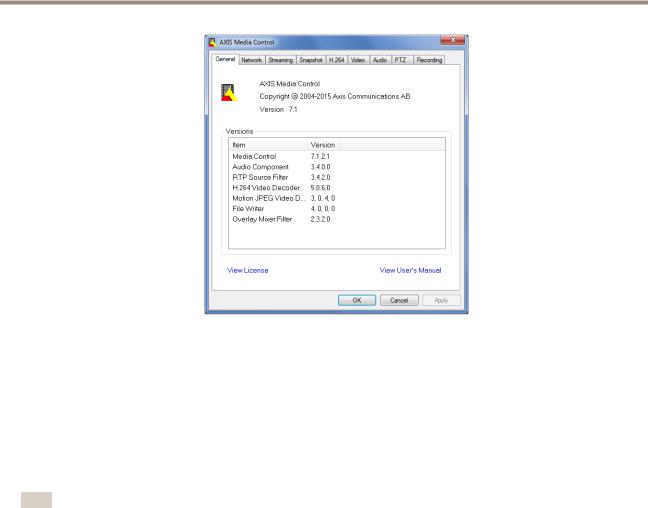
AXIS Media Control (AMC) . . . . . . . . . . . . . . . . . . . . . . . . . . . . . . . . . . . . . . . . |
13 |
Alternative Methods of Accessing the Video Stream . . . . . . . . . . . . . . . . . . . . |
14 |
Set Up the Product . . . . . . . . . . . . . . . . . . . . . . . . . . . . . . . . . . . . . . . . . . |
15 |
Basic Setup . . . . . . . . . . . . . . . . . . . . . . . . . . . . . . . . . . . . . . . . . . . . . . . . . . . . |
15 |
Video . . . . . . . . . . . . . . . . . . . . . . . . . . . . . . . . . . . . . . . . . . . . . . . . . . . . . |
16 |
Set Up Video Streams . . . . . . . . . . . . . . . . . . . . . . . . . . . . . . . . . . . . . . . . . . . . |
16 |
Stream Profiles . . . . . . . . . . . . . . . . . . . . . . . . . . . . . . . . . . . . . . . . . . . . . . . . . |
17 |
ONVIF Media Profiles . . . . . . . . . . . . . . . . . . . . . . . . . . . . . . . . . . . . . . . . . . . . |
17 |
Camera Settings . . . . . . . . . . . . . . . . . . . . . . . . . . . . . . . . . . . . . . . . . . . . . . . . |
18 |
Overlay . . . . . . . . . . . . . . . . . . . . . . . . . . . . . . . . . . . . . . . . . . . . . . . . . . . . . . . . |
19 |
Privacy Mask . . . . . . . . . . . . . . . . . . . . . . . . . . . . . . . . . . . . . . . . . . . . . . . . . . . |
21 |
Configure the Live View Page . . . . . . . . . . . . . . . . . . . . . . . . . . . . . . . . . |
23 |
Default Viewer for Browsers . . . . . . . . . . . . . . . . . . . . . . . . . . . . . . . . . . . . . . . |
23 |
Viewer Settings . . . . . . . . . . . . . . . . . . . . . . . . . . . . . . . . . . . . . . . . . . . . . . . . . |
23 |
User Defined Links . . . . . . . . . . . . . . . . . . . . . . . . . . . . . . . . . . . . . . . . . . . . . . . |
24 |
PTZ (Pan Tilt Zoom) . . . . . . . . . . . . . . . . . . . . . . . . . . . . . . . . . . . . . . . . . |
25 |
Preset Positions . . . . . . . . . . . . . . . . . . . . . . . . . . . . . . . . . . . . . . . . . . . . . . . . . |
25 |
Autotracking . . . . . . . . . . . . . . . . . . . . . . . . . . . . . . . . . . . . . . . . . . . . . . . . . . . |
26 |
Gatekeeper . . . . . . . . . . . . . . . . . . . . . . . . . . . . . . . . . . . . . . . . . . . . . . . . . . . . |
27 |
Guard Tour . . . . . . . . . . . . . . . . . . . . . . . . . . . . . . . . . . . . . . . . . . . . . . . . . . . . . |
27 |
OSDI Zones . . . . . . . . . . . . . . . . . . . . . . . . . . . . . . . . . . . . . . . . . . . . . . . . . . . . |
28 |
Advanced . . . . . . . . . . . . . . . . . . . . . . . . . . . . . . . . . . . . . . . . . . . . . . . . . . . . . . |
28 |
Control Queue . . . . . . . . . . . . . . . . . . . . . . . . . . . . . . . . . . . . . . . . . . . . . . . . . . |
30 |
Detectors . . . . . . . . . . . . . . . . . . . . . . . . . . . . . . . . . . . . . . . . . . . . . . . . . . |
31 |
Shock Detection . . . . . . . . . . . . . . . . . . . . . . . . . . . . . . . . . . . . . . . . . . . . . . . . |
31 |
Motion Detection . . . . . . . . . . . . . . . . . . . . . . . . . . . . . . . . . . . . . . . . . . . . . . . |
31 |
Applications . . . . . . . . . . . . . . . . . . . . . . . . . . . . . . . . . . . . . . . . . . . . . . . |
33 |
Application Licenses . . . . . . . . . . . . . . . . . . . . . . . . . . . . . . . . . . . . . . . . . . . . . |
33 |
Upload Application . . . . . . . . . . . . . . . . . . . . . . . . . . . . . . . . . . . . . . . . . . . . . . |
33 |
Application Considerations . . . . . . . . . . . . . . . . . . . . . . . . . . . . . . . . . . . . . . . . |
33 |
Events . . . . . . . . . . . . . . . . . . . . . . . . . . . . . . . . . . . . . . . . . . . . . . . . . . . . |
35 |
Set Up Action Rules . . . . . . . . . . . . . . . . . . . . . . . . . . . . . . . . . . . . . . . . . . . . . |
35 |
Add Recipients . . . . . . . . . . . . . . . . . . . . . . . . . . . . . . . . . . . . . . . . . . . . . . . . . . |
37 |
Create Schedules . . . . . . . . . . . . . . . . . . . . . . . . . . . . . . . . . . . . . . . . . . . . . . . . |
39 |
Set Up Recurrences . . . . . . . . . . . . . . . . . . . . . . . . . . . . . . . . . . . . . . . . . . . . . . |
39 |
Recordings . . . . . . . . . . . . . . . . . . . . . . . . . . . . . . . . . . . . . . . . . . . . . . . . . |
40 |
Find Recordings . . . . . . . . . . . . . . . . . . . . . . . . . . . . . . . . . . . . . . . . . . . . . . . . . |
40 |
Play Recording . . . . . . . . . . . . . . . . . . . . . . . . . . . . . . . . . . . . . . . . . . . . . . . . . . |
40 |
Export Video Clip . . . . . . . . . . . . . . . . . . . . . . . . . . . . . . . . . . . . . . . . . . . . . . . . |
41 |
Continuous Recording . . . . . . . . . . . . . . . . . . . . . . . . . . . . . . . . . . . . . . . . . . . . |
41 |
Languages . . . . . . . . . . . . . . . . . . . . . . . . . . . . . . . . . . . . . . . . . . . . . . . . . |
42 |
System Options . . . . . . . . . . . . . . . . . . . . . . . . . . . . . . . . . . . . . . . . . . . . . |
43 |
Security . . . . . . . . . . . . . . . . . . . . . . . . . . . . . . . . . . . . . . . . . . . . . . . . . . . . . . . |
43 |
Date & Time . . . . . . . . . . . . . . . . . . . . . . . . . . . . . . . . . . . . . . . . . . . . . . . . . . . . |
45 |
Network . . . . . . . . . . . . . . . . . . . . . . . . . . . . . . . . . . . . . . . . . . . . . . . . . . . . . . . |
46 |
Storage . . . . . . . . . . . . . . . . . . . . . . . . . . . . . . . . . . . . . . . . . . . . . . . . . . . . . . . |
51 |
Maintenance . . . . . . . . . . . . . . . . . . . . . . . . . . . . . . . . . . . . . . . . . . . . . . . . . . . |
53 |
Support . . . . . . . . . . . . . . . . . . . . . . . . . . . . . . . . . . . . . . . . . . . . . . . . . . . . . . . |
54 |
4

AXIS Q6128-E PTZ Network Camera |
|
Table of Contents |
|
Advanced . . . . . . . . . . . . . . . . . . . . . . . . . . . . . . . . . . . . . . . . . . . . . . . . . . . . . . |
54 |
Reset to Factory Default Settings . . . . . . . . . . . . . . . . . . . . . . . . . . . . . . . . . . . |
55 |
Troubleshooting . . . . . . . . . . . . . . . . . . . . . . . . . . . . . . . . . . . . . . . . . . . . |
56 |
Check the Firmware . . . . . . . . . . . . . . . . . . . . . . . . . . . . . . . . . . . . . . . . . . . . . |
56 |
Upgrade the Firmware . . . . . . . . . . . . . . . . . . . . . . . . . . . . . . . . . . . . . . . . . . . |
56 |
Symptoms, Possible Causes and Remedial Actions . . . . . . . . . . . . . . . . . . . . . |
56 |
Technical Specifications . . . . . . . . . . . . . . . . . . . . . . . . . . . . . . . . . . . . . . |
60 |
Performance Considerations . . . . . . . . . . . . . . . . . . . . . . . . . . . . . . . . . . . . . . . |
62 |
5

AXIS Q6128-E PTZ Network Camera
Safety Information
Safety Information
Hazard Levels
 DANGER
Indicates a hazardous situation which, if not avoided, will result in death or serious injury.
 WARNING
Indicates a hazardous situation which, if not avoided, could result in death or serious injury.
 CAUTION
Indicates a hazardous situation which, if not avoided, could result in minor or moderate injury.
NOTICE
Indicates a situation which, if not avoided, could result in damage to property.
Other Message Levels
Important
Indicates significant information which is essential for the product to function correctly.
Note
Indicates useful information which helps in getting the most out of the product.
6

AXIS Q6128-E PTZ Network Camera
Hardware Overview
Hardware Overview
NOTICE
Make sure the dome is attached in operation mode, otherwise focus may be affected.
1Hook for safety wire
2Network connector (High PoE)
3Ground screw
4Unit holder (3x)
5Part number (P/N) & Serial number (S/N)
6Power button
7Status LED indicator
8Control button
9SD card slot (SDHC)
Connectors and Buttons
For technical specifications, see page 60.
Network Connector
RJ45 Push-pull Connector (IP66) with High Power over Ethernet (High PoE).
7

AXIS Q6128-E PTZ Network Camera
Hardware Overview
NOTICE
The product shall be connected using a shielded network cable (STP). All cables connecting the product to the network shall be intended for their specific use. Make sure that the network devices are installed in accordance with the manufacturer’s instructions. For information about regulatory requirements, see Electromagnetic Compatibility (EMC) on page 2 .
NOTICE
To comply with the IP66-rated design of the camera and maintain the IP66 protection, the supplied RJ45 Push-pull Connector (IP66) shall be used. Alternatively, use the RJ45 IP66-rated cable with premounted connector which is available from your Axis reseller. Do not remove the plastic network connector shield from the camera.
SD Card Slot
NOTICE
•Risk of damage to SD card. Do not use sharp tools or excessive force when inserting or removing the SD card.
•Risk of data loss. To prevent data corruption, the SD card should be unmounted before removal. To unmount, go to Setup > System Options > Storage > SD Card and click Unmount.
This product supports SD/SDHC/SDXC cards (not included).
For SD card recommendations, see www.axis.com
Control Button
For location of the control button, see Hardware Overview on page 7 .
The control button is used for:
•Resetting the product to factory default settings. See page 55.
•Connecting to an AXIS Video Hosting System service. See page 47. To connect, press and hold the button for about 3 seconds until the Status LED flashes green.
•Connecting to AXIS Internet Dynamic DNS Service. See page 47. To connect, press and hold the button for about 3 seconds.
Power Button
The power button is used with the control button to reset the camera to factory default settings. See page 55.
LED Indicators
Status LED |
Indication |
|
|
Unlit |
Connection and normal operation. |
|
|
Green |
Shows steady green for 10 seconds for normal operation after startup completed. |
|
|
Amber |
Steady during startup. Flashes during firmware upgrade. |
|
|
Amber/Red |
Flashes amber/red if network connection is unavailable or lost. |
|
|
8

AXIS Q6128-E PTZ Network Camera
Access the Product
Access the Product
To install the Axis product, see the Installation Guide supplied with the product.
The product can be used with most operating systems and browsers. The recommended browsers are
•Internet Explorer® with Windows®
•Safari® with OS X®
•ChromeTM or Firefox® with other operating systems. See Technical Specifications on page 60.
To view streaming video in Internet Explorer, allow installation of AXIS Media Control (AMC) when prompted.
The Axis product includes one (1) H.264 decoder license for viewing video streams. The license is automatically installed with AMC. The administrator can disable the installation of the decoders, to prevent installation of unlicensed copies.
Note
• QuickTimeTM is also supported for viewing H.264 streams.
Access from a Browser
1.Start a web browser.
2.Enter the IP address or host name of the Axis product in the browser’s Location/Address field.
To access the product from a Mac computer (OS X), go to Safari, click on Bonjour and select the product from the drop-down list.
If you do not know the IP address, use AXIS IP Utility to locate the product on the network. For information about how to discover and assign an IP address, see the document Assign an IP Address and Access the Video Stream on Axis Support web at www.axis.com/techsup
Note
To show Bonjour as a browser bookmark, go to Safari > Preferences.
3.Enter your user name and password. If this is the first time the product is accessed, the root password must first be configured. For instructions, see Set the Root Password on page 10.
4.The product’s Live View page opens in your browser.
Note
The controls and layout of the Live View page may have been customized to meet specific installation requirements and user preferences. Consequently, some of the examples and functions featured here may differ from those displayed in your own Live View page.
Access from the Internet
Once connected, the Axis product is accessible on your local network (LAN). To access the product from the Internet you must configure your network router to allow incoming data traffic to the product. To do this, enable the NAT-traversal feature, which will attempt to automatically configure the router to allow access to the product. This is enabled from Setup > System Options > Network > TCP/IP Advanced.
For more information, see NAT traversal (port mapping) for IPv4 on page 49. See also AXIS Internet Dynamic DNS Service at www.axiscam.net
For Technical notes on this and other topics, visit the Axis Support web at www.axis.com/techsup
9

AXIS Q6128-E PTZ Network Camera
Access the Product
Set the Root Password
To access the Axis product, you must set the password for the default administrator user root. This is done in the Configure Root Password dialog, which opens when the product is accessed for the first time.
To prevent network eavesdropping, the root password can be set via an encrypted HTTPS connection, which requires an HTTPS certificate. HTTPS (Hypertext Transfer Protocol over SSL) is a protocol used to encrypt traffic between web browsers and servers. The HTTPS certificate ensures encrypted exchange of information. See HTTPS on page 44.
The default administrator user name root is permanent and cannot be deleted. If the password for root is lost, the product must be reset to the factory default settings. See Reset to Factory Default Settings on page 55.
To set the password via a standard HTTP connection, enter it directly in the dialog.
To set the password via an encrypted HTTPS connection, follow these steps:
1.Click Use HTTPS.
A temporary certificate (valid for one year) is created, enabling encryption of all traffic to and from the product, and the password can now be set securely.
2.Enter a password and then re-enter it to confirm the spelling.
3.Click OK. The password has now been configured.
The Live View Page
The controls and layout of the Live View page may have been customized to meet specific installation requirements and user preferences. Consequently, some of the examples and functions featured here may differ from those displayed in your own Live View page. The following provides an overview of each available control.
Controls on the Live View Page
Click the View size buttons to show the image in full size (right button) or to scale down the image to fit the browser window (left button).
Click Speed Dry button to enable this function. The camera vibrates to clear the dome of water drops and render a clearer image. For information about how to configure and enable the button, see Manual Trigger on page 11
Select a stream profile for the Live View page from the Stream Profile drop-down list. For information about how to configure stream profiles, see page 17.
The Manual Trigger button is used to trigger an action rule from the Live View page. For information about how to configure and enable the button, see Manual Trigger on page 11 .
Click Snapshot to save a snapshot of the video image. This button is primarily intended for use when the AXIS Media Control viewer toolbar is not available. Enable this button from Live View Config > Action Buttons.
Enable or disable the Gatekeeper by selecting On or Off from the drop-down list. For more information about the Gatekeeper, see page 27.
10
AXIS Q6128-E PTZ Network Camera
Access the Product
Manual Trigger
The Manual Trigger is used to trigger an action rule from the Live View page. The manual trigger can for example be used to validate actions during product installation and configuration.
To configure the manual trigger:
1.Go to Setup > Events.
2.Click Add to add a new action rule.
3.From the Trigger drop-down list, select Input Signal.
4.From the second drop-down list, select Manual Trigger.
5.Select the desired action and configure the other settings as required. For more information about action rules, see Events on page 35.
To show the manual trigger buttons in the Live View page:
1.Go to Setup > Live View Config.
2.Under Action Buttons, select Show manual trigger button.
AXIS Media Control viewer toolbar
The AXIS Media Control viewer toolbar is available in Internet Explorer only. See AXIS Media Control (AMC) on page 13 for more information. The toolbar displays the following buttons:
The Play button connects to the Axis product and starts playing a media stream.
The Stop button stops the media stream.
The Snapshot button takes a snapshot of the video image. The location where the image is saved can be specified in the AMC Control Panel.
Click the View Full Screen button and the video image will fill the entire screen. Press ESC (Escape) on the computer keyboard to cancel full screen view.
The Record button is used to record the current video stream on your computer. The location where the recording is saved can be specified in the AMC Control Panel. Enable this button from Live View Config > Viewer Settings.
PTZ Controls
The Live View page also displays Pan/Tilt/Zoom (PTZ) controls. The administrator can enable/disable controls for specified users under
System Options > Security > Users.
With the PTZ Control Queue enabled the time each user is in control of the PTZ settings is limited. Click the buttons to request or release control of the PTZ controls. The PTZ Control Queue is set up under PTZ > Control Queue.
Click the Emulate joystick mode button and click in the image to move the camera view in the direction of the mouse pointer.
Click the Center mode button and click in the image to center the camera view on that position.
The center mode button could also be used to zoom in on a specific area. Click in the image and drag to draw a rectangle surrounding the area to be magnified. To zoom out, rotate the mouse wheel.
11

AXIS Q6128-E PTZ Network Camera
Access the Product
Click the Ctrl panel button to open the PTZ control panel which provides additional PTZ controls.
User-defined buttons can also appear in the Control panel. See Controls on page 29.
Select a recorded tour and click  to play a previously recorded tour and click
  to stop. See
Tour Recording on page 28.
Select a PTZ preset position to steer the camera view to the saved position. See Preset Positions on page 25.
Click the Start Auto Track button to start autotracking directly from the Live View page. See
Autotracking on page 26.
Pan and Tilt bars – Use the arrows to pan and tilt the camera view, or click on a position on the bar to steer the camera view to that position.
Zoom bar – Use the arrows to zoom in and out, or click on a position on the bar to zoom to that position.
Focus bar – Use the arrows to focus the camera, or click on a position on the bar to set the focus position. Using the focus bar will disable the product’s autofocus. To re-enable, use the PTZ control panel which is opened by clicking the Ctrl panel button (see above).
Iris bar – Click on a position to set a manual exposure level to make the image brighter or darker. This will disable auto iris (automatic exposure) and set fixed levels on iris, gain and shutter speed. To re-enable auto iris, use the PTZ control panel which is opened by clicking the Ctrl panel button (see above). If auto iris is enabled, Auto is visible next to the Iris bar bar.
Important
In an environment with varying light conditions it is recommended to use the Brightness bar instead of the Iris bar to adjust image brightness since changing the brightness level will not disable auto iris (automatic exposure).
Brightness bar – Click on a position on the brightness bar to adjust the image brightness. This setting will not be saved. To make a saved change, go to Setup > Video > Camera Settings > Brightness and adjust the brightness.
The PTZ controls can be disabled under PTZ > Advanced > Controls, see Controls on page 29.
12

AXIS Q6128-E PTZ Network Camera
Media Streams
Media Streams
The Axis product provides several video stream formats. Your requirements and the properties of your network will determine the type you use.
The Live View page in the product provides access to H.264 and Motion JPEG video streams, and to the list of available stream profiles. Other applications and clients can access video streams directly, without going via the Live View page.
How to Stream H.264
H.264 can, without compromising image quality, reduce the size of a digital video file by more than 80% compared with the Motion JPEG format and as much as 50% more than the MPEG-4 standard. This means that much less network bandwidth and storage space are required for a video file. Or seen another way, much higher video quality can be achieved for a given bit rate.
Deciding which combination of protocols and methods to use depends on your viewing requirements, and on the properties of your network. The available options in AXIS Media Control are:
Unicast RTP |
This unicast method (RTP over UDP) is used |
|
|
|
for live unicast video, especially when it is |
|
|
|
important to have an up-to-date video stream, |
|
|
|
even if some frames are dropped. |
Unicasting is used for video-on-demand |
|
|
|
transmission so that there is no video traffic |
|
RTP over RTSP |
This unicast method (RTP tunneled over RTSP) |
||
on the network until a client connects and |
|||
|
is useful as it is relatively simple to configure |
||
|
requests the stream. |
||
|
firewalls to allow RTSP traffic. |
||
|
Note that there are a maximum of 10 |
||
|
|
||
RTP over RTSP over HTTP |
This unicast method can be used to traverse |
simultaneous unicast connections. |
|
|
firewalls. Firewalls are commonly configured to |
|
|
|
allow the HTTP protocol, thus allowing RTP to |
|
|
|
be tunneled. |
|
|
|
|
|
|
Multicast RTP |
This method (RTP over UDP) should be used for live multicast video. The video stream is always |
||
|
up-to-date, even if some frames are dropped. |
|
|
|
Multicasting provides the most efficient usage of bandwidth when there are large numbers of |
||
|
clients viewing simultaneously. A multicast cannot however, pass a network router unless the |
||
|
router is configured to allow this. It is not possible to multicast over the Internet, for example. |
||
|
Note also that all multicast viewers count as one unicast viewer in the maximum total of 10 |
||
|
simultaneous connections. |
|
|
|
|
|
|
AXIS Media Control negotiates with the Axis product to determine the transport protocol to use. The order of priority, listed in the AMC Control Panel, can be changed and the options disabled, to suit specific requirements.
Note
H.264 is licensed technology. The Axis product includes one H.264 viewing client license. Installing additional unlicensed copies of the client is prohibited. To purchase additional licenses, contact your Axis reseller.
AXIS Media Control (AMC)
AXIS Media Control (AMC) in Internet Explorer in Windows is the recommended method of accessing live video from the Axis product.
The AMC Control Panel can be used to configure various video settings. Please see the AXIS Media Control User’s Manual for more information.
The AMC Control Panel is automatically installed on first use, after which it can be configured. Open the AMC Control Panel from:
•Windows Control Panel (from the Start screen or Start menu)
•Alternatively, right-click the video image in Internet Explorer and click Settings.
13
AXIS Q6128-E PTZ Network Camera
Media Streams
Alternative Methods of Accessing the Video Stream
You can also access video and images from the Axis product in the following ways:
•Motion JPEG server push (if supported by the client, Chrome or Firefox, for example). This option maintains an open HTTP connection to the browser and sends data as and when required, for as long as required.
•Windows Media Player. This requires AXIS Media Control and the H.264 decoder to be installed. The following paths can be used:
•QuickTimeTM. The following paths can be used:
Note
•<ip>= IP address
•The Axis product supports QuickTime 6.5.1 and later.
•QuickTime may add latency to the video stream.
•It may be possible to use other players to view the H.264 stream using the paths above, although Axis does not guarantee this.
14

AXIS Q6128-E PTZ Network Camera
Set Up the Product
Set Up the Product
The Axis product can be configured by users with administrator or operator rights. To open the product’s Setup pages, click Setup in the top right-hand corner of the Live View page.
•Administrators have unrestricted access to all settings.
•Operators have restricted access to settings, see Users on page 43
See also the online help  .
.
Basic Setup
Basic Setup provides shortcuts to the settings that should be made before using the Axis product:
1.Users. See page 43.
2.TCP/IP. See page 46.
3.Date & Time. See page 45.
4.Video Stream. See page 16.
The Basic Setup menu can be disabled from System Options > Security > Users.
15

AXIS Q6128-E PTZ Network Camera
Video
Video
It is possible to configure the following video features in your Axis product:
•Video stream. See page 16.
•Stream profiles. See page 17.
•ONVIF Media Profiles. See page 17.
•Camera settings. See page 18.
•Overlay image. See page 19.
•Privacy mask. See page 21.
Set Up Video Streams
To set up the product’s video streams, go to Video > Video Stream.
The video stream settings are divided into the following tabs:
•Image. See page 16.
•H.264. See page 17.
Pixel Counter
The pixel counter shows the number of pixels in an area of the image. The pixel counter is useful in situations where there is a specific size requirement, for example in face recognition.
The pixel counter can be used:
•When setting up a video stream, see Set Up Video Streams on page 16. Under Preview, click Open and select the Show pixel counter option to enable the rectangle in the image. Use the mouse to move and resize the rectangle, or enter the number of pixels in the Width and Height fields and click Apply.
•When accessing the Live View page in Internet Explorer with AXIS Media Control (AMC) in Windows. Right-click in the image and select Pixel counter. Use the mouse to move and resize the rectangle.
Image
The default image settings can be configured under Video> Video Stream. Select the Image tab.
The following settings are available:
•Resolution. Select the default resolution.
•Compression. The compression level affects the image quality, bandwidth and file size of saved images; the lower the compression, the higher the image quality with higher bandwidth requirements and larger file sizes.
•Rotate image. If required, the image can be rotated.
•Maximum frame rate. To avoid bandwidth problems, the frame rate allowed to each viewer can be Limited to a fixed amount. Alternatively, the frame rate can be set as Unlimited, which means the Axis product always delivers the highest frame rate possible under the current conditions.
•Overlay settings. See Overlay on page 19.
Click Save to apply the new settings.
16

AXIS Q6128-E PTZ Network Camera
Video
H.264
H.264, also known as MPEG-4 Part 10/AVC, is a video compression standard that provides high quality video streams at low bit rates. An H.264 video stream consists of different types of frames such as I-frames and P-frames. An I-frame is a complete image whereas P-frames only contain the differences from previous frames.
The H.264 stream settings can be configured from the Video > Video Stream page. Select the H.264 tab. The settings defined in this page will apply to all H.264 streams that do not use a stream profile.
The GOP length is the number of frames between two consecutive I-frames. Increasing the GOP length may save considerably on bandwidth requirements in some cases, but may also have an adverse affect on image quality.
The Axis product supports the following H.264 profile(s):
•Baseline. The Baseline profile is recommended for clients that don’t support CABAC entropy coding.
•Main. The Main profile provides higher compression with maintained video quality compared to the Baseline profile but requires more processing power to decode.
•High. The High profile provides reduced bit rate and higher compression with maintained video quality compared to the Main profile but requires more processing power to decode.
The bit rate can be set as Variable bit rate (VBR) or Maximum bit rate (MBR). VBR adjusts the bit rate according to the image complexity, using up more bandwidth for increased activity in the image, and less for lower image activity. When the activity in the scene increases, the bit rate would usually increase as well. If there is a surplus in bandwidth, this may not be an issue and selecting Variable bit rate (VBR) will be sufficient. But if bandwidth is limited, it is recommended to control the bit rate by selecting Maximum bit rate (MBR). When the activity in the scene increases, VBR adjusts the bit rate according to the complexity, using up more bandwidth for increased activity in the scene, and less for lower scene activity. MBR allows you to set a target bit rate that limits the bandwidth consumption.
The MBR target bit rate works like the ceiling of a tent. It limits the bit rate, while maintaining some flexibility. The bit rate may bounce up and down within the set target but when it nears the set target value, the limitation kicks in. However, because MBR will always prioritize a continuous video stream, it allows temporary overshoots from the target bit rate. Because setting a target value prevents the bit rate from increasing, frame rate and image quality are affected negatively. To partly compensate for this, select which variable shall be prioritized, frame rate or image quality. Not setting a priority means that frame rate and image quality are equally affected.
To apply the settings, click Save.
Stream Profiles
A stream profile is a set of predefined stream settings including resolution, compression, frame rate and overlay settings. Stream profiles can be used:
•When setting up recording using action rules. See Events on page 35.
•When setting up continuous recording. See Continuous Recording on page 41.
•In the Live View page – select the stream profile from the Stream profile drop-down list.
For quick setup, use one of the predefined stream profiles. Each predefined profile has a descriptive name, indicating its purpose. If required, the predefined stream profiles can be modified and new customized stream profiles can be created.
To create a new profile or modify an existing profile, go to Setup > Video > Stream Profiles.
To select a default stream profile for the Live View page, go to Setup > Live View Config.
ONVIF Media Profiles
An ONVIF media profile consists of a set of configurations that can be used to change media stream settings. ONVIF media profiles can be set through the ONVIF Media Profile Settings page and be used by a client to configure media stream properties.
17

AXIS Q6128-E PTZ Network Camera
Video
The ONVIF Media Profiles page lists all such pre-configured profiles. These profiles cannot be removed. Pre-configured media profiles have been included in the product for quick setup. It is also possible to configure new ONVIF media profiles as per required specifications. To add a new ONVIF media profile, click Add and enter the required information. You can also modify or remove a profile from this page.
Camera Settings
The Video > Camera Settings page provides access to advanced image settings for the Axis product.
Capture Mode
Capture mode defines the maximum frame rate available in the Axis product and affects light sensitivity. A capture mode with a high maximum frame rate has reduced light sensitivity and vice versa.
To change capture mode, follow these steps:
1.Go to Setup > Video > Camera Settings.
2.Select the new capture mode.
3.Click Save.
Image Appearance
To change Image Appearance go to the menus under Setup > Video > Camera Settings.
Increasing the Color level increases the color saturation. The value 100 gives maximum color saturation and the value 0 gives minimum color saturation.
The image Brightness can be adjusted in the range 0–100, where a higher value produces a brighter image.
Increasing the Sharpness can increase bandwidth usage. A sharper image might increase image noise especially in low light conditions. A lower setting reduces image noise, but the whole image will appear less sharp.
White Balance
To change this setting go to Setup > Video > Camera Settings
White balance is used to make colors in the image appear the same regardless of the color temperature of the light source. The Axis product can be set to automatically identify the light source and compensate for its color. Alternatively, select the type of light
source from the drop-down list. For a description of each available setting, see the online help .
.
Exposure Settings
Exposure control - These settings is used to adapt to the amount of light used. Automatic is the default setting and it can be used in most situations. The shutter speed is automatically set to produce optimum image quality. Use Manual if you have special requirements for the exposure setting and wish to lock it. Select the desired exposure time from the drop-down list.
Enable Backlight compensation - Select Enable Backlight compensation if a bright spot of light such as a light bulb, causes other areas in the image to appear too dark.
Enable Highlight compensation - This setting detects bright lights from a source such as a torch or car headlights and masks that image area. The feature is useful when the camera operates in a very dark area where a bright light may overexpose part of the image and prevent the operator from seeing other parts of the scene.
Max gain - Measured in decibels (dB), gain describes the amount of amplification applied to a signal, in this case the visual information in the image. A high level of amplification may provide a better image in very low light situations. A high gain will also increase the amount of image noise.
Exposure zones - This setting determines which part of the image is used to calculate the exposure. For most situations, the Auto setting can be used. For particular requirements, select a predefined area by defining Include and Exclude windows within the image
18

AXIS Q6128-E PTZ Network Camera
Video
to exclude areas that are too bright or dark, and include areas in the scene that have better lighting which will contribute to the exposure data. There must be at least one Include window. There can be a total of ten Include and Exclude windows to tailor the exposure zone. Note that an Exclude window is effective only when placed inside an include window. Tip: If an area is extremely bright draw an Include window to cover the whole area and define Exclude windows within it to block out the bright areas.
IR cut filter - The IR cut filter prevents infrared (IR) light from reaching the image sensor. In poor lighting conditions, or when using an external IR lamp, set the IR cut filter to Off. This increases light sensitivity and allows the product to “see” infrared light. The image is shown in black and white when the IR cut filter is off. Set the IR cut filter to Auto to automatically switch between On and Off according to the lighting conditions.
Day/Night shift priority - Use the Day/Night shift priority bar to determine when the camera shifts into either day mode or night mode. By default, the camera will automatically change from day to night mode at a pre-defined level which corresponds to light conditions. By dragging the bar handle towards the sun, the camera will change to day mode earlier and change to night mode late.
Image Settings
Important
The autofocus behavior is affected by factors such as light conditions, contrasts in the scene, and objects moving in and out. In these conditions or scenes, a manual focus could be preferable to enhance performance and allow the camera to focus faster.
Autofocus enabled - Autofocus enables the camera to focus although the distance to different objects of interest is constantly changing. Whenever the camera’s pan/tilt/zoom position is changed, the autofocus performs a search to find the ideal focus point. Automatic focusing is enabled by default. If the focus position is changed manually using the focus bar, autofocus will be disabled even if enabled in Image Settings. In this case, use the PTZ control panel to enable autofocus, see page 11 . If required, the focus control can be disabled under PTZ > Advanced > Controls.
Defog - Enable this feature from Video & Audio > Camera Settings to counter the effects of foggy weather and get a clear image.
Noise reduction - Set to On to enable noise reduction. Noise reduction may increase the amount of motion blur.
Stabilizer - When monitoring environments that are subject to vibrations (e.g. traffic control), images may appear to be unsteady. Select On or Off to enable/disable the stabilizer. Enabling the stabilizer will steady the image and will limit the digital zoom.
See the online help  for more information.
Image freeze on PTZ - Select All movements to freeze the image while the camera is moving during a pan, tilt or zoom operation. Once the camera reaches its new position, the view from that position is shown. Presets freezes the image only when the camera moves between preset positions.
Overlay
Overlays are used to provide extra information, such as forensic video analysis or during product installation and configuration. Overlays are superimposed over the video stream.
An overlay text can display the current date and time, or a text string.
When using a text string, modifiers can be used to display information such as the name of the current week or month.
For information about available modifiers, see File Naming & Date/Time Formats in the online help  .
.
It is also possible to display text when an action rule is triggered, see Use Overlay Text in an Action Rule.
Note
To enable overlays:
1.Go to Video > Video Stream and select the Image tab.
2.To include an overlay image, select Include overlay image at the coordinates. The overlay image must first be uploaded to the Axis product, see Overlay Image.
19
 Loading...