


Apple Confidential
!"#$%%&'()%'*++,-./"0+
!"#$%&'("")$*#"$+,-.$/.0123#4"5-$6
%&'("")$*#"$&-$&$75&1'3 83-$9--32
:93$%&'("")$*#"$+,-.$/.0123#4"5-$6$+,-.$"-.3#$23;,'39 <==9 >,12$&19+3#9
?&!3-@A$.&125,17A$&12$#3705&-"#@$,1!"#B&-,"1

Apple Confidential
MacBook Pro at a glance
Say hello to MacBook Pro with Thunderbolt 3
This guide provides the essential information you need in order to get the most from your MacBook Pro with Thunderbolt 3.
Take a look around. Want a quick intro to the features (ports, connectors, accessories) of your MacBook Pro with Thunderbolt 3? Go to the next section, Take a tour.
Get started. Start your MacBook Pro with Thunderbolt 3 by lifting the lid or connecting it to power, or by pressing the power button or Touch ID. Follow the Setup Assistant prompts, and youʼre up and running. For details, see Set up. To migrate your information from an older computer, see Migrate your data for more details.
Make the most of shortcuts. If your MacBook Pro has a Touch Bar, shortcuts for common tasks are right at your fingertips. Change settings, use typing suggestions for text and messages, add an emoji, edit photos, and much more, with just a touch. See Meet the Touch Bar and Touch ID.
Stay in sync. Access your documents, photos, music, apps, contacts, and calendars across all your devices with iCloud. And use your MacBook Pro with your iOS devices to make and receive phone calls and texts, copy and paste across devices, or create an Instant Hotspot. Learn more in Access your content anywhere with iCloud and Use your MacBook Pro with iCloud and Continuity features.
Unleash your creativity. Edit photos, organize albums, and share memories with Photos; organize and listen to music, books, movies, and more with iTunes; create presentations with Keynote; and check out all the apps available on the App Store, to express yourself in as many ways as you have ideas.

Dig deeper. Explore your MacBook Pro withApple ConfidentialThunderbolt 3 and get your questions answered. See Mac Help.
Take a tour
This guide is for MacBook Pro models with Thunderbolt 3 (USB-C). (Not all features are available on all models.)
Thunderbolt 3 (USB-C) ports: Charge your computer, transfer data at Thunderbolt speeds (up to 40 Gbps), connect to a display or projector, and more.
3.5 mm headphone jack: Plug in stereo headphones or external speakers to listen to your favorite music or movies.
Microphones: Talk with friends or record audio (models with the Touch Bar have three microphones; other models have two microphones).
Touch Bar: Some models include a Touch Bar at the top of the keyboard, which dynamically adapts to the app youʼre using. The Touch Bar is an extension of the keyboard that presents intuitive shortcuts and application controls exactly when and where you need them. You can use familiar gestures like slide and tap in the
Touch Bar. For more information, see Meet the Touch Bar and Touch ID.

FaceTime HD camera: Make FaceTimeApplevideoConfidentialcalls or take pictures and video. If the light is glowing, the camera is on. For more information, see FaceTime.
Touch ID (power button): To learn more about how to use Touch ID, see Meet the Touch Bar and Touch ID. If your keyboard doesnʼt have the Touch Bar, you can learn more about the power button in Keyboard.
Force Touch trackpad: Control your MacBook Pro with gestures. The entire trackpad surface acts as a button so you can easily click anywhere. For more about using gestures, see Trackpad.
Whatʼs included
To use your MacBook Pro, you need these two accessories, included in the box:
USB-C Charge Cable: To charge your MacBook Pro, connect one end of the USB-C Charge Cable to any Thunderbolt 3 port on your MacBook Pro, and the other end to the 61W Power Adapter (13-inch MacBook Pro models) or the 87W Power Adapter (15-inch MacBook Pro models).
61W or 87W USB-C Power Adapter: After the power adapter is connected to MacBook Pro with the USB-C Charge Cable, fully extend the electrical prongs on the AC plug, and plug the adapter into an AC power outlet.
Automatically start up your MacBook Pro. Connect your 61W or 87W USB-C Power Adapter and USB-C Charge Cable and lift the lid to turn on and start up your MacBook Pro. Log in and get right to work.
Keyboard
The function keys on the keyboard provide shortcuts for common functions, such as increasing the volume or screen brightness.
Note: If your MacBook Pro has the Touch Bar, the system function keys are in the Touch Bar. See Meet the Touch Bar and Touch ID.

Apple Confidential
Power button: Press and hold  for 3 seconds to turn your MacBook Pro on or off. Press
  to put MacBook Pro to sleep.
Brightness keys (F1, F2): Press  or
or  to decrease or increase the brightness of the screen.
Mission Control key (F3): Press  to view whatʼs running on your MacBook Pro, including all your spaces and open windows.
Launchpad key (F4): Press  to instantly see all the apps on your MacBook Pro. Click an app to open it.
Keyboard illumination keys (F5, F6): Press  or
or  to decrease or increase the brightness of the keyboard.
Media keys (F7, F8, F9): Press  to rewind,
  to play or pause, or
  to fastforward a song, movie, or slideshow.
Mute key (F10): Press  to mute the sound from the built-in speakers or 3.5 mm headphone jack.
Volume keys (F11, F12): Press  or
or  to decrease or increase the volume of sound from the built-in speakers or 3.5 mm headphone jack.
Function (Fn) key: Each function key (on the top row) can also perform other functions—for example, the F12 key can open Dashboard. Hold down the Fn key while you press a function key to trigger the action associated with the key.
 Tip: Press the Fn key twice to turn on dictation, which lets you dictate text wherever you can type it (for example, in Messages, Mail, Pages, and many other apps).
Set keyboard preferences. Use the Keyboard pane of System Preferences (choose Apple menu > System Preferences, click Keyboard, then click the buttons at the top to see the available options).

Apple Confidential
Keyboard with the Touch Bar and Touch ID
Meet the Touch Bar and Touch ID
Note: Read the following sections if your MacBook Pro has the Touch Bar.
The Touch Bar at the top of your keyboard displays dynamically changing tools, depending on your current activity. The Touch ID (power button) is located on the right side of the Touch Bar. After you set up Touch ID, you can use your fingerprint to unlock your MacBook Pro and make purchases on the App Store, iBooks Store, iTunes Store, and websites using Apple Pay.
Use the Touch ID (power button). Press to turn on your MacBook Pro (or just lift the lid). When you first start up or restart, you need to log in by typing your password. You set up Touch ID during setup or later in the Touch ID pane of System Preferences. After setup, whenever youʼre asked for your password after you first log in, you can place your finger lightly on the Touch ID sensor to authenticate instead of typing your password.
You can also use Touch ID to make purchases online securely with Apple Pay. For more information about Touch ID, see Set up. For more information about Apple Pay, see Apple Pay.
Note: Press and hold the Touch ID (power button) for a few seconds to turn off your MacBook Pro. To put your MacBook Pro to sleep, choose Apple menu > Sleep.
Use the Touch Bar. The Touch Bar is integrated into many macOS apps to give you handy shortcuts for the tasks you do most, based on your current app and activity. Use familiar gestures—like tap and slide—in the Touch Bar while you work.
The buttons at the right end of the Touch Bar are the Control Strip—you use them to expand or collapse the Control Strip, change the brightness and volume, or use Siri. The other buttons in the Touch Bar depend on the app youʼre using.

Apple Confidential
MN<"*+%'(%4'&&"</$%.1$%?'*.('&%5.(7<,%>#3E031-5@$0932$9@9-3B$'"1-#"59A$5,)3$;"50B3$&12 4#,7.-1399A$$5"'&-32$,1$-.3$M"1-#"5$?-#,=$"1$-.3$#,7.-$9,23$"!$-.3$/"0'.$(C$/&=$ $-" 3I=&12$-.3$9-#,=A$-.31$-&=$40--"19$"#$95,23#9$!"#$-.3$93--,179$@"0$+&1-$-"$'.&173C$/&=$
 +.31$@"0$!,1,9.A$"#$53&;3$-.3$M"1-#"5$?-#,=$"=31$-"$)33=$-.3$40--"19$&;&,5&453C
?)/.'27O$%.1$%?'*.('&%5.(7<,%:93$-.3$U3@4"$=&13$"!$?@9-3B$*#3!3#31'39$F'.""93 <==53$B310$c$?@9-3B$*#3!3#31'39A$-.31$'5,')$U3@4"G$-"$'09-"B,S3$-.3$M"1-#"5$?-#,=C
:7/<&"6%.1$%3)*4.7'*%#$6/,%*#399$&12$."52$-.3$>01'-,"1$F>1G$)3@$-"$2,9=5&@$-.3$!01'-,"1 )3@9$>]$-.#"07.$>]b$,1$-.3$/"0'.$(A$-.31$-&=$&$!01'-,"1$40--"1$-"$093$,-C
8/$%.1$%M/4%@)..'*,%/.3$R9'$40--"1$090&55@$&==3 $"1$-.3$53!-$9,23$"!$-.3$/"0'.$(A$,1 -.3$9&B3$=5&'3$-.3$R9'$)3@$&==3 $"1$-#&2,-,"1&5$)3@4"C$R9'$&==3 $"1$-.3$53!- 3;31$+.31$-.3$"-.3#$-""59$"1$-.3$/"0'.$($'.&173C
 !7<A%J1$9"B3$&==9A$&1"-.3#$-""5$,1$-.3$/"0'.$($B&@$-3B="#,5@$#3=5&'3$-.3$R9' 40--"1C$/&=$K"13$"#$
 A$&12$-.3$R9'$40--"1$&==3 C$>"#$B"#3$,1!"#B&-,"1A$933$-.3 <==53$?0=="#-$-,'53$P"+$-"$093$-.3$R9'&=3$40--"1$"1$@"0#$%&'("")$*#"$+,-. /"0'.$(C
!"<%7*/.$"+%'3%.6<$,%J1$&==9$+.3#3$@"0$'"B="93$-3I-A$5,)3$W"-39A$%399&739A$/3I-R2,-A &12$%&,5A$-.3$/"0'.$($'&1$2,9=5&@$-@=,17$907739-,"19$-"$.35=$@"0$9&;3$-,B3$4@ =#3931-,17$+"#29$&12$3B"N,$@"0$'&1$-&=$,19-3&2$"!$-@=3C$/&=$ $,1$-.3$/"0'.$($-"$933 -@=,17$907739-,"19A$,!$-.3@L#3$1"-$&5#3&2@$9."+,17C
F)+&7,/@=,17$907739-,"19$B&@$1"-$43$&;&,5&453$,1$&55$5&170&739$"#$,1$&55$&9C
MN<($//%6')(/$&3%H7.1%$2'P7,%J1$9"B3$&==9A$@"0$'&1$'.""93$&1$3B"N,$,19-3&2$"!$+"#29 !"#$&$!01$+&@$-"$B&)3$@"0#$=",1-C$/&=$ $-"$2,9=5&@$-.3$3B"N,C$?+,=3$-"$9'#"55$-.#"07. "=-,"19A$"#7&1,S32$4@$'&-37"#@A$90'.$&9$e>#3E031-5@$:932Af$e?B,53@9$g$*3"=53Af$e/#&;35$g *5&'39Af$&12$B"#3C$/&=$-"$9353'-$-.3$3B"N,$@"0$+&1-C

Explore and experiment. Tap around toAppleseeConfidentialwhat you can accomplish quickly and efficiently. Itʼs often easier to tap the Touch Bar than to click or select items onscreen in order to accomplish a task or apply a setting. For example, open Calculator and do quick calculations with the number keys and the functions on the Touch Bar—no more moving your cursor, clicking, and typing onscreen.
Keep using the Touch Bar to find the best ways to achieve the results you want. Move seamlessly between the Touch Bar, your keyboard, and the trackpad to get the job done. See Included apps and the sections for each app for information about their Touch Bar features.
To learn more about the Touch Bar, see the Apple Support article How to use the Touch Bar on your MacBook Pro.
Customize the Touch Bar
In the Finder and in many apps, such as Mail and Safari, you can customize the buttons in the Touch Bar. You can also customize the Control Strip. Choose View > Customize Touch Bar to add, delete, or rearrange items in the Touch Bar.
When youʼre customizing the Touch Bar, the buttons jiggle, and you see the Done button. For example, hereʼs the Calculator Touch Bar, ready to be edited:
Add buttons to the Touch Bar. Drag controls to the bottom of your screen and into the Touch Bar to add them.
When you finish, tap Done in the Touch Bar or click Done on the screen.

Q$"(("*;$%@)..'*/%7*%.1$%!')41%="(,%DApple.,53Confidential$'09-"B,S,17$-.3$/"0'.$(A$2#&7$40--"19$-"
&$13+$5"'&-,"1C$D.31$@"0$!,1,9.A$-&=$K"13C
Q$2'9$%@)..'*/%3('2%.1$%!')41%="(,%D.,53$'09-"B,S,17$-.3$/"0'.$(A$2#&7$&$40--"1 !#"B$-.3$/"0'.$($-"$-.3$9'#331$-"$#3B";3$,-C$D.31$@"0$!,1,9.A$-&=$K"13C
5)"#&C"7
Z"0$'&1$2"$&$5"-$"1$@"0#$%&'("")$*#"$09,17$9,B=53$-#&')=&2$739-0#39a9'#"55$-.#"07. +34=&739A$S""B$,1$"1$2"'0B31-9A$#"-&-3$=."-"9A$&12$B"#3C$D,-.$-.3$>"#'3$/"0'. -#&')=&2A$=#3990#3V9319,17$'&=&4,5,-,39$&22$&1"-.3#$53;35$"!$,1-3#&'-,;,-@C$/.3$-#&')=&2 =#";,239$!3324&')a+.31$@"0$2#&7$"#$#"-&-3$"4N3'-9A$@"0$!335$&$904-53$;,4#&-,"1$+.31 -.3@L#3$&5,7132A$&55"+,17$@"0$-"$+"#)$+,-.$7#3&-3#$=#3',9,"1C
P3#3$$9"B3$'"BB"1$739-0#39[
?&74#A%*#399$&1@+.3#3$"1$-.3$-#&')=&2C$O#$31&453$e/&=$-"$'5,')f ,1$/#&')=&2$=#3!3#31'39A$&12$9,B=5@$-&=C
R'(4$%4&74#A%M5,')$&12$-.31$=#399$233=3#C$Z"0$'&1$093$!"#'3$'5,') -"$5"")$0=$B"#3$,1!"#B&-,"1a'5,')$&$+"#2$-"$933$,-9$23!,1,-,"1A$"# &1$&22#399$-"$933$&$=#3;,3+$-.&-$@"0$'&1$"=31$,1$%&=9C
5$4'*+"(6%4&74#%K(7;1.%4&74#LA%M5,')$+,-.$-+"$!,173#9$-"$"=31 9."#-'0-$B3109C$J!$e/&=$-"$'5,')f$,9$31&4532A$-&=$+,-.$-+"$!,173#9C
!H'>37*;$(%/4('&&A%?5,23$-+"$!,173#9$0=$"#$2"+1$-"$9'#"55C
G7*41%.'%O''2A%*,1'.$@"0#$-.0B4$&12$!,173#$"=31$"#$'5"932$-"
S""B$,1$"#$"0-$"!$=."-"9$&12$+34=&739C
5H7<$%.'%*"97;".$A%?+,=3$53!-$"#$#,7.-$+,-.$-+"$!,173#9$-"$!5,= -.#"07.$+34=&739A$2"'0B31-9A$&12$B"#3a5,)3$-0#1,17$&$=&73$,1 &$4"")C
S<$*%T")*41<"+A%i0,')5@$"=31$&==9$,1$Q&01'.=&2C$*,1'. '5"932$+,-.$!"0#$"#$!,;3$!,173#9A$-.31$'5,')$&1$&==$-"$"=31$,-C
5H7<$%@$.H$$*%"<</A%/"$9+,-'.$!#"B$"13$!055V9'#331$&==$-" &1"-.3#A$9+,=3$53!-$"#$#,7.-$+,-.$-.#33$"#$!"0#$!,173#9C
?)/.'27O$%6')(%;$/.)($/,%M.""93$<==53$B310$c$?@9-3B$*#3!3#31'39$"#$'5,')$-.3 ?@9-3B$*#3!3#31'39$,'"1$ $,1$-.3$K"')A$-.31$'5,')$/#&')=&2C
J1$/#&')=&2$=#3!3#31'39$@"0$'&1[
Q3$B"#3$&4"0-$3&'.$739-0#3
Set the pressure you prefer to use Apple Confidential
Decide whether to use pressure-sensing features
Customize other trackpad features
 Tip: If you find youʼre force clicking when you donʼt intend to, try adjusting the click pressure to a firmer setting in Trackpad preferences. Or change the “Look up and data detectors” option from the “Force Click with one finger” default setting to “Tap with three fingers.”
For more information and examples of force click options, see the Apple Support article How to use the Force Touch trackpad.
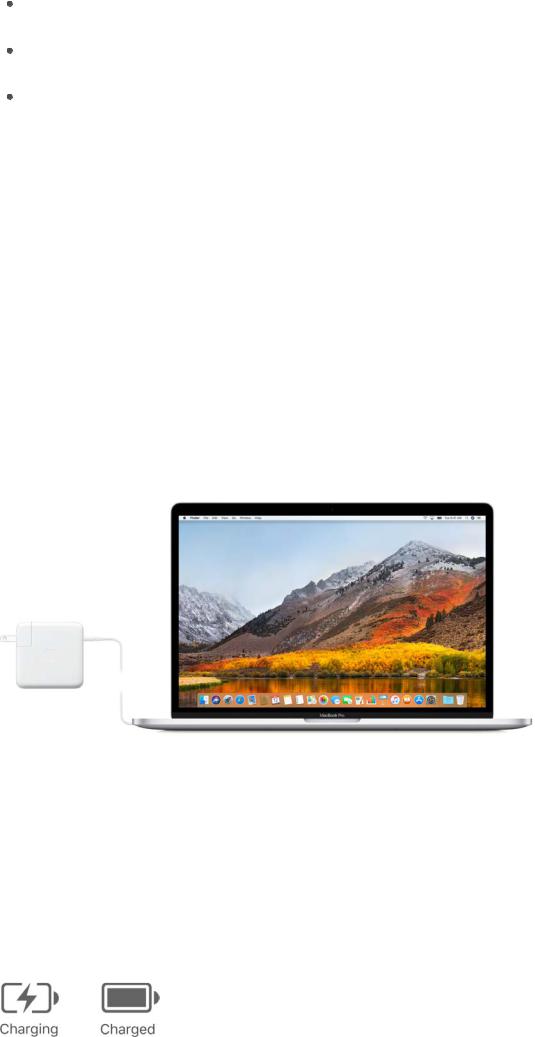
Charge the battery
The battery in your MacBook Pro recharges whenever the MacBook Pro is connected to power.
Charge the battery. Connect your MacBook Pro to a power outlet using the included USB-C Charge Cable and 61W or 87W USB-C Power Adapter.
You can charge your MacBook Pro using any of the Thunderbolt 3 ports on your computer. The battery charges more quickly when the computer is off or in sleep.
Check the batteryʼs charge. Look at the battery status icon at the right of the menu bar to see the battery level or charging status.
Conserve battery power. To extend battery life on a given charge, you can reduce the display brightness, close apps, and disconnect peripheral devices youʼre not using. You can change your power settings in Energy Saver preferences (click the System Preferences icon  in the Dock, then click Energy Saver). If your MacBook Pro with Thunderbolt 3 is in sleep when a device is connected to it, the deviceʼs battery may drain.
For more information about the internal,ApplerechargeableConfidential battery in your MacBook Pro with Thunderbolt 3, and for conservation and performance tips, go to Apple Lithium-ion Batteries.
Accessories
The following Apple accessories are available to connect your MacBook Pro to power, external devices and displays, and more.
Thunderbolt 3 (USB-C) to Thunderbolt 2 Adapter: Connect your MacBook Pro to Thunderbolt 2 devices or a Thunderbolt display.
USB-C to USB Adapter: Connect your MacBook Pro to standard USB accessories or connect a USB cable to sync and charge your iPhone, iPad, or iPod touch.
USB-C Digital AV Multiport Adapter: Connect your MacBook Pro to an HDMI display, while also connecting a
standard USB device and a USB-C charge cable to charge your MacBook Pro.
USB-C VGA Multiport Adapter: Connect your MacBook Pro to a VGA projector or display, while also connecting a standard USB device and a USB-C charge cable to charge your MacBook Pro.
Adapters and other accessories are sold separately at apple.com or your local
Apple Store. Review the documentation or check with the manufacturer to make sure youʼre choosing the right adapter for your MacBook Pro.
Use an external display
The Thunderbolt 3 port on your MacBook Pro supports video output. You can use an external display, a projector, or an HDTV with your MacBook Pro.

Apple Confidential
Connect a VGA display or projector: Use a USB-C VGA Multiport Adapter to connect the display to the USB-C port on your MacBook Pro.
Connect an HDMI display or HDTV: Use a USB-C Digital AV Multiport Adapter to connect the HDMI display or HDTV to the USB-C port on your MacBook Pro.
Connect a USB-C display: Connect the display to the USB-C port on your MacBook Pro.
Connect a Thunderbolt display: Use a Thunderbolt 3 (USB-C) to Thunderbolt 2 Adapter to connect the Thunderbolt display to a Thunderbolt 3 port on your MacBook Pro.
Adapters and other accessories are sold separately at apple.com or your local
Apple Store. Review the documentation or check with the manufacturer to make sure you choose the right adapter.
If you have an HDTV connected to an Apple TV, you can also use AirPlay to mirror your MacBook Pro screen on your TV screen in up to 1080p HD. See AirPlay for details.
Apple Confidential
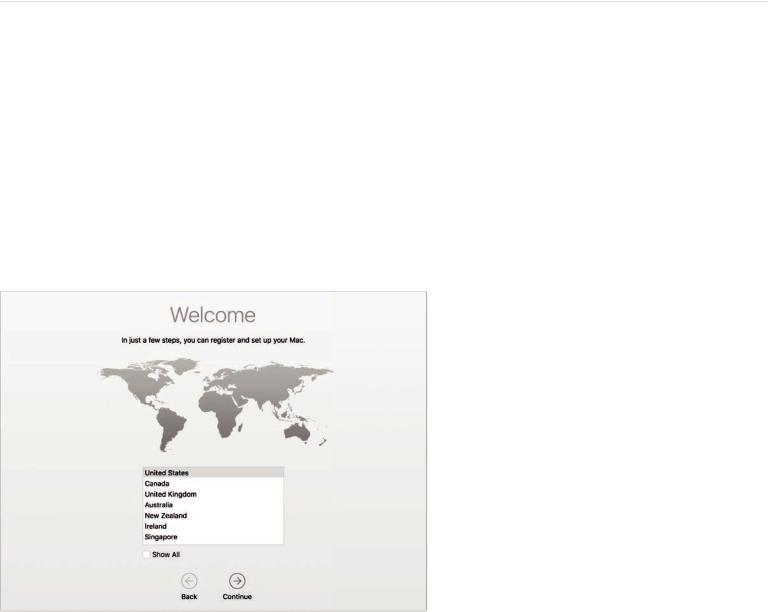
G,.'+.").,7
1,.'6C
/.3$!,#9-$-,B3$@"0#$%&'("")$*#"$9--9$0=A$?3-0=$<99,9-&1-$+&5)9$@"0$-.#"07.$-.3$9,B=53 9-3=9$133232$-"$9--$09,17$@"0#$13+$%&'C$J!$@"0$+&1-$-"$-#&19!3#$@"0#$2&-&$!#"B$&1"-.3# '"B=0-3#A$933$%,7#&-3$@"0#$2&-&$!"#$23-&,59C
(3$90#3$-"$'"113'-$-"$D,V>,A$-0#1$"1$(503-""-.j$+,#35399$-3'.1"5"7@A$73-$&1$<==53$JKA -.31$9,71$,1$-"$,M5"02C$<'-,;&-3$?,#,$20#,17$93-0=A$,!$@"0$+&1-C$J!$@"0#$%&'("")$*#"$.&9$-.3 /"0'.$(A$@"0$'&1$&59"$93-$0=$/"0'.$JK$&12$<==53$*&@C
Z"0$'&1$2"$-.393$9-3=9$E0,')5@$&12$3&9,5@$+,-.$?3-0=$<99,9-&1-a40-$,!$@"0$+&1-$-"$2" -.3B$5&-3#A$.3#3L9$."+[
?'**$4.%.'%D7>R7,%M5,')$-.3$D,V>,$9-&-09$,'"1$ $,1$-.3$B310$4A$-.31$'.""93$&$D,V>, 13-+"#)$&12$31-3#$-.3$=&99+"#2A$,!$13'399@C
!)(*%D7>R7%'*%'(%'33,%M5,')$-.3$D,V>,$9-&-09$,'"1$ $,1$-.3$B310$4A$-.31$'.""93$/0#1 D,V>,$O1$"#$/0#1$D,V>,$O!!C
!)(*%=&)$.''.1%'*%'(%'33,%M5,')$-.3$(503-""-.$,'"1$ $,1$-.3$B310$4A$-.31$'.""93$/0#1 (503-""-.$O1$"#$/0#1$(503-""-.$O!!C
 !7<A%J!$@"0$2"1L-$933$-.3$D,V>,$9-&-09$,'"1$
 $"#$(503-""-.$,'"1$
 $,1$-.3$B310$4A$@"0 '&1$&22$-.3BC$>"#$D,V>,A$'.""93$<==53$B310$c$?@9-3B$*#3!3#31'39A$-.31$'5,')$W3-+"#)C M5,')$D,V>,$,1$-.3$5,9-$"1$-.3$53!-A$-.31$9353'-$e?."+$D,V>,$9-&-09$,1$B310$4Cf$>"# (503-""-.A$'.""93$<==53$B310$c$?@9-3B$*#3!3#31'39A$'5,')$(503-""-.A$-.31$9353'-$e?."+ (503-""-.$,1$B310$4Cf

-$.%"*%I<<&$%J:,%Z"0#$<==53$JK$,9$-.3$&''"01Apple Confidential-$@"0$093$!"#$3;3#@-.,17$@"0$2"$+,-.$<==53a ,1'502,17$09,17$-.3$<==$?-"#3A$-.3$,/0139$?-"#3A$,M5"02A$%399&739A$&12$B"#3C$Z"0# <==53$JK$'"19,9-9$"!$&1$3B&,5$&22#399$&12$&$=&99+"#2C$Z"0$1332$"15@$"13$<==53$JK$-"$093 &1@$<==53$93#;,'3A$"1$&1@$23;,'3a+.3-.3#$,-L9$@"0#$'"B=0-3#A$,O?$23;,'3A$"# <==53$D&-'.C$J-L9$439-$-"$.&;3$@"0#$"+1$<==53$JK$&12$1"-$9.$,-a'#3&-3$93=&-3 <==53$JK9$!"#$3&'.$!&B,5@$B3B43#C
J!$@"0$2"1L-$&5#3&2@$.&;3$&1$<==53$JKA$@"0$'&1$'#3&-3$"13$F,-L9$!#33GC$8"$-"$-.3$<==53$JK &''"01-$+349,-3C
J2<'(."*.A%J!$@"0$!"#73-$@"0#$<==53$JK$=&99+"#2A$@"0$2"1L-$1332$-"$'#3&-3$&$13+ <==53$JKC$k09-$'5,')$-.3$>"#7"-$5,1)$,1$-.3$5"7,1$+,12"+$-"$#3-#,3;3$@"0#$=&99+"#2C
5$.%)<%7?&')+%'*%6')(%0"4=''#%G(',%D,-.$,M5"02A$@"0$'&1$9-"#3$&55$"!$@"0#$'"1-31-a 2"'0B31-9A$B";,39A$B09,'A$=."-"9A$&12$B"#3a,1$-.3$'5"02A$&12$&''399$,-$&1@+.3#3$@"0 7"C
/"$93-$0=$,M5"02A$'.""93$<==53$B310$c$?@9-3B$*#3!3#31'39A$-.31$'5,')$,M5"02C$J1$-.3 +,12"+$-.&-$&==3 A$31-3#$@"0#$<==53$JK$&12$=&99+"#2C$/.31$9353'-$-.3$!3&-0#39$@"0 +&1-$-"$093C$/"$!,12$"0-$B"#3A$933$<''399$@"0#$'"1-31-$&1@+.3#3$+,-.$,M5"02C
J2<'(."*.A%(3$90#3$-"$093$-.3$9&B3$<==53$JK$!"#$,M5"02$"1$&55$@"0#$23;,'39C
5$.%)<%57(7,%Z"0$'&1$31&453$?,#,$"1$@"0#$%&'("")$*#"$+.31$=#"B=-32$20#,17$93-0=C$/" 53$."+$-"$-0#1$"1$?,#,$5&-3#$&12$!"#$,1!"#B&-,"1$&4"0-$09,17$?,#,$"1$@"0#$%&'A$933$?,#,C
5$.%)<%!')41%J:,%J!$@"0#$%&'("")$*#"$.&9$-.3$/"0'.$($&12$/"0'.$JKA$@"0$'&1$&22$& !,173#=#,1-$-"$/"0'.$JK$20#,17$93-0=C$/"$93-$0=$/"0'.$JK$5&-3#$"#$-"$&22$&22,-,"1&5 !,173#=#,1-9A$'5,')$-.3$?@9-3B$*#3!3#31'39$,'"1$ $,1$-.3$K"')A$"#$'.""93$<==53$B310$c ?@9-3B$*#3!3#31'39C$/.31$'5,')$/"0'.$JKC$/"$&22$&$!,173#=#,1-A$'5,')$
 $&12$!"55"+$-.3 "19'#331$,19-#0'-,"19C$Z"0$'&1$&22$0=$-"$-.#33$!,173#=#,1-9$=3#$093#$&''"01-$F@"0$'&1 &22$0=$-"$!,;3$!,173#=#,1-9$-"-&5$-"$@"0#$%&'("")$*#"GC
Z"0$'&1$&59"$93-$"=-,"19$!"#$."+$@"0$+&1-$-"$093$/"0'.$JK$"1$@"0#$%&'("")$*#"[$-" 015"')$@"0#$%&'$,19-3&2$"!$31-3#,17$@"0#$=&99+"#2A$-"$093$<==53$*&@$F933$<==53$*&@GA$"# -"$=0#'.&93$,-3B9$"1$-.3$,/0139$?-"#3A$<==$?-"#3A$&12$,("")9$?-"#3C
 Tip: If two or more users use the sameAppleMacBookConfidential Pro, each one can add a fingerprint to Touch ID to quickly unlock, authenticate, and log in to the MacBook Pro. Your MacBook Pro can store a total of five fingerprints.
For more information about Touch ID, see the Apple Support article Use Touch ID on MacBook Pro.
Set up Apple Pay. If you have a MacBook Pro with the Touch Bar, you can set up Apple Pay for one user account on your MacBook Pro during setup. Other users can still pay with Apple Pay, but they must complete the purchase using their iPhone or
Apple Watch thatʼs been set up for Apple Pay (see Apple Pay for more details). Follow the onscreen prompts to add and verify your card. If you already use a card for iTunes purchases, you might be prompted to verify this card first.
To set up Apple Pay or add additional cards later, click the System Preferences icon  in the Dock, or choose Apple menu > System Preferences. Then click Wallet & Apple Pay and follow the onscreen prompts to set up Apple Pay.
Note: The card issuer determines whether your card is eligible to use with Apple Pay, and may ask you to provide additional information to complete the verification process. Many credit and debit cards can be used with Apple Pay. For information about Apple Pay availability and current credit card issuers, see the Apple Support article Apple Pay participating banks.

Apple Confidential
H/-7'2%6)'4"2'")%6-7
53,'7,+&.%CI'A,-6'8")I'H/-7,)I'"-7'J,0C
/.3$!,#9-$-.,17$@"0$933$"1$@"0#$%&'("")$*#"$,9$-.3$%&6>+)5K$+.3#3$@"0$'&1$E0,')5@$"=31 &==9A$93'.$!"#$&1@-.,17$"1$@"0#$%&'("")$*#"$&12$-.3$+34A$"#7&1,S3$@"0#$!,539A$&12 B"#3C
 !7<A%M&1L-$!,12$-.3$=",1-3#H$/"$B&71,!@$,-$-3B="#,5@A$B";3$@"0#$!,173#$#&=,25@$4&') &12$!"#-.$"1$-.3$-#&')=&2C$O#$,!$@"0L#3$09,17$&$B"093A$95,23$,-$4&')$&12$!"#-.$E0,')5@C
0$*)%@"(,%:93$-.3$B3109$&12$,'"19$&5"17$-.3$-"=$"!$-.3$9'#331$-"$"=31$13+$+,12"+9A '"113'-$-"$&$D,V>,$13-+"#)A$'.3')$@"0#$D,V>,$9-&-09$ A$'.&173$-.3$;"50B3$
 A$'.3') @"0#$4&--3#@$'.I$
 A$E03#@$?,#,A$&12$B"#3C$/.3$B310$,-3B9$'.&173A$23=312,17$"1 +.,'.$&==$@"0L#3$09,17C
I<<&$%2$*),%/.3$<==53$B310$,1$-.3$0==3#V53!-$'"#13#$"!$-.3$9'#331$'"1-&,19$!#3E031-5@ 0932$,-3B9C$/"$"=31$,-A$'5,')$-.3$<==53$,'"1C
R7*+$(,%/.3$>,123#$,9$&1$&==$-.&-L9$&5+&@9$"=31C$:93$-.3$>,123#$-"$"#7&1,S3$&12$5"'&-3 @"0#$!,539C$/"$"=31$&$>,123#$+,12"+A$'5,')$-.3$>,123#$,'"1$ $,1$-.3$K"')$&-$-.3$4"--"B$"! -.3$9'#331C$>"#'3$'5,')$&$!,53$,'"1$-"$73-$&$E0,')$5"")$&-$,-9$'"1-31-9A$"#$!"#'3$'5,')$& !,531&B3$-"$32,-$,-C
>"#$,1!"#B&-,"1$&4"0-$09,17$-.3$/"0'.$($!"#$>,123#$-&9)9A$933$/.3$/"0'.$(C

Apple Confidential
Y$&<%2$*),%P35=$!"#$@"0#$%&'("")$*#"$&12$B&'O?$&==9$,9$&5+&@9$&;&,5&453$!#"B$-.3 >,123#C$/"$73-$.35=A$'5,')$-.3$P35=$B310$&12$'.""93$%&'$P35=C$O#$-@=3$,1$-.3$93'.$!,352 &12$'.""93$&$907739-,"1C
/"$53$B"#3A$933$%&'$P35=C d3&2$"1$-"$53$&4"0-$-.3$K"')$&12$"-.3#$!3&-0#39$"!$-.3$239)-"=C
53,'5%6#3'$")
:93$-.3$/"0'.$(A$&-$-.3$-"=$"!$@"0#$)3@4"A$-"$=3#!"#B$>,123#$-&9)9$&12$B"#3C
8/$%.1$%!')41%="(,%/&=$40--"19$-"$B";3$4&')$&12$!"#-.$-.#"07.$,-3B9$@"0L;3$;,3+32A 93-$;,3+$"=-,"19A$&12$E0,')5@$5"")$&-A$9.A$"#$-&7$&1$,-3BC
/&=$ $-"$933$40--"19$!"#$;,3+,17$&12$9"#-,17$"=-,"19[
/&=$ $-"$933$9.,17$"=-,"19[
/&=$ $-"$933$-&79$@"0$'&1$&==5@[
>"#$B"#3$,1!"#B&-,"1$"1$09,17$-.3$/"0'.$(A$933$%33-$-.3$/"0'.$($&12$/"0'.$JKC

The Dock
Apple Confidential
The Dock, at the bottom of the screen, is a convenient place to keep the apps and documents you use frequently.
Open an app or file. Click its icon in the Dock.
Add an item to the Dock. Drag the item and drop it where you want it. Place apps to the left of the line in the Dock, and files or folders to the right.
Remove an item from the Dock. Drag it out of the Dock. The item isnʼt removed from your MacBook Pro—just from the Dock.
See all open windows in an app. Force click an app in the Dock to access Exposé and view all the appʼs open windows.
 Tip: You can make the Dock larger or smaller, add or remove items, move it to the left or right side of the screen, or even set it to hide when youʼre not using it. To change how the Dock looks, click the System Preferences icon
  in the Dock, or choose
Apple menu > System Preferences. Then click Dock.
Quickly open apps
Your MacBook Pro comes with apps for all the things you love to do—browse the web, check email, share photos, enjoy movies, and more.
Apple Confidential
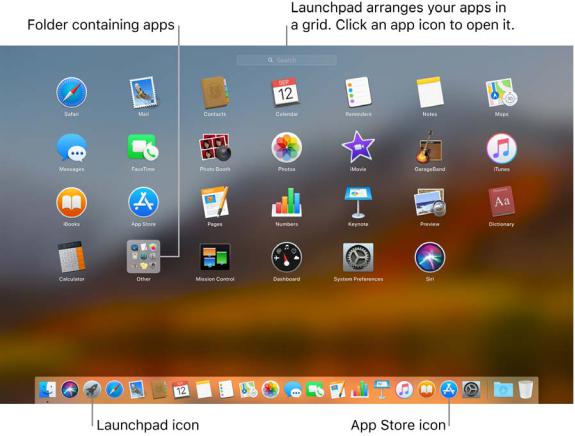
Open an app. Click an app icon in the Dock, or click the Launchpad icon  in the Dock and click the app you want. You can also search for an app using Spotlight, then open the app directly from your Spotlight search results.
 Ask Siri. Say something like: “Open Calculator.”
Organize apps in Launchpad. Launchpad organizes your apps in a grid. Drag an app to a new location to rearrange apps. Drag an app onto another app to create a folder. Drag more apps to the new folder to add them. To remove an app from a folder, drag it out.
Get more apps. Click the App Store icon  in the Dock and search for apps you want. Apps you download from the App Store appear automatically in Launchpad. To quickly get updates for apps and macOS, click Updates in the App Store.
Notification Center
Use Notification Center to view details about your day (calendar, stocks, weather, and more) and catch up on notifications you might have missed (email, reminders, app notifications, and more).

Apple Confidential
S<$*%Z'.7374".7'*%?$*.$(,%M5,')$-.3$W"-,!,'&-,"1$M31-3#$,'"1$ $&-$-.3$-"=$#,7.-$"!$-.3 9'#331C$/&=$/"2&@$-"$933$+.&-L9$'"B,17$0=$"#$W"-,!,'&-,"19$-"$#3;,3+$+.&-L9$'"B3$,1C
12+.,A'(),M,),-#,+
?@9-3B$*#3!3#31'39$,9$+.3#3$@"0$=3#9"1&5,S3$@"0#$%&'("")$*#"$93--,179C$>"#$3I&B=53A 093$R13#7@$?&;3#$=#3!3#31'39$-"$'.&173$9533=$93--,179C$O#$093$K39)-"=$g$?'#331$?&;3# =#3!3#31'39$-"$&22$&$239)-"=$=,'-0#3$"#$'.""93$&$9'#331$9&;3#C
?)/.'27O$%6')(%0"4=''#%G(',%M5,')$-.3$?@9-3B$*#3!3#31'39$,'"1$ $,1$-.3$K"')A$"# '.""93$<==53$B310$c$?@9-3B$*#3!3#31'39C$/.31$'5,')$-.3$-@=3$"!$=#3!3#31'3$@"0$+&1-$-" 93-C
1C%.0/:3. |
Apple Confidential |
|
?="-5,7.-$ $,9$&1$3&9@$+&@$-"$!,12$&1@-.,17$"1$@"0#$%&'("")$*#"A$90'.$&9$2"'0B31-9A '"1-&'-9A$'&5312$3;31-9A$&12$3B&,5$B399&739C$?="-5,7.-$?07739-,"19$"!!3#$,1!"$!#"B D,),=32,&$-,'539A$(,17$93'.$#3905-9A$13+9A$9="#-9A$+3&-.3#A$9-"')9A$B";,39A$&12$"-.3# 9"0#'39C
D.31$@"0$93'.$+,-.$?="-5,7.-A$-.3$=#3;,3+$&$"1$-.3$#,7.-$=#";,239$93'.$#3905-9 @"0$'&1$,1-3#&'-$+,-.aB&)3$&$'&55A$9312$&1$3B&,5$B399&73A$=5&@$&$9"17A$73-$2,#3'-,"19A 3;31$'"1;3#-$'0##31',39C$?="-5,7.-$'&1$=#";,23$&19+3#9$-"$B&-.$E039-,"19$"#$23!,13 +"#29A$&55$"1$@"0#$239)-"=C
5$"(41%3'(%"*6.17*;,%M5,')$ $&-$-.3$-"=$#,7.-$"!$-.3$9'#331A$-.31$9--$-@=,17C
 !7<A%/@=3$M"BB&12m?=&'3$4$-"$9."+$"#$.,23$-.3$?="-5,7.-$93'.$!,352C
-$.%3&7;1.%7*3',%R1-3#$-.3$&,#5,13$&12$!5,7.-$10B43#$,1$?="-5,7.-$-"$933$@"0#$!5,7.-$9-&-09 &12$&$B&=A$+,-."0-$.&;,17$-"$"=31$?&!,C
Preview your results. Click a search resultApple Confidentialand view it in the preview on the right. Sometimes thatʼs all you need to do—click items or links directly in the preview. You can also double-click a result to open it.
Open an app. Type the app name in Spotlight, then press Return.
Turn off Spotlight Suggestions. If you want Spotlight to search only for items on your MacBook Pro, you can turn off Spotlight Suggestions in Spotlight preferences. Click the System Preferences icon  in the Dock, click Spotlight, then click to deselect Spotlight Suggestions. Make any other changes you want to the list of categories Spotlight searches.
Siri
You can talk to Siri on your MacBook Pro and use your voice for many tasks. For example, you can find files, schedule meetings, change preferences, get answers, send messages, place calls, and add items to your calendar. Siri can give you directions (“How do I get home from here?”), provide information (“How high is Mount Whitney?”), perform basic tasks (“Create a new list called Groceries”), and much more.
Note: Siri may not be available in all languages or in all areas, and features may vary by area.
Enable Siri. Click the Siri icon  in the menu bar or in the Dock, then click Enable when prompted. If you enabled Siri during setup, clicking the icon opens Siri. Or click the System Preferences icon
  in the Dock, click Siri, then select Enable Ask Siri. You can set other preferences in the pane, such as Language and whether to show Siri in the menu bar.
If your MacBook Pro has the Touch Bar, youʼll see additional options in the Siri preferences pane, including “Listen for ‘Hey Siriʼ” and allowing Siri to respond when your MacBook Pro is locked.
Note: To use Siri, your MacBook Pro must be connected to the Internet.
Speak to Siri. Click Siri  in the menu bar or the Dock and start speaking. Or press and hold the Command key and the Space bar, and speak to Siri.
Hey Siri. On your MacBook Pro with the Touch Bar, you can simply say “Hey Siri” to get responses to your requests. To enable this feature in the Siri pane of System Preferences, click “Listen for ‘Hey Siriʼ.” You can also tap the Siri button in the Control Strip to open Siri.
 Tip: To learn about more ways you can use Siri, ask “What can you do?” at any time, or click the Help button
  .
.

Apple Confidential
G&"6%/'2$%2)/74,%k09-$9&@A$e*5&@$9"B3$B09,'Af$&12$?,#,$2"39$-.3$#39-C$Z"0$'&1$3;31$-355 ?,#,A$e*5&@$-.3$-"=$9"17$!#"B$%'.$]oo]Cf
R7*+%"*+%'<$*%37&$/,%<9)$?,#,$-"$!,12$!,539$&12$"=31$-.3B$#,7.-$!#"B$-.3$?,#,$+,12"+C$Z"0 '&1$&9)$4@$!,53$1&B3$"#$4@$239'#,=-,"1C$>"#$3I&B=53A$e?."+$B3$!,539$:#905&$931-Af$"# eO=31$-.3$9=#3&29.33-$J$'#3&-32$5&9-$1,7.-Cf
:(";%"*+%+('<,%K#&7$&12$2#"=$,B&739$&12$5"'&-,"19$!#"B$-.3$?,#,$+,12"+$,1-"$&1$3B&,5A -3I-$B399&73A$"#$2"'0B31-C$Z"0$'&1$&59"$'"=@$&12$=&9-3$-3I-C
G7*%"%($/)&.,%?&;3$?,#,$#3905-9$!#"B$9="#-,17$3;31-9A$d3B,123#9A$M5"')A$?-"')9A$W"-39A >,123#A$&12$7313#&5$)1"+53273$FD,),=32,&A$!"#$3I&B=53G$-"$-.3$/"2&@$;,3+$,1 W"-,!,'&-,"19C$M5,')$-.3$=509$9,71$ $,1$-.3$-"=$#,7.-$"!$&$?,#,$#3905-$-"$=,1$,-$-"$-.3$/"2&@ ;,3+C$/"$933$,-$5&-3#A$'5,')$-.3$W"-,!,'&-,"1$M31-3#$,'"1$
 A$-.31$'5,')$/"2&@C$J!$@"0L#3 '.3'),17$&$9="#-9$9'"#3A$!"#$3I&B=53A$#3905-9$9-&@$0=$-"$2&-3C
?1"*;$%.1$%9'74$,%M5,')$-.3$?@9-3B$*#3!3#31'39$,'"1$ $,1$-.3$K"')A$'5,')$?,#,A$-.31 '.""93$&1$"=-,"1$!#"B$-.3$?,#,$h",'3$B310C
Z"0L55$!,12$907739-,"19$!"#$-.,179$@"0$'&1$&9)$?,#,$-.#"07."0-$-.,9$70,23a-.3@$5"")$5,)3 -.,9[
 I/#%57(7,%?&@$9"B3-.,17$5,)3[
eO=31$-.3$U3@1"-3$=#3931-&-,"1$J$+&9$+"#),17$"1$5&9-$1,7.-Cf
eD.&-$-,B3$,9$,-$,1$*,9Hf

Apple Confidential
Whatʼs new
New macOS features
macOS High Sierra offers many exciting new features, including:
Spotlight: Instead of going to an airline website, open Spotlight and quickly type an airline and flight number to get current flight status information. For more details, see Spotlight.
Safari: You can customize behaviors per website with new preferences for page zoom, auto-play, content blockers, Reader View, and more; and Safari now removes cross-site tracking data to make it more difficult for advertisers to learn your habits. For more information, see Safari.
Mail: Mail search now returns Top Hits of your most relevant messages and offers the ability to view messages full screen in split view—so you can have a message youʼre referencing open as you write a new one. For more information, see Mail.
Photos: Add effects to Live Photos and loop them into fun videos; use the improved editing tools with advanced features like Curves and Selective Color; and organize your photos quickly with the new pop-up menu. For more information, see Photos.
FaceTime: During a FaceTime call, you can capture a Live Photo and save it to Photos. Both of you must set your preferences to enable this feature. For more information, see FaceTime.
Notes: Add tables to your notes, and pin frequently used notes to the top of your list. For more information, see Notes.
Family Sharing: Your family can now share a single iCloud storage plan, with space for each family member to store private backups, documents, and photos. For details about setting up this feature, see Access your content anywhere with iCloud.
iCloud Drive: Share your files with colleagues or family members so everyone can work on the same document. Click the Share button  , then click Add People. For more information about iCloud Drive, see Access your content anywhere with iCloud.
“Hey Siri” on your Mac
Siri is now available by saying “Hey Siri” and immediately speaking your request, if your MacBook Pro has the Touch Bar. Play music, set up a meeting, open a file, and more by using your voice. Enable the “Listen for ‘Hey Siriʼ” option (if you didnʼt during setup) in the Siri pane of System Preferences. For more information, see Siri.
 Loading...