


2-632-721-03(1)
TFT LCD
い。お読みになったあとは、いつでも見られるところに必ず保 管してください。
SDM-HX75
SDM-HX95
© 2005 Sony Corporation
VCCIB
(SDM-HX75
2

Macintosh Apple Computer Inc.
Windows→ Microsoft Corporation
IBM PC/AT VGA IBM Corporation
VESA DDC™ Video Electronics Standard Association
ENERGY STAR→
Adobe Acrobat Adobe Systems Incorporated
WOW SRS 
 SRS Labs, Inc.
WOW SRS Labs, Inc.
→ ™
http://www.sony.co.jp/
. . . . . . . . . . . . . . . . . . . . . . . . . . . . . . . . . . . . . . . . . . . . 4. . . . . . . . . . . . . . . . . . . . . . . . . . . . . . . . . . . . . . 5
. . . . . . . . . . . . . . . . . . . . . . . . . . . . . . . . . . . . . . 7
1: . . . . . . . . . . . . . . . . . . . . . . . . . . 72: . . . . . . . . . . . . . . . . . . . . . . . . 83: . . . . . . . . . . . . . . . . . . . . . . . . . . . . . . . . . . 84: . . . . . . . . . . . . . . . . . . . . . . . . . . . . . . . . . . . . 95: . . . . . . . . . . . . . . . . . . . . . . . . . . . . . . . . . . . . . . . . 96: . . . . . . . . . . . . . . . . . . . . . . . . .10INPUT . . . . . . . . . . . . . . . . . . . . .11
. . . . . . . . . . . . . . . . . . . . . . . . . . . . . . . . . . . . . .12
. . . . . . . . . . . . . . . . . . . . . . . . . . . . . . . . . . . . .12
 / . . . . . . . . . . . . . . . . . . . . . . . . . . . . . . . . . .13. . . . . . . . . . . . . . . . . . . . . . . . . . . . . . . . . . . . . . . .13
 . . . . . . . . . . . . . . . . . . . . . . . . . . . . . . . . . . . . . .13

 . . . . . . . . . . . . . . . . . . . . . .136 . . . . . . . . . . . . . . . . . . . . . . . . . . .13
 . . . . . . . . . . . . . . . . . . . . . . . . .14
 . . . . . . . . . . . . . . . . . . . . . . . . . . . . . . . .14

 . . . . . . . . . . . . . . . . . . . . . . . . . . . . . . . . .14
 . . . . . . . . . . . . . . . . . . . . . . . . . .15
 . . . . . . . . . . . . . . . . . . . . . . . . . . . . . . . . . .15. . . . . . . . . . . . . . . . . . . . .15. . . . . . . . . . . . . . . . . . . . . . . . . . . . . . .15
0 . . . . . . . . . . . . . . .15  RGB . . . . . . . . . . . . . . .16
  . . . . . . . . . . . . . . . . . . . . . . . . . . . . . . . . . .17
  . . . . . . . . . . . . . . . . . . . .17
 . . . . . . . . . . . . . . . . . . . . . . . . . . . . . . . . . . . . . .18
0 . . . . . . . . . .18
 . . . . . . . . . . . . . . . . . . . . . . . . . . . . . . . . . . . . . . .18
. . . . . . . . . . . . . . . . . . . . . . . . . . . . . . . . . . . . . . . . . .19
. . . . . . . . . . . . . . . . . . . . . . . . . . . . . . . . . . . . . . . . . . .19. . . . . . . . . . . . . . . . . . . . . . . . . . . .19
/  . . . . . . . .20
. . . . . . . . . . . . . . . . . . . . . .20RGB . . . . . . . . . . . . . . . . .20
. . . . . . . . . . . . . . . . . . . . . . . . . . . .21
. . . . . . . . . . . . . . . . . . . . . . . . . . . . . . . . . . .21. . . . . . . . . . . . . . . . . . . . . . . . . . . . . . . . .22
. . . . . . . . . . . . . . . . . . . . . . . .24
. . . . . . . . . . . . . . . . . . . . . . . . . . . . . . . . . . . . . .25
3

AC100V
・
場所 変形したり、故障したりすることがあります。
・
海辺や砂地、あるいは砂ぼこりが起こる場所などでは、 砂がかからないようにしてください。故障の原因になる ばかりか、修理できなくなることがあります。
しまいます。窓際や室外に置くときなどはご注意ください。
いたりしないでください。画面にムラが出たり、液晶パ ネルの故障の原因になります。
りますが、故障ではありません。
抜いてください。
面に触れないようにしてください。また画面の汚れをふ きとるときは、乾いた柔らかい布でふきとってください。
さい。変質したり、塗装がはげたりすることがあります。
ださい。
ル製品に長時間接触させると、変質したり、塗装がはげ たりすることがあります。
すべてはずし、画面を傷つけないよう注意し、液晶ディ スプレイの両側をしっかり持ってください。落としたり するとけがや故障の原因となることがあります。
本機が入っていた箱と、クッション材を使ってください。
収・再資源化いたします。
http://www.sony.co.jp/ pcrecycle/
は、地方自治体の条例または規則に従ってください。
4
MENU
OK
INPUT
3
4
5
6
MENU
OK
INPUT
1
2
9
 q;
q;
7
8
A1 1
9 19
1/
1
B20
C19
DMENU 12
Em/M 2 12 19
FOK 12
5 m/M
GINPUT 11
ピュータを選びます。
H  20
20
/
I7
J19
5
|
|
|
|
K 8 |
|
|
|
|
|
|
|
|
|
L |
|
|
|
|
|
|
|
|
|
|
|
|
|
|
|
|
|
|
ql |
|
|
|
|
|
|
|
|
|
|
MINPUT1 8 |
|
|
|
|
INPUT1 |
qa |
|
qs |
|
|
|
|
|
||
|
|
|
|
|
|
|
|
|
NINPUT1 HD15 RGB |
qd qf qg |
qh |
qj qk |
|
7 |
|
|
|
|
RGB 0.700 Vp-p |
|
|
|
|
|
INPUT 1 |
INPUT 2 |
INPUT 3 |
|
OINPUT2 8 |
|
|
INPUT2
PINPUT2 HD15 RGB7
RGB 0.700 Vp-p
QINPUT3 8
INPUT3
RINPUT3 DVI-D RGB7
DVI Rev. 1.0 RGB
S 9
6
・
HD15-HD15 RGB
DVI-D RGB
CD-ROM Windows/Macintosh /
1
ください。
HD15 RGBHD15 RGB
DVI RGB
INPUT3 DVI-D RGBDVI-D RGB
DVI-D RGB
DVI
RGB
DVI-D
RGB
HD15 RGB
INPUT1 INPUT2 HD15RGB HD15-HD15RGB
xIBM PC/AT
HD15 RGB
HD15
|
RGB |
||
|
|
HD15-HD15 |
|
IBM PC/AT |
|
||
RGB |
|||
|
|
||
|
|
||
7

x Macintosh
HD15 RGB
 HD15-HD15RGB
2
は、「音量を調節する」19
3
1
2
1


2 


8

4
1
3
1

2
3
5
11
1
MENU |
|
OK |
|
INPUT |
|
2
3INPUT
詳しくは、「入力を切り換えるにはINPUT
11
INPUT
行ってください12
9
か確認する。
NO INPUT SIGNAL
のキーのどれかを押してみるか、マウスを動かしてみ る。
INPUT 11
CABLE DISCONNECTED
る。
INPUT 11
OUT OF RANGE
|
|
|
|
|
|
|
|
|
28 |
80 kHz |
28 64 kHz |
|
|
|
|
|
48 |
75 Hz |
60 Hz |
|
|
|
|
|
1280 × 1024 |
1280 × 1024 |
|
|
|
|
|
22
& DDC Windows& &
60 Hz
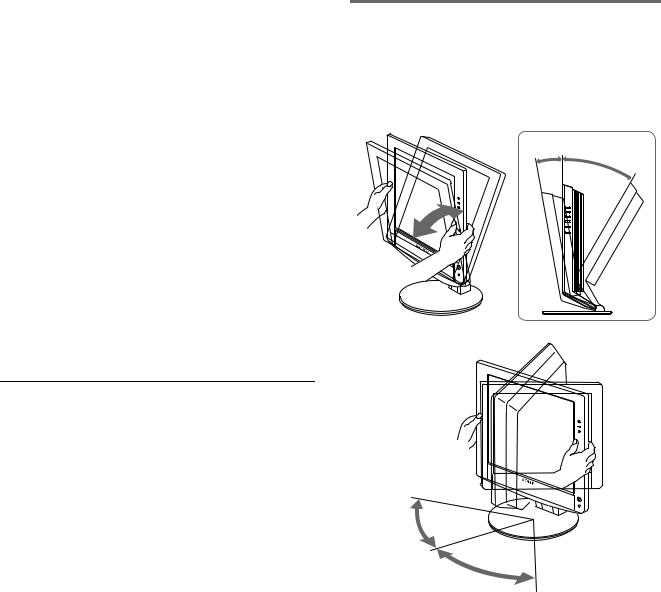
6
5° |
20° |
|
MENU
OK
INPUT
MENU
OK
INPUT
45°
45°
10
INPUT
INPUT
INPUT
|
|
|
|
|
|
|
|
|
|
|
|
|
|
|
|
|
|
|
|
|
|
|
|
|
|
|
|
|
|
|
|
|||
5 |
|
|
||||
|
|
|
|
|
|
|
|
1 HD15 |
|
INPUT1 HD15 |
|||
|
RGB |
|||||
|
|
|||||
|
|
|
|
|
|
|
|
2 HD15 |
|
INPUT2 HD15 |
|||
|
RGB |
|||||
|
|
|||||
|
|
|
|
|
|
|
|
3 DVI-D |
|
INPUT3 DVI-D |
|||
|
RGB |
|||||
|
|
|||||
|
|
|
|
|
|
|
11

30
MENU
MENU
, 
 M O V I E
1 2 8 0 x 1 0 2 4 / 6 0 H z


m/M OK
OK
,
m/M OK
OK
,


m/M OK OK
OK
,
MENU MENU 45
MENU
x
018
12

 /
/
/
GAME/MOVIE/ |
|
|
|
PC/AUTO |
M O V I E |
|
|
|
|
||
|
|
|
|
AUDIO |
|
|
|
0 |
1 2 8 0 x 1 0 2 4 / 6 0 H z |
||
|
|||
|
|
|
|
x
x 
|
|
|
|
|
|
|
|
|
|
|
|
|
|||
|
|
|
|||||
6 |
|
|
|
|
M O V I E |
||
|
|
|
: |
1 0 0 |
|||
|
|
|
|
||||
|
|
|
: |
7 0 |
|||
|
|
|
|
: |
5 0 |
||
|
|
|
|
||||
|
|
|
|
||||
|
1 2 8 0 x 1 0 2 4 / 6 0 H z |
||||||
|
|
|
|
|
|||
|
|
|
|
||||


1 |
MENU |
|
|
/ |
|
|
|
|
2 |
m/M |
/ OK |
|
|||
1MENU
2m/M  / OK
/ OK
/
3m/M MOVIE OK
MODE
MODE
GAME
 MOVIE
MOVIE
PC
AUTO
1 2 8 0 x 1 0 2 4 / 6 0 H z


4m/M OK
MOVIEGAME
MOVIE
PCAUTO
(20
AUTO
/
3m/M  OK
OK
4m/M 

 OK
OK
5m/M OK
6
1MENU
2m/M  / OK
/ OK
/
3m/M  OK
OK
4m/M 6 OK
5m/M OK
13

1MENU
2m/M  / OK
/ OK
/
3m/M  OK
OK
4m/M  OK
OK
5m/M OK

 1234
1234
1 2 8 0 x 1 0 2 4 / 6 0 H z


1MENU
2m/M  / OK
/ OK
/
3m/M  OK
OK
4m/M  OK
OK
5m/M OK


 9 3 0 0 K 6 5 0 0 K

1 2 8 0 x 1 0 2 4 / 6 0 H z


1MENU
2m/M  / OK
/ OK
/
3m/M  OK
OK
4m/M 
 OK
OK
5m/M OK
9300Kt6500K
GAME/MOVIE/PC/AUTO)
1MENU
2m/M  / OK
/ OK
/
3m/M  OK
OK
4m/M 
 OK
OK
5m/M OK
R |
|
|
|
1 2 8 |
|
G |
|
|
|
|
1 2 8 |
|
|
|
|
||
B |
|
1 2 8 |
|||
|
|
|
|
||
1 2 8 0 x 1 0 2 4 / 6 0 H z


6m/M R Red B Blue
OK m/MOK
G Green R BG
14
7m/M  OK
OK

1MENU
2m/M  / OK
/ OK
/
3m/M  OK
OK
4m/M  OK
OK
5m/M OK
x 
|
AUD I O |
|
|
M O V I E |
|
|
||
|
||
|
||
|
|
|
|
1 2 8 0 x 1 0 2 4 / 6 0 H z


1MENU
2m/M  / OK
/ OK
/
3m/M OK
4m/MOK
5m/M OK
1MENU
2m/M  / OK
/ OK
/
3m/M OK
4m/M OK
5m/M OK
SRS WOW
1 2 8 0 x 1 0 2 4 / 6 0 H z


SRS WOW
SRS WOW
SRS WOW SRS Labs
x0
1MENU
2m/M  / OK
/ OK
/
3m/M 0 OK
4m/M OK
OK /
/
15

RGB
|
|
|
|
|
|
|
|
|
|
|
|
|
|
|
|
|
|
||
|
|
|
|
|
|
|
|
||
|
|
|
|
|
|
|
|
||
|
|
|
|
|
|
1 2 8 0 x 1 0 2 4 / 6 0 H z |
|||
|
|
|||
|
|
|
|
|
INPUT3 DVI-D RGB
x
/20
1
/ /
/ /
x
1MENU
2m/M  OK
OK
3m/M OK
x/
HD15RGB
1 1280×1024
2 CD-ROM
3CD-ROM
Windows
CD-ROM
1 Utility
2Adjust Next
CD-ROM
1 CD-ROM CD-ROM
2[Utility] [Windows] 3 [Win_Utility.exe]
Macintosh
1 [Utility] [Mac]
2[Mac_Utility.exe]
4MENU
5m/M  OK
OK
6m/M OK
7m/M
8OK
9m/M OK
10m/M
16
11 [END]
x /
1 1280×1024
2 CD-ROM
3CD-ROM
Windows
CD-ROM
1Utility
2Adjust Next
CD-ROM
1 CD-ROM CD-ROM
2[Utility] [Windows] 3 [Win_Utility.exe]
Macintosh
1 [Utility] [Mac]
2[Mac_Utility.exe]
4MENU
5m/M  OK
OK
6m/M OK
7m/M
8[END]

1 2 8 0 x 1 0 2 4 / 6 0 H z


1MENU
2m/M 
 OK
OK
3m/M OK
9


1 2 8 0 x 1 0 2 4 / 6 0 H z


1MENU
2m/M OK
3m/M OK
や、本体のINPUT21
INPUT
17


L A N G UA G E
 E N G L I S H
F R A N Ç A I S
D E U T S C H
E S P A Ñ O L
I T A L I A N O
1 2 8 0 x 1 0 2 4 / 6 0 H z


1MENU
2m/M  OK
OK
3m/M OK
English
Français
Deutsch
Español
Italiano
Nederlands
Svenska


0
O K
1 2 8 0 x 1 0 2 4 / 6 0 H z


1MENU
2m/M 0 OK
3m/M OK
OK 
画面に戻ります。


1 2 8 0 x 1 0 2 4 / 6 0 H z


1MENU
2m/M  OK
OK
3m/M
1 INPUT

MENU 
18
1 m/M
|
|
, |
3 0 |
2 m/M
5
・
VESA NUTEK ENERGY STARSDM-HX75 DPMS Display Power Management Standard DMPMDVI Digital Monitor Power Management
SDM-HX75
|
|
|
1 |
|
|
50 W |
|
|
|
|
|
|
* |
1 W |
|
** |
|
|
|
|
|
|
|
|
1 |
1 W |
|
|
|
|
|
|
SDM-HX95 |
|
|
|
|
|
|
|
|
|
1 |
|
|
|
|
|
|
60 W |
|
|
|
|
|
|
* |
1 W |
|
** |
|
|
|
|
|
|
|
|
1 |
1 W |
|
|
|
|
|
* NO INPUT SIGNAL5
** EPA Environmental Protection Agency
19
/

GAMEtMOVIEtPCtAUTOAUTO
覧ください。

MOVIE1 MOVIE ( )PC
 : GAME
 : M
: M
,
: PC
 : AU
: AU
5
する機能があります。本機右側面の MENU /
  AUTOMOVIE
 AUTOm/M
RGB
/
28 80 kHz
48 75 Hz
16
20
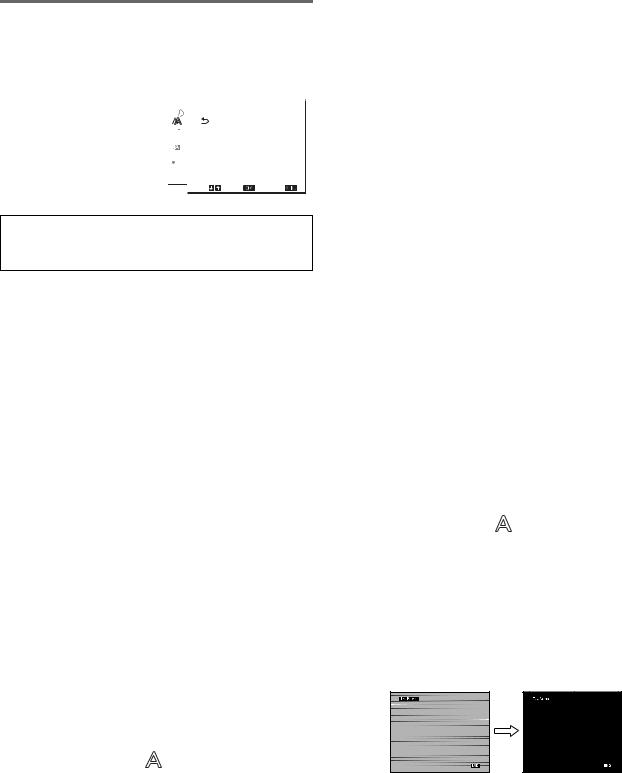
OUT OF RANGE
22
xxx.x kHz / xxx Hz
/
 I NFORMA T I ON
OUT OF RANGE
I NPUT # : XXXXX
XXX . XKH z / XXXH z
RESOLUTION > 1280 × 1024
1280 × 1024
 I NFORMA T I ON
OUT OF RANGE
I NPUT # : XXXXX
RESOL UT I ON > 1. 2 8 0 X 1 0 2 4
NO INPUT SIGNAL
17
 I NFORMA T I ON
NO |
I NPUT S I GNA L |
I NPUT # : XXXX X |
|
GO |
TO POWER SAVE |
|
|
|
|
|
|
|
|
GO TO POWER SAVE
5
CABLE DISCONNECTED
17
 I NFORMA T I ON
CAB L E D I SCONNECT ED
I NPUT # : XXXXX
21

|
|
|
|
|
|
|
|
|
|
|
|
|
1 |
|
|
1 |
|
|
1 |
|
|
|
|
|
|
|
CABLE DISCONNECTED |
7 |
|
|
|
|
|
|
|
|
|
11 |
|
|
|
|
|
CABLE DISCONNECTED |
|
|
|
|
|
|
NO INPUT SIGNAL |
7 |
|
|
|
|
|
1 |
|
|
|
11 |
|
|
x |
|
|
|
|
|
|
|
|
|
|
|
|
|
|
|
|
|
|
OUT OF RANGE |
x |
|
|
21 |
|
|
|
|
|
|
|
|
|
28 80 kHz( RGB) 28 64kHz( RGB) |
|
|
48 75 Hz( RGB) 60Hz( RGB) |
|
|
1280 × 1024 |
|
|
|
|
Windows |
|
|
|
|
|
|
Windows SONY SDM- |
|
|
HX75 SDM-HX95 |
|
|
|
|
|
|
|
Macintosh |
|
|
|
|
|
|
|
|
RGB 16 |
|
|
|
|
|
|
x |
|
|
|
|
|
|
|
|
VESA Macintosh19″ |
|
|
|
|
|
|
|
|
|
|
|
|
|
|
|
|
|
|
|
|
60 Hz |
|
|
|
22
|
|
|
|
|
|
|
|
|
|
13 14 |
|
|
|
15 |
|
|
|
RGB 16 |
|
|
|
x |
|
|
|
1280 × 1024 |
|
|
|
|
|
|
|
|
|
|
|
|
|
|
|
|
|
|
|
16 |
|
|
|
/ 17 |
|
|
RGB |
|
|
|
|
|
|
|
|
|
|
|
|
x |
|
|
|
1280 × 1024 |
|
|
|
|
|
|
|
13 |
|
|
|
14 |
|
|
|
14 |
|
|
|
|
|
|
|
|
AUTO |
|
|
|
13 20 |
|
|
|
|
|
|
RGB 16 |
|
|
|
|
|
|
|
RGB 16 |
|
|
|
|
|
|
|
14 |
|
|
|
|
|
|
|
18 |
|
|
|
|
|
|
|
|
|
|
|
|
|
|
|
|
|
|
|
|
|
出るまでMENU 5
MENU
MENU |
INFORMATION |
|
|
|
MODEL : SDM-HX95
SER. NO : 1234567 MANUFACTURED : 2005-40

SDM-HX75 SDM-HX95
と名前
RGB/ RGB
23

の際、お買い上げ店でお受け取りください。
に保存してください。
3
b
b
切り後8
SDM-HX75 SDM-HX95
購入年月日
TEL.
TEL.
This display is designed for use in Japan only and cannot be used in any other country.
24

LCD |
a-Si TFT |
|
|
|
17 43 cm SDM-HX75 |
|
19 48 cm SDM-HX95 |
|
|
|
RGB * |
|
28 80 kHz( RGB) |
|
28 64 kHz( RGB) |
|
48 75 Hz( RGB) |
|
60 Hz( RGB) |
|
1280 |
|
1024 |
RGB |
|
|
0.7 Vp-p 75 Ω |
|
|
|
TTL 2.2 kΩ |
|
/ |
|
RGB DVI |
|
TMDS Single link |
|
0.5 Vrms |
|
3 W × 2 |
|
|
|
|
|
SDM-HX75 |
|
AC100 240 V/50–60 Hz |
1.0 A SDM-HX95
AC100 240 V/50–60 Hz 1.1 A
50 W SDM-HX75 60 W SDM-HX95
5 35 °C
/ /
SDM-HX75
414 × 418.5 × 232 mm SDM-HX95
466.5 × 468 × 265 mm
|
SDM-HX75 |
|
6.5 kg |
|
SDM-HX95 |
|
8.5 kg |
& |
DDC2B |
|
7 |
4.8%0.8 µs
2.5 µs
450 µs
25

2-632-721-03(1)
TFT LCD Color
Computer Display
SDM-HX75
SDM-HX95
© 2005 Sony Corporation
Owner’s Record
The model and serial numbers are located at the rear of the unit. Record these numbers in the spaces provided below. Refer to them whenever you call upon your dealer regarding this product. Model No. Serial No.
WARNING
To reduce the risk of fire or electric shock, do not expose this apparatus to rain or moisture.
Dangerously high voltages are present inside the unit. Do not open the cabinet. Refer servicing to qualified personnel only.
FCC Notice
This equipment has been tested and found to comply with the limits for a Class B digital device, pursuant to Part 15 of the FCC Rules. These limits are designed to provide reasonable protection against harmful interference in a residential installation. This equipment generates, uses, and can radiate radio frequency energy and, if not installed and used in accordance with the instructions, may cause harmful interference to radio communications. However, there is no guarantee that interference will not occur in a particular installation. If this equipment does cause harmful interference to radio or television reception, which can be determined by turning the equipment off and on, the user is encouraged to try to correct the interference by one or more of the following measures:
–Reorient or relocate the receiving antenna.
–Increase the separation between the equipment and receiver.
–Connect the equipment into an outlet on a circuit different from that to which the receiver is connected.
–Consult the dealer or an experienced radio/TV technician for help. You are cautioned that any changes or modifications not expressly approved in this manual could void your authority to operate this equipment.
IMPORTANTE
Para prevenir cualquier mal funcionamiento y evitar daños, por favor, lea detalladamente este manual de instrucciones antes de conectar y operar este equipo.
If you have any questions about this product, you may call; Sony Customer Information Services Center 1-800-222-7669 or http://www.sony.com/
Declaration of Conformity
Trade Name: |
SONY |
Model: |
SDM-HX75/HX95 |
Responsible Party: |
Sony Electronics Inc. |
Address: |
16530 Via Esprillo, |
|
San Diego, CA 92127 U.S.A. |
Telephone Number: |
858-942-2230 |
This device complies with part 15 of the FCC rules. Operation is subject to the following two conditions: (1) This device may not cause harmful interference, and (2) this device must accept any interference received, including interference that may cause undesired operation.
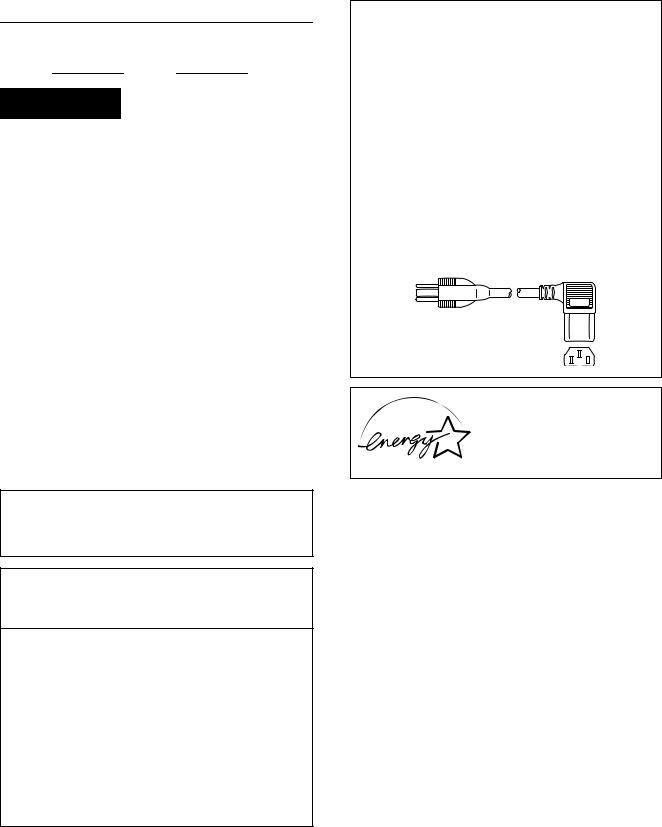
NOTICE
This notice is applicable for USA/Canada only.
If shipped to USA/Canada, install only a UL LISTED/CSA LABELLED power supply cord meeting the following specifications:
SPECIFICATIONS Plug Type
Cord 18 AWG Length
Rating
NOTICE
Cette notice s’applique aux Etats-Unis et au Canada uniquement.
Si cet appareil est exporté aux Etats-Unis ou au Canada, utiliser le cordon d’alimentation portant la mention UL LISTED/CSA LABELLED et remplissant les conditions suivantes: SPECIFICATIONS
Type de fiche
Cordon 18 AWG Longueur
Tension
As an ENERGY STAR Partner, Sony Corporation has determined that this product meets the ENERGY STAR guidelines for energy efficiency.
(SDM-HX75 only)
2
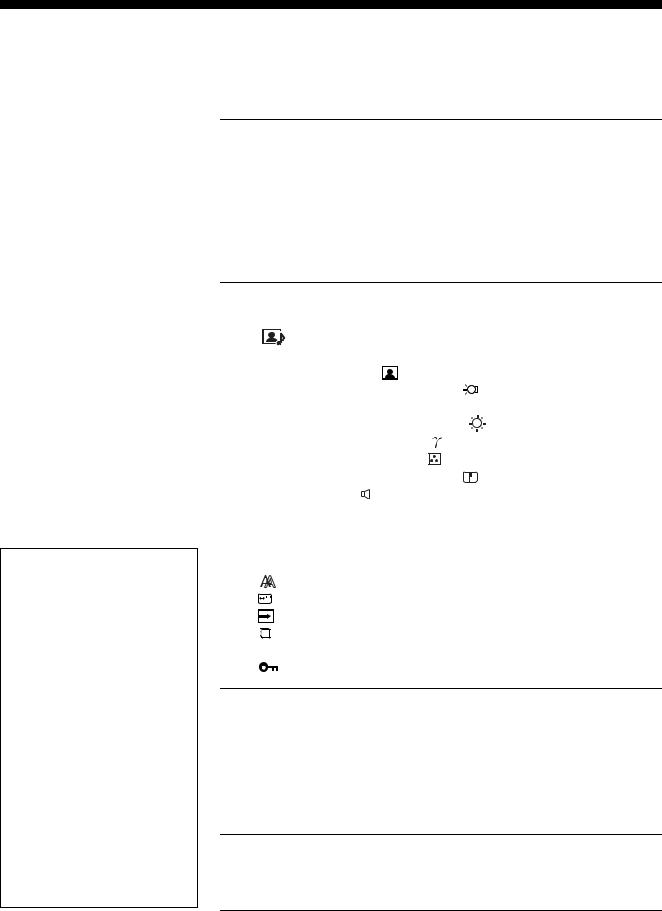
Table of Contents
Precautions . . . . . . . . . . . . . . . . . . . . . . . . . . . . . . . . . . . . . . . . . . . 4
Identifying parts and controls . . . . . . . . . . . . . . . . . . . . . . . . . . . . . . 5
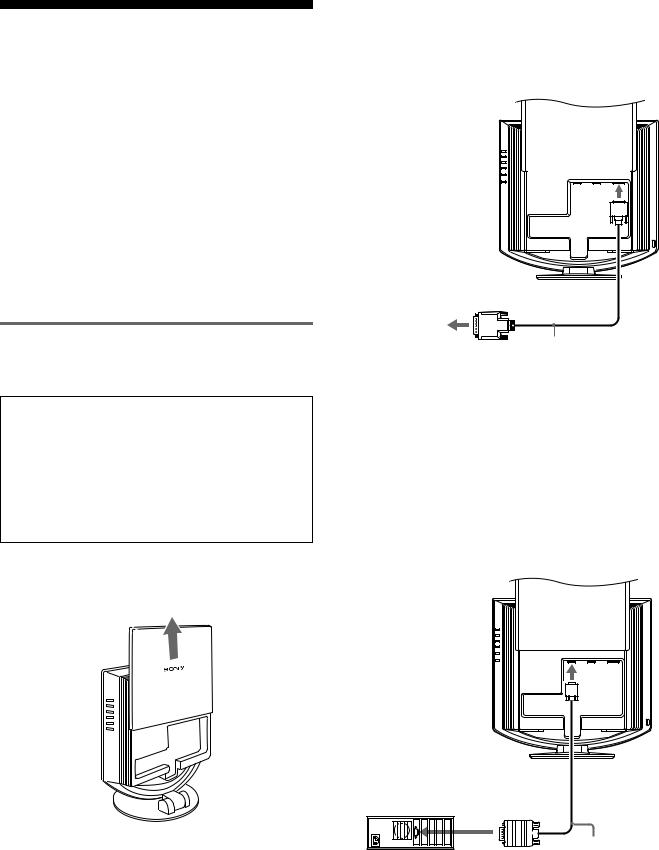
Setup . . . . . . . . . . . . . . . . . . . . . . . . . . . . . . . . . . . . . . . . .7
Setup 1: Connect the video signal cables . . . . . . . . . . . . . . . . . . . . 7
Setup 2: Connect the audio cord . . . . . . . . . . . . . . . . . . . . . . . . . . 8
Setup 3: Connect the power cord . . . . . . . . . . . . . . . . . . . . . . . . . . 8
Setup 4: Bundle the cords and cables . . . . . . . . . . . . . . . . . . . . . . 9
Setup 5: Turn on the monitor and computer . . . . . . . . . . . . . . . . . . 9
Setup 6: Adjust the tilt and swivel . . . . . . . . . . . . . . . . . . . . . . . . . 10
Selecting the input signal (INPUT button) . . . . . . . . . . . . . . . . . . . 11
•Macintosh is a trademark licensed to Apple Computer, Inc., registered in the U.S.A. and other countries.
•Windows→ is registered trademark of Microsoft Corporation in the United States and other countries.
•IBM PC/AT and VGA are registered trademarks of IBM Corporation of the U.S.A.
•VESA and DDC™ are trademarks of the Video Electronics Standards Association.
•ENERGY STAR is a U.S. registered mark.
•Adobe and Acrobat are trademarks of Adobe Systems Incorporated.
•WOW, SRS and 
 symbol are trademarks of SRS Labs, Inc.
•WOW technology is incorporated under license from SRS Labs, Inc.
•All other product names mentioned herein may be the trademarks or registered trademarks of their respective companies.
•Furthermore, “™” and “→” are not mentioned in each case in this manual.
http://www.sony.net/
Customizing Your Monitor . . . . . . . . . . . . . . . . . . . . . . .12
Navigating the menu . . . . . . . . . . . . . . . . . . . . . . . . . . . . . . . . . . . |
12 |
|
|||||
|
|
PICTURE/AUDIO menu . . . . . . . . . . . . . . . . . . . . . . . . . . . . . |
13 |
|
|||
|
|
MODE menu . . . . . . . . . . . . . . . . . . . . . . . . . . . . . . . . . . . . . . . |
13 |
|
|||
|
|
PICTURE menu . . . . . . . . . . . . . . . . . . . . . . . . . . . . . . . . |
13 |
|
|||
|
|
Adjusting the BACKLIGHT |
|
|
13 |
|
|
|
|
||||||
GB |
|||||||
|
|
Adjusting the CONTRAST 6 . . . . . . . . . . . . . . . . . . . . . . . . |
13 |
||||
|
|
|
|||||
|
|
Adjusting the BRIGHTNESS . . . . . . . . . . . . . . . . . . . . . |
14 |
|
|||
|
|
Adjusting the GAMMA . . . . . . . . . . . . . . . . . . . . . . . . . . |
14 |
|
|||
|
|
Adjusting the COLOR . . . . . . . . . . . . . . . . . . . . . . . . . . . |
14 |
|
|||
|
|
Adjusting the SHARPNESS . . . . . . . . . . . . . . . . . . . . . . |
15 |
|
|||
|
|
AUDIO menu . . . . . . . . . . . . . . . . . . . . . . . . . . . . . . . . . . . . |
15 |
|
|||
|
|
Adjusting TREBLE, BASS or BALANCE . . . . . . . . . . . . . . . |
15 |
|
|||
|
|
Adjusting SURROUND . . . . . . . . . . . . . . . . . . . . . . . . . . . . |
15 |
|
|||
|
|
MODE RESET menu |
|
|
|||
|
|
(resetting every mode to the default) 0 . . . . . . . . . . . . . . . . . |
15 |
|
|||
|
|
SCREEN menu (analog RGB signal only) . . . . . . . . . . . . . . . |
16 |
|
|||
|
|
MENU POSITION menu . . . . . . . . . . . . . . . . . . . . . . . . . . . . . . |
17 |
|
|||
|
|
|
|||||
|
|
INPUT SENSING ON/OFF menu . . . . . . . . . . . . . . . . . . . . . . |
17 |
|
|||
|
|
LANGUAGE menu |
18 |
|
|||
|
|
|
|||||
0 RESET menu (reset to the default setting) . . . . . . . . . . . . . . . |
18 |
|
|||||
|
|
MENU LOCK menu . . . . . . . . . . . . . . . . . . . . . . . . . . . . . . . . |
18 |
|
|||
Technical Features . . . . . . . . . . . . . . . . . . . . . . . . . . . . .19
Controlling the volume . . . . . . . . . . . . . . . . . . . . . . . . . . . . . . . . . . 19 Power saving function . . . . . . . . . . . . . . . . . . . . . . . . . . . . . . . . . . 19 Setting the MODE (PICTURE/AUDIO) ( mode) . . . . . . . . . . . 20 Automatic brightness adjustment function (light sensor) . . . . . . . . 20 Automatic picture quality adjustment function
(analog RGB signal only) . . . . . . . . . . . . . . . . . . . . . . . . . . . . . . . . 20
Troubleshooting . . . . . . . . . . . . . . . . . . . . . . . . . . . . . . .21
On-screen messages . . . . . . . . . . . . . . . . . . . . . . . . . . . . . . . . . . . 21 Trouble symptoms and remedies . . . . . . . . . . . . . . . . . . . . . . . . . 22
Specifications . . . . . . . . . . . . . . . . . . . . . . . . . . . . . . . . .24
3
Precautions
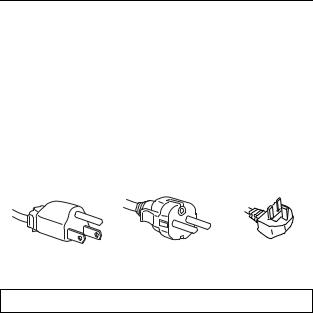
Warning on power connections
•Use the supplied power cord. If you use a different power cord, be sure that it is compatible with your local power supply.
For the customers in the U.S.A.
If you do not use the appropriate cord, this monitor will not conform to mandatory FCC standards.
For the customers in the UK
If you use the monitor in the UK, be sure to use the appropriate UK power cord.
Example of plug types
for 100 to 120 V AC for 200 to 240 V AC for 240 V AC only
The equipment should be installed near an easily accessible outlet.
Installation
Do not install or leave the monitor:
•In places subject to extreme temperatures, for example near a radiator, heating vent, or in direct sunlight. Subjecting the monitor to extreme temperatures, such as in an automobile parked in direct sunlight or near a heating vent, could cause deformations of the casing or malfunctions.
•In places subject to mechanical vibration or shock.
•Near any equipment that generates a strong magnetic field, such as a TV or various other household appliances.
•In places subject to inordinate amounts of dust, dirt, or sand, for example near an open window or an outdoor exit. If setting up temporarily in an outdoor environment, be sure to take adequate precautions against airborne dust and dirt. Otherwise irreparable malfunctions could occur.
Handling the LCD screen
•Do not leave the LCD screen facing the sun as it can damage the LCD screen. Take care when you place the monitor by a window.
•Do not push on or scratch the LCD screen. Do not place a heavy object on the LCD screen. This may cause the screen to lose uniformity or cause LCD panel malfunctions.
•If the monitor is used in a cold place, a residual image may appear on the screen. This is not a malfunction. The screen returns to normal as the temperature rises to a normal operating level.
•If a still picture is displayed for a long time, a residual image may appear for a while. The residual image will eventually disappear.
•The LCD panel becomes warm during operation. This is not a malfunction.
About the built-in stereo speakers
Be sure to keep magnetic recording equipment, tapes, and floppy discs away from the speaker’s opening as the speakers generate a magnetic field. This magnetic field may affect data stored on magnetic tapes and discs.
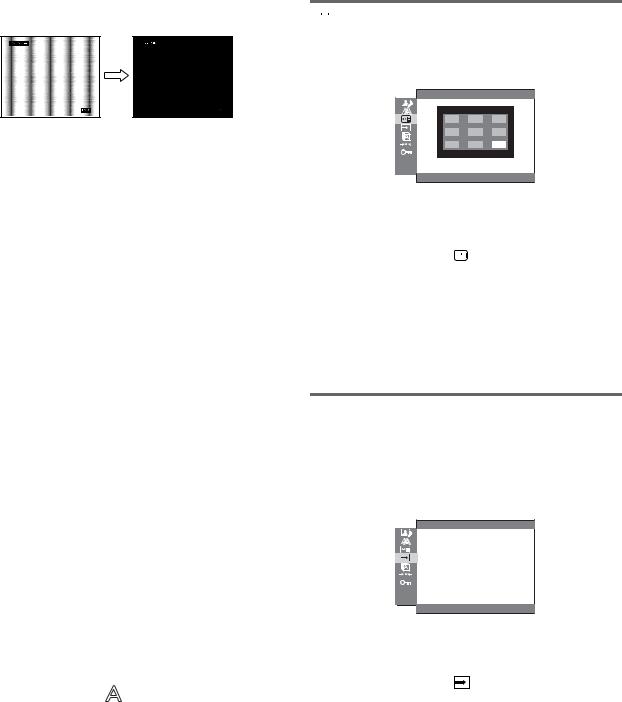
Note on the LCD (Liquid Crystal Display)
Please note that the LCD screen is made with high-precision technology. However, black points or bright points of light (red, blue, or green) may appear constantly on the LCD screen, and irregular colored stripes or brightness may appear on the LCD screen. This is not malfunction.
(Effective dots: more than 99.99%)
Maintenance
•Be sure to unplug the power cord from the power outlet before cleaning your monitor.
•Clean the LCD screen with a soft cloth. If you use a glass cleaning liquid, do not use any type of cleaner containing an anti-static solution or similar additive as this may scratch the LCD screen’s coating.
•Clean the cabinet, panel, and controls with a soft cloth lightly moistened with a mild detergent solution. Do not use any type of abrasive pad, scouring powder, or solvent, such as alcohol or benzine.
•Do not rub, touch, or tap the surface of the screen with sharp or abrasive items such as a ballpoint pen or screwdriver. This type of contact may result in a scratched picture tube.
•Note that material deterioration or LCD screen coating degradation may occur if the monitor is exposed to volatile solvents such as insecticide, or if prolonged contact is maintained with rubber or vinyl materials.
Transportation
•Disconnect all cables from the monitor, and grasp both side of the LCD display firmly taking care not to scratch the screen when transporting. If you drop the monitor, you may be injured or the monitor may be damaged.
•When you transport this monitor for repair or shipment, use the original carton and packing materials.
Disposal of the monitor
•Do not dispose of this monitor with general household waste.
•The fluorescent tube used in this monitor contains mercury. Disposal of this monitor must be carried out in accordance to the regulations of your local sanitation authority.
4
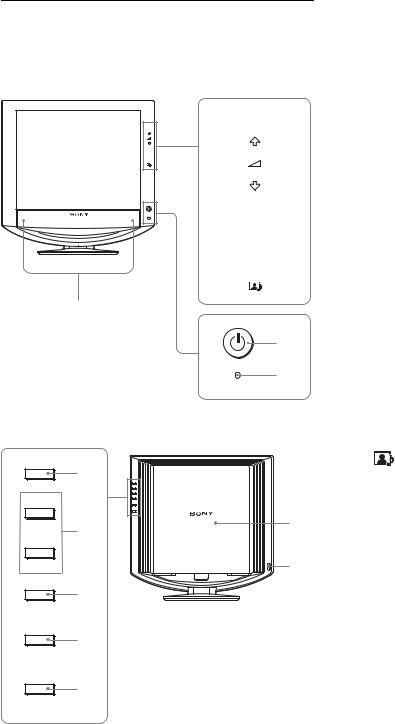
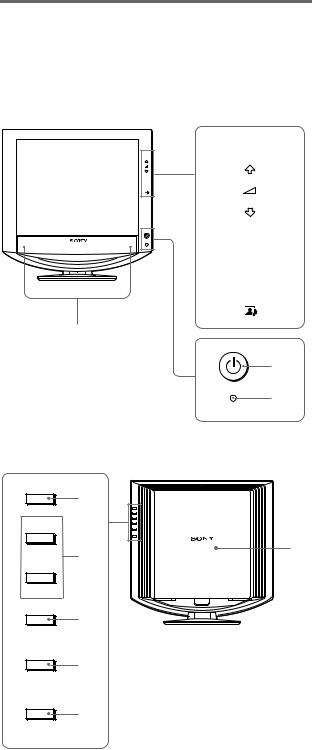
Identifying parts and controls
See the pages in parentheses for further details.
Front of the LCD display
MENU
MENU
OK
INPUT
OK
INPUT
3
1
2
Side view of the LCD display
4 |
|
5 |
9 |
|
|
|
q; |
6 |
|
7
8
A1 (Power) switch and 1 (power) indicator
(pages 9, 19)
To turn the display on or off, press the 1 (power) switch. The power indicator lights up in green when the display is turned on, and lights up in orange when the display is in the power saving mode.
BLight sensor (page 20)
This sensor measures the brightness of the surrounding area. Be sure not to cover the sensor with papers, etc.
CStereo speakers (page 19)
These speakers output the audio signals as sound.
DMENU button (page 12)
This button turns the menu screen on and off.
Em/M and 2 (volume control) buttons (pages 12, 19)
These buttons are used to select the menu items and make adjustments, and also display the “Volume” menu to control the volume.
FOK button (page 12)
This button activates the selected menu item and adjustments made using the m/M buttons (5).
G INPUT button (page 11)
|
This button switches the video input signal between INPUT1, |
GB |
|
INPUT2 and INPUT3 when two computers are connected to |
|
|
|
|
|
the monitor. |
|
H |
button (page 20) |
|
|
This button changes the MODE (PICTURE/AUDIO). |
|
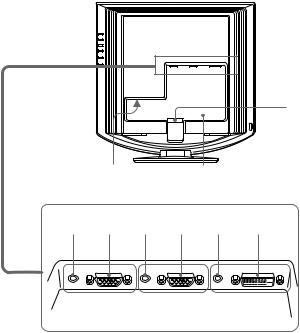
IBack cover (page 7)
Slide up this cover when you connect cables or cords.
JHeadphones jack (page 19)
This jack outputs audio signals to the headphones.
5
 Loading...