


DIGITALD1232
SUPER HYBRID SYSTEM
DIGITALD816
SUPER HYBRID SYSTEM
Panasonic |
Panasonic |
Digital Super Hybrid System
Programming Guide
KX-TD816
Model KX-TD1232
Please read this manual before using the Digital Super Hybrid System. This manual is for software version P341I, P342I or later for KX-TD816 and P241I, P242I or later for KX-TD1232.

Introduction
About this Programming Guide
This Programming Guide is designed to serve as an overall system programming reference for the Panasonic Digital Super Hybrid System, KX-TD816 / KX-TD1232.
This manual contains the following sections:
Section 1, Programming Instructions
Provides information about what you need or what you should do before/during programming.
Section 2, General Programming
Provides details about the general system programmings.
Section 3, ISDN Programming
Provides details about the system programmings required to use ISDN lines.
The system is in accordance with EuropeanTelecommunication Standard (ETS) specifications below:
ETS 300 092 Calling Line Identification Presentation (CLIP) supplementary service. ETS 300 093 Calling Line Identification Restriction (CLIR) supplementary service.
ETS 300 097 Connected Line Identification Presentation (COLP) supplementary service. ETS 300 098 Connected Line Identification Restriction (COLR) supplementary service. ETS 300 122 Generic keypad protocol for the support of supplementary service (ISDN Service Access).
ETS 300 130 Malicious Call Identification (MCID) supplementary service.
ETS 300 182 Advice of Charge (AOC) supplementary service Digital Signalling Syste No.one (DSS1) protocol.
Section 4, E&M Programming
Provides details about the system programmings required to use E&M (TIE) lines.
Section 5, DECT Programming
Provides details about the system programmings required to use the wireless system with a DECT portable station.
Section 6, Default Values
Provides the list of default values for all programmings.
Section 7, Index
Provides the programming titles, important words and phrases to help you access the required information easily.
About the other manuals
Along with this Programming Guide, the following manuals are available to help you install, know the available features and use the KX-TD816 / KX-TD1232 system:
Installation Manual
Provides instructions for installing the hardware and optional equipment.
Features Guide
Provides information about the system features.
2 |
Introduction |

User Manual
Provides operating instructions for the end users using proprietary telephones, single line telephones, consoles or DECT portable stations.
Introduction |
3 |

Table of Contents
1 |
Programming Instructions............................................................... |
9 |
1.1 |
Programming Instructions.......................................................................................... |
10 |
1.2 |
Using Proprietary Telephones .................................................................................... |
11 |
1.3 |
Programming Methods ............................................................................................... |
15 |
1.4 |
Entering Characters .................................................................................................... |
17 |
1.5 |
User Programming Mode............................................................................................ |
22 |
1.6 |
Programming Example ............................................................................................... |
23 |
2 General Programming ................................................................... |
27 |
|
2.1 |
Manager Programming............................................................................................... |
28 |
[000] Date and Time Set ...................................................................................................... |
28 |
|
[001] System Speed Dialling Number Set........................................................................... |
30 |
|
[002] System Speed Dialling Name Set .............................................................................. |
32 |
|
[003] |
Extension Number Set ............................................................................................... |
34 |
[004] |
Extension Name Set ................................................................................................... |
36 |
[005] Flexible CO Button Assignment ................................................................................ |
38 |
|
[006] Operator / Manager Extension Assignment ............................................................... |
41 |
|
[007] Console Port and Paired Telephone Assignment ....................................................... |
43 |
|
[008] |
Absent Messages........................................................................................................ |
45 |
[009] Emergency Dial Number Set ..................................................................................... |
47 |
|
[010] |
Budget Management .................................................................................................. |
49 |
[011] |
Charge Margin Rate ................................................................................................... |
51 |
[015] Quick Dialling Number Set ....................................................................................... |
52 |
|
2.2 |
System Programming .................................................................................................. |
53 |
[100] |
Flexible Numbering ................................................................................................... |
53 |
[101] Day / Night Service Switching Mode ........................................................................ |
57 |
|
[102] Day / Night Service Starting Time............................................................................. |
58 |
|
[103] Automatic Access Outside Line Group Assignment ................................................. |
60 |
|
[104] Flexible Quick Dialling Number Set ......................................................................... |
61 |
|
[105] |
Account Codes ........................................................................................................... |
63 |
[106] |
Station Hunting Type ................................................................................................. |
65 |
[107] |
System Password........................................................................................................ |
67 |
[108] |
One-Touch Transfer by DSS Button .......................................................................... |
68 |
[109] |
Expansion Unit Type.................................................................................................. |
69 |
[113] VM Status DTMF Set ................................................................................................ |
71 |
|
[114] VM Command DTMF Set ......................................................................................... |
73 |
|
[115] |
Adjust Time................................................................................................................ |
75 |
[116] |
ROM Version Display ................................................................................................ |
76 |
[117] Voice Mail Number Assignment................................................................................ |
77 |
|
[118] Voice Mail Extension Number Set............................................................................. |
79 |
|
[119] Voice Mail Extension Group Assignment.................................................................. |
81 |
|
[120] |
Charge Display Selection........................................................................................... |
83 |
[121] |
Assignment of Denomination .................................................................................... |
84 |
[122] |
Charge Verification Assignment ................................................................................ |
85 |
[123] Charge Verification ID Code Set................................................................................ |
86 |
|
[124] |
Hotel Application ....................................................................................................... |
87 |
4 |
Table of Contents |

[12 |
5]User Password............................................................................................................. |
88 |
[12 |
6]UCD Overflow ............................................................................................................ |
89 |
[12 |
7]UCD Time Table ......................................................................................................... |
91 |
[13 0]Phantom Extension Number Set ................................................................................. |
93 |
|
[14 |
8]Off-Hook Monitor....................................................................................................... |
95 |
[15 |
4]Message Waiting Control............................................................................................ |
96 |
[15 5]Message Waiting Lamp Assignment .......................................................................... |
98 |
|
[15 6]Message Waiting Port Set ......................................................................................... |
100 |
|
2.3 |
Timer Programming................................................................................................... |
102 |
[20 |
0]Hold Recall Time ...................................................................................................... |
102 |
[20 |
1]Transfer Recall Time ................................................................................................ |
103 |
[20 2]Call Forwarding – No Answer Time......................................................................... |
104 |
|
[20 |
3]Intercept Time ........................................................................................................... |
105 |
[20 |
4]Pickup Dial Waiting Time ......................................................................................... |
106 |
[20 5]Extension-to-Outside Line Call Duration Time........................................................ |
107 |
|
[20 |
6]Outside-to-Outside Line Call Duration Time ........................................................... |
108 |
[20 |
7]First Digit Time......................................................................................................... |
109 |
[20 |
8]Inter Digit Time ........................................................................................................ |
110 |
[20 9]Automatic Redial Repeat Times ............................................................................... |
111 |
|
[21 0]Automatic Redial Interval Time ............................................................................... |
112 |
|
[21 |
1]Dial Start Time.......................................................................................................... |
113 |
[21 2]Call Duration Count Start Time ................................................................................ |
114 |
|
[21 3]DISA Delayed Answer Time .................................................................................... |
115 |
|
[21 |
4]DISA Prolong Time .................................................................................................. |
116 |
[21 |
5]Outgoing Message Time ........................................................................................... |
117 |
[21 6]Message Waiting Ring Interval Time ....................................................................... |
118 |
|
[21 7]Timed Reminder Alarm Repeat Times ..................................................................... |
119 |
|
[21 8]Timed Reminder Alarm Interval Time ..................................................................... |
120 |
|
[22 1]DISA AA Wait Time................................................................................................. |
121 |
|
2.4 TRS / ARS Programming .......................................................................................... |
122 |
|
[30 0]TRS Override for System Speed Dialling................................................................. |
122 |
|
[301-3 05]TRS Denied Code Entry for Levels 2 through 6 ............................................... |
123 |
|
[306-3 10]TRS Excepted Code Entry for Levels 2 through 6 ............................................ |
125 |
|
[31 |
2]ARS Mode ................................................................................................................ |
127 |
[31 |
3]ARS Time ................................................................................................................. |
128 |
[314-3 21]ARS Leading Digit Entry for Plans 1 through 8 ............................................... |
130 |
|
[322-3 29]ARS Routing Plans 1 through 8 ........................................................................ |
132 |
|
[33 0]ARS Modify Removed Digit .................................................................................... |
134 |
|
[33 1]ARS Modify Added Number .................................................................................... |
135 |
|
2.5 |
Outside Line Programming ....................................................................................... |
136 |
[40 0]Outside Line Connection Assignment ...................................................................... |
136 |
|
[40 1]Outside Line Group Assignment .............................................................................. |
138 |
|
[40 |
2]Dial Mode Selection ................................................................................................. |
140 |
[40 |
3]Pulse Speed Selection ............................................................................................... |
142 |
[40 |
4]DTMF Time .............................................................................................................. |
144 |
[407-4 08]DIL 1:1 Extension – Day / Night ...................................................................... |
146 |
|
[409-4 10]Intercept Extension – Day / Night ..................................................................... |
148 |
|
[41 1]Host PBX Access Codes........................................................................................... |
150 |
|
[41 |
2]Pause Time ................................................................................................................ |
152 |
Table of Contents |
5 |

[413] |
Flash Time................................................................................................................ |
153 |
[414] |
Disconnect Time ...................................................................................................... |
155 |
[417] Outside Line Name Assignment .............................................................................. |
156 |
|
[423] |
Pay Tone Assignment............................................................................................... |
158 |
[441] |
Line Hunting Sequence ............................................................................................ |
160 |
2.6 |
COS Programming .................................................................................................... |
161 |
[500-501] Toll Restriction Level – Day / Night................................................................. |
161 |
|
[502] Extension-to-Outside Line Call Duration Limit ...................................................... |
163 |
|
[503] Call Transfer to Outside Line................................................................................... |
165 |
|
[504] Call Forwarding to Outside Line ............................................................................. |
166 |
|
[505] |
Executive Busy Override ......................................................................................... |
167 |
[506] Executive Busy Override Deny................................................................................ |
168 |
|
[507] |
Do Not Disturb Override.......................................................................................... |
169 |
[508] Account Code Entry Mode ...................................................................................... |
170 |
|
[509] |
Off-Hook Call Announcement (OHCA) .................................................................. |
172 |
2.7 |
Extension Programming ........................................................................................... |
173 |
[600] |
EXtra Device Port .................................................................................................... |
173 |
[601] |
Class of Service........................................................................................................ |
175 |
[602] |
Extension Group Assignment .................................................................................. |
177 |
[603-604] DIL 1:N Extension and Delayed Ringing – Day / Night.................................. |
179 |
|
[605-606] Outgoing Permitted Outside Line Assignment – Day / Night .......................... |
181 |
|
[607-608] Doorphone Ringing Assignment – Day / Night ............................................... |
183 |
|
[609] Voice Mail Access Codes......................................................................................... |
185 |
|
[612] |
Incoming Call Display ............................................................................................. |
187 |
[616] Live Call Screening Recording Mode Assignment.................................................. |
189 |
|
2.8 |
Resource Programming............................................................................................. |
191 |
[800] SMDR Incoming / Outgoing Call Log Printout....................................................... |
191 |
|
[801] |
SMDR Format.......................................................................................................... |
193 |
[802] |
System Data Printout ............................................................................................... |
194 |
[803] |
Music Source Use .................................................................................................... |
195 |
[804] |
External Pager BGM................................................................................................ |
197 |
[805] External Pager Confirmation Tone........................................................................... |
199 |
|
[806-807] Serial Interface (RS-232C) Parameters ............................................................ |
200 |
|
[809] |
DISA SecurityType ................................................................................................. |
202 |
[810] |
DISA Tone Detection ............................................................................................... |
203 |
[811] DISA / TIE User Codes ........................................................................................... |
204 |
|
[812] |
DISA DTMF Repeat ................................................................................................ |
206 |
[813] |
Floating Number Assignment .................................................................................. |
207 |
[814] |
Modem Standard ...................................................................................................... |
209 |
[815] |
SMDR Output Mode................................................................................................ |
210 |
[817] KX-TD197 Baud Rate Set ....................................................................................... |
211 |
|
[818] DISA Built-in Automated Attendant Number ......................................................... |
212 |
|
2.9 |
Optional Programming ............................................................................................. |
213 |
[990] |
System Additional Information................................................................................ |
213 |
[991] |
COS Additional Information.................................................................................... |
224 |
3 ISDN Programming...................................................................... |
227 |
|
3.1 |
Manager Programming............................................................................................. |
228 |
[005] Flexible CO Button Assignment ................................................................................ |
38 |
|
6 |
Table of Contents |

[01 2]ISDN Extension Number Set .................................................................................... |
231 |
|
[01 3]ISDN Extension Name Set ....................................................................................... |
233 |
|
[01 4]Budget Management on ISDN Port .......................................................................... |
235 |
|
3.2 |
System Programming ................................................................................................. |
237 |
[10 |
0]Flexible Numbering .................................................................................................... |
53 |
[10 |
9]Expansion Unit Type................................................................................................... |
69 |
[11 2]ISDN Network Type Assignment ............................................................................. |
243 |
|
[15 |
0]DDI Translation Table .............................................................................................. |
244 |
[151-1 52]DDI Ringing Assignment – Day / Night........................................................... |
246 |
|
3.3 |
ISDN Line Programming ........................................................................................... |
248 |
[41 8]ISDN Line Number Assignment............................................................................... |
248 |
|
[41 9]ISDN Outgoing CLIR Service Assignment.............................................................. |
250 |
|
[42 1]ISDN DDI / MSN Removed Digit / Added Number Assignment ............................ |
252 |
|
[42 |
4]ISDN Port Type......................................................................................................... |
254 |
[42 5]ISDN Layer 1 Active Mode ...................................................................................... |
256 |
|
[42 |
6]ISDN Configuration .................................................................................................. |
258 |
[42 7]ISDN Data Link Mode.............................................................................................. |
260 |
|
[42 |
8]ISDN TEI Mode........................................................................................................ |
262 |
[42 9]ISDN Extension Multiple Subscriber Number ......................................................... |
264 |
|
[43 0]ISDN Extension Progress Tone ................................................................................ |
266 |
|
[44 |
7]MSN Assignment...................................................................................................... |
268 |
[448-4 49]Extension Ringing Assignment – Day / Night for ISDN .................................. |
270 |
|
[45 |
0]PRI Configuration ..................................................................................................... |
272 |
[45 |
1]PRI Reference CO .................................................................................................... |
273 |
[452-4 53]ISDN Ring Service Assignment – Day / Night ................................................. |
275 |
|
3.4 |
Extension Programming ............................................................................................ |
277 |
[61 |
3]ISDN Class of Service .............................................................................................. |
277 |
[614-6 15]Outgoing Permitted Outside Line Assignment – Day / Night for ISDN Extension
|
279 |
|
[61 7]CLIP / COLP Number Assignment for Extension.................................................... |
281 |
|
[61 8]CLIP / COLP Number Assignment for ISDN Extension ......................................... |
283 |
|
3.5 |
Optional Programming .............................................................................................. |
285 |
[99 |
0]System Additional Information ................................................................................ |
213 |
4 E & M Programming ................................................................... |
297 |
|
4.1 |
System Programming ................................................................................................. |
298 |
[10 |
0]Flexible Numbering .................................................................................................... |
53 |
[10 |
9]Expansion Unit Type................................................................................................... |
69 |
[12 |
8]PBX Code ................................................................................................................. |
304 |
[12 |
9]E&M Signal Assignment .......................................................................................... |
305 |
4.2 |
Timer Programming................................................................................................... |
306 |
[22 |
0]TIE First / Inter Digit Time ....................................................................................... |
306 |
4.3 |
TIE Line Routing Table Programming .................................................................... |
307 |
[34 0]TIE Line Routing Table ............................................................................................ |
307 |
|
[34 1]TIE Modify Removed Digit / Added Dial ................................................................ |
309 |
|
4.4 |
TIE Line Programming ............................................................................................. |
311 |
[43 1]TIE Table Number Assignment ................................................................................ |
311 |
|
[43 |
2]TIE Incoming Assignment........................................................................................ |
313 |
[43 |
3]TIE Outgoing Assignment ........................................................................................ |
314 |
Table of Contents |
7 |

[434] TIE Subscriber Number Removed Digit .................................................................. |
316 |
|
[435] |
TIE Added Number.................................................................................................. |
317 |
[436] TIE Wink Time Out Assignment ............................................................................. |
318 |
|
[437] |
Outside-to-TIE Transfer........................................................................................... |
320 |
[438] |
TIE-to-Outside Transfer........................................................................................... |
321 |
[439] |
TIE-to-TIE Transfer ................................................................................................. |
322 |
[440] |
TIE Security Type .................................................................................................... |
323 |
[442] |
Voice Path Type........................................................................................................ |
324 |
[443] |
Voice Level (Transmit)............................................................................................. |
325 |
[444] |
Voice Level (Receive) .............................................................................................. |
326 |
[445] |
TIE Receive Dial...................................................................................................... |
327 |
4.5 |
Resource Programming............................................................................................. |
328 |
[811] DISA / TIE User Codes ........................................................................................... |
204 |
|
4.6 |
Optional Programming ............................................................................................. |
330 |
[990] |
System Additional Information................................................................................ |
213 |
5 |
DECT Programming .................................................................... |
341 |
|
5.1 |
|
Manager Programming............................................................................................. |
342 |
[020] PS Flexible CO Button Assignment......................................................................... |
342 |
||
5.2 |
|
System Programming ................................................................................................ |
344 |
[100] |
Flexible Numbering ................................................................................................... |
53 |
|
[109] |
Expansion Unit Type.................................................................................................. |
69 |
|
5.3 |
|
Extension Programming ........................................................................................... |
350 |
[650] |
PS Registration......................................................................................................... |
350 |
|
[651] |
PS Termination......................................................................................................... |
354 |
|
[653] PS Extension Name Set ........................................................................................... |
356 |
||
[654] |
SXDP Assignment ................................................................................................... |
357 |
|
[655] |
PS Budget Management........................................................................................... |
358 |
|
[656] PS Charge Verification Assignment......................................................................... |
360 |
||
[657] PS Class of Service .................................................................................................. |
361 |
||
[658] PS Extension Group Assignment............................................................................. |
363 |
||
[659-660] PS DIL 1:N Extension – Day / Night ............................................................... |
365 |
||
[661-662] PS Outgoing Permitted Outside Line Assignment – Day / Night .................... |
367 |
||
[663-664] PS Doorphone Ringing Assignment – Day / Night .......................................... |
369 |
||
[665] PS Voice Mail Access Codes ................................................................................... |
371 |
||
[671] PS Extension Number Set ........................................................................................ |
373 |
||
[672] |
PS Password Set....................................................................................................... |
375 |
|
[673] CLIP / COLP Number Assignment for PS .............................................................. |
376 |
||
[676] PS Incoming Call Display........................................................................................ |
378 |
||
[680] Cell Station Number Assignment for Master CS..................................................... |
380 |
||
[681] PS Radio System ID Reference ............................................................................... |
381 |
||
[682] |
Radio Information Data Clear.................................................................................. |
382 |
|
5.4 |
|
Optional Programming ............................................................................................. |
383 |
[990] |
System Additional Information................................................................................ |
213 |
|
6 |
Default Values ............................................................................... |
395 |
|
7 |
Index .............................................................................................. |
407 |
|
8 |
Table of Contents |

Section
Programming Instructions
Programming Instructions |
9 |

1.1Programming Instructions
1.1Programming Instructions
Default Setting
This system has a default factory setting. If any of the programming needs to be changed, you will find the necessary information in the Features Guide. This makes the system very simple to install and customise as required by the customer. Any required changes can be written in "Programming Tables".
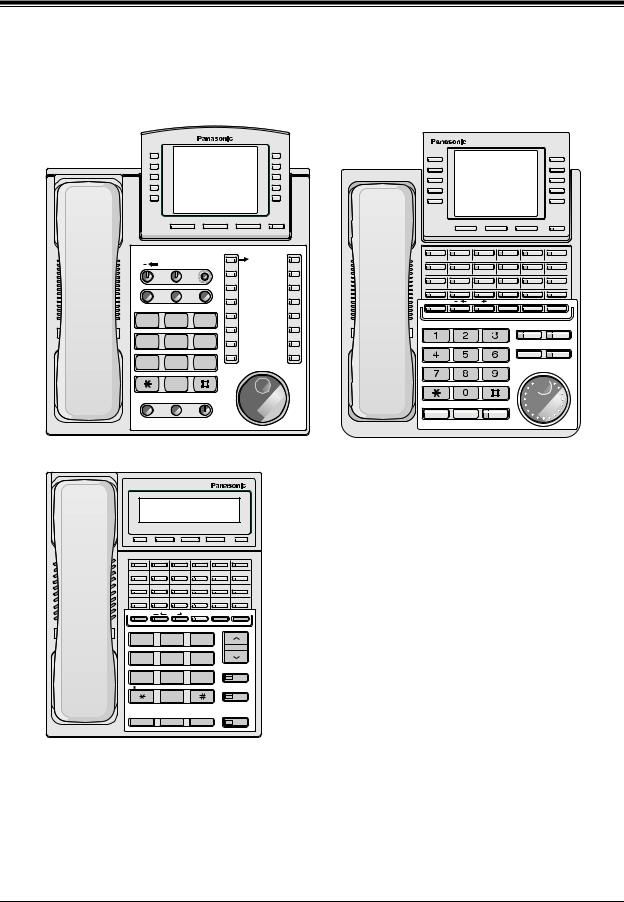
Required Telephone Set
One of the following telephone sets is required for System Programming:
• Digital Proprietary Telephone (DPT):
KX-T7536, KX-T7533, KX-T7531, KX-T7436, KX-T7433, KX-T7235, KX-T7230
• Analogue Proprietary Telephone (APT):
KX-T7330, KX-T7130, KX-T7030, KX-T7033
Extensions Used for Programming
Connect one of the above-mentioned telephone sets to either of the following:
•Jack number 1
•Jack programmed as a manager extension
To assign the manager extension, see Section 2.1 [006]Op erator / Manager Extension Assignment.
User Programming (Manager Programming)
Manager programming items are allowed for any display proprietary telephone user in the system. See Section 1.5 User Programming Mode.
10 |
Programming Instructions |
1.2 Using Proprietary Telephones
1.2Using ProprietaryTelephones
Soft Buttons and SHIFT Button on the Display DPT
Three soft buttons are provided just below the display of Digital Proprietary Telephones (DPT), KX-T7533, KX-T7536, KX-T7433, KX-T7436, KX-T7230 and KX-T7235. The functions of these soft buttons vary as the programming procedures advance step by step. Those functions that are currently assigned to the buttons are shown on the lower line of the display. (See "Viewing the Display" in this section for more information on the display lines.)
If the SHIFT button indicator is on, two functions are available with each softbutton. To alternate between the two functions, press the SHIFT button on the right side of the display.
Soft button variations
Type 1
CLR NEXT
Example:
KX-T7230 Display
Buttons
|
Soft 1 |
|
Soft 2 |
Soft 3 |
SHIFT |
|
|
|
|
|
|
|
|
|
|
|
||||||
Type 2 |
|
|
|
|
|
|
|
|
|
|
|
|
|
|
|
|
|
|
|
|
||
|
|
|
|
|
|
|
|
|
|
|
|
Press SHIFT |
|
|
|
|
|
|||||
|
SKP+ CLR |
NEXT |
|
|
|
to alternate |
SKP- |
|
|
PREV |
|
|||||||||||
|
|
|
|
|
|
|
|
|
|
|||||||||||||
|
|
|
|
|
|
|
|
|
|
|||||||||||||
|
|
|
|
|
|
|
|
|
|
|
|
|
|
|
|
|
|
|
|
|
|
|
|
|
|
|
|
|
|
|
|
|
|
|
|
|
|
|
|
|
|
|
|
|
|
|
|
|
|
|
|
|
|
|
|
|
|
|
|
|
|
|
|
|
|
|
|
|
|
|
Soft 1 |
|
Soft 2 |
Soft 3 |
SHIFT |
|
|
|
|
Soft 1 |
Soft 2 |
|
Soft 3 |
SHIFT |
|||||||
Type 3 |
|
|
|
|
|
|
|
|
|
|
|
|
|
|
|
|
|
|
|
|
||
|
|
|
|
|
|
|
|
|
|
|
|
Press SHIFT |
|
|
|
|
|
|||||
|
-> |
SEL+ |
NEXT |
|
|
|
to alternate |
|
<- SELPREV |
|
||||||||||||
|
|
|
|
|
|
|
|
|
||||||||||||||
|
|
|
|
|
|
|
|
|
||||||||||||||
|
|
|
|
|
|
|
|
|
|
|
|
|
|
|
|
|
|
|
|
|
|
|
|
|
|
|
|
|
|
|
|
|
|
|
|
|
|
|
|
|
|
|
|
|
|
|
|
|
|
|
|
|
|
|
|
|
|
|
|
|
|
|
|
|
|
|
|
|
|
|
Soft 1 |
|
Soft 2 |
Soft 3 |
SHIFT |
|
|
|
|
Soft 1 |
Soft 2 |
|
Soft 3 |
SHIFT |
|||||||
Type 4 |
|
|
|
|
|
|
|
|
|
|
|
|
|
|
|
|
|
|
|
|
||
|
|
|
|
|
|
|
|
|
|
|
|
Press SHIFT |
|
|
|
|
|
|||||
|
|
A |
|
B |
C |
|
|
|
|
to alternate |
|
|
|
b |
|
c |
|
|
||||
|
|
|
|
|
|
|
|
|
|
|
a |
|
|
|
||||||||
|
|
|
|
|
|
|
|
|
|
|
|
|
|
|||||||||
|
|
|
|
|
|
|
|
|
|
|
|
|
|
|
|
|
|
|
|
|
|
|
|
|
|
|
|
|
|
|
|
|
|
|
|
|
|
|
|
|
|
|
|
|
|
|
|
|
|
|
|
|
|
|
|
|
|
|
|
|
|
|
|
|
|
|
|
|
|
|
Soft 1 |
|
Soft 2 |
Soft 3 |
SHIFT |
|
|
|
|
Soft 1 |
Soft 2 |
|
Soft 3 |
SHIFT |
|||||||
Type 5 |
|
|
|
|
|
|
|
|
|
|
|
|
|
|
|
|
|
|
|
|
||
|
|
|
|
|
|
|
|
|
|
|
|
Press SHIFT |
|
|
|
|
|
|||||
|
SKP+ SEL |
NEXT |
|
|
|
to alternate |
|
|
|
CLR |
|
PREV |
|
|||||||||
|
|
|
|
|
|
SKP- |
|
|
||||||||||||||
|
|
|
|
|
|
|
|
|
||||||||||||||
|
|
|
|
|
|
|
|
|
|
|
|
|
|
|
|
|
|
|
|
|
|
|
|
|
|
|
|
|
|
|
|
|
|
|
|
|
|
|
|
|
|
|
|
||
|
|
|
|
|
|
|
|
|
|
|
|
|
|
|
|
|
|
|
|
|
|
|
|
|
Soft 1 |
|
Soft 2 |
Soft 3 |
SHIFT |
|
|
|
|
Soft 1 |
Soft 2 |
|
Soft 3 |
SHIFT |
|||||||
Programming Instructions |
11 |

1.2Using Proprietary Telephones
You can use either the soft buttons or the overlay buttons. (For overlay buttons, refer to "Using the Overlay" below.)
Throughout programming you will see instructions such as "Press PREV". If you use soft buttons, this means press SHIFT, release SHIFT and then press Soft 3. The (PREV) function is performed.
Note
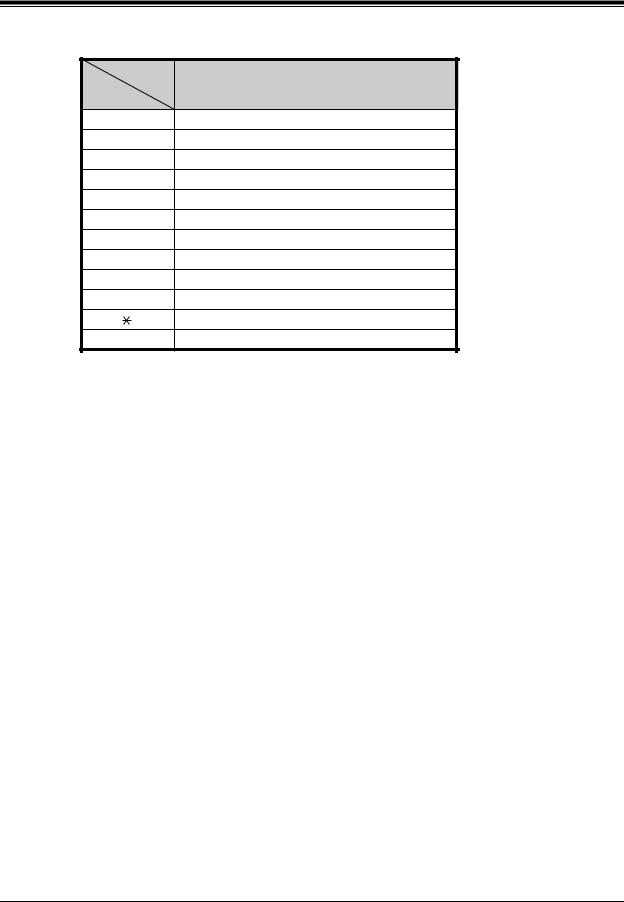
If you use soft buttons and if programming instructions tell you to press the following buttons, you may press soft buttons shown below.
Instructions |
Soft button |
|
|
SELECT |
SEL+, SEL-, or SEL |
|
|
CLEAR |
CLR |
|
|
Using the Overlay
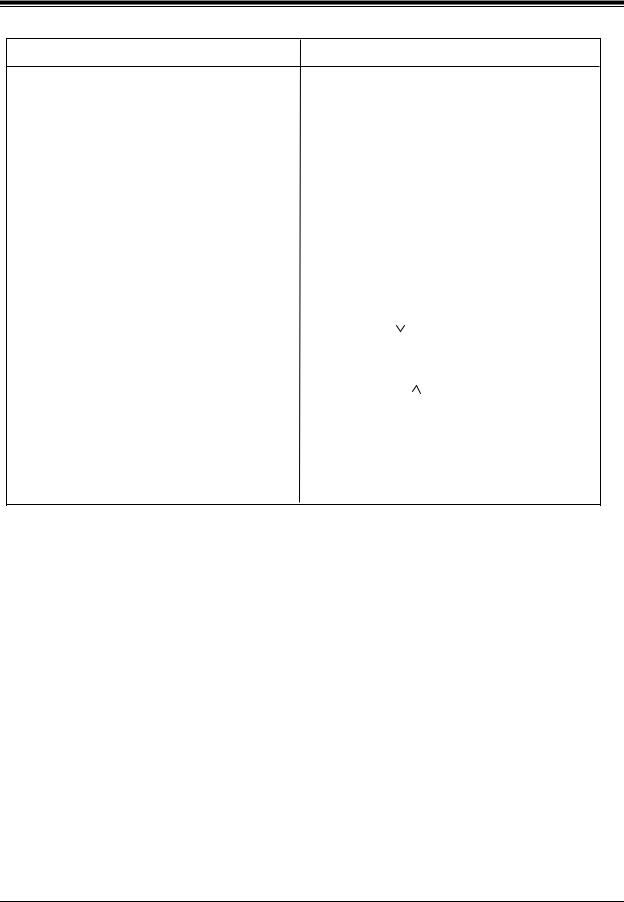
A programming overlay is packed with the telephone at the factory. This overlay should be used at all times while in programming mode since the functions of the telephone keys change while in programming mode as follows: (The original functions are in parentheses.)
During Normal Operation |
During Programming |
||||
|
|
|
|
|
|
(PAUSE) |
PAUSE / PROGRAM |
||||
|
|
|
|
|
|
(SP-PHONE) |
NEXT |
||||
|
|
|
|
|
|
(REDIAL) |
PREV (PREVIOUS) |
||||
|
|
|
|
|
|
(AUTO ANSWER / MUTE) |
SELECT |
||||
|
|
|
|
|
|
(FLASH) |
FLASH |
||||
|
|
|
|
|
|
(TRANSFER) |
CLEAR |
||||
|
|
|
|
|
|
(FWD/DND) |
|
|
|
|
|
|
|
|
|
|
|
|
|
|
|
|
|
(CONF) |
— / |
|
|
||
|
|
||||
|
|
|
|||
|
|
|
|
|
|
(INTERCOM) |
SECRET |
||||
|
|
|
|
|
|
(AUTO DIAL / STORE) |
STORE |
||||
|
|
|
|
|
|
(HOLD) |
END |
||||
|
|
|
|
|
|
12 |
Programming Instructions |
1.2 Using Proprietary Telephones
Location of Controls with the Overlay
The pictures below show the functions of the buttons of the proprietary telephone while in programming mode. There are Overlays for the KX-T7500, KX-T7400 and KX-T7200 series telephones. KX-T7536 and KX-T7230 are used for the examples.
|
|
|
KX-T7536 |
|
|
|
|
|
SHIFT |
REVERSE |
|
|
|
|
|
SECRET, |
PROGRAM |
|
|
|
INT |
PROG. |
|
|
|
|
|
6 |
12 |
FLASHR |
PAUSE |
CLEAR |
5 |
11 |
|
|
|
4 |
10 |
1QZ!? |
2ABC |
3DEF |
|
|
|
ABC |
DEF |
|
|
1 |
2 |
3 |
3 |
9 |
|
|
|||
4GHI |
5JKL |
6MNO |
2 |
8 |
|
|
|||
4 |
5 |
6 |
1 |
7 |
7PQRS |
8TUV |
9WXYZ |
|
|
7 |
8 |
9 |
SELECT |
STORE |
|
|
|||
*/+–=<> |
0 . , ’ : ; |
#$%&@( |
) |
|
|
0 |
|
|
|
PREV |
END |
NEXT |
|
|
KX-T7536 |
|
|
||
SECRET |
|
PAUSE |
CLEAR |
|
1QZ!? |
2ABC |
3DEF |
|
|
1 |
2 |
3 |
|
|
4GHI |
5JKL |
6MNO |
|
|
4 |
5 |
6 |
|
|
7PRS |
8TUV |
9WXY |
|
STORE |
7 |
8 |
9 |
|
|
|
|
|||
/+–=<> |
0 . , ’ : ; |
#$%&@( ) |
SELECT |
|
|
0 |
|
||
|
|
|
|
|
PREV |
FLASH |
END |
|
NEXT |
KX-T7230 |
|
|
|
|
KX-T7436
SHIFT
SECRET |
|
PROGRAM |
PAUSE |
CLEAR |
1QZ!? |
2ABC |
3DEF |
STORE |
|
4GHI |
5JKL |
6MNO |
FLASH |
SELECT |
7PRS |
8TUV |
9WXY |
|
|
*/+–=<> |
0., ,:; |
#$%&@( ) |
|
|
PREV |
END |
NEXT |
|
|
KX-T7436
Programming Instructions |
13 |

1.2Using Proprietary Telephones
Viewing the Display
The display gives you helpful information, such as what you should do now, what you have done, etc..
The KX-T7533, KX-T7536, KX-T7433, KX-T7436, KX-T7230 and the KX-T7235 utilise two information lines for programming. The upper line is called the Message Line and the lower one is called the Function Line.
The Message Line (upper) shows you what you should do or what you should select. It also allows you to confirm what you have just entered. The display capacity is 16 digits. If your
entry exceeds the capacity, you can shift the display by pressing  or
or 
 button.
The Function Line (lower) shows the current function of the soft buttons. These functions change with the programming procedures.
|
|
|
|
|
|
|
|
SYS-PGM NO? → |
← Message Line |
|
|
|
|
|
CLR |
NEXT |
← Function Line |
|
|
|
|
2-Line Display |
|
|
|
|
|
|
|
← Message Line |
|
|
|
|
|
SYS-PGM NO? → |
SYS-PGM NO? → |
|
← Message Line |
||
|
CLR |
NEXT |
← Function Line |
CLR |
NEXT |
← Function Line |
|
|
|
|
|
|
|
|
3-Line Display |
|
6-Line Display |
|
|
|
Before entering the programming mode
Before entering programming mode, confirm that:
•Your telephone is on-hook.
•No calls are on hold at your telephone.
Entering the programming mode
Press PROGRAM (or PAUSE) + + # and enter your System
Password (default=1234).
• The display shows the Initial Message: SYG-PGM NO? 
Note
•If your telephone set does not have a PROGRAM button, substitute it with the PAUSE button.
•If nothing is entered in five seconds after the PROGRAM (or PAUSE) button is pressed, it is cancelled.
•The System Password entered is not shown on the display. The System Password can be
changed by System Programming. Refer to Section 2.2 [107] System Password.
•During the programming mode, your extension is treated as a busy extension.
•Only one proprietary telephone can be in programming mode at any one time.
14 |
Programming Instructions |

1.3 Programming Methods
1.3Programming Methods
Advancing to the next stage
When "SYS-PGM NO?  " is displayed, you can select one of the following:
•To go to programme [000], press the NEXT button.
•To go to another programme, enter the 3-digit programme address.
Rotation of jack number
Each jack of the Digital Super Hybrid System supports the connection of a digital proprietary telephone and a single line device with different extension numbers (eXtra Device Port: XDP function). To programme this function it is necessary to assign two parts for each jack. The first part of jack one is 01-1. The second part of jack one is 01-2. The first part of jack two is 02-1 and so on. The NEXT and PREV buttons can be used to move from jack to jack as required.
Example
|
NEXT |
|
NEXT |
|
NEXT |
|||||||
#01-1 |
|
|
|
#01-2 |
|
|
|
#02-1 |
|
|
|
#02-2...... |
|
|
|
|
|
|
|
||||||
|
PREV |
|
PREV |
|
PREV |
|||||||
Note
The first part of a jack is for a DPT of a XDP-assigned jack. The second part is for a single line device. Programme [600 ]EXtra Device Port assigns which jacks are XDP
Storing your data
Press STORE to store your data.
•The STORE indicator lights red and a confirmation tone is emitted.
*Confirmation tone (one beep)
After pressing STORE, you will hear a beep. This informs you that storage is completed.
* Alarm tone (three beeps)
If you hear this alarm, your entry is not valid.
Making another selection within the same programme address
•To make the next higher selection, press NEXT.
•To make the previous selection, press PREV.
•To make a specific selection, press SELECT and then enter the number.
Programming Instructions |
15 |

1.3Programming Methods
Going to another programme address
After pressing STORE, you can go to another programme with either of the following two methods:
a)To go to the next larger programme address:
Press Soft 1 (SKP+) or VOLUME  (DOWN) or rorate the Jog Dial in the counterclockwise direction.
To go to the next smaller programme address:
Press SHIFT + Soft 1 (SKP– ) or VOLUME  (UP) or rorate the Jog Dial in the clockwise direction.
b)To go to a specific programme address:
Press END, then enter the programme Address.
Method (1) is useful when you want to perform a series of programmes consecutively. For example, to change the programming in addresses [0XX], use this method.You can move from [000] to [001], from [001] to [002], and so on by pressing the SKP+ or VOLUME  . You can move in reverse order from [008] to [007], etc. by pressing the SKP– or VOLUME
 .
.
This method can also be used to move between neighboring programme groups: For example, you can move between the programme addresses of the largest [0XX] and [100], the largest [1XX] and [200], and so on. Also, you can move between the smallest programme address [000] and the largest one [9XX].
Method (2) is useful when you wish to jump to another programme address. For example, you have just finished with programme [006] and now you want to go to programme [301]. Neither SKP+ / VOLUME  nor SKP– /VOLUME
  is convenient in this case. So you should press END and enter 301.
Note
The following programming instructions assume that you have already entered the programming mode and that you will use Method (b).
Confirming the entries
You may review the stored programming without making any changes.
Going back to the operation mode
Two ways are available to go back to the operation mode:
a) Lift the handset while in programming mode.
b) When the Initial Message: SYS-PGM NO? is displayed, press the PROGRAM (or PAUSE) button. (Todisplay the Initial Message, press END.)
16 |
Programming Instructions |

1.4 Entering Characters
1.4Entering Characters
Entering Characters
You can enter characters to store names or messages by using the dialling key pad, buttons or the Jog Dial.
See the Combination Tables below.
Combination Table a
Soft button |
|
S1 |
SHIFT+S1 |
S2 |
SHIFT+S2 |
S3 |
SHIFT+S3 |
SHIFT+ |
SHIFT+ |
|
SHIFT+S1 |
SHIFT+S2 |
|||||||
SELECT button |
|
|
|
|
|
|
|
|
|
pressing |
0 |
1 |
2 |
3 |
4 |
5 |
6 |
7 |
8 |
times |
|||||||||
keys |
|
|
|
|
|
|
|
|
|
|
|
|
|
|
|
|
|
|
|
1 |
1 |
Q |
q |
Z |
z |
! |
? |
|
|
2 |
2 |
A |
a |
B |
b |
C |
c |
|
|
3 |
3 |
D |
d |
E |
e |
F |
f |
|
|
4 |
4 |
G |
g |
H |
h |
I |
i |
|
|
5 |
5 |
J |
j |
K |
k |
L |
l |
|
|
6 |
6 |
M |
m |
N |
n |
O |
o |
|
|
7 |
7 |
P |
p |
Q |
q |
R |
r |
S |
s |
8 |
8 |
T |
t |
U |
u |
V |
v |
|
|
9 |
9 |
W |
w |
X |
x |
Y |
y |
Z |
z |
0 |
0 |
(space) |
. |
, |
’ |
: |
; |
|
|
|
* |
/ |
+ |
- |
= |
< |
> |
|
|
# |
# |
$ |
% |
& |
@ |
( |
) |
|
|
Programming Instructions |
17 |
1.4Entering Characters
Combination Table b
Jog Dial
Display sequence by rotating the Jog Dial
keys
1 |
1 |
Q |
q |
|
R |
|
r |
|
S |
s |
T |
t |
··· |
|
2 |
2 |
A |
a |
|
B |
|
b |
|
C |
|
c |
D |
d ··· |
|
3 |
3 |
D |
d |
|
E |
|
e |
|
F |
|
f |
G |
g ··· |
|
4 |
4 |
G |
g |
|
H |
|
h |
|
I |
i |
|
J |
j |
··· |
5 |
5 |
J |
j |
K |
k |
L |
l |
M |
m |
··· |
||||
6 |
6 |
M |
m |
N |
n |
O |
o |
P |
p ··· |
|||||
7 |
7 |
P |
p |
|
Q |
|
q |
|
R |
|
r |
S |
s ··· |
|
8 |
8 |
T |
t |
|
U |
|
u |
V |
v |
W |
w ··· |
|||
9 |
9 |
W |
w |
X |
x |
Y |
y |
Z |
z (space) ··· |
|||||
0 |
0 |
(space) |
|
! |
? . |
, |
’ |
: |
; ··· |
|||||
|
* |
/ |
+ |
– |
= |
< |
> |
|
# |
$ |
··· |
|||
# |
# $ |
% |
|
& |
|
@ |
( |
|
) |
A |
a B b ··· |
|||
|
|
|
|
|
|
|
|
|
|
|
|
|
|
|
Note
•The alphabetical characters correspond to the letters shown on the twelve dialling keys on the proprietary telephone. (except symbols)
•In Combination Table a:
If your telephone is a KX-T7531, do not use the provided SELECT button. Use the AUTO ANSWER/MUTE button which becomes the SELECT button when using the overlay.
•In Combination Table b:
If you keep rotating the Jog Dial, all of the characters in the table will be displayed.
Character Entering Methods
Please see the following example which shows how to select a desired character. For example, to select the letter "M":
Select either of the following three methods:
1.Using the SHIFT and Soft buttons
(for KX-T7533 / KX-T7536 / KX-T7433 / KX-T7436 / KX-T7230 / KX-T7235 only)
*See Combination Table a.
a)Press 6. ("M" belongs to "6".)
• The Function Line shows: M N O
b)Press the Soft 1 (M) button.
(Press SHIFT to display the lower case of the above letters.)
2.Using the SELECT button * See Combination Table a.
a)Press 6. ("M" belongs to "6".)
b)Press the SELECT button once.
18 |
Programming Instructions |

1.4 Entering Characters
•Pressing the SELECT button an appropriate number of times gives you the desired letter. Pressing SELECT twice gives the letter "m", pressing three times gives "N", and so on.
3.Using the Jog Dial
(for KX-T7531 / KX-T7533 / KX-T7536 / KX-T7433 / KX-T7436 only)
*See Combination Table b.
a)Press 6. ("M" belongs to "6".)
b)Rotate the Jog Dial one pulse.
•Rotating the Jog Dial an appropriate number of pulses gives you the desired letter. Rotating the Jog Dial two pulses gives the letter "m", rotating three pulses gives "N", and so on.
OR
a)Press any dialling keypad.
b)Rotate the Jog Dial until the desired character appears.
•If you keep rotating the Jog Dial, all of the characters will be displayed. For example, if you rotate the Jog Dial after pressing 2, characters will appear in the following order: A a B b •••• Z z (space) ! ? . , ' : ; * / + — = < > # $ % & @ ( ) A a B b ••••
Example of entering characters: to enter "Mike":
Using method (1)
*See Combination Table a.
a)Enter 6.
|
|
6 |
|
|
M |
N |
O |
|
|
|
|
b) Press Soft 1 (M). |
|
||
|
|
|
|
|
|
M |
|
|
M |
N |
O |
|
|
|
|
c) Enter 4. |
|
|
|
|
|
|
|
|
|
M4 |
|
|
G |
H |
I |
d) Press SHIFT. |
|
||
|
|
|
|
|
|
M4 |
|
|
g |
h |
i |
e) Press Soft 3 (i). |
|
||
|
|
|
|
|
|
Mi |
|
|
g |
h |
i |
|
|
|
|
Programming Instructions |
19 |

1.4Entering Characters
|
f) Enter 5. |
|
|
|
||
|
|
|
|
|
|
|
|
|
|
Mi5 |
|
|
|
|
|
j |
k |
l |
|
|
|
|
|
|
|
|
|
|
g) Press Soft 2 (k). |
|
|
|
||
|
|
|
|
|
|
|
|
|
|
Mik |
|
|
|
|
|
j |
k |
l |
|
|
|
h) Enter 3. |
|
|
|
||
|
|
|
|
|
|
|
|
|
|
Mik3 |
|
|
|
|
|
d |
e |
f |
|
|
|
i) Press Soft 2 (e). |
|
|
|
||
|
|
|
|
|
|
|
|
|
|
Mike |
|
|
|
|
|
d |
e |
f |
|
|
|
|
|
|
|
||
Using method (2) |
|
|
|
|||
* See Combination Table a. |
|
|||||
|
|
|
|
|
|
|
|
|
|
Procedures |
The display shows: |
||
|
|
|
|
|
|
|
1. |
Enter 6. |
|
|
|
6 |
|
|
|
|
|
|
|
|
2. |
Press SELEC . |
|
|
M |
||
|
|
|
|
|
|
|
3. |
Enter 4. |
|
|
|
M4 |
|
|
|
|
|
|
||
4. |
Press SELECT six times. |
Mi |
||||
|
|
|
|
|
|
|
5. |
Enter 5. |
|
|
|
Mi5 |
|
|
|
|
|
|
||
6. |
Press SELECT four times. |
Mik |
||||
|
|
|
|
|
|
|
7. |
Enter 3. |
|
|
|
Mik3 |
|
|
|
|
|
|
||
8. |
Press SELECT four times. |
Mike |
||||
|
|
|
|
|
||
Using method (3) |
|
|
|
|||
* See Combination Table b. |
|
|||||
|
|
|
|
|
|
|
|
|
|
Procedures |
The display shows: |
||
|
|
|
|
|
|
|
1. |
Enter 6. |
|
|
|
6 |
|
|
|
|
|
|
||
2. |
Rotate Jog Dial one pulse. |
M |
||||
|
|
|
|
|
|
|
3. |
Enter 4. |
|
|
|
M4 |
|
|
|
|
|
|
||
4. |
Rotate Jog Dial six pulse. |
Mi |
||||
|
|
|
|
|
|
|
5. |
Enter 5. |
|
|
|
Mi5 |
|
|
|
|
|
|
||
6. |
Rotate Jog Dial four pulses. |
Mik |
||||
|
|
|
|
|
|
|
7. |
Enter 3. |
|
|
|
Mik3 |
|
|
|
|
|
|
||
8. |
Rotate Jog Dial four pulses. |
Mike |
||||
|
|
|
|
|
|
|
20 |
Programming Instructions |
1.4 Entering Characters
OR
|
Procedures |
The display shows: |
|
|
|
1. |
Enter 2. |
2 |
|
|
|
2. |
Rotate Jog Dial until "M" appears. |
M |
|
|
|
3. |
Enter 2. |
M2 |
|
|
|
4. |
Rotate Jog Dial until "i" appears. |
Mi |
|
|
|
5. |
Enter 2. |
Mi2 |
|
|
|
6. |
Rotate Jog Dial until "k" appears. |
Mik |
|
|
|
7. |
Enter 2. |
Mik2 |
|
|
|
8. |
Rotate Jog Dial until "e" appears. |
Mike |
|
|
|
Note
•To erase all the letters, press CLEAR.
•To erase the last letter, press  .
.
Programming Instructions |
21 |

1.5User Programming
1.5User Programming Mode
User Programming Mode
Manager programming items (programme address: [0XX]) are accessible by any display proprietary telephone user in the system.
Entering the user programming mode
You can access these programmes by entering the User Programming Mode as follows: Before entering the mode, confirm that:
•Your telephone is on-hook.
•No calls are on hold at your telephone
Press PROGRAM (or PAUSE) + + and enter the User
Password (default=1234)
After entering the mode, perform the same programming steps as the system programming steps in each programme address.
Note
•If your telephone set does not have a PROGRAM button, substitute it with the PAUSE button.
•If nothing is entered in five seconds after the PROGRAM (or PAUSE) button is pressed, it is cancelled.
•The User Password is not shown on the display. The password can be changed by system
programming. Refer to Section 2.2 |
[125]User Password. |
•During the programming mode, your extension is treated as a busy extension.
•Only one proprietary telephone can be in programming mode at any one time.
22 |
Programming Instructions |

1.6 Programming Example
1.6Programming Example
Programming Example
The following programming instructions assume that you have already entered the programming mode and that you will employ method (b) of "Going to another programme
address" in Section 1.3 P |
rogramming Methods. |
Example: programme [001] |
S ystem Speed Dialling Number Set |
|
|
Sample of Description |
Explanation |
(2)
[001](1) System Speed Dialling Number Set
Description (3)
(1)Programme address.
(2)Programme title.
(3)Provides a more detailed description of the programme.
Used to program the System Speed Dial numbers. These numbers are available to all extension users. There are 500 numbers from 000 through 499.
Selection (4) |
(4) |
Shows you choices that you can assign. |
|
(5) |
Shows you the default (factory setting). |
||
• Speed dial number: 000 through 499 |
(6) |
Shows you programming procedures step by step. |
|
• Telephone number: 24 digits (max.) |
|||
|
• While programming, use the overlay. |
||
|
|
Default (5)
All speed dial numbers – Not stored
(6)
Programming
1. Enter 001.(7)
(8)
Display: SPD Number Set
2.Press NEXT. (9)
Display: SPD Code?→ (10)
3.Enter a speed dial number.
To enter speed dial number 000, you can also press NEXT.
Display example: 000:Not Stored
•Before starting to programme, enter the programming mode. (See Entering the programming mode in Section 1.2 Using Proprietary Telephones.)
(7)Enter the programme address.
(8)The display shows the programme title. If your telephone has soft buttons, the lower line shows the functions that are currently assigned to them.
(9)Press either Soft 3 (NEXT)shown on the display or the NEXT shown on the overlay.
(10)The message line advises you to enter a speed dial number.
(11)(11) If the telephone number has already been stored, the number is displayed.
4. Enter a telephone number. (12)
To delete the current entry, press CLEAR.(13)
To change the current entry, press
CLEAR and enter the new number.
5. Press STORE.(14)
(12)Enter the telephone number that you want to store. Your entry is displayed as you enter the digits.
(13)Pressing CLEAR erases the whole entry.
(14)Your entry is now stored.
The indicator lights red and a confirmation tone lets you know that storage is completed.
Programming Instructions |
23 |
1.6Programming Example
Sample of Description |
Explanation |
6.To programme another speed dial number, press NEXT or PREV, or SELECT and the desired speed dial number.(15)
7.Repeat steps 4 through 6. (16)
8.Press END.(17)
Conditions (18)
• Each speed dial number has a maximum of 24 digits. The valid characters are 0 through 9,  and # keys, FLASH, PAUSE, SECRET and – (hyphen) buttons.
•
•
•
•
•
•
•
•
(19)
Features Guide References
System Speed Dialling
(15)Select the best way for you to store another speed dial number. Pressing the NEXT / PREV allows you to select the next higher / lower speed dial number. You can also keep pressing them until the desired one is displayed. If you press SELECT and the desired speed dial number, the selected code is displayed.
(16)You can continue to programme another entry.
(17)After you have stored all your entries, finish this programme by pressing END. After pressing END you can go to any programme address you desire. You can return to the Initial Message mode any time by pressing END.
To go to the next larger programme address, do not press END but press Soft 1 (SKP+) or VOLUME or rorate the Jog Dial in the counter-clockwise direction.
To go to the next smaller programme address, do not press END but press SHIFT + Soft 1 (SKP-)
or VOLUME or rorate the Jog Dial in the counter-clockwise direction.
(18)Tells you what you should notice or consider when doing the programming.
(19)Lists all of the features related to the programming. These features are described in the Features Guide.
Programming Structur
Programme |
Programming Group |
Description |
Address |
|
|
|
|
|
[0XX] |
Manager Programming |
These programmes may be accessed by the syste |
|
|
manager of the customer to meet frequent changes |
|
|
requested by the customer. |
|
|
|
[1XX] |
System Programming |
Entire system programming. |
|
|
|
[2XX] |
Timer Programming |
Flexible system timer setting. |
|
|
|
[3XX] |
TRS / ARS / TIE Line |
Assignment of Toll Restriction, Automatic Route |
|
Routing Table Programming |
Selection (ARS) or TIE Line RoutingTable. |
|
|
|
[4XX] |
Outside Line / ISDN Line / |
Setting of outside line, outside line group, ISDN line |
|
TIE Line Programming |
or TIE line values. |
|
|
|
[5XX] |
COS Programming |
Setting of Class of Service (COS). |
|
|
|
[6XX] |
Extension Programming |
Setting of extension values. |
|
|
|
24 |
Programming Instructions |

|
|
1.6 Programming Example |
|
|
|
|
|
|
|
|
|
|
Programming Structur |
||
|
|
|
|
Programme |
Programming Group |
Description |
|
Address |
|
|
|
|
|
|
|
[8XX] |
Resource Programming |
Assignment of customer-supplied peripherals |
|
|
|
connected to the system. |
|
|
|
|
|
[9XX] |
Optional Programming |
Used to answer the user's requirements or troubles, |
|
|
|
if needed. |
|
|
|
|
|
Programming Instructions |
25 |

1.6Programming Example
26 |
Programming Instructions |

Section
General Programming
General Programming |
27 |

2.1Manager Programming
2.1Manager Programming
[000]D ate and Time Set
Description
Sets the current date and time.
Selection
•Year: 00 through 99
•Month: Jan. through Dec.
•Day: 1 through 31
•Day of the week: SUN / MON / TUE / WED / THU / FRI / SAT
•Hour: 00 through 23
•Minute: 00 through 59
•AM / PM
Default
'95 Jan. 1 SUN 00:00
Programming
1. Enter 000.
Display: Day / Time set
2. Press NEXT.
Display example: '95 Jan. 1 SUN
3. Enter the year.
To change the current entry, press CLEAR and enter the new year
4.Press  .
.
5.Keep pressing SELECT until the desired month is displayed.
6.Press  .
.
7.Enter the day.
To change the current entry, press CLEAR and enter the new day
8.Press  .
.
9.Keep pressing SELECT until the desired day of the week is displayed.
10.Press STORE.
11.Press NEXT.
Display example: 12:00 PM
12.Enter the hour.
28 |
General Programming |

2.1 Manager Programming
To change the current entry, press CLEAR and enter the new hour.
13.Press  .
.
14.Enter the minute.
To change the current entry, press CLEAR and enter the new minute.
15.Press  .
.
16.Press SELECT for AM or PM.
17.Press STORE.
18.Press END.
Conditions
•After changing an entry, you can press STORE. You do not have to perform the rest of the steps.
• To return to a previous field, press 
 in steps 4 through 9 and steps 13 through 16.
•If you hear an alarm after pressing STORE, check that the date is valid.
•The clock starts immediately after the STORE button is pressed.
•You cannot leave an entry empty.
Features Guide References
Display Message
General Programming |
29 |

2.1Manager Programming
[001]S ystem Speed Dialling Number Set
Description
Used to programme the System Speed Dial numbers. These numbers are available to all extension users. There are 500 numbers available from 000 to 499.
Selection
•Speed dial number: 000 through 499
•Telephone number: 24 digits (max.)
Default
All speed dial numbers – Not stored
Programming
1. Enter 001.
Display: SPD Number Set
2. Press NEXT.
Display: SPD Code?
3. Enter a speed dial number
To enter speed dial number 000, you can also press NEXT.
Display example: 000:Not Stored
4. Enter a telephone number.
To delete the current entry, press CLEAR.
To change the current entry, press CLEAR and enter the new number.
5.Press STORE.
6.To programme another speed dial number, press NEXT or PREV, or SELECT and the desired speed dial numbe .
7.Repeat steps 4 through 6.
8.Press END.
30 |
General Programming |
 Loading...