


Operating and Installation Instructions
Fridge-Freezer Combination
To prevent accidents and damage to the appliance, you must read all instructions supplied before installing for using the appliance.
en - US, CA |
M.-Nr. 10 203 400 |

Contents
IMPORTANT SAFETY INSTRUCTIONS. . . . . . . . . . . . . . . . . . . . . . . . . . . . . . . . . 5
Guide to the Appliance . . . . . . . . . . . . . . . . . . . . . . . . . . . . . . . . . . . . . . . . . . . . 11 Included accessories . . . . . . . . . . . . . . . . . . . . . . . . . . . . . . . . . . . . . . . . . . . . . . 13 Optional accessories . . . . . . . . . . . . . . . . . . . . . . . . . . . . . . . . . . . . . . . . . . . . . . . 13
How to save Energy . . . . . . . . . . . . . . . . . . . . . . . . . . . . . . . . . . . . . . . . . . . . . . . 14
Turning the Appliance On / Off . . . . . . . . . . . . . . . . . . . . . . . . . . . . . . . . . . . . . . 16 Before the first use . . . . . . . . . . . . . . . . . . . . . . . . . . . . . . . . . . . . . . . . . . . . . . . . . 16 Operating the appliance . . . . . . . . . . . . . . . . . . . . . . . . . . . . . . . . . . . . . . . . . . . . 16 Turning the appliance on . . . . . . . . . . . . . . . . . . . . . . . . . . . . . . . . . . . . . . . . . . . . 16 Turning the appliance off . . . . . . . . . . . . . . . . . . . . . . . . . . . . . . . . . . . . . . . . . . . . 17 Vacation Tips . . . . . . . . . . . . . . . . . . . . . . . . . . . . . . . . . . . . . . . . . . . . . . . . . . . . . 17
The Right Temperature . . . . . . . . . . . . . . . . . . . . . . . . . . . . . . . . . . . . . . . . . . . . 18
. . . in the refrigerator . . . . . . . . . . . . . . . . . . . . . . . . . . . . . . . . . . . . . . . . . . . . . . . 18 Automatic cold air circulation (DynaCool) . . . . . . . . . . . . . . . . . . . . . . . . . . . . 18
. . . in the freezer . . . . . . . . . . . . . . . . . . . . . . . . . . . . . . . . . . . . . . . . . . . . . . . . . . 18 Temperature display . . . . . . . . . . . . . . . . . . . . . . . . . . . . . . . . . . . . . . . . . . . . . . . 19 Setting the temperature for the refrigerator and freezer . . . . . . . . . . . . . . . . . . . . 19
Using SuperCool in the refrigerator section . . . . . . . . . . . . . . . . . . . . . . . . . . . 21
Using SuperCool in the freezer section . . . . . . . . . . . . . . . . . . . . . . . . . . . . . . . 22
Temperature and Door Alarm . . . . . . . . . . . . . . . . . . . . . . . . . . . . . . . . . . . . . . . 23
Additional Settings . . . . . . . . . . . . . . . . . . . . . . . . . . . . . . . . . . . . . . . . . . . . . . . 25 Sabbath mode S . . . . . . . . . . . . . . . . . . . . . . . . . . . . . . . . . . . . . . . . . . . . . . . . . . 25 Safety lock c. . . . . . . . . . . . . . . . . . . . . . . . . . . . . . . . . . . . . . . . . . . . . . . . . . . . . . 26 Temperature unit (Fahrenheit or Celsius) § . . . . . . . . . . . . . . . . . . . . . . . . . . . . . . 27 Brightness of the display ^ . . . . . . . . . . . . . . . . . . . . . . . . . . . . . . . . . . . . . . . . . . 28 Lower hinge heating control H . . . . . . . . . . . . . . . . . . . . . . . . . . . . . . . . . . . . . . . . 29
Using the Refrigerator Efficiently . . . . . . . . . . . . . . . . . . . . . . . . . . . . . . . . . . . . 30 Different storage zones . . . . . . . . . . . . . . . . . . . . . . . . . . . . . . . . . . . . . . . . . . . . . 30
Arranging the Interior - Refrigerator Section . . . . . . . . . . . . . . . . . . . . . . . . . . 32 Adjusting the shelves. . . . . . . . . . . . . . . . . . . . . . . . . . . . . . . . . . . . . . . . . . . . . . . 32 Shelf above the fruit and vegetable drawers . . . . . . . . . . . . . . . . . . . . . . . . . . . . . 32 Fruit and vegetable drawers . . . . . . . . . . . . . . . . . . . . . . . . . . . . . . . . . . . . . . . . . 32 Adjusting the door shelf / bottle shelf . . . . . . . . . . . . . . . . . . . . . . . . . . . . . . . . . . 33 Adjusting the bottle divider . . . . . . . . . . . . . . . . . . . . . . . . . . . . . . . . . . . . . . . . . . 33

Contents
Freezing and Storing Food . . . . . . . . . . . . . . . . . . . . . . . . . . . . . . . . . . . . . . . . . 34 Maximum freezing capacity. . . . . . . . . . . . . . . . . . . . . . . . . . . . . . . . . . . . . . . . . . 34 Freezing fresh food . . . . . . . . . . . . . . . . . . . . . . . . . . . . . . . . . . . . . . . . . . . . . . . . 34 Placing food in the freezer . . . . . . . . . . . . . . . . . . . . . . . . . . . . . . . . . . . . . . . . 34 Thawing frozen foods . . . . . . . . . . . . . . . . . . . . . . . . . . . . . . . . . . . . . . . . . . . . . . 35 Cooling drinks quickly . . . . . . . . . . . . . . . . . . . . . . . . . . . . . . . . . . . . . . . . . . . . . . 35
Making Ice Cubes. . . . . . . . . . . . . . . . . . . . . . . . . . . . . . . . . . . . . . . . . . . . . . . . . 36 Turning the ice cube maker On . . . . . . . . . . . . . . . . . . . . . . . . . . . . . . . . . . . . . . . 36 Setting the water quantity for the ice cube tray E . . . . . . . . . . . . . . . . . . . . . . . . . 37
Arranging the Interior - Freezer Section . . . . . . . . . . . . . . . . . . . . . . . . . . . . . . 39 Freezer drawers . . . . . . . . . . . . . . . . . . . . . . . . . . . . . . . . . . . . . . . . . . . . . . . . . . . 39 Adjusting the separators. . . . . . . . . . . . . . . . . . . . . . . . . . . . . . . . . . . . . . . . . . 39 Removing the freezer drawer containers . . . . . . . . . . . . . . . . . . . . . . . . . . . . . 40
Defrosting . . . . . . . . . . . . . . . . . . . . . . . . . . . . . . . . . . . . . . . . . . . . . . . . . . . . . . . 41 Refrigerator section . . . . . . . . . . . . . . . . . . . . . . . . . . . . . . . . . . . . . . . . . . . . . . . . 41 Freezer section . . . . . . . . . . . . . . . . . . . . . . . . . . . . . . . . . . . . . . . . . . . . . . . . . . . 41
Cleaning and Care . . . . . . . . . . . . . . . . . . . . . . . . . . . . . . . . . . . . . . . . . . . . . . . . 42 Cleaning agents. . . . . . . . . . . . . . . . . . . . . . . . . . . . . . . . . . . . . . . . . . . . . . . . . . . 42 Before cleaning . . . . . . . . . . . . . . . . . . . . . . . . . . . . . . . . . . . . . . . . . . . . . . . . . . . 43 Cleaning the interior and accessories . . . . . . . . . . . . . . . . . . . . . . . . . . . . . . . . . . 43 Door seal . . . . . . . . . . . . . . . . . . . . . . . . . . . . . . . . . . . . . . . . . . . . . . . . . . . . . . . . 43 Ventilation slits . . . . . . . . . . . . . . . . . . . . . . . . . . . . . . . . . . . . . . . . . . . . . . . . . . . . 43 Cleaning the air filter . . . . . . . . . . . . . . . . . . . . . . . . . . . . . . . . . . . . . . . . . . . . . 44 Resetting the air filter indicator n. . . . . . . . . . . . . . . . . . . . . . . . . . . . . . . . . . . . 45
Frequently asked questions . . . . . . . . . . . . . . . . . . . . . . . . . . . . . . . . . . . . . . . . 46
Noises . . . . . . . . . . . . . . . . . . . . . . . . . . . . . . . . . . . . . . . . . . . . . . . . . . . . . . . . . . 54
After sales service . . . . . . . . . . . . . . . . . . . . . . . . . . . . . . . . . . . . . . . . . . . . . . . . 55 Warranty . . . . . . . . . . . . . . . . . . . . . . . . . . . . . . . . . . . . . . . . . . . . . . . . . . . . . . 55
Caring for the environment . . . . . . . . . . . . . . . . . . . . . . . . . . . . . . . . . . . . . . . . . 58
Installation Information . . . . . . . . . . . . . . . . . . . . . . . . . . . . . . . . . . . . . . . . . . . . 59 Location . . . . . . . . . . . . . . . . . . . . . . . . . . . . . . . . . . . . . . . . . . . . . . . . . . . . . . . . . 59 Climate class . . . . . . . . . . . . . . . . . . . . . . . . . . . . . . . . . . . . . . . . . . . . . . . . . . 60 Installation niche . . . . . . . . . . . . . . . . . . . . . . . . . . . . . . . . . . . . . . . . . . . . . . . . . . 60 Niche floor . . . . . . . . . . . . . . . . . . . . . . . . . . . . . . . . . . . . . . . . . . . . . . . . . . . . . . . 60 Adjacent furniture/units . . . . . . . . . . . . . . . . . . . . . . . . . . . . . . . . . . . . . . . . . . . . . 60 Door hinge . . . . . . . . . . . . . . . . . . . . . . . . . . . . . . . . . . . . . . . . . . . . . . . . . . . . . . . 60 Proper ventilation . . . . . . . . . . . . . . . . . . . . . . . . . . . . . . . . . . . . . . . . . . . . . . . . . . 61

Contents
Installation Dimensions. . . . . . . . . . . . . . . . . . . . . . . . . . . . . . . . . . . . . . . . . . . . 62
Opening angle of the door . . . . . . . . . . . . . . . . . . . . . . . . . . . . . . . . . . . . . . . . 63
Niche Dimensions . . . . . . . . . . . . . . . . . . . . . . . . . . . . . . . . . . . . . . . . . . . . . . . . 64
Door Swing Clearance . . . . . . . . . . . . . . . . . . . . . . . . . . . . . . . . . . . . . . . . . . . . . 65
Planning the Water Connection . . . . . . . . . . . . . . . . . . . . . . . . . . . . . . . . . . . . . 66
Information Concerning the door panel. . . . . . . . . . . . . . . . . . . . . . . . . . . . . . . 67 Inset installation . . . . . . . . . . . . . . . . . . . . . . . . . . . . . . . . . . . . . . . . . . . . . . . . . . . 67 Frameless installation . . . . . . . . . . . . . . . . . . . . . . . . . . . . . . . . . . . . . . . . . . . . . . 68
Installing the Appliance. . . . . . . . . . . . . . . . . . . . . . . . . . . . . . . . . . . . . . . . . . . . 69 Installing the Appliance . . . . . . . . . . . . . . . . . . . . . . . . . . . . . . . . . . . . . . . . . . . . . 69 Installing the anti-tip brackets . . . . . . . . . . . . . . . . . . . . . . . . . . . . . . . . . . . . . . . . 69 Installation of the anti-tip bracket in a cabinet with a depth greater than 25"
(635 mm). . . . . . . . . . . . . . . . . . . . . . . . . . . . . . . . . . . . . . . . . . . . . . . . . . . . . . 71 Fastening the covers . . . . . . . . . . . . . . . . . . . . . . . . . . . . . . . . . . . . . . . . . . . . . . . 71 Pushing the appliance into the niche . . . . . . . . . . . . . . . . . . . . . . . . . . . . . . . . . . 72 Aligning the appliance . . . . . . . . . . . . . . . . . . . . . . . . . . . . . . . . . . . . . . . . . . . . . . 72 Securing the appliance in the niche . . . . . . . . . . . . . . . . . . . . . . . . . . . . . . . . . . . 73 Aligning the appliance door . . . . . . . . . . . . . . . . . . . . . . . . . . . . . . . . . . . . . . . . . 73 Aligning the drawer front . . . . . . . . . . . . . . . . . . . . . . . . . . . . . . . . . . . . . . . . . . . . 74 Install the base cover with the ventilation slits . . . . . . . . . . . . . . . . . . . . . . . . . . . . 74 Removing the mounting rails . . . . . . . . . . . . . . . . . . . . . . . . . . . . . . . . . . . . . . . . . 76 Installing the mounting rails on the door panel . . . . . . . . . . . . . . . . . . . . . . . . . . . 77 Installing the door panel on the appliance door . . . . . . . . . . . . . . . . . . . . . . . . . . 77
Aligning the door panel . . . . . . . . . . . . . . . . . . . . . . . . . . . . . . . . . . . . . . . . . . 78 Installing the door panels on the freezer drawers . . . . . . . . . . . . . . . . . . . . . . . . . 81
Plumbing. . . . . . . . . . . . . . . . . . . . . . . . . . . . . . . . . . . . . . . . . . . . . . . . . . . . . . . . 82 Information regarding the water connection . . . . . . . . . . . . . . . . . . . . . . . . . . . . . 82 Connecting the water supply . . . . . . . . . . . . . . . . . . . . . . . . . . . . . . . . . . . . . . . . . 83
Electrical connection . . . . . . . . . . . . . . . . . . . . . . . . . . . . . . . . . . . . . . . . . . . . . . 86
Contact details . . . . . . . . . . . . . . . . . . . . . . . . . . . . . . . . . . . . . . . . . . . . . . . . . . 91
IMPORTANT SAFETY INSTRUCTIONS
When using the appliance, follow basic safety precautions, including the following:
Read all instructions before installation and use to prevent accidents and machine damage.
This appliance complies with all applicable safety laws and regulations. However, improper use can result in personal injury and material damage.
Before using the appliance for the first time, carefully read the operating and installation instructions. They contain important information on installation, safety, operation and care. This will protect you from injury and prevent damage to the appliance.
Miele will not be held liable for damage caused by failure to comply with these instructions.
Keep the instructions in a safe place and pass them along to any future owner
Risk of injury!
This appliance is very heavy and can tip forwards when the door is open. Keep the appliance door shut until the appliance has been installed and secured in accordance with these operating and installation instructions.
Intended use
This appliance is intended for use in domestic households and similar residential environments.
This appliance is not intended for outdoor use.
This appliance is intended to be used only for the cool storage of food and drink as well as for storing frozen food, freezing fresh food and for making ice under normal household conditions.
All other use occurs at the owner's own risk and may be dangerous.
The appliance is not suitable for storing and cooling medicines, blood plasma, laboratory preparations or other such materials or products. Improper use of the appliance can cause deterioration and spoilage of the stored items. The appliance is not suitable for use in areas where there is a risk of explosion.
Miele will not be held liable for damage resulting from incorrect or improper use or operation.
Persons who lack physical, sensory or mental abilities, or experience with the appliance should not use it without supervision or instruction by a responsible person.
5
IMPORTANT SAFETY INSTRUCTIONS
Safety with children
Children under 8 years of age must be kept away from the appliance unless they are constantly supervised.
Children ages 8 and up may only use the appliance unsupervised if they have been shown how to use it in a safe manner, and if they are able to recognize and understand the potential risks of improper use.
Children must not be allowed to clean or service the appliance without supervision.
Please supervise any children in the vicinity of the appliance and do not let them play with it.
Danger of suffocation. Ensure that any packing material is disposed of safely and kept out of the reach of children.
Technical safety
The cooling system has been checked for leaks. This appliance complies with all applicable local and national safety requirements.
This appliance contains the coolant isobutane (R600a), a natural gas which is environmentally friendly. Although it is flammable, it does not damage the ozone layer and does not increase the greenhouse effect.
The use of this coolant has, however, led to a slight increase in the noise level of the appliance. In addition to the noise of the compressor, you might be able to hear the refrigerant flowing throughout the system. Though this is unavoidable, it does not have any adverse effect on the performance of the appliance.
Care must be taken during the transport and installation/setup of the appliance so that no parts of the cooling system are damaged. Leaking coolant can damage the eyes. In the event of any damage:
–Avoid open flames and anything that creates sparks,
–Disconnect the appliance from the power supply,
–Ventilate the room in which the appliance is located for several minutes,
–Contact Miele.
The more coolant there is in an appliance, the larger the room it should be installed in. In the event of a leakage, there is a danger of combustible gases building up if the appliance is in too small of a room.
For every 8 g of coolant, at least 1 m3 of room space is required. The amount of coolant contained in the appliance is stated on the data plate inside the appliance.
6

IMPORTANT SAFETY INSTRUCTIONS
To protect the refrigerator from possible damage, take care that it always remains in an upright position. Any time it is moved or installed, always let it stand for 30 to 60 minutes before plugging it in. This allows the coolant and lubricant to settle down, which is essential for proper operation.
Before connecting the appliance, make sure that the connection data on the data plate (fuse rating, voltage and frequency) matches the power supply. This data must correspond in order to avoid damage to the appliance. If in doubt, consult a qualified electrician.
The electrical safety of this appliance can only be ensured if it has been properly grounded in compliance with the applicable safety regulations. It is most important that this basic safety requirement is observed. If there is any doubt contact a qualified electrician.
The electrical safety of this appliance can only be ensured if it has been properly grounded in compliance with the applicable safety regulations. It is most important that this basic safety requirement is observed. If there is any doubt about the grounding of your household wiring, have it inspected by a qualified electrician.
Do not connect the appliance to the electrical supply with a power bar or extension cord. These are a fire hazard and do not guarantee the required safety of the appliance.
Do not use the appliance in areas where there may be moisture or splashing water (e.g. garages, laundry rooms, etc.)
Moisture can reach the electrical components and cause a short circuit.
This appliance is not to be used in mobile locations such as ships.
A damaged appliance can be dangerous. Before installing the appliance, check for visible damage. Do not operate a damaged appliance.
To ensure safe operation, use the appliance only when it is fully installed.
Ensure the appliance is disconnected from the power supply during installation, maintenance and repair work or work on the water supply. The appliance is only completely disconnected from the electrical supply when:
–the respective circuit breaker is tripped,
–the respective fuse is removed, or
–the power cord is unplugged.
Pull on the plug and not on the cord when removing it from the outlet.
Improper installation, repair and maintenance work or work on the water supply can be dangerous for the user of the appliance. Installation, repair and maintenance work or repairs on the ice cube maker should only be performed by a Miele authorized technician.
Repairs not performed by a Miele authorized service technician will void the warranty.
7

IMPORTANT SAFETY INSTRUCTIONS
Only with original Miele parts can the manufacturer guarantee the safety of the appliance. Defective components should only be replaced with parts from Miele.
Miele will not be held liable for damage resulting from a faulty connection to the water supply.
The ice cube maker is not intended to be used with a hot water supply line.
Proper use
The appliance is designed for use within a certain climate range (room temperature range) and should not be used outside this range.
The climate range is specified on the data plate inside the appliance. If the room is too cold, it will cause the cooling system to remain off for too long so that the temperature in the appliance rises.
WARNING! Danger of damage from overheating. May restrict operation. Keep ventilation openings, in the appliance enclosure or in the built-in structure, clear of obstruction.
If greasy foods are stored on the appliance or the appliance door, make sure that no oil or grease leaks onto the plastic parts of the appliance. This can cause the plastic to crack and break.
Never store explosive materials or products with flammable propellants (spray cans, for example) in the appliance. The electric components can ignite the flammable gas. Fire and explosion hazard!
Do not operate any electrical devices in the appliance (ice cream maker, for example). This could cause sparking. Risk of explosion!
Do not use the freezer section for storing cans or bottles that contain carbonated beverages or liquids that could freeze. The cans or bottles could burst.
Risk of personal injury or damage to the appliance!
Bottles that are put in the freezer for quick cooling must be removed within one hour. Otherwise, they could burst. Risk of injury and damage to the appliance!
Do not handle frozen items or metal parts when your hands are wet. Your hands could freeze to the items. Risk of injury!
Never put ice or popsicles in your mouth immediately after taking them out of the freezer.Your lips or tongue could freeze to the item. Risk of injury!
Never re-freeze partially or completed thawed food. Thawed food should be used promptly, before it loses nutritional value or spoils. However, once it has been cooked, thawed food can be refrozen.
Eating food stored for too long can cause food poisoning.
The storage life depends on many factors, including the quality of the food, how fresh it is, and the storage temperature. Always observe the food producer's recommended storage instructions and best before dates.
8

IMPORTANT SAFETY INSTRUCTIONS
Use only original Miele parts. Adding or installing other parts will void any warranty and/or product liability claims.
Cleaning and care
Do not use any oil or grease on the door seals.
They can cause the seals to deteriorate over time.
Never use a steam cleaner to clean the appliance.
The steam can reach the electrical components and cause a short circuit.
Never use a pointed or sharp-edged object to
–remove frost or ice,
–or to detach food items frozen to the walls.
This will damage the evaporators, causing irreversible damage to the appliance.
Never place candles or electric heaters in the appliance to defrost it. This will damage the plastic.
Do not use defrosting sprays or
de-icers. They may contain substances that can damage the plastic or that could cause a build-up of explosive gasses or pose a health hazard.
Transport
Always transport the appliance in an upright position and in its original transport packaging to avoid damage in transit.
Due to the size and weight of the appliance, it must be transported by two people. Danger of injury and damage!
California Proposition 65
– This product can expose you to chemicals including vinyl chloride, which is known to the State of California to cause cancer and birth defects or other reproductive harm. For more information go to www.P65Warnings.ca.gov.
9

IMPORTANT SAFETY INSTRUCTIONS
Disposal of your old appliance
Risk of suffocation. Children playing can shut themselves in and suffocate.
–Take the door(s) off.
–Remove the drawers.
–Leave the storage shelves in the appliance so that children cannot easily climb into the appliance.
Danger of electric shock
–Cut off the plug from the power cord and discard.
–Cut off the power cord from the discarded appliance. Dispose of separately from the appliance.
Ensure during and after disposal that the appliance isn't stored in the vicinity of gasoline or other flammable vapors and liquids.
When disposing of the appliance, ensure that the refrigeration circuit is not damaged to prevent uncontrolled escape of the coolant it contains (data on type plate) and oil.
Be careful not to damage any part of the cooling system, for example by:
–Puncturing the refrigerant channels in the evaporator,
–Bending any pipework, or
–Scratching the surface coating.
Refrigerant spurting out of the cooling system can damage the eyes.
SAVE THESE INSTRUCTIONS AND PASS THEM ON TO ANY FUTURE USER
10
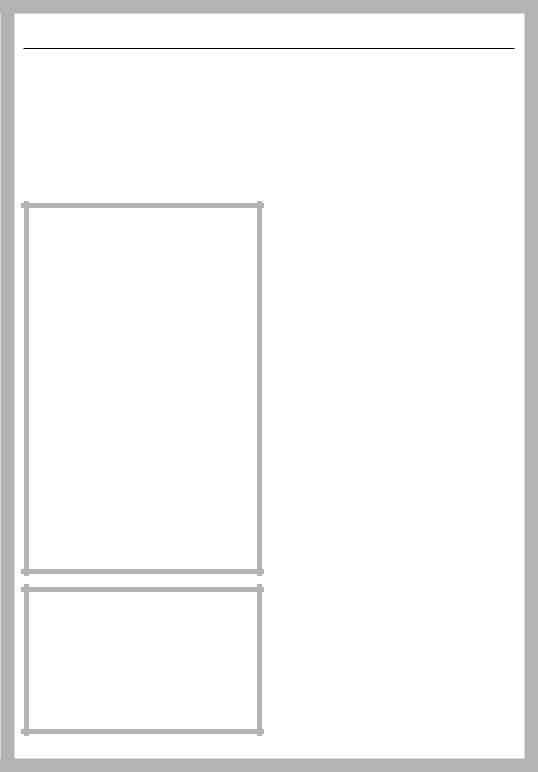
Guide to the Appliance
Control panel
Refrigerator section
Alarm-off button for silencing the door alarm, or the temperature alarm of the freezer section
Button for turning SuperCool On / Off
Button for turning the refrigerator section On / Off
Button for setting a higher or lower temperature in the refrigerator section
Indicator lights:
Power failure
Air filter dirty
SuperCool is on
Safety lock is On
Temperature display (top for refrigerator section, bottom for freezer section) and symbol display (only visible in the settings mode MENU; "More settings")
Freezer section
Indicator lights:
Temperature alarm for the freezer section
Ice cube maker is On
SuperCool is On
Button for setting a higher or lower temperature in the freezer section
Button for turning the freezer section On / Off
Button for turning SuperCool On / Off
Button for switching the ice cube maker On / Off
11

Guide to the Appliance
Control panel
Interior lighting
Fan
Egg tray / Door shelf
Shelf
Bottle rack
Bottle shelf with bottle divider
Fruit and vegetable drawers
Automatic ice cube maker behind the drawer
Freezer section interior lighting
Freezer drawers
Base cover with air filter behind it
Water connection
12
|
Guide to the Appliance |
|
|
Included accessories |
Optional accessories |
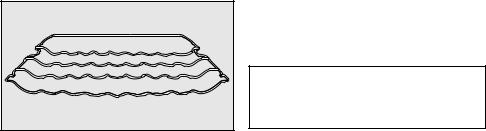
Bottle rack |
Bottle rack |
The bottle rack allows you to store bottles horizontally, which saves space.
The bottle rack can be used at several locations in the appliance.
(see "Included accessories" for more information)
Optional accessories are available from Miele, your Miele dealer or online.
13

How to save Energy
|
Normal |
Increased |
|
energy consumption |
energy consumption |
|
|
|
|
|
|
Installation / |
In a well ventilated room. |
In an enclosed, |
maintenance |
|
poorly ventilated room. |
|
|
|
|
Protected from direct |
In direct sunlight. |
|
sunlight. |
|
|
|
|
|
Away from heat sources |
Near a heat source (radiator, |
|
(radiator, stove/oven). |
stove/oven). |
|
|
|
|
Where the room temperature |
Where the room temperature |
|
is ideal, i.e. around 20°C. |
is higher. |
|
|
|
|
Do not block the ventilation |
Where the ventilation |
|
openings, and keep them |
openings are blocked and |
|
clean. |
full of dust. |
|
|
|
Temperature |
39 - 41°F (4 - 5°C) in the |
The lower the temperature |
setting |
refrigerator section |
setting, the higher the |
|
|
energy consumption. |
|
0°F (-18°C) in the freezer |
|
|
|
|
|
section |
|
|
|
|
14
|
|
|
How to save Energy |
|
|
|
|
|
Normal |
|
Increased |
|
|
||
|
energy consumption |
|
energy consumption |
|
|
|
|
|
|
|
|
Use |
The drawers and shelves are |
|
|
|
in the original arrangement. |
|
|
|
|
|
|
|
Only open the doors when |
|
Frequent opening of the door |
|
necessary and for as short a |
|
or for long periods will allow |
|
time as possible. |
|
the cold to escape and warm |
|
Store food in an organized |
|
air to enter. The appliance |
|
|
|
|
|
way. |
|
tries to keep the temperature |
|
|
|
|
|
|
|
low and the compressor runs |
|
|
|
longer. |
|
|
|
|
|
When shopping, use a cooler |
|
Hot food warms up the |
|
box or bag and place the food |
|
appliance. |
|
in the appliance as soon as |
|
The appliance then tries to |
|
possible. |
|
keep the temperature low and |
|
Replace items removed from |
|
the compressor runs longer. |
|
|
|
|
|
the appliance as soon as |
|
|
|
possible before they warm up. |
|
|
|
Allow hot food and drinks to |
|
|
|
cool down before placing |
|
|
|
them in the appliance. |
|
|
|
|
|
|
|
Store food covered or |
|
The evaporation or |
|
wrapped. |
|
condensation of liquids in the |
|
|
|
refrigerator section lower the |
|
|
|
cooling performance. |
|
|
|
|
|
Place frozen food in the |
|
|
|
refrigerator to thaw. |
|
|
|
|
|
|
|
Do not overfill the appliance in |
|
|
|
order to allow the air to |
|
|
|
circulate. |
|
|
|
|
|
|
15
Turning the Appliance On / Off
Before the first use |
Operating the appliance |
It is very important to let the appliance stand for 30 to 60 minutes after transport before you plug it in for the first time. Failure to do so can prevent the appliance from functioning properly!
Packaging material
Remove all packaging material from the inside of the appliance.
Protective film
The stainless steel trim and covers are covered with a film to protect them during transportation.
Pull the protective film off the stainless steel surfaces.
Cleaning and care
Clean the inside of the appliance and the accessories (see "Cleaning and care").
A light touch of the finger on the sensor buttons is all that is required to operate this appliance.
After transporting the appliance, let it stand for approx. 1/2 to 1 hour before plugging it in. This is necessary to ensure that the appliance functions correctly!
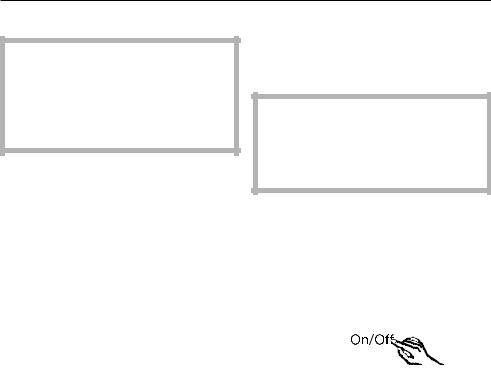
Turning the appliance on
The refrigerator and freezer sections can be turned on and off separately so that you can use one section only.This is useful when you only need to have the freezer section running (when on vacation, for example.)
Touch the button for turning the refrigerator and/or the freezer section On / Off so that the respective temperature is displayed.
The appliance starts to cool.
The top temperature display shows the temperature in the refrigerator section, the bottom temperature is that in the freezer section.
If the temperature in the freezer section is above 32°F (0°C), only dashes are displayed.
16

Turning the Appliance On / Off
The alarm symbol on the control panel flashes until the selected temperature is reached.
The interior lighting will come on when the refrigerator door or a freezer drawer is opened.
Allow the appliance to run for a few hours before placing food in it. Do not place food in the freezer section until the temperature is cold enough (at least 0°F / -18°C).
Turning the appliance off
Touch the button for turning the refrigerator and/or the freezer section on On / Off until the respective temperature display goes out.
This is not possible when the safety lock is on, which is indicated by thesymbol on the control panel.
The interior lighting goes out and the cooling is turned off.
Vacation Tips
Short vacations (if you will be away for less than four weeks)
Shut off the water supply to the ice cube maker.
When the ice cube maker LED starts blinking, the remaining water in the supply line is in the ice cube maker.
Leave the Ice Maker on and working for one day so that the remaining ice cubes are ejected.
Turn off the ice cube maker.
Transfer all ice cubes to the right part of the upper drawer or to the bottom drawer.
Use all perishables.
Freeze other items.
Long vacations (if you will be away for more than four weeks)
Shut off the water supply to the ice cube maker.
When the ice cube maker LED starts blinking, the remaining water in the supply line is in the ice cube maker.
Leave the ice cube maker on and working for one day so that the remaining ice cubes are ejected.
Turn off the Ice maker.
Remove all ice cubes from the drawer and dispose of them.
Remove all food from the appliance.
Turn the appliance off.
Unplug the power cord from the electrical outlet or trip the circuit breaker.
Clean the appliance.
Leave the doors ajar to prevent any odor build-up in the appliance.
If, during a long absence, the appliance is turned off but not cleaned and the doors are left closed, bacteria may build up in the appliance.
17

The Right Temperature
The right temperature is very important for storing food. If food is not stored at the right temperature, bacteria can multiply rapidly, causing the food to spoil. This can be prevented or delayed by selecting the right temperature. Temperature affects the rate at which bacteria multiply. Reducing the temperature slows down this process.
The temperature in the appliance will rise for the following reasons:
–if you open the door frequently or keep it open too long,
–if you put too much food in it,
–if you put food in it that is too warm,
–if the room temperature is too high. The appliance is designed for use within a certain climate range (room temperature range) and should not be used outside this range.
. . . in the refrigerator
We recommend a temperature of 39°F (3°C) in the refrigerator section.
Automatic cold air circulation (DynaCool)
Whenever the refrigerator section turns on for cooling, the fan is automatically turned on as well. This ensures that cold air is evenly distributed throughout the refrigerator, so that all the food stored inside will be chilled to approximately the same temperature.
. . . in the freezer
For freezing fresh food and storing frozen food for longer periods of time, the temperature needs to be 0°F (-18°C). At this temperature, most bacteria stop multiplying. However, when the temperature rises above 14°F (-10°C) the bacteria become active, causing the food to start deteriorating and reducing the storage life. This is why any partially or completely thawed food must never be refrozen until it has been cooked. High cooking temperatures will kill most bacteria.
18
The Right Temperature
Temperature display
In normal operation the display shows the current average refrigerator temperature and the temperature in the warmest part of the freezer.
Dashes are displayed if the temperature in the freezer section is not within the displayable range.
Depending on the room temperature, it can take several hours (3 to 8) until the selected temperature is reached and displayed steadily.
If the temperature was above 0°F (-18°C) for a longer period of time you will need to check to make sure that no frozen food started to thaw. Any food that started to thaw must be used as soon as possible!
The temperature display flashes when
–a new temperature is being set,
–the temperature in the appliance has risen by several degrees, indicating that it is warming up too much, or
–a fault is displayed "F1" to "F5" (see "Frequently asked questions").
This short-term loss of cooling is no cause for concern in the following cases:
–when the door has been left open for a while, for example to take out or put in a large amount of food,
–when fresh food is being frozen.
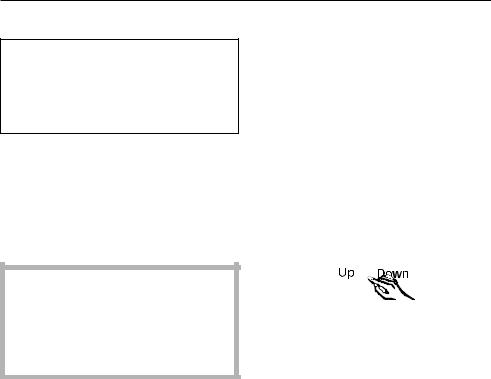
Setting the temperature for the refrigerator and freezer
The temperatures for the refrigerator and the freezer are set separately using the buttons for the respective section.
Set the desired temperatures using each of the buttons.
Tap
–Up to increase the temperature
–Down to decrease the temperature.
The temperature display flashes while you set the new temperature.
19

The Right Temperature
When you tap the buttons, you will see the following changes in the display:
–When first tapped: The last temperature selected flashes.
–Every new tap:
The temperature value changes in increments of 1 degree.
–Holding down the button will change the temperature value continuously.
Approximately 5 seconds after you release the button, the actual temperature in the appliance will be displayed.
If you have changed the temperature and the appliance is not very full, wait approx. 6 hours, if it is full, approx. 24 hours before checking the temperature display again. It will take that long to reach the selected temperature.
If, after this amount of time, the temperature is too high or too low, you will need to adjust it again.
Temperature ranges
The temperature can be selected within the following ranges:
–In the refrigerator section, 36°F to 44°F (2°C to 6°C).
–In the freezer section, 7°F to -15°F (-14°C to -27°C).
20
Using SuperCool in the refrigerator section
The SuperCool function can be used to rapidly reduce the temperature in the refrigerator section to its lowest setting (depending on the room temperature).
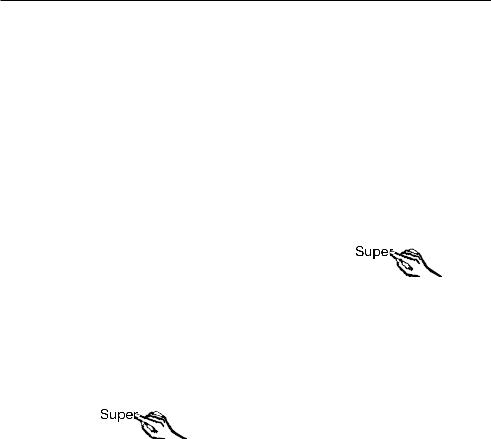
Turning on SuperCool
SuperCool is particularly recommended for quickly cooling large amounts of fresh food or drinks.
Touch the button for turning SuperCool on and off so that the symbol to the left of the display will come on.
The temperature in the refrigerator now begins to fall, with maximum cooling performance.
Turning off SuperCool
SuperCool automatically turns off after approx. 6 hours. The appliance continues running with normal cooling performance.
To save energy, you can turn off SuperCool yourself once the food or drinks are sufficiently chilled.
Touch the button for turning SuperCool On / Off so that the symbol to the left of the display will go out.
The appliance now continues running with normal cooling performance.
21
Using SuperCool in the freezer section
For best results, turn on SuperCool before putting fresh food into the freezer.
Fresh food will be frozen quickly, so that the nutritional value, vitamin content, appearance and taste are maintained.
Exceptions:
–if you are loading frozen food into the freezer.
–if you are not loading more than 4.5 lbs (2 kg) fresh food into the freezer per day.
Turning off SuperCool
SuperCool turns off automatically after approx. 30 - 65 hours. The length of time required until it turns off depends on the amount of fresh food added. goes out, and the appliance continues running with normal cooling performance.
To save energy, you can turn off SuperCool once the freezer reaches a constant temperature of at least 0°F (-18°C). Therefore you should check the temperature in the freezer section.
Turning SuperCool on
SuperCool should be turned on 6 hours before you place fresh food in the freezer. However, if you want maximum freezing performance, SuperCool should be turned on 24 hours beforehand!
Touch the button for turning SuperCool On / Off so that the symbol to the right of the display comes on.
The temperature in the freezer section now begins to fall, with maximum cooling performance.
Touch On / Off button for SuperCool so that the symbol to the right of the display goes out.
The appliance now continues running with normal cooling performance.
22
Temperature and Door Alarm
The appliance is equipped with a warning system to ensure that the temperature in the freezer section does not rise unnoticed and to avoid energy being wasted if doors or drawers are left open.
Temperature alarm
An alarm will sound if the temperature in the freezer section becomes toowarm. The alarm indicator flashes on the control panel as well as the bottom temperature indicator (for the freezer section) in the display.
When the alarm is triggered depends on the selected temperature.
The audio and visual signal is triggered:
–when you turn on the appliance if the temperature in the freezer section differs too much from the selected temperature,
–when too much warm air flows into the appliance, for example when food is being re-arranged or taken out,
–when freezing large amounts of food at once,
–when the appliance is malfunctioning.
Once the alarm condition has ended, the audio alarm stops and the alarm indicator goes out. The temperature indicator for the freezer section stops flashing.
If the temperature was above 0°F (-18°C) for a longer period of time, you will need to check to make sure that no frozen food started to thaw. Any food that started to thaw must be used as soon as possible or cooked before refreezing!
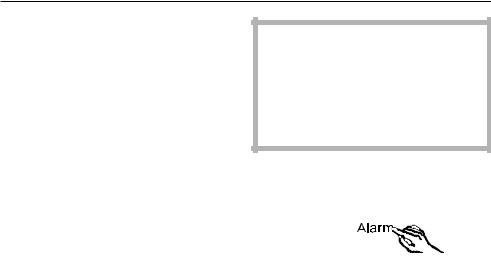
Turning off the audio alarm
If the alarm signal bothers you, it can be silenced.
Touch the alarm button.
The alarm sound will stop.
The alarm indicator and the bottom temperature indicator in the display keep flashing until the temperature has returned to normal.
23

Temperature and Door Alarm
Door alarm
An alarm will sound if the appliance door or a freezer drawer is left open for more than 3 minutes.
The alarm will stop as soon as the door or the freezer drawer is closed.
Turning off the audio alarm
If the alarm signal bothers you, it can be silenced.
Touch the alarm button.
The alarm sound will turn off.
24
Additional Settings
Certain appliance settings can only be selected in the settings mode.
Options
5 |
Sabbath mode |
|
|
c |
Safety lock |
|
|
l |
Ice cube maker function test |
|
(for Service use only) |
|
|
E |
Setting the water quantity for the |
|
ice cube tray (see "Making ice |
|
cubes") |
|
|
§ |
Temperature unit |
|
(Fahrenheit or Celsius) |
|
|
^ |
Brightness of the display |
|
|
H |
Lower hinge heating control |
|
|
n |
Resetting the air filter display |
|
(see "Cleaning and care") |
|
|
Some setting options are not covered below but rather in their respective chapters.
Sabbath mode S
Sabbath mode can be selected to facilitate religious customs.
In Sabbath mode, many functions are deactivated and cannot be selected.
–The interior lighting does not come on when the door or a freezer drawer is opened.
–The fan stays in its last setting.
–The door alarm is deactivated.
–The temperature alarm is deactivated.
The cooling performance of the appliance is not affected.
Sabbath mode is automatically deselected after approx. 120 hours. You can deactivate Sabbath mode yourself
When in Sabbath mode, the appliance cannot be turned off. Either deselect Sabbath mode or pull the plug.
A power failure would not be indicated in Sabbath mode. After a power failure the appliance goes back to Sabbath mode.
25
Additional Settings
Turning Sabbath mode On / Off |
If not manually deactivated, Sabbath |
|
mode is automatically deselected after |
|
approx. 120 hours. |
Press and hold the SuperCool button for the freezer section On / Off button for 5 seconds.
The SuperCool indicator to the right of the display is on during this time, and after 5 seconds S flashes in the lower temperature display (freezer section). The display shows MENU. You are now in settings mode.
Touch the Super button again.
The following will appear in the display:
–5 1 (Sabbath mode is activated), or
–5 0 (Sabbath mode is deactivated).
Touch the Super button again to confirm your selection.
The display shows "S" when the appliance is in Sabbath mode. The interior lighting goes out and the display and the symbols on the control panel go out.
To leave the settings mode, touch the button for turning the freezer section on and off.
Safety lock c
The safety lock can be activated to prevent the appliance being turned off inadvertently.
Turning the safety lock On / Off
Press and hold the SuperCool for the freezer section On / Off button for 5 seconds.
The SuperCool indicator to the right of the display is on during this time, and after 5 seconds S flashes in the lower temperature display (freezer section). The display shows MENU. You are now in the settings mode.
Tap the button for setting the
temperature in the freezer section until a flashing c appears in the lower temperature display.
Touch the Super button again.
The following will appear in the display:
–c 1 (Safety lock is activated), or
–c 0 (Safety lock is deactivated).
26
Additional Settings
Touch the Super button again to confirm your selection.
appears in the control panel when the safety lock is activated.
To leave the settings mode, touch the button for turning the freezer section on and off.
Temperature unit (Fahrenheit or Celsius) §
The temperature can be displayed in Fahrenheit (°F) or Celsius (°C).
The factory default is Fahrenheit.
Selecting the temperature unit
Press and hold the SuperCool button for the freezer secion On / Off button for 5 seconds.
The SuperCool indicator to the right of the display is on during this time, and after 5 seconds S flashes in the lower temperature display (freezer section). The display shows MENU. You are now in the settings mode.
Tap the button for setting the temperature in the freezer section until a flashing § appears in the lower temperature display.
Touch the Super button again.
The following will appear in the display:
–§ C (Temperature display in Celsius), or
–§ F (Temperature display in Fahrenheit).
Touch the Super button again to confirm your selection.
The temperature is now displayed in the selected unit.
To leave the settings mode, touch the button for turning the freezer section on and off.
27

Additional Settings
Brightness of the display ^
You can adjust the brightness of the display to suit the light conditions in the room.
There are five different brightness settings. The factory default setting is 5 (maximum brightness).
Changing the brightness of the display
Press and hold the SuperCool button for the freezer section On / Off button for 5 seconds.
The SuperCool indicator to the right of the display is on during this time, and after 5 seconds S flashes in the lower temperature display (freezer section). The display shows MENU. You are now in the settings mode.
Press and hold the buttons for setting
the temperature in the freezer section until a flashing ^ appears in the lower temperature display.
Touch the Super button again.
The display shows ^ 0 to ^ 5:
–^ 0: lowest brightness level
–^ 5: highest brightness level.
You can change the brightness within levels 0 to 5 by tapping the button for setting the temperature in the freezer section.
Touch the Super button again to confirm your selection.
To leave the settings mode, touch the button for turning the freezer section on and off.
28
 Loading...