


CD-RECEIVER
KDC-MP5539U KDC-MP5039U KDC-MP4039
INSTRUCTION MANUAL
© B64-3956-00/00 (MW)
Contents
Before use
Basic Operation
General functions
Tuner functions
Disc & Audio file play functions
General Operation
Audio Control
Audio Setup
Speaker Setting
Display Switching
Tuner Operation
Direct Access Tuning
Frequency Step Setting
Music disc/Audio file Operation
Play Functions of Disc Changer
Direct Music Search
Direct Disc Search
List Select
iPod Select
Track Select
Menu Operation
Menu System
Security Code
Manual Clock Adjustment
Auxiliary Input Display Setting
Demonstration mode Setting
3 Appendix |
13 |
|
|
|
|
4Accessories/ Installation Procedure 15
|
Connecting Wires to Terminals |
16 |
|
6 |
Installation |
17 |
|
Troubleshooting Guide |
18 |
||
|
|||
|
Specifications |
20 |
|
8 |
|
|
|
8 |
|
|
10
Basic Operations of remote control 12
Panel illustrations used in this document
The control panel for KDC-MP5539U is used to describe operations in this document.
Playing AAC, MP3, and WMA data
This document refers to AAC, MP3, and WMA data stored in iPod, USB device, and CD-R/RW as
"audio files." Refer to the section on "Audio Files" to control these data. See <About Audio file> (page 13) for details.
• iPod is a trademark of Apple Inc., registered in the U.S. and other countries.
• The "AAC" logo is trademark of Dolby Laboratories.
2 | KDC-MP5539U/KDC-MP5039U/KDC-MP4039
Before use
2WARNING
To prevent injury or fire, take the following precautions:
•To prevent a short circuit, never put or leave any metallic objects (such as coins or metal tools) inside the unit.
Before using this unit for the first time
This unit is initially set on the Demonstration mode. When using this unit for the first time, cancel the <Demonstration mode Setting> (page 11).
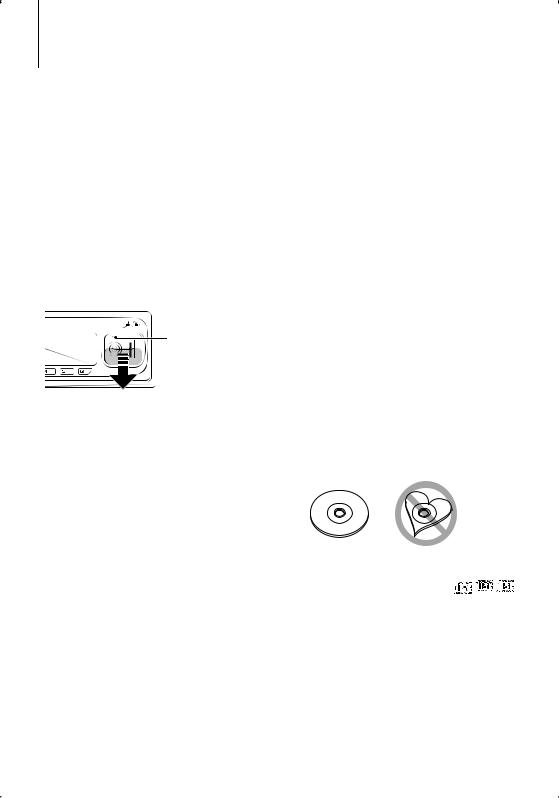
How to reset your unit
•If this unit or the connected unit (disc auto changer, etc.) fails to operate properly, press the Reset button. The unit returns to factory settings when the Reset button is pressed.
Reset button
Cleaning the Unit
If the faceplate of this unit is stained, wipe it with a dry soft cloth such as a silicon cloth.
If the faceplate is stained badly, wipe the stain off with a cloth moistened with neutral cleaner, then wipe it again with a clean soft dry cloth.
¤
•Applying spray cleaner directly to the unit may affect its mechanical parts. Wiping the faceplate with a hard cloth or using a volatile liquid such as thinner or alcohol may scratch the surface or erases characters.
Cleaning the Faceplate Terminals
If the terminals on the unit or faceplate get dirty, wipe them with a clean soft dry cloth.
Lens Fogging
When you turn on the car heater in cold weather, dew or condensation may form on the lens in the CD player of the unit. Called lens fogging, this condensation on the lens may not allow CDs to play. In such a situation, remove the disc and wait for the condensation to evaporate. If the unit still does not operate normally after a while, consult your Kenwood dealer.
•If you experience problems during installation, consult your Kenwood dealer.
•When you purchase optional accessories, check with your Kenwood dealer to make sure that they work with your model and in your area.
•The characters which can be displayed by this unit are A-Z 0-9 @ " ‘ ` % & * + – = , . / \ < > [ ] ( ) : ; ^ - { } | ~ .
•The illustrations of the display and the panel appearing in this manual are examples used to explain more clearly how the controls are used. Therefore, what appears on the display in the illustrations may differ from what appears on the display on the actual equipment, and some of the illustrations on the display may be inapplicable.
Handling CDs
•Do not touch the recording surface of the CD.
•Do not stick tape etc. on the CD, or use a CD with tape stuck on it.
•Do not use disc type accessories.
•Clean from the center of the disc and move outward.
•When removing CDs from this unit, pull them out horizontally.
•If the CD center hole or outside rim has burrs, use the CD only after removing the burrs with a ballpoint pen etc.
CDs that cannot be used
• CDs that are not round cannot be used.
• CDs with coloring on the recording surface or CDs that are dirty cannot be used.
• This unit can only play the CDs with

 . This unit may not correctly play discs which do not
have the mark.
•You cannot play a CD-R or CD-RW that has not been finalized. (For the finalization process refer to your CD-R/CD-RW writing software, and your CD-R/CD- RW recorder instruction manual.)
English | 3

Basic Operation
[AUTO] Release [M.JOG] Display Disc slot Auxiliaryinput [ ]
[ ] |
Controllknob |
[SRC] [1] [2] [3] [4] [5] [6] |
USB Termiinal |
General functions
Power/Source Select button  [SRC]
[SRC]
Turns on the power.
When the power is on, the source switches between Tuner (“TUNER”) , USB or iPod (“USB” or “iPod”),
CD (“CD”) , Auxiliary input (“AUX”), and Standby (“STANDBY”) each time this button is pressed. Press at least 1 second to turn off the power.
•Do not place the faceplate (and the faceplate case) in areas exposed to direct sunlight, excessive heat or humidity. Also avoid places with too much dust or the possibility of water splashing.
•To prevent deterioration, do not touch the terminals of the unit or faceplate with your fingers.
Auxiliary input  Auxiliary input
Used to connect a portable audio device with miniplug cable (3.5 ø).
⁄
•When the power is ON, the <Security Code> (page 10) is displayed as "CODE ON" or "CODE OFF".
•For whether USB devices and iPod can be connected, refer to <About Audio file> (page 13).
•When an optional accessory is connected, the source name for each device appears.
•When connection of the iPod is recognized, the source display changes from "USB" to "iPod".
Volume control |
Control knob |
Turn the knob to adjust the volume.
Faceplate release  Release
Releases the faceplate lock so that it can be removed. Refer to the following diagram when reattaching the faceplate.
⁄
•Use the mini-plug cable (stereo) which does not have any resistance.
Muting volume upon reception of phone call
When there is a call, “CALL” is displayed and the audio system is paused.
When the call ends, “CALL” disappears and the audio system comes back on.
The audio system comes back on when [SRC] is pressed during a call.
Subwoofer output  Control knob
Switches between ON (“SUBWOOFER ON”) and OFF (“SUBWOOFER OFF”) each time pushing toward down for at least 2 seconds.
¤
•The faceplate is a precision piece of equipment and can be damaged by shocks or jolts.
•Keep the faceplate in its faceplate case while detached.
4 | KDC-MP5539U/KDC-MP5039U/KDC-MP4039
Tuner functions
Band select  Control knob
Switches between FM1, FM2, and FM3 each time pushing toward up.
Switches to AM when pushing toward down.
Tuning  Control knob
Changes the frequency when pushing toward left or right.

⁄
• During reception of stereo stations the “ST” indicator is ON.
Tuning mode select  [AUTO]
Switches as follows each time this button is pressed.
Tuning mode |
Display |
|
Operation |
Auto seek |
“SEEK : AUTO1” |
Automatic search for a station. |
|
Preset station seek |
“SEEK : AUTO2” |
Search in order of the stations in the |
|
|
|
|
Preset memory. |
Manual |
“SEEK : MANUAL” |
Normal manual tuning control. |
|
Preset memory |
[1] - [6] |
||
Memorizes the station selected when pressing for at least 2 seconds.
Auto memory entry  [AUTO]
Memorizes six stations with good reception automatically when pressed for at least 2 seconds.
Preset tuning |
[1] - [6] |
Recalls the memorized station.
Disc & Audio file play functions
Disc play  Disc slot
Starts playing when a disc is inserted.
When a CD is inserted, the “IN” indicator is ON.
⁄
•3 inch (8 cm) CD cannot be used. Attempt to insert using an adapter can cause malfunction.
USB device play (KDC-MP5539U/MP5039U)
USB Terminal
Used to connect the USB device to the USB cable (optional accessory) which is connected to the USB terminal.
When the USB device is connected, the “USB” indicator is ON.
⁄
•For the playable audio file, media, and devices, refer to <About Audio file> (page 13).
Pause and play |
[38] |
Switches between pause and play each time this button is pressed.
Disc ejection  [0]
[0]
⁄
•You can eject the disc for 10 minutes after switching off the engine.
 : Indicates the button etc. to operate.
USB device removing  [0]
[0]
Press this button for 2 seconds or longer to select the remove mode, and the remove the USB device. During the remove mode, “USB REMOVE” is displayed.
Music search  Control knob
Changes the music when pushing toward left or right. Fast reverses or forwards the music while keeping pushing toward left or right. (No sound is output while playing audio file.)
Folder search  Control knob
Changes the folder containing the audio file when pushing toward up or down.
Select mode  [M.JOG]
After pressing this button, you can quickly search songs with the control knob. See <List Select> (page 9), <iPod Select> (page 9) for details.
Track/ File/ Folder repeat play |
[4] |
Switches between Track Repeat (“TRAC REP ON”) and OFF (“REP OFF”) when pressed while playing a CD. Switches between File Repeat (“FILE REP ON”), Folder Repeat (“FOLD REP ON”), and OFF (“REP OFF”) when pressed while playing an audio file.
⁄
•The folder repeat operation cannot be performed while iPod is playing.
Scan play |
[2] |
Successively plays the intro of the music in the disc or folder.
When Scan Play is turned on, “TRAC SCAN ON”/ “FILE SCAN ON” is displayed.
⁄
•The Scan paly operation cannot be performed while iPod is playing.
Random play  [3]
[3]
Randomly plays the music in the disc or folder. When Random Play is turned on, “DISC RDM ON”/ “FOLD RDM ON” is displayed.
Text/Title scroll  Control knob
Scrolls the CD and audio file text display when pushing toward up for at least 2 seconds.
English | 5

General Operation
Audio Control
You can adjust following Audio Control items;
Adjustment Item |
Display |
Range |
Rear volume* |
“R-VOLUME” |
0 — 35 |
Subwoofer level |
“SUB-W L” |
–15 — +15 |
Bass Boost** |
“B.BOOST-L” |
“L1”/”L2”/“OFF” (The |
|
|
indicator turns on according to |
|
|
the setting.) |
System Q |
“NATURAL”/ |
Natural/User setting/Rock/ |
|
“USER”/“ROCK”/ |
Pops/Easy/Top 40/Jazz |
|
“POPS”/“EASY”/ |
(The indicator turns on |
|
“TOP40”/“JAZZ” |
according to the setting.) |
Bass level |
“BASS L” |
–8 — +8 |
Middle level |
“MID L” |
–8 — +8 |
Treble level |
“TRE L” |
–8 — +8 |
Balance |
“BALANCE” |
Left 15 — Right 15 |
Fader |
“FADER” |
Rear 15 — Front 15 |
Exit Audio Control mode (Volume control mode)
*Function of KDC-MP5539U/MP5039U. **Function of KDC-MP4039.
⁄
•“USER”: The customized Bass, Middle, and Treble levels are effective. On the KDC-MP5539U/5039U, this item can be selected at any time. On the KDC-MP4039, this item is displayed only when the tone quality has been adjusted. On the KDC-MP4039, this item disappears when another setting is selected.
•You can set Bass, Middle, and Treble for each source.
1 Select the source to adjust
Press the [SRC] button.
2Enter Audio Control mode
Press the Control knob.
3Select the Audio item to adjust
Press the Control knob.
4Adjust the Audio item
Turn the Control knob.
5Exit Audio Control mode
Press any button.
Press a button other than the Control knob or 0 button.
Audio Setup
You can set Sound system , such as follows;
Adjustment Item |
Display |
Range |
Front High Pass Filter* |
“HPF F” |
Through/80/100/120/ 150/180 |
|
|
Hz |
Rear High Pass Filter* |
“HPF R” |
Through/80/100/120/ 150/180 |
|
|
Hz |
Low Pass Filter |
“LPF SW” |
60*1/80/120/160*2/Through Hz |
Subwoofer Phase* |
“PHASE” |
Reverse (180°)/ Normal (0°) |
Volume offset |
“V-OFFSET” |
–8 — ±0 (AUX: -8— +8) |
Loudness* |
“LOUDNESS” |
OFF/ON |
Dual Zone System* |
“2ZONE” |
OFF/ON |
*Function of KDC-MP5539U/MP5039U. *1KDC-MP5539U/MP5039U only. *2KDC-MP4039 only.
⁄
•Volume offset: Sets each source’s volume as a difference from the basic volume.
•Loudness: Compensates for low and high tones during low volume. (Only the low tone is compensated for when the tuner is selected as a source.)
•Dual Zone System
Main source and sub source (Auxiliary input) output Front channel and Rear channel separately.
-Set up the channel of sub source by “ZONE2” of <Menu System> (page 10).
-Select Main source by [SRC] button.
-Adjust the volume of Front channel by Control knob.
-Adjust the volume of Rear channel by <Audio Control> (page 6).
-The Audio Control has no effect on sub source.
1 Select the source to adjust
Press the [SRC] button.
2Enter Audio Setup mode
Press the Control knob for at least 1 second.
3Select the Audio Setup item to adjust
Press the Control knob.
4Adjust the Audio setup item
Turn the Control knob.
5Exit Audio Setup mode
Press the Control knob for at least 1 second.
6 | KDC-MP5539U/KDC-MP5039U/KDC-MP4039
 Loading...