


KDC-C519FM
KDC-C469FM
KDC-C469FMA
COMPACT
DIGITAL AUDIO
CD AUTOCHANGER / CONTROLLER / FM MODULATOR SYSTEM
INSTRUCTION MANUAL
CHANGEUR AUTOMATIQUE DE CD / CONTROLEUR / SYSTEME A MODULATION DE FM
MODE DÕEMPLOI
SISTEMA DEL MODULADOR DE FM / CONTROLADOR / CAMBIADOR AUTOMATICO DE DISCOS COMPACTOS
MANUAL DE INSTRUCCIONES
SISTEMA MODULADOR FM/CONTROLADOR / CHANGER AUTOMçTICO DE CDs
MANUAL DE INSTRU‚ÍES
Take the time to read through this instruction manual.
Familiarity with installation and operation procedures will help you obtain the best performance from your new compact disc auto changer.
For your records
Record the serial number, found on the back of the unit, in the spaces designated on the warranty card, and in the space provided below. Refer to the model and serial numbers whenever you call upon your KENWOOD dealer for information or service on the product.
Model KDC-C519FM,KDC-C469FM Serial number
©B64-2347-00/00 (KW/EW)

English
Contents |
|
Before use |
|
Warning......................................................................................... |
3 |
Safety Precautions ........................................................................ |
4 |
Handling Compact Discs ............................................................... |
6 |
Loading Compact Discs ................................................................ |
7 |
Buttons |
|
Display Unit .................................................................................. |
8 |
Remote ......................................................................................... |
8 |
Operations |
|
Playing CDs ................................................................................... |
8 |
Fast Fowarding and Reversing Disc Play ...................................... |
9 |
Track Search.................................................................................. |
9 |
Disc Search ................................................................................... |
9 |
Direct Track Search ....................................................................... |
9 |
Direct Disc Search....................................................................... |
10 |
Track Repeat ............................................................................... |
10 |
Disc Repeat................................................................................. |
10 |
Track Scan................................................................................... |
10 |
Random Play ............................................................................... |
11 |
Magazine Random Play............................................................... |
11 |
Changing the Transmission Frequency ....................................... |
12 |
Modulation level/Dynamic control............................................... |
13 |
Installation |
|
Accessories................................................................................. |
14 |
Installation Procedure.................................................................. |
14 |
Installation ................................................................................... |
15 |
Connecting Wires to Terminals................................................... |
17 |
Troubleshooting guide........................................................ |
18 |
Specifications.......................................................................... |
21 |
— 2 —

2Warning
2CAUTION
Use of controls or adjustments or performance of procedures other than those specified herein may result in hazardous radiation exposure.
In compliance with Federal Regulations, following are reproductions of labels on, or inside the product relating to laser product safety.
KENWOOD CORPORATION 2967-3, ISHIKAWA-CHO, HACHIOJI-SHI
TOKYO, JAPAN
KENWOOD CORP. CERTIFIES THIS EQUIPMENT CONFORMS TO DHHS REGULATIONS N0.21 CFR 1040. 10, CHAPTER I, SUBCHAPTER J.
Location : Rear Panel
FCC WARNING
This equipment may generate or use radio frequency energy. Changes or modifications to this equipment may cause harmful interference unless the modifications are expressly approved in the instruction manual. The user could lose the authority to operate this equipment if an unauthorized change or modification is made.
NOTE
This equipment has been tested and found to comply with the limits for a Class B digital device, pursuant to Part 15 of the FCC Rules. These limits are designed to provide reasonable protection against harmful interference in a residential installation. This equipment may cause harmful interference to radio communications, if it is not installed and used in accordance with the instructions. However, there is no guarantee that interference will not occur in a particular installation. If this equipment does cause harmful interference to radio or television reception, which can be determined by turning the equipment off and on, the user is encouraged to try to correct the interference by one or more of the following measures:
¥Reorient or relocate the receiving antenna.
¥Increase the separation between the equipment and receiver.
¥Connect the equipment into an outlet on a circuit different from that to which the receiver is connected.
¥Consult the dealer or an experienced radio/TV technician for help.
NOTE
This Class B digital apparatus complies with Canadian ICES-003.
— 3 —
English
Safety Precautions
2WARNING
Take the following precautions to prevent fire and avoid personal injury:
¥When extending the ignition wire, battery wire, or ground wire, use 0.75mm2 (AWG18) or larger automotive grade wire to avoid wire deterioration or damage to the covering.
¥Check that no metal objects (coins, tools, etc.) are left inside the unit to avoid short circuits.
¥If you smell or see smoke, turn the power off immediately and consult your Kenwood dealer.
¥Do not touch the liquid crystal fluid if the LCD is damaged or broken due to shock. The liquid crystal fluid may be dangerous to your health or even fatal.
If the liquid crystal fluid from the LCD contacts your body or clothing, wash it off with soap immediately.
2CAUTION
¥When replacing a fuse, only use a new one with the prescribed rating. Using a fuse with the wrong rating may cause your unit to malfunction. on hot places such as above the dashboard.
¥To prevent a short circuit when replacing a fuse, first disconnect the wiring harness.
NOTE
¥If you have difficulty in installing this unit in your vehicle, contact your Kenwood dealer.
¥If it doesnÕt seem to be working properly, first press the Reset button. If the malfunction persists, consult your Kenwood dealer.
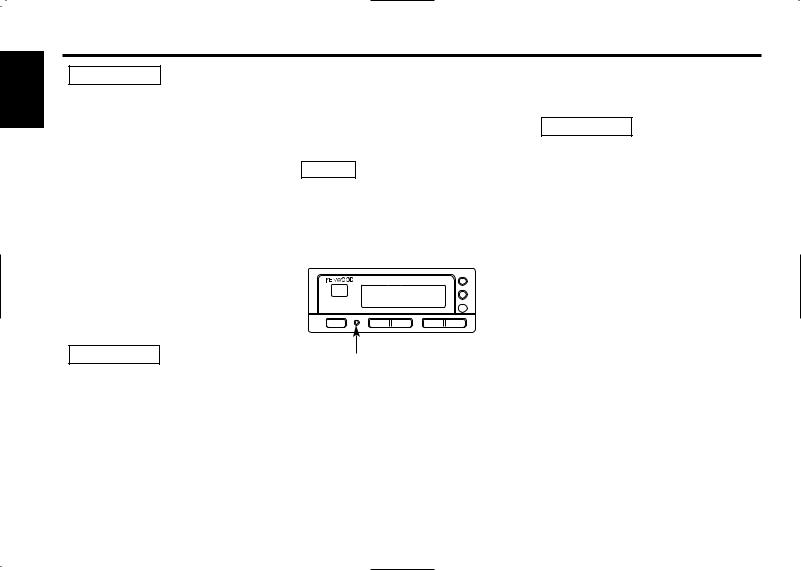
|
|
|
|
|
REP |
|
C D A U T O C H A N G E R C O N T R O L L E R |
|
|
|
|
|
T R A C K |
DISC |
|
RDM |
|
|
|
FREQ |
|
|
|
' |
|
LEVEL |
|
|
|
M . R D M |
D . R E P D . S C N |
|
M H z |
3/ 8 |
|
|
|
|
|||
|
T R A C K |
|
D I S C |
|
|
PWR |
4 |
¢ |
|
- |
+ |
Reset button
Cleaning the Unit
If the front panel gets dirty, turn off the power and wipe the panel with a dry silicon cloth or soft cloth.
2CAUTION
Do not use hard cloths or paint thinner, alcohol, or other volatile solvents. These may damage external surfaces or remove indicator characters.
Lens fogging
In cold climates, there may be a period after you turn on your vehicleÕs heater when the lens that guides the laser beam used in your CD player fogs up. If this happens, you cannot play compact discs. Take out discs and the fogging will disappear. If it does not return to normal after several hours, contact your Kenwood dealer.
Take the following precautions to keep the unit in proper working order.
¥Be sure the unit is connected to a 12V DC power supply with a negative ground connection.
¥Do not open the top or bottom cover.
¥Do not install the unit in places it is exposed to direct sunlight, high heat or humidity, water may splash over it, or dust exists.
¥Some car stereos cause the sound of the tuner to make for a moment when an engine is activated.
¥The reception of the tuner may be reduced a little if the KDC-C519FM, KDC-C469FM is used.
¥If the sound is lower than the tuner sound, raise up the volume level of the CD with using the receiver.
¥Do not use your own screws. Use only the screws provided. If you use the wrong screws, you could damage the unit.
— 4 —

Safety Precautions
2CAUTION
Do not set the remote on hot places such as above the dashboard.
Loading and Replacing the Batteries:
Use two "AAA" batteries. Slide the cover while pressing
downwards to remove it as illustrated. Insert the batteries with the + and Ð poles aligned properly, following the illustration inside the case.
2WARNING
Store unused batteries out of the reach of children. Contact a doctor immediately if the battery is accidentally swallowed.
NOTE
¥The provided batteries are intended for use in operation checking, and their service life may be short.
¥When the remote controllable distance becomes short, replace both of the batteries with new ones.
NOTE
A portion of the operations may not be possible, depending on the unit that is connected.
— 5 —

English
Handling Compact Discs
Playing a CD that is dirty, scratched or warped can cause the sound to skip and the unit to operate incorrectly, resulting in worsened sound quality. Take the following precautions to prevent your CDs from getting scratched or damaged.
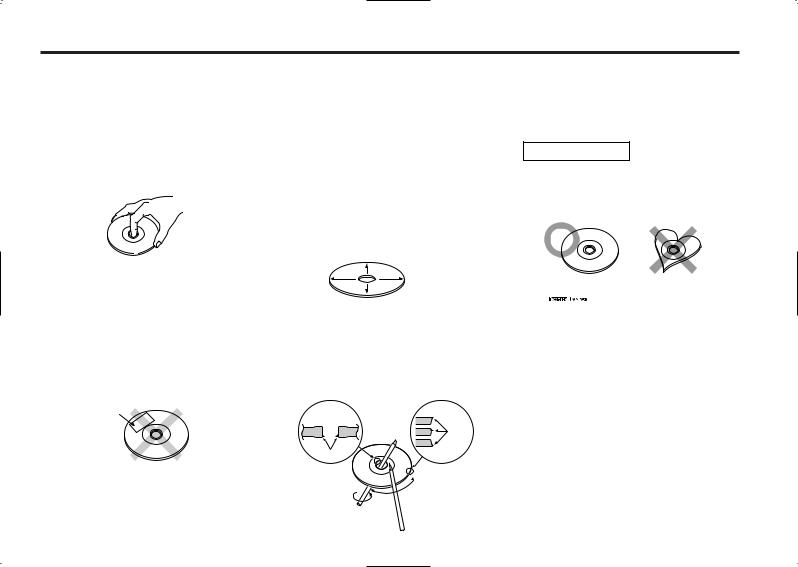
Handling CDs
¥Do not touch the recorded side of the CD (the side opposite the label) when holding it.
¥The reflective film on a CD-R or a CD-RW is more fragile than that on an ordinary music CD, and may peel off if scratched. Fingerprints on a CD-R or CDRW are also more likely to cause skipping when the disc is played. For these reasons, handle the disc very carefully. Detailed handling instructions will appear on the CD-R or CD-RW package: read this information carefully before using the disc.
¥Do not stick tape on either side of the CD.
Tape
Storing CDs
¥Do not store CDs in areas exposed to direct sunlight (such as a car seat or the dashboard) or other hot places.
¥A CD-R or CD-RW is more susceptible than a
music CD to damage from high temperatures and humidity, and in some cases, may become unusable if left in the car for long periods of time.
¥Remove CDs from the unit when not listening to them for a while, and put them back in their cases. Do not pile up CDs that are removed from their cases or prop them against something.
Cleaning CDs
If a CD has gotten dirty, wipe it off gently using a commercially available cleaning cloth or a soft cotton cloth, starting from the center of the disc and moving outward. Do not clean CDs with conventional record cleaners, anti-static formulas, or chemicals such as paint thinner or benzene.
Checking New CDs for Burrs
When playing a new CD for the first time, check that there are not any burrs stuck to the perimeter of the disc or in the central hole. CDs with burrs stuck on them may not load properly or may skip while playing. Remove burrs using a ballpoint pen or a similar utensil.
Burrs
Burrs
Do Not Load CD Accessories
Do not use commercially available CD accessories that can be loaded into the CD slot, such as stabilizers, protective sheets, or CD cleaning discs, since they can cause the unit to malfunction.
2CAUTION
Do Not Use Special Shape CDs
¥Be sure to use round shape CDs only for this unit and do not use any special shape CDs. Use of special shape CDs may cause the unit to malfunction.
¥ This unit can only play the CDs with


 .
.
It may not correctly play disks which do not have the mark.
¥CD-Rs and CD-RWs which have not undergone finalization processing cannot be played. (For more information on finalization processing, refer to the manual for your CD-R/CD-RW writing software or CD-R/CD-RW recorder.) Additionally, depending on the recording status, it may prove impossible to play certain CDs recorded on CD-R or CD-RW.
Do Not Use CDs with Sticker on the Labeled Side
Do not use the CD with the label sticker stuck on it.
Using such a CD may cause the CD to be deformed and the sticker to peel off, resulting in malfunction of the unit.
— 6 —

Loading Compact Discs
1
"KENWOOD"
Projection
Make sure the disc magazine is the right way up with the Kenwood logo on the top.Pull the tray out by the projection.
2 |
' |
|
' |
3
Open the CD changer door.
4
5
Close the CD changer door.
NOTE
Use the CD changer with its door closed to prevent the entry of dust into the changer.
6 Magazine ejection
Place the disc on the tray with the label facing upwards. Insert the tray into the disc magazine until it locks. The discs are numbered from the bottom from 1 to 6 or 10.
2CAUTION
¥Take care to insert the tray into the correct grooves in the disc magazine.
¥8-cm discs cannot be used. If an 8-cm disc adapter is used, the disc cannot be ejected.
¥Keep all the trays in the magazine even when empty.
'
Insert the magazine into the CD changer until it clicks.
'
Open the CD changer door, and press the EJECT button.
NOTE
Be sure to open the door completely before pressing the EJECT button. If the door is not completely open, the magazine may hit the door and cause damage of malfunction.
— 7 —

English
Buttons |
Operations |
|
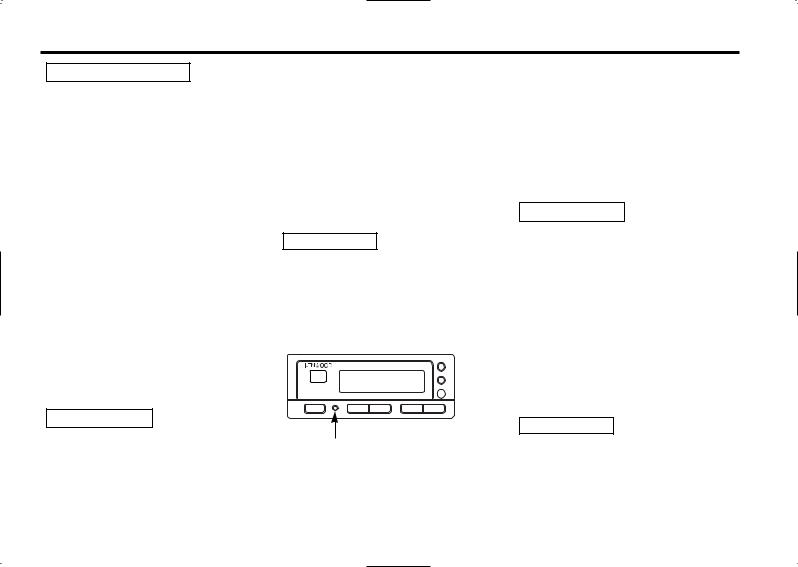
Display Unit
|
|
|
|
REP |
|
C D A U T O C H A N G E R C O N T R O L L E R |
|
|
|
|
T R A C K |
DISC |
RDM |
|
|
|
FREQ |
|
|
' |
|
LEVEL |
|
|
M . R D M |
D . R E P D . S C N |
M H z |
3/ 8 |
|
|
|
|||
|
T R A C K |
D I S C |
|
|
PWR |
4 |
¢ |
- |
+ |
Reset button |
|
- / |
+ buttons |
|
PWR button |
|
|
6 button |
|
|
|
|
|
|
4 / ¢ buttons |
|
RDM button |
||
|
|
|
||
|
|
|
REP button |
|
Remote (Accessory of the KDC-C519FM / KDC-C469FM(Europe
sales area only))
POWER button |
|
|
|
RDM button |
|
POWER |
|
RDM |
|
+ button |
D.UP |
|
|
REP button |
|
|
REP |
|
|
|
D.DOWN |
|
|
38 button |
- button |
|
|
38 |
|
|
|
|
||
|
|
|
|
|
T. DOWN button |
T.DOWN |
|
T.UP |
T. UP button |
|
|
|
||
|
D.REPEAT |
|
|
|
D.REPEAT button |
SCAN |
|
(M.RDM) |
|
SCAN button |
|
|
|
M.RDM button |
1 |
2 |
3 |
|
|
|
|
|||
|
4 |
5 |
6 |
|
|
7 |
8 |
9 |
Number buttons |
|
|
|||
|
|
0 |
|
|
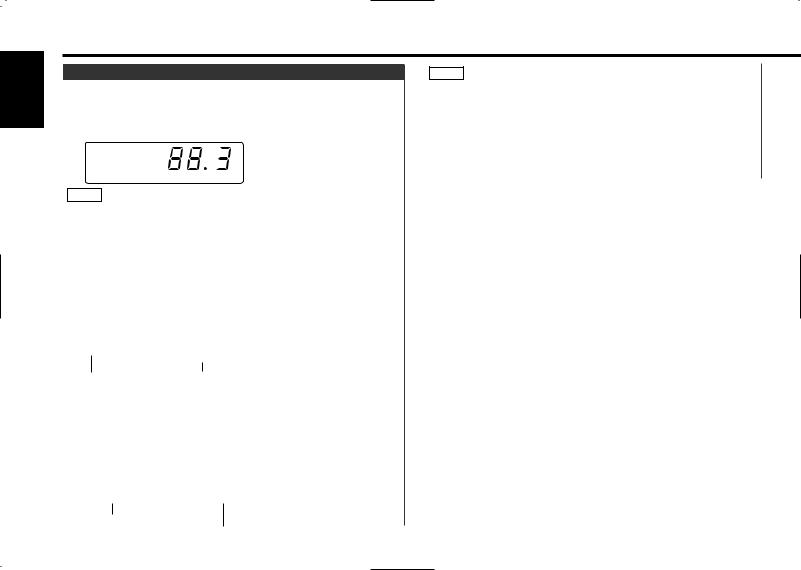
Set the car radio FM station to 88.3 MHz. See Page 12 for more information on changing the transmission frequency.
Playing CDs
Playing CDs:
Press the PWR (POWER...Remote) button.
The power goes ON and the CD play start. When the unit receives any signal from the remote controller, the
 mark lights up.
Disc No.
Play indicator
T R A C K 

 DISC
DISC
Pause indicator Track No.
When the player reaches the end of the last track on the disc you are playing, it will shift automatically to the first track on the next disc. When the player plays the last disc, it will return to the first disc.
The play display blinks during disc replacement. Disc No. 10 is displayed as "0". (KDC-C519FM only)
Power off :
Press the PWR (POWER...Remote) button.
The power goes OFF.
To listen to the radio :
Press the PWR (POWER...Remote) button.
The FM modulator is turned OFF and the radio can be heard.
Pause :
Press the 6 (38...Remote) button. Disc play is temporarily paused.
If you press the switch once more, the disc is replayed from the paused part.
NOTE
¥Be sure to turn down the volume whenever you listen to the radio or a cassette tape after stopping the disc play.
¥During the disc play is being conducted, you are not able to receive ordinary Radio broadcasting because antenna output is
—8 — switched into compact disc playerÔs side.

Fast Forwarding and Reversing Disc Play
Fast Forwarding Disc Play :
Hold down on the ¢ button.
Release your finger to play the disc at that point.
Reversing Disc Play :
Hold down on the 4 button.
Release your finger to play the disc at the point.
Track Search
Search forward or backward through the tracks on the disc until you reach the one that you want to listen to.
Making a Reverse Track Search :
Press the 4 (T. DOWN...Remote) button to display the desired track number.
Press once to search back to the beginning of the current track, twice to search back to the beginning of the previous track, and so forth.
Play starts at the beginning of the displayed track number.
NOTE
Pressing the 4 (T. DOWN...Remote) button while listening to track 1 will only search back to the beginning of that track. The reverse search is not "recycled" to the last track on the disc.
Making a Forward Track Search:
Press the ¢ (T. UP...Remote) button to display the desired track number.
Press once to fast forward to the next track, twice to fast forward to the track after that, and so forth.
Play starts at the beginning of the displayed track number.
NOTE
You cannot make a forward track search when listening to the last track on a disc.
Disc Search
Search forward or backward through the discs in a disc changer.
Making a Reverse Disc Search :
Press the Ð button to display the desired disc number. Each time the button is pressed, the displayed disc number decreases by one.
Play starts at the beginning of the displayed disc.
Making a Forward Disc Search :
Press the + button to display the desired discnumber. Each time the button is pressed, the displayed disc number increases by one.
Play starts at the beginning of the displayed disc.
Direct Track Search |
Function of Remote |
Using the remote, directly input the track number that you want to listen to.
1Using the number buttons on the remote, input the number of the track that you want to listen to.
The selected track number will blink in the display for 10 seconds.
If you make no further input in the 10-second period, the number entry mode will automatically be canceled.
2Press either the T. DOWN or T. UP button while the track number is blinking.
The track starts playing.
Canceling Direct Track Search While It Is Operating :
Press the 38 button.
— 9 —

English
Operations
Direct Disc Search |
Function of remote |
Using the remote, directly input the disc number that you want to listen to.
1Using the number buttons on the remote, input the number of the disc that you want to listen to.
The selected disc number will blink in the display for 10 seconds.
If you make no further input in the 10-second period, the number entry mode will automatically be canceled.
NOTE
¥Input "0" to select disc 10.
¥If you input more than two numbers all at once, a search will be made only of the last number input.
2Press either the + or Ð button while the number inputted is blinking.
The disc starts playing.
Canceling Direct Disc Search While It Is Operating :
Press the 38 button.
Track Repeat
Repeat playing the track currently being listened to.
To repeat track :
Press the REP (REP...Remote) button.
The REP indicator will appear on the display and the Track repeat function will turn on.
The same track is played repeatedly.
To cancel :
Press the REP (REP...Remote) button.
The REP indicator disappears and the Track repeat function is canceled.
NOTE
When disc play stops, Track repeat is canceled.
Disc Repeat |
Function of remote |
Repeat playing the disc currently being listened to.
To repeat disc :
Press the D.REPEAT button.
The D.REP indicator will appear on the display and the Disc repeat function will turn on.
The same disc is played repeatedly.
To cancel :
Press the D.REPEAT button.
The D.REP indicator disappears and the Disc repeat function is canceled.
NOTE
When disc play stops, Disc repeat is canceled.
Track Scan |
Function of remote |
Successively play the beginning of each track on a disc until you find the track that you want to listen to.
Starting the Track Scan:
Press the SCAN button. The SCN indicator will appear on the display and the player will play the first 10 seconds of each track in succession.
Stopping to Listen to the Track Being Scanned :
Press the 38 or SCAN button.
The SCN indicator disappears and the Track scan is canceled. Normal playback starts.
NOTE
¥When disc play stops, Track scan is canceled.
¥When all tracks on the disc you are listening to are scanned, Track scan is canceled.
— 10 —
Random Play
Play all the tracks on the current disc in random order.
1Press the RDM button to switch the random play function on and off.
The RDM indicator lights up when the random play function is turned on.
The display of the track number changes continuously as the next track is being selected.
When the track has been selected, play starts.
The selected track number blinks in the display as it is being played.
NOTE
When all the tracks on a certain disc have been played using the random play function, the next disc on the changer starts playing (with the random play function still turned on).
2To change the track being heard, press the ¢ (T. UP...Remote) button.
Another track is selected and played.
NOTE
The random play function is cancelled when you stop playing a disc.
Magazine Random Play |
Function of remote |
2To change the track being heard, press the T. UP button. Another disc/track will be selected and played.
NOTE
¥Magazine random play is canceled when you stop playing a disc.
¥The time needed for random selection depends on the number of discs loaded in the disc magazine.
Play the tracks on all the discs in the disc changer in random order.
1Press the M.RDM button to switch magazine random play on and off.
The M.RDM indicator lights up when magazine random play is turned on.
The disc and track numbers will change over and over in the display as the next track is being selected.
When the disc/track has been selected, play will begin. The selected disc/ track number blinks in the display as it is being played.
— 11 —
English
Operations
Changing the Transmission Frequency
1 To set the frequency change mode
Press the REP button for at least three seconds. The FREQ indicator will light up and the currently set frequency will be displayed.
F R E Q
M H z
NOTE
¥The initial value is 88.3MHz.
¥If this function is on, the functions other than power on / off, reset, and modulation level / dynamic control, cannot be operated.
¥This function is not available when the random play, repeat play, or scan play function is on. Before using this function, cancel the other functions. This function cannot be used while loading a disc (while the play indicator is blinking).
2To change the frequency
Press either the 4 or ¢ button.
Each time you press the 4 or ¢ button, the mode switches as follows :
|
|
|
|
|
|
|
|
|
|
|
→ |
|
|
|
|
|
→ |
|
|
||
87.7MHz |
|
|
|
89.9MHz |
||||||
→ |
→ |
|
|
|
→ |
→ |
||||
87.9MHz |
|
|
|
89.7MHz |
||||||
→ |
→ |
|
|
|
→ |
→ |
||||
88.1MHz |
|
|
|
89.5MHz |
||||||
→ |
→ |
|
|
|
→ |
→ |
||||
88.3MHz (initial value) |
89.3MHz |
|||||||||
→ |
→ |
|
|
|
→ |
→ |
||||
88.5MHz |
|
|
|
89.1MHz |
||||||
→ |
→ |
|
|
|
→ |
→ |
||||
88.7MHz |
|
|
|
88.9MHz |
||||||
|
|
→ |
|
|
|
|
|
→ |
||
|
|
|
|
|
|
|
||||
|
|
|
¢ |
|
|
|
||||
|
|
|
|
|
|
|
|
|
|
|
|
|
|
|
|
|
|
|
|
|
|
|
|
|
|
|
|
|
|
|
|
|
|
|
|
|
¢ |
|
|
|
|
|
|
|
|
|
|
|
|
|
|
|
||
NOTE
Some car radios cannot receive a 87.7 MHz frequency.
To cancel :
Press the REP button on the display unit for at least three seconds.
The FREQ indicator will go off and the frequency change will take effect.
The frequency change mode is automatically canceled if you do nothing for 15 seconds.
— 12 —

Modulation level / Dynamic control
1 To set the control mode
Press the RDM button on the display unit for at least three seconds.
The LEVEL indicator will light up and the currently set modulation level will be displayed.
Modulation level
L E V E L
Number for prevention of distortion setting
NOTE
¥If this function is on, the functions other than power on / off, reset, and changing the transmission frequency, cannot be operated.
¥This function is not available when the random play, repeat play, or scan play function is on. Before using this function, cancel the other functions. This function cannot be used while loading a disc (while the play indicator is blinking).
2To change the modulation level
Press either the 4 or ¢ button.
Each time the 4 or ¢ button is pressed, the modulation level changes in the range from 1 to 4. As the number increases, the modulation level increases.The initial setting is 2.
NOTE Dynamic control
The unit comes with the prevention of distortion function to reduce sound distortion.
If the sound is distorted severely, press the + button on the display unit and then set the function to "2" (ON). If the prevention of distortion function is set to "2" (ON), the sound extension is reduced.
The initial setting is "1" (OFF).
2CAUTION
If a disc with a high recording level is used, the sound may distort even if the prevention of distortion function is set to "2" (ON). In this case, reduce the modulation level.
To cancel :
Press the RDM button on the display unit for at least three seconds.
The LEVEL indicator will go off and the modulation level change will take effect. The control mode is automatically canceled if you do nothing for 15 seconds.
— 13 —

English
Accessories
External view
......... Number of items
1
.........1
3
.........4
5
.........1
7
.........1
2
.........4
4
.........1
6
.........2
8
.........1
9
.........1
Europe sales area only.
2CAUTION
The use of any accessories except for those provided might result in damage to the unit. Make sure only to use the accessories shipped with the unit, as shown above.
Installation Procedure
1.To prevent a short circuit, remove the key from the ignition and disconnect the - battery.
2.Make the proper input and output wire connections for each unit.
3.Connect the wiring harness wires in the following order: ground, battery, ignition.
4.Install the unit in your car.
5.Reconnect the - battery.
6.Press the reset button.
2WARNING
When drilling a hole in the car chassis to install the unit, check first that nothing is on the other side.
2CAUTION
¥If the fuse blows, first make sure the wires arenÕt touching to cause a short circuit, then replace the old fuse with one with the same rating.
¥Do not let unconnected wires or terminals touch metal on the car or anything else conducting electricity. To prevent a short circuit, do not remove the caps on the ends of the unconnected wires or the terminals.
¥After the unit is installed, check whether the brake lamps, blinkers, wipers, etc. on the car are working properly.
¥Insulate unconnected wires with vinyl tape or other similar material.
¥Some disc changers need conversion cords for connection. See the section on "Safety Precautions" for details.
■Removing the transportation screws
Remove all 3 transportation screws for protecting the internal mechanism before you start to install the unit.
Transportation screws
NOTE
After removing the transport screw, retain it carefully and attach it again before transporting the unit again.
— 14 —

Installation Procedure
■ Angle adjustment switches
The angle adjustment switches on the both saides of the unit are to be set according to the angle of installation of the CD auto changer. Set both of the two switches to the same position. If the switches are not set properly, sound skip or other malfunction may occur.
Set the angle adjustment switches with a coin or other flat object.
Change the switch step by step by detaching and reusing the object at the end of each step.
Angle adjustment switches
|
0 |
|
0 |
|
|
45 |
|
|
45 |
|
90 |
|
|
90 |
Right side |
|
|
|
Left side |
|
0¡~5¡ |
|
40¡~50¡ |
85¡~90¡ |
Installation |
|
|
|
|
angle |
|
|
|
|
Angle |
|
0 |
0 |
0 |
adjustment |
45 |
|
45 |
45 |
|
|
|
|
|
switch |
90 |
|
90 |
90 |
|
|
|
|
|
position |
|
|
|
|
¥It is not possible to install at an angle of 40¡~50¡ if only 1 is used.
Installation
■Installation of Display unit
•Installation without using the trim mount plate 7
Display unit |
Attach one velcro to the |
|
slanted-line of the the display |
|
units as shown above, and |
|
attach the other velcro to the |
|
parts where you wish to |
|
attach the display units. |
|
Then, put velcros together |
5and install the display units.
•Installation using the trim mount plate 7
|
|
|
|
|
REP |
|
C D A U T O C H A N G E R C O N T R O L L E R |
|
|
|
|
|
T R A C K |
|
|
RDM |
|
|
FREQ |
|
|
|
|
|
LEVEL |
|
|
|
|
' |
R D M |
R E P |
M H Z |
3 |
/ 8 |
|
Display unit |
||||
|
T R A C K |
- |
D I S C |
+ |
|
PWR |
1 ¡ |
|
|
||
 7
7
Pass the wire from the display unit through the hole on the trim mount plate and push fit the display unit into the trim mount plate until it locks.
2CAUTION
¥Be sure not to place the unit on such place as where it is exposed to direct sunlight and temperature eventually rises. It results in the deformation of the case.
¥Depending on the installing location, the display unit may not be able to receive the signals from the controller unit. Install them after confirming that the signals can be received.
¥Install the unit in such a way that it does not disturb driving.
— 15 —

Installation
■ Horizontal installation
English |
Use the holes marked (¶) to install the unit. |
||
Bottom view |
|
|
|
|
|
|
|
|
Side view |
|
|
|
KDC-C519FM |
KDC-C469FM |
|
|
0 |
|
|
|
45 |
|
|
|
90 |
|
|
|
|
0 |
|
|
|
45 |
|
|
|
90 |
|
|
0 |
|
|
|
45 |
|
|
|
|
0 |
1 |
|
90 |
45 |
|
|
|
90 |
|
■ Vertical installation
Use the holes marked (¶) to install the unit.
Bottom view
Side view
KDC-C519FM KDC-C469FM
90 |
90 |
|
45 |
45 |
90 |
|
90 |
|
|
45 |
45 |
0 |
0 |
|
|
0 |
0 |
1
2
3
φ4
2
90 |
45 |
0
3
 φ4
φ4
■ In case of hanging in the trunk
Use the holes marked (¶) to install the unit.
Bottom view

 φ4
φ4
1
Side view
KDC-C519FM KDC-C469FM
0
45
90
0
45
90
3
0
45
|
0 |
90 |
45 |
90 |
2 |
|
■ Installation of FM modulator unit
6 |
2CAUTION |
|
|
|
Take sufficient care so |
|
that the wires are not |
|
caught under the seat. |
|
If they are caught, they |
|
may break. |
|
φ3 |
Install the FM modulator unit beneath the front seat using Metal fixture and Bind head screw as shown in the above figure.
— 16 —

Connecting Wires to Terminals
Display unit
|
|
|
|
REP |
|
C D A U T O C H A N G E R C O N T R O L L E R |
|
|
|
|
T R A C K |
|
RDM |
|
|
|
FREQ |
|
|
|
|
LEVEL |
|
|
|
M . R D M |
D . R E P D . S C N |
M H z |
3/ 8 |
|
T R A C K |
D I S C |
|
|
PWR |
4 |
¢ |
- |
+ |
Control input
FM modulator unit
2WARNING
CD auto-changer
Output
Control output
Changer connection wire 4
CD auto - changer input
FM/AM antenna input |
9 |
Antenna plug |
|
||
|
|
|
|
|
for automobile |
|
Car stereo |
|
with FM tuner |
FM/AM antenna output |
8 |
|
|
|
Ignition key |
|
switch |
Ignition wire + (Red) |
ACC |
Battery wire + (Yellow) |
Car fuse box |
Ground wire (Black) - (To car chassis)
Battery
NOTE
To prevent fire when the ignition wire (Red) or battery wire (Yellow) is short-circuited by coming into contact with the vehicle chassis (ground), only connect the power supply after making the fuse box connections.
2CAUTION
Be sure to press the reset button after installation.
Do not install an antenna of radio equipment or distribute the antenna wire near the changer output wire, for this could cause malfunction with this unit.
— 17 —

English
Troubleshooting guide
What might seem to be a malfunction in your unit may just be the result of slight misoperation or miswiring. Before calling service, first check the following table for possible problems.
PROBLEM |
POSSIBLE CAUSE |
SOLUTION |
||
|
|
|
|
|
The power is not turned on. |
The wiring harness fuse blows. |
Check wires for shorts, then replace the fuse with one of |
||
|
|
with the same rating (shown on the case). |
||
No sound or sound is low. |
The volume level is minimum. |
Raise the volume level. |
||
|
||||
|
|
|
||
|
The fader or balance is set to one side. |
Adjust the fader and balance. |
||
|
|
|
||
|
The input/output wire or wiring harness is connected |
Connect the input/output wire or wiring harness correctly. |
||
|
incorrectly. |
See "Connecting Wires to Terminals" (Page 15). |
||
|
|
|
|
|
The unit does not work properly |
The microcomputer malfunctions. |
Press the Reset button of the display unit. |
||
when a button is pressed. |
|
|
|
|
|
|
|
||
Sound quality is poor. |
The volume level is too high. |
Use the appropriate volume level. |
||
(Sound distortion) |
|
|
|
|
CD play does not start. |
CD auto-changer input is not connected to the unit. |
Connect the CD auto-changer input to the unit. |
||
|
|
|
||
|
Power button is not turned ON. |
Turn the power button ON. |
||
|
|
|
|
|
The specified disc is not |
The specified disc is very dirty. |
Check and, if possible, clean the disc. |
||
played; a different disc is |
|
See "Cleaning CDs" (Page 6). |
||
played instead. |
|
|
|
|
The disc is loaded upside down. |
Eject the disc magazine and insert the disc correctly. |
|||
|
||||
|
|
|
||
|
Two discs are inserted in a slot. |
Eject the disc magazine and insert the discs correctly. |
||
|
|
|
|
|
|
The number of the slot into which the disc is inserted is |
Eject the disc magazine and check the number of the |
||
|
different from the number of the specified disc. |
specified disc. |
||
|
|
|
|
|
|
The disc is severely damaged. |
Use another disc. |
||
|
|
|
|
|
— 18 —

Troubleshooting guide
PROBLEM |
POSSIBLE CAUSE |
SOLUTION |
Sound skips due to vibration.
Something is touching the CD auto-changer. |
Keep it away from the CD auto-changer. |
|
|
The disc is dirty or damaged. |
If sound skips at the same part, the disc is faulty. Check |
|
and, if possible, clean the disc. |
|
See "Cleaning CDs" (Page 6). |
|
The unit is mounted at a slant. |
Mount the unit so that is level. |
|
|
|
|
Changer unit is mounted in an unstable place. |
Mount the unit in a stable place. |
|
|
|
|
The angle adjustment switches are set improperly. |
Set the angle adjustment switches to the correct positions. |
|
|
|
Nothing appears on the display. |
The control output of the display unit is not connected |
Connect the control output properly. |
|
properly. |
|
|
|
|
Sound distortion. |
A disc with a high recording level is used. |
Change the modulation level / dynamic control setting.(Page 13) |
|
|
|
Sound quality is poor. |
The recording of the disc is poor. |
Try playing another disc. If the sound is good, the fault was |
|
|
with the original disc. |
The disc is dirty or damaged.
Check and, if possible, clean the disc. See "Cleaning CDs" . (Page 6)"
No sound is heard even though the information concerning the CD auto-changer is displayed.
Volume is set to minimum level. |
Raise the volume level. |
|
|
The microcomputer does not function |
Press the Reset button of the display unit. |
correctly. |
|
The system is not connected properly. |
Connect the system properly. |
|
See "Connecting Wires to Terminals" .(Page 15) |
The specified track is not played.
The player is set to Random Play / Magazine Random Play.
Turn off Random Play / Magazine Random Play.
— 19 —

English
Troubleshooting guide
The following messages are displayed when certain problems are occurring in your system. Take the recommended actions.
01 E: No disc magazine has been loaded in the changer. The disc magazine is not completely loaded. ] Load the disc magazine properly.
02 E: No disc has been loaded in the disc magazine. ] Load a disc into the disc magazine.
04 E: No disc has been loaded in the disc magazine.
]Load a disc into the disc magazine
The CD is quite dirty. The CD is upside-down. The CD is scratched a lot.
] Clean the CD and load it correctly.
77 E: The unit is malfunctioning for some reason.
] Press the reset button on the unit. If the "77E" code does not disappear, consult your nearest service center.
99 E: Something is wrong with the disc magazine. Or the unit is malfunctioning for some reason.
]Check the disc magazine. And then, press the reset button on the unit. If the "99E" code does not disappear, consult your nearest service center.
0d E: The protective circuit in the unit activates when the temperature inside the automatic disc changer exceeds 60¡C (140¡F), stopping all operation.
]Cool down the unit by opening the windows or turning on the air conditioner. As the temperature falls below 60¡C (140¡F), the disc will start playing again.
— 20 —
Specifications
Specifications subject to change without notice.
Disc section
Laser Diode..................................................... |
GaAlAs (λ=780 nm) |
Digital Filter (D/A) ...................................... |
8 Times Over Sampling |
D/A Converter......................................................................... |
1 bit |
Spindle speed ............................................... |
500 ~ 200 rpm (CLV) |
Wow & Flutter ......................................... |
Below Measurable Limit |
Frequency Response (±1 dB) ................................ |
10 Hz ~ 20 kHz |
Modulating Frequency (200KHz STEP) ........ |
87.7, 87.9, 88.1, 88.3, |
|
88.5, 88.7, 88.9, 89.1, |
|
89.3, 89.5, 89.7, 89.9, |
|
MHz |
General
Operating Voltage.............................................. |
14.4 V (11 ~ 16 V) |
Current consumption............................................................. |
1.4 A |
Operating Temperature ............................................... |
Ð10 ~ 50 °C |
Size (W × H × D) |
|
CD changer |
|
(KDC-C519FM) ............................................ |
250 × 80 × 176 mm |
|
(9-13/16 × 3-1/8 × 6-13/16 in.) |
(KDC-C469FM) ............................................ |
250 × 64 × 176 mm |
|
(9-13/16 × 2-1/2 × 6-13/16 in.) |
Controller ..................................................... |
43 × 135 × 22 mm |
|
(1-11/16 × 5-5/16 × 7/8 in.) |
Display unit .................................................. |
105 × 40 × 18 mm |
|
(4-1/8 × 1-9/16 × 11/16 in.) |
FM modulator unit........................................ |
150 × 30 × 80 mm |
|
(5-7/8 × 1-3/16 × 3-1/8 in.) |
Trim mount plate............................................ |
188 × 58 × 2 mm |
|
(7-3/8 × 2-5/16 × 1/16 in.) |
Weight |
|
CD changer |
|
(KDC-C519FM)..................................................... |
2.0 kg (4.4 lbs) |
(KDC-C469FM)..................................................... |
1.8 kg (4.0 lbs) |
Controller....................................................... |
0.050 kg (0.11 lbs) |
Display unit .................................................... |
0.125 kg (0.28 lbs) |
FM modulator unit ........................................... |
0.600 kg (1.3 lbs) |
— 21 —

Fran•ais
Table des mati•res |
|
Avant l'utilisation |
|
PrŽcautions de sŽcuritŽ............................................................... |
23 |
Manipulation des disques compacts........................................... |
25 |
Chargement des disques ............................................................ |
26 |
Touches |
|
UnitŽ d'affichage ......................................................................... |
27 |
TŽlŽcommande ........................................................................... |
27 |
OpŽrations |
|
Lecture de CD ............................................................................. |
27 |
Lecture rapide d'un disque vers l'avant et vers l'arri•re ............. |
28 |
Recherche de plages .................................................................. |
28 |
Recherche de disques ................................................................ |
28 |
Recherche directe de plages ...................................................... |
28 |
Recherche directe de disques .................................................... |
29 |
RŽpŽtition de plage ..................................................................... |
29 |
RŽpŽtition de disque ................................................................... |
29 |
Fonction de balayage de plages .................................................. |
29 |
Fonction de lecture alŽatoire....................................................... |
30 |
Fonction de lecture alŽatoire du magasin ................................... |
30 |
Comment changer la frŽquence de transmission ....................... |
31 |
Niveau de modulation/contr™le dynamique................................. |
32 |
Installation |
|
Accessoires................................................................................. |
33 |
ProcŽdure d'installation............................................................... |
33 |
Installation ................................................................................... |
34 |
Connexion des cables sur les prises ........................................... |
36 |
Guide de depannage ............................................................ |
37 |
Fiche technique...................................................................... |
40 |
Ñ 22 Ñ
PrŽcautions de sŽcuritŽ
2AVERTISSEMENT
Pour Žviter tout risque de feu et de blessures physiques, observer les prŽcautions suivantes:
¥Enfoncer la fa•ade amovible ˆ fond sur l'appareil principal de fa•on ˆ ce qu'elle soit fermement encastrŽe, et ainsi Žviter qu'elle ne se dŽtache lors d'un Žventuel accident. Si le besoin de rallonger l'un des c‰bles d'alimentation (masse, mŽmoire...) utiliser des c‰bles de catŽgorie automobile d'une section minimum de 0,75 mm2 (AWG 18) ou plus afin d'Žviter toute dŽtŽrioration de ces derniers.
¥VŽrifier que l'on nÕa pas laissŽ d'objets mŽtalliques (pi•ces de monnaie, outils, etc.) ˆ l'intŽrieur de l'appareil, afin d'Žviter les courts-circuits.
¥Lors d'un dŽgagement d'odeur ou de fumŽe, Žteindre immŽdiatement l'appareil et consulter son agent Kenwood.
¥Ne touchez pas le cristal liquide si l'affichage LCD Žtait endommagŽ ou cassŽ ˆ cause d'un choc. Le cristal liquide peut •tre dangereux pour votre santŽ et m•me mortel. Si le cristal liquide de l'affichage LCD entrait en contact avec votre corps ou un v•tement, lavez-le immŽdiatement avec du savon.
2ATTENTION
Pour maintenir l'appareil en parfait Žtat de marche, observer les prŽcautions suivantes.
¥Assurez-vous de mettre l'appareil ˆ la masse sur une alimentation nŽgative de 12V CC.
¥N'ouvrez pas le couvercle supŽrieur ou infŽrieur de l'appareil.
¥N'installez pas l'appareil dans un endroit exposŽ directement ˆ la lumi•re du soleil, ˆ une chaleur excessive ou ˆ l'humiditŽ. Evitez aussi les endroits trop poussiŽreux et o• l'appareil risque d'•tre ŽclaboussŽ.
¥Lors du remplacement d'un fusible, utilisez seulement un fusible neuf avec la valeur indiquŽe. L'utilisation d'un fusible d'une valeur diffŽrente peut •tre la cause d'un mauvais fonctionnement de votre appareil.
¥Pour Žviter les courts-circuits lors du remplacement d'un fusible, dŽconnectez d'abord le faisceau de c‰bles.
REMARQUE
¥Si l'on rencontre des difficultŽs pour installer l'appareil dans le vŽhicule, consulter son agent Kenwood.
¥Si l'appareil semble ne pas fonctionner correctement, appuyer tout d'abord sur la touche "reset" (rŽinitialisation). Si l'appareil ne fonctionne toujours pas, consulter son agent Kenwood.
|
|
|
|
|
REP |
|
C D A U T O C H A N G E R C O N T R O L L E R |
|
|
|
|
|
T R A C K |
DISC |
|
RDM |
|
|
|
FREQ |
|
|
|
' |
|
LEVEL |
|
|
|
M . R D M |
D . R E P D . S C N |
|
M H z |
3/ 8 |
|
|
T R A C K |
|
D I S C |
|
|
PWR |
4 |
¢ |
|
- |
+ |
Touche "Reset"
¥Sur certains auto-radios, le tuner n'entre en fonction que quelques instans apr•s la mise en route du moteur.
¥La rŽception du tuner rusque d'•tre
un peu monis forte avec le KDC-C519FM, KDC-469FM.
¥Si le son du CD est plus faible que le son du tuner, augmenter le volume sonore du CD ˆ partir du rŽoepteur.
¥Pendant l'installation, n'utilisez aucunes autres vis que celles fournies. L'utilisation de vis incorrectes pourrait endommager l'appareil.
Nettoyage de l'appareil
Si le panneau avant est sale, l'essuyer avec un chiffon au silicone ou un chiffon doux et sec apr•s avoir Žteint l'appareil.
2ATTENTION
Ne pas utiliser de chiffons durs ni de diluant pour peinture, alcool ou autre solvant volatile. Ces produits risqueraient d'ab”mer les surfaces externes ou d'effacer les inscriptions.
Condensation sur la lentille
Dans les climats froids, quelque temps apr•s avoir allumŽ le chauffage de la voiture, il peut arriver que la lentille qui guide le rayon laser du lecteur CD s'embue. Dans ce cas, la lecture des disques n'est plus possible. Sortir les disques et la buŽe devrait dispara”tre. Si la difficultŽ persiste, consulter son agent Kenwood.
REMARQUE
Cet appareil numŽrique de la classe B est conforme ˆ la morme NMB-003 du Canada.
Ñ 23 Ñ

Fran•ais
PrŽcautions de sŽcuritŽ
2ATTENTION
Ne laissez pas la tŽlŽcommande dans des endroits chauds comme sur le tableau de bord.
Chargement et remplacement des piles:
Utiliser deux piles format "AAA". Faire coulisser le couvercle tout en l'appuyant vers le bas pour l'enlever comme indiquŽ sur l'illustration. InsŽrer les piles en alignant correctement les p™les + et Ð,
suivant l'illustration gravŽe ˆ l'intŽrieur du compartiment.
2AVERTISSEMENT
Conserver les piles inutilisŽes hors de portŽe des enfants. Contacter immŽdiatement un mŽdecin si une pile est accidentellement avalŽe.
REMARQUE
¥Les piles fournies sont con•ues pour •tre utilisŽe pour une opŽration vŽrification, et leur durŽe de vie peut •tre courte.
¥Lorsque la distance tŽlŽcommandable devient courte, remplacer les deux piles par des nouvelles.
REMARQUE
Une partie des opŽrations ne peut pas •tre effectuŽe, selon l'unitŽ connectŽe.
Ñ 24 Ñ
Manipulation des disques compacts
La reproduction d'un CD sale, rayŽ ou gondolŽ peut •tre la cause d'un son qui saute et d'un mauvais fonctionnement provoquant une qualitŽ sonore de plus en plus mauvaise. Prenez les prŽcautions suivantes pour Žviter de rayer ou d'endommager vos CD.
Manipulation des CD
¥Ne touchez pas la face enregistrŽe du CD (la face opposŽe ˆ la face imprimŽe) quand vous le prenez.
¥Le film rŽflŽchissant sur un CD-R ou un CD-RW est plus fragile que celui sur un CD musical ordinaire et risque de se dŽtacher sÕil est rayŽ. Des traces de doigt sur un CD-R ou CD-RW peuvent Žgalement provoquer un sautillement du disque lors de sa lecture. Pour cette raison, manipulez soigneusement le disque.
Des instructions de manipulation dŽtaillŽes figurent sur lÕemballage du CD-R ou CD-RW: lisez attentivement cette information avant dÕutiliser le disque.
¥Ne collez pas de ruban adhŽsif sur aucune des faces du CD.
Ruban adhŽsif
Rangement des CD
¥Ne rangez pas les CD dans un endroit directement exposŽ ˆ la lumi•re du soleil Ñcomme sur le si•ge d'une voiture ou son tableau de bordÑ ou dans d'autres endroits chauds.
¥Un CD-R ou CD-RW est plus susceptible dÕ•tre
endommagŽ par des tempŽratures ŽlevŽes et un haut degrŽ dÔhumiditŽ quÕun CD musical, et dans certains cas, il peut devenir inutilisable sÕil est laissŽ ˆ lÕintŽrieur dÕun vŽhicule pendant de longues pŽriodes.
¥Retirez les CD de l'appareil quand vous ne les Žcoutez pas et remettez les dans leur bo”te. N'empilez pas des CD qui ont ŽtŽ retirŽs de leur bo”te et ne les posez pas contre quelque chose.
Nettoyage des CD
Si un CD devient sale, essuyez-le dŽlicatement en utilisant un tissu de nettoyage disponible dans le commerce ou un tissu en coton doux, en commen•ant du centre du disque et en allant vers l'extŽrieur. Ne nettoyez pas les CD avec un nettoyant conventionnel pour disque analogique, de type antistatique ou chimique comme un diluant ˆ peinture ou du benzine.
Recherche de bavures sur les nouveaux CD
Lors de la reproduction d'un nouveau CD pour la premi•re fois, vŽrifiez qu'il n'y a aucunes bavures collŽes sur le pŽrim•tre du disque ou sur le trou central. Les CD avec des bavures collŽes peuvent ne pas •tre chargŽs correctement ou sauter lors de la reproduction. Retirez les bavures en utilisant un stylo-bille ou un objet similaire.
Bavures
Bavures
Ne chargez pas d'accessoires de CD
N'utilisez pas d'accessoires de CD disponibles dans le commerce qui peuvent •tre introduits dans la fente ˆ CD comme des stabilisateurs, des feuilles de protection ou des disques de nettoyage de CD car ils pourraient •tre la cause d'un mauvais fonctionnement de l'appareil.
2ATTENTION
Ne pas utiliser de CD de formespŽciale
¥Veiller ˆ n'utiliser que des CD ronds pour cet appareil et n'utiliser jamais de CD de forme spŽciale. Cela nuirait au bon fonctionnement de l'appareil.
¥Cet appareil ne peut lire que les CD comportant


 .
.
Il ne peut jouer les disques qui ne comportent pas la marque.
¥Les disques CD-R et CD-RW qui n'ont pas ŽtŽ mis au point ne peuvent •tre jouŽs. (Pour plus d'information sur la mise au point, rŽfŽrez-vous au manuel pour le logiciel d'inscription de CD-R / CDRW ou pour l'enregistreur de CD-R / CD-RW). En outre, dŽpendant du statut d'enregistrement, il peut s'avŽrer impossible de faire jouer certains CDs enregistrŽs sur les enregistreurs de CD-R ou de CD-RW.
Ne pas utiliser de CD avec une Žtiquette collŽe sur la face portant l'Žtiquette d'origine.
Ne pas utiliser le CD si une Žtiquette a ŽtŽ collŽe dessus.
L'utilisation d'un tel CD peut occasionner la dŽformation du CD et le dŽcollement de l'Žtiquette, ce qui rŽsulterait en un mauvais fonctionnement de l'autoradio.
Ñ 25 Ñ
 Loading...