


LaserJet Pro
MFP M125, M126, M127, M128
Getting Started Guide
www.hp.com/support/ljMFPM125series www.hp.com/support/ljMFPM126series www.hp.com/support/ljMFPM127series www.hp.com/support/ljMFPM128series
|
English.............. |
1 |
|
Français............. |
6 |
2 |
Español............ |
12 |
|
Português........ |
18 |
www.register.hp.com |
|
|
 IMPORTANT:
Follow Steps1-3on the printer hardware setup poster, then continue
with Step 4 below.
4. Select a connection method and prepare for software installation
USB connection directly between the printer and the computer
Use an A-to-B type USB cable.
Windows
1.For Windows 7 or lower, do not connect the USB cable before installing the software. The installation process prompts to connect the cable at the appropriate time. If the cable is already connected, restart the printer when installation prompts to connect the cable.
2.Continue to “5.Locateordownloadthesoftwareinstallationfiles.”
NOTE: During software installation, select the option to Directly connect this computer using a USB cable.
Mac
1.For Mac, connect the USB cable between the computer and the printer before installing the software.
2.Continue to “5.Locateordownloadthesoftwareinstallationfiles.”
Wireless network connection (nw, rnw, and fw models only)
fw models
1.To connect the printer to a wireless (Wi-Fi) network, on the printer control panel, touch the Wireless button.
2.Touch Wireless Menu, and then touch Wireless Setup Wizard. Select the network name from the SSID list, or enter the network name if it is not listed.
3.Use the keyboard to enter the passphrase, and then touch the OK button.
4.Wait while the printer establishes a network connection.
5.On the printer control panel, touch the Network button. If an IP address is listed, the network connection has been established. If not, wait a few more minutes and try again. Note the IP address for use during software installation. Example IP address: 192.168.0.1
6.To print from a computer, continue with “5. Locate or download the softwareinstallationfiles.”To print from a phone or tablet only, continue with “7.Mobileandwirelessprinting(optional).”
Wired (Ethernet) network connection
(optional)
Use a standard network cable.
1.Connect the network cable to the printer and to the network. Wait a few minutes for the printer to acquire a network address.
2.Continue to “5.Locateordownloadthesoftwareinstallationfiles.”
NOTE: During software installation, select the option to Connect through a network.
nw and rnw models
1.To connect the printer to a wireless (Wi-Fi) network, make sure that the printer, access point, and computer are turned on and that the computer is connected to the wireless network.
2.A USB cable will be required.
3.Disconnect any USB or Ethernet cable that is connected to the printer.
4.To print from a computer, continue with “5. Locate or download the softwareinstallationfiles.”To print from a phone or tablet only, continue with “7.Mobileandwirelessprinting(optional).”
 NOTE: During software installation, select the option to Help me set up a first-timewirelessconnection.
*CZ181-90968* *CZ181-90968*
&=
Find printer IP address (optional)
1. |
Press the Setup button. |
2.Open Reports, then open ConfigReport, and press OK.
3.Find the printer IP address in the Network Information section.
NOTE: For more information, see the User Guide.
1
5. Locateordownloadthesoftwareinstallationfiles
 Method 1: Download from HP Easy Start (Windows and OS X)
1.Go to 123.hp.com/laserjet, and click Download.
2.Followtheonscreeninstructionsandpromptstosavethefiletothecomputer.
3.Launchthesoftwarefilefromthefolderwherethefilewassaved,andcontinue with “6. Install the software.”
 Method 2: Download from printer support Web site (Windows and OS X)
1.Go to www.hp.com/support/ljMFPM125series, www.hp.com/support/ljMFPM126series, www.hp.com/support/ljMFPM127series, or www.hp.com/support/ljMFPM128series.
2.Select Software and drivers.
3.Download the software for your printer model and operating system.
4.Launch the installation file by clicking on the .exe or .zip file as necessary, and continue with “6. Install the software.”
 Method 3:InstallfromtheprinterCD (Windows only)
1.Insert the printer CD into the computer.
2.Continue with “6. Install the software.”
6. Install the software
Windows full solution
1.Insert the printer CD into the computer, or launch the software installationfiledownloadedfromtheWeb.
2.The software installer detects the language of the operating system, and then it displays the main menu of the installation program in the same language. When installing from the CD, if the installer program does not start after 30 seconds, browse the CD drive on the computer and launch thefilenamedSETUP.EXE.
3.Follow the on-screen instructions to install the software.
4.When prompted to select a connection type, select the appropriate option for the type of connection:
•Directly connect this computer using a USB cable
•Connect through a network
•Helpmesetupafirst-timewirelessconnection
 NOTE: When connecting through a network, the easiest way to detect the printer is to select Automaticallyfindmyproductonthenetwork.
OS X full solution
1.Launchthesoftwareinstallation.dmgfilethatyoudownloadedfromthe
Web.
2.The software installer detects the language of the operating system, and then it displays the main menu of the installation program in the same language.
3.After the Software License Agreement screen, select the installation type.
4.Follow the on-screen instructions to install the software.
5.At the end of the software installation process, use the HP Utility Setup
Assistanttoconfigureprinteroptions.
OS X basic installation
To install basic print and fax drivers without running the HP full solution software from CD or hp.com download, follow these steps:
1.Connect the printer to the computer or network.
2.From System Preferences, click Printers and Scanners, then the plus button on the bottom left, and select M125, M126, M127, or M128 using the driver named either AirPrint or Secure AirPrint.
ReadirisProforHP
Download this free software to enable extra scanning features, including Optical Character Recognition (OCR).
To download the software from the Web, go to:
•www.hp.com/support/ljMFPM125series
•www.hp.com/support/ljMFPM126series
•www.hp.com/support/ljMFPM127series
•www.hp.com/support/ljMFPM128series
Select Drivers, select the appropriate operating system, and click Next. Click Application-3rdParty, and then click the Download button.
2
7.  Mobile and wireless printing (optional)
7.1 Connect the device to the wireless network
To print from a phone or tablet, connect the device to the same wireless network as the printer.
AppleiOSdevices(AirPrint)
Open the item to print, and select the Action icon. Select Print, select the printer, and then select Print.
NewerAndroiddevices(4.4ornewer)
Open the item to print, and select the Menu button. Select Print, select the printer, and select Print.
Some devices require downloading the HP Print Service plugin app from the Google Play store.
7.2 HP Wireless Direct
(nw, rnw, and fw wireless models only)
HP Wireless Direct enables close-proximity printing from a wireless mobile device directly to an HP Wireless Direct-enabled printer without requiring a connection to a network or the Internet.
Enable HP Wireless Direct
To set up HP Wireless Direct from the control panel, complete the following steps:
LCD control panel
1.At the printer control panel, press the Setup button to open the the following menus:
OlderAndroidDevices(4.3orolder)
Download the HP ePrint app from the Google Play store.
Windows Phone
Download the HP AiO Remote app from the Windows Store.
 Learn more about mobile printing
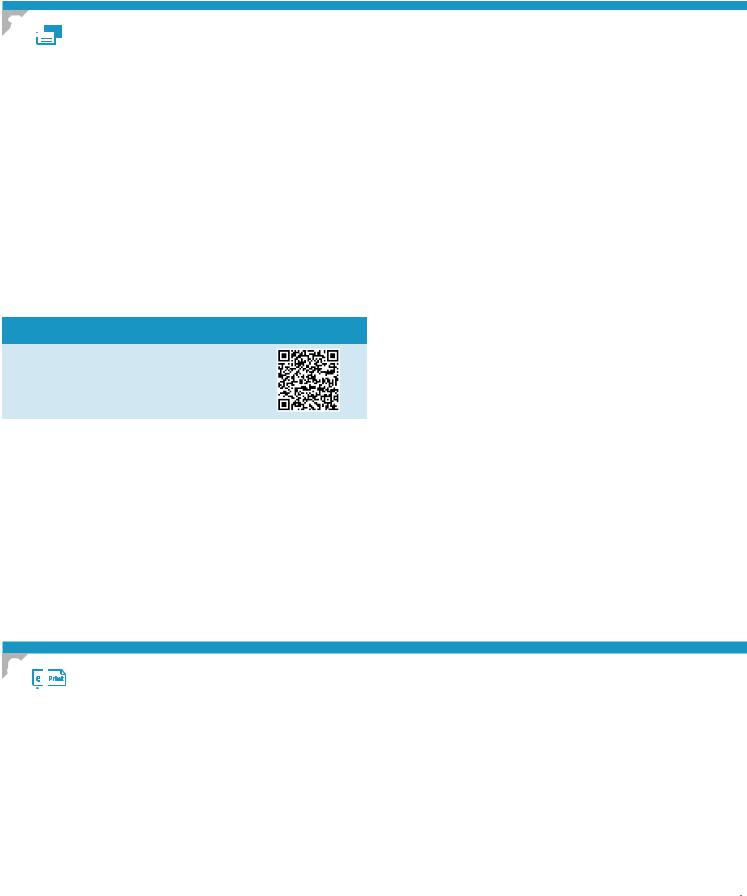
To learn more about other mobile printing options, including additional ePrint solutions, scan the QR code, or see the “Mobile printing” section of the User Guide.
•Network Setup
•Wireless Menu
•Wireless Direct
2.Select the On option, and then press the OK button. The printer saves the setting and then returns the control panel to the Wireless Direct Settings menu.
Touchscreen control panel
1.From the Home screen on the printer control panel, touch the Wireless
 button, and open the following menus:
•Wireless Menu
•Wireless Direct Settings
•On/Off
2.Touch the On menu item. The printer saves the setting and then returns the control panel to the Wireless Direct Settings menu.
 For more information on wireless printing and wireless setup, go to www.hp.com/go/wirelessprinting.
Discover the printer
1.From the mobile device, turn on the WiFi, and search for wireless networks.
2.Select the printer, which will show up as ‘HP-Print-model-name’ as shown on the printer control panel. Example printer name: HP-Print- 29-AJ OJP 8620
8. Set up HP ePrint via email (optional)
Use HP ePrint via email to print documents by sending them as an email attachment to the printer’s email address from any email enabled device, even from devices that are not on the same network.
To use HP ePrint via email, the printer must meet these requirements:
•The printer must be connected to a wired or wireless network and have Internet access.
•HP Web Services must be enabled on the printer, and the printer must be registered with HP Connected.
Enable HP Web Services
LCD control panel
1.Once the printer is connected to a network, enter the printer’s network
IP address into a Web browser. Use one of the following options to find the printer IP:
•Go to “Find printer IP address,” in this Getting Started Guide
•Refer to the User Guide
2.On the Web page that appears, click the HP Web Services tab.
3.Review and accept the terms of use, and then click the Enable button.
Touchscreen control panel
1.From the Home screen on the printer control panel, touch the Web Services button.
2.Touch the Enable Web Services button. The printer enables Web Services, and then prints an information page. The information page contains a printer code necessary to register the HP printer at HP Connected.
3.Go to www.hpconnected.com to create an HP ePrint account and complete the setup process.
3
9 |
Setupfax(fn,fp,andfwmodelsonly-optional) |
|||
9.1 |
Connect the printer |
9.2 |
Configuretheprinter |
|
|
The printer is an analog device. HP recommends using the printer on a |
|
Configuring the fax time, date, and header settings is required to use |
|
|
dedicated analog telephone line. |
|
the fax feature. |
|
|
NOTE: Some countries/regions might require an adapter for the |
|
HP Fax Setup Wizard (Windows) |
|
|
phone cord that came with the printer. |
|
1. |
Click Start, and then click Programs. |
|
Connect the phone cord that came with the printer to the Fax port on |
|
2. |
Click HP, click the name of the printer, and then click Fax Setup |
|
the printer and to the telephone jack on the wall. |
|
|
Wizard. |
|
|
|
3. |
Follow the on-screen instructions to configure the fax settings. |
|
|
|
LCD control panel |
|
|
|
|
1. |
On the printer control panel, press the Setup button. |
|
|
|
2. |
Select System Setup, and then select Time/Date. |
|
|
|
3. |
Select Time/Date. |
|
|
|
4. |
Select the 12-hour or 24-hour. |
|
|
|
5. |
Use the keypad to enter the current time, and then press the |
|
|
|
|
OK button. |
|
|
|
6. |
Select the date format. |
|
|
|
7. |
Use the keypad to enter the current date, and then press the |
|
|
|
|
OK button. |
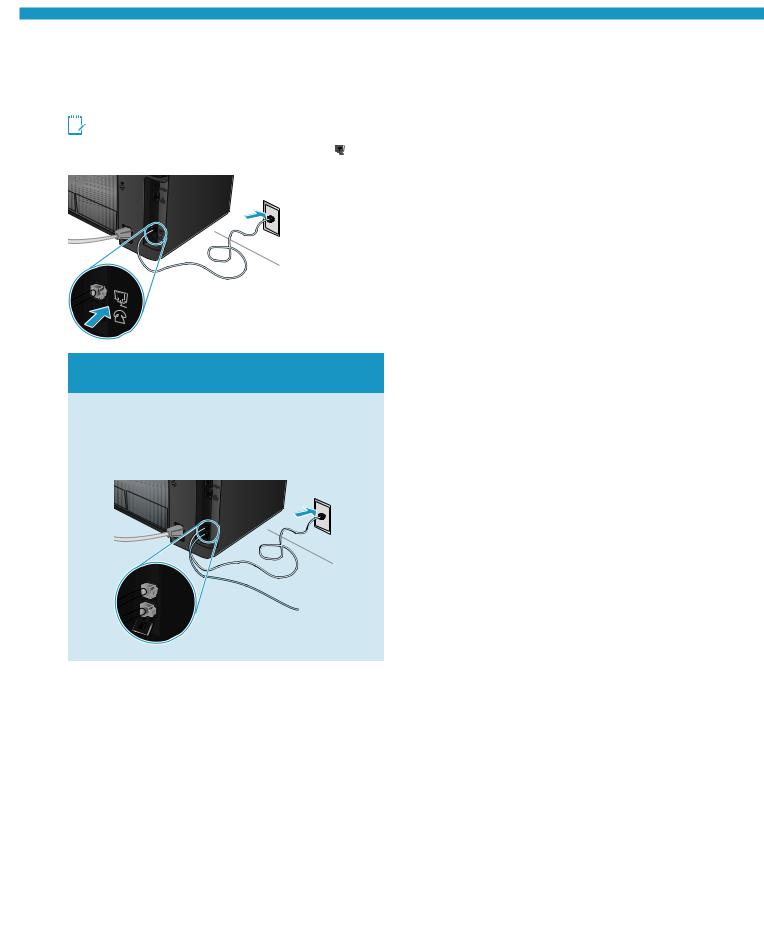
 How do I connect an answering machine or extension phone?
1.Remove the plug from the phone port  .
.
2.Disconnect the answering machine phone cord from the phone jack, and then connect it to the phone port  on the printer.
3.Connect the phone cord that came with the printer to the fax port  on the printer and to the telephone jack on the wall.
8.From the Setup menu, select Fax Setup, and then select Fax Header
9.Use the keypad to enter the fax number, and then press the OK button.

 NOTE: The maximum number of characters for the fax number is 20.
10.Use the keypad to enter your company name or header, and then press the OK button.


 NOTE: The maximum number of characters for the fax header is 40.
Touchscreen control panel
1.From the Home screen on the printer control panel, touch the Setup  button.
2.Select Fax Setup, and then select Basic Setup.
3.Select Time/Date.
4.Select the 12-hour or 24-hour.
5.Use the keypad to enter the current time, and then touch the OK button.
6.Select the date format.
7.Use the keypad to enter the current date, and then touch the OK button.
8.Select Fax Header.
 How do I set up HP printers in digital phone environments?
HPprintersaredesignedspecificallyforusewithtraditionalanalogphone services.Foradigitalphoneenvironment(suchasDSL/ADSL,PBX,ISDN, orFoIP),digital-to-analogfiltersorconvertersmightbenecessarywhen setting up the printer for fax.
Note: Depending on the phone company, the printer might not be compatible with all digital service lines or providers, in all digital environments, or with all digital-to-analog converters. Contact the phone company to determine which setup options are best.
Note: WhensettingupringpatterndetectioninaPBXphonesystem thathasdifferentringpatternsforinternalandexternalcalls,makesure to dial the printer fax number using an external number for recording the ring pattern.
9.Use the keypad to enter the fax number, and then touch the OK button.


 NOTE: The maximum number of characters for the fax number is 20.
10.Use the keypad to enter your company name or header, and then touch the OK button.
To enter special characters that are not on the standard keypad, touch the @#$ button to open a keypad that contains special characters.

 NOTE: The maximum number of characters for the fax header is 40.
 Learn more!
For more information about other ways to send faxes, such as scheduling a fax to be sent later or sending faxes from a computer, see the User Guide on the printer CD, or go to:
•www.hp.com/support/ljMFPM125series
•www.hp.com/support/ljMFPM126series
•www.hp.com/support/ljMFPM127series
•www.hp.com/support/ljMFPM128series
|
|
|
10. |
Use the scan feature |
|
Use the HP Scan software on your computer to start a scan job at the printer. |
|
|
Windows |
|
OS X |
Click Start, select Programs or AllPrograms, select HP, and then select HP Scan. |
Click Applications, select HP, and then select HP Scan. |
|
4

Troubleshooting
User Guide
The User Guide includes printer usage and troubleshooting information. It is available on the printer CD and on the Web:
1.Go to:
•www.hp.com/support/ljMFPM125series
•www.hp.com/support/ljMFPM126series
•www.hp.com/support/ljMFPM127series
•www.hp.com/support/ljMFPM128series
2.Select the appropriate language, and then select the printer if prompted to, and then click User guides.
For Windows, the User Guide is copied to the computer during the recommended software installation.
Windows® XP, Windows Vista®, and Windows® 7
Click Start, select Programs or AllPrograms, select HP, select the folder for the HP printer, and then select Help.
Windows® 8
On the Start screen, right-click an empty area on the screen, click AllApps on the app bar, click the icon with the printer’s name, and then select Help.
Checkforfirmwareupdates
1.Go to:
•www.hp.com/support/ljMFPM125series
•www.hp.com/support/ljMFPM126series
•www.hp.com/support/ljMFPM127series
•www.hp.com/support/ljMFPM128series
2.Select a printer or category from the list, and then click Drivers.
3.Select the operating system, and click the Next button.
4.Select Firmware, and click the Download button.
Control panel help (M127fw and M128fw models only)
Touch the Help button on the printer control panel to access help topics.
Additionalsupportresources
For HP’s all-inclusive help for the printer, go to:
•www.hp.com/support/ljMFPM125series
•www.hp.com/support/ljMFPM126series
•www.hp.com/support/ljMFPM127series
•www.hp.com/support/ljMFPM128series
•Solve problems
•Find advanced configuration instructions
•Download software updates
•Join support forums
•Find warranty and regulatory information
•Mobile printing resources
 Wired (Ethernet) network connection (optional)
•Verify that the printer is attached to the correct network port using a cable of the correct length.
•Verify the lights next to the network port are lit.
•Verify the print driver is installed on the computer.
•Test the network connection by pinging the network:
Windows
Click Start > Run. Type cmd, and press Enter. Type ping,
type a space, type the printer IP address, and then press Enter.
Example IP address:192.168.0.1.TofindtheprinterIP,see“FindtheprinterIP address.”
OS X
Open the Network Utility, and type the IP address in the ping pane. Press Enter.
Example IP address:192.168.0.1.TofindtheprinterIP,see“FindtheprinterIP address.”
•If the window displays round-trip times, the network is working.
•If the ping does not work, try restarting the printer and recheck all of the connection steps.
Wireless network connection (nw, rnw, and fw models)
•Verify that the network cable is not connected. The printer cannot connect to a wireless network when a network cable is connected.
•Verify that the printer and wireless router are turned on and have power. Also make sure the wireless switch is turned on.
•Verify that the printer is within the range of the wireless network. For most networks, the printer must be within 30 m (100 ft) of the wireless access point (wireless router).
•Verify the print driver is installed on the computer.
•Verify that the computer and printer connect to the same wireless network.
•For Mac, verify that the wireless router supports Bonjour.
•Restart the wireless router.
Fax troubleshooting (fn, fp, and fw models only)
Verify the physical connection |
|
|
• |
Verify that the phone cord is connected to the |
port on the back of the |
|
printer and to the wall jack. |
|
•For an extension phone or other additional device, verify the phone cord
is connected to the telephone port on the back of the printer and to the device.
•If outgoing phone calls fail because no dial tone is detected or the line is busy, connecttoadifferentphoneline.
•For Fax over IP service, reduce the Fax Speed,andturnoffError Correction Mode from the Fax Settings menu on the printer control panel.
Verify the printer fax settings
•To use a voice-mail service from the phone company or service provider, make sure that the printer RingstoAnswersetting is set to be fewer rings than the telephone answering machine.
•If multiple phone numbers are assigned to the same physical phone line and the line is shared by multiple devices, make sure that the printer is set to the correct distinctive ring setting. Use a setting in which the printer answers faxes and ignores other ring types.
•ConfiguringtheFaxSpeedsettingtoMedium(V.17) or Slow(V.29) can also improve your ability to send a fax.
5
English.............. |
1 |
Français............. |
6 |
Español............ |
12 |
Português........ |
18 |
Imprimante multifonction LaserJet Pro
M125, M126,M127,M128
Guide de démarrage
www.hp.com/support/ljMFPM125series www.register.hp.com www.hp.com/support/ljMFPM126series www.hp.com/support/ljMFPM127series www.hp.com/support/ljMFPM128series
IMPORTANT:
Suivezlesétapes1à3 surl’affichedeconfiguration matérielle de l’imprimante puispassezà l’étape4
ci-dessous.
4. Sélection d’une méthode de connexion et préparation à l’installation du logiciel
Connexion USB directement entre l’imprimante et l’ordinateur
Utilisez un câble USB de type A-à-B.
Windows
1.Pour Windows 7 ou systèmes plus anciens, ne branchez pas le
câble USB avant d’installer le logiciel. Le processus d’installation vous invite à connecter le câble au moment opportun. Si le câble est déjà connecté, redémarrez l’imprimante lorsque le processus d’installation vous invite à connecter le câble.
2.Poursuivez avec «5.Localiseroutéléchargerlesfichiers d’installationdulogiciel».
 REMARQUE:Lors de l’installation du logiciel, sélectionnez l’option pour
Connecterdirectementcetordinateuràl’aided’uncâbleUSB.
Mac
1.Pour Mac, branchez le câble USB entre l’ordinateur et l’imprimante avant d’installer le logiciel.
2.Poursuivez avec «5.Localiseroutéléchargerlesfichiers d’installationdulogiciel».
Connexionàunréseausansfil
(modèles nw, rnw et fw uniquement)
Modèlesfw
1.Pour connecter l’imprimante à un réseau sans fil (Wi-Fi), sur le panneau de commande de l’imprimante, appuyez sur le bouton Sans fil.
2.Appuyez sur MenuSansfil, puis sur Assistantd’installationsansfil.
Sélectionnez le nom du réseau dans la liste SSID, ou entrez le nom du réseau s’il n’y figure pas.
3.Entrez la phrase secrète à l’aide du clavier, puis appuyez surOK.
4.Patientez pendant que l’imprimante établit une connexion réseau.
5.Sur le panneau de commande de l’imprimante, appuyez sur le bouton
Réseau. Si une adresse IP est indiquée, la connexion au réseau a été établie. Si ce n’est pas le cas, patientez quelques minutes et réessayez. Notez l’adresse IP à utiliser lors de l’installation du logiciel. Exemple d’adresseIP: 192.168.0.1
6.Pour imprimer à partir d’un ordinateur, passez à la section
«5.Localiseroutéléchargerlesfichiersd’installationdulogiciel».
Pour imprimer à partir d’un téléphone ou d’une tablette uniquement, continuez avec «7.Impressionmobileetsansfil(facultatif)».
Connexionàunréseaufilaire(Ethernet)
(facultatif)
Utilisez un câble réseau standard.
1.Branchez le câble réseau à l’imprimante et au réseau. Attendez quelques minutes que l’imprimante acquière une adresse réseau.
2.Poursuivez avec «5.Localiseroutéléchargerlesfichiers d’installationdulogiciel».
 REMARQUE:Lors de l’installation du logiciel, sélectionnez l’option
Seconnecterviaunréseau.
Modèles nw et rnw
1.Pour connecter l’imprimante à un réseau sans fil (Wi-Fi), assurez-vous que le point d’accès de l’imprimante et l’ordinateur sont activés et que l’ordinateur est connecté au réseau sans fil.
2.Un câble USB est nécessaire.
3.Débranchez tout câble USB ou Ethernet connecté à l’imprimante.
4.Pour imprimer à partir d’un ordinateur, passez à la section
«5.Localiseroutéléchargerlesfichiersd’installationdulogiciel».
Pour imprimer à partir d’un téléphone ou d’une tablette uniquement, continuez avec«7.Impressionmobileetsansfil(facultatif)».
 REMARQUE:Lors de l’installation du logiciel, sélectionnez l’option
Aidez-moiàétabliruneconnexionsansfilpourlapremièrefois.
 Rechercherl’adresseIPdel’imprimante(facultatif)
1. Appuyez sur le bouton Configurer .
2.Ouvrez Rapports, puis Rapportdeconfigurationet appuyez sur OK.
3.Recherchez l’adresse IP dans la section Informations réseau.
 REMARQUE:Pour plus d’informations, consultez le Guide
de l’utilisateur.
6
5. Localiseroutéléchargerlesfichiersd’installationdulogiciel
 Méthode 1 : téléchargement à partir d’HP Easy Start (Windows et OS X)
1.Accédezà123.hp.com/laserjet,etcliquezsurTélécharger.
2.Suivezlesinstructionsetlesinvitesàl’écranpourenregistrerlefichiersur l’ordinateur.
3.Lancezlefichierlogicielàpartirdudossierdanslequelilaétéenregistré,puis poursuivezavec« 6. Installation du logiciel. »
 Méthode 2 : téléchargement à partir du site Web d’assistance de l’imprimante (Windows et OS X)
1.Accédezàwww.hp.com/support/ljMFPM125series, www.hp.com/support/ljMFPM126series, www.hp.com/support/ljMFPM127series, ou www.hp.com/support/ljMFPM128series.
2.Sélectionnez Pilotes et logiciels.
3.Téléchargez le logiciel adapté à votre modèle d’imprimante et à votre système d’exploitation.
4.Lancez le fichier d’installation en cliquant sur le fichier .exe ou .zip le cas échéant, puis poursuivez avec « 6. Installation du logiciel. »
 Méthode3:installationàpartirduCDdel’imprimante
(Windows uniquement)
1.InsérezleCDdel’imprimantedansvotreordinateur.
2.Passezàlasection« 6. Installation du logiciel. »
6. Installation du logiciel
Solution complète Windows
1.Insérez le CD de l’imprimante dans l’ordinateur, ou lancez le fichier d’installation du logiciel téléchargé à partir du Web.
2.Le logiciel d’installation détecte la langue du système d’exploitation, puis affiche le menu principal du programme d’installation dans
la même langue. Lors de l’installation à partir du CD, si le programme d’installation ne démarre pas après 30 secondes, parcourez le lecteur du CD de l’ordinateur et lancez le fichier nommé setup.exe.
3.Suivez les instructions à l’écran pour installer le logiciel.
4.Lorsque vous êtes invité à sélectionner un type de connexion, sélectionnez l’option appropriée pour le type de connexion :
•Se connecter directement à cet ordinateur à l’aide d’un câble USB
•Se connecter via un réseau
•Aidez-moiàétabliruneconnexionsansfilpourlapremièrefois
REMARQUE:Lors de la connexion à travers un réseau, la meilleure façon de détecter l’imprimante est de sélectionner Trouver automatiquement mon produit sur le réseau.
Solution complète OS X
1.Lancez le fichier .dmg d’installation du logiciel que vous avez téléchargé à partir du Web.
2.Le logiciel d’installation détecte la langue du système d’exploitation, puis affiche le menu principal du programme d’installation dans la même langue.
3.Après l’écran Contrat de licence du logiciel, sélectionnez le type d’installation.
4.Suivez les instructions à l’écran pour installer le logiciel.
5.À la fin du processus d’installation du logiciel, utilisez l’assistant deconfigurationdeHPUtilitypour configurer les options
de l’imprimante.
Installation de base d’OS X
Pour installer les pilotes d’impression et de télécopie de base sans exécuter le logiciel de solution complète HP à partir du CD ou du téléchargement
à partir de hp.com, procédez comme suit :
1.Connectez l’imprimante directement à l’ordinateur ou au réseau.
2.Dans Préférences système,cliquezsurImprimantes et scanners, puis surlebouton+enbasàgaucheetsélectionnezM125, M126, M127 ou M128utilisant le pilote nommé soit AirPrint ou Secure AirPrint.
ReadirisPROpourHP
Téléchargez gratuitement ce logiciel pour activer des fonctions de numérisation supplémentaires, notamment la reconnaissance optique de caractères (OCR).
Pour télécharger le logiciel sur Internet, rendez-vous sur :
•www.hp.com/support/ljMFPM125series
•www.hp.com/support/ljMFPM126series
•www.hp.com/support/ljMFPM127series
•www.hp.com/support/ljMFPM128series
Sélectionnez Pilotes, puis le système d’exploitation approprié et cliquez sur
Suivant. Cliquez sur Application-Tierce, puis sur le bouton Télécharger.
7
7.  Impressionmobileetsansfil(facultatif)
7.1 Connexionduproduitàunréseausansfil
Pour imprimer depuis un téléphone ou une tablette, connectez le périphérique au même réseau que celui sur lequel l’imprimante est connectée.
PériphériquesAppleiOS(AirPrint)
Ouvrez le document à imprimer, puis sélectionnez l’icône Action. Sélectionnez Imprimer, puis l’imprimante et appuyez surImprimer.
PériphériquesAndroidlesplusrécents(4.4ouultérieurs)
Ouvrez le document à imprimer, puis sélectionnez le bouton Menu. Sélectionnez Imprimer, puis l’imprimante et appuyez sur Imprimer.
Certains périphériques nécessitent le téléchargement de l’appli plugin
HP Print Service, disponible sur Google Play.
PériphériquesAndroidplusanciens(4.3ouantérieurs)
Téléchargez l’application HP ePrint à partir de Google Play.
WindowsPhone
Téléchargez l’appli HP AiO Remote disponible dans le Windows Store.
 En savoir plus sur l’impression mobile
Pour en savoir plus sur les autres options d’impression mobile, notamment les solutions ePrint supplémentaires, numérisez le code QR ou consultez la section « Impression mobile » du Guide
de l’utilisateur.
7.2 HP Wireless Direct
(modèlessansfilnw,rnwetfwuniquement)
La fonctionnalité d’impression directe sans fil HP vous permet d’imprimer
àproximité de votre périphérique mobile sans fil directement sur un produit disposant de cette même fonctionnalité sans vous connecter
àun réseau ou Internet.
ActiverHPWirelessDirect
Pour configurer HP Wireless Direct depuis le panneau de commande, procédez comme suit :
Panneau de commande LCD
1.Sur le panneau de commande de l’imprimante, appuyez sur le bouton Configurer pour ouvrir les menus suivants :
•Configurationduréseau
•MenuSansfil
•Directsansfil
2.Sélectionnez l’option Activé puis appuyez sur OK. L’imprimante enregistre le paramètre, puis renvoie le panneau de commande aux menus Paramètresd’impressiondirectesansfil.
Panneau de commande à écran tactile
1.Sur l’écran d’accueil du panneau de commande de l’imprimante, appuyez sur le bouton Sans fil
 , puis ouvrez les menus suivants :
•MenuSansfil
•Paramètresdirectsansfil
•Actif/Inactif
2.Appuyez sur l’élément de menuActivé. L’imprimante enregistre le paramètre, puis renvoie le panneau de commande aux menus
Paramètresd’impressiondirectesansfil.
 Pour obtenir plus d’informations sur l’impression sans fil et la
configuration sans fil, accédez à www.hp.com/go/wirelessprinting.
Détecter l’imprimante
1.À partir du périphérique mobile, activez la Wi-Fi puis recherchez des réseaux sans fil.
2.Sélectionnez l’imprimante, qui apparaîtra comme
« HP-Print-nom-modèle » comme indiqué sur le panneau
de commande de l’imprimante. Exemple de nom d’imprimante :
HP-Print-29-AJ OJP 8620
8. ConfigurerHPePrintviamessagerieélectronique(facultatif)
Utilisez HP ePrint via messagerie électronique pour imprimer des documents en les envoyant en pièce jointe à l’adresse électronique de l’imprimante depuis n’importe quel périphérique activé, même ceux qui ne sont pas sur le même réseau.
Pour utiliser HP ePrint via messagerie électronique, l’imprimante doit répondre aux exigences suivantes :
•L’imprimante doit être connectée à un réseau câblé ou sans fil et avoir accès à Internet.
•Les services Web HP doivent être activés sur l’imprimante et celle-ci doit être enregistrée auprès de HP Connected.
ActiverlesservicesWebHP
Panneau de commande LCD
1.Une fois que l’imprimante est connectée à un réseau, entrez l’adresse IP
du réseau de l’imprimante dans un navigateur Web. Utilisez l’une des options suivantes pour rechercher l’IP de l’imprimante :
•Accédez à « Rechercher l’adresse IP de l’imprimante » dans ce Guide de démarrage.
•Reportez-vous au guide de l’utilisateur.
2.Sur la page Web qui s’affiche, cliquez sur l’onglet Services Web HP.
3.Lisez et acceptez les conditions d’utilisation, puis cliquez sur le bouton Activer.
Panneau de commande à écran tactile
1. |
Sur l’écran d’accueil du panneau de commande de l’imprimante, appuyez |
|
sur le bouton Services Web . |
2. |
Appuyez sur le bouton ActiverlesservicesWeb. L’imprimante active les |
|
services Web, puis imprime une page d’informations. Celle-ci contient le code |
|
de l’imprimante nécessaire pour enregistrer le produit HP sur HP Connected. |
3. |
Rendez-vous sur www.hpconnected.com pour créer un compte HP ePrint et |
8 |
terminer le processus de configuration. |
|
 Loading...