


Designjet SmartStream
Table of contents
 Loading...
Designjet SmartStream
User’s Guide

Edition 2
© 2014 Hewlett-Packard Development
Company, L.P.
Legal notices
The information contained herein is subject to
change without notice.
The only warranties for HP products and
services are set forth in the express warranty
statements accompanying such products and
services. Nothing herein should be construed
as constituting an additional warranty. HP shall
not be liable for technical or editorial errors or
omissions contained herein.
Trademarks
Microsoft® and Windows® are U.S. registered
trademarks of Microsoft Corporation.

Table of contents
1 Introduction .................................................................................................................................................. 1
What is it for? ......................................................................................................................................................... 1
Getting started ....................................................................................................................................................... 2
What do I see on the screen? ................................................................................................................................. 2
2 Installation ................................................................................................................................................... 5
Requirements ........................................................................................................................................................ 5
How to install ......................................................................................................................................................... 6
3 Printers ........................................................................................................................................................ 9
Add a printer .......................................................................................................................................................... 9
Change a printer’s IP address .............................................................................................................................. 10
Remove a printer ................................................................................................................................................. 10
The printers pane ................................................................................................................................................ 11
4 Set preferences ........................................................................................................................................... 15
General preferences ............................................................................................................................................ 15
Printer-specific preferences ................................................................................................................................ 15
5 Job preparation ........................................................................................................................................... 18
HP Designjet SmartStream Preflight Manager ................................................................................................... 19
Edit a job .............................................................................................................................................................. 22
Job options ........................................................................................................................................................... 22
Page options ........................................................................................................................................................ 23
Filter pages .......................................................................................................................................................... 24
Sort pages ............................................................................................................................................................ 25
Move a job to another printer .............................................................................................................................. 25
Remove a job ....................................................................................................................................................... 26
Print settings ....................................................................................................................................................... 26
6 Print preview .............................................................................................................................................. 30
Image, page, and roll ........................................................................................................................................... 30
Preview features .................................................................................................................................................. 31
Crystal Preview .................................................................................................................................................... 31
ENWW iii

7 Printing ...................................................................................................................................................... 34
Submit jobs for printing ....................................................................................................................................... 34
Filtered and unchecked pages ............................................................................................................................. 34
Printing queue ..................................................................................................................................................... 34
Printing interruptions .......................................................................................................................................... 35
Cancel jobs ........................................................................................................................................................... 36
Exit the application while printing ...................................................................................................................... 36
8 Color management ...................................................................................................................................... 37
9 The job history ............................................................................................................................................ 38
Search the job history .......................................................................................................................................... 38
Reprint a job ......................................................................................................................................................... 38
Reconfigure a job ................................................................................................................................................. 38
Remove jobs from the job history ....................................................................................................................... 39
10 Folding ..................................................................................................................................................... 40
11 Scanning ................................................................................................................................................... 42
12 Troubleshooting ........................................................................................................................................ 43
Index ............................................................................................................................................................. 44
iv ENWW

1 Introduction
What is it for?
HP Designjet SmartStream is a professional software solution for technical-production environments, which
offers true PDF management, allows you to cut job preparation time by 50%, and achieves total control
across the printing workflow.
●
With HP Designjet SmartStream, true PDF management is fully guaranteed and you will no longer
spend time solving PDF issues.
The latest Adobe Libraries embedded in HP Designjet Smartstream ensure fully reliable reproduction of
your PDF files. Accurate rendering and printing are achieved at a higher speed, even for the most
complex PDFs. You do not have to convert PDF files into TIFF anymore, and, in addition, you can
anticipate potential PDF issues faster thanks to automatic error warnings.
●
With HP Designjet SmartStream, you can reduce job preparation time by up to 50% on multi-page
jobs.
A single screen view provides all the information at a glance and helps you manage all your printing
workflow. A user-friendly interface enables you to easily process large jobs while getting fast and
accurate previews of complex PDFs. And HP Designjet SmartStream, which can connect simultaneously
to more than one HP Designjet production printer, allows you to prepare and send jobs easily to any of
them.
With HP Designjet SmartStream you can manage printing settings per page, while working on
simultaneous print jobs. Automatically identify page size and page color so that you can extract and
save jobs. You can also make extra copies of particular pages, remove unwanted white areas, or change
the order in which documents will be printed.
●
HP Designjet SmartStream helps you gain total control of your printing workflow.
HP Crystal Preview Technology shows what and how content will be printed with true accuracy so that
you can avoid reprints. You can see exactly how graphical content will be printed, because the preview
is color soft-proofed to the paper type on which it will be printed.
HP Designjet SmartStream easily integrates production hardware accessories, and therefore offers
total control of the entire printing workflow.
Finally, you can rely on end-to-end assistance right from job preparation to printing, which will monitor
job and printer status, and warn you of potential issues with printer alerts.
With HP Designjet SmartStream, you have professional software to boost your productivity. You gain true
PDF management, big savings in job preparation time, and full control of your printing workflow.
HP Designjet SmartStream does not need or use any printer driver. However, you may want to keep printer
drivers installed for some particular purposes.
ENWW What is it for? 1

Getting started
1. Install the application. See Installation on page 5.
2. Create a job in the job preparation pane, which gives you many tools for manipulating and setting up
each job before printing. You can preview pages in the preview pane. See Job preparation on page 18.
To create your first job, select the printer that you want to use, and drag and drop one or more files
onto the job preparation pane (or press the icon to browse for files).
3. Send your job to the printing queue (using the Print Job button), where you can monitor its progress.
See Printing on page 34.
4. Conveniently reprint past jobs from the job history. See The job history on page 38.
IMPORTANT: If you close the application or shut down the computer while there are still jobs printing or
waiting to print, those jobs are canceled and moved to the job history.
What do I see on the screen?
HP Designjet SmartStream provides three tabs, only one of which is visible at a time:
●
The job preparation tab, in which you prepare each job. This contains:
◦
The printers pane, showing the printers available to the application and their status.
◦
The job preparation pane, showing the pages of the job.
◦
The preview pane, showing a preview of the selected page.
◦
The settings pane, which lists the print settings for the selected page.
●
The printing queue tab, in which you can monitor the progress of each job.
◦
The printers pane.
◦
The printing queue pane, showing the jobs in the printing queue and their status.
◦
The preview pane.
●
The job history tab, from which you can reprint any past job.
◦
The printers pane.
◦
The job history pane, showing the old jobs in the job history.
The printers pane, preview pane, and settings pane can be minimized.
2 Chapter 1 Introduction ENWW
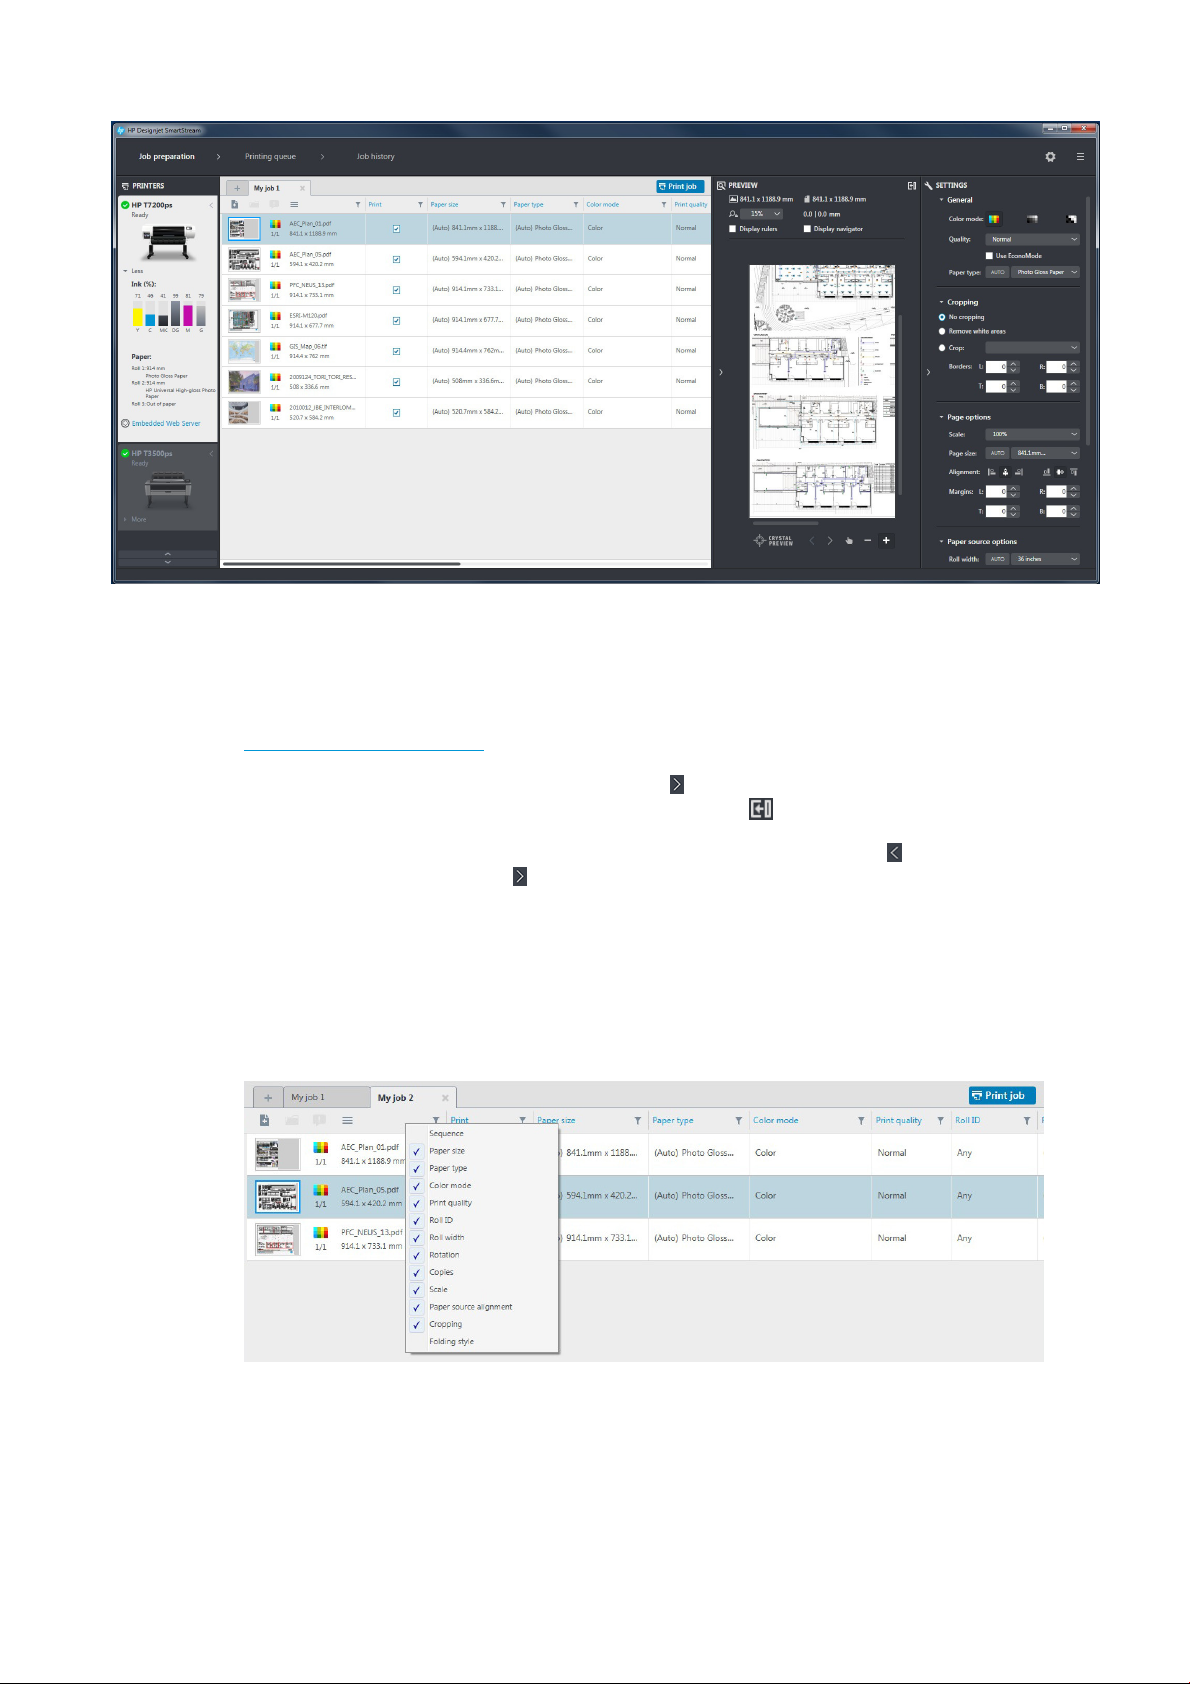
How can I adjust the HP Designjet SmartStream window?
The widths of each area can be changed according to your requirements.
●
The printers pane is minimized by default, but can be widened by clicking the active printer. See also
The printers pane on page 11.
●
The preview pane can be minimized by pressing the icon or the PREVIEW title, or widened by dragging
the left pane border to the left, or maximized by pressing the icon in the top right corner of the pane.
●
The settings pane is minimized by default, but can be widened by pressing the icon and then
minimized again by pressing the icon.
●
The job preparation pane includes a horizontal scroll bar if necessary, so that all columns can be
accessed.
You can change the order of the columns by dragging the column headings.
You can show or hide columns by right-clicking anywhere in the column heading row, and then checking
or unchecking column names in the menu.
Notifications
A notification is displayed briefly on the screen when certain events occur, such as:
ENWW What do I see on the screen? 3

●
A job moves from the job preparation pane to the printing queue.
●
A job moves from the printing queue to the job history (when it has been printed).
●
Scanned pages are available for importing.
●
A stacker or folder has been installed or uninstalled.
The notification normally fades in, remains for 5 seconds, and then fades out. You can stop it from fading by
hovering over it, or see it again by hovering over the notification icon in the icon tray (if you have enabled it).
4 Chapter 1 Introduction ENWW
2 Installation
Requirements
Computer hardware and software
●
Intel Core i3 2.4 GHz with 4 virtual cores/threads, or equivalent or better processor
●
4 GB of RAM, or more
●
3.5 GB of free space on hard disk, or more, plus 100 MB for each additional printer added
●
Screen resolution of 1280 × 1024 pixels, or more, tuned or calibrated to sRGB for optimal Crystal
Preview performance
●
Ethernet network, IPv4 or IPv6, 100 Mb/s or faster
●
Microsoft Windows 7 or 8 (32- or 64-bit)
Ensure that your computer is connected to the same subnet as your printers. Otherwise, ensure that
computer and printers are able to communicate through the 8080, 8085, 8086, 9100 TCP, and 161 UDP
ports.
How can I improve the performance of HP Designjet SmartStream?
If you feel the need of improvement, the performance of the application can be improved by exceeding the minimum
specifications above: more than 4GB of RAM (which requires a 64-bit operating system), a faster processor with more cores, a
faster network, and a faster hard disk drive (ideally a solid-state drive).
Supported printers
HP Designjet SmartStream currently supports the following printers:
●
HP Designjet T7200 Production printer
For documentation and other support, see http://www.hp.com/go/T7200/support.
●
HP Designjet T7100 printer (but not HP Designjet T7100 Monochrome)
For documentation and other support, see http://www.hp.com/go/T7100/support.
●
HP Designjet T3500 Production eMFP
For documentation and other support, see http://www.hp.com/go/T3500/support.
●
HP Designjet Z6200 Photo Production printer (42 in and 60 in)
For documentation and other support, see http://www.hp.com/go/Z6200/support.
●
HP Designjet Z6600 Production printer
ENWW Requirements 5

For documentation and other support, see http://www.hp.com/go/Z6600/support.
●
HP Designjet Z6800 Photo Production printer
For documentation and other support, see http://www.hp.com/go/Z6800/support.
NOTE: HP Designjet SmartStream supports only PostScript printers. If your printer requires an accessory to
handle PostScript, you must install the accessory to use the printer with HP Designjet SmartStream.
For further up-to-date information, see http://www.hp.com/go/designjetsmartstream.
Supported file types
HP Designjet SmartStream supports PDF, TIFF, JPEG, and HP-GL/2 files.
Licensing
In order to use HP Designjet SmartStream, you must own at least two licenses:
●
One license for the HP SmartStream Preflight Manager for HP Designjet
●
One license per printer for the HP SmartStream Print Controller
Thus, one of your printers should have both licenses installed: the Preflight Manager and the Print Controller.
Furthermore, the printer with both licenses must always be connected and turned on.
The application may be installed on multiple computers.
How to install
Update your printer’s firmware
Ensure that your printer has the latest firmware version installed, following the instructions in your printer
documentation; or see http://www.hp.com/go/model/support, where model is the model number of your
printer (such as T7200).
Install the licenses
Licenses are installed in the form of USB dongles attached to your printers. HP Designjet SmartStream will
not work at all unless it finds both a Preflight Manager license and a Print Controller license installed in a
connected printer; further printers may be added with only a Print Controller license. HP Designjet
SmartStream may check at any time for the presence of the appropriate licenses.
The license dongles have been designed to be used only with a supported HP Designjet PostScript printer
(see Supported printers on page 5).
However, their use is not restricted to one printer. After installing a license in an HP Designjet printer, you can
uninstall it and then install it in another supported HP Designjet printer.
You should install the Preflight Manager license first, before installing any Print Controller license.
How to install the Preflight Manager license
1. Ensure that your printer is supported by HP Designjet SmartStream, and turned on.
2. Insert the HP SmartStream Preflight Manager license dongle into a USB port on the printer, marked with
the USB symbol:
The front panel displays a message confirming that the license is ready for installation, and asks you to
press OK to continue.
6 Chapter 2 Installation ENWW
3. Press OK. Please wait, and do not remove the dongle.
4. The front panel asks you to press OK to restart the printer.
5. Press OK.
6. Remove the dongle from the USB port.
IMPORTANT: Keep the dongle: you will need it if you ever want to uninstall the license from this
printer.
Now you are ready to install the Print Controller license.
How to install the Print Controller license
1. Ensure that your printer is supported by HP Designjet SmartStream, and turned on.
2. Insert the HP SmartStream Print Controller license dongle into a USB port on the printer.
The front panel displays a message confirming that the license is ready for installation, and asks you to
press OK to continue.
3. Press OK. Please wait, and do not remove the dongle.
4. The front panel asks you to press OK to restart the printer.
5. Press OK.
6. Remove the dongle from the USB port.
IMPORTANT: Keep the dongle: you will need it if you ever want to uninstall the license from this
printer.
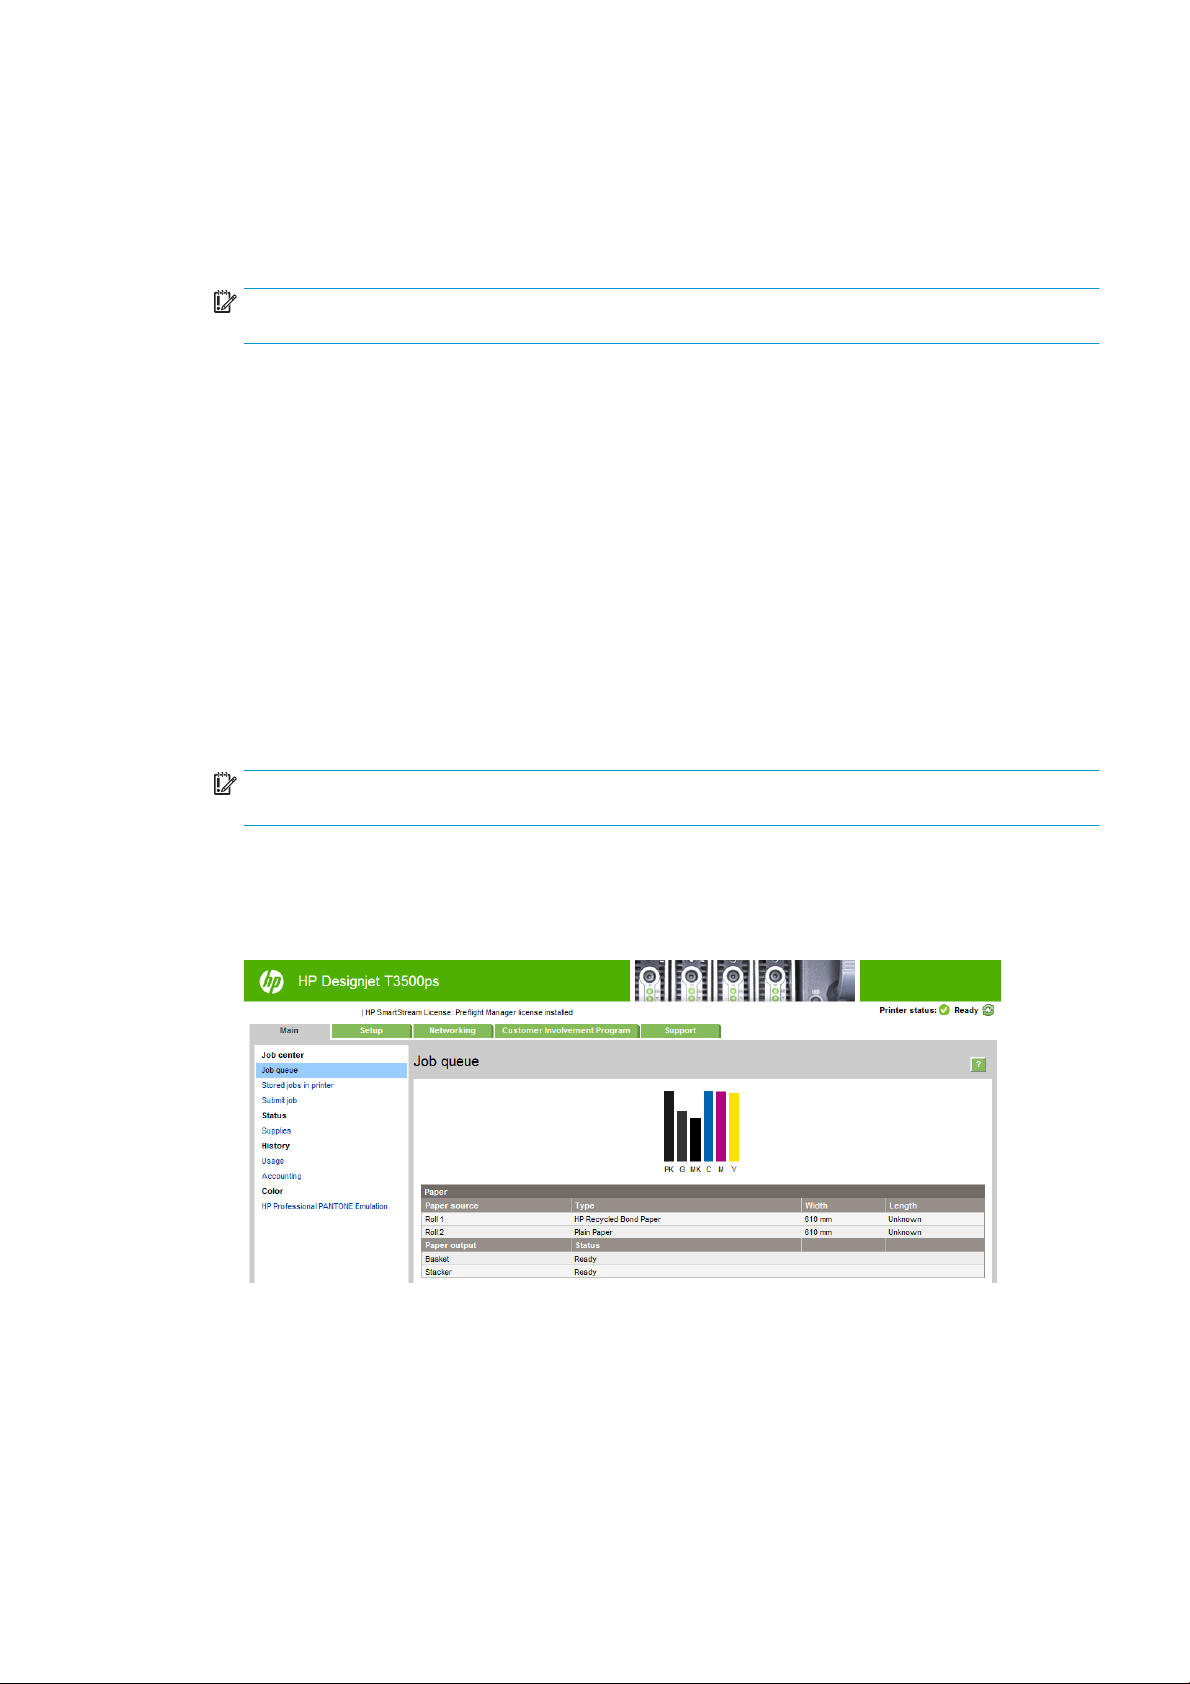
7. To check that the license has been correctly installed, you can use the printer’s front panel to view
general information about the printer (see the printer user’s guide). It should tell you which HP
Designjet SmartStream licenses have been installed, if any. The printer’s Embedded Web Server also
displays this information, near the top of the window, just under the green header bar:
8. The printer is now ready for use with HP Designjet SmartStream.
How to uninstall a Preflight Manager or Print Controller license
1. Ensure that the printer is turned on.
2. Insert the license dongle into a USB port on the printer.
The front panel displays a message confirming that the license can be uninstalled, and asks you to
press OK to continue.
ENWW How to install 7
3. Press OK and wait; do not remove the dongle.
4. When the uninstallation is complete, remove the dongle and store it in a safe place. You may want to
install it again later in the same printer or in another one.
Install the HP Designjet SmartStream application
1. Download the correct installer for your operating system (32- or 64-bit) from http://www.hp.com/go/
designjetsmartstream/software.
2. Start the installer, and follow the instructions on the screen.
3. When the installation has finished, start the application.
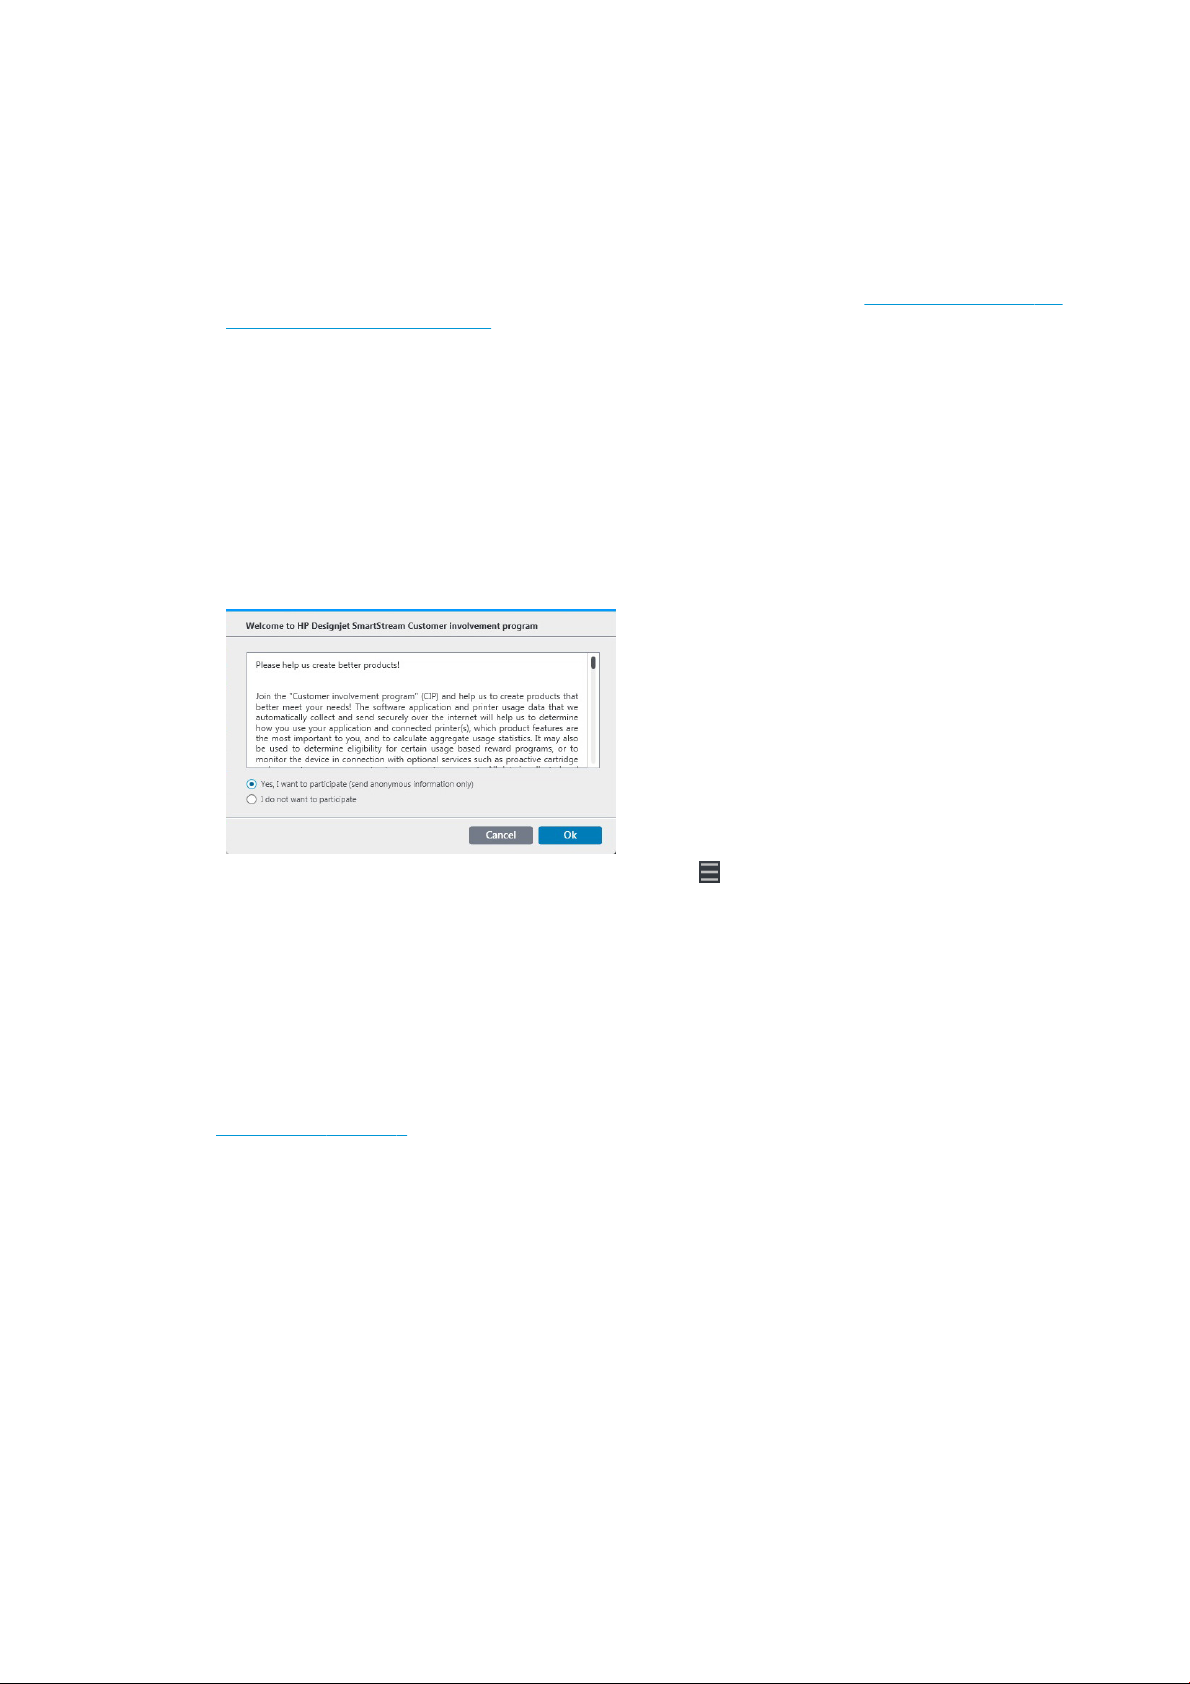
4. Choose whether to participate in the Customer Involvement Program.
The Customer Involvement Program allows HP to collect anonymous usage data from your product in
order to improve the quality of the product. Fuller information about it is displayed automatically during
installation.
In the Welcome window, read the text, select your answer, and press the OK button.
This window can be displayed at any time by pressing the icon near the top right of the window, then
Customer Involvement Program.
Add the first printer
If you start the application with no printer in the printers pane, you are prompted to add a printer. You must
add at least one printer in order to use the application, and the first printer that you add must have the HP
Designjet SmartStream Preflight Manager and Print Controller licenses installed.
You can add as many printers as you like, as long as they all have the Print Controller license installed.
See Add a printer on page 9 for details of the process.
8 Chapter 2 Installation ENWW
3 Printers
Add a printer
1. Ensure that the printer you want to add is turned on, awake, and accessible from your computer.
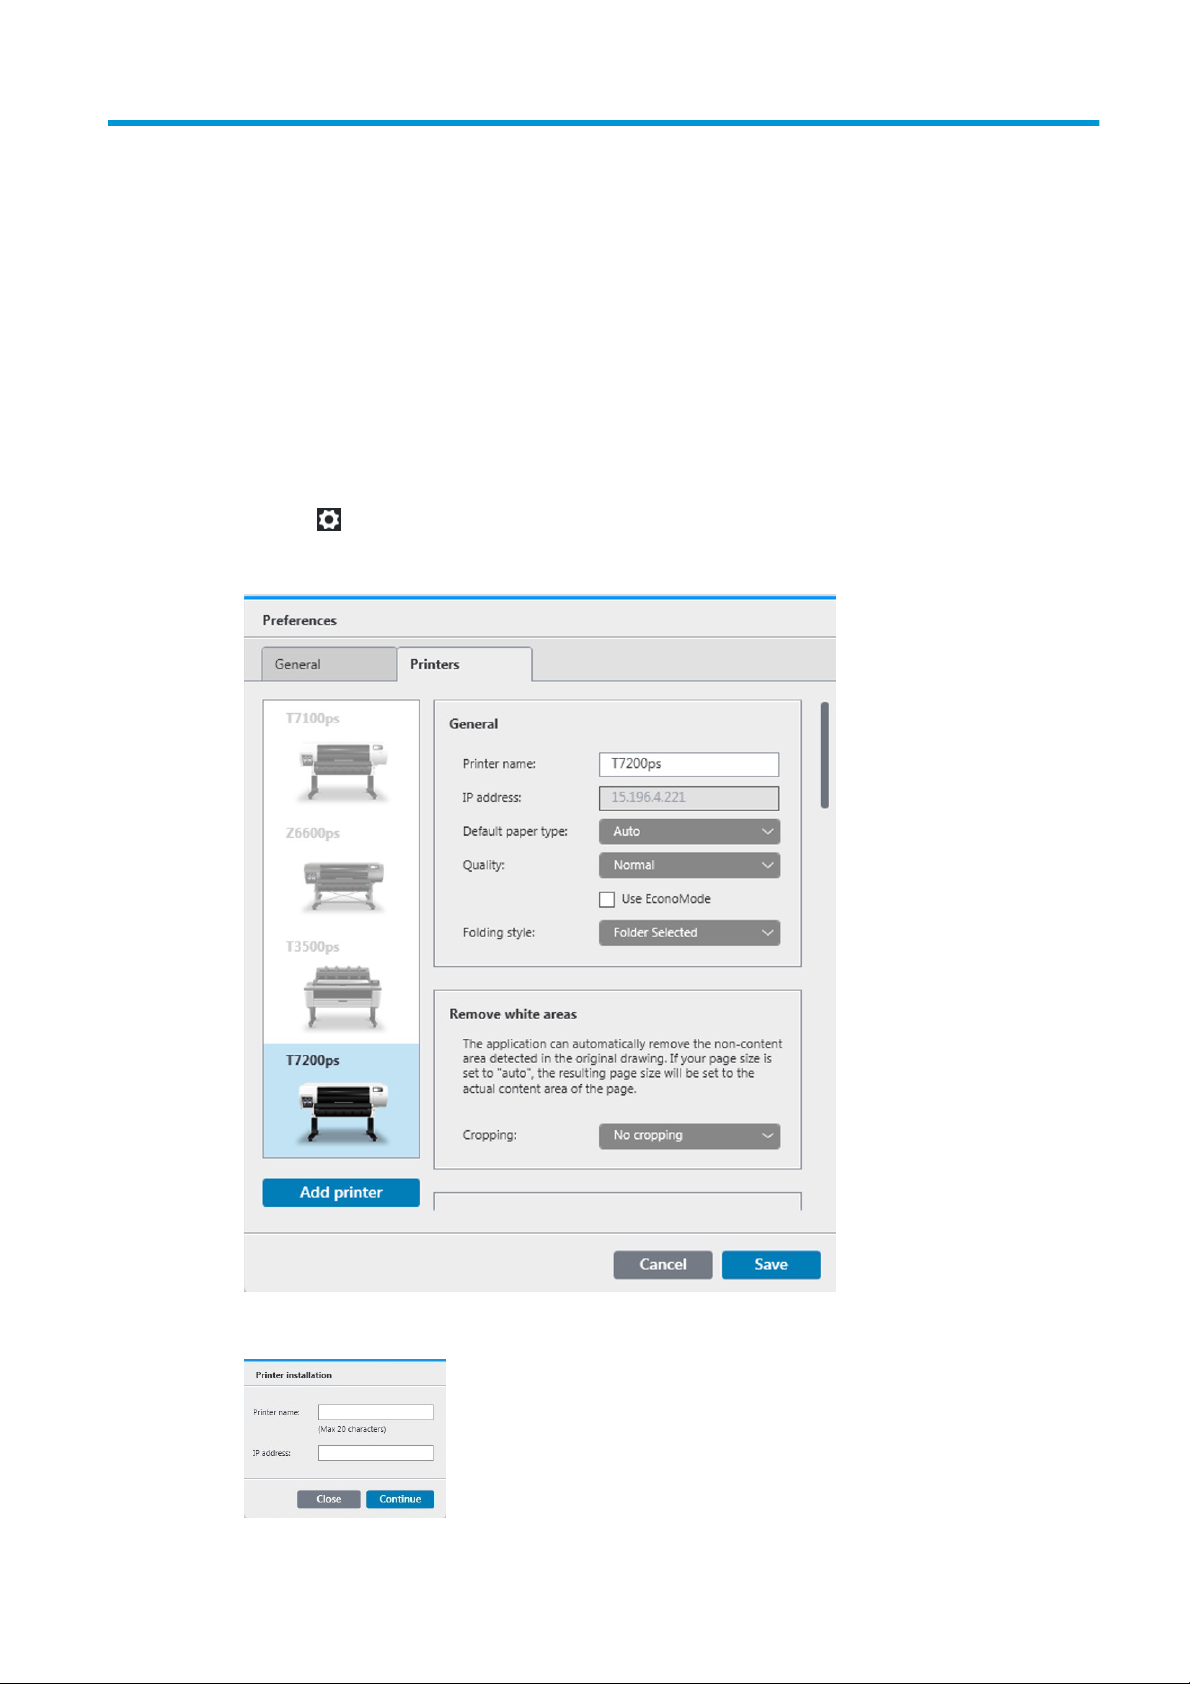
2. Click the icon near the top right of the window.
3. Click the Printers tab.
4. Click the Add Printer button.
ENWW Add a printer 9
5. Give the printer a name and enter its IP address, then press Continue. You can choose any name you like
to assign to the printer; it will be used only in the printers pane. If you do not know the printer’s IP
address, the printer’s own documentation will tell you how to find it. It is normally available from the
Connectivity menu in the printer’s front panel.
NOTE: Only supported printers are detected (see Supported printers on page 5), and only licensed
printers can be added to the application; any attempt to add an unlicensed printer will fail (see Licensing
on page 6).
6. The application downloads a set of color profiles for the new printer, and a window appears with the
progress bar. When the profiles have been downloaded, press the Finish button.
The name you have given the new printer should now appear in the printers pane.
You can add more printers, in which case their names all appear in the printers pane. If the pane is too small
to show all of the printers, you can move up and down the list by clicking the and buttons at the bottom
of the pane.
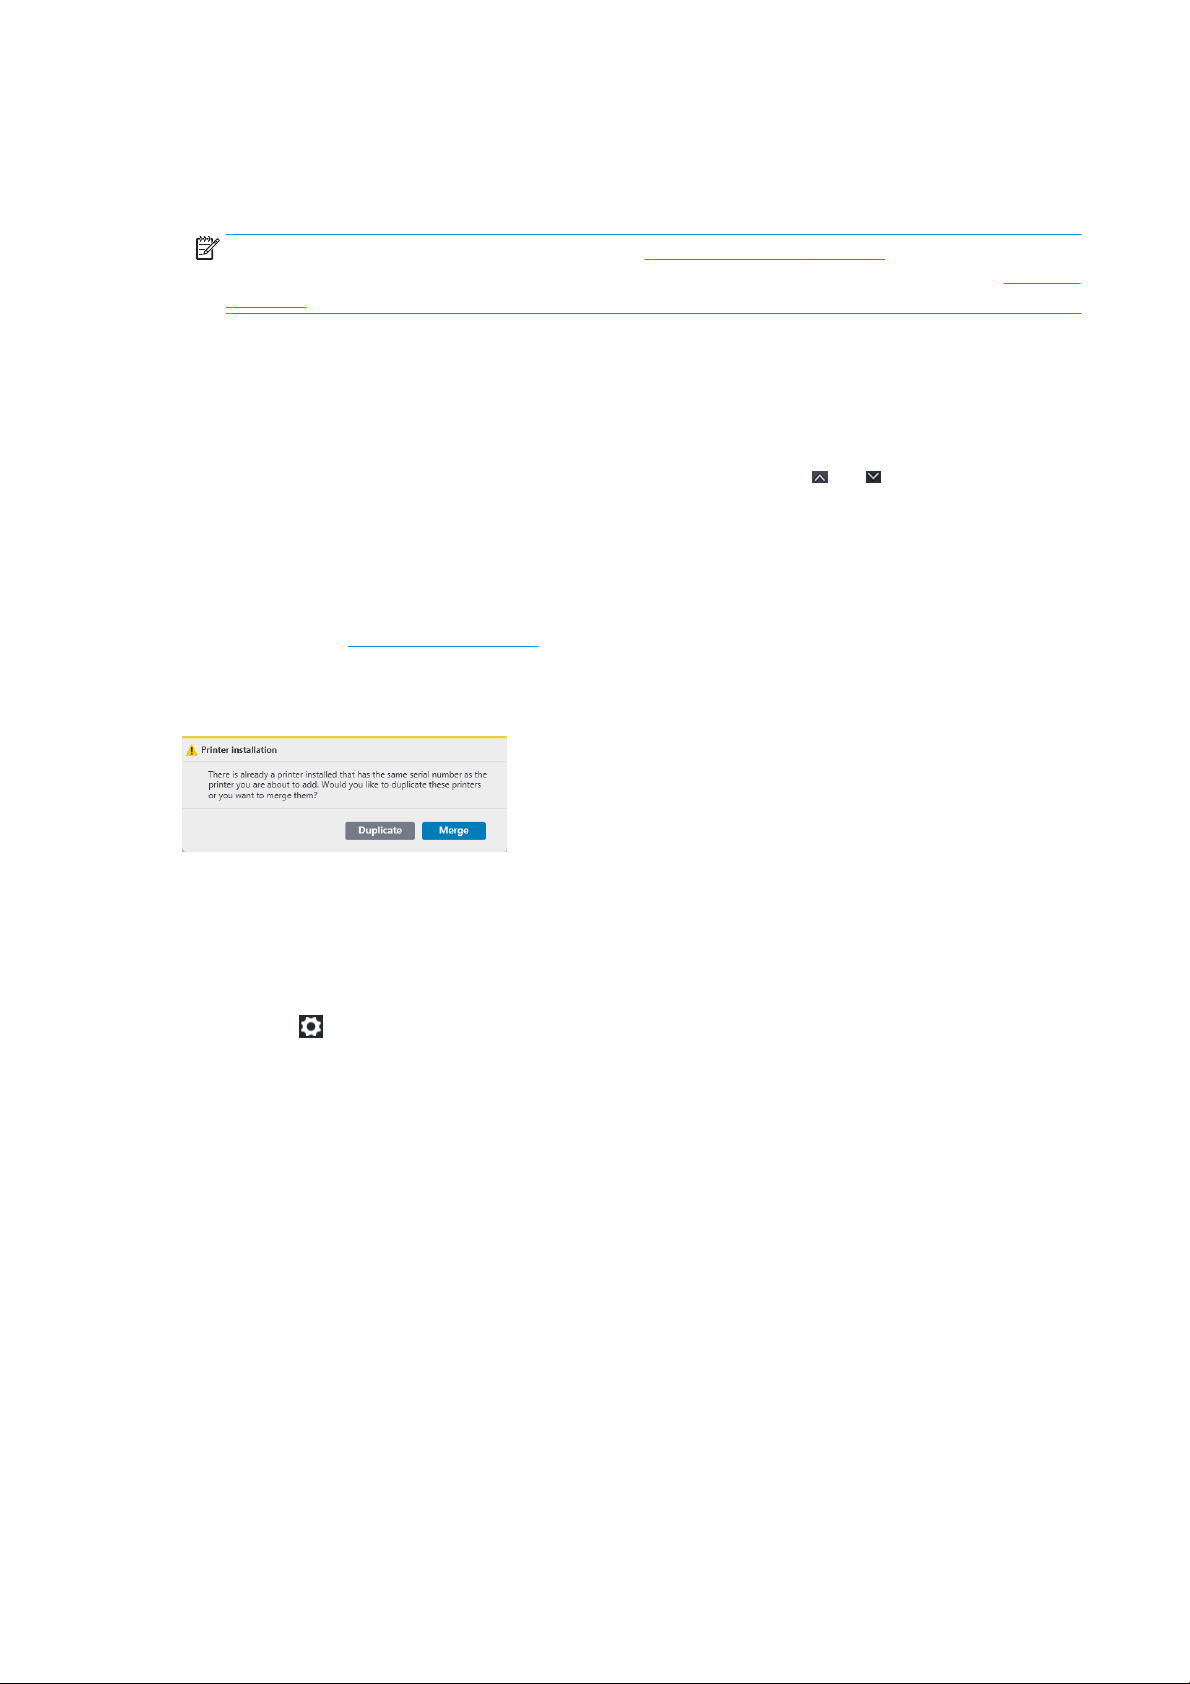
Change a printer’s IP address
If the IP address of a printer changes, it is removed from HP Designjet SmartStream. To add it again with the
new IP address, see Add a printer on page 9.
When you add it with the new IP address, HP Designjet SmartStream detects that it is the same printer with a
new IP address, and asks whether you would like to merge the two printers.
●
Press Merge to merge the two printers: the new printer keeps the history of the old printer.
●
Press Duplicate not to merge the printers: the new printer’s history starts off empty.
Remove a printer
1. Click the icon near the top right of the window.
2. Click Preferences in the drop-down menu
10 Chapter 3 Printers ENWW
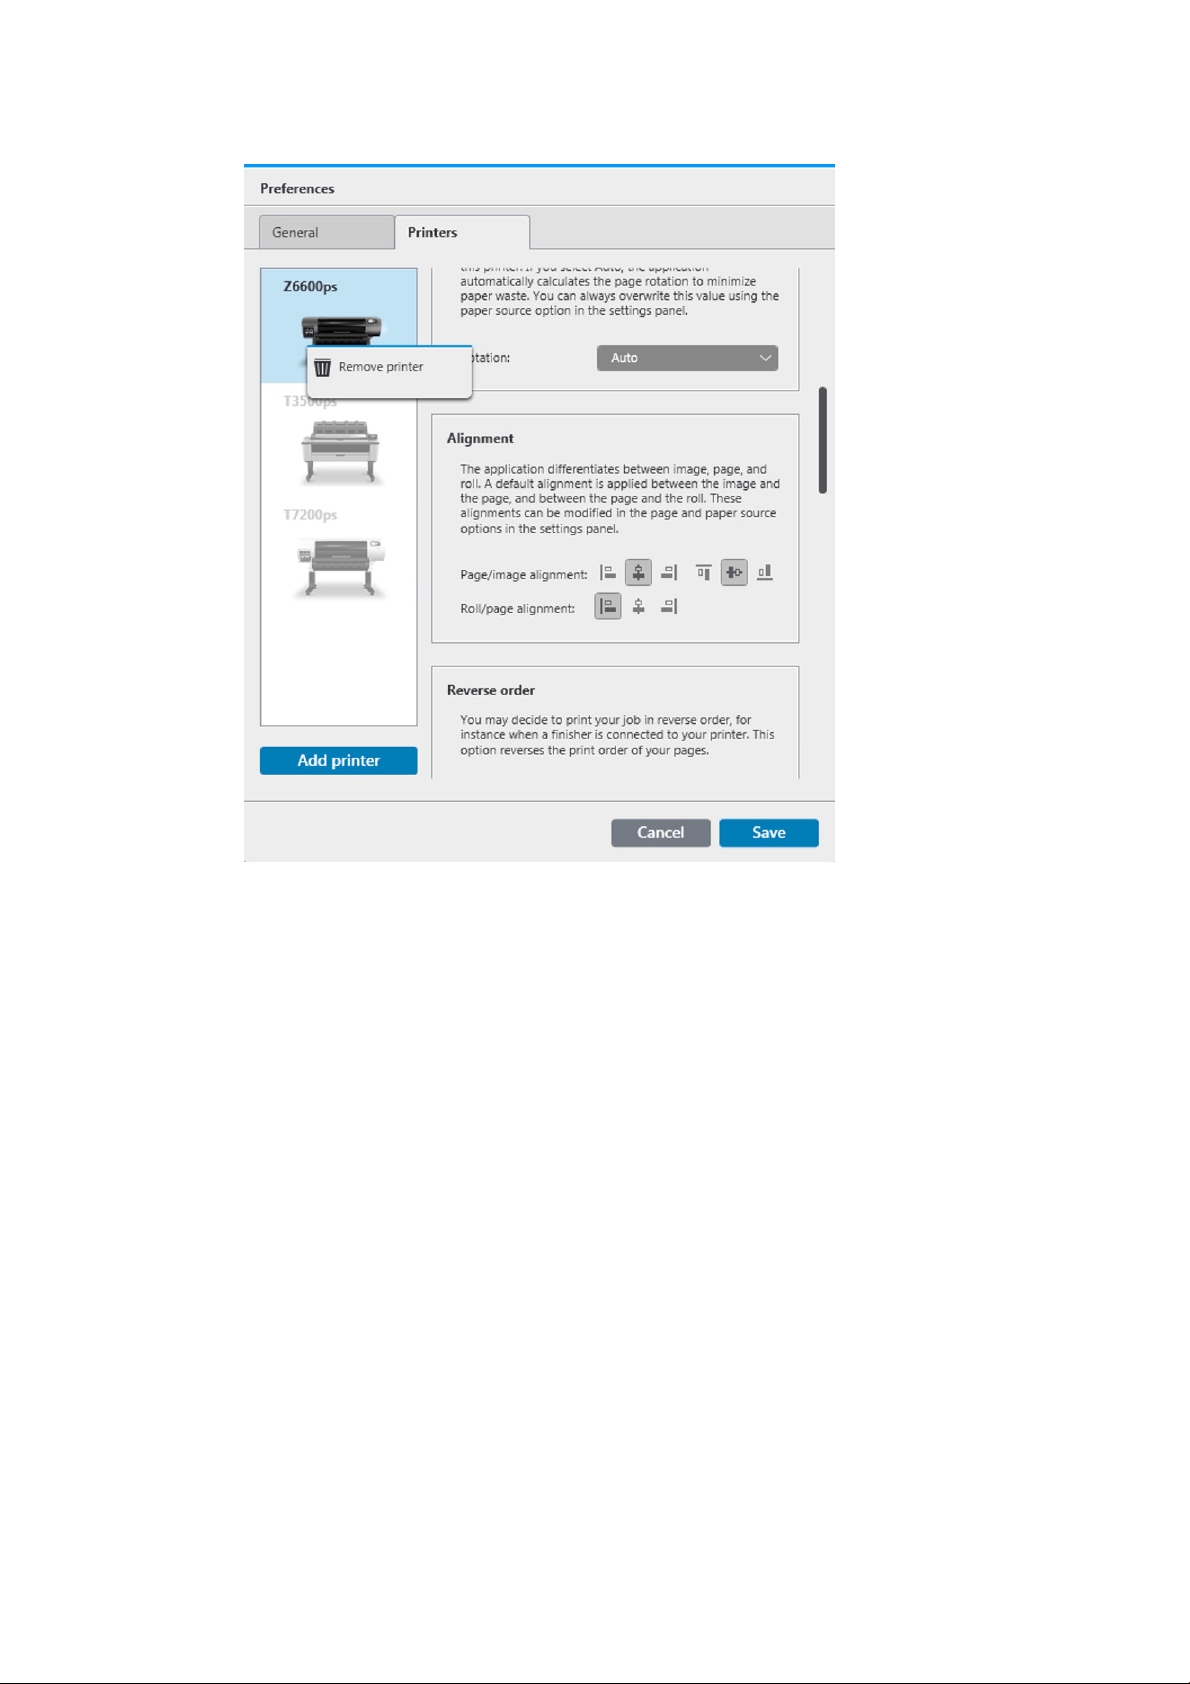
3. Right-click the printer that you want to remove, and click Remove printer in the popup window.
4. Another window warns you of the implications of removing the printer, and offers you the chance to
Cancel or Remove printer.
The printers pane
The printers pane is at the far left of the window. By default, it shows only the names of the printers that you
have added.
Click a printer name to select the active printer; the rest of the window always shows the jobs for the active
printer, in any of the three tabs.
The active printer is highlighted with dark text on a light background.
ENWW The printers pane 11
Loading...