


*
Ordering spare parts
When ordering spare parts for the CG125 models, it is advisable to deal direct with an official Honda agent, who will be able to supply many of the items required ex-stock. It is advisable to get acquainted with the local Honda agent, and to rely on his advice when purchasing spares. He is in a better position to specify exactly the parts required and to identify the relevant spare part numbers so that there is less chance of the wrong part being supplied by the manufacturer due to a vague or incomplete description.
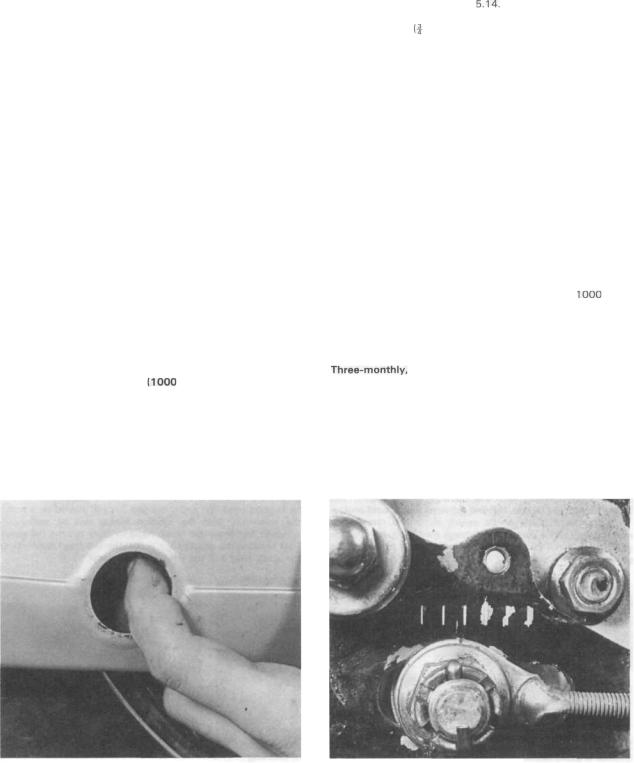
When ordering spares, always quote the frame and engine numbers in full, together with any prefixes or suffixes in the form of letters. The frame number is found stamped on the right-hand side of the steering head, in line with the forks. The engine number is stamped on the left-hand side of the crankcase, immediately behind the oil strainer cap.
Use only parts of genuine Honda manufacture. A few pattern parts are available, sometimes at a cheaper price, but there is no guarantee that they will give such good service as the originals they replace. Retain any worn or broken parts until the replacements have been obtained; they are sometimes needed as a pattern to help identify the correct replacement when design changes have been made during a production run.
Some of the more expendable parts such as spark plugs, bulbs, tyres, oils and greases etc., can be obtained from accessory shops and motor factors, who have convenient opening hours and can often be found not far from home. It is also possible to obtain them on a Mail Order basis from a number of specialists who advertise regularly in the motorcycle magazines.
Frame number location |
Engine number location |


18 |
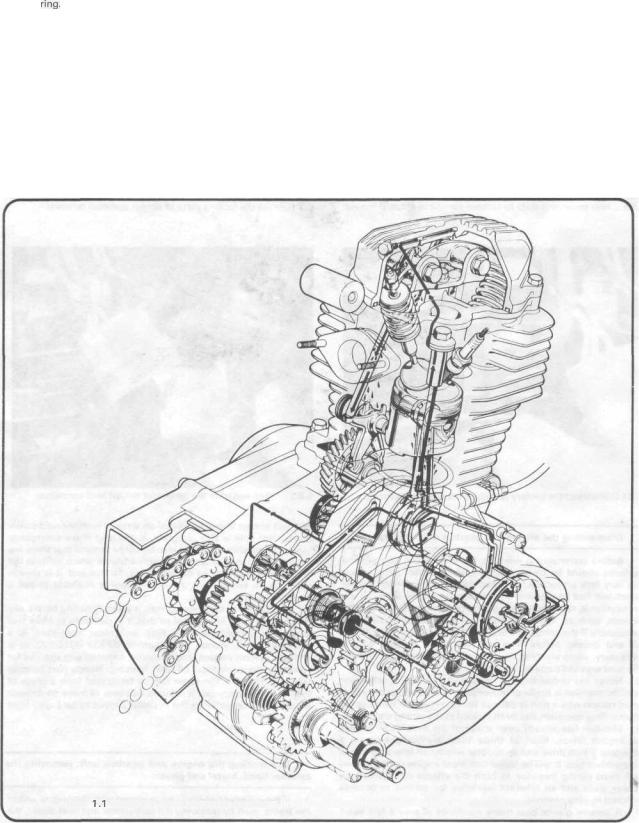
Chapter 1 Engine, clutch and gearbox |
|
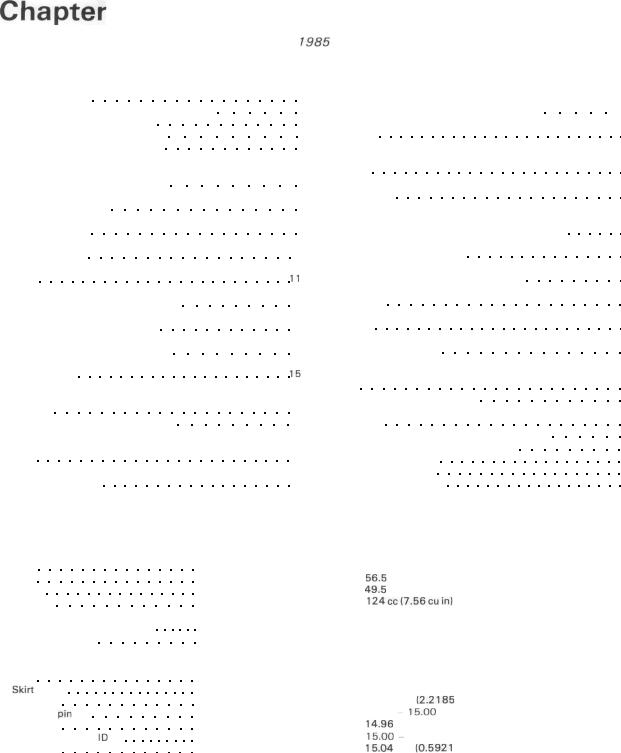
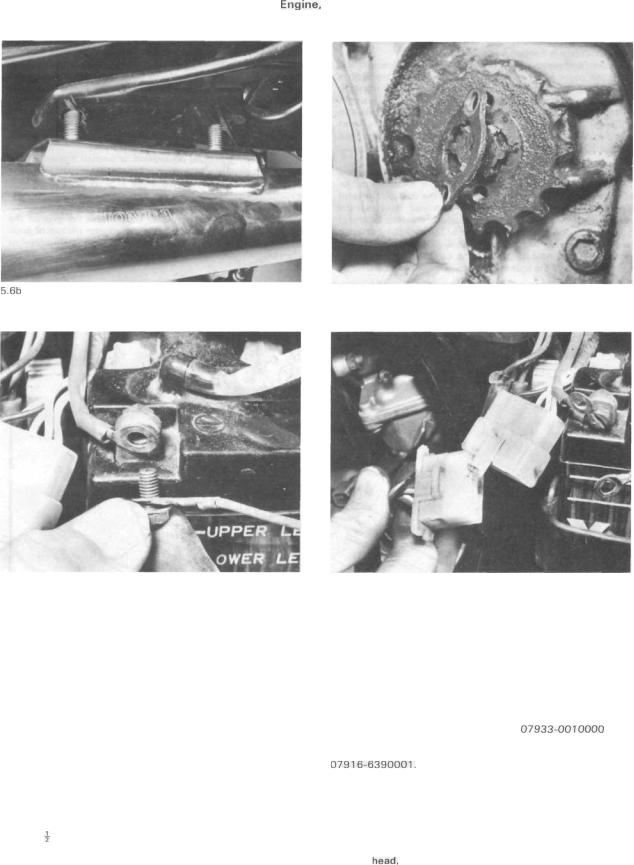
packing pieces behind it. The exhaust is secured by two nuts to its mounting bracket, which is secured to the frame by a bolt and by the swinging arm pivot bolt retaining nut. These should be removed and the complete system withdrawn. The footrest assembly should be removed after unscrewing the four bolts which hold it to the underside of the crankcase.
7Remove the gearchange pedal pinch bolt and slide the pedal off its splines. Remove the left-hand outer cover, and place it to one side to await reassembly. The gearbox sprocket is retained by a locking plate which in turn is held in position by two bolts. Remove the bolts, to allow the plate to be turned slightly and drawn off the splined shaft.
8Remove the left-hand side panel which is a push fit in the frame lugs. It is also worth removing the right-hand panel to avoid any risk of damage to the paint finish. Remove the screw from the battery negative (—) terminal and release the two green leads to isolate the battery from the electrical system. Separate the white multiple connector block to disconnect the generator; this will be found adjacent to the battery.
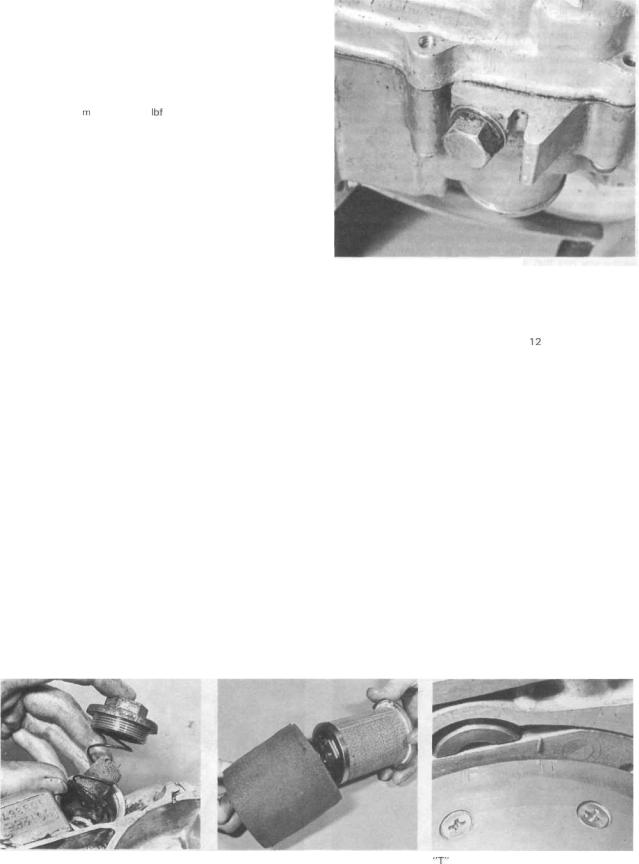
9 The engine is now held only by the five mounting bolts. Remove the two front bolts and place them to one side. It is worthwhile removing the entire engine plate to gain the maximum amount of manoeuvring room. Remove the lower rear mounting bolt, noting that the nut may be difficult to reach if the exhaust mounting bracket has not been removed, followed by the upper bolt which passes through a lug in the cylinder head. Finally, release the remaining rear mounting bolt, disengaging the generator harness from its clip. As the bolt is withdrawn, the unit will drop free, and it is advisable to have an
assistant to hand to help with these final stages. Note that whilst not strictly necessary, it was found helpful to remove the left-hand head steady plate to provide better clearance. The unit is not heavy, and can easily be lifted clear of the frame by one person.
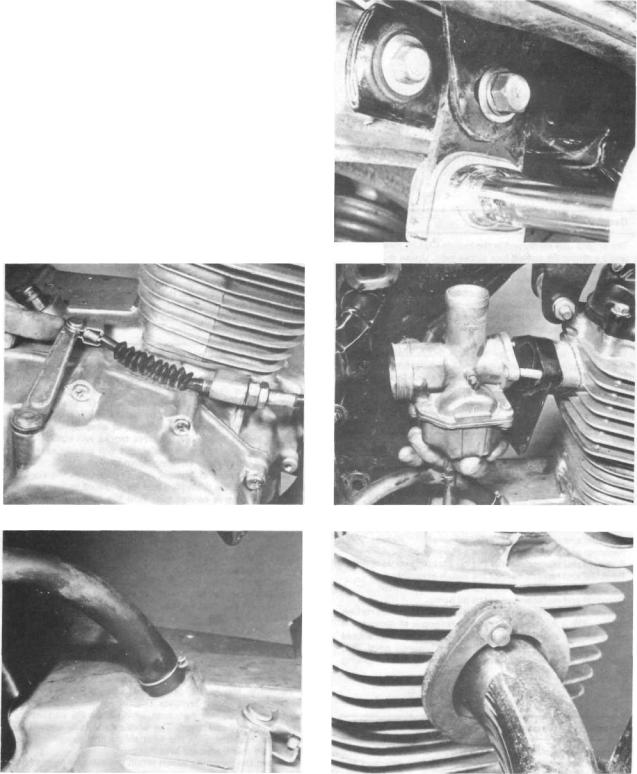
5.3 Seat is retained by two bolts at rear
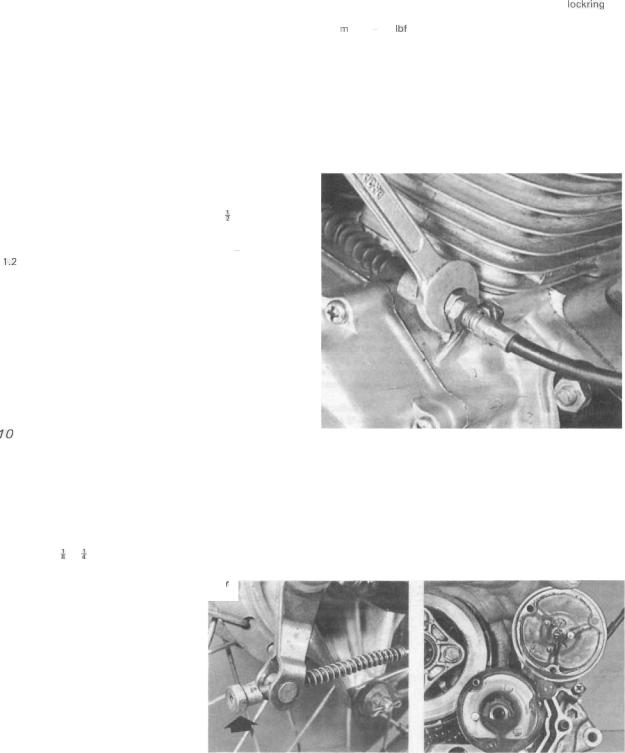
5.4 Slacken off and remove the clutch cable |
5.5a Remove the carburettor, heatshield and spacer (early |
|
models) |
5.5b Pull off the crankcase breather pipe |
5.6a Remove exhaust pipe flange followed by . |


 User Manual")


 Loading...