


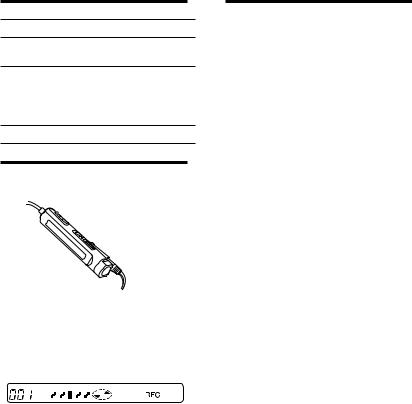
R5ST-MZ Recorder MiniDisc Portable
3-860-705-13 (1)
Portable
MiniDisc Recorder
Operating instructions |
|
EN |
|||
|
|
||||
Mode d'emploi |
|
F |
|||
|
|
||||
Bedienungsanleitung |
|
D |
|||
|
|
||||
Manual de instrucciones |
|
ES |
|||
MZ-R5ST
1997 by Sony Corporation

WARNING
To prevent fire or shock hazard, do not expose the unit to rain or moisture.
To avoid electrical shock, do not open the cabinet. Refer servicing to qualified personnel only.
Caution
The use of optical instruments with this product will increase eye hazard.
Information
IN NO EVENT SHALL SELLER BE LIABLE FOR ANY DIRECT, INCIDENTAL OR CONSEQUENTIAL DAMAGES OF ANY NATURE, OR LOSSES OR EXPENSES RESULTING FROM ANY DEFECTIVE PRODUCT OR THE USE OF ANY PRODUCT.
"MD WALKMAN" is a trademark of Sony Corporation.
2-EN

Welcome!
Welcome to the world of the MiniDisc! Here are some of the capabilities and features you'll discover with the new MiniDisc Recorder.
•The MiniDisc station system — Use the recorder either by itself or attached to the station dock. Use the recorder attached to the station to enjoy full features and connectivity. Use the recorder detached from the station for portability.
•High-fidelity recording — Low-noise, low-distortion, high-fidelity recording through the optical digital input jack.
•Sampling rate converter — This unit enables you to record programs from digital equipment using other sampling rates, such as a BS tuner or DAT deck.
•Variety of recording options
—Long recording with monaural recording (up to 148 minutes).
—Time Machine recording enables you to record from the top of a song even if you pressed the button after you heard the beginning of the song.
—Connect to an audio-timer to record when you are not home.
•Easy editing with the large LCD panel and the editing buttons
—Title samples (21 words and phrases).
—UNDO function lets you undo an editing operation.
•Programmed playback — Play any set of tracks in the order of your choice.
•Card remote commander — Operate the station from a distance. Direct Selection available.
•Output jack for active speakers — Connect to the active speakers SRSZ1000 (not supplied), etc., to enjoy powerful MD playback at your desktop.
EN
3-EN

Table of contents |
|
Setting up the station system .................................. |
6 |
Recording an MD right away! .................................. |
8 |
Playing an MD right away! ..................................... |
10 |
Various ways of recording ...................................... |
12 |
Recording in sync with the source player (Synchro-recording) ....... |
12 |
Starting recording going back 2 seconds (Time Machine |
|
recording) ................................................................................................. |
13 |
Recording in monaural for double the normal recording time ........ |
14 |
Recording from a microphone ............................................................... |
15 |
To adjust the recording level manually ........................................... |
15 |
Recording through analog input (Analog recording) ........................ |
16 |
Checking the remaining time or the recording position .................... |
17 |
On the station ....................................................................................... |
17 |
On the recorder .................................................................................... |
17 |
On the remote control ......................................................................... |
18 |
Setting the clock to stamp the recorded time ...................................... |
19 |
Various ways of playback ....................................... |
20 |
Playing an MD on the station ................................................................ |
20 |
Playing back with active speakers .................................................... |
20 |
Selecting a track directly (Direct Selection) ..................................... |
20 |
Playing selected tracks in the order of your choice |
|
(Program Play) ..................................................................................... |
21 |
Playing tracks repeatedly ....................................................................... |
22 |
Emphasizing bass (DIGITAL MEGA BASS) ....................................... |
23 |
Protecting your hearing (AVLS) ............................................................ |
23 |
Checking the remaining time or the playing position ....................... |
24 |
On the station ....................................................................................... |
24 |
On the recorder .................................................................................... |
24 |
On the remote control ......................................................................... |
25 |
4-EN

Editing recorded tracks ........................................... |
26 |
Erasing tracks (ERASE) ........................................................................... |
26 |
To erase a track .................................................................................... |
26 |
To erase the whole disc ...................................................................... |
26 |
Adding a track mark (TRACK MARK ON)......................................... |
27 |
Erasing a track mark (TRACK MARK OFF) ........................................ |
28 |
Moving recorded tracks (MOVE) .......................................................... |
29 |
Labeling recordings (TITLE) .................................................................. |
29 |
Cancelling the last editing operation (UNDO) ................................... |
31 |
Other useful functions ............................................ |
32 |
Locking the controls (HOLD) ................................................................ |
32 |
Recording/playing with a timer ........................................................... |
32 |
Connection and power sources .............................. |
34 |
Hookup for recording — connecting with CD players, etc. .............. |
34 |
Hookup for digital recording ............................................................ |
34 |
Hookup for analog recording ............................................................ |
34 |
Hookup for playback — connecting with amplifiers or active |
|
speakers ..................................................................................................... |
35 |
Hookup with digital equipment ....................................................... |
35 |
Hookup with analog equipment ....................................................... |
35 |
Power sources .......................................................................................... |
36 |
Using the station on house current ................................................... |
36 |
Using the recorder on a lithium ion rechargeable battery ............ |
36 |
Using the recorder on dry batteries .................................................. |
37 |
Battery life ............................................................................................ |
38 |
Additional information ........................................... |
38 |
Precautions ............................................................................................... |
38 |
Troubleshooting ....................................................................................... |
41 |
System limitations ................................................................................... |
44 |
Error Messages ......................................................................................... |
45 |
Specifications ............................................................................................ |
47 |
What is an MD? ........................................................................................ |
48 |
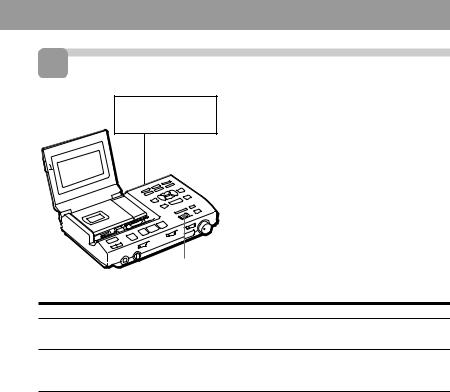
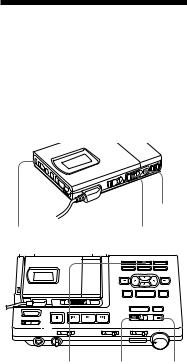
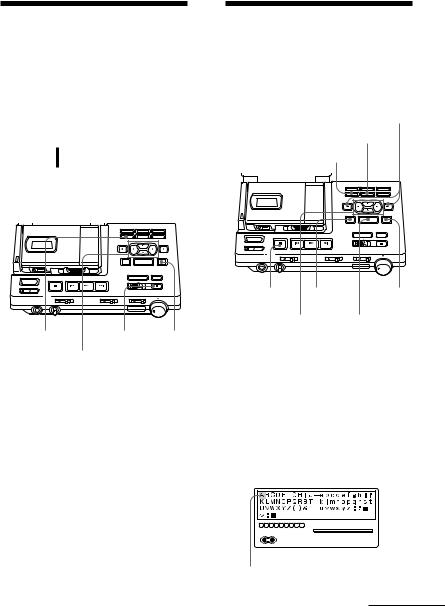
Looking at the controls ........................................................................... |
50 |
5-EN
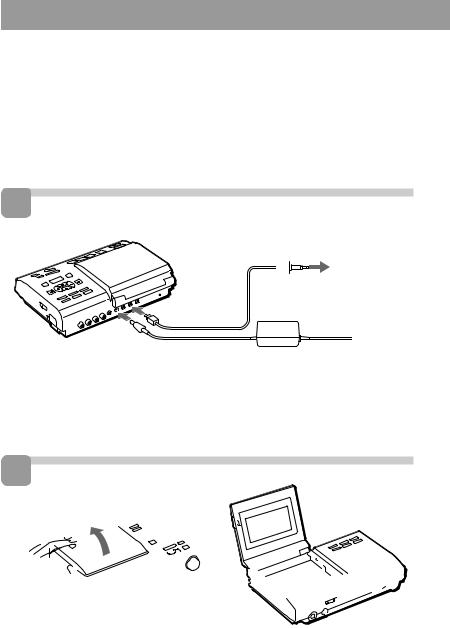
Setting up the station system
Connect other equipment to the station before plugging in the AC power cord. This section explains how to set up to record from a portable CD player, etc., through digital input. To connect for other ways of recording, see ”Hookup for recording”, (page 34).
1 Make connections.
to OPTICAL (DIGITAL) OUT
to |
|
|
|
Portable CD |
|
|
|
|
player, etc. |
||
DIGITAL |
Optical cable |
||||
|
|||||
|
|||||
IN OPT1 |
(not supplied) |
||||
or OPT2 |
|
|
|
|
|
to DC IN 9V |
to a wall outlet |
AC power adaptor |
|
(supplied) |
|
1Connect the portable CD player to the station.
2 Connect the AC power adaptor.
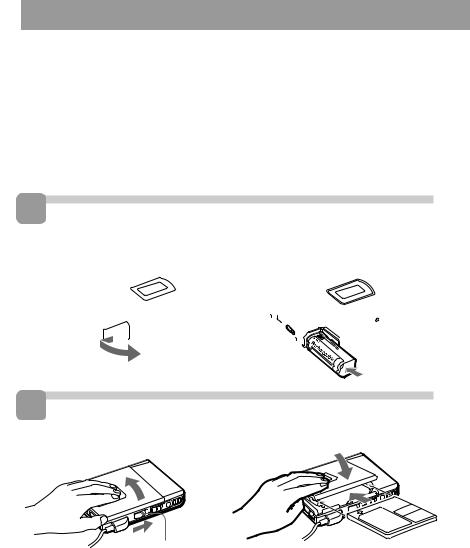
2 Open the lid.


 º
º


Press PUSH OPEN and open the lid.
6-EN
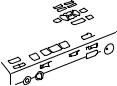
3 Attach the recorder to the station.


 º
º 


1 Fit the right side of the recorder ... |
2 ... and push down the left side until |
|
it clicks. |
|
The display will light up on the station if |
|
the recorder is attached correctly. |
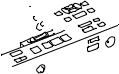
To detach the recorder from the station
RELEASE
Slide RELEASE fully to the right during stop.
Notes
•Set the clock to stamp the recorded date and time (see page 19).
•When recording from a portable CD player, play it on AC power and disable the anti-skip function (such as ESP*).
*Electronic Shock Protection
•Do not stick stickers, etc., on surfaces where the recorder comes to contact with the station, as this may cause a malfunction.
7-EN

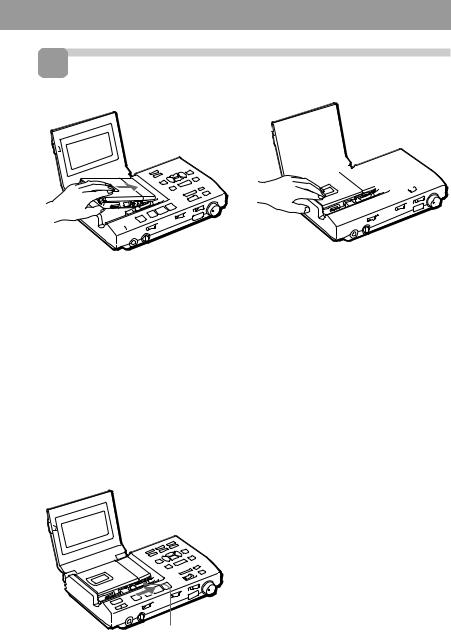
Recording an MD right away!
The explanation here is for recording through digital input. To record through analog input, see page 16. To record with a microphone, see page 15.
1 Insert a recordable MD. |
||
1 Slide OPEN and |
2 Insert a recordable MD |
|
with the label side facing |
||
open the lid. |
||
up, and press the lid |
||
|
||
º |
down to close. |
|
OPEN |
|
|
2 Select input.
Set INPUT switch to match the input jack connected to the source.
Input jack |
INPUT switch |
DIGITAL IN OPT 1 |
OPT 1 |
|
|
DIGITAL IN OPT 2 |
OPT 2 |
|
|
3 Select the point to start recording.
If you want to record from the end of the previous recording, press END SEARCH.
(If you want to start recording from the beginning, skip this step).
END SEARCH
8-EN
4 Record an MD.
CD player, etc. (source)
1 Press and slide REC to the right .
“REC” lights up in the display and recording starts.
|
2 Play the CD or tape you want to |
|
record. |
|
To stop recording, press p. |
|
Note |
|
”Toc Edit” flashes while data of the |
|
recording (the track’s start and end points, |
|
etc.) is being recorded. Do not move or jog |
REC |
the recorder or disconnect the power source |
|
while the indication is flashing in the |
|
display. |
To |
Press |
Pause |
P1) |
|
Press Pagain to resume recording. |
Record part way through the previous recording2)
(, +or =to find the start point of recording and press pto stop. Then slide REC.
Remove the MD |
pand open the lid.3) |
|
|
Turn power off |
Press POWER |
1)A track mark is added at the point where you press P; thus the remainder of the track will be counted as a new track.
2)If you start a new recording partway from a previous recording, the previous recording will be overwritten (erased) by the new one.
3)Once you open the lid, the point to start recording will change to the beginning of the first track. Check the point to start recording on the display.
If the recording does not start
•Make sure the MD is not record-protected (page 40).
•If "SCMS NO COPY" is displayed, you cannot record digitally (page 40).
•Premastered MDs cannot be recorded over.
For models supplied with the AC plug adaptor
If the AC power adaptor does not fit the wall outlet, use the AC plug adaptor.
z
•You can monitor the sound during recording. Plug in the headphones to the 2HEADPHONES jack on the station, or to 2/REMOTE jack on the recorder. Note that the quality of sound through the headphones connected to the recorder is inferior to that connected to the station. Use it to confirm recording.
•The power turns off automatically if you leave the station unoperated for 5 minutes during stop. Press (to turn the power on again.
9-EN
Playing an MD right away!
This section explains how to play MDs on the recorder when it is detached from the station. Make sure the rechargeable battery is fully charged. For charging and other power sources, see “Power Sources”, (pages 36 to 38).
1 Insert the rechargeable battery.
 º
º 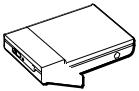
2 Insert an MD.
|
º |
OPEN |
|
1 Slide OPEN and open the lid. |
2 Insert an MD with the label side |
|
facing up, and press the lid down to |
|
close. |
10-EN
3 Play an MD.
VOL –/+
(
VOL –/+
p
1 Press ((Turn the control to (•+on the remote control).
A short beep sounds in the headphones.
2 Press VOL+/– to adjust the volume.
The volume will be shown in the display.
To stop play, press p.
A long beep sounds in the headphones.
To |
Press (Beeps in the headphones) |
Pause |
P(Continuous short beeps) |
|
Press Pagain to resume play. |
|
|
Find the beginning of the current track |
=once (Turn the control to =on |
|
the remote control) |
|
(Three short beeps) |
|
|
Find the beginning of the next track |
+once (Turn the control to |
|
(•+on the remote control) |
|
(Two short beeps) |
Go backwards while playing1)
keep pressing =(Turn and hold the control to =on the remote control)
Go forward while playing1)
keep pressing +(Turn and hold the control to (•+on the remote control)
Remove the MD |
pand open the lid.2) |
1)To go backward or forward quickly without listening, press Pand keep pressing =or +.
2)Once you open the lid, the point to start play will change to the beginning of the first track.
If the play does not start
Make sure the recorder is not locked (page 32).
z
Playback will switch automatically between stereo and monaural according to the sound source.
To play with the recorder attached to the station
See "Playing an MD on the station" (page 20).
When using optional headphones
Use only headphones with a stereo miniplug. You cannot use headphones with a micro-plug.
11-EN

zVarious ways of recording
Recording in sync with the source player (Synchro-recording)
You can easily make digital recordings of a digital source on an MD.
Before synchro-recording, make connections to the digital source with a digital cable, and insert a recordable MD.
CD players, etc.
|
|
|
|
|
SYNCHRO REC |
|
REC |
||
|
|
|
|
|
INPUT
1 Set INPUT switch to ”OPT1” or ”OPT2”.
Set it to match the input jack connected to the source.
2 Slide SYNCHRO REC to ON. “SYNC” appears in the display.
SYNC |
0% |
50% |
100% |
LEFT
LEVEL –db 50 40 30 20 12 8 6 4 2 0
RIGHT
3 Press and slide REC to the right.
The recorder stands by for recording.
4 Play the source sound.
The recorder starts recording when it receives the playing sound.
To stop recording, press p.
z
•You cannot pause manually during synchro-recording.
•When there is no sound from the player for more than 3 seconds during synchrorecording, the recorder goes into the standby mode automatically. When the sound comes from the player again, the recorder resumes synchro-recording. If the recorder is kept in the standby mode for 5 minutes or longer, the recorder stops automatically.
Notes
•Do not switch SYNCHRO REC after step 2. Recording may not be done properly.
•When recording in monaural, follow steps 1 and 2 of “Recording in monaural for double the normal recording time” (page 14) before synchro-recording .
12-EN
Starting recording going back 2 seconds (Time Machine recording)
The recorder stores sound input in its memory during record standby. When you start Time Machine recording, the sound is recalled from the memory and the recorder starts recording the sound from 2 seconds before.
This is convenient, for example, if you do not want to miss the beginning of a track when recording from a BS or a FM program.
Start (step 3) |
Stop |
Time |
2 sec. |
Recording |
Sound is recorded from here |
4 Press TIME MACHINE REC to start recording.
The recorder will go back 2 seconds and start recording.
To stop recording, press p.
Note
If you have taken less than 2 seconds between steps 2 and 3, then the time the recorder will go back will also be less than 2 seconds.
TIME MACHINE REC |
P |
1 While pressing P, press and slide REC to the right.
The recorder stands by for recording.
2 Play the sound source.
The recorder will start storing the sound input.
3 If you want to record through analog input, adjust the recording level (follow step 6 in ”Recording through analog input”, page 16).
13-EN
Recording in monaural for double the normal recording time
For longer recordings, choose to record in monaural. The recording time becomes double the normal. Monaural recording is possible either with the recorder detached from or attached to the station.
P
MODE |
REC |
5 Play the sound source.
To stop recording, press p.
The recorder switches back to stereo recording when you record the next time.
Notes
•For longer recordings, we recommend the use of the recorder attached to the station.
•If you record a stereo source in monaural, the sounds from left and right will be mixed.
•Set SYNCHRO REC to OFF when recording through digital input. You cannot record in monaural if SYNCHRO REC is slid to ON.
•The MDs recorded in monaural can be played back only with an MD player/ recorder that has the monaural playing function.
MODE REC P
1 While pressing P, press and slide REC to the right.
The recorder stands by for recording.
2 Press MODE.
”MONO” and ”Monaural REC” appear in the display, and the recorder switches to monaural recording.
3 If you want to record through analog input on the station, adjust the recording level (play the source and follow step 6 in ”Recording through analog input”, page 16).
4 Press Pagain to start recording.
14-EN
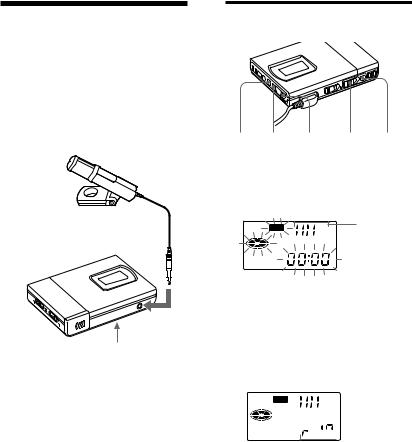
Recording from a microphone
Connect a stereo microphone (ECM-717, ECM-MS907, ECM-MS957, etc.; not supplied) to the MIC (PLUG IN POWER) jack. When using the recorder detached from the station, you can only record through the microphone. The recording level is adjusted automatically, though you can adjust manually as well.
Stereo microphone
to MIC (PLUG IN
POWER)
MIC SENS (at the bottom)
1 Select the sensitivity with MIC SENS. Usually, set it to HIGH. When recording loud sounds such as a live concert, set it to LOW.
2 Insert a recordable MD and start recording.
Press and slide REC to the right. For other operations, see “Recording an MD right away! ” (page 8). The buttons on the station with the same names have the same function.
Note
When the recorder is attached to the station, you cannot record through the microphone.
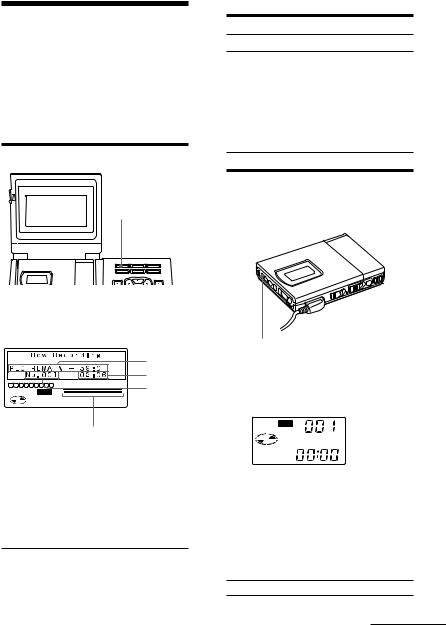
To adjust the recording level manually
p = + REC P
1 While holding down P, press and hold REC to the right for more than 2 seconds.
The recorder stands by for recording.
REC |
Recording |
|
level meter |
2 Play the source.
3 Observe the level meter in the display and adjust the recording level by pressing +(+) or =(–). Set the level so that the meter shows 4 bars at average input level.

 REC
REC


 Recording
level
4 Press Pagain to start recording.
To stop recording, press p.
The recording level control is switched back to automatic control.
z
Select the sensitivity with MIC SENS .
Note
Adjust the recording level while the recorder is in standby mode. You cannot adjust it while recording.
15-EN
Recording through analog input (Analog recording)
When recording from a radio or a record, connect analogically (page 35) and record as follows. Be sure to adjust recording level manually.
pINPUT P
REC REC LEVEL (ANALOG)
1 Insert a recordable MD.
2 Set INPUT to ANALOG.
3 Select the point to start recording.
If you want to record form the end of the previous recording, press END SEARCH.
4 While holding down P, press and slide REC to the right.
The recorder stands by for recording.
1
REC |
0% |
50% |
100% |
LEFT
LEVEL –db 50 40 30 20 12 8 6 4 2 0
RIGHT
Recording level indicator
5 Play the source.
6 Observe the level meter in the display and adjust the recording level with REC LEVEL. Set the level to around 12 (-12dB) at average input level.
1
REC |
0% |
50% |
100% |
LEFT
LEVEL –db 50 40 30 20 12 8 6 4 2 0
RIGHT


low high Recording level indicator
7 Press Pagain to start recording.
Note
Note that REC LEVEL is effective even during recording; adjusting it will change recording level.
16-EN
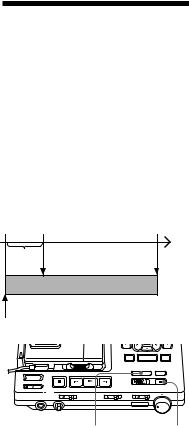
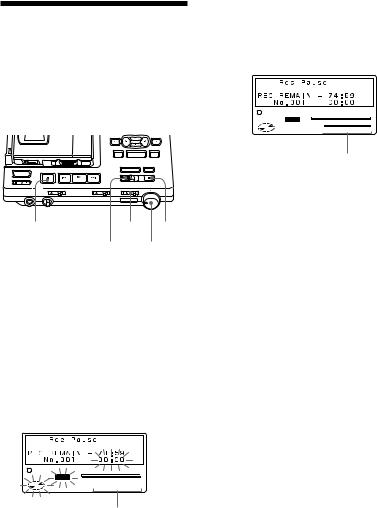
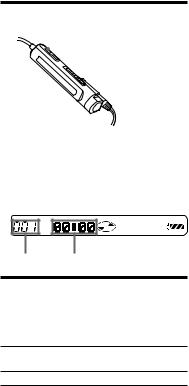
Checking the remaining time or the recording position
You can check information such as the remaining time on the display window of the station, the display window of the recorder, or on the display window of the remote control.
On the station
DISPLAY
In stop mode
AB
—Elapsed time
Remaining time for |
Elapsed time |
recording |
|
|
|
Remaining time of |
Remaining time of |
the tracks in the |
the current track |
disc |
|
|
|
Current time and |
Elapsed time |
date1) |
|
1) Appears only when the clock is set.
On the recorder
There is no display on the recorder when it is attached to the station.
1 Press DISPLAY.
With each press, the display changes as follows.
|
|
|
|
|
|
|
|
|
|
|
|
A |
|
|
|
|
|
|
|
|
|
|
|
|
B |
|
|
|
|
|
|
|
|
|
|
|
|
|
1 |
2 |
3 |
4 |
5 |
6 |
7 |
8 |
9 |
|
|
|
Track |
|
|
|
|
|
|
REC |
0% |
50% |
100% |
|||
|
|
|
|
|
|
|
|
|
LEFT |
|
|
number |
|
|
|
|
|
|
|
|
|
LEVEL –db 50 40 30 |
20 |
12 8 6 4 2 0 |
|
|
|
|
|
|
|
|
|
|
RIGHT |
|
|
|
|
|
|
|
|
|
|
|
Position pointer |
|
|||
While recording |
|
|
|
|||||||||
A |
|
|
|
|
|
|
|
|
|
|
B |
|
|
|
|
|
|||||||||
Remaining time for |
|
Elapsed time |
||||||||||
recording |
|
|
|
|
|
|
||||||
Current time and |
|
Elapsed time |
||||||||||
date1) |
|
|
|
|
|
|
|
|
|
|||
1) Appears only when the clock is set.
DISPLAY
1 Press DISPLAY.
Each time you press the button, the display changes as follows.
REC |
|
|
|
A |
|
|
|
|
|
|
|
|
|
|
|
|
B |
|
|
|
|
|
|
|
|
|
|
|
|
|
|
|
|
|
|
|
|
|
|
|
|
While recording |
|
|
|
|
|
A |
B |
|
|
Track number |
Elapsed time |
|
|
— |
Remaining time |
|
for recording |
Current year1) |
Current month |
|
and date1) |
—Current time1)
1)Appears only when the clock is set.
continued
17-EN
In stop mode
AB
Track number |
Elapsed time |
—Remaining time for recording
Remaining number |
Remaining time |
of tracks |
for playback |
|
|
Current year1) |
Current month |
|
and date1) |
—Current time1)
1)Appears only when the clock is set.
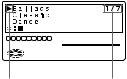
On the remote control
 DISPLAY
1 Press DISPLAY.
Each time you press the button, the display changes as follows. When the recorder is attached to the station, the display will not change from the track number and the elapsed time.
|
|
|
|
|
|
|
|
|
|
|
|
|
|
|
|
|
|
|
|
|
|
|
|
|
|
|
|
|
|
|
|
|
|
|
|
|
|
|
|
A |
B |
||||||||||
While recording |
||||||||||||
A |
|
|
|
|
|
B |
||||||
|
|
|
|
|
|
|
||||||
Track number |
|
|
|
|
|
Elapsed time |
||||||
|
|
|
|
|
|
|
||||||
Track number |
|
|
|
|
|
Remaining time |
||||||
|
|
|
|
|
|
|
|
|
|
|
|
for recording |
|
|
|
|
|
|
|
|
|
||||
|
|
— |
|
|
|
|
|
Current month1) |
||||
|
|
|
|
|
|
|
|
|
|
|
|
and date |
|
|
|
|
|
|
|
|
|
||||
|
|
— |
|
|
|
|
|
Current time1) |
||||
1) Appears only when the clock is set.
In stop mode
AB
Track number |
Elapsed time |
Track number |
Track name1) |
Number of tracks |
Disc name1) |
in the disc |
|
— |
Current month |
|
and date2) |
— |
Current time2) |
1)Appears only if the disc/track has been labeled.
2) Appears only when the clock is set.
z
If you want to check the playing position or track name while playing, see page 24.
18-EN
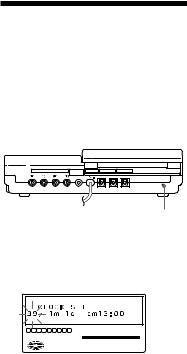
Setting the clock to stamp the recorded time
To stamp the date and time on the MD when you record, you first need to set the clock. You can set the clock either from the detached recorder, or from the station when the recorder is attached.
|
LINE(ANALOG) |
ACTIVE DC IN 9V DIGITAL IN |
DIGITAL OUT |
|
|
SP OUT |
|
IN |
OUT |
OPT 1 OPT 2 |
OPTICAL |
CLOCK SET
CLOCK SET
1 Press CLOCK SET.
Use a pointed object. The digits of the year flash.
Display window of the station
1 2 3 4 5 6 7 8 9
0% |
50% |
100% |
LEFT
LEVEL –db 50 40 30 20 12 8 6 4 2 0
RIGHT
2 Change the current year by pressing Âor µ.
To change the digits rapidly, keep pressing Âor µ.
3 Press mto enter the year.
The digit of the month flashes.
4 Repeat steps 2 and 3 to enter the current month, date, hour, and minute.
When you press TITLE/ENTER to enter the minute, the clock starts operating.
If you make a mistake while setting the clock
Press p, and set the clock again from step 2. You can skip a step by pressing m.
To set the clock on the recorder
The procedure is the same as in setting the clock on the station. Press CLOCK SET at the bottom of the recorder so that the digit of the year flashes. Change the number with =or +, and enter with (. When you press (to enter the minute, the clock starts operating.
When you attach the recorder to the station after you have set the clock on the recorder, the clock on the station will be synchronized automatically.
To display the time in the 24hour system
While setting the clock, press DISPLAY. To display the time in the 12-hour system, press DISPLAY again.
Charging the built-in battery for the clock
When you use the recorder for the first time or after a long period of disuse, charge the built-in battery. After setting the clock, leave the recorder connected to the AC power for about 2 hours to charge the built-in battery. Once charged, the built-in battery should last about a month without connecting to any of the power sources. The recorder will automatically charge the built-in battery while connected to AC power, dry batteries or a rechargeable battery.
19-EN
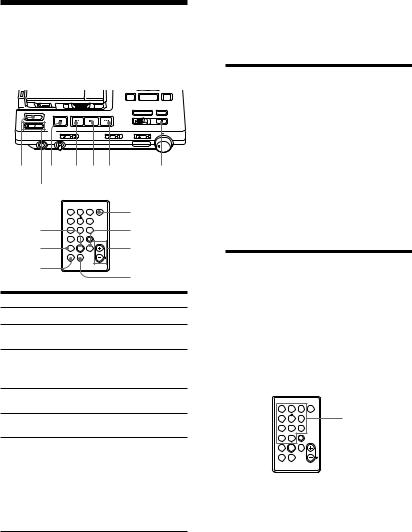
zVarious ways of playback
Playing an MD on the station
Play an MD with the recorder attached to the station as follows. You can use the card remote commander as well.
POWER p = (+ |
P |
ACTIVE SP LEVEL |
|
|
|
|
POWER |
POWER |
|
1 |
2 |
3 |
|
( |
4 |
5 |
6 |
|
7 |
8 |
9 |
+ |
|
|
|
|
PLAY MODE |
|
|
>10 |
0/10 |
|
|
= |
|
|
ACTIVE SP |
ACTIVE |
= ( |
LEVEL |
|||
|
+ |
SP LEVEL |
||
|
P |
p |
|
|
P |
|
|
|
p |
|
|
|
|
|
To |
|
|
Operation |
|
Play |
|
|
Press ( |
|
Adjust the volume |
Turn LEVEL on the |
|||
of the headphones |
station |
|
||
Pause |
|
|
Press P |
|
|
|
|
Press Pagain to |
|
|
|
|
resume play |
|
Find the beginning |
Press =once |
|||
of the current track |
|
|
||
Find the beginning |
Press +once |
|||
of the next track |
|
|
|
|
Go backwards while Keep pressing = playing1)
Go forward while |
Keep pressing + |
playing1) |
|
Remove the MD |
Press pand open |
|
the lid.2) |
Turn power off |
Press POWER |
1)To go backwards or forward quickly without listening, press Pthen keep pressing =or +.
2)Once you open the lid, the point to start play will change to the beginning of the first track.
Note
The power turns off automatically when you leave the station unoperated for 5 minutes during stop. Press POWER or (to turn the power on again.
Playing back with active speakers
You can enjoy MD playback on active speakers such as SRS-Z1000 (not supplied), etc., by connecting it to the station (page 35).
Operate with the buttons on the station or from the card remote commander.
To adjust volume
Press ACTIVE SP LEVEL –/+ on the station or the card remote commander.
Selecting a track directly (Direct Selection)
You can select a track directly by pressing the track number on the card remote commander.
1 Press the number key(s) for the track number of the track of your choice. The recorder will play the selected track.
|
|
POWER |
1 |
2 |
3 |
4 |
5 |
6 |
Number keys |
7 8 9
PLAY MODE
>10 0/10
ACTIVE SP
=( +
LEVEL
Pp
z
•To select track number 10, press 0/10. •To select a track number larger than 10,
first press >10, then press the number for the tens digit and then the units digit. Press 0/10 if the units digit is zero.
•To select a track number larger than 100, first press >10 twice, then press the number for the hundreds digit, tens digit, and the units digit.
20-EN
Playing selected tracks in the order of your choice (Program Play)
Select up to 20 tracks and play them in the order of your choice.
|
|
POWER |
1 |
2 |
3 |
|
4 |
5 |
6 |
Number keys |
|
7 |
8 |
9 |
|
|
|
|
PLAY MODE |
PLAY MODE |
|
>10 |
0/10 |
ACTIVE SP |
|
( |
= ( |
+ |
|
|
|
|
LEVEL |
|
|
Pp
1Press PLAY MODE repeatedly until ”PROGRAM” lights up in the display.
2Press the number key(s) for the track number of your choice in the order to be played.
The tracks are programmed in sequence. You can program up to 20 tracks.
Program |
|
|
|
|
|
|
|
|
|
|
|
|
|
|
|
|
Total |
number |
1 |
2 |
4 |
8 |
|
11 |
|
|
|
|
|
|
|
time |
|||
|
|
|
|
|
|
|
|
0% |
|
50% |
100% |
|
|
|
|||
|
|
|
|
|
|
|
|
|
LEVEL |
LEFT |
|
|
|
12 8 6 4 2 0 |
|
|
|
|
|
|
|
|
|
|
|
|
–db 50 40 30 |
20 |
|
|
|
|
|||
|
|
|
|
|
PROGRAM |
|
|
RIGHT |
|
|
|
|
|
|
|
||
Track number
To cancel a track, press ERASE/
DELETE on the station.
3 Press (.
The recorder will play the tracks in the programmed order.
To display the track order
Press SELECT on the station before playing back. With each press, the track number will be displayed in the order programmed.
To change the program
Press ERASE/DELETE on the station before playback to cancel the last track, or press pto cancel all tracks. Then, repeat from step 2.
To program from the station
1 Press MODE repeatedly until ”PROGRAM” lights up in the display.
2 Select the track number of your choice with the cursor keys and press SELECT.
3 Repeat step 2 and select tracks in the order to be played.
4 Press (.
Note
The program will be erased if you do any of the following:
•press p
•remove the disc
•detach the recorder from the station
•record or edit
21-EN
Playing tracks repeatedly
You can play tracks repeatedly in three ways — all repeat, single repeat, and shuffle repeat.
On the recorder
PLAY
MODE
MODE
On the station
|
|
|
POWER |
|
1 |
2 |
3 |
|
|
4 |
5 |
6 |
|
|
7 |
8 |
9 |
|
|
|
|
PLAY MODE |
ACTIVE SP PLAY |
|
>10 |
0/10 |
|
||
= ( |
+ |
|
MODE |
|
|
|
|
LEVEL |
|
P p
MODE
1 Press MODE (PLAY MODE on the remote control) repeatedly during playback until the play mode indication of your choice appears in the display.
Play mode |
Recorder/ |
Station |
|
|
Remote control |
|
|
All the tracks |
“ |
” |
REPEAT |
are played |
|
|
|
repeatedly. |
|
|
|
(all repeat) |
|
|
|
|
|
|
|
A single track |
“ |
1” |
REPEAT 1 |
is played |
|
|
|
repeatedly. |
|
|
|
(single repeat) |
|
|
|
|
|
|
|
All the tracks |
“ |
SHUF” |
REPEAT |
are played |
|
|
SHUFFLE |
repeatedly in |
|
|
|
random order. |
|
|
|
(shuffle repeat) |
|
|
|
To cancel repeat play
Press MODE (PLAY MODE on the remote control) repeatedly until ”REPEAT” ” ”
”
disappears from the display.
22-EN

Emphasizing bass (DIGITAL MEGA BASS)
Mega Bass function intensifies low frequency sound for richer quality audio reproduction. You can use this function only with the recorder detached from the
station.
DIGITAL MEGA BASS
1 Set DIGITAL MEGA BASS to ”1” or ”2”.
The bass sound will be emphasized accordingly (1: moderate effect, 2: strong effect).
Notes
•If the sound becomes distorted when emphasizing bass, turn down the volume.
•Mega Bass function does not affect the sound being recorded.
Protecting your hearing (AVLS)
The AVLS (Automatic Volume Limiter System) function keeps down the maximum volume to protect your ears. You can use this function only with the recorder detached from the station.
AVLS
1 Set AVLS to LIMIT.
”AVLS” will appear in the display, and the volume will be limited within a moderate level.
23-EN

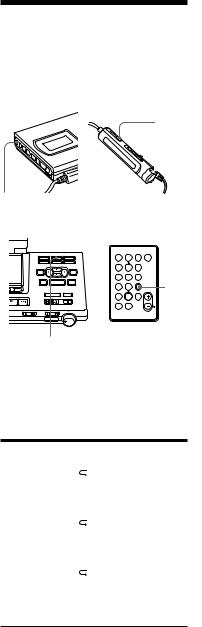
Checking the remaining time or the playing position
You can check information such as track and disc name on the display window of the station, the display window of the recorder, or on the display window of the remote control.
On the station
DISPLAY
1 Press DISPLAY during playback. With each press, the display changes as follows.
Disk |
|
|
|
|
|
|
|
|
|
A |
name1) |
|
|
|
|
|
|
|
|
|
|
Track |
|
|
|
|
|
|
|
|
|
B |
|
|
|
|
|
|
|
|
|
|
|
1 |
2 |
3 |
4 |
5 |
6 |
7 |
8 |
9 |
|
|
name1) |
|
|
|
|
|
|
|
0% |
50% |
100% C |
|
|
|
|
|
|
|
|
LEFT |
|
|
|
|
|
|
|
|
|
|
LEVEL –db 50 40 30 |
20 |
12 8 6 4 2 0 |
|
|
|
|
|
|
|
|
RIGHT |
|
|
A |
B |
C |
|
|
|
— |
Elapsed |
Track |
|
time |
number |
Remaining |
Remaining |
Track |
number of |
time of |
number |
tracks and |
current track |
|
remaining |
|
|
time |
|
|
Recorded time |
Recorded |
Recorded |
and date |
time2) |
Year month/ |
|
|
date2) |
1)Appears only if the disc/track has been labeled.
2)Appears only if the recorded date and time has been stamped.
On the recorder
There is no display on the recorder when it is attached to the station.
DISPLAY
1 Press DISPLAY during playback. With each press, the display changes as follows.
A
B
AB
Track number |
Elapsed time |
Track number |
Remaining time of |
|
current track |
Remaining number |
Remaining time |
of tracks |
|
Recorded year1) |
Recorded month |
|
and date1) |
— |
Recorded time1) |
1)Appears only if the recorded date and time has been stamped.
24-EN
On the remote control
 DISPLAY
1 Press DISPLAY during playback. With each press, the display changes as follows. When the recorder is attached to the station, the display will not change from the track number and the elapsed time.
AB
AB
Track number |
Elapsed time |
Track number |
Track name1) |
Number of tracks |
Disc name1) |
in the disc |
|
—Recorded month and date2)
—Recorded time2)
1)Appears only if the disc/track has been labeled.
2)Appears only if the recorded date and time has been stamped.
z
If you want to check the remaining time or the recording position while recording or in stop mode, see page 17.
25-EN

zEditing recorded tracks
You can edit your recordings by adding/ erasing track marks or labeling tracks and MDs. Premastered MDs cannot be edited.
Notes on editing
•Do not move or jog the recorder while “Toc Edit”* is flashing in the display.
•You cannot edit tracks on an MD that is record-protected. Before editing tracks, close the tab on the side of the MD.
*TOC = Table of Contents
Erasing tracks (ERASE)
To erase a track
Make sure of the track you are erasing.
pERASE/ TITLE/ DELETE ENTER
1Press ERASE/DELETE while playing
the track you want to erase.
“Erase OK? nPush Enter” appears in the display, and the recorder plays the selected track repeatedly. To cancel erasing, press p.
2Check the track number in the display and press TITLE/ENTER. The track is erased from the MD and the remaining tracks are renumbered. The recorder will start to play the next track.
To erase a part of a track
Add track marks (page 27) at the beginning and the end of the part you want to erase, then erase the part.
To erase the whole disc
You can erase all the tracks and data of the MD at the same time.
Be sure to check the contents of the disc you want to erase.
pREC TITLE/
ENTER
ERASE/
DELETE
1 In stop mode, keep pressing ERASE/ DELETE and press and slide REC to the right.
“All Erase OK ? nPush Enter” appears in the display. To cancel erasing, press p.
2 Press TITLE/ENTER.
”Toc Edit” flashes in the display. When the MD is erased, “BLANK DISC” appears.
26-EN

Adding a track mark (TRACK MARK ON)
You can add track marks so that the part after the new track mark is counted as a new track.
The track numbers will increase as follows.
1 |
|
2 |
3 |
4 |
|
|
4 |
|
|
. |
|
Add a Track mark |
|
|
1 |
2 |
3 |
4 |
5 |
Track numbers increase
Cursor keys TITLE/ENTER TRACK MARK
1 While playing or pausing an MD, press TRACK MARK on the station at the point you want to add a mark. ”Rehearsal” and ”Track Mark ON OK? nPush Enter” will appear. A four second segment will be played repeatedly. Press the cursor keys to adjust the point to be marked. It can be moved forward or backward up to eight seconds, in 0.06 second steps. To cancel adding, press p.
2 Press TITLE/ENTER.
”Track Mark ON” will be displayed. A track mark is added and the portion after the mark will be counted as a new track.
To insert a track mark on the recorder
Press T MARK during playback or pause. A track mark will be added where you pressed the button.
To add track marks while recording
Press TRACK MARK on the station, T MARK on the recorder or TRACK MARK on the remote control. A track mark will be added where you pressed the button.
Note
When adding a track mark with the recorder, or when adding a track mark during recording, the mark will be added at the point where you pressed the T MARK or the TRACK MARK button. You cannot adjust its position with the cursor keys.
27-EN

Erasing a track mark (TRACK MARK OFF)
When you record with analog (line) input, unnecessary track marks may be recorded where recording level is low. You can erase a track mark to combine the tracks before and after the track mark. The track numbers will change as follows.
1 |
2 |
3 |
4 |
|
|
4 |
|
. |
Erase a track mark |
||
1 |
|
2 |
3 |
Track numbers decrease
= TITLE/ |
P TRACK |
ENTER |
MARK |
1 While playing the track with the track mark you want to erase, press Pto pause.
2 Find the track mark by pressing = lightly.
For example, to erase the third track mark, find the beginning of the third track. “00:00” appears in the display.
3 Press TRACK MARK on the station. ”Rehearsal” will light up and ”Track Mark OFF OK? nPush Enter” will appear. A four second segment will be played repeatedly.
To cancel erasing, press p.
4 Press TITLE/ENTER.
”Track Mark OFF” will be displayed. The track mark is erased and the two tracks are combined. The number of the newly combined track will be that of the first track. The succeeding tracks will be renumbered.
To erase a track mark on the recorder
Press = or +during pause to find the track mark you want to erase. Press T MARK.
Note
When erasing a track mark with the recorder, the mark will be erased where you pressed the T MARK button. There will be no repeated play.
z
When you erase a track mark, the date, time, and name assigned to the mark are also erased.
28-EN
Moving recorded tracks (MOVE)
You can change the order of the recorded tracks.
Before moving |
|
|
|
|
|
||
Track A |
Track B |
Track C |
Track D |
||||
1 |
2 |
3 |
4 |
|
|
||
|
|
|
|
Move track C |
|
||
After |
|
|
|
from the third to |
|||
|
|
|
the second track. |
||||
moving |
$ |
Track B |
Track D |
||||
Track A |
Track C |
||||||
|
|
|
|
|
|
||
1 |
2 |
3 |
4 |
|
|
||
|
|
|
|
|
|
|
|
Labeling recordings (TITLE)
You can label the MDs and tracks you recorded with letters, numbers, and marks. Each label can be made up of up to 200 characters, and each MD can hold up
to about 1700 characters.
INPUT POSITION ERASE/DELETE
MOVE/INSERT
MOVE/INSERT |
P |
TITLE/ |
Cursor keys |
|
ENTER |
|
|
1 While playing or pausing the track you want move, press MOVE/ INSERT.
For the example above, ”Move MV003 n003” and ”OK? nPush Enter” appear in the display.
2 Press the cursor keys to select the new track position.
Mor µmoves the track number down. Âor mmoves the track number up.
To cancel moving, press p.
3 Press TITLE/ENTER.
The track moves to the position before the designated track.
p |
CAPS |
TITLE/ |
|
|
ENTER |
Cursor keys |
SELECT |
|
1 To label a track , play the track you want to label.
To label an MD, insert the MD you want to label. If an MD is already inserted, press pto stop.
2 Press TITLE/ENTER.
A set of characters will be displayed.
3 Press the cursor keys to select a character and press SELECT to enter.
1 2 3 4 5 6 7 8 9
0% |
50% |
100% |
LEFT
LEVEL –db 50 40 30 20 12 8 6 4 2 0
RIGHT
Cursor
continued
29-EN
Press |
To |
CAPS |
Switch between the |
|
alphabet, symbols and |
|
numbers, and title |
|
samples. |
Cursor keys |
Move the cursor up/ |
|
down/right/left. |
|
|
INPUT |
Move the input position |
POSITION M/m left/right. |
|
SELECT |
Enter a letter and move |
|
the input position to the |
|
right. |
p |
Cancel labeling. |
MOVE/ |
Insert a blank space. |
INSERT |
|
ERASE/ |
Delete a letter and move |
DELETE |
the input position to the |
|
left. |
4 Repeat step 3 until you have entered all the characters for the label.
5 Press TITLE/ENTER.
The track or disk is labeled.
To cancel labeling, press p.
Available characters
•Capital and small letters of the English alphabet
•Numbers 0 to 9
•! " # $ % & ( ) * + – . ; < = > ? @ _ ` ' , / : _ (space)
To use the title samples
Use any of the 21 sample words/phrases as a disc name, track title, or message. Press M/mto change the page.
Press Â/µto move the cursor (>) up or down.
Press SELECT to enter the title chosen with the cursor.
1 |
2 |
3 |
4 |
5 |
6 |
7 |
8 |
9 |
|
|
|
|
|
|
|
|
|
|
0% |
50% |
100% |
|
|
|
|
|
|
|
|
LEFT |
|
|
|
|
|
|
|
|
|
|
LEVEL –db 50 40 30 |
20 |
12 8 6 4 2 0 |
|
|
|
|
|
|
|
|
RIGHT |
|
|
Cursor Page indication
To relabel recordings
Follow steps 1 and 2 to display the label of the track or MD. Enter a new character over the one you want to change, then press TITLE/ENTER.
Notes
•You cannot relabel premastered MDs or label MDs that have not been recorded.
•The recorder is able to display, but cannot label using, Japanese “Katakana” characters.
30-EN
 Loading...