


KITCHEN SCALE
KITCHEN SCALE
Operation and Safety Notes
WAGA KUCHENNA
Wskazówki dotyczące obsługi i bezpieczeństwa
KONYHAMÉRLEG
Kezelési és biztonsági utalások
KUHINJSKA TEHTNICA
Navodila za upravljanje in varnostna opozorila
KUCHYŇSKÁ VÁHA
Pokyny pro obsluhu a bezpečnostní pokyny
KUCHYNSKÁ VÁHA
Pokyny pre obsluhu a bezpečnostné pokyny
KÜCHENWAAGE
Bedienungs - und Sicherheitshinweise
IAN 93636
GB |
Operation and Safety Notes |
Page |
4 |
PL |
Wskazówki dotyczące obsługi |
|
|
|
i bezpieczeństwa |
Strona |
18 |
HU |
Kezelési és biztonsági utalások |
Oldal |
33 |
SI |
Navodila za upravljanje |
|
|
|
in varnostna opozorila |
Stran |
47 |
CZ |
Pokyny pro obsluhu a |
|
|
|
bezpečnostní pokyny |
Strana |
62 |
SK |
Pokyny pre obsluhu a |
|
|
|
bezpečnostné pokyny |
Strana |
76 |
DE / AT / CH |
Bedienungsund Sicherheitshinweise |
Seite |
90 |

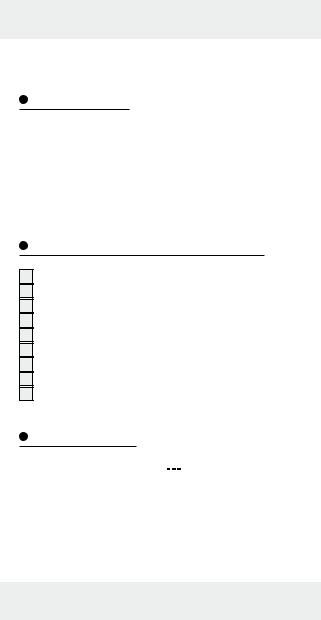
A
1
2
7 |
3 |
6 |
4 |
|
5 |
B
8
9
3

Intended Use....................................................... |
Page |
5 |
Description of parts and features..... |
Page |
5 |
Technical data.................................................... |
Page |
5 |
Scope of delivery............................................ |
Page |
6 |
Safety advice |
|
|
General Safety Instructions....................................... |
Page |
6 |
Safety instructions for batteries................................. |
Page |
8 |
Before use |
|
|
Inserting / replacing the batteries............................. |
Page 10 |
|
Adjusting the time...................................................... |
Page 10 |
|
Setting up the appliance........................................... |
Page 11 |
|
Operation |
|
|
Setting the units of weight and weighing................. |
Page 11 |
|
Tare (TARE function).................................................. |
Page 12 |
|
Removing weighed product...................................... |
Page 13 |
|
Setting the timer......................................................... |
Page 13 |
|
Switching off the weighing function.......................... |
Page 14 |
|
Temperature display.................................................. |
Page 14 |
|
Troubleshooting............................................... |
Page 15 |
|
Cleaning, care and storage.................... |
Page 15 |
|
Disposal................................................................... |
Page 16 |
|
Warranty............................................................... |
Page 16 |
|
4 GB
Kitchen Scale
Intended Use
This product is suitable for weighing and tare weighing of typical domestic quantities of foodstuffs. The digital kitchen scales are used to determine the weight and / or volume of non-aggressive, non-corrosive and non-abrasive liquids or solids. The product is for private use only and is not intended for medical or commercial use.
Description of parts and features
1Suspension bracket
2Balance tray
3ON / OFF button
4T-SET button (timer / adjustment of clock)
5LC display
6▼ UNIT button (adjustment of the measurement unit)
7▲ Z / T button (ZERO / TARE)
8Battery compartment cover
9Battery compartment
Technical data
Power supply: |
2 x 1.5 V |
|
AAA |
|
|||
Temperature display: |
0–40 °C, to an accuracy of ±2 °C |
||
Weighing range: |
0–5000 g, in 1 g intervals |
||
GB 5
Scope of delivery
1 Digital kitchen scale
2 Batteries 1.5 V 

 AAA
AAA
1 Operating manual

 Safety advice
PLEASE RETAIN ALL SAFETY INFORMATION AND INSTRUCTIONS FOR FUTURE REFERENCE!
General Safety Instructions

 RISK OF
FATAL INJURY AND
ACCIDENTS FOR INFANTS AND SMALL CHILDREN! Never leave children unsupervised with the packaging materials. The packaging material presents a danger of suffocation. Children often underestimate dangers. Always keep children away from the packaging material.

 RISK OF FATAL INJURY! Batteries could be swallowed, which could pose a lethal hazard. If a
6 GB
battery has been swallowed, seek medical help immediately.
This appliance can be used by children aged from 8 years and above and persons with reduced physical, sensory or mental capabilities or lack of experience and knowledge if they have been given supervision or instruction concerning use of the appliance in a safe way and understand the hazards involved. Children shall not play with the appliance. Cleaning and user maintenance shall not be made by children without supervision.
5 kg
CAUTION! Do not load the
scales beyond 5 kg. Otherwise the product may be damaged. Protect the product from electrostatic charge / discharge. This could hinder the internal data exchange, which can cause errors in the LC display readout. Check the product for damage before use. Never use a damaged product.
 Never open the housing of the product.
GB 7
This can result in injury and damage to the product. Repairs must only be carried out by a qualified electrician.
Make sure that anyone intending to use the product has read the operating manual and is capable of operating the product safely.
Place the product on a solid, horizontal and flat surface.
Magnetic fields may cause the product to function incorrectly. If this happens, briefly remove the batteries from the product and then re-insert them.
FOOD SAFE! This product has no adverse effect on taste or
smell.
Safety instructions for batteries
Remove the batteries from the device if they have not been used for a long period.
 CAUTION! EXPLOSION HAZARD!
The batteries must never be recharged!
8 GB

When inserting the batteries, ensure the correct polarity! This is shown inside the battery compartment.
If necessary, clean the contacts on the batteries and on the device itself before inserting them.
Remove spent batteries immediately from the device. There is an increased danger of leaks!
Batteries must not be disposed of in the normal domestic waste!
Every consumer is legally obliged to dispose of batteries in the proper manner! Keep batteries away from children; do not throw them in the fire, short-circuit them or take them apart.
If the above instructions are not complied with, the batteries may discharge themselves beyond their minimum voltage. There is then a danger of leaking. If the batteries have leaked inside your appliance, you should remove them immediately in order to prevent damage to the appliance!
GB 9
Avoid contact with the skin, eyes and mucous membranes. Any parts of the body coming into contact with battery acid should be rinsed off with copious amounts of water and / or contact a doctor!
Before use
Inserting / replacing the batteries
Note: Always switch off the appliance before changing the battery.
Remove the battery compartment cover 8 from the back of the appliance.
If necessary, remove the spent batteries.
Insert 2 x 1.5 V  AAA batteries into the battery compartment 9 .
Note: Ensure the correct polarity. This is shown inside the battery compartment.
Close the battery compartment again.
The appliance is now in the time mode, and ready for use.
Adjusting the time
The clock must be adjusted before using for the first time and after the batteries have been changed.
10 GB
As soon as the batteries have been inserted, the hour display begins to flash. To set the hour press the ▲ Z / T button 7 or the ▼ UNIT button 6 .
Press the T-SET button 4 , to go to the minute display. Press the ▲ Z / T button or ▼ UNIT button to set the minutes. Press the T-SET button. The clock is now set.
Note: If you need to reset the time, press and hold the T-SET button until the time display flashes. Proceed as described above.
Setting up the appliance
Place the appliance on a flat, non-slip surface.
Note: Because furniture surfaces are made of a variety of materials and treated with very different products, it cannot be ruled out that some of these materials may contain chemicals that will attack and soften the rubber feet. If necessary, place an anti-slip mat under the feet of the appliance.
Note: Remove the protective film from the balance tray 2 .
Operation
Setting the units of weight and weighing
You can choose between metric and imperial / avoirdupois units of weight. For the range 0 g–999 g, the unit of weight is in g; from 0 oz–15.9 oz, the unit of weight is shown in oz. For the range from 1000 g upwards, the unit of weight is in kg; from 16 oz the unit of weight is shown in lb:oz. Likewise, you can weigh liquids, in which case press the ▼ UNIT button 6 .
GB 11
|
|
|
In the metric system: |
|
|
– Millimetre (ml) water: |
“WATER” is shown in the |
|
|
LC display. |
|
– Millimetre (ml) milk: |
“MILK” is shown in the |
|
|
LC display. |
|
In the imperial / avoirdupois system: |
||
– Fluid ounces (fl. oz) water: |
“WATER” is shown in the |
|
|
LC display. |
|
– Fluid ounces (fl. oz) milk: |
“MILK” is shown in the |
|
|
LC display. |
|
Press the ON / OFF button |
|
. The appliance is now in |
3 |
||
weighing mode. The set unit of weight appears under to the right of the weight in the LC display 5 .
Press and hold the ▼ UNIT button 6 for about 2 seconds to change the unit of weight (g / lb’oz).
The weight “0” is shown in the LC display. Place a suitable bowl or container on the balance tray 2 and press the ▲ Z / T button 7 . Again, the weight “0” is shown in
the LC display. The weight of the bowl / container is not displayed.
Place the product to be weighed in the bowl / container. The weight of the product is shown in the LC display. Note: If no button is pressed for 2 minutes, or the weight is not changed, the readout in the LC display always returns to the time mode.
Tare (TARE function)
You can set the appliance to “0” again, so that you can weigh out another product.
Note: A small circle-symbol appears in the left of the LC display as soon as the appliance is switched on. The display is now in
12 GB
the standard zero-setting. The circle-symbol disappears as soon as the TARE function is used.
To do this press the ▲ Z / T button 7 once. The message “TARE” appears in the LC display 5 . Again, the weight “0” is shown in the LC display.
Place the next product to be weighed in the bowl / container. The weight of the newly added product is shown in the LC display.
Note: You can repeat this process many times. Never place more than 5 kg onto the appliance.
Remove the bowl / container and the weighed product from the balance tray. Press the ▲ Z / T button. Again, the weight “0” is shown in the LC display.
Removing weighed product
Press the ▲ Z / T button 7 . The message “TARE” appears in the LC display 5 . Again, the weight “0” is shown in the LC display.
Remove the desired amount of the weighed product. The weight of the product is shown in the LC display as a negative value.
Note: You can repeat this process many times. Remove the bowl / container and the weighed product from the balance tray. Press the ▲ Z / T button. Again, the weight “0” is shown in the LC display.
Setting the timer
The timer can be used in the clock and weighing modes. Set the timer for a defined time period. A signal sounds at the end of the period. The set time runs as a countdown.
GB 13
Press the T-SET button 4 once in the clock mode or twice in the weighing mode. A bell-symbol appears in the LC display 5 .
Note: You can set the time period precisely to the second. Press and hold the ▲ Z / T button 7 or ▼ UNIT button 6 , so that the time readout in the LC display runs faster.
Press the ▲ Z / T button or ▼ UNIT button to set the time in 10 minute intervals.
Press the T-SET button once. Press the ▲ Z / T button or ▼ UNIT button to set the time in 1 minute intervals. Press the T-SET button once. Press the ▲ Z / T button or ▼ UNIT button to set the time in 10 second intervals. Press the T-SET button once. Press the ▲ Z / T button or ▼ UNIT button in set time in 1 second intervals.
Press the T-SET button to start the countdown.
Note: You can reset the timer. To do this press the T-SET button.
A signal sounds as soon as set time period has elapsed. Press any button to switch off the signal.
Switching off the weighing function
Note: If the appliance has not been used for about 2 minutes, it switches automatically to the time mode.
Press the ON / OFF button 3 to return manually to the time mode.
Temperature display
The temperature is shown in °C in the lower right of the LC display 5 .
14 GB
Troubleshooting
–If the LC display 5 shows “Err”, there is too much weight on the appliance. Remove the excess load. Never place a load of more than 5 kg onto the appliance.
–If the LC display shows “Lo”, the batteries are discharged. Change the batteries.
Note: The message “Lo” only appears in the weighing mode.
–If the LC display shows “UNST”, wait for a few seconds.
–If the appliance does not work as expected, change the batteries.
Note: The device contains delicate electronic components. This means that if it is placed near an object that transmits radio signals, it could cause interference. If the display indicates a problem, move such objects away from it. Electrostatic discharges can lead to malfunctions. In the case of such malfunctions remove the batteries briefly and then insert them again.
Cleaning, care and storage
Note: For storage you can hang the appliance using the hanger 1 (see Fig. A).
Under no circumstances should you use liquids or detergents, as these will damage the appliance.
The appliance should only be cleaned on the outside with a soft, dry and lint-free cloth.
For stubborn dirt use a cloth with soapy water or stainless steel cleaner.
GB 15
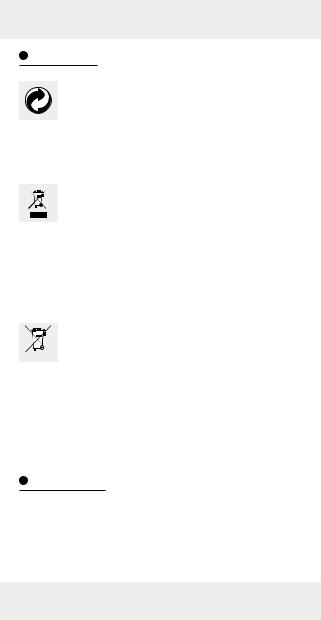
Disposal
The packaging is made entirely of recyclable materials which you can dispose of at your local recycling facilities.
Contact your local waste disposal authority for more details on how to dispose of the product when it is no longer needed.
To help protect the environment, please dispose the product properly, and not in the household waste, when it has reached the end of its useful life. Contact your municipal authorities for information regarding collection points and their opening hours.
Faulty or used batteries must be recycled in accordance with Directive 2006 / 66 / EC. Return batteries and / or the equipment through the collection facilities provided.
Pb
Environmental damage through incorrect disposal of the batteries!
Never dispose of batteries in your household waste. They may contain toxic heavy metals and are subject to hazardous waste regulations. The chemical symbols of the heavy metals are:
Cd = cadmium, Hg = mercury, Pb = lead. Therefore dispose of used batteries through your local collection site.
Warranty
The device has been manufactured to strict quality guidelines and meticulously examined before delivery. In the event of product defects you have legal rights against the retailer of this product. Your legal rights are not limited in any way by our warranty detailed below.
16 GB
The warranty for this device is 3 years from the date of purchase. Should this device show any fault in materials or manufacture within three years from the date of purchase, we will repair or replace it - at our choice - free of charge to you.
The warranty period begins on the date of purchase. Please keep the original sales receipt in a safe location. This document is required as your proof of purchase. This warranty becomes void if the device has been damaged or improperly used or maintained.
The warranty applies to faults in material or manufacture. This warranty does not cover product parts subject to normal wear, thus possibly considered consumables (e.g. batteries) or for damage to fragile parts, e.g. switches, rechargeable batteries or glass parts.
GB 17

|
|
Użytkowanie produktu zgodnie z |
|
przeznaczeniem............................................. |
Strona 19 |
Opis części........................................................... |
Strona 19 |
Dane techniczne............................................. |
Strona 19 |
Zakres dostawy............................................. |
Strona 20 |
Wskazówki dotyczące |
|
bezpieczeństwa |
|
Ogólne wskazówki bezpieczeństwa..................... |
Strona 20 |
Wskazówki bezpieczeństwa dotyczące baterii.... |
Strona 23 |
Przed użyciem |
|
Zakładanie / wymiana baterii................................. |
Strona 25 |
Ustawianie zegara.................................................. |
Strona 25 |
Ustawienie urządzenia........................................... |
Strona 26 |
Obsługa |
|
Ustawienie jednostki wagi i ważenie..................... |
Strona 26 |
Doważanie (funkcja TARA)..................................... |
Strona 27 |
Odejmowanie ważonego artykułu......................... |
Strona 28 |
Ustawianie minutnika.............................................. |
Strona 28 |
Wyłączanie funkcji ważenia.................................. |
Strona 29 |
Wskaźnik temperatury............................................ |
Strona 29 |
Usuwanie błędów........................................ |
Strona 30 |
Czyszczenie, konserwacja, |
|
przechowywanie.......................................... |
Strona 30 |
Utylizacja............................................................. |
Strona 31 |
Gwarancja.......................................................... |
Strona 32 |
18 PL
Waga kuchenna
Użytkowanie produktu zgodnie z przeznaczeniem
Niniejsze urządzenie przeznaczone jest do ważenia oraz doważania normalnych ilości artykułόw żywnościowych. Cyfrowa waga kuchenna służy do określenia wagi nieagresywnych, nie żrących oraz nie zawierających substancji ściernych cieczy lub ciał stałych. Produkt przeznaczony jest jedynie do użytku domowego, nie do użytku medycznego lub handlowego.
Opis części
1Wieszak
2Tacka
3Przycisk ON- / OFF (WŁĄCZ / WYŁĄCZ)
4Przycisk T-SET (licznik / ustawienie zegara)
5Wyświetlacz LCD
6▼ Przycisk UNIT (ustawienie jednostki ważenia)
7▲ Przycisk Z / T (ZERO / TARA)
8Pokrywa komory na baterie
9Komora na baterie
Dane techniczne
Zasilanie: |
2 x 1,5 V |
|
AAA |
|
|||
Wskaźnik temperatury: |
0–40 °C, z tolerancją ±2 °C |
||
Zakres ważenia: |
0–5000 g, w etapach 1 g |
||
PL 19
Zakres dostawy
1 Cyfrowa waga kuchenna
2 Baterie 1,5 V 

 AAA
AAA
1 Instrukcja obsługi
Wskazówki dotyczące bezpieczeństwa
NALEŻY ZACHOWAĆ WSZYSTKIE WSKAZÓWKI DOTYCZĄCE BEZPIECZEŃSTWA ORAZ INSTRUKCJE!
Ogólne wskazówki bezpieczeństwa


 NIEBEZPIECZEŃSTWO UTRATY ŻYCIA LUB ODNIESIENIA OBRAŻEŃ
PRZEZ DZIECI! Nigdy nie pozostawiaj dzieci bez nadzoru z materiałem opakowania. Zachodzi niebezpieczeństwo uduszenia się materiałem opakowaniowym. Dzieci często nie doceniają zagrożenia. Trzymać dzieci z dala od materiału opakowaniowego.
20 PL
NIEBEZPIECZEŃSTWO UTRATY ŻYCIA! Baterie mogą zostać połknięte, co stwarza zagrożenie dla życia. W przypadku połknięcia baterii należy natychmiast skorzystać z pomocy lekarskiej. Niniejsze urządzenie może być używane przez dzieci od lat 8 oraz przez osoby z obniżonymi zdolnościami fizycznymi, sensorycznymi lub mentalnymi lub brakiem doświadczenia i/lub wiedzy, jeśli pozostają pod nadzorem lub zostały pouczone w kwestii bezpiecznego użycia urządzenia i rozumieją wynikające z niego zagrożenia. Dzieci nie mogą bawić się urządzeniem. Czyszczenie i konserwacja przez użytkownika nie mogą być bez nadzoru przeprowadzane przez dzieci.
5 kg
UWAGA! Nie należy dopro-
wadzać do przeciążenia wagi powyżej 5 kg. Produkt mógłby zostać uszkodzony.
Produkt należy chronić przed ładowaniem / rozładowaniem
PL 21

elektrostatycznym. Mogą one spowodować utrudnienie w wewnętrznej wymianie danych, co może wywołać błąd w wyświetlaczu LCD.
Przed użyciem należy skontrolować czy produkt nie jest uszkodzony. Nie należy uruchamiać uszkodzonego produktu.

 Nie należy nigdy otwierać obudowy produktu. Następstwem tego mogą być urazy i uszkodzenie produktu. Naprawy powinny być przeprowadzane wyłącznie przez wykwalifikowanego elektryka.
Należy się upewnić, że każdy, kto używa produktu, zapoznał się z instrukcją obsługi i jest w stanie go bezpiecznie obsługiwać.
Produkt należy umieścić na stabilnym, poziomym i płaskim podłożu. Poszczegόlne funkcje produktu mogą zostać zakłόcone przez występowanie pola magnetycznego. W takim przypadku należy na krόtko wyjąć baterie z produktu i ponownie je włożyć.
22 PL
NADAJE SIĘ DO ŚRODKÓW SPOŻYWCZYCH!
Produkt nie wpływa ujemnie na właściwości smakowe i zapachowe.
Wskazówki bezpieczeństwa dotyczące baterii
Jeżeli baterie nie były używane przez dłuższy czas, należy je usunąć z urządzenia.
 UWAGA! NIEBEZPIECZEŃSTWO WYBUCHU! Nigdy nie należy ponownie ładować baterii!
Umieszczając baterie w urządzeniu należy zwrócić uwagę na odpowiednie ułożenie biegunów! Jest ono pokazane w komorze na baterie.
W razie potrzeby przed założeniem oczyścić styki baterii i urządzenia.
Zużyte baterie należy niezwłocznie wyjąć z urządzenia. W przeciwnym razie zwiększa się ryzyko wycieku elektrolitu! Nie wyrzucać zużytych baterii razem z odpadami domowymi!
PL 23

Każdy użytkownik jest ustawowo zobowiązany do prawidłowego usuwania baterii do odpadów!
Baterie należy przechowywać w miejscu niedostępnym dla dzieci, nie należy wrzucać ich do ognia, rozbierać na części lub powodować zwarcia.
W przypadku nieprzestrzegania wskazówek baterie mogą zostać rozładowane poza ich napięcie końcowe. Istnieje wówczas niebezpieczeństwo wycieku. W przypadku wystąpienia wycieku z baterii znajdujących się w urządzeniu należy je natychmiast wyjąć, aby zapobiec uszkodzeniu urządzenia! Unikać kontaktu ze skórą, oczami i błonami śluzowymi. W razie kontaktu z elektrolitem przemyć dane miejsce dużą ilością wody i / lub zasięgnąć porady lekarza!
24 PL
Przed użyciem
Zakładanie / wymiana baterii
Hinweis: Przed wymianą baterii należy uważać, aby urządzenie było wyłączone.
Zdjąć pokrywę komory na baterie 8 na odwrotnej stronie produktu.
W razie potrzeby należy wyjąć zużyte baterie.
Włożyć baterie 2 x 1,5 V 

 AAA do komory na baterie 9 . Wskazówka: Zwrócić uwagę na odpowiednie ułożenie biegunów. Jest ono pokazane w komorze na baterie.
Ponownie zamknąć komorę na baterie.
Urządzenie znajduje się w trybie zegara i jest gotowe do użycia.
Ustawianie zegara
Przed pierwszym użyciem i po wymianie baterii należy ustawić aktualny czas.
Po włożeniu baterii zacznie migać wskaźnik godziny. Należy nacisnąć przycisk ▲ Z / T 7 lub ▼ UNIT 6 , aby ustawić godzinę.
Należy nacisnąć przycisk T-SET 4 , aby przejść do wskaźnika minut.
Należy nacisnąć przycisk ▲ Z / T lub przycisk ▼ UNIT, aby ustawić minuty.
Nacisnąć przycisk T-SET. Zegar został ustawiony. Wskazówka: Jeśli zegar jest ustawiany ponownie, należy nacisnąć i przytrzymać przycisk T-SET, dopóki nie zacznie migać wskaźnik godziny. Należy postępować zgodnie z wcześniej opisanymi wskazówkami.
PL 25

Ustawienie urządzenia
Urządzenie należy ustawić na płaskiej, antypośligowej powierzchni.
Wskazówka: Ponieważ powierzchnie mebli złożone są z różnych materiałów i pielęgnowane są za pomocą najróżniejszych środków, nie można całkowicie wykluczyć, że niektóre z tych materiałów zawierać mogą składniki, które naruszają i zmiękczają gumowe podstawki. W razie potrzeby pod podstawę urządzenia podłożyć antypoślizgową podkładkę.
Wskazówka: Usunąć folię ochronną z tacki 2 .
Obsługa
Ustawienie jednostki wagi i ważenie
Można dokonać wyboru między metrycznym a angloamerykańskim systemem miar. W zakresie 0 g–999 g jednostka wagi pokazywana jest w g, a od 0 oz–15,9 oz w oz. W zakresie od 1000 g jednostka wagi pokazywana jest w kg, od 16 oz w lb:oz. W ten sam sposób można ważyć ciecze, naciskając przycisk ▼ UNIT 6 .
W systemie metrycznym: |
|
– Mililitr (ml) wody: |
Na wyświetlaczu LCD |
|
pokazuje się „WATER”. |
– Mililitr (ml) mleka: |
Na wyświetlaczu LCD |
|
pokazuje się „MILK”. |
W systemie angloamerykańskim: |
|
– Uncja cieczy (fl ´oz) woda: |
Na wyświetlaczu LCD |
|
pokazuje się „WATER”. |
– Uncja cieczy (fl ´oz) mleko: |
Na wyświetlaczu LCD |
|
pokazuje się „MILK”. |
26 PL
Nacisnąć przycisk ON- / OFF 3 . Urządzenie znajduje się w trybie ważenia. Ustawiona jednostka wagi pokazywana jest na dole lub po prawej stronie obok wskaźnika wagi na wyświetlaczu LCD 5 .
Aby zmienić jednostkę wagi (g / lb‘oz), należy nacisnąć i przytrzymać przycisk ▼ UNIT 6 przez ok. 2 sekundy. Na wyświetlaczu LCD wskazywany jest ciężar „0”. Należy postawić odpowiednie naczynie / pojemnik na tackę 2
i nacisnąć przycisk ▲ Z / T 7 . Na wyświetlaczu LCD pokazywany jest ciężar „0”. Ciężar naczynia / pojemnika nie jest pokazywany.
Należy położyć produkt do zważenia do naczynia / pojemnika. Na wyświetlaczu LCD wskazywany jest ciężar ważonego produktu.
Wskazówka: Wskaźnik wyświetlacza LCD ponownie wraca do trybu zegara, jeśli po ok. 2 minutach nie zostanie naciśnięty żaden przycisk lub nie zmieni się aktualnie ważony ciężar.
Doważanie (funkcja TARA)
Urządzenie można ponownie ustawić na „0”, aby zważyć kolejny produkt.
Wskazówka: Na wyświetlaczu LCD po lewej stronie pojawia się symbol koła zaraz po włączeniu urządzenia. Wskaźnik znajduje się w standardowej pozycji zerowej. Symbol koła znika przy użyciu funkcji TARA.
Do tego należy nacisnąć jednokrotnie przycisk ▲ Z / T 7 . Na wyświetlaczu LCD 5 pokazuje się wskaźnik „TARE”. Na wyświetlaczu LCD ponownie pokazywany jest ciężar „0”. Należy położyć kolejny produkt do zważenia do naczynia / pojemnika. Na wyświetlaczu LCD wskazywany jest ciężar nowego dołożonego ważonego produktu.
PL 27
Wskazówka: Proces można wielokrotnie powtarzać. Na urządzenie nie należy jednak kłaść więcej niż 5 kg. Należy zdjąć naczynie / pojemnik i ważony produkt z powierzchni ważenia. Nacisnąć przycisk ▲ Z / T. Na wyświetlaczu LCD ponownie pokazywany jest ciężar „0”.
Odejmowanie ważonego artykułu
Nacisnąć przycisk ▲ Z / T 7 . Na wyświetlaczu LCD 5 pokazuje się wskaźnik „TARE”. Na wyświetlaczu LCD ponownie pokazywany jest ciężar „0”.
Należy odjąć wymaganą ilość ważonego artykułu. Ciężar odjętego ważonego artykułu pojawi się na wyświetlaczu LCD jako wartość negatywna.
Wskazówka: Proces można wielokrotnie powtarzać. Należy zdjąć naczynie / pojemnik i ważony artykuł z powierzchni ważenia. Nacisnąć przycisk ▲ Z / T. Na wyświetlaczu LCD ponownie pokazywany jest ciężar „0”.
Ustawianie minutnika
Minutnik może być używany w trybie zegara i ważenia. Za pomocą minutnika ustawia się określony zakres czasu. Na koniec danego zakresu czasu występuje sygnał dźwiękowy. Ustawiony czas przebiega na zasadzie odliczania.
Nacisnąć jednokrotnie przycisk T-SET 4 w trybie zegara
lub dwukrotnie w trybie ważenia. Na wyświetlaczu LCD 5 pojawia się symbol dzwonka.
Wskazówka: Można ustawić dokładnie zakres czasu co do sekundy. Nacisnąć i przytrzymać przycisk ▲ Z / T 7 lub ▼ UNIT 6 , aby wzskaźnik czasu na wyświetlaczu przebiegał szybciej.
28 PL
Należy nacisnąć przycisk ▲ Z / T lub ▼ UNIT, aby ustawić czas w 10-minutowych etapach.
Jednokrotnie nacisnąć przycisk T-SET. Należy nacisnąć przycisk ▲ Z / T lub ▼ UNIT, aby ustawić czas w 1-minuto- wych etapach.
Jednokrotnie nacisnąć przycisk T-SET. Należy nacisnąć przycisk ▲ Z / T lub ▼ UNIT, aby ustawić czas w 10-sekundo- wych etapach.
Jednokrotnie nacisnąć przycisk T-SET. Należy nacisnąć przycisk ▲ Z / T lub ▼ UNIT, aby ustawić czas w 1-sekundo- wych etapach.
Należy nacisnąć przycisk T-SET, aby rozpocząć odliczanie. Wskazówka: Można cofnąć minutnik. Do tego należy nacisnąć przycisk T-SET.
Jeśli ustawiony zakres czasu minie, rozlegnie się sygnał dźwiękowy. Sygnał dźwiękowy można wyłączyć naciskając dowolny przycisk.
Wyłączanie funkcji ważenia
Wskazówka: Urządzenie przełącza się automatycznie na tryb zegara, jeśli nie jest używane przez ok. 2 minuty.
Nacisnąć przycisk ON- / OFF 3 , aby ręcznie wrócić do trybu zegara.
Wskaźnik temperatury
Temperatura pokazywana jest na dole po prawej stronie na wyświetlaczu LCD 5 w °C.
PL 29
Usuwanie błędów
–Jeśli wyświetlacz LCD 5 wskazuje „Err”, urządzenie jest przeciążone. Należy usunąć przeciążenie. Nie należy przeciążać urządzenia więcej niż 5 kg.
–Jeśli wyświetlacz LCD wskazuje „Lo”, baterie są rozładowane. Należy wymienić baterie.
Wskazówka: Wskaźnik „Lo” pojawia się tylko w trybie ważenia.
–Jeśli na wyświetlaczu LCD pokazuje się „UNST”, należy poczekać kilka sekund.
–Jeśli urządzenie nie funkcjonuje zgodnie z oczekiwaniami, należy wymienić baterie.
Wskazówka: Urządzenie zawiera wrażliwe podzespoły elektroniczne. Z tego względu znajdujące się w pobliżu urządzenia emitujące fale radiowe mogą powodować zakłócenie jego działania. W przypadku pojawienia się błędnych wskazań na wyświetlaczu należy usunąć takie urządzenia z otoczenia budzika. Wyładowania elektrostatyczne mogą powodować zakłócenia w działaniu urządzenia. W razie pojawienia się takich zakłóceń należy wyjąć baterie i po chwili włożyć je ponownie.
Czyszczenie, konserwacja, przechowywanie
Wskazówka: W celu przechowywania można powiesić urządzenie za pomocą wieszaka 1 (patrz rys. A).
W żadnym wypadku nie używać cieczy oraz rozpuszczalników, ponieważ powodują one uszkodzenia. Czyścić urządzenie wyłącznie z zewnątrz przy użyciu miękkiej, suchej i niestrzępiącej się ściereczki.
Przy mocniejszym zanieczyszczeniu należy użyć ściereczki i wody z mydłem lub środka do czyszczenia stali.
30 PL
 Loading...