


Owner’s Manual
Thank you, and congratulations on your choice of the Roland RT-10 series.
Before using this unit, carefully read the sections entitled: “USING THE UNIT SAFELY” and “IMPORTANT NOTES” (p. 2; p. 3). These sections provide important information concerning the proper operation of the unit. Additionally, in order to feel assured that you have gained a good grasp of every feature provided by your new unit, Owner’s manual should be read in its entirety. The manual should be saved and kept on hand as a convenient reference.


 /
/


VERY IMPORTANT!!!
•Mounting The Drum Trigger Correctly (p. 6)
•Setting Trigger Parameters in a Percussion Sound Module (p. 14)
Copyright © 2006 ROLAND CORPORATION
All rights reserved. No part of this publication may be reproduced in any form without the written permission of ROLAND CORPORATION.
04232178 |
’06-4-2N |
* 0 4 2 3 2 1 7 8 - 0 2 * |
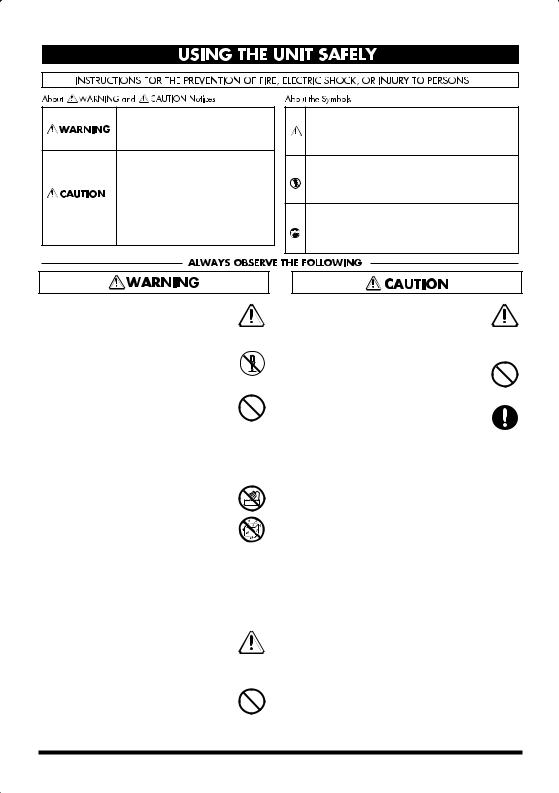
Used for instructions intended to alert the user to the risk of death or severe injury should the unit be used improperly.
Used for instructions intended to alert the user to the risk of injury or material damage should the unit be used improperly.
* Material damage refers to damage or other adverse effects caused with respect to the home and all its furnishings, as well to domestic animals or pets.
•Before using this unit, make sure to read the instructions below, and the Owner’s Manual.
..................................................................................................
• Do not open or perform any internal modifications on the unit.
..................................................................................................
•Do not attempt to repair the unit, or replace parts within it (except when this manual provides specific instructions directing you
to do so). Refer all servicing to your retailer, the nearest Roland Service Center, or an authorized Roland distributor, as listed on the “Information” page.
..................................................................................................
• Never use or store the unit in places that are:
• Subject to temperature extremes (e.g., direct sunlight in an enclosed vehicle, near a heating duct, on top of heat-gener- ating equipment); or are
•Damp (e.g., baths, washrooms, on wet floors); or are
•Humid; or are
•Exposed to rain; or are
•Dusty; or are
•Subject to high levels of vibration.
..................................................................................................
•In households with small children, an adult should provide supervision until the child is capable of following all the rules essential for the safe operation of the unit.
..................................................................................................
• Do not drop it!
The symbol alerts the user to important instructions or warnings.The specific meaning of the symbol is determined by the design contained within the triangle. In the case of the symbol at left, it is used for general cautions, warnings, or alerts to danger.
The  symbol alerts the user to items that must never be carried out (are forbidden). The specific thing that must not be done is indicated by the design contained within the circle. In the case of the symbol at left, it means that the unit must never be disassembled.
The ● symbol alerts the user to things that must be carried out. The specific thing that must be done is indicated by the design contained within the circle. In the case of the symbol at left, it means that the powercord plug must be unplugged from the outlet.
•Try to prevent cords and cables from becoming entangled. Also, all cords and cables should be placed so they are out of
the reach of children.
..................................................................................................
•Never climb on top of, nor place heavy objects on the unit.
..................................................................................................
•Should you remove the hoop guard and the sensor bolt/nut, keep them in a safe place out of children’s reach, so there is no chance of them being swallowed accidentally.
2


 IMPORTANT NOTES
291a
In addition to the items listed under “USING THE UNIT SAFELY” on page 2, please read and observe the following:
Placement
354a
•Do not expose the unit to direct sunlight, place it near devices that radiate heat, leave it inside an enclosed vehicle, or otherwise subject it to temperature extremes. Excessive heat can deform or discolor the unit.
Maintenance
401a
•For everyday cleaning wipe the unit with a soft, dry cloth or one that has been slightly dampened with water. To remove stubborn dirt, use a cloth impregnated with a mild, non-abrasive detergent. Afterwards, be sure to wipe
the unit thoroughly with a soft, dry cloth.
402
•Never use benzine, thinners, alcohol or solvents of any kind, to avoid the possibility of discoloration and/or deformation.
Additional Precautions
553
• Use a reasonable amount of care when using the unit’s buttons, sliders, or other controls; and when using its jacks and connectors. Rough handling can lead to malfunctions.
556
• When connecting / disconnecting all cables, grasp the connector itself—never pull on the cable. This way you will avoid causing shorts, or damage to the cable’s internal elements.
558b
• To avoid disturbing your neighbors, try to keep the unit’s volume at reasonable levels (especially when it is late at night).
988
• Security Slot ( )
http://www.kensington.com/
3


 Before You Start
Contents of the Package
•Drum trigger
•Connection cable
•Owner’s Manual (this manual)
•Two hoop guards (RT-10K only)
Features
•Works perfectly with Roland V-Drums Modules
•High-Accuracy Sensor for Perfect Triggering
•Dual Trigger for Head & Rim (only RT-10S Snare Trigger)
•Mounts Easily and Quickly on Hoop
•Adjustable-Sensor System for Hoop Height
•Compatible with Various Size of Acoustic Drums
Parts Descriptions
fig.RT-10K-e
RT-10K |
RT-10S / RT-10T |
Sensor Bolt |
Sensor Bolt |
|
|
|
Output Jack |
Head Sensor
Mounting Screw
Head Sensor
Rim Sensor
(RT-10S Only)
Output Jack
Mounting Screw
*Do not place excessive pressure on the sensor and do not leave it mounted for extended periods (for example when not in use) or with pressure exerted from an angle. Following these instructions will guarantee efficient triggering and prevent damage.
4

Before You Start
Drum Triggers-Definition
A drum trigger uses a built-in sensor to sense the timing and velocity (force) of how the drum is played. Then these trigger signals and transmitted to the sound module.
|
|
Percussion Sound Module |
Vibration |
|
Trigger Signal |
|
Audio
Trigger MIDI Converter
MIDI
The RT-10K Kick Trigger and RT-10T tom trigger support head triggering.
The RT-10S Snare Trigger supports separate head/rim dual triggering.
Setting Up
1.Mount the drum trigger (p. 6).
2.Then connect it to percussion sound module (p. 8).
3.Set the trigger type and various parameters in the percussion sound module (p. 14).
4.If needed, fine-tune the trigger parameters while checking the response of the trigger (p. 14).
Connection Example
fig.Setting
5

 Mounting The Drum Trigger
Important Things To Know
•Set up your drums, making sure that any trigger-mounted drum is NOT in contact with another drum or stand. Vibrations transmitted from such direct contact can cause unwanted triggering.
•Make sure the snare drum is secure in its stand.
•Muffling (muting) of the drums can help reduce excess vibrations of the drum trigger, which will improve triggering accuracy.
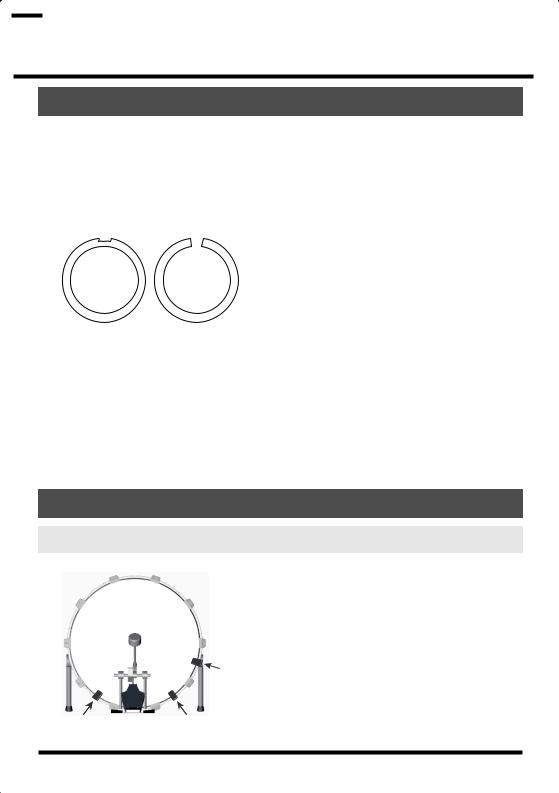
We recommend using a conventional bass drum mute or blanket pressing against the head. For the snare drum, use a ring muffler with the area where the sensor touches the head cut out as shown in the diagram below.
•Correct setting of the percussion sound module’s trigger parameters will ensure the best dynamic response.
•Vibrations from other drums being played or drum resonance can cause sounds to be triggered accidently. Spacing the drums a bit farther apart, placing them on separate stands, muffling, and/ or changing the tuning can improve trigger response.
If after doing any of those suggested procedures you still have problems, re-adjust the trigger parameters (p. 14).
•Loud sounds from monitor speakers can also cause unwanted triggering. Change the angle of the speakers or move them further away from the drum kit. If unwanted triggering continues, readjust the trigger parameters (p. 14).
Attaching the Drum Trigger
RT-10K Kick Trigger
6
 Loading...