


 Loading...
Philips MG3711, MG3712, MG3720, MG3721, MG3722 User Manual [ru]
...MG3710
MG3711
MG3712
MG3720
MG3721
MG3722
MG3730
MG3731
MG3740
MG3747
MG3748
MG3757
MG3758


1
9MM 12MM 16MM
1
6 |
7 |
8 |
1MM 2MM 3MM 5MM 3-7MM
2
9 |
10 |
11 |
12 |
13 |
3 
15
BODY 3MM
14 
 16
16 
4
17
18
5

empty page before TOC

English 6 Čeština 20 Eesti 34 Hrvatski 48 Latviešu 62 Lietuviškai 77 Magyar 91 Polski 106 Română 123 Shqip 138 Slovenščina 152 Slovensky 166 Srpski 182
Български 196 Македонски 212 Русский 227 Українська 242
Қазақша 257

6 English
Introduction
Congratulations on your purchase and welcome to Philips! To fully benefit from the support that Philips offers, register your product at www.philips.com/welcome.
General description (Fig. 1)
1Nose trimmer (MG3710, MG3711, MG3712, MG3721, MG3720, MG3730, MG3731, MG3740, MG3747, MG3748, MG3757 only)
2Precision trimmer (MG3740, MG3757 only)
3Full-size hair trimmer
4On/off slide
5Socket for small plug
6Hair comb (9mm) (MG3720, MG3721, MG3730, MG3731, MG3740, MG3747, MG3748, MG3757 only)
7Hair comb (12mm) (MG3730, MG3740, MG3747, MG3757, MG3731, MG3748 only)
8Hair comb (16mm) (MG3730, MG3740, MG3747, MG3757, MG3731, MG3748 only)
9Stubble comb (1mm) (MG3710, MG3711, MG3712, MG3720, MG3721, MG3730, MG3731, MG3740, MG3747, MG3748, MG3757 only)
10Stubble comb (2mm) (MG3710, MG3711, MG3720, MG3721, MG3730, MG3731, MG3740, MG3747, MG3748, MG3757 only)
11Stubble comb 3mm (MG3710, MG3711, MG3712, MG3720, MG3721 only)
12Stubble comb 5mm (MG3710, MG3711, MG3712, MG3720, MG3721 only)
13Adjustable comb (3-7mm) (MG3730, MG3731, MG3740, MG3747, MG3748, MG3757 only)
14Body comb (3mm) (MG3747, MG3748 only)
15Supply unit
16Small plug
17Storage display (MG3711, MG3712, MG3721, MG3731, MG3748 only)
English

English 7
18 Cleaning brush
The accessories supplied may vary for different products. The box shows the accessories that have been supplied with your appliance.
Important safety information
Read this important information carefully before you use the appliance and its accessories and save it for future reference. The accessories supplied may vary for different products.
Danger
- Keep the supply unit dry.
Warning
-To charge the battery, only use the detachable supply unit (A00390) provided with the appliance.
-The supply unit contains a transformer. Do not cut off the supply unit to replace it with another plug, as this causes a hazardous situation.

8 English
-This appliance can be used by children aged from 8 years and above and persons with reduced physical, sensory or mental capabilities or lack of experience and knowledge if they have been given supervision or instruction concerning use of the appliance in a safe way and understand the hazards involved. Children shall not play with the appliance. Cleaning and user maintenance shall not be made by children without supervision.
-Always check the appliance before you use it. Do not use the appliance if it is damaged, as this may cause injury. Always replace a damaged part with one of the original type.
-Do not open the appliance to replace the rechargeable battery.
Caution
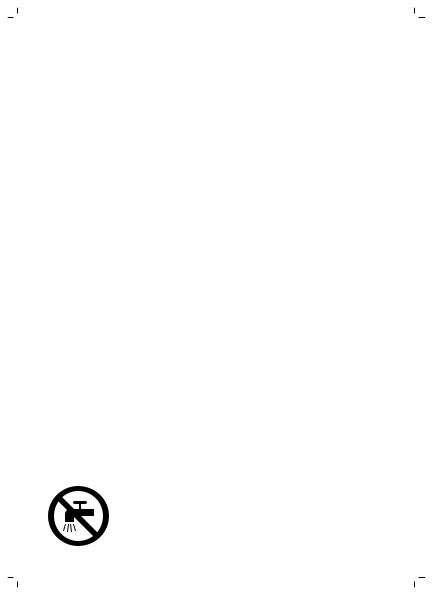
-This appliance is not washable. Never immerse the appliance in water and do not rinse it under the tap.

English 9
-Only use this appliance for its intended purpose as shown in the user manual.
-For hygienic reasons, the appliance should only be used by one person.
-Never use compressed air, scouring pads, abrasive cleaning agents or aggressive liquids such as petrol or acetone to clean the appliance.
-Do not use the supply unit in or near wall sockets that contain an electric air freshener to prevent irreparable damage to the supply unit.
Electromagnetic fields (EMF)
This Philips appliance complies with all applicable standards and regulations regarding exposure to electromagnetic fields.
General
-The supply unit is suitable for mains voltages ranging from 100 to 240 volts.
-The supply unit transforms 100-240 volts to a safe low voltage of less than 24 volts.
-Maximum noise level: Lc = 75 dB(A).
Charging
When the appliance has charged for 16 hour, it has a cordless operating time of up to 60 minutes (MG3710, MG3711, MG3712, MG3720, MG3721, MG3730, MG3731, MG3740) or 70 minutes (MG3757, MG3748, MG3747).
10 English
1Make sure the appliance is switched off.
2Insert the small plug into the appliance and put
the supply unit in the wall socket.
3 After charging, remove the supply unit from the wall outlet and pull the small plug out of the appliance.
Using the appliance
Note: Switch off and clean the appliance after each use.
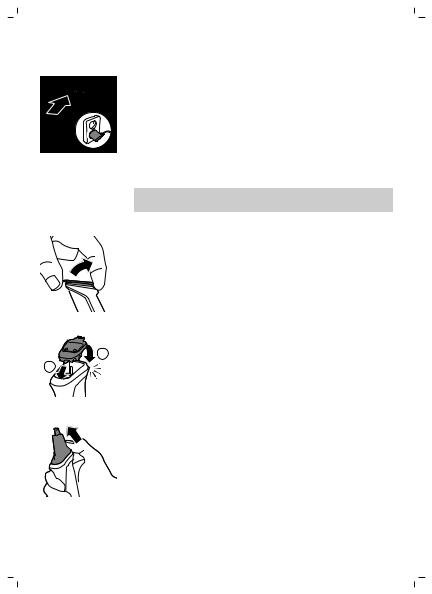
Detaching and attaching cutting elements
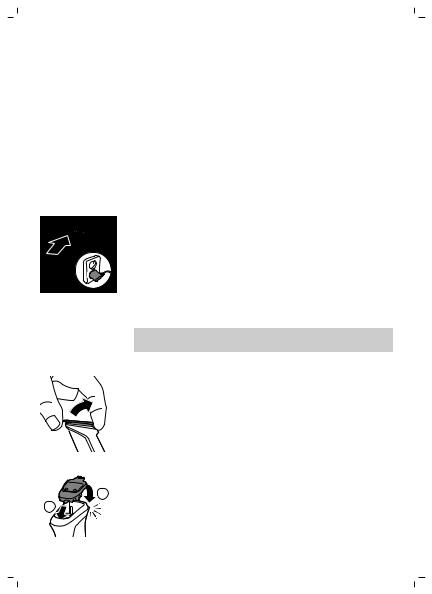
1 To detach a cutting element, push upwards against the teeth of the cutting element and take it off the handle.
|
2 To attach a cutting element, insert the lug of the |
|
cutting element into the guiding slot at the front |
2 |
and push the back of the cutting element onto |
1 |
the appliance ('click'). |
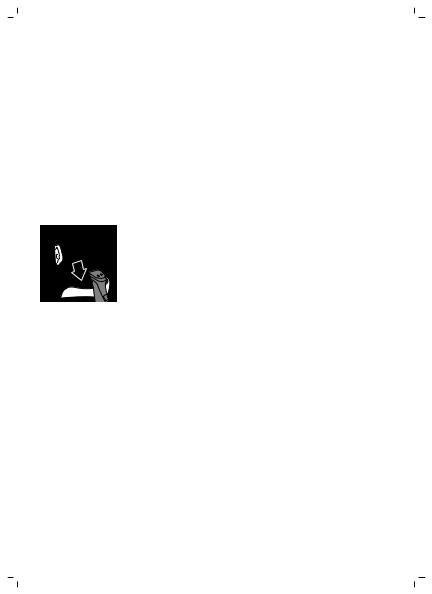
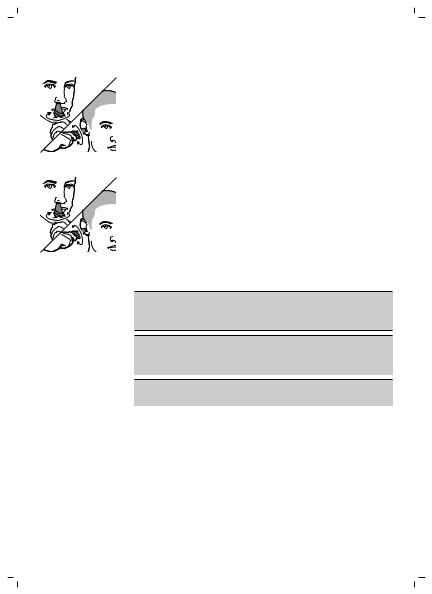
Detaching the nose trimmer
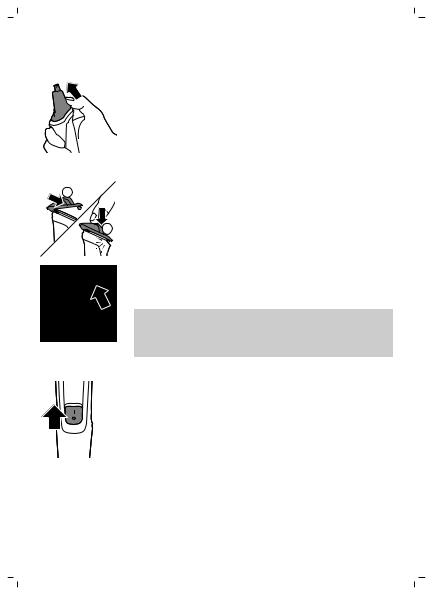
1 Place your finger on the arrow at the back of the attachment and push it off the handle in the direction of the arrow.
English |
11 |
Attaching and detaching combs
1 |
1 |
To attach any type of guard onto a cutting |
|
element, slide the front part of the guard onto |
|
|
|
|
|
|
the teeth of the cutting element. Then push |
|
2 |
down the center of the guard with your fingers |
|
|
or the palm of your hand ('click'). |
|
2 |
To detach any type of comb from the cutting |
|
|
element, carefully pull its back part off the |
|
|
appliance and then slide it off the cutting |
|
|
element. |
|
|
Note: When trimming for the first time, start by |
|
|
using the comb with the maximum trimming |
|
|
length setting to familiarize yourself with the |
|
|
appliance. |
Switching the appliance on and off
To switch on the appliance, slide the on/off button up.
To switch off the appliance, slide the on/off button down.
Attachments for use on beard
Full-size hair trimmer
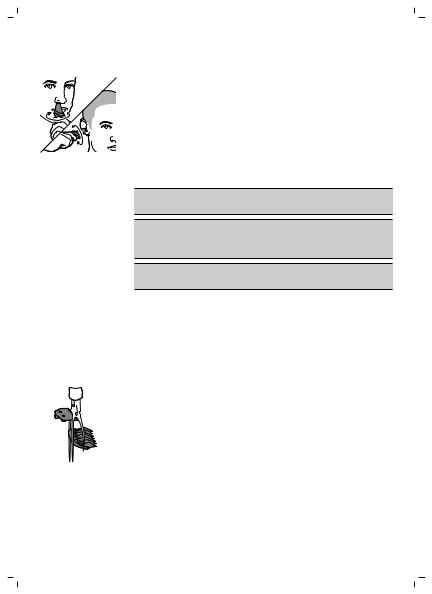
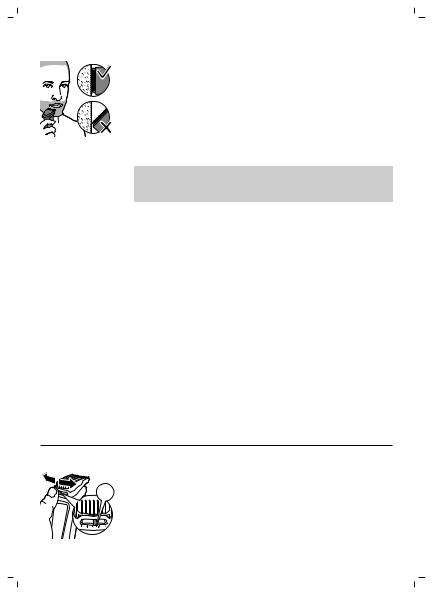
Use the full-size hair trimmer without a comb to trim hair close to the skin (to a length of 1/32in (0.5mm) or to create clean lines around your beard, neck and sideburns.
1 To trim hair close to the skin, place the flat side of the cutting element against your skin and make strokes against the direction of hair growth.
12 English
2For contouring, hold the cutting element perpendicular to the skin and move it upwards or downwards with gentle pressure.
Beard combs
Note: The accessories supplied may vary for different products. The box shows the accessories that have been supplied with your appliance.
The appliance comes with multiple stubble combs and an adjustable comb. The hair length settings are indicated on the combs. The settings correspond to the remaining hair length after trimming.
Comb |
mm |
|
|
Stubble comb |
1mm |
|
|
Stubble comb |
2mm |
|
|
Stubble comb |
3mm |
|
|
Stubble comb |
5mm |
|
|
Adjustable comb |
3-7mm |
1 Attach the comb to the full-size hair trimmer.
= MM
2Adjustable comb: Push the length selector to the left or right to select the desired hair length setting.
3To trim the most effective way, move the comb against the direction of hair growth. Make sure the surface of the comb always stays in contact with the skin.

English 13
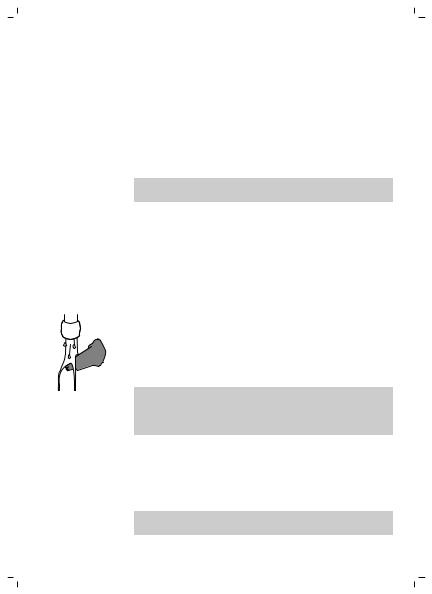
Attachments for use on body
-Use the green body guard to trim body hair.
-Make sure hair is clean and dry as wet hair tends to stick to the body and, when trimming sensitive areas, always use a body guard.
-Since all hairs do not grow in the same direction, you may want to try different trimming positions (i.e. upwards, downwards, or across). Practice is best for optimum results.
-Always make smooth and gentle movements and be sure the surface of the guard always stays in contact with your skin.
-When too many hairs have accumulated on the product, blow the hairs out before use, for best trimming results.
Body comb
Attach the body comb to the full-size hair trimmer to trim hairs below the neckline. The appliance comes with 1 body comb. The hair length settings is indicated on the comb. The setting corresponds to the remaining hair length after trimming.
Comb |
mm |
|
|
Body comb (green) |
3mm |
1Attach the body comb to the full-size hair trimmer.
2 To trim in the most effective way, stretch the skin with your free hand and move the comb against the direction of hair growth. Make sure the surface of the comb always stays in contact with the skin.
14 English
Attachments for use on head
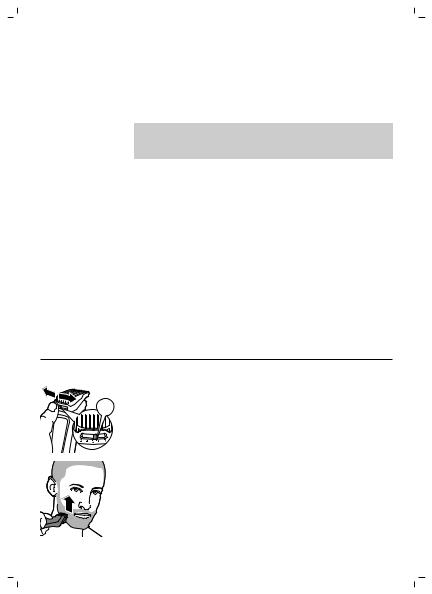
Full-size hair trimmer
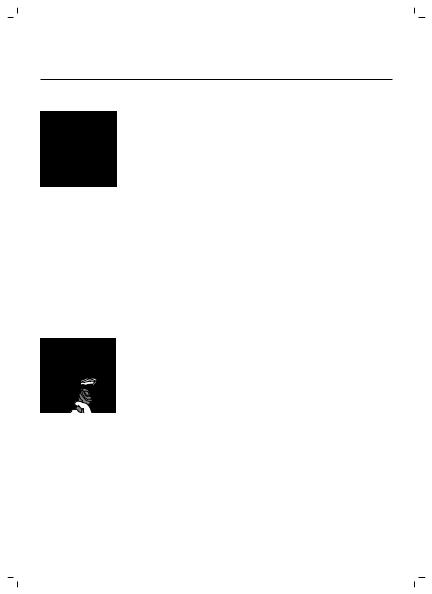
Use the full-size hair trimmer without a comb to clip the hair on your head very close to the skin (1/32in (0.5mm) or to contour the neckline and area around the ears.
1 To contour the hairline around the ears, comb the hair ends over the ears.
2 Tilt the appliance in such a way that only one edge of the cutter blades touches the hair ends when you shape the contours around the ears.
3 To contour the nape of the neck or sideburns,
turn the appliance and make downward
strokes.
4 Move the appliance slowly and smoothly following the natural hairline.
|
Hair combs |
|
Attach a hair comb to the full-size hair trimmer to |
|
evenly trim the hairs on your head. The appliance |
|
comes with 3 hair combs. The hair length settings |
|
are indicated on the combs. The settings |
|
correspond to the remaining hair length after |
|
trimming. |
Comb |
mm |
|
|
Hair comb |
9mm |
|
|
Hair comb |
12mm |
|
|
Hair comb |
16mm |
|
|
|
1 Attach a comb to the full-size hair trimmer. |
English 15
2Move the trimmer slowly over the crown from different directions to achieve an even result.
Make sure the surface of the comb always stays in contact with the skin.
- Always move the trimmer against the direction of hair growth. Press lightly.
-Make overlapping passes over the head to ensure that all hair that should be cut has been cut.
Precision attachments for use on face
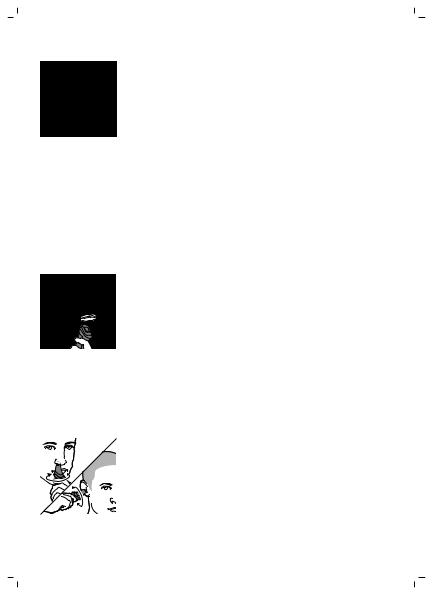
Precision trimmer
Use the precision trimmer to create fine lines and contours around your facial style, close to the skin (to a length of 1/32in./0.5mm).
1 Hold the precision trimming head perpendicular to the skin and move the trimming head
upwards or downwards with gentle pressure.
Nose trimmer
Use the nose trimmer to trim your nose hair and ear hair.
-Make sure nasal passages are clean. Make sure outer ear channels are clean and free from wax.
-Do not insert the tip more than 5mm.
-Always clean the attachment after each use.
Trimming nose hair
1 Gently move the tip in and out of nose while turning it around to remove unwanted hairs.
16 English
Trimming ear hair
1 Slowly move the tip round the ear to remove hairs that stick out beyond the rim of the ear.
2 Gently move the tip in and out of the outer ear channel to remove unwanted hairs.
Cleaning
Do not rinse the handle under the tap, only the attachments can be rinsed under the tap.
Never use scouring pads, abrasive cleaning agents or aggressive liquids such as gasoline or acetone to clean the product.
Never dry the trimmer teeth with a towel or tissue, as this may damage the trimmer teeth.
After every use: cleaning under the tap
1Turn off the appliance and disconnect from the wall socket.
2Remove any comb or cutting element from the appliance.
3Rinse the hair chamber under a warm tap.
4 Clean the cutting element and comb under a warm tap.
5 Carefully shake off excess water and let all parts air dry completely.
Thorough cleaning
1Turn off the appliance and disconnect from the power outlet.
2Wipe the handle of the appliance with a dry cloth.
English 17
3Remove any comb or cutting element from the appliance.
4Remove any hairs that have accumulated in the hair chamber with the cleaning brush supplied.
5Remove any hairs that have accumulated in the cutting elements and/or combs with the cleaning brush supplied.
6Clean the cutting elements under a warm tap.
The handle is not suitable for cleaning under the tap.
7Clean the combs under a warm tap.
8Carefully shake off excess water and let all parts air dry completely.
Cleaning the nose trimmer
Clean the nose trimmer immediately after use and when a lot of hair or dirt has accumulated on the nose trimmer head.
1 Rinse the nose trimmer head with hot water. 2 Turn on the appliance and rinse the nose
trimmer head once more to remove any
remaining hairs. Then turn off the appliance again.
For a thorough clean, immerse the nose trimmer head in a bowl with warm water for a few minutes and then turn on the appliance to remove stubborn hair/debris.
3Carefully shake off excess water and let all parts air dry completely.
Storage
-Store the appliance in the pouch supplied.
Note: Make sure the appliance is dry before you store it in the pouch.
18 English
Ordering accessories
To buy accessories or spare parts, visit www.philips.com/parts-and-accessories or go to your Philips dealer. You can also contact the Philips Consumer Care Center in your country (see the international warranty leaflet for contact details).
Recycling
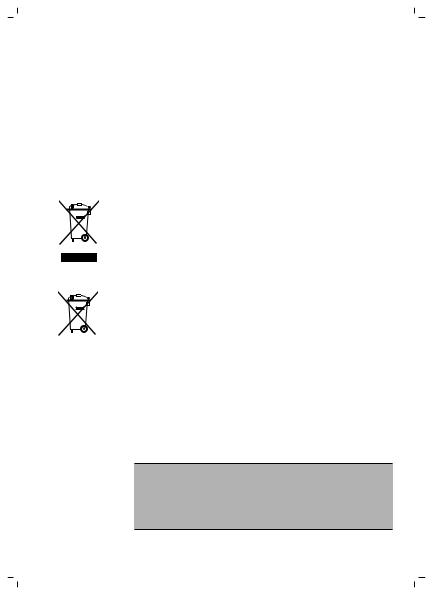
- This symbol means that this product shall not be disposed of with normal household waste (2012/19/EU).
- This symbol means that this product contains a built-in rechargeable battery which shall not be disposed of with normal household waste (2006/66/EC). Please take your product to an official collection point or a Philips service center to have a professional remove the rechargeable battery.
-Follow your country’s rules for the separate collection of electrical and electronic products and rechargeable batteries. Correct disposal helps prevent negative consequences for the environment and human health.
Removing the rechargeable battery
Only remove the rechargeable battery when you discard the product. Before you remove the battery, make sure that the product is disconnected from the wall socket and that the battery is completely empty.

English 19
Take any necessary safety precautions when you handle tools to open the product and when you dispose of the rechargeable battery.
1Check if there are screws in the back or front of the appliance. If so, remove them.
2Remove the back and/or front panel of the appliance with a screwdriver. If necessary, also remove additional screws and/or parts until you see the printed circuit board with the rechargeable battery.
3Remove the rechargeable battery.
Warranty and support
If you need information or support, please visit www.philips.com/support or read the international warranty leaflet.
Warranty restrictions
Cutting units are not covered by the terms of the international warranty because they are subject to wear.

20 Čeština
Úvod
Společnost Philips Vám gratuluje ke koupi a vítá Vás! Chcete-li využívat všech výhod podpory nabízené společností Philips, zaregistrujte svůj výrobek na stránkách www.philips.com/welcome.
Všeobecný popis (obr. 1)
1Zastřihovač chloupků v nose (pouze modely MG3710, MG3711, MG3712, MG3721, MG3720, MG3730, MG3731, MG3740, MG3747, MG3748, MG3757)
2Přesný zastřihovač (pouze modely MG3740, MG3757)
3Velký zastřihovač vlasů
4Posuvný vypínač
5Zásuvka pro malou zástrčku
6Hřebenový nástavec (9 mm) (pouze modely MG3720, MG3721, MG3730, MG3731, MG3740, MG3747, MG3748, MG3757)
7Hřebenový nástavec (12 mm) (pouze modely MG3730, MG3740, MG3747, MG3757, MG3731, MG3748)
8Hřebenový nástavec (16 mm) (pouze modely MG3730, MG3740, MG3747, MG3757, MG3731, MG3748)
9Hřebenový nástavec na vousy (1 mm) (pouze modely MG3710, MG3711, MG3712, MG3720, MG3721, MG3730, MG3731, MG3740, MG3747, MG3748, MG3757)
10Hřebenový nástavec na vousy (2 mm) (pouze modely MG3710, MG3711, MG3720, MG3721, MG3730, MG3731, MG3740, MG3747, MG3748, MG3757)
11Hřebenový nástavec na vousy 3 mm (pouze modely MG3710, MG3711, MG3712, MG3720, MG3721)
Čeština
Čeština 21
12Hřebenový nástavec na vousy 5 mm (pouze modely MG3710, MG3711, MG3712, MG3720, MG3721)
13Nastavitelný hřeben (3–7 mm) (pouze modely MG3730, MG3731, MG3740, MG3747, MG3748, MG3757)
14Hřeben na zastřihování chloupků na těle (3 mm) (pouze modely MG3747, MG3748)
15Napájecí jednotka
16Malá zástrčka
17Stojánek pro uložení přístroje (pouze modely MG3711, MG3712, MG3721, MG3731, MG3748)
18Čisticí kartáček
Dodané příslušenství se může pro různé výrobky lišit. Příslušenství, které je součástí výrobku, je zobrazeno na krabičce produktu.
Důležité bezpečnostní informace
Před použitím přístroje a jeho příslušenství si pečlivě přečtěte tuto příručku s důležitými informacemi a uschovejte ji pro budoucí použití. Dodané příslušenství se může pro různé výrobky lišit.
Nebezpečí
- Zdroj udržujte v suchu.
Varování
-K nabíjení baterie používejte pouze odnímatelnou napájecí jednotku (A00390) dodávanou s tímto přístrojem.
22 Čeština
-Zdroj obsahuje transformátor. U zdroje nikdy neodřezávejte a nenahrazujte zástrčku. Mohlo by tak dojít k nebezpečné situaci.
-Tento přístroj mohou používat děti od 8 let věku. Osoby s omezenými fyzickými, smyslovými nebo duševními schopnostmi nebo nedostatkem zkušeností a znalostí jej mohou používat, pokud jsou pod dohledem nebo byly poučeny o bezpečném používání přístroje a pokud chápou související rizika. Děti si s přístrojem nesmí hrát. Děti nesmí provádět bez dozoru čištění a uživatelskou údržbu.
-Před použitím přístroj vždy zkontrolujte. Přístroj nepoužívejte, je-li poškozený, aby nedošlo ke zranění. Poškozenou součástku vyměňujte vždy za původní typ.
-Neotvírejte přístroj, ani se nepokoušejte vyměnit akumulátor.
Upozornění
- Tento přístroj není omyvatelný. Přístroj nikdy neponořujte do vody ani jej neproplachujte pod tekoucí vodou.

Čeština 23
-Přístroj používejte pouze
k účelu, ke kterému je určen, jak je vyobrazeno v uživatelské příručce.
-Z hygienických důvodů by měla přístroj používat pouze jedna osoba.
-K čištění přístroje nikdy nepoužívejte stlačený vzduch, kovové žínky, abrazivní ani agresivní čisticí prostředky, jako je například benzín nebo aceton.
-Nepoužívejte zdroj v zásuvce, ve které je zapojen elektrický osvěžovač vzduchu, ani v její blízkosti. Předejdete tak nenapravitelnému poškození zdroje.
Elektromagnetická pole (EMP)
Tento přístroj Philips odpovídá všem platným normám a předpisům týkajícím se vystavení účinkům elektromagnetických polí.
Obecné informace
-Napájecí jednotku lze připojit do sítě o napětí v rozmezí 100 až 240 V.
24 Čeština
-Zdroj transformuje 100 V až 240 V na bezpečné nízké napětí nižší než 24 V.
-Maximální hladina hluku: Lc = 75 dB(A).
Nabíjení
Nabíjí-li se přístroj 16 hodin, pracuje bez připojení k síti až 60 minut (modely MG3710, MG3711, MG3712, MG3720, MG3721, MG3730, MG3731, MG3740) nebo 70 minut (modely MG3757, MG3748, MG3747).
1Ujistěte se, že je přístroj vypnutý.
2Malou zástrčku zasuňte do přístroje a napájecí
jednotku zapojte do elektrické zásuvky. 3 Po nabití vytáhněte napájecí jednotku
z elektrické zásuvky a malý konektor z přístroje.
Používání přístroje
Poznámka: Po každém použití přístroj vypněte a vyčistěte.
Snímání a nasazování střihacích jednotek
1 Chcete-li střihací jednotku sejmout, zatlačte směrem nahoru proti zubům střihací jednotky a vyjměte ji z rukojeti.
|
2 Chcete-li střihací jednotku nasadit, umístěte |
|
výstupek střihací jednotky do vodicí drážky |
2 |
vpředu a zatlačte zadní část střihací jednotky |
1 |
do přístroje (ozve se zaklapnutí). |
Čeština 25
Snímání zastřihovače chloupků v nose
1 Položte prst na šipku na zadní straně nástavce, zatlačte ve směru šipky a sejměte nástavec z rukojeti.
Nasazování a snímání hřebenů
1 |
1 |
Když chcete na střihací jednotku nasadit |
|
hřeben, nasaďte jeho přední část na zuby |
|
|
|
|
|
|
střihací jednotky. Prsty nebo dlaní pak zatlačte |
|
2 |
uprostřed hřebene (ozve se zacvaknutí). |
|
2 |
Chcete-li sejmout hřeben ze střihací jednotky, |
|
|
opatrně sejměte zadní část z přístroje a pak ho |
|
|
vysuňte ze střihací jednotky. |
|
|
Poznámka: Pokud s přístrojem pracujete |
|
|
poprvé, zvolte hřeben s maximální délkou |
|
|
zastřižení, abyste si vyzkoušeli práci |
|
|
s přístrojem. |
Zapínání a vypínaní přístroje
Chcete-li přístroj zapnout, posuňte vypínač nahoru.
Chcete-li přístroj vypnout, posuňte vypínač dolů.
Nástavce na zastřihování vousů
Velký zastřihovač vlasů
Chcete-li zastřihnout vlasy blízko pokožky (na délku 0,5 mm) nebo dosáhnout precizních linií kolem vousů, krku nebo kotlet, použijte zastřihovač bez hřebenového nástavce.
26 Čeština
1 Pokud chcete zastřihnout vlasy blízko pokožky, položte plochou stranu střihací jednotky na pokožku a pohybujte jí proti směru růstu vlasů.
2 Pokud chcete tvarovat, podržte střihací jednotku kolmo na kůži a posouvejte ji směrem nahoru a dolů za jemného tlaku.
Hřebeny na zastřihování vousů
Poznámka: Dodané příslušenství se může pro různé výrobky lišit. Příslušenství, které je součástí výrobku, je zobrazeno na krabičce produktu.
Přístroj je dodáván s několika hřebenovými nástavci na vousy a nastavitelným hřebenem. Nastavení délky vousů je vyznačeno na hřebenech. Nastavení odpovídají délce zbývajících vousů po zastřižení.
Hřeben |
mm |
|
|
Hřebenový nástavec na |
1 mm |
vousy |
|
|
|
Hřebenový nástavec na |
2 mm |
vousy |
|
|
|
Hřebenový nástavec na |
3 mm |
vousy |
|
|
|
Hřebenový nástavec na |
5 mm |
vousy |
|
|
|
Nastavitelný hřeben: |
3–7 mm |
1 Nasaďte hřeben na velký zastřihovač.
2 Nastavitelný hřeben: Posunutím voliče délky doleva nebo doprava vyberte požadované
= MM |
nastavení délky vousů. |

Čeština 27
3 Nejúčinnější je stříhání proti směru růstu vousů. Dbejte na to, aby povrch hřebene zůstal vždy
v kontaktu s pokožkou.
Nástavce pro zastřihování chloupků na těle
-K zastřihování chloupků na těle použijte zelený hřeben na tělo.
-Zastřihujte čisté a suché chloupky, neboť mokré chloupky mají tendenci lepit se na pokožku. Při zastřihování citlivých oblastí vždy použijte hřeben na tělo.
-Protože všechny chloupky nerostou ve stejném směru, je třeba při zastřihování vyzkoušet různé polohy přístroje (nahoru, dolů nebo napříč). Pro dosažení nejlepších výsledků je třeba získat praxi.
-Pohyby by měly být vždy plynulé a jemné. Dbejte na to, aby plocha zastřihovacího hřebene byla vždy v kontaktu s pokožkou.
-Pokud se v přístroji nahromadí velké množství vlasů, pro dosažení nejlepších výsledků je nejprve vyfoukejte.
Hřeben na zastřihování chloupků na těle
|
Pro zastřižení chloupků v oblasti pod krkem |
|
nasaďte na velký zastřihovač hřeben na |
|
zastřihování chloupků na těle. Přístroj je dodáván |
|
s 1 hřebenem na zastřihování chloupků na těle. |
|
Nastavení délky chloupků je vyznačeno na |
|
hřebenu. Nastavení odpovídá délce zbývajících |
|
chloupků po zastřižení. |
Hřeben |
mm |
Hřeben pro zastřihování |
3 mm |
chloupků na těle (zelený) |
|
|
|

28 Čeština
1Nasaďte hřeben na zastřihování chloupků na těle na velký zastřihovač.
2 Nejúčinnější je pohybovat hřebenem proti směru růstu chloupků a volnou rukou přitom napínat pokožku. Dbejte na to, aby povrch hřebene zůstal vždy v kontaktu s pokožkou.
Nástavce na zastřihování vlasů
Velký zastřihovač vlasů
Velký zastřihovač bez hřebenového nástavce můžete použít ke stříhání vlasů velmi blízko pokožky (0,5 mm) nebo k zarovnání linie krku a oblasti okolo uší.
1Před tvarováním linií okolo uší sčešte konečky vlasů přes uši.
2Při tvarování linií okolo uší nakloňte přístroj tak, že se konečků vlasů dotýká pouze jeden okraj střihacích břitů.
3 K zarovnání linie krku a kotlet otočte přístroj a provádějte pohyby směrem dolů.
4 Přístrojem pohybujte pomalu a jemně. Sledujte přirozenou linii vlasů.
Hřebenové nástavce
Pro rovnoměrné zastřižení vlasů nasaďte na velký zastřihovač hřebenový nástavec. Přístroj je dodáván s 3 hřebenovými nástavci. Nastavení délky vousů je vyznačeno na hřebenech. Nastavení odpovídají délce zbývajících vousů po zastřižení.
Hřeben |
mm |
|
|
Hřebenový nástavec |
9 mm |
|
|
Hřebenový nástavec |
12 mm |
|
|
Čeština 29
Hřebenový nástavec |
16 mm |
1Nasaďte hřebenový nástavec na velký zastřihovač.
2Pohybujte zastřihovačem zvolna po temeni hlavy různými směry, abyste dosáhli
rovnoměrného výsledku stříhání. Dbejte na to, aby povrch hřebene zůstal vždy v kontaktu
s pokožkou.
-Přístrojem vždy pohybujte proti směru růstu vlasů. Vyvíjejte mírný tlak.
-Pohyby na hlavě překrývejte, abyste zajistili, že se ostříhají všechny vlasy, které chcete ostříhat.
Přesné nástavce na tvář
Přesný zastřihovač
Pomocí přesného zastřihovače můžete vytvářet jemné linie a kontury dle typu vašeho obličeje blízko pokožky (až do 0,5 mm).
1 Držte přesnou zastřihovací hlavu kolmo na kůži a posouvejte ji nahoru a dolů za jemného tlaku.
Zastřihovač chloupků v nose
Zastřihovač chloupků v nose můžete použít k zastřihování chloupků v nose a uších.
-Dbejte na to, aby byly nosní dírky čisté. Ujistěte se, že vnější sluchové kanálky jsou čisté a bez mazu.
-Nezasouvejte čelo zastřihovače dále než 5 mm hluboko.
-Po každém použití vyčistěte nástavec.
30 Čeština
Stříhání chloupků v nose
1 Jemně pohybujte čelem zastřihovače do nosu a ven a současně jím otáčejte, abyste odstranili nežádoucí chloupky.
Zastřihování chloupků v uších
1 Pomalu posouvejte čelo zastřihovače podél okraje ucha a odstraňte veškeré chloupky přesahující okraj.
2 Jemně pohybujte čelem zastřihovače do vnějšího sluchového kanálku a ven, abyste odstranili nežádoucí chloupky.
Čištění
Rukojeť nikdy neoplachujte pod tekoucí vodou. Pod tekoucí vodou lze opláchnout pouze nástavce.
K čištění přístroje nikdy nepoužívejte drátěnky, abrazivní čisticí prostředky ani agresivní čisticí prostředky, jako je například benzín nebo aceton.
Zuby zastřihovače nikdy nesušte ručníkem nebo jinou tkaninou. Vyvarujete se tak poškození zubů.
Po každém použití: umyjte pod tekoucí vodou.
1Vypněte přístroj a odpojte ho ze zásuvky.
2Sejměte z přístroje hřeben, případně střihací jednotku.
3Vypláchněte komoru na odstřižené vousy teplou tekoucí vodou.
Loading...