


 Loading...
MG3710
MG3711
MG3712
MG3720
MG3721
MG3730
MG3731
MG3740
MG3747
MG3748
MG3757


empty page before TOC

English 6
Dansk 21 Deutsch 36 Español 53 Français 69 Italiano 86 Nederlands 102 Norsk 118 Português 133 Suomi 149 Svenska 164 Türkçe 179
Ελληνικα 194

6 English
General overview MG37xx Chimera
9MM |
12MM |
16MM |
1 |
|
|
6 |
7 |
8 |
1MM 2MM |
3MM |
5MM 3-7MM |
2
9 |
10 |
11 |
12 |
13 |
3 
15
BODY 3MM
14 
 16
16 
4
17
18
5
Introduction
Congratulations on your purchase and welcome to Philips! To fully benefit from the support that Philips offers, register your product at www.philips.com/welcome.
English

English 7
General description (Fig. 1)
1Nose trimmer (MG3710, MG3711, MG3712, MG3721, MG3720, MG3730, MG3731, MG3740, MG3747, MG3748, MG3757 only)
2Precision trimmer (MG3740, MG3757 only)
3Full-size hair trimmer
4On/off slide
5Socket for small plug
6Hair comb (9mm) (MG3720, MG3721, MG3730, MG3731, MG3740, MG3747, MG3748, MG3757 only)
7Hair comb (12mm) (MG3730, MG3740, MG3747, MG3757, MG3731, MG3748 only)
8Hair comb (16mm) (MG3730, MG3740, MG3747, MG3757, MG3731, MG3748 only)
9Stubble comb (1mm) (MG3710, MG3711, MG3712, MG3720, MG3721, MG3730, MG3731, MG3740, MG3747, MG3748, MG3757 only)
10Stubble comb (2mm) (MG3710, MG3711, MG3720, MG3721, MG3730, MG3731, MG3740, MG3747, MG3748, MG3757 only)
11Stubble comb 3mm (MG3710, MG3711, MG3712, MG3720, MG3721 only)
12Stubble comb 5mm (MG3710, MG3711, MG3712, MG3720, MG3721 only)
13Adjustable comb (3-7mm) (MG3730, MG3731, MG3740, MG3747, MG3748, MG3757 only)
14Body comb (3mm) (MG3747, MG3748 only)
15Supply unit
16Small plug
17Storage display (MG3711, MG3712, MG3721, MG3731, MG3748 only)
18Cleaning brush
The accessories supplied may vary for different products. The box shows the accessories that have been supplied with your appliance.
8 English
Important safety information
Read this important information carefully before you use the appliance and its accessories and save it for future reference. The accessories supplied may vary for different products.
Danger
- Keep the supply unit dry.
Warning
-To charge the battery, only use the detachable supply unit (A00390) provided with the appliance.
-The supply unit contains a transformer. Do not cut off the supply unit to replace it with another plug, as this causes a hazardous situation.

English 9
-This appliance can be used by children aged from 8 years and above and persons with reduced physical, sensory or mental capabilities or lack of experience and knowledge if they have been given supervision or instruction concerning use of the appliance in a safe way and understand the hazards involved. Children shall not play with the appliance. Cleaning and user maintenance shall not be made by children without supervision.
-Always check the appliance before you use it. Do not use the appliance if it is damaged, as this may cause injury. Always replace a damaged part with one of the original type.
-Do not open the appliance to replace the rechargeable battery.
Caution
-This appliance is not washable. Never immerse the appliance in water and do not rinse it under the tap.

10 English
-Only use this appliance for its intended purpose as shown in the user manual.
-For hygienic reasons, the appliance should only be used by one person.
-Never use compressed air, scouring pads, abrasive cleaning agents or aggressive liquids such as petrol or acetone to clean the appliance.
-Do not use the supply unit in or near wall sockets that contain an electric air freshener to prevent irreparable damage to the supply unit.
Electromagnetic fields (EMF)
This Philips appliance complies with all applicable standards and regulations regarding exposure to electromagnetic fields.
General
-The supply unit is suitable for mains voltages ranging from 100 to 240 volts.
-The supply unit transforms 100-240 volts to a safe low voltage of less than 24 volts.
Charging
When the appliance has charged for 16 hour, it has a cordless operating time of up to 60 minutes (MG3710, MG3711, MG3712, MG3720, MG3721, MG3730, MG3731, MG3740) or 70 minutes (MG3757, MG3748, MG3747).
1 Make sure the appliance is switched off.
English 11
2 Insert the small plug into the appliance and put the supply unit in the wall socket.
3 After charging, remove the supply unit from the wall outlet and pull the small plug out of the appliance.
Using the appliance
Note: Switch off and clean the appliance after each use.
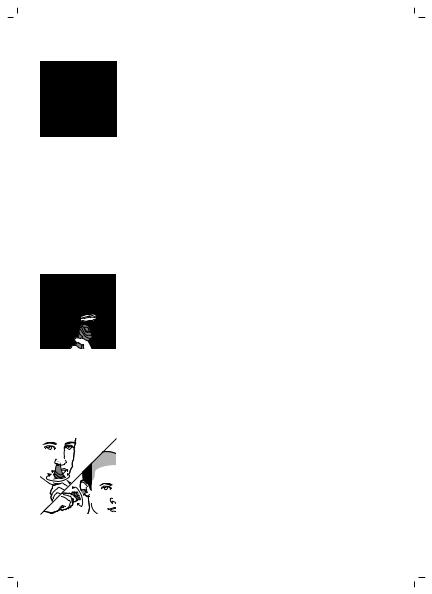
Detaching and attaching cutting elements
1 To detach a cutting element, push upwards against the teeth of the cutting element and take it off the handle.
|
2 To attach a cutting element, insert the lug of the |
|
cutting element into the guiding slot at the front |
2 |
and push the back of the cutting element onto |
1 |
the appliance ('click'). |
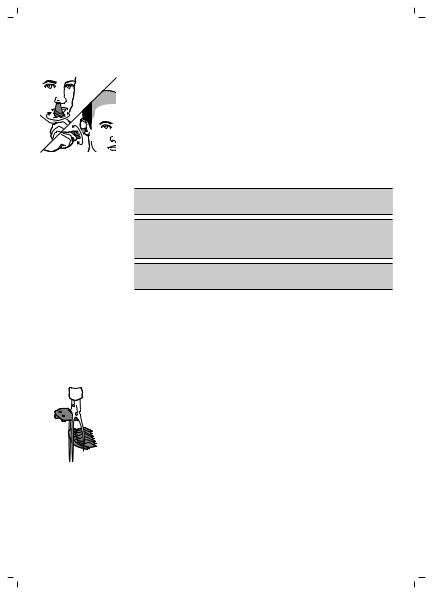
Detaching the nose trimmer
1 Place your finger on the arrow at the back of the attachment and push it off the handle in the direction of the arrow.

12 English
Attaching and detaching combs
1 |
1 |
To attach any type of guard onto a cutting |
|
element, slide the front part of the guard onto |
|
|
|
|
|
|
the teeth of the cutting element. Then push |
|
2 |
down the center of the guard with your fingers |
|
|
or the palm of your hand ('click'). |
|
2 |
To detach any type of comb from the cutting |
|
|
element, carefully pull its back part off the |
|
|
appliance and then slide it off the cutting |
|
|
element. |
|
|
Note: When trimming for the first time, start by |
|
|
using the comb with the maximum trimming |
|
|
length setting to familiarize yourself with the |
|
|
appliance. |
Switching the appliance on and off
To switch on the appliance, slide the on/off button up.
To switch off the appliance, slide the on/off button down.
Attachments for use on beard
Full-size hair trimmer
Use the full-size hair trimmer without a comb to trim hair close to the skin (to a length of 1/32in (0.5mm) or to create clean lines around your beard, neck and sideburns.
1 To trim hair close to the skin, place the flat side of the cutting element against your skin and make strokes against the direction of hair growth.

English 13
2For contouring, hold the cutting element perpendicular to the skin and move it upwards or downwards with gentle pressure.
Beard combs
Note: The accessories supplied may vary for different products. The box shows the accessories that have been supplied with your appliance.
The appliance comes with multiple stubble combs and an adjustable comb. The hair length settings are indicated on the combs. The settings correspond to the remaining hair length after trimming.
Comb |
mm |
|
|
Stubble comb |
1mm |
|
|
Stubble comb |
2mm |
|
|
Stubble comb |
3mm |
|
|
Stubble comb |
5mm |
|
|
Adjustable comb |
3-7mm |
1 Attach the comb to the full-size hair trimmer.
= MM
2Adjustable comb: Push the length selector to the left or right to select the desired hair length setting.
3To trim the most effective way, move the comb against the direction of hair growth. Make sure the surface of the comb always stays in contact with the skin.

14 English
Attachments for use on body
-Use the green body guard to trim body hair.
-Make sure hair is clean and dry as wet hair tends to stick to the body and, when trimming sensitive areas, always use a body guard.
-Since all hairs do not grow in the same direction, you may want to try different trimming positions (i.e. upwards, downwards, or across). Practice is best for optimum results.
-Always make smooth and gentle movements and be sure the surface of the guard always stays in contact with your skin.
-When too many hairs have accumulated on the product, blow the hairs out before use, for best trimming results.
Body comb
Attach the body comb to the full-size hair trimmer to trim hairs below the neckline. The appliance comes with 1 body comb. The hair length settings is indicated on the comb. The setting corresponds to the remaining hair length after trimming.
Comb |
mm |
|
|
Body comb (green) |
3mm |
1Attach the body comb to the full-size hair trimmer.
2 To trim in the most effective way, stretch the skin with your free hand and move the comb against the direction of hair growth. Make sure the surface of the comb always stays in contact with the skin.

English 15
Attachments for use on head
Full-size hair trimmer
Use the full-size hair trimmer without a comb to clip the hair on your head very close to the skin (1/32in (0.5mm) or to contour the neckline and area around the ears.
1 To contour the hairline around the ears, comb the hair ends over the ears.
2 Tilt the appliance in such a way that only one edge of the cutter blades touches the hair ends when you shape the contours around the ears.
3 To contour the nape of the neck or sideburns,
turn the appliance and make downward
strokes.
4 Move the appliance slowly and smoothly following the natural hairline.
|
Hair combs |
|
Attach a hair comb to the full-size hair trimmer to |
|
evenly trim the hairs on your head. The appliance |
|
comes with 3 hair combs. The hair length settings |
|
are indicated on the combs. The settings |
|
correspond to the remaining hair length after |
|
trimming. |
Comb |
mm |
|
|
Hair comb |
9mm |
|
|
Hair comb |
12mm |
|
|
Hair comb |
16mm |
|
|
|
1 Attach a comb to the full-size hair trimmer. |
16 English
2Move the trimmer slowly over the crown from different directions to achieve an even result.
Make sure the surface of the comb always stays in contact with the skin.
- Always move the trimmer against the direction of hair growth. Press lightly.
-Make overlapping passes over the head to ensure that all hair that should be cut has been cut.
Precision attachments for use on face
Precision trimmer
Use the precision trimmer to create fine lines and contours around your facial style, close to the skin (to a length of 1/32in./0.5mm).
1 Hold the precision trimming head perpendicular to the skin and move the trimming head
upwards or downwards with gentle pressure.
Nose trimmer
Use the nose trimmer to trim your nose hair and ear hair.
-Make sure nasal passages are clean. Make sure outer ear channels are clean and free from wax.
-Do not insert the tip more than 5mm.
-Always clean the attachment after each use.
Trimming nose hair
1 Gently move the tip in and out of nose while turning it around to remove unwanted hairs.
English 17
Trimming ear hair
1 Slowly move the tip round the ear to remove hairs that stick out beyond the rim of the ear.
2 Gently move the tip in and out of the outer ear channel to remove unwanted hairs.
Cleaning
Do not rinse the handle under the tap, only the attachments can be rinsed under the tap.
Never use scouring pads, abrasive cleaning agents or aggressive liquids such as gasoline or acetone to clean the product.
Never dry the trimmer teeth with a towel or tissue, as this may damage the trimmer teeth.
After every use: cleaning under the tap
1Turn off the appliance and disconnect from the wall socket.
2Remove any comb or cutting element from the appliance.
3Rinse the hair chamber under a warm tap.
4Clean the cutting element and comb under a
warm tap.
5 Carefully shake off excess water and let all parts air dry completely.
Thorough cleaning
1Turn off the appliance and disconnect from the power outlet.
2Wipe the handle of the appliance with a dry cloth.

18 English
3Remove any comb or cutting element from the appliance.
4Remove any hairs that have accumulated in the hair chamber with the cleaning brush supplied.
5Remove any hairs that have accumulated in the cutting elements and/or combs with the cleaning brush supplied.
6Clean the cutting elements under a warm tap.
The handle is not suitable for cleaning under the tap.
7Clean the combs under a warm tap.
8Carefully shake off excess water and let all parts air dry completely.
Cleaning the nose trimmer
Clean the nose trimmer immediately after use and when a lot of hair or dirt has accumulated on the nose trimmer head.
1 Rinse the nose trimmer head with hot water. 2 Turn on the appliance and rinse the nose
trimmer head once more to remove any
remaining hairs. Then turn off the appliance again.
For a thorough clean, immerse the nose trimmer head in a bowl with warm water for a few minutes and then turn on the appliance to remove stubborn hair/debris.
3Carefully shake off excess water and let all parts air dry completely.
Storage
-Store the appliance in the pouch supplied.
Note: Make sure the appliance is dry before you store it in the pouch.

English 19
Ordering accessories
To buy accessories or spare parts, visit www.shop.philips.com/service or go to your Philips dealer. You can also contact the Philips Consumer Care Center in your country (see the international warranty leaflet for contact details).
Recycling
- This symbol means that this product shall not be disposed of with normal household waste (2012/19/EU).
- This symbol means that this product contains a built-in rechargeable battery which shall not be disposed of with normal household waste (2006/66/EC). Please take your product to an official collection point or a Philips service center to have a professional remove the rechargeable battery.
-Follow your country’s rules for the separate collection of electrical and electronic products and rechargeable batteries. Correct disposal helps prevent negative consequences for the environment and human health.
Removing the rechargeable battery
Only remove the rechargeable battery when you discard the product. Before you remove the battery, make sure that the product is disconnected from the wall socket and that the battery is completely empty.
Take any necessary safety precautions when you handle tools to open the product

20 English
and when you dispose of the rechargeable battery.
1Check if there are screws in the back or front of the appliance. If so, remove them.
2Remove the back and/or front panel of the appliance with a screwdriver. If necessary, also remove additional screws and/or parts until you see the printed circuit board with the rechargeable battery.
3Remove the rechargeable battery.
Warranty and support
If you need information or support, please visit www.philips.com/support or read the international warranty leaflet.
Warranty restrictions
Cutting units are not covered by the terms of the international warranty because they are subject to wear.
Dansk 21
General overview MG37xx Chimera
9MM |
12MM |
16MM |
1 |
|
|
6 |
7 |
8 |
1MM 2MM |
3MM |
5MM 3-7MM |
2
9 |
10 |
11 |
12 |
13 |
3 
15
BODY 3MM
14 
 16
16 
4
17
18
5
Introduktion
Tillykke med dit køb, og velkommen til Philips! For at få fuldt udbytte af den support, Philips tilbyder, skal du registrere dit produkt på www.philips.com/welcome.
Dansk

22 Dansk
Generel beskrivelse (fig. 1)
1Næsehårstrimmer (kun MG3710, MG3711, MG3712, MG3721, MG3720, MG3730, MG3731, MG3740, MG3747, MG3748, MG3757)
2Præcisionstrimmer (kun MG3740, MG3757)
3Hårtrimmer i fuld størrelse
4On/off-kontakt
5Indgang til lille strømstik
6Hårkam (9 mm) (kun MG3720, MG3721, MG3730, MG3731, MG3740, MG3747, MG3748, MG3757)
7Hårkam (12 mm) (kun MG3730, MG3740, MG3747, MG3757, MG3731, MG3748)
8Hårkam (16 mm) (kun MG3730, MG3740, MG3747, MG3757, MG3731, MG3748)
9Stubbekam (1 mm) (kun MG3710, MG3711, MG3712, MG3720, MG3721, MG3730, MG3731, MG3740, MG3747, MG3748, MG3757)
10Stubbekam (2 mm) (kun MG3710, MG3711, MG3720, MG3721, MG3730, MG3731, MG3740, MG3747, MG3748, MG3757)
11Stubbekam 3 mm (kun MG3710, MG3711, MG3712, MG3720, MG3721)
12Stubbekam 5 mm (kun MG3710, MG3711, MG3712, MG3720, MG3721)
13Justerbar kam (3-7 mm) (kun MG3730, MG3731, MG3740, MG3747, MG3748, MG3757)
14Kropskam (3 mm) (kun MG3747, MG3748)
15Oplader
16Lille stik
17Lagerskærm (kam MG3711, MG3712, MG3721, MG3731, MG3748)
18Rensebørste
Det medfølgende tilbehør kan variere for forskellige produkter. Boksen viser det tilbehør, der leveres sammen med apparatet.

Dansk 23
Vigtige sikkerhedsoplysninger
Læs disse vigtige oplysninger omhyggeligt igennem, inden apparatet og tilbehøret tages i brug, og gem dem til eventuel senere brug. Det medfølgende tilbehør kan variere for forskellige produkter.
Fare
- Hold forsyningsenheden tør.
Advarsel
-Brug kun den aftagelige forsyningsenhed (A00390), der fulgte med apparatet, til at oplade batteriet.
-Strømforsyningsenheden indeholder en transformator. Klip ikke strømforsyningsenheden af og udskift den med et andet stik, da dette vil føre til farlige situationer.

24 Dansk
-Dette apparat må bruges af børn fra 8 år og opefter og personer med reducerede fysiske, sensoriske eller mentale evner eller manglende erfaring og viden, hvis de er blevet instrueret i sikker brug af apparatet og forstår de medfølgende risici. Lad ikke børn lege med apparatet. Rengøring og vedligeholdelse må ikke foretages af børn uden opsyn.
-Kontroller altid apparatet, inden du anvender det. Anvend ikke apparatet, hvis det er beskadiget, da dette kan forårsage personskade. Udskift altid en beskadiget del med en tilsvarende original type.
-Apparatet må ikke åbnes i forbindelse med udskiftning af det genopladelige batteri.
Forsigtig
-Dette apparat er ikke vaskbart. Apparatet må aldrig
lægges ned i vand eller skylles under vandhanen.
-Brug kun apparatet til det tilsigtede formål som vist i brugervejledningen.

Dansk 25
-Af hygiejniske grunde bør apparatet kun anvendes af en og samme person.
-Brug aldrig trykluft, skuresvampe eller skrappe rengøringsmidler, som f.eks. benzin, acetone eller lignende, til rengøring af apparatet.
-Brug ikke strømforsyningsenheden i eller i nærheden af stikkontakter, som indeholder en elektrisk luftfrisker, for at forhindre uoprettelig beskadigelse af strømforsyningsenheden.
Elektromagnetiske felter (EMF)
Dette Philips-apparat overholder alle branchens gældende standarder og regler angående eksponering for elektromagnetiske felter.
Generelt
-Forsyningsenheden er egnet til netspændinger fra 100 til 240 volt.
-Strømforsyningsenheden omformer 100-240 Volt til en lav sikkerhedsspænding under 24 Volt.

26 Dansk
Opladning
Når apparatet har ladet op i 16 tuner, kan det bruges uden ledning i op til 60 minutter (MG3710, MG3711, MG3712, MG3720, MG3721, MG3730, MG3731, MG3740) eller 70 minutter (MG3757, MG3748, MG3747).
1Kontroller, at apparatet er slukket.
2Sæt det lille stik i apparatet, og sæt opladeren i
stikkontakten.
3 Efter opladning skal du tage opladeren ud af stikkontakten og det lille stik ud af apparatet.
Sådan bruges apparatet
Bemærk: Sluk og rengør apparatet efter hver brug.
Aftagning og påsætning af skæreenheder
1 For at tage en skæreenhed af skal du skubbe opad mod skæreenhedens tænder og fjerne den fra grebet.
|
2 For at sætte en skæreenhed på skal du placere |
|
den lille tap på skærenheden i hullet forrest på |
2 |
apparatet og trykke bagsiden af skærenheden |
1 |
fast ("klik"). |

Dansk 27
Aftagning af næsehårstrimmer
1 Placer din finger på pilen bag på tilbehøret, og skub det af grebet i pilens retning.
Påsætning og aftagning af kamme
1
1 For at sætte en hvilken som helst beskyttende enhed på skæreenheden skal du sætte den
forreste del af den beskyttende enhed på
2 |
skæreenhedens tænder. Tryk derefter ned midt |
på den beskyttende enhed med fingrene eller håndfladen ("klik").
2 For at tage en hvilken som helst kam af skæreenheden skal du forsigtigt trække kammens bagerste del af apparatet og derefter tage den af skæreenheden.
Bemærk: Hvis det er første gang, du bruger trimmeren, anbefales det at bruge kammen med den højeste længdeindstilling, indtil du vænner dig til at bruge apparatet.
Sådan tændes og slukkes apparatet
Tænd apparatet ved at trykke on/off-knappen opad.
Sluk apparatet ved at trykke on/off-knappen nedad.
Tilbehør til skæg
Hårtrimmer i fuld størrelse
Brug hårtrimmeren i fuld størrelse uden kam, hvis du vil klippe håret meget kort (0,5 mm) eller rette

28 Dansk
hårgrænsen omkring skægget, i nakken og ved bakkenbarterne til.
1 Hvis du vil klippe håret meget kort, skal du placere den flade side af skæreenheden ind mod huden og bevæge apparatet mod hårenes retning.
2 Hvis du vil rette håret til, skal du holde skæreenheden vinkelret på huden og bevæge den opad eller nedad, mens du anvender et let tryk.
|
Skægkamme |
|
|
|
Bemærk: Det medfølgende tilbehør kan variere for |
|
forskellige produkter. Boksen viser det tilbehør, der |
|
leveres sammen med apparatet. |
|
Der følger flere stubbekamme og en justerbar kam |
|
med apparatet. Indstillingerne for hårlængde er |
|
angivet på kammene. Indstillingerne svarer til |
|
længden af håret på dit hoved efter trimningen. |
Kam |
mm |
|
|
Stubbekam |
1 mm |
|
|
Stubbekam |
2 mm |
|
|
Stubbekam |
3 mm |
|
|
Stubbekam |
5 mm |
|
|
Justerbar kam |
3-7 mm |
|
|
|
1 Sæt kammen på hårtrimmeren i fuld størrelse. |
= MM
2Justerbar kam: Skub længdevælgeren til højre eller venstre for at vælge den ønskede hårlængdeindstilling.

Dansk 29
3 Trimningen bliver mest effektiv, når apparatet bevæges mod hårenes retning. Sørg for, at kammens overflade forbliver i kontakt med huden.
Tilbehør til krop
-Brug den grønne kropsbeskyttelse til at trimme kropshår.
-Sørg for at håret er rent og tørt, da våde hår har tendens til at klæbe sig til kroppen. Brug altid kropsbeskytter, når du trimmer følsomme områder.
-Da ikke alt hår vokser i samme retning, skal du bevæge apparatet i forskellige retninger (opad, nedad og tværs over kroppen). Det bedste resultat opnås med lidt øvelse.
-Brug altid stille og rolige bevægelser, og sørg for, at beskyttelsens overflade altid bevarer kontakten med huden.
-Når der har samlet sig for mange hår på produktet, så pust dem forsigtig væk for at få det bedste resultat.
Kropskam
|
Sæt kropskammen på hårtrimmeren i fuld størrelse |
|
for at trimme hår fra halsen og nedefter. Apparatet |
|
leveres med 1 kropskam. Indstillingen for |
|
hårlængde er angivet på kammen. Indstillingen |
|
svarer til længden af håret på dit hoved efter |
|
trimningen. |
Kam |
mm |
|
|
Kropskam (grøn) |
3 mm |
|
|
|
1 Sæt kropskammen på hårtrimmeren i fuld |
|
størrelse. |

30 Dansk
2 For at få den mest effektive trimning skal du lade kammen glide hen over huden mod hårenes retning, mens du strækker huden med den frie hånd. Sørg for, at kammens overflade forbliver i kontakt med huden.
Tilbehør til hovedhår
Hårtrimmer i fuld størrelse
Brug hårtrimmeren i fuld størrelse uden kam, hvis du vil klippe dit hovedhår meget kort (0,5 mm) eller rette hårgrænsen i nakken og omkring ørerne til.
1 For at rette hårgrænsen omkring ørerne til skal du rede hårspidserne ned over ørerne.
2 Hold apparatet i en vinkel, så kun kanten af skæreklingerne berører hårspidserne, når du retter til omkring ørerne.
3 For at rette nakkehår og bakkenbarter til skal du
vende apparatet om og bevæge det med
nedadgående strøg.
4 Brug kun langsomme og rolige bevægelser, der følger den naturlige hårgrænse.
|
Hårkamme |
|
Sæt en hårkam på hårtrimmeren i fuld størrelse for |
|
at trimme dine hovedhår jævnt. Apparatet leveres |
|
med 3 hårkamme. Indstillingerne for hårlængde er |
|
angivet på kammene. Indstillingerne svarer til |
|
længden af håret på dit hoved efter trimningen. |
Kam |
mm |
|
|
Hårkam |
9 mm |
|
|
Hårkam |
12 mm |
|
|
Hårkam |
16 mm |
|
|
|
1 Sæt en kam på hårtrimmeren i fuld størrelse. |
Loading...