


 Loading...
Manual

ENGLISH
TRAKTOR AUDIO 10
Manual
Table Of Contents
1 Welcome to TRAKTOR AUDIO 10!.................................................................................................................. |
4 |
|||
|
1.1 |
What is Included in the Box?............................................................................ |
4 |
|
|
1.2 |
Manual Conventions........................................................................................ |
4 |
|
2 |
Safety Precautions....................................................................................................................................... |
6 |
||
|
2.1 |
Risk of Damaging your Hearing......................................................................... |
6 |
|
|
2.2 |
Caution.......................................................................................................... |
7 |
|
|
2.3 |
Notice........................................................................................................... |
8 |
|
|
|
2.3.1 Disposal of the Product........................................................................... |
8 |
|
|
|
2.3.2 |
Specifications Subject to Change............................................................. |
8 |
|
|
2.3.3 |
Disclaimer............................................................................................. |
8 |
3 |
Installation.................................................................................................................................................... |
9 |
||
|
3.1 |
System Requirements..................................................................................... |
9 |
|
|
3.2 |
Software Installation....................................................................................... |
9 |
|
|
|
3.2.1 |
Installing TRAKTOR AUDIO 10 on Windows® 7........................................ |
9 |
|
|
3.2.2 |
Installing TRAKTOR AUDIO 10 on Windows® XP/Vista®........................... |
12 |
|
|
3.2.3 |
Installing TRAKTOR AUDIO 10 on Mac OS® X......................................... |
15 |
|
3.3 |
Connecting the Hardware................................................................................ |
18 |
|
|
3.4 |
Registration................................................................................................... |
20 |
|
4 |
Basic Configuration.................................................................................................................................... |
21 |
||
|
4.1 |
Selecting the TRAKTOR AUDIO 10 as Your System’s Default Audio Output |
|
|
|
|
Device.......................................................................................................... |
21 |
|
|
|
4.1.1 |
Windows® XP...................................................................................... |
21 |
|
|
4.1.2 Windows® Vista®, Windows® 7............................................................ |
21 |
|
|
|
4.1.3 |
Mac OS® X.......................................................................................... |
22 |
|
4.2 |
Using the TRAKTOR AUDIO 10 as an Audio Output Device with Music |
|
|
|
|
Software....................................................................................................... |
22 |
|
|
4.3 |
Using the TRAKTOR AUDIO 10 with DJ Software.............................................. |
22 |
|
5 The Hardware in Detail............................................................................................................................... |
23 |
|||
|
5.1 |
Front Panel................................................................................................... |
23 |
|
|
5.2 |
Rear Panel.................................................................................................... |
24 |
|
|
5.3 |
Top Panel...................................................................................................... |
26 |
|
6 |
Advanced Configuration............................................................................................................................. |
28 |
||
|
6.1 |
Advanced Configuration on Windows® (Control Panel)....................................... |
28 |
|
|
|
6.1.1 |
Audio Settings Page.............................................................................. |
29 |
|
|
6.1.2 Channel Setup (Port Configuration on Windows®)..................................... |
31 |
|
|
|
6.1.3 |
Diagnostics Page.................................................................................. |
34 |
|
6.2 |
Advanced Configuration on Mac OS® X........................................................... |
36 |
|
|
|
6.2.1 |
Channel Setup (Port Configuration on Mac OS® X).................................. |
36 |
|
|
6.2.2 |
Audio Configuration.............................................................................. |
39 |

7 Using the TRAKTOR AUDIO 10 (Setup Scenarios)...................................................................................... |
41 |
|||
|
7.1 |
Analog DJing Setups...................................................................................... |
41 |
|
|
|
7.1.1 |
Connecting a Turntable for Analog DJing.................................................. |
41 |
|
|
7.1.2 |
Connecting a CD Deck for Analog DJing.................................................. |
44 |
|
7.2 |
Digital DJing Setups....................................................................................... |
47 |
|
|
|
7.2.1 |
Setting Up TRAKTOR AUDIO 10 for Internal Mixing.................................. |
47 |
|
|
7.2.2 |
Setting Up TRAKTOR AUDIO 10 for External Mixing................................ |
49 |
|
|
7.2.3 |
Connecting Turntables for DJing with Timecode Vinyl............................... |
52 |
|
|
7.2.4 |
Connecting CD Decks for DJing with Timecode CDs................................. |
58 |
|
7.3 |
Miscellaneous Setups..................................................................................... |
63 |
|
|
|
7.3.1 |
Connecting Headphones........................................................................ |
63 |
|
|
7.3.2 |
Connecting a Dynamic Microphone for Recording.................................... |
64 |
|
|
7.3.3 |
Connecting MIDI Equipment.................................................................. |
67 |
8 |
Troubleshooting........................................................................................................................................... |
69 |
||
|
8.1 |
Solving Hardware-related Problems................................................................. |
69 |
|
|
8.2 |
How to Check Whether the TRAKTOR AUDIO 10 Drivers are Installed |
|
|
|
|
Correctly....................................................................................................... |
69 |
|
|
8.3 |
USB Troubleshooting...................................................................................... |
70 |
|
|
|
8.3.1 |
USB 2.0 required................................................................................. |
70 |
|
|
8.3.2 |
Try another USB cable.......................................................................... |
70 |
|
|
8.3.3 |
Using a powered USB 2.0 hub............................................................... |
70 |
|
|
8.3.4 |
Recommended USB-ports (MacBook® Only)............................................ |
71 |
|
|
8.3.5 |
Disable USB Energy Saving Mode (Windows® only).................................. |
71 |
|
|
8.3.6 |
Update the Driver.................................................................................. |
71 |
|
8.4 |
Physically Re-configuring the TRAKTOR AUDIO 10........................................... |
71 |
|
|
8.5 |
Check your IRQs (Windows® only)................................................................... |
71 |
|
9 |
Getting Help................................................................................................................................................. |
72 |
||
|
9.1 |
Readme / Knowledge Base / Technical Support................................................. |
72 |
|
|
9.2 |
Forum........................................................................................................... |
72 |
|
|
9.3 |
Updates........................................................................................................ |
72 |
|
10 |
Appendix....................................................................................................................................................... |
|
73 |
|
|
10.1 About Latency and Buffers............................................................................. |
73 |
||
|
10.2 Different Types of ASIO.................................................................................. |
73 |
||
ENGLISH
1 Welcome to TRAKTOR AUDIO 10!
Thank you for your purchase of TRAKTOR AUDIO 10. It is the ultimate hardware complement for a variety of home studio and DJ applications. The TRAKTOR AUDIO 10 provides the following features:
•USB 2.0 soundcard, based on the new XMOS audio platform
•10 Ins / 10 Outs (RCA)
•Phono preamps for input channels on ports A, B, C, and D
•“Direct Thru” option on ports A, B, C, and D for analog mixing and stand-alone functionality (using the TRAKTOR AUDIO 10 without employing a computer)
•Microphone input with 1/4” phone socket
•Headphone output with switchable monitoring source (In 1|2 and Out 1|2)
•24-bit / 96 kHz Cirrus Logic® Audio Interface
•ASIO™-, Core Audio™-, Directsound® and WASAPI™ driver support
•MIDI In and Out
1.1 What is Included in the Box?
The package contains:
•1 x TRAKTOR AUDIO 10 audio interface
•1 x shielded USB 2.0 cable
•1 x DC power supply with adapter plugs
•1 x driver installation disc
•A printed copy of this manual
•The TRAKTOR LE 2 DJ software
•KOMPLETE 7 PLAYERS software bundle
1.2 Manual Conventions
This manual uses particular formatting to point out special facts and to warn you of potential issues. The icons introducing the following notes let you see what kind of information is to be expected:
!!Whenever this exclamation mark icon appears, you should read the corresponding note carefully and follow the instructions and hints given there if applicable.
%%This lightbulb icon indicates that a note contains useful extra information. This information may often help you to solve a task more efficiently, but does not necessarily apply to the setup or operating system you are using; however, it’s always worth a look.
4 – TRAKTOR AUDIO 10 – Manual

Furthermore, the following formatting is used:
•Text appearing in (drop-down) menus (such as Open…, Save as… etc.) and paths to locations on your hard drive or other storage devices is printed in italics.
•Text appearing elsewhere on the screen (labels of buttons, controls, text next to checkboxes, etc.) is printed in light blue. Whenever you see this formatting applied, you will find the same text appearing somewhere on the screen.
•Important names and concepts are printed in bold.
•References to keys on your computer’s keyboard you’ll find put in square brackets (e.g., “Press [Shift] + [Return]”).
Single instructions are introduced by this play button type arrow. →→ Results of actions are introduced by this smaller arrow.
Pet Names for the Hardware
Throughout the documentation, we will refer to the TRAKTOR AUDIO 10 hardware whether as “TRAKTOR AUDIO 10” or abbreviate “TA10.”
ENGLISH
TRAKTOR AUDIO 10 – Manual – 5

2 Safety Precautions
Before using the TRAKTOR AUDIO 10, thoroughly read the following instructions. This will provide you with important information needed for setting up and using your TRAKTOR
AUDIO 10 safely.
!!Keep this document in a safe place for further reference.
2.1 Risk of Damaging your Hearing
The TRAKTOR AUDIO 10, in combination with an amplifier, headphones or speakers, can produce sounds in decibel ranges that may cause hearing damage. For your protection, set all volume levels to a minimum before using TRAKTOR AUDIO 10. Gradually raise the volume controls while music is playing to set the desired listening level. If you experience any hearing problems or ringing in the ears, consult a hearing specialist immediately.
6 – TRAKTOR AUDIO 10 – Manual

2.2 Caution
It is important you read and understand the following instructions to make sure the TRAK-
TOR AUDIO 10 or any device connected will not be damaged during usage or maintenance:
•Do not use the product’s power supply if it appears to be malfunctioning. Discontinue use immediately and have the device inspected by qualified service personnel.
•Do not connect the TRAKTOR AUDIO 10 to power supplies of types not identical to the one delivered with the device.
•Do not open the TRAKTOR AUDIO 10 or attempt to disassemble or modify any internal parts. The TRAKTOR AUDIO 10 does not contain any user-serviceable parts. If the device appears to be malfunctioning, discontinue use immediately and have the device inspected by qualified service personnel.
•Do not expose the unit to rain, use it near water or in damp or wet conditions.
•Make sure no objects or liquids of any kind penetrate the unit. When cleaning the TRAKTOR AUDIO 10, use a soft, dry cloth. Never use paint thinners, solvents, cleaning fluids, or chemical-infused wiping cloths.
•Never use or store the unit in areas subject to extreme temperatures (e.g., direct exposure to sunlight in an enclosed vehicle or near heat-generating equipment), or high levels of vibration.
•Always let the TRAKTOR AUDIO 10 adapt to changed room temperature after it has been stored in a cold environment.
•Do not place the TRAKTOR AUDIO 10 in an unstable position where it could accidentally fall.
•Turn off electronic devices (e.g. mixers, amplifiers or active speakers) before connecting them to the TRAKTOR AUDIO 10.
•Before moving the TRAKTOR AUDIO 10, remove all connected cables.
•Disconnect the TRAKTOR AUDIO 10’s power supply from the power outlet during thunderstorms or when leaving the TRAKTOR AUDIO 10 unused for a long period of time.
•Do not use excessive force on buttons, knobs, switches and connectors if any parts should appear to be malfunctioning. Discontinue use immediately and have the TRAKTOR AUDIO 10 inspected by qualified service personnel.
ENGLISH
TRAKTOR AUDIO 10 – Manual – 7
2.3 Notice
2.3.1 Disposal of the Product
Should this product become damaged beyond repair, or if you wish to dispose it, please observe the regulations of your area and country that relate to the disposal of electronic products.
2.3.2 Specifications Subject to Change
The information contained in this manual is believed to be correct at the time of printing or digital release. However, Native Instruments reserves the right to make changes to the specifications at any time without notice or obligation to update existing units.
2.3.3 Disclaimer
Native Instruments GmbH cannot be held responsible for damage or lost or destroyed data caused by improper use or modification of TRAKTOR AUDIO 10.
8 – TRAKTOR AUDIO 10 – Manual

3 Installation
In order for the TRAKTOR AUDIO 10 to work properly with your computer, the following two programs are automatically installed on your system during the software installation process:
•The TRAKTOR AUDIO 10 driver. This handles the communication between the audio interface and your computer.
•The Control Panel software:
•• In Windows®, the Control Panel software allows you to adjust performance settings, preamp settings, to perform diagnostics, and to configure the soundcard’s port settings.
•• In Mac OS® X, the performance settings and preamp settings are controlled from the system’s Audio MIDI setup, located in the Utilities folder. The port configuration again is accessed through the Control Panel software.
%%If you are familiar with the installation procedure and the general configuration of USBdriven audio devices on your computer, you can skip this chapter and continue with registration chapter 10.
3.1 System Requirements
For the latest system requirements of your product, please visit the product page at http:// www.native-instruments.com/TA10.
3.2 Software Installation
3.2.1 Installing TRAKTOR AUDIO 10 on Windows® 7
!!Dofinished.not connect the TA10 to your computer before the software installation process is
To install the TRAKTOR AUDIO 10 on Windows® 7:
1.Place the installation disc in your computer’s CD/DVD-ROM drive.
2.Use Windows® Explorer to browse the contents of the disc.
3.Double-click the installer file: “TRAKTOR AUDIO 10 Setup PC.exe.”
ENGLISH
TRAKTOR AUDIO 10 – Manual – 9
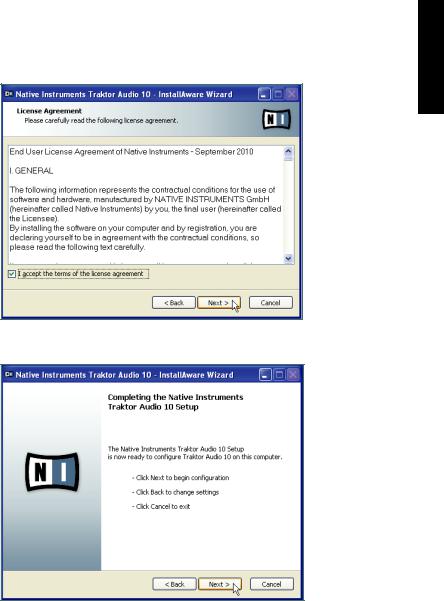
4.In the installation welcome screen, click Next.
5.To continue, you need to first accept the license agreement. After you have read the license agreement, click on the corresponding checkbox. Then click Next.
10 – TRAKTOR AUDIO 10 – Manual
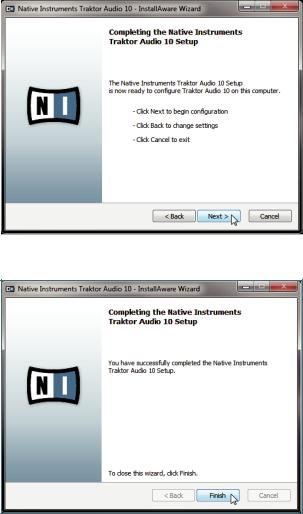
6. |
The InstallAware Wizard will prompt you to begin the configuration. Click Next to proceed. |
ENGLISH |
|
|
|||
|
|
|
|
|
|
|
|
|
|
|
|
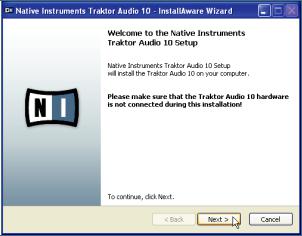
7.Once the installation has been performed successfully, click Finish.
8.Proceed with connecting the hardware as described in chapter 3.3.
TRAKTOR AUDIO 10 – Manual – 11
3.2.2 Installing TRAKTOR AUDIO 10 on Windows® XP/Vista®
!!Dofinished.not connect the TA10 to your computer before the software installation process is
To install the TRAKTOR AUDIO 10 on Windows® XP/Vista®:
1.Place the installation disc in your computer’s CD/DVD-ROM drive.
2.Use the Windows® Explorer to browse the contents of the disc.
3.Double-click the installer file: “TRAKTOR AUDIO 10 Setup PC.exe.”
4.In the installation welcome screen, click Next.
12 – TRAKTOR AUDIO 10 – Manual
5. |
To continue, you first need to accept the license agreement. After you have read the |
ENGLISH |
|
license agreement, click on the corresponding checkbox. Then click Next.
6.The InstallAware Wizard will prompt you to begin the configuration. Click Next to proceed.
TRAKTOR AUDIO 10 – Manual – 13
7.During driver installation, a Windows® security warning will appear. This does not indicate a problem. To proceed with the installation, click Continue Anyway (on Windows® XP) or Install (on Windows® Vista®).
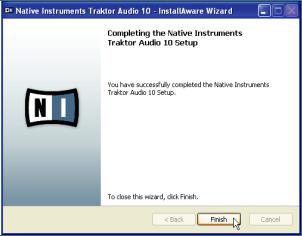
8.Once the installation has been performed successfully, click Finish.
9.Proceed with connecting the hardware as described in chapter 3.3.
14 – TRAKTOR AUDIO 10 – Manual
3.2.3 Installing TRAKTOR AUDIO 10 on Mac OS® X
To install the TRAKTOR AUDIO 10 on Mac OS® X:
1.Place the installation disc in your computer’s CD/DVD-ROM drive. Its icon will appear in the Mac OS® X Finder.
2.Double-click the TRAKTOR AUDIO 10 disc icon to display the contents of the disc.
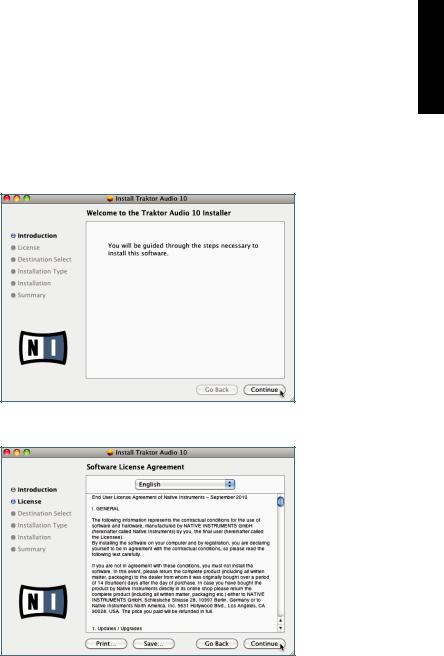
3.Double-click the installer file: “TRAKTOR AUDIO 10 Installer Mac.mpkg.” The installation will start, and a welcome screen will appear.
4.Click Continue to proceed.
ENGLISH
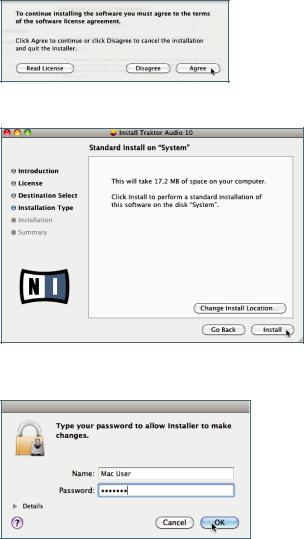
5.Read the Software License Agreement and click Continue to proceed.
TRAKTOR AUDIO 10 – Manual – 15
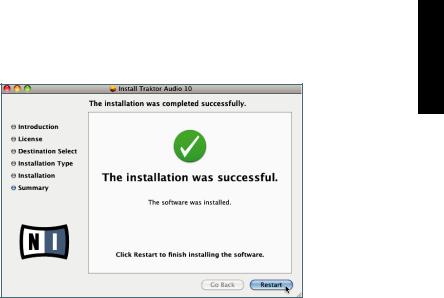
6.If you agree to the Software License Agreement, click Agree to continue.
7.Click Install to install the driver.
8.Mac OS® X will prompt you to authenticate the installation. Enter the name and corresponding password of a user with administrator privileges.
16 – TRAKTOR AUDIO 10 – Manual
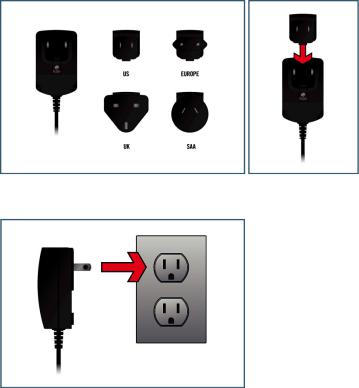
9. |
Once the installation has been performed successfully, you will be prompted to restart |
ENGLISH |
|
your Mac. Click the Restart button to complete the installation.
10. Proceed with connecting the hardware as described in section 3.3.
TRAKTOR AUDIO 10 – Manual – 17
3.3 Connecting the Hardware
Before connecting the hardware, make sure you have installed all software components as described in chapter 3.2. Once you have installed the software:
1.Insert the fixture of the matching adapter plug into the corresponding part on the power supply, then press the adapter plug carefully against the power supply until a click confirms the adapter plug has snapped into place.
2.Connect the power supply to a power outlet.
18 – TRAKTOR AUDIO 10 – Manual
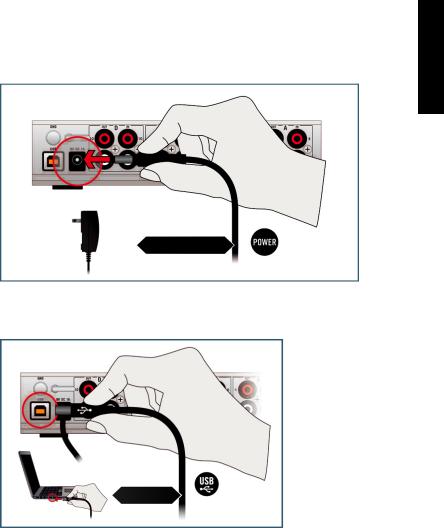
3. |
Connect the plug at the end of the power supply’s cable to the power supply connector |
ENGLISH |
|
on the rear panel of your TA10.
4.Connect the TA10 to a USB 2.0 port on your computer using the USB cable included in the package.
→→ After connecting the soundcard to your computer, the USB drivers will be installed on your computer automatically and the TRAKTOR AUDIO 10 soundcard should be ready to use straight away. Proceed with registration chapter 3.4. For Windows® XP, see separate section below.
TRAKTOR AUDIO 10 – Manual – 19
XP Users Only: Completing the Device Driver Installation
Upon detection of the new hardware, Windows® completes the device driver installation:
1.Windows® XP will identify the TRAKTOR AUDIO 10 soundcard. Choose No if Windows® asks you to search the internet for a driver.
2.During device driver installation, a Windows® message may call attention to the fact that the TRAKTOR AUDIO 10 driver has not passed Windows® Logo Testing. This is an expected behavior and does not indicate a problem. To proceed, click Continue Anyway.
→→ Your computer will display a “New Hardware found” message. Subsequently, another message reading “Your devices are ready to use” will notify you that the device driver installation was completed successfully.
After you have completed the driver installation procedure, the driver installer will start again. This is intended behavior. Repeat the previous steps in order to install all required driver components.
→→ All software components are now installed, and the TRAKTOR AUDIO 10 should be ready to use. Proceed with registration chapter 3.4.
3.4 Registration
Registering the TRAKTOR AUDIO 10 is not mandatory. Nevertheless, registration is recommended for support inquiries or in case of theft. As a registered user, you will also benefit from exclusive incentives and insider specials.
!!To register your TRAKTOR AUDIO 10 on the Native Instruments website, you will need the serial number from the product activation sticker. This is located on the bottom panel of your TRAKTOR AUDIO 10.
To register your TRAKTOR AUDIO 10, visit our registration page on: http://www.nativeinstruments.com/registration and follow the on-screen instructions.
Proceed with chapter 4.
20 – TRAKTOR AUDIO 10 – Manual

4 Basic Configuration
In order for the TRAKTOR AUDIO 10 to operate as your computer’s default audio output device, you will need to select it within the system’s audio preferences. Find the relevant instructions in chapter 4.1.
For information on using the TRAKTOR AUDIO 10 as your music software’s default audio output device, see chapter 4.2.
For information on using the TA10 with TRAKTOR DJ or other DJ software, see chapter 4.3.
4.1Selecting the TRAKTOR AUDIO 10 as Your System’s Default Audio Output Device
In the following sections, you will learn how to set up the TRAKTOR AUDIO 10 as your computer’s default audio output device.
4.1.1 Windows® XP
1.Open Start > Control Panel > Hardware and Sound > Sound.
2.In the Sounds and Audio Devices Properties window, select the Audio tab.
3.From the Default Device drop-down list of options, select TRAKTOR AUDIO 10.
4.Click OK to confirm your selection and close the window.
→→ TRAKTOR AUDIO 10 is now selected as the default audio output device.
4.1.2 Windows® Vista®, Windows® 7
1.Open Start > Control Panel > Hardware and Sound > Sound.
2.In the Sound control panel, select the Playback tab.
3.Choose from one of TRAKTOR AUDIO 10’s pair of outputs (Ch A, Out 1|2 or Ch B, Out 3|4) that you want to set as default by clicking the corresponding entry.
4.Click Set Default.
5.Click OK to confirm your selection and close the window.
→→ TRAKTOR AUDIO 10 is now selected as the default audio output device.
ENGLISH
TRAKTOR AUDIO 10 – Manual – 21
4.1.3 Mac OS® X
1.Open the System Preferences under the gray Apple Icon menu in the top left corner of your screen.
2.In the Hardware category (second row from top), select Sound.
3.In the Sound control panel, select the Output tab.
4.Choose TRAKTOR AUDIO 10 from the list of available soundcards.
5.Close the panel.
→→ TRAKTOR AUDIO 10 is now selected as the default audio output device.
4.2Using the TRAKTOR AUDIO 10 as an Audio Output Device with
Music Software
Before using the TRAKTOR AUDIO 10 with music production or DJ software, you will need to set it up as the software’s audio output device. Most music production and DJ programs provide direct access to the soundcard properties in the audio and MIDI setup section of their preferences dialog. Please refer to the documentation of your music production or DJ software for information on how to configure audio and MIDI interfaces.
4.3 Using the TRAKTOR AUDIO 10 with DJ Software
For instructions on how to utilize TRAKTOR DJ software for mixing purposes with a dedicated hardware audio interface, please see the documentation of your TRAKTOR software.
For the TRAKTOR AUDIO 10 to work in a digital DJing context (with timecode media), it is important that the input channels on the relevant ports are set up for receiving timecode, i.e., THRU mode is deactivated and the channels are set to PHONO or LINE, depending on whether you use timecode vinyl or CD decks sending timecode. See chapter 6.1.2 / 6.2.1 for instructions on how to configure the port settings. See chapter 7.2 for instructions on how to set up the TA10 to work with DJ software.
22 – TRAKTOR AUDIO 10 – Manual
Loading...