


Traktor Kontrol X1 MK2
Manual

The information in this document is subject to change without notice and does not represent a
commitment on the part of Native Instruments GmbH. The software described by this document is subject to a License Agreement and may not be copied to other media. No part of this
publication may be copied, reproduced or otherwise transmitted or recorded, for any purpose,
without prior written permission by Native Instruments GmbH, hereinafter referred to as Native
Instruments.
“Native Instruments”, “NI” and associated logos are (registered) trademarks of Native Instruments GmbH.
Mac, Mac OS, GarageBand, Logic, iTunes and iPod are registered trademarks of Apple Inc.,
registered in the U.S. and other countries.
Windows, Windows Vista and DirectSound are registered trademarks of Microsoft Corporation
in the United States and/or other countries.
All other trade marks are the property of their respective owners and use of them does not imply any affiliation with or endorsement by them.
Document authored by: Native Instruments GmbH
Document version: 1.0 (08/2013)
Disclaimer
Special thanks to the Beta Test Team, who were invaluable not just in tracking down bugs, but
in making this a better product.

Germany
Native Instruments GmbH
Schlesische Str. 29-30
D-10997 Berlin
Germany
www.native-instruments.de
USA
Native Instruments North America, Inc.
6725 Sunset Boulevard
5th Floor
Los Angeles, CA 90028
USA
www.native-instruments.com
Japan
Native Instruments KK
YO Building 3F
Jingumae 6-7-15, Shibuya-ku,
Tokyo 150-0001
Japan
www.native-instruments.co.jp
Contact
© Native Instruments GmbH, 2013. All rights reserved.

Table of Contents
Table of Contents
1 Welcome to the TRAKTOR KONTROL X1! ......................................................................
1.1 A word about this Document ....................................................................................................... 6
1.2 Document Conventions ............................................................................................................... 7
1.3 Naming Convention .................................................................................................................... 7
2 TRAKTOR KONTROL X1 HARDWARE .............................................................................
2.1 Top Panel ...................................................................................................................................8
2.2 Rear Panel .................................................................................................................................. 10
2.3 TRAKTOR KONTROL X1 Modes ..................................................................................................... 10
2.3.1 Native NHL Mode ....................................................................................................... 10
2.3.2 MIDI Mode .................................................................................................................. 10
3 Key functions when using the X1 with TRAKTOR ..........................................................
3.1 Accessing Primary and Secondary Functions .............................................................................. 12
3.2 Connecting the X1 device to TRAKTOR ........................................................................................ 12
3.3 Using the X1 to Browse & Load Tracks ....................................................................................... 13
3.4 Deck Control ............................................................................................................................... 15
3.5 Using the Transport Section (Playback, HotCues, Flux, and Sync Control) .................................. 21
3.4.1 Using the Touch Strip in Split Mode .......................................................................... 15
3.4.2 Primary Function of the Touch Strip ........................................................................... 17
3.4.3 Secondary Function of the Touch Strip ....................................................................... 17
3.4.4 Resizing the Touch Strip (Single Mode) ..................................................................... 19
3.4.5 Using the Touch Strip with Scratch Control ............................................................... 21
3.5.1 HotCue Buttons ......................................................................................................... 22
3.5.2 PLAY buttons ............................................................................................................. 25
3.5.3 CUE Buttons .............................................................................................................. 25
3.5.4 SYNC (MASTER) Buttons ............................................................................................ 25
3.5.5 FLUX Buttons ............................................................................................................. 26
6
8
12
Traktor Kontrol X1 Mk2 - Manual - 4

3.6 Using the Loop Encoders ............................................................................................................ 26
3.7 Effects Section ........................................................................................................................... 28
3.7.1 Assigning an Effect ................................................................................................... 29
3.7.2 Triggering an Effect in TRAKTOR .............................................................................. 30
3.7.3 Assigning FX to the Touch Strip ................................................................................ 32
3.7.4 Using a second X1 controller's FX .............................................................................. 34
4 Hardware Reference .................................................................................................
4.1 Top Panel ....................................................................................................................................36
4.2 Rear Panel .................................................................................................................................. 37
4.3 Transport Section ....................................................................................................................... 38
4.4 FX Section ...................................................................................................................................40
4.5 BROWSE, SHIFT and Load ........................................................................................................... 42
4.6 Touch Strip ................................................................................................................................. 43
5 Appendix ..................................................................................................................
5.1 TRAKTOR KONTROL X1 Preferences ............................................................................................. 45
5.2 Adding a TRAKTOR KONTROL X1 Mk1 to your Setup .................................................................... 49
5.1.1 Browse Encoder ......................................................................................................... 46
5.1.2 Touch Strip ................................................................................................................ 47
5.1.3 FLUX Button ............................................................................................................... 48
5.1.4 Effects Knobs ............................................................................................................ 48
5.1.5 LEDs .......................................................................................................................... 48
Index ........................................................................................................................
Table of Contents
35
45
51
Traktor Kontrol X1 Mk2 - Manual - 5

Welcome to the TRAKTOR KONTROL X1!
A word about this Document
1 Welcome to the TRAKTOR KONTROL X1!
Dear Native Instruments customer,
Thank you for purchasing the TRAKTOR KONTROL X1, and for your continued trust in Native
Instruments products.
The TRAKTOR KONTROL X1 is a portable and professional TRAKTOR software controller for
DJ's. The TRAKTOR KONTROL X1 provides the following features:
▪ Seamless TRAKTOR integration.
▪ HotCue control over track position, pitchbend, loops, and effects.
▪ Superior buttons and knobs provide the feeling of high-end hardware.
▪ RGB backlit HotCue buttons for comprehensive visual feedback.
▪ High resolution proprietary TRAKTOR NHL protocol, superior to MIDI.
▪ MIDI functionality for hardware or software that supports the MIDI standard.
▪ Lightweight, robust housing with slim, ultra-portable form factor – fits perfectly alongside
a standard club mixer.
▪ Expandable – connect two TRAKTOR KONTROL X1s to control four Decks and four Ef-
fects units.
1.1
A word about this Document
The goal of this manual is to swiftly get you orientated with the key components, and functions
of the TRAKTOR KONTROL X1. Although you will no doubt be keen to get straight into the mix
with your new device, it is recommended that you take some time to read through this manual,
and follow the instructions and tutorials where prompted to achieve the best results. This manual will also provide some scope for the more advanced uses of the TRAKTOR KONTROL X1.
Traktor Kontrol X1 Mk2 - Manual - 6

Welcome to the TRAKTOR KONTROL X1!
Document Conventions
1.2 Document Conventions
This document uses particular formatting to point out special facts and to warn you of potential issues. The icons introducing the following notes let you see what kind of information can
be expected:
Whenever this exclamation mark icon appears, you should read the corresponding note
carefully and follow the instructions and hints given there if applicable.
This light bulb icon indicates that a note contains useful extra information. This information may often help you to solve a task more efficiently, but does not necessarily apply to
the setup or operating systems you are using; however, it's always worth a look.
Furthermore, the following formatting is used:
▪ Text appearing in (drop-down) menus (such as Open…, Save as…) and paths to locations
on your hard drive or other storage devices is printed in italics.
▪ Text referring to elements appearing on the screen (labels of buttons, controls, text next
to checkboxes, etc.) is printed in light blue. Whenever you see this formatting applied,
you will find the same text appearing on your computer screen.
▪ Text referring to elements printed on hardware is formatted orange. Whenever you see this
formatting applied, you will find the same text appearing on the hardware.
▪ Important names and concepts are printed in bold.
Single instructions are introduced by this play button type arrow.
►
Results of actions are introduced by this smaller arrow.
→
1.3 Naming Convention
Throughout this document, you will often hear the TRAKTOR KONTROL X1 alternatively being
referred to as the X1, and the requisite TRAKTOR PRO software as TRAKTOR.
Traktor Kontrol X1 Mk2 - Manual - 7
TRAKTOR KONTROL X1 HARDWARE
2 TRAKTOR KONTROL X1 HARDWARE
This section will provide you with an overview of the key hardware components on the X1.
2.1 Top Panel
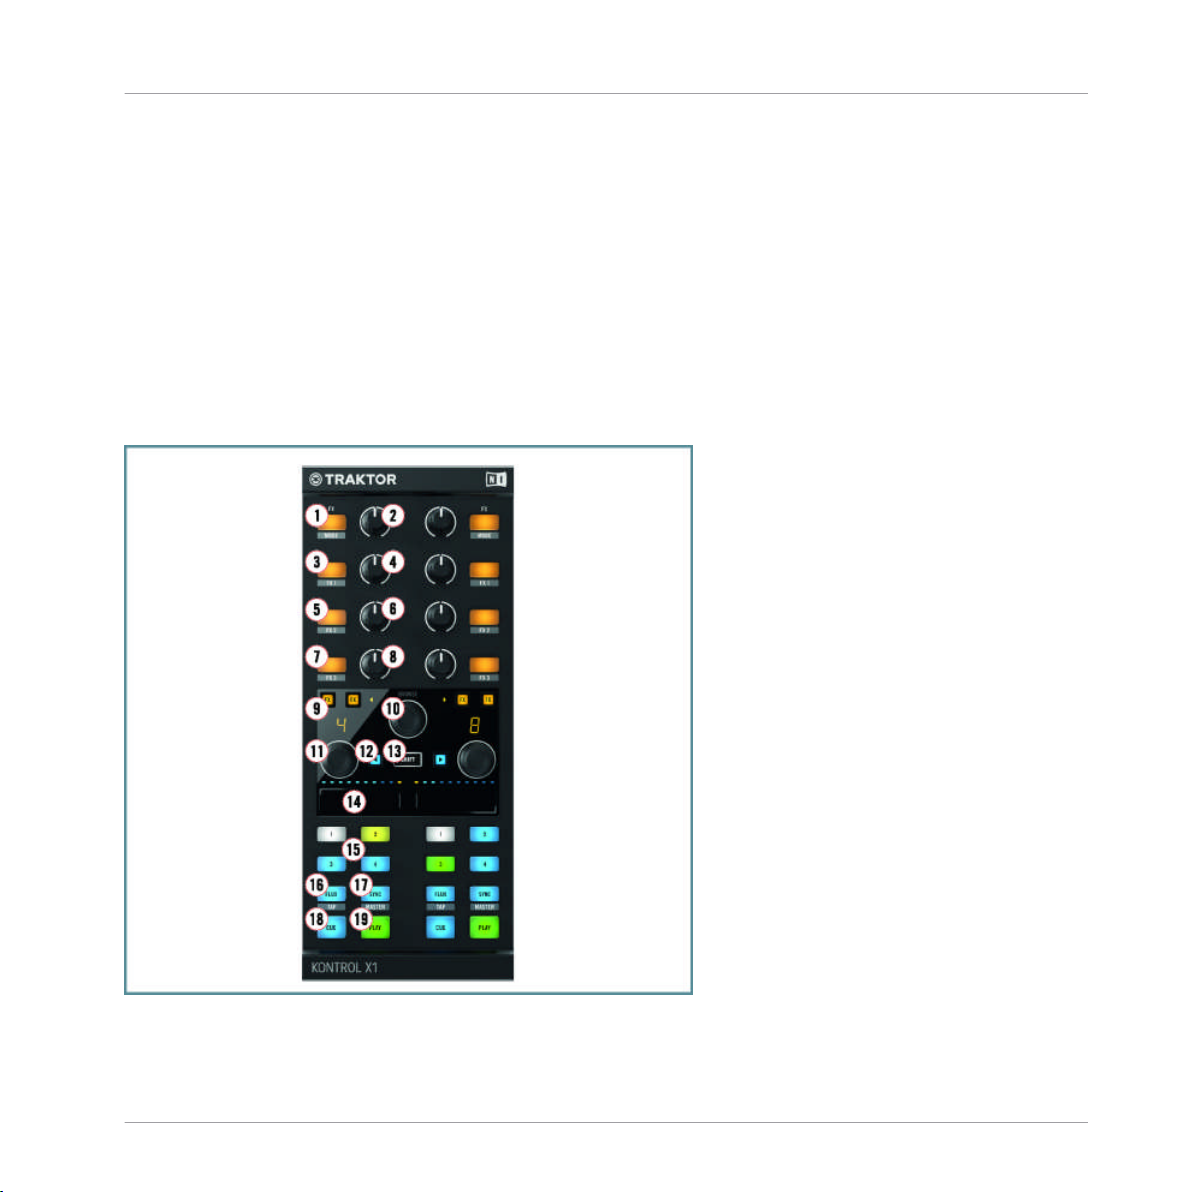
The image below shows a view of the top panel of the X1. The numbered section on the left
hand side of the device itemizes each of the hardware components. By default, the left side of
the X1 controls TRAKTOR Deck A, and likewise the right-hand side controls TRAKTOR Deck B.
Top Panel
The top panel of the X1
(1) FX (Mode) Button
Traktor Kontrol X1 Mk2 - Manual - 8

(2) FX (Dry/Wet) Knob
(3) FX1 Button
(4) FX1 Knob
(5) FX2 Button
(6) FX2 Knob
(7) FX3 Button
(8) FX3 Knob
(9) FX Assign Buttons
(10) Browse Encoder
(11) Loop Encoder
(12) Load Left Button
(13) Shift Button
(14) Touch Strip
(15) HotCue Buttons 1-4
TRAKTOR KONTROL X1 HARDWARE
Top Panel
(16) Flux (Tap) Button
(17) Sync (Master) Button
(18) Cue Button
(19) Play Button
Traktor Kontrol X1 Mk2 - Manual - 9
TRAKTOR KONTROL X1 HARDWARE
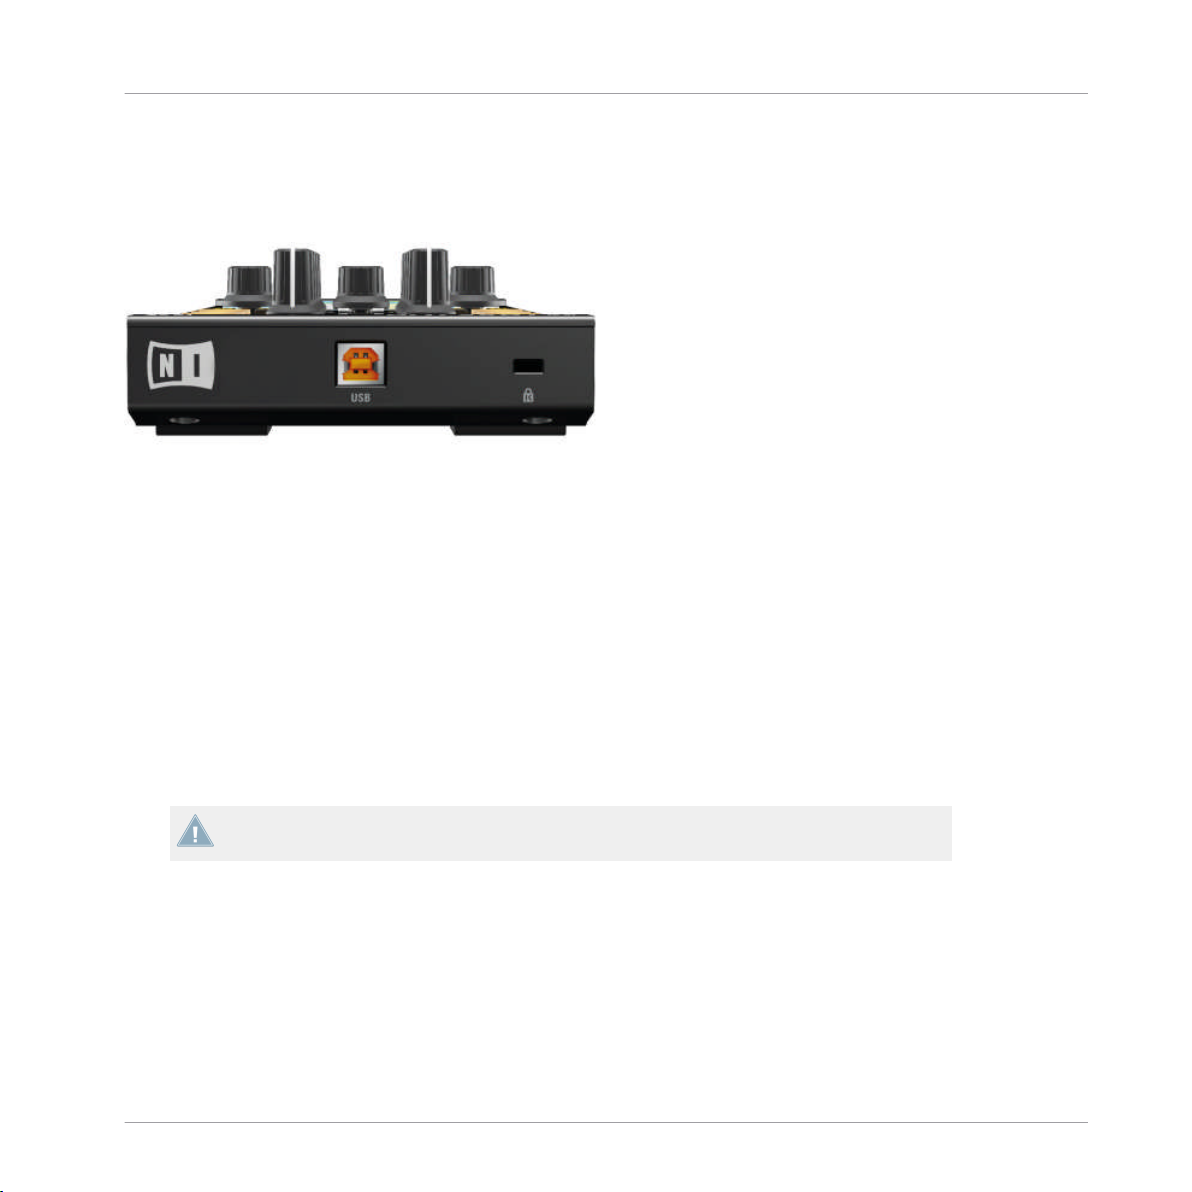
2.2 Rear Panel
The Rear panel of the X1
2.3 TRAKTOR KONTROL X1 Modes
When using the TRAKTOR KONTROL X1 with TRAKTOR, the default configuration of TRAKTOR KONTROL X1 has two modes as described below.
Rear Panel
2.3.1 Native NHL Mode
In Native NHL mode TRAKTOR KONTROL X1 will communicate directly with TRAKTOR over
USB using the Native Instruments proprietary NHL protocol, which features high resolution
translation of the TRAKTOR KONTROL X1 knobs superior to MIDI.
For normal TRAKTOR control, you will use this mode.
2.3.2 MIDI Mode
The TRAKTOR KONTROL X1 is preconfigured to also be used as a standard MIDI controller
and can control any hardware or software that supports the MIDI standard.
To access MIDI mode, hold SHIFT and press both Load Left and Load Right buttons. The
►
TRAKTOR KONTROL X1 will then transmit MIDI data like a normal MIDI controller.
Traktor Kontrol X1 Mk2 - Manual - 10
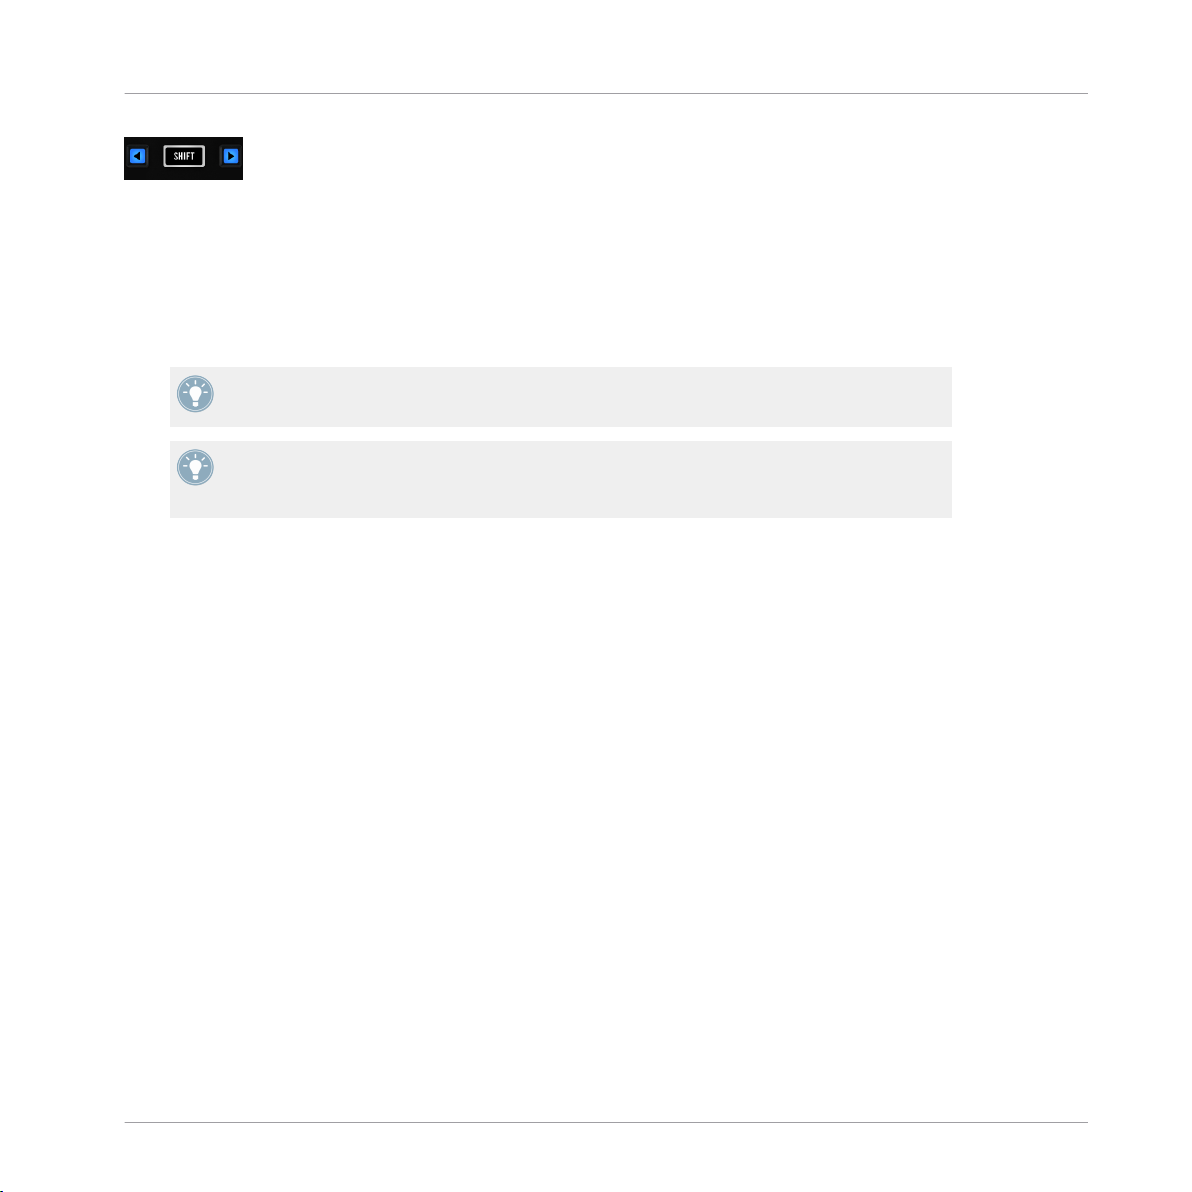
TRAKTOR KONTROL X1 HARDWARE
The SHIFT, Load Left, and Load Right area used for MIDI mode
To leave MIDI mode and return to native TRAKTOR control, hold SHIFT and press both
►
(backlit blue) Load Left and Load Right buttons again.
To customize the TRAKTOR KONTROL X1's MIDI mappings for previous TRAKTOR ver-
►
sions, use TRAKTOR's CONTROLLER MANAGER (Preferences > Controller Manager).
You can switch back and forth from native TRAKTOR control mode to MIDI mode at any
time while using TRAKTOR.
These two modes may be used simultaneously, for example you can control TRAKTOR in
native NHL mode, then hold SHIFT and pressing both Load Left and Load Right buttons to
switch to MIDI mode to control other software or hardware over MIDI.
TRAKTOR KONTROL X1 Modes
Traktor Kontrol X1 Mk2 - Manual - 11

Key functions when using the X1 with TRAKTOR
Accessing Primary and Secondary Functions
3 Key functions when using the X1 with TRAKTOR
This chapter details the use of the X1 with TRAKTOR, whilst offering detailed explanations of
the device's key functions and suggested workflows. By the end of reading this, you'll be more
than ready to get creative with your TRAKTOR KONTROL device.
3.1 Accessing Primary and Secondary Functions
By default, the X1 will function in TRAKTOR with its primary functions. Alternatively, the X1's
secondary functions can be activated on certain buttons in combination with the SHIFT button.These functions are detailed throughout this manual.
3.2 Connecting the X1 device to TRAKTOR
Before proceeding, ensure that the X1's firmware is already installed as explained in the
Setup Guide. The TRAKTOR X1 Setup Guide is available for download from the Native Instruments.
The first thing that will happen when connecting the X1 with TARKTOR is verification of the
current Deck setup. By default, the left LED display flashes “A” to indicate that Deck A is controlled by the left side of X1, while the right display flashes “B” to indicate that Deck B is controlled by the right side of X1. If you’d like to change this setup, you can do so with the Browse
or Loop encoders:
Press either the BROWSE encoder, or one of the LOOP encoders to confirm the Deck set-
►
up.
The X1 will now be backlit, indicating it's ready for action.
→
At the point of selecting your chosen Deck assignment for the X1, the LED displays will
identify which side of the device will control the corresponding Deck.
Traktor Kontrol X1 Mk2 - Manual - 12
Key functions when using the X1 with TRAKTOR
Using the X1 to Browse & Load Tracks
If you wish to change this, you can do so at the point of opening TRAKTOR, or at any point
by disconnecting, and subsequently reconnecting the device's USB connection on the rear
panel.
Deck Setup Options
There are four use cases (or Deck Setup combinations) for how the X1 can be setup to control
TRAKTOR's four available decks:
▪ Decks A & B (default)
▪ Decks C & D
▪ Decks C & A
▪ Decks B & D
In all of the above combinations: The first Deck of these potential combinations will always
be situated on the left-hand side of the X1, whilst the second will always be assigned to the
right-hand side of the X1. Using the example of the default Deck combination (A & B),
Deck A will be controlled by the left-hand side of the X1, Deck B by the right-hand side.
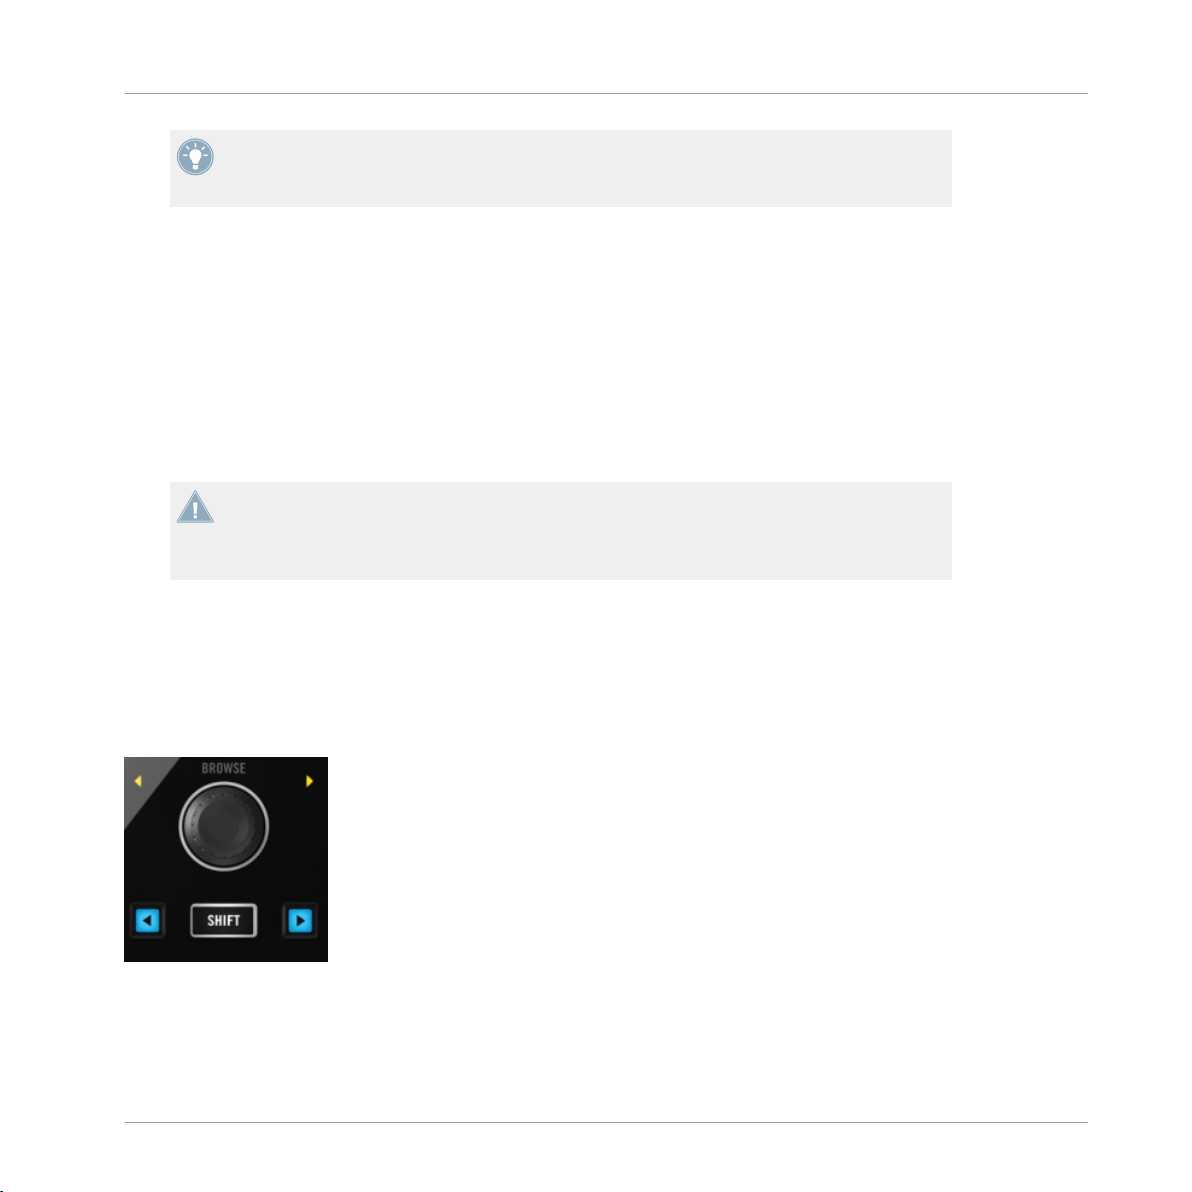
3.3 Using the X1 to Browse & Load Tracks
The process of browsing through and loading of tracks, takes place in the central section of
your X1 device.
The BROWSE encoder, SHIFT, Load Left & Load Right buttons.
Follow the below instructions to understand how to use the X1 to browse, navigate, and load
tracks in TRAKTOR.
Traktor Kontrol X1 Mk2 - Manual - 13

Key functions when using the X1 with TRAKTOR
Using the X1 to Browse & Load Tracks
1. To scroll through your Track Collection in TRAKTOR, turn the BROWSE encoder either
left, or right.
2. To navigate your way to another collection, playlist, or location in the TRAKTOR file tree,
hold SHIFT and turn the BROWSE encoder. There is no need to press the Browse encoder
again to select. Simply release the SHIFT button on your chosen tree node and continue
browsing in your newly selected location.
3. When you have navigated you way to your chosen track, press either of the Load Left or
Load Right buttons to either side of the SHIFT button. The Load Left button when pressed will load the track into TRAKTOR's left hand Deck (by default TRAKTOR Deck A). The
Load Right button will load the track into the right-hand TRAKTOR Deck (by default
TRAKTOR Deck B).
Refer to the available X1 deck combinations as described in section ↑3.2, Connecting the
X1 device to TRAKTOR.
Secondary Function of the Load Buttons
The two Load buttons have the following secondary functions:
▪ Pressing the Load Left button in combination with SHIFT engages TRAKTOR's Snap
mode. Located on TRAKTOR's master panel, with Snap mode on, any Cue Point you create in the track will snap to the closest beat, thus ensuring that you get directly to that
beat next time you press the Hotcue.
▪ Pressing the Load Right button in combination with SHIFT engages TRAKTOR's Quantize
mode. Located on TRAKTOR's master panel, with Quantize mode on, whenever you jump
through the track (e.g., by pressing a HotCue button or clicking somewhere in the Overview waveform), the playback jumps to the nearest position that preserves the beatmatching, this ensures that the current sync doesn’t get lost when you jump through the
track.
Traktor Kontrol X1 Mk2 - Manual - 14

Key functions when using the X1 with TRAKTOR
3.4 Deck Control
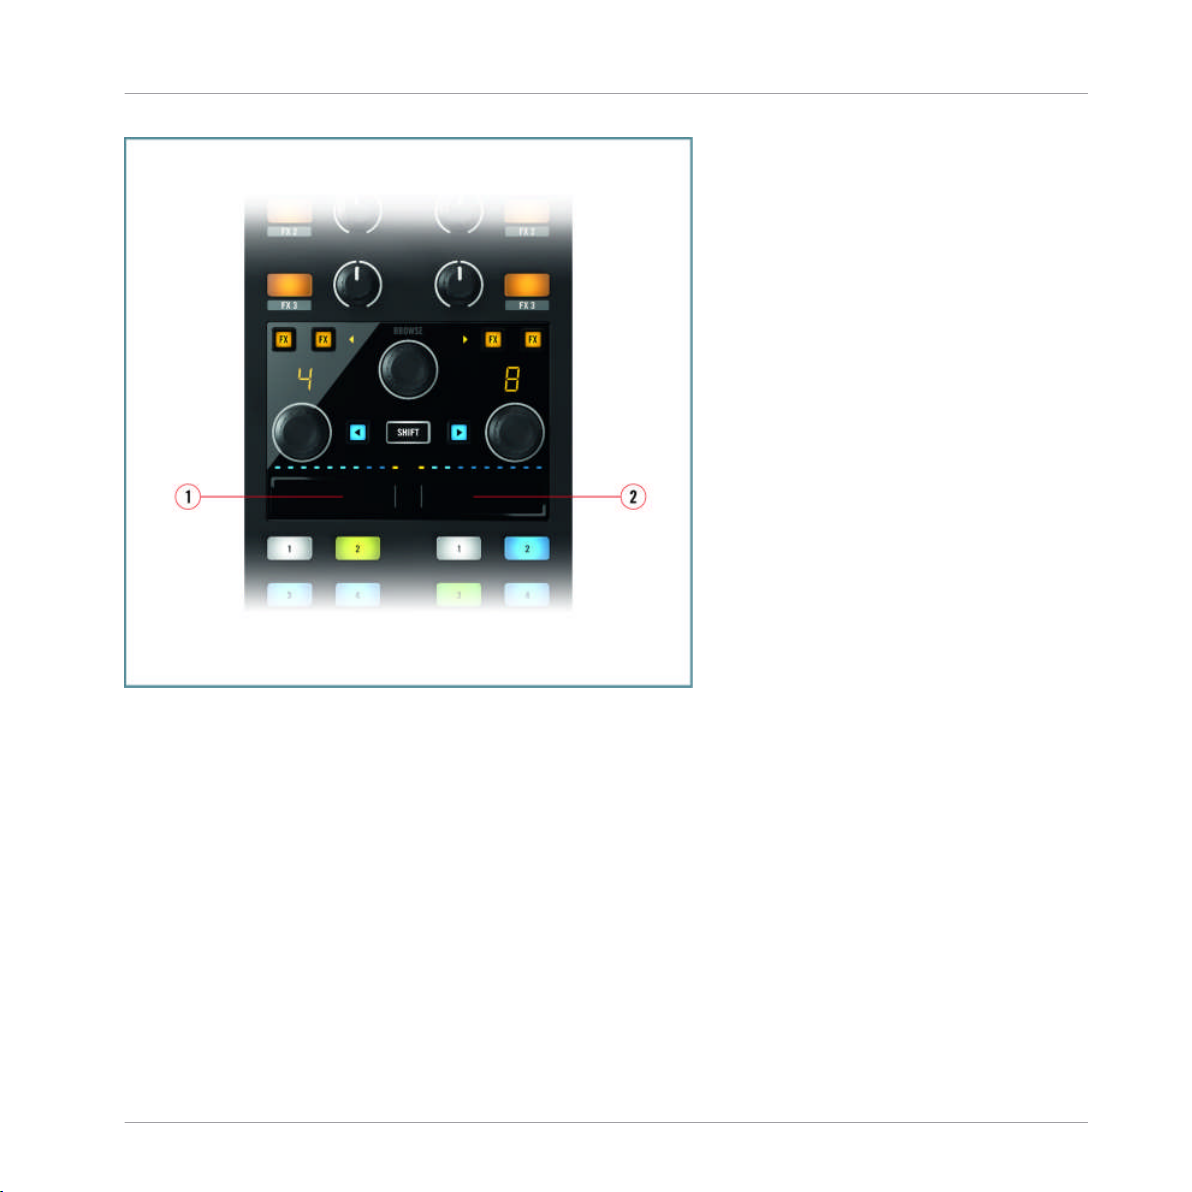
3.4.1 Using the Touch Strip in Split Mode
The X1's Touch Strip can be used to control two TRAKTOR Decks together, known as Split
Mode. In this mode, the Touch Strip assign section is located in the center area and marks the
control divide between the two decks.
In Split Mode, the Touch Strip assign area is visually indicated by two orange dots. When
this Touch Strip section is pressed, these dots illuminate brighter to indicate Touch Strip
can now be resized.
Deck Control
Traktor Kontrol X1 Mk2 - Manual - 15
Key functions when using the X1 with TRAKTOR
Deck Control
The Touch Strip in Split Mode.
Using the X1's default Deck combination A & B:
(1) This area controls Deck A
(2) This area controls Deck B
Try out the X1's Touch Strip in Split Mode by following these steps:
1. Load two tracks into TRAKTOR's decks.
2. Before pressing play, move your finger on the right or left-hand sections of the Touch
Strip.
You will notice by looking at the TRAKTOR software that this moves the start position of
→
the correspondingTRAKTOR deck.
Traktor Kontrol X1 Mk2 - Manual - 16
 Loading...