Honeywell Sparco Aquamix Installation Manual

Sparco™ Aquamix™
(Old Style AM Series Models)
Replacement Element
INSTALLATION INSTRUCTIONS
GENERAL
Hard water conditions may result in scale deposits causing binding of internal parts in extreme cases. Cleaning the internal parts will usually restore the valve to proper operating conditions. In some cases it may be necessary to replace the lower assembly.
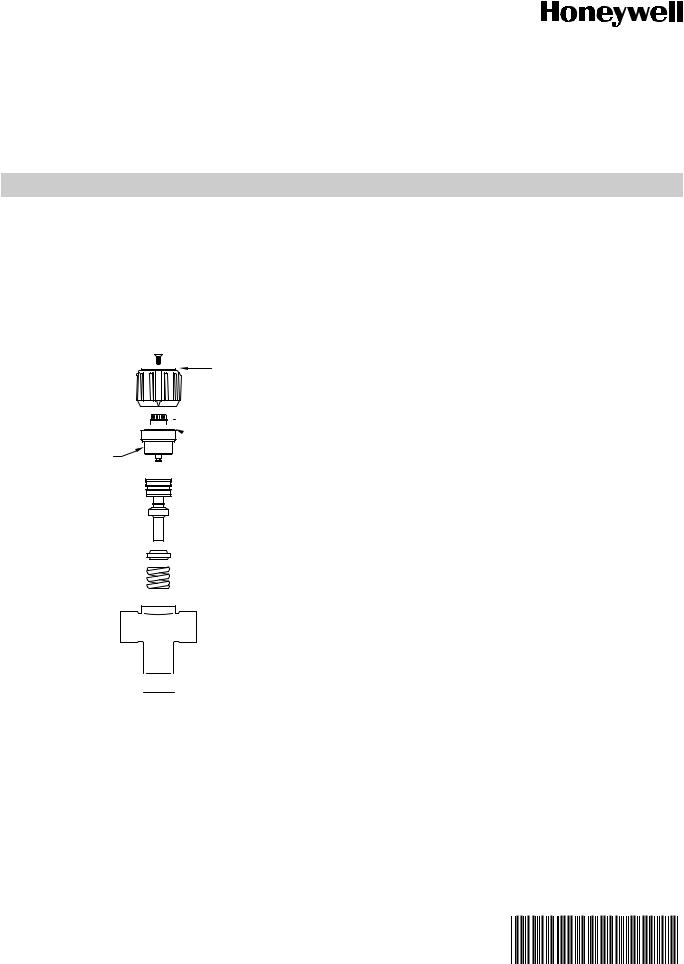
SCREW
LABEL
HANDWHEEL


 UPPER NUT
 HANDWHEEL
STOP
LOWER NUT
TOP ASSEMBLY
LOWER ASSEMBLY
DIFFUSER
SPRING
C 
 H
H
VALVE BODY
 MIX
MIX 
M25028
Fig. 1. Exploded View
INSTALLATION
To clean and/or replace the lower assembly, shut off water and:
1.Pierce center circle of nameplate with a screwdriver and remove screw and hand wheel.
2.Loosen upper nut (do not remove) to allow engaging an adjustable wrench on lower nut. Unscrew lower nut (counterclockwise). This removes top assembly.
3.Brass top assembly will pop up. Remove lower assembly, diffuser and spring.
4.Carefully remove any scaling (calcium deposits) or foreign particles from valve seat and other internal parts. Use vinegar to remove calcium. Soak parts until calcium
becomes soft and can be scrubbed and washed off. Do not use solvents or scratch metallic/Teflon® coated surfaces.
5.Replace cleaned spring, diffuser and lower assembly following instructions below or use new replacement kit assembly. For correct kit number, refer to table on page 2.
a.Some older models have a brass washer between the spring and body. Remove this washer, as it is no longer needed with the latest replacement kits.
b.Insert spring with larger diameter on the bottom into the body.
c.Fit valve top assembly into lower assembly and insert into valve.
d.Tighten lower nut. Line up U slot with raised dot or arrow on body and hold while tightening upper nut.
e.Turn plastic star wheel clockwise until it stops, then back as shown in table.
f.Place hand wheel on position 1 over raised arrow and insert screw. turn hand wheel to desired temperature setting.
62-3105—01
 Loading...