


AIR CONDITIONER
INSTRUCTION MANUAL
SAVE THESE INSTRUCTIONS
CLIMATISEUR
mode d’emploi CONSERVEZ CE MODE D’EMPLOI
CLIMATIZADOR
INSTRUCCIONES DE USO CONSERVE ESTAS INSTRUCCIONES LEA CUIDADOSAMENTE ESTE
INSTRUCTIVO ANTES DE USAR SU APARATO
PAC T140HPEC
Register this product online and receive a free trial issue of Cook’s Illustrated. Visit www.delonghiregistration.com.
Visit www.delonghiusa.com for a list of service centers near you. (U.S. Only)
Enregistrez ce produit en ligne et recevez un numéro gratuit de Cook’s Illustrated.
Visitez www.delonghiregistration.com. Visitez www.delonghiusa.com pour y voir une liste des centres de réparation proches de chez vous. (É.-U. uniquement)
Registre este producto en línea y reciba un ejemplar gratis de Cook’s Illustrated. Visite www.delonghiregistration.com.
Visite www.delonghiusa.com para ver la lista de centros de servicios cercanos a usted.
(Solamente en los Estados Unidos)
Electronic characteristics/Caractéristiques électroniques/Caracteristicas electricas
115V~60Hz 1500W

I M P O R T A N T S A F E G U A R D S
•Use this appliance only as described in this instruction manual. As with any electrical appliance, the instructions aim to cover as many situations as possible. Caution and common sense should be used when operating and installing this air conditioner.
•This appliance has been manufactured to cool and dehumidify domestic environments and must not be used for other purposes.
•It is dangerous to alter or modify the unit’s characteristics in any way.
•The appliance must be installed in accordance with the relevant national legislation.
•Should repairs be necessary, contact the nearest authorized Repair Service Center. Unauthorized servicing can be dangerous.
•The appliance is not intended for use by persons (including children) with reduced physical, sensory or mental capabilities, or lack of experience and knowledge, unless they have been given supervision or instruction concerning use of the appliance by a person responsible for their safety. Children should be supervised to ensure that they do not play with the appliance.
•If the power cable is damaged, it must be replaced by the manufacturer or an authorized technical service center in order to avoid risk.
•Always ensure the appliance is plugged into a grounded 3-prong outlet. If you have any doubts check with a qualified electrician.
•Do not use extension cables.
•Before cleaning or maintenance operations, always unplug the unit from the outlet.
•Do not pull on or place strain on the power cord when moving the appliance.
•The appliance should not be installed where the atmosphere may contain combustible gases, oil or sulphur, or near heat sources.
•Do not rest hot or heavy objects on the appliance.
•Clean the filters at least once a week.
•Avoid using heaters near the unit.
•The unit should be transported in a vertical position. If this is not possible secure the unit at an angle, do not lie it horizontally.
•Before transporting the unit, drain the unit.
After transportation, wait at least 6 hours before switching the unit on.
•The packaging materials can be recycled.
You are therefore recommended to place them in the special containers for differentiated waste collection.
•This appliance is fitted with a special safety device. When the compressor switches
off, this device prevents it from switching on again for at least 3 minutes.
WARNING: Changes or modifications not expressly approved by the party responsible for compliance could void the user’s authority to operate the equipment.
SPECIFIC WARNINGS FOR APPLIANCES WITH R410A REFRIGERANT GAS:
R410A refrigerant gas conforms to EC regulations on the environment.
Avoid perforating the refrigerant circuit of the appliance.
ENVIRONMENTAL INFORMATION:
This unit contains fluorinated greenhouse gases covered by the Kyoto Protocol. Maintenance and disposal must be carried out by qualified personnel only (R410A, GWP=1975).
SAVE THESE INSTRUCTIONS
this product is for household only
2
ELECTRICAL CONNECTIONS
Before plugging the appliance into the outlet, check that:
•the power supply corresponds to the value indicated on the rating plate on the back of the appliance;
•the outlet and electrical circuit are adequate for the appliance;
•the outlet matches the plug. If this is not the case, have the plug replaced;
•the outlet is a properly grounded 3 hole outlet.
Failure to follow these important safety instructions absolves the manufacturer of all liability.
WHAT IS THE PINGUINO
During the summer, you feel comfortable at a
temperature of between 75 - 80°F (24 - 27°C) with a relative humidity of about 50%.
An air conditioner removes excess moisture and heat from the room where it is located. Compared with wall mounted models, portable air conditioners have the advantage that they can be moved from one room to another in the home or be transported from one building to another. Hot air from the room is passed through a coil cooled by refrigerant gas. Excess heat and moisture are removed before the air is re-emitted into the room.
With portable air conditioners, a small part of this air is used to cool the refrigerant gas and then, when hot and damp, is discharged outside.
In the spring and autumn, the appliance can also be used to heat.
The efficient heat pump system provides a high heating capacity with low energy consumption. All Pinguino models can also be used in fan-only mode.
PREPARING FOR USE
The instructions below will enable you to prepare your air conditioner for operation as efficiently as possible.
Before use, make sure the air intake and outlet grilles are unobstructed.
Air-conditioning without installation
Just a few simple steps and your comfort is ensured with your appliance:
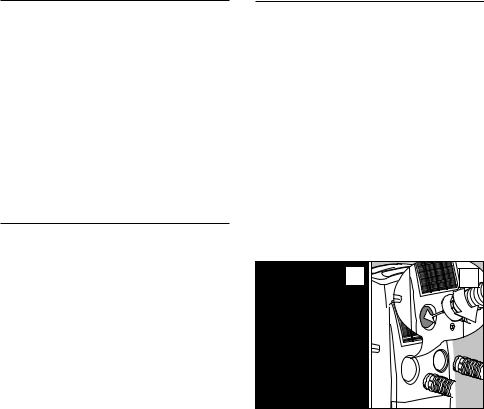
•Fit the air exhaust hose (F) in the housing at the back of the appliance (fig. 1).
•In order to improve the performance of theappliance in air conditioning and boost (supercool) modes, you can also fit
the intake hose accessory (M) in its housing in the back of the appliance as shown in figure 1A. This step is optional.
1 |
|
1A |
|
1 |
2 |
|
|
•Fit the window outlet (N) to the end of the hose (L/M).
•Place the air conditioner near a window or French window.
•Adjust the length of the hose to reach the window.
•Make sure the air exhaust hose is unobstructed.
Sash window
For optimum results:
•If you have a sash window, place the bracket
(U)or (V) according to your needs, on the window sill, extend the bracket fully within the window frame, fix the bracket by using the locking pin then lower the window onto the bracket. Insert the window outlet (N) of the exhaust hose (L) into the slot, then connect the hose to the airconditioner (fig. 2 and 2A).
Thanks to the locking pins, it’s possible to use the window bracket also for sliding windows.
3

Description
AAir outlet grille
BControl panel
CCastors
DHandles
EAir intake grille with filters
FAir exhaust hose housing
GIntake grille
HContinuous condensate drain connection
ICondensate tank
JPower cable
K2 flange caps
LAir exhaust hose
MAir inlet to intake hose
N2 window outlets
OSuckers
PCastor locks
QContinuous drain hose with coupling
RRemote control
S3M® air purifying filter
TSilver ion filter
USingle hole window bracket with pin
VDouble holes window bracket with pins
WBug net
XRemote control support + adhesive strip
YDust cover
ZRemote control receiver
 K
K
W |
U |
|
V
Y
X 
L
 N
N
M
O
S 

T |
P |
|
|
|
R |
A B Z
D
C

 E
E

 F
F
G
H
I
J


 Q
Q
4

Position the hole of the bracket so to allow a correct installation of the exhaust hose.
2 |
2A |
If the windows are large, use the 2 window bar (U and V) to cover your window opening, extending them to the required length, then blocking it with the locking pins supplied. Make sure you do not cover the hole or holes for the window outlet.
Bug Screen
To stop bugs from coming in, a screen can be mounted on the window bracket as shown in fig. 3.
1 
2
3
Keep the air hose as short and free of curves as possible to avoid bottlenecks.
Double window
Open the double window slightly and position
the window outlet (N) . Use the suction pad (O) to hold the two parts of the window together (fig. 4).
2 |
4 |
1 |
|
Air-conditioning with installation
If required, your appliance can be installed semipermanently (Fig. 5 and 5A).
|
5 |
|
|
|
5A |
|
inches |
|
|
|
|
.8 |
|
|
|
ches |
|
11 |
|
|
|
|
|
|
|
|
in |
||
|
cm |
1 |
.8 |
|
|
|
30 |
1 |
|
cm |
|
|
|
|
|
30 |
|
11,8 inches |
|
11,8 inches |
|
|
|
30 cm |
|
30 cm |
|
|
|
Proceed as follows:
•Drill a hole in an outside wall or through a window pane. Fit the flange accessory provided in the hole following the indications in figs. 6, 7 and 8.
Respect the dimensions and height of the hole given in figures 6, 7 and 8.
4.17 inches - 106 mm inlet hole dimension
inches (106mm) |
6 |
|
|
4.17 |
|
|
|
|
|
|
|
in the |
|
wall: you are |
|
|
|
|
|
|
|
|
|||
|
|
|
in the wooden |
||||||
|
|
|
recommended to |
||||||
|
|
|
kickboard of a |
||||||
in the window |
|||||||||
insulate the sec- |
|||||||||
pane |
French |
||||||||
tion of wall using |
|||||||||
|
|
|
window |
||||||
|
|
|
suitable insulation |
||||||
|
|
|
|
|
|
||||
|
|
|
|
|
|
||||
inches (134 mm) |
7 |
|
|
5.27 |
|
5.27 inches - 134 mm outlet hole dimension |
|
5

8
 MAX 39.37 inches MAX100 cm
MIN 13.77 inches
MIN 35 cm
•Fit the air exhaust hose (L) in the housing at the back of the appliance (fig. 1).
•Fit the end of the hose to the flange (K).
When the hose is not fitted, the hole can be closed with the flange cap.
 Keep the air hose as short and free of curves as possible to avoid bottle necks.
 When installing the air conditioner semipermanently, you should leave a door slightly open, as little as 0.5 inch (1 cm), to guarantee correct ventilation.
control panel
|
|
|
14 |
|
5 |
|
|
7 |
|
|
|
10 |
|
|
9 |
|
|
|
|
|
|
||||||||||
|
|
|
|
|
|
|
|
|
|
|
|
|
|
|
|
|
|
|
|
|
|
|
|
|
|
|
|||||
15 |
|
|
|
|
|
4 |
|
6 |
|
|
|
|
|
|
|
|
|
13 |
1 |
||||||||||||
|
|
|
|
|
|
|
|
|
|
|
|
|
|
|
|
|
|
|
|
|
|
|
|
|
|
|
|
|
|
|
|
|
|
|
|
|
|
|
|
|
|
|
|
|
|
|
|
|
|
|
|
|
|
|
|
|
|
|
|
|
|
|
|
|
|
|
|
|
|
|
|
|
|
|
|
|
|
|
|
|
|
|
|
|
|
|
|
|
|
|
|
|
|
|
|
|
|
|
|
|
|
|
|
|
|
|
|
|
|
|
|
|
|
|
|
|
|
|
|
|
|
|
|
|
|
|
|
|
|
|
|
|
|
|
|
|
|
|
|
|
|
|
|
|
|
|
|
|
|
|
|
|
|
|
|
|
|
|
|
|
|
|
|
|
|
|
|
|
|
|
|
|
|
|
|
|
|
|
|
|
|
|
|
|
|
|
|
|
|
|
|
|
|
|
|
|
|
|
|
|
|
|
|
|
|
|
|
|
|
|
|
|
|
|
|
|
|
|
|
|
|
|
|
|
|
|
|
|
|
|
|
|
|
|
|
|
|
|
|
|
|
|
|
|
|
|
|
|
|
|
|
|
|
|
|
|
|
|
|
|
|
|
|
|
|
|
|
|
|
|
|
|
|
|
|
|
|
|
|
|
|
|
|
|
|
|
|
|
|
|
|
|
|
|
|
|
|
|
|
|
|
|
|
|
|
|
|
|
|
|
|
|
|
|
|
|
|
|
|
|
|
|
|
|
|
|
|
|
|
|
|
|
|
|
|
|
|
|
|
|
2 |
|
3 |
|
|
11 |
|
|
9 |
|
8 |
|
|
|
|
|
|||||||
|
|
|
|
|
|
|
|
|
|
|
|
|
|
|
|
|
|
|
|
|
|
|
|
|
|
|
|
|
|
|
|
|
|
|
|
|
|
|
12 |
|
|
|
|
|
|
|
|
|
|
||||
Description |
|
|
|
|
8 |
|
|
|
Fan speed button: Quiet - Med - High - |
|||||||||||||||||
1 |
ON/Standby button (on/off) |
|
|
|
|
|
|
|
||||||||||||||||||
2 |
MODE button (selects the modes): Air |
|
|
|
|
|
|
|
|
|
Auto. |
|
|
|
|
|
|
|
||||||||
|
conditioning, dehumidifying, air |
|
|
|
|
9 |
|
|
|
Speed indicator |
|
|
|
|
|
|
|
|||||||||
|
purifying/fan, heating, Smart |
|
|
|
|
10 |
|
|
SLEEP symbol |
|
|
|
|
|
|
|
||||||||||
3 |
Air conditioning symbol |
|
|
|
|
11 |
|
|
“Timer” symbol |
|
|
|
|
|
|
|
||||||||||
4 |
Dehumidifying symbol |
|
|
|
|
12 |
|
|
“Ionizer” symbol (certain models only) |
|||||||||||||||||
5 |
Air purifying/fan symbol |
|
|
|
|
13 |
|
|
Increase button (+) |
|||||||||||||||||
6 |
Heating symbol |
|
|
|
|
14 |
|
|
Decrease button (-) |
|||||||||||||||||
7 |
Smart symbol |
|
|
|
|
15 |
|
|
SWING button (movement of the grille |
|||||||||||||||||
|
|
|
|
|
|
|
|
|
|
|
|
|
|
|
|
flaps) |
|
|
|
|
|
|
|
|||
6
 Loading...