


Contents |
|
INTRODUCTION................................... |
7 |
Symbols used in these instructions .................. |
7 |
Letters in brackets............................................. |
7 |
Troubleshooting and repairs.............................. |
7 |
SAFETY............................................. |
7 |
Fundamental safety warnings............................ |
7 |
DESIGNATED USE................................. |
8 |
INSTRUCTIONS................................... |
8 |
DESCRIPTION..................................... |
8 |
Description of the appliance.............................. |
8 |
Description of control panel.............................. |
8 |
PRELIMINARY CHECKS.......................... |
9 |
Checking the appliance...................................... |
9 |
Installing the appliance...................................... |
9 |
Connecting the appliance................................... |
9 |
Using the appliance for the first time................. |
9 |
TURNING THE APPLIANCE ON.................. |
9 |
TURNING THE APPLIANCE OFF............... |
10 |
SETTING AUTO-OFF (STAND-BY)............. |
10 |
ENERGY SAVING................................ |
10 |
MAKING COFFEE................................ |
10 |
Selecting the coffee taste................................. |
10 |
Selecting the quantity of coffee in the cup....... |
11 |
Adjusting the coffee mill.................................. |
11 |
Tips for a hotter coffee:................................... |
11 |
Making coffee using coffee beans................... |
11 |
Making coffee using pre-ground coffee........... |
12 |
MAKING CAPPUCCINO......................... |
12 |
Cleaning the cappuccino maker after use........ |
13 |
HEATING WATER................................ |
13 |
CLEANING........................................ |
13 |
Cleaning the coffee maker............................... |
13 |
Cleaning the coffee grounds container............ |
13 |
Cleaning the drip tray...................................... |
14 |
Cleaning the inside of the machine.................. |
14 |
Cleaning the water tank................................... |
14 |
Cleaning the coffee spouts.............................. |
14 |
Cleaning the pre-ground coffee funnel............. |
14 |
Cleaning the infuser......................................... |
14 |
DESCALING...................................... |
15 |
SETTING WATER HARDNESS................. |
16 |
Measuring water hardness.............................. |
16 |
Set water hardness.......................................... |
16 |
TECHNICAL SPECIFICATION................... |
16 |
disposal........................................ |
16 |
MEANING OF LIGHTS DURING NORMAL |
|
OPERATION ..................................... |
17 |
MEANING OF THE ALARM LIGHTS........... |
18 |
TROUBLESHOOTING........................... |
19 |
6

INTRODUCTION
Thank you for choosing the ESAM03.110 automatic coffee and cappuccino maker.
We hope you enjoy using your new appliance. Take a few minutes to read these instructions. This will avoid all risks and damage to the machine.
Symbols used in these instructions
Important warnings are identified by these symbols.
These warnings must absolutely be respected.
 Danger!!
Failure to observe the warning could result in possibly life threatening injury from electric shock.
 Important!
Failure to observe the warning could result in injury or damage to the appliance.
Danger of burns!!
Failure to observe the warning could result in scalds or burns.
 Please note :
This symbol identifies important advice or information for the user.
Letters in brackets
The letters in brackets refer to the legend in the Description of the appliance on page 3.
Troubleshooting and repairs
In the event of problems, first try and resolve them following the information given in the sections “Meaning of the alarm lights” on page 18 and “Troubleshooting” on page 19.
If this does not resolve the problem or you require further information, you should consult Customer Services by calling the number given on the annexed “Customer Service” sheet.
If your country is not among those listed on the sheet, call the number given in the guarantee.
If repairs are required, contact De’Longhi Customer Services only.
The addresses are given in the guarantee certificate provided with the machine.
SAFETY
Fundamental safety warnings
 Danger!!
This is an electrical appliance and may therefore cause electric shock.
You should therefore respect the following safety warnings:
•Never touch the appliance with damp hands or feet.
•Never touch the plug with damp hands.
•Make sure the socket used is freely accessible at all times, enabling the appliance to be unplugged when necessary.
•Unplug directly from the plug only. Never pull the power cable as you could damage it.
•To disconnect the appliance completely, place the main switch at the back of the appliance in the 0 position (fig. 6).
•If the appliance is faulty, do not attempt to repair. Turn it off, unplug from the mains socket and contact Customer Services.
•If the plug or power cable is damaged, it must be replaced by De’Longhi customer services only to avoid all risk.
 Important!
Keep all packaging (plastic bags, polystyrene foam) away from children.
 Important!
The appliance is not intended for use by persons (including children) with reduced physical, sensory or mental capabilities, or lack of experience and knowledge, unless they have been given supervision or instruction concerning use of the appliance by a person responsible for their safety. Children must be supervised to ensure they do not play with the appliance.
Danger : Risk of burns!
This appliance produces hot water and steam may form while it is in operation.
Avoid contact with splashes of water or hot steam.
7

DESIGNATED USE
This appliance is designed and made to prepare coffee and heat drinks. All other use is considered improper.
This appliance is not suitable for commercial use.
The manufacturer is not liable for damage deriving from improper use of the appliance.
This is a household appliance only. It is not intended to be used in:
•staff kitchen areas in shops, offices and other working environments;
•farm houses
•by clients in hotels, motels and other residential type environments
•bed and breakfast type environments.
INSTRUCTIONS
Read these instructions carefully before using the appliance.
•Failure to respect these instructions may result in burns or damage to the appliance.
•The manufacturer is not liable for damage deriving from failure to respect these instructions.
 Please note :
Keep these instructions
If the appliance is passed to other persons, they must also be provided with these instructions.
DESCRIPTION
Description of the appliance
(page 3 - |
A |
) |
|
|
A1. |
Grinding adjustment knob |
|||
A2. |
Main switch (on back of appliance) |
|||
A3. |
Beans container |
|
||
A4. |
Beans container lid |
|||
A5. |
Pre-ground coffee funnel lid |
|||
A6. |
Compartment for measure |
|||
A7. |
Cup shelf |
|
|
|
A8. |
Pre-ground coffee funnel |
|||
A9. |
Steam spout |
|
||
A10. Cappuccino maker (removable) |
||||
A11. Steam nozzle (removable) |
||||
A12. Water tank |
|
|||
A13. Power cable |
|
|||
A14. Cup tray |
|
|
||
A15. Drip tray |
|
|
||
A16. Infuser door |
|
|||
A17. Coffee grounds container |
||||
A18. Coffee spout (adjustable height) |
||||
A19. Coffee guide |
|
|||
A20. Infuser |
|
|
||
A21. Control panel |
|
|||
Description of control panel |
||||
(page 3 - |
B |
) |
|
|
B1. |
|
button: turns the appliance on and off |
||
|
(stand-by). |
|
||
B2. |
1 cup and coffee temperature OK light |
|||
B3. |
|
button: to make 1 cup of coffee |
||
B4. |
2 cups and coffee temperature OK light |
|||
B5. |
|
button: to make 2 cups of coffee |
||
B6. |
Steam and steam temperature OK light |
|||
B7. |
|
button: to select the steam function |
||
B8. |
Coffee quantity selection knob (short, stan- |
|||
|
dard or long) |
|
||
B9. |
Selection knob to choose coffee taste (for a |
|||
|
mild, standard or strong coffee) or use pre- |
|||
|
ground coffee |
. |
||
B10. Steam/hot water knob |
||||
B11. |
|
light: no water or water tank absent |
||
B12. |
|
light: grounds container full or absent |
||
B13. |
light: general alarm |
|||
B14. |
|
button to select rinsing or descaling |
||
B15. Descaling light
B16. ECO button to select energy saving mode
B17. Energy saving mode light
8
PRELIMINARY CHECKS
Checking the appliance
After removing the packaging, make sure the product is complete and undamaged and that all accessories are present.
Do not use the appliance if it is visibly damaged. Contact De’Longhi Customer Services.
Installing the appliance
 Important!
When you install the appliance, you should respect the following safety warnings:
•The appliance gives off heat. After positioning the appliance on the worktop, leave a space of at least 3 cm between the surfaces of the appliance and the side and rear walls and at least 15 cm above the coffee maker.
•Water penetrating the appliance could cause damage. Do not place the appliance near taps or sinks.
•The appliance could be damaged if the water it contains freezes. Do not install the appliance in a room where the temperature could drop below freezing point.
•Arrange the power cable in such a way that it cannot be damaged by sharp edges or contact with hot surfaces (e.g. electric hot plates).
Connecting the appliance
 Important!
Check that the mains power supply voltage corresponds to the value indicated on the rating plate on the bottom of the appliance.
Connect the appliance to an efficiently earthed and correctly installed socket with a minimum current rating of 10A only.
If the power socket does not match the plug on the appliance, have the socket replaced with a suitable type by a qualified professional.
Using the appliance for the first time
Please note :
•Coffee has been used to factory test the appliance and it is therefore completely normal for there to be traces of coffee in the mill.
The machine is, however, guaranteed to be new.
•You should customise water hardness as soon as possible following the instructions in the section “Setting water hardness” on page 16.
1.Remove the water tank, fill to the MAX line with fresh water then replace in the appliance (fig. 1).
2.Turn the cappuccino maker outwards and place a container with a minimum capacity of 100 ml underneath (fig. 2).
3.Plug the appliance into the mains socket and place the main switch on the back of the appliance in the I position (fig. 3).
4. Press the |
|
(fig. 4) button (fig. 4). The |
, |
, |
lights flash simultaneou- |
sly.
5.Turn the steam knob a half turn anticlockwise as far as it will go to position I (fig. 5). Water is delivered from the cappuccino maker (it is normal for the appliance to make some noise).
6.Wait for delivery of hot water to stop auto-
matically. The |
, |
, |
lights flash |
to indicate that you must close the steam tap by turning the steam knob to the 0 position.
7.Turn the steam knob to the 0 position. The appliance goes off automatically.
To use the appliance, turn it on.
Please note :
•When using the appliance for the first time, you need to make 4-5 cups of coffee or 4-5 cappuccinos before the appliance starts to give satisfactory results.
TURNING THE APPLIANCE ON
 Please note :
Before turning the appliance on, make sure the main switch on the back of the appliance is in the I position (fig. 3).
Each time the appliance is turned on, it performs an automatic preheat and rinse cycle which cannot be interrupted.
The appliance is ready for use only after completion of this cycle.
Danger of burns!
During rinsing, a little hot water comes out of the
9

coffee spouts and is collected in the drip tray underneath. Avoid contact with splashes of water.
•To turn the appliance on, press the  button (fig. 4). The
  and
and 
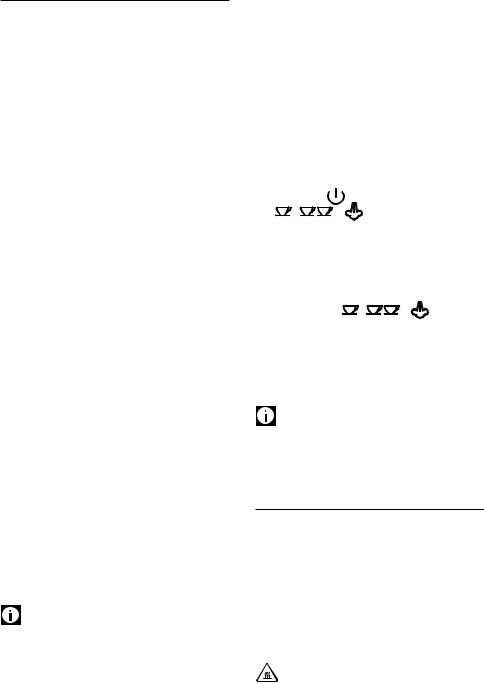
 lights flash while the appliance is heating up and performing an automatic rinse cycle. By circulating the hot water, the appliance heats both the boiler and the internal circuits. During this phase, the light flashes.
When the  and
and 
 lights remain on steadily, the appliance is at temperature.
TURNING THE APPLIANCE OFF
Each time the appliance is turned off, it performs an automatic rinse cycle which cannot be interrupted.
Danger of burns!
During rinsing, a little hot water flows from the coffee spouts.
Avoid contact with splashes of water.
To turn the appliance off, press the  button (fig. 4). The appliance performs a rinse cycle then goes off.
 Please note :
If the appliance is not used for an extended period, place the main switch in the 0 position (fig. 6).
 Important!
To avoid damaging the appliance, never place the main switch (fig. 6) in the 0 position while the appliance is on.
SETTING AUTO-OFF (STAND-BY)
The appliance is set by default to go off if not used for two hours.
The time can be changed so that the appliance switches off after 15 or 30 minutes, or after 1, 2 or 3 hours.
1.With the appliance off but the main switch in the l position (fig. 3), press and hold the ECO button until the lights at the bottom of the control panel come on (see image after point 2).
2.Select the required period of time (15 or 30 minutes or 1, 2 or 3 hours) by pressing the
button (see the light/time table below).
15min 30min |
1h |
2h |
3h |
3.Press the ECO button to confirm the selection. Auto-off is programmed.
 Please note:
To disconnect the appliance completely, place the main switch at the back of the appliance in the 0 position (fig. 6).
ENERGY SAVING
Use this function to activate or deactivate energy saving mode. This reduces energy consumption in compliance with current European regulations.
ECO mode is active by default (ECO light on). To deactivate the function, press the ECO button. The light goes off.
To reactivate the function, press the ECO button again, the light comes on.
 Please note:
A few seconds may elapse between energy saving mode and delivery of the first coffee as the appliance must heat up again.
MAKING COFFEE
Selecting the coffee taste
Turn the coffee taste selection knob (B8) to select the required taste. Turning it clockwise increases the quantity of coffee beans the appliance will grind and therefore the strength of the coffee obtained.
Please note :
•The first time you use the appliance, you will need to make a number of coffees to identify the correct knob position through trial and error.
•Make sure not to turn the knob too far clockwise, otherwise the coffee may be de-
10
 Loading...