


Washing machine |
Instructions for use |
GC4 1D

General safety rules
–This appliances is intendedIntroductionto be used in household and similar applications such as:
• Staff kitchen areas in shops, offices and other working
Please read these instructions for use carefully and all other information enclosed with the environments;
washing machine.
• Farm houses;
Keep all documentation in a safe place for future reference or for any future owners.
• By clients in hotels, motels and other residential type environments;
This• Bedappliancesand breakfastis intendedtype environmentsto be used. in household and
A different use of this appliance from household environment similar applications such as:
or from typical housekeeping functions, as commercial use by
- staffexpertkitchenorareastrainedshops,users,officesisandexcludedother workingevenvironments;in the above applications.
- farmIf houses;the appliance is used in a manner inconsistent with this it
may reduce the life of otherappliance and may void the manufacturer’s |
||
- by clients in hotels, motels and |
residential type environments; |
|
warranty. Any damage to the |
appliance or other damage or |
|
- bed nd breakfast type environm nts. |
|
|
loss arising through |
use that |
is not consistent with domestic |
A differentor householdof this applianceuse (evenfrom ifhouseholdlocatedenvinronmenta domesticr from typicalor housekhouseholdeping functions,environment)as commercialshallusenotby expertbe acceptedor train users,by theis xcludedmanufacturereven in thetoabovethe applicationsfullest .extent permitted by law.
– This appliance can be used by children aged from 8 years and
If theaboveapplianceandis uspersonsd in a mannerwith inconsistreducednt withphysical,th it maysensoryreduce theorlifementalof the applicapabilitiesnce and may vorid thelackmanufacturer’sof experiencewarranty. and knowledge if they have Anybeendamagegivento the supervisionap liance or otherordamageinstructionor l ss arisiconcerningthrough usethatofis notthe consistentappliancewith domesticin a safeor householdway anduse understand(even if located thein a domestichazardsor involvedhousehold . environment)Childrenshallshallnot benotacceplayted bywiththe manufacturerthe applianceto the fullest. Cleaningextent permittedandby userlaw.
maintenance shall not be made by children without supervision.
NotesChildrenon disposalshould be supervised to ensure that they do not play with
–
All thepackapplianceging material.used is environmentally-friendly and recyclable. Please help dispose of
the packaging via environmentally-friendly means.
– Children of less than 3 years should be kept away unless continuously supervised.
– YourIf thesupsupplylier cordlocalis damaged,council willit mustbe ablebe replacedto give byyouthe manufacturer, its service agent or similarly qualified persons in details of current means of disposal.
order to avoid a hazard.
– Only use the hose-sets supplied with the appliance for the water
Valuable materials can be salvaged from an old appliance via scrap reprocessing. supply connection (do not reuse old hose-sets).
– Water pressure must be between 0,05 MPa and 0,8 MPa.
Note: pull out the mains plug from any old appliance.
– Make sure that a carpet do not obstruct the base of the machine
Cutand theventilationpoweropeningscable and. dispose of it, together with the
– plugThe .OFF condition is reached by placing the reference mark on the programmes control/knob in the vertical position. Any other different position of such control sets the machine in ON condition
When disposing of an old washing machine, please ensure that the door lock is rendered
(only for models with programmes knob). inoperable to prevent children shutting themselves in the appliance.
2

– After installation, the appliance must be positioned so that the plug is accessible.
Contents Page
– The maximum load capacity of dry clothes depends on the model used (see control panel).
Introduction |
2 |
– To consult the product fiche please refer to the manufacturer |
|||
|
General delivery notes |
4 |
|
|
website. |
4 |
|
|
Safety notes |
|
|
|
Quick start |
5 |
|
|
Safety instructions |
|
|
|
Description of controls |
6 |
|
– Before cleaning or maintaining the washing machine, unplug the |
|||
|
appliance and turn off the water faucet. |
12 |
|
|
Programme Table |
|
|
|
Programme selector |
14 |
|
– Make sure the electrical system is grounded. Otherwise, seek |
|||
|
Detergent drawer |
17 |
|
|
qualified professional assistance. |
|
|
|
Detergents, washing aids and amounts to use |
18 |
|
– Please do not use converters, multiple sockets or extension cords. |
|||
|
Useful advice for the user |
20 |
|
|
The main wash |
21 |
|
|
|
||
|
WARNING: water may reach very high temperatures during |
|
|
|
Cleaning and routine maintenance |
23 |
|
|
the wash cycle. |
|
|
|
Investigating malfunctions |
25 |
|
|
|
||
|
Technical data |
27 |
|
– Make sure there is no water in the drum before opening the |
|||
|
porthole. |
28 |
|
|
Setting up + installation |
|
|
– Do not pull on the power cord or appliance to unplug the machine.
– Do not expose the washing machine to rain, direct sunlight or other weather elements.
– BEFOREWhen moving,SWITCHINGdo not liftONtheTHEwashingAPPLIANCEmachine MAKEby the knobsSUREor ITdetergentIS CORRECTLYdrawer; duringINSTALLEDtransport, neverAND restTHATtheTHEportholeFIXINGon the trolley. We recommend two people lift the washing machine.
SCREWS ARE REMOVED AS SHOWN IN PAGE 28.
–In the event of fault and/or malfunction, turn off the washing machine, close the water faucet and do not tamper with the appliance. Immediately contact the Customer Service Centre and only use original spare parts. Failure to observe these instruction may jeopardise appliance safety.
Appliance complies with European Directives:
•2006/95/EC (LVD);
•2004/108/EC (EMC);
•2009/125/EC (ErP);
•2011/65/EU (RoHS)
and subsequent amendments.
3

Contents |
Page |
General safety rules |
2 |
General delivery notes |
5 |
Quick start |
5 |
Description of controls |
6 |
Programme Table |
12 |
Programme selector |
14 |
Detergent drawer |
17 |
Detergents, washing aids and amounts to use |
18 |
Useful advice for the user |
20 |
The main wash |
21 |
Cleaning and routine maintenance |
23 |
Investigating malfunctions |
25 |
Technical data |
27 |
Setting up + installation |
28 |
BEFORE SWITCHING ON THE APPLIANCE MAKE SURE IT IS CORRECTLY INSTALLED AND THAT THE FIXING SCREWS ARE REMOVED AS SHOWN IN PAGE 28.
Please read these instructions for use carefully and all other information enclosed with the washing machine.
Keep all documentation in a safe place for future reference or for any future owners.
4

M)N.B!
If the appliance is installed on a carpeted floor ensure that the ventilation holes on the base of the applianceGeneralare ot obstructeddelivery. notes
N)If the appliance is not running properly or breaks down, switch it off, turn off the tap and do Pleasenot tampercheck thatwiththethefollowingapplianceitems. are delivered with the appliance:
-InstructionConsult onlymanualthe Authorised Technical Support Service for possible repair and ask them to
-Certificateuse originalofspareguaranteeparts.
-InletFailurehoseto comply with the above can compromise the safety of the appliance.
O)CheckIf thethatappliance’sno damagepowerhascableoccurredshoulduringever needtransit,replacing,and if so,consultcall yourthe Authorisednearest Authorised TechnicalTechnicalSupportSupportServiceServiceagent.
Quick start
Washing
-Open the door by using the handle “A” (Fig. 1, page 6)
-Select laundry and put it in the machine
-Close the door
-Put detergent in the compartments as indicated in the programme guide in this instruction manual
-Select programme
-Wait that a “SPIN” indicator light will go on.
Press additional function buttons (if required)
-Press the “Start/Pause” button (page 7)
-After few seconds the appliance starts working.
After washing
-All the wash stage indicator lights will illuminate.
-Wait for the door lock to be released
(about 2 minutes after the programme has finished). The “Door Security” indicator light will go out.
-Switch off the washing machine by turning the selector to “OFF” position.
-Open the door and remove the laundry.
Ensure that the machine is correctly installed in line with the instructions found on page 28.
5

Description of controls
Fig. 1
C I F L H G ME N
P
B MD
A
Door handle |
A |
"Door Security" indicator light |
B |
"Start/Pause" button |
C |
"Cold wash" button |
D |
"Allergy Care" button |
E |
"Delay Start" button |
F |
"Spin Selection" button |
G |
Spin speed indicator light |
H |
Programme Start light |
I |
"Wash stage" indicator lights |
L |
Buttons indicator lights |
M |
Programme selector with "OFF" position |
N |
Detergent drawer |
P |
6

Door handle
Press the finger-bar inside the door handle to open the door.
DOOR SECURITY indicator light
A
B
The“DoorSecurity”indicatorlightisilluminatedwhenthedoorisfullyclosedandthemachineisON. When "Start/Pause" is pressed on the machine with the door closed the indicator will flash momentarily and then illuminate.
If the door is not closed the indicator will continue to flash.
Aspecial safety device prevents the door from being opened immediately after the end of the cycle. Wait for 2 minutes after the wash cycle has finished and the “Door Security” light has gone out before opening the door.At the end of the cycle turn the programme selector to "OFF" .
START/PAUSE button
C
After selecting a programme wait that a “Spin” indicator light is illuminate before pressing the START button.
Press to start the selected cycle (according to the selected cycle one wash stage indicator lights will illuminate).
NOTE: When the "Start/Pause" button has been pressed, the appliance can take few seconds before it starts working.
Changing the settings after the programmes has started (PAUSE)
The programme may be paused at any time during the wash cycle by holding down the “START/PAUSE” button for about 4 seconds.
When the machine is in the paused mode, a “wash stage” indicator light and option buttons will flash.
To restart the programme press the START button once again.
If you wish to add or remove items during washing, wait 2 minutes until the safety device unlocks the door.
When you have carried out the manoeuvre, close the door, press "Start/Pause" button and the appliance will continue working where it left off.
CANCELLING THE PROGRAMME
To cancel the programme, set the selector to the OFF position.
Select a different programme.
Re-set the programme selector to the OFF position.
7
The option buttons should be selected before pressing the "Start/Pause" button.
COLD WASH button |
D |
|
By pressing this button it is possible to transform every programme into a cold washing one, without modifying other characteristics (water level, times, rythmes, etc...).
Curtains, small carpets, man made delicate fabrics, non coulor fast garments can be safely washed thanks to this new device.
“ALLERGY CARE” button |
E |
|
By pressing this button you can activate a special new wash cycle in the Cotton and Mixed Fabrics programs, thanks to the new Sensor System. This option treats with care the fibres of garments and the delicate skin of those who wear them.
The load is washed in a much larger quantity of water and this, together with the new combined action of the drum rotation cycles, where water is filled and emptied, will give you garments which have been cleaned and rinsed to perfection. The amount of water in the wash is increased so that the detergent dissolves perfectly, ensuring an efficient cleaning action. The amount of water is also increased during the rinse procedure so as to remove all traces of detergent from the fibres. This function has been specifically designed for people with delicate and sensitive skin, for whom even a very small amount of detergent can cause irritation or allergy.
You are advised to also use this function for children’s clothing and for delicate fabrics in general, or when washing garments made of towelling, where the fibres tend to absorb a greater quantity of detergent. To ensure the best performance for your wash, this function is always activated on the Delicates and Woollens/Hand wash programs.
8
DELAY START button |
F |
|
Appliance start time can be set with this button, delaying the start by 3, 6 or 9 hours.
Proceed as follows to set a delayed start:
Select a programme (Wait that a “Spin” indicator light will go on).
Press "Delay Start" button (each time the button is pressed the start will be delayed by 3, 6 or 9 hours respectively and the corresponding light will blink).
Press "Start/Pause" to commence the Delay Start operation (the indicator light associated with the selected Delay Start time stops blinking and remains ON).
At the end of the required time delay the programme will start.
To cancel the Delay Start function :
press the "Delay Start" button until the indicator lights will be off and the programme can be started manually using the "Start/Pause" button or switch off the appliance by turning the programme selector to "OFF" position.
Warning: If there is any break in the power supply while the machine is operating, a special memory stores the selected programme and, when the power is restored, it continues where it left off.
SPIN SELECTION button |
G |
|
The spin cycle is very important to remove as much water as possible from the laundry without damaging the fabrics. You can adjust the spin speed of the machine to suit your needs.
By pressing this button, it is possible to reduce the maximum speed, and if you wish, the spin cycle can be cancelled (the spin speed indicator light are off).
To reactivate the spin cycle press the button until you reach the spin speed you would like to set. To prevent damage to the fabrics, it is not possible to increase the speed over that which is automatically suitable during the selection of the program.
It is possible to modify the spin speed without to pausing the machine.
Note:
The machine is fitted with a special electronic device, which prevents the spin cycle should the load be unbalanced. This reduces the noise and vibration in the machine and so prolongs the life of your machine.
9
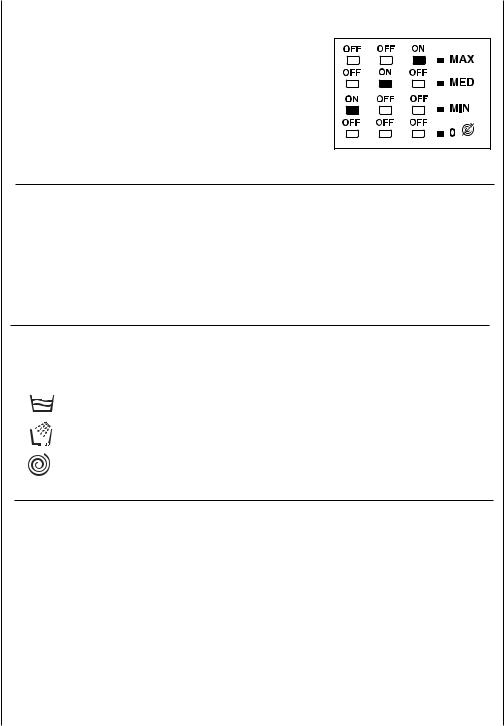
Spin speed indicator light |
H |
When you set a program, the maximum possible spin speed will be automatically shown by the relevant indicator light.
Choosing a smaller spin speed by the appropriate button, the relevant indicator light will go on.
Programme Start light
This lights up when the START button has been pressed.
WASH STAGE indicator lights
= main wash
= rinse
= spin
I
L
Buttons indicator light |
M |
These light up when the relevant buttons are pressed.
If an option is selected that is not compatible with the selected programme then the light on the button first flashes and then goes off.
10
 Loading...