


40005112Eng.qxd 30/05/2007 11:18 Page 1
®
Instruction Book
GO DC 38T
Condenser Tumble Dryer
English
Dansk
Norsk
Suomi
Svenska
40005112Eng.qxd 30/05/2007 11:18 Page 2
English . . . . . . . . . . . . . . . . |
. 2 |
Suomi . . . . . . . . . . . . . . . . . |
56 |
Dansk . . . . . . . . . . . . . . . . . |
20 |
Svenska . . . . . . . . . . . . . . . . |
74 |
Norsk. . . . . . . . . . . . . . . . . . |
38 |
|
|
Introduction . . . . . . . . . . . . . . . . . . . . . . . . . . . . . . . . . . . . . . . . . . . . . . . 3 Delivery information . . . . . . . . . . . . . . . . . . . . . . . . . . . . . . . . . . . . . . . . . . . . . 3 Unpacking the Product . . . . . . . . . . . . . . . . . . . . . . . . . . . . . . . . . . . 3 Safety reminders . . . . . . . . . . . . . . . . . . . . . . . . . . . . . . . . . . . . . . . . . . 4 Installation . . . . . . . . . . . . . . . . . . . . . . . . . . . . . . . . . . . . . . . . . . . . . . . . . . . . . 4 Use . . . . . . . . . . . . . . . . . . . . . . . . . . . . . . . . . . . . . . . . . . . . . . . . . . . . . . . . . . . 4 The Laundry . . . . . . . . . . . . . . . . . . . . . . . . . . . . . . . . . . . . . . . . . . . . . . . . . . . . 4 Environmental Issues . . . . . . . . . . . . . . . . . . . . . . . . . . . . . . . . . . . . . . . . . . . . . 5 GIAS Service . . . . . . . . . . . . . . . . . . . . . . . . . . . . . . . . . . . . . . . . . . . . . . . . . . . . 5 Installation. . . . . . . . . . . . . . . . . . . . . . . . . . . . . . . . . . . . . . . . . . . . . . . . . 6 Electrical requirements . . . . . . . . . . . . . . . . . . . . . . . . . . . . . . . . . . . . . . . . . . . 6 Adjusting the feet . . . . . . . . . . . . . . . . . . . . . . . . . . . . . . . . . . . . . . . . . . . . . . . 6 Ventilation . . . . . . . . . . . . . . . . . . . . . . . . . . . . . . . . . . . . . . . . . . . . . . . . . 7 Preparing the load . . . . . . . . . . . . . . . . . . . . . . . . . . . . . . . . . . . . . . . . 8 Clothes preparation . . . . . . . . . . . . . . . . . . . . . . . . . . . . . . . . . . . . . . . . . . . . . . 8 Sorting the load. . . . . . . . . . . . . . . . . . . . . . . . . . . . . . . . . . . . . . . . . . . . . . . . . 9 Drying advice. . . . . . . . . . . . . . . . . . . . . . . . . . . . . . . . . . . . . . . . . . . . . 10 Do not tumble dry . . . . . . . . . . . . . . . . . . . . . . . . . . . . . . . . . . . . . . . . . . . . . . 10 Energy saving. . . . . . . . . . . . . . . . . . . . . . . . . . . . . . . . . . . . . . . . . . . . . . . . . . 10 Drying guide . . . . . . . . . . . . . . . . . . . . . . . . . . . . . . . . . . . . . . . . . . . . . . . . . . 10
Controls and indicators
Door and Filter . . . . . . . . . . . . . . . . . . . . . . . . . . . . . . . . . . . . . . . . . . . 12 Opening the door . . . . . . . . . . . . . . . . . . . . . . . . . . . . . . . . . . . . . . . . . . . . . . 12 Filter. . . . . . . . . . . . . . . . . . . . . . . . . . . . . . . . . . . . . . . . . . . . . . . . . . . . . . . . . 12 Filter care indicator . . . . . . . . . . . . . . . . . . . . . . . . . . . . . . . . . . . . . . . . . . . . . 12 Water container . . . . . . . . . . . . . . . . . . . . . . . . . . . . . . . . . . . . . . . . . . 13 To remove the container . . . . . . . . . . . . . . . . . . . . . . . . . . . . . . . . . . . . . . . . . 13 Condenser . . . . . . . . . . . . . . . . . . . . . . . . . . . . . . . . . . . . . . . . . . . . . . . . 14 To remove the condenser . . . . . . . . . . . . . . . . . . . . . . . . . . . . . . . . . . . . . . . . 14
Selecting the Programme
Operation . . . . . . . . . . . . . . . . . . . . . . . . . . . . . . . . . . . . . . . . . . . . . . . . . 16 Cancelling and resetting the programme . . . . . . . . . . . . . . . . . . . . . . . . . . . . 16 Start Delay . . . . . . . . . . . . . . . . . . . . . . . . . . . . . . . . . . . . . . . . . . . . . . . . . . . . 16
Cleaning and Routine Maintenance. . . . . . . . . . . . . . . . . . . . 17
Cleaning the dryer . . . . . . . . . . . . . . . . . . . . . . . . . . . . . . . . . . . . . . . . . . . . . . 17 Technical specifications . . . . . . . . . . . . . . . . . . . . . . . . . . . . . . . . . . . . . . . . . . 17 Troubleshooting. . . . . . . . . . . . . . . . . . . . . . . . . . . . . . . . . . . . . . . . . . 18 Customer Service. . . . . . . . . . . . . . . . . . . . . . . . . . . . . . . . . . . . . . . . . 19 Spares. . . . . . . . . . . . . . . . . . . . . . . . . . . . . . . . . . . . . . . . . . . . . . . . . . . . . . . . 19 GIAS Service . . . . . . . . . . . . . . . . . . . . . . . . . . . . . . . . . . . . . . . . . . . . . . . . . . . 19
2
40005112Eng.qxd 30/05/2007 11:18 Page 3
Introduction
Please read and follow these instructions carefully and operate the machine accordingly. This booklet provides important guidelines for safe use, installation, maintenance and some useful advice for best results when using your machine.
Keep all documentation in a safe place for future reference or for any future owners
Check that no damage has occurred to the machine during transit. If it has, call for service by GIAS.
Delivery information
Please check that the following items are delivered with the appliance:
●Instruction manual
●Guarantee card
●Energy label
Failure to comply with the above can compromise the safety of the appliance. You may be charged for a service call if a problem with your machine is caused by misuse.
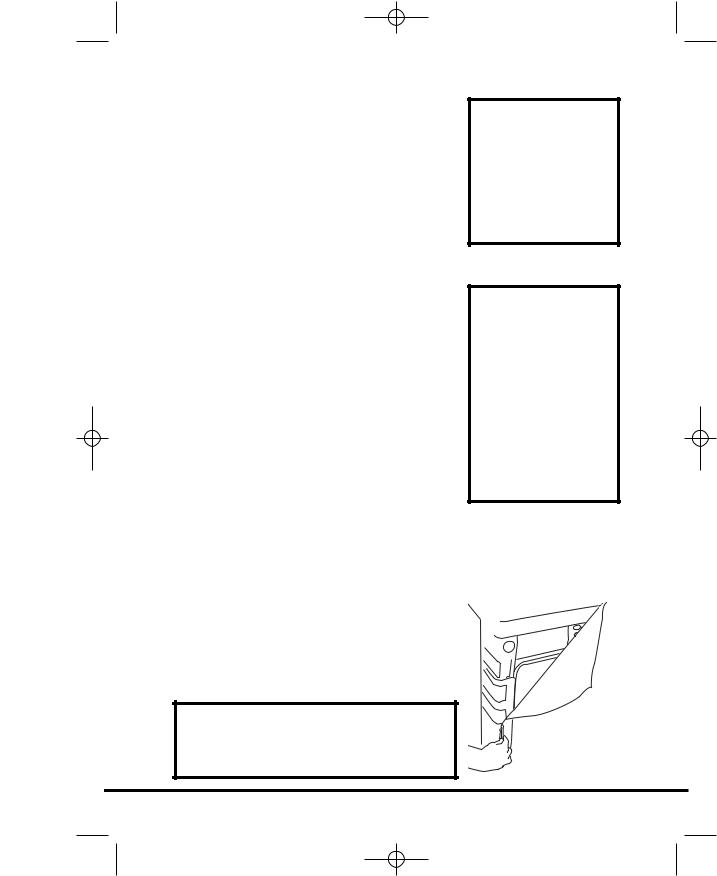
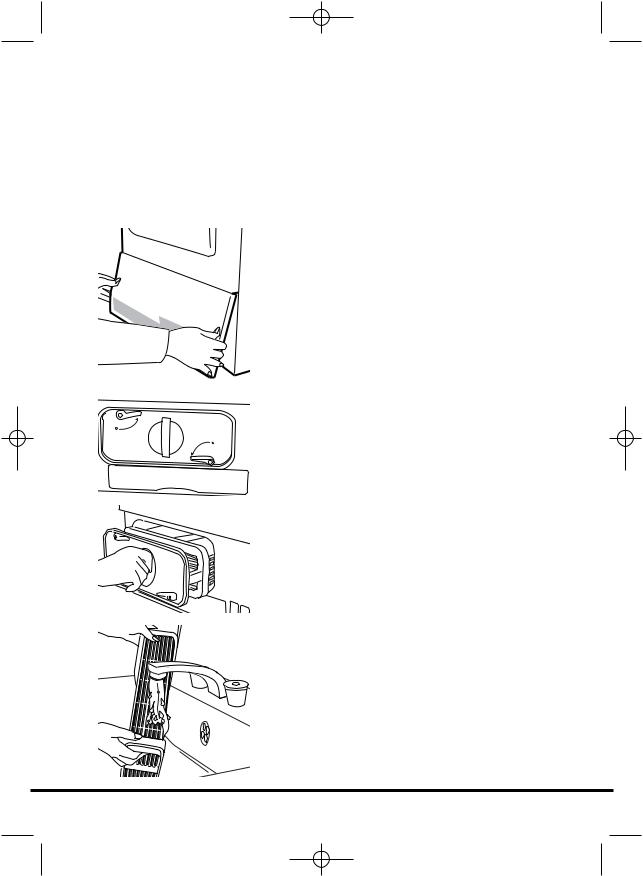
Unpacking the product
Remove the machine from its packaging close to the final location of the machine.
1. Cut carefully around the base of the packaging and up one corner.
2.Remove the polythene sleeve and lift the dryer off the polystyrene base.
Dispose of the packaging safely. Make sure it is out of the reach of children, it is a potential source of danger.
3
40005112Eng.qxd 30/05/2007 11:18 Page 4
Safety reminders
Installation
●Check that the product has no visible signs of damage before use. If damaged do not use and please call GIAS Service.
●Do not use adapters, multiple connectors and/or extensions.
●Never install the dryer against curtains and be sure to prevent items from falling or collecting behind the dryer.
●The appliance must not be installed behind a lockable door, a sliding door or a door with a hinge on the opposite side to that of the tumble dryer.
Use
●This appliance is not intended for use by persons (including children) with reduced physical, sensory or mental capabilities, or lack of experience and knowledge, unless they have been given supervision or instruction concerning use of the appliance by a person responsible for their safety.
●Children should be supervised to ensure that they do not play with the appliance.
●WARNING Misuse of a tumble dryer may create a fire hazard.
●This machine is solely for domestic use, i.e. to dry household textiles and garments.
●This machine should only be used for its intended purpose as described in this manual. Ensure that the instructions for installation and use are fully understood before operating the appliance.
●Do not touch the appliance when hands or feet are damp or wet.
●Do not lean on the door when loading the machine or use the door to lift or move the machine.
●Do not allow children to play with the machine or its controls.
●WARNING Do not use the product if the fluff filter is not in position or is damaged; fluff could be ignited.
●WARNING Where the hot surface symbol  is located the temperature rise during operation of the tumble dryer may be in excess of 60 degrees C.
●Remove the plug from the electricity supply. Always remove the plug before cleaning the appliance.
●Do not continue to use this machine if it appears to be faulty.
●Lint and fluff must not be allowed to collect on the floor around the outside of the machine.
●The drum inside may be very hot. Always allow the dryer to complete the cool down period before removing the laundry.
The Laundry
●Do not dry unwashed items in the tumble dryer.
●WARNING Do not tumble dry fabrics treated with dry cleaning fluids.
●WARNING Foam rubber materials can, under certain circumstances, when heated become ignited by spontaneous combustion. Items such as foam rubber (latex foam), shower caps, waterproof textiles, rubber backed articles and clothes or pillows fitted with foam rubber pads MUST NOT be dried in the tumble dryer.
●Always refer to the laundry care labels for directions on suitability for drying.
4

40005112Eng.qxd 30/05/2007 11:19 Page 5
●Clothes should be spin dried or thoroughly wrung before they are put into the tumble dryer. Clothes that are dripping wet should NOT be put into the dryer.
●Lighters and matches must not be left in pockets and NEVER use flammable liquids near the machine.
●Glass fibre curtains should NEVER be put in this machine. Skin irritation may occur if other garments are contaminated with the glass fibres.
●Items that have been soiled with substances such as cooking oil, acetone, alcohol, petrol, kerosene, spot removers, turpentine, waxes and wax removers should be washed in hot water with an extra amount of detergent before being dried in the tumble dryer.
●Fabric softeners, or similar products, should be used as specified by the fabric softener instructions.
Environmental Issues
●All packaging materials used are environmentally-friendly and recyclable. Please help dispose of the packaging via environmentally-friendly means. Your local council will be able to give you details of current means of disposal.
●To ensure safety when disposing of an old tumble dryer disconnect the mains plug from the socket, cut the mains power cable and destroy this together with the plug. To prevent children shutting themselves in the machine break the door hinges or the door lock.
GIAS Service
●To ensure the continued safe and efficient operation of this appliance we recommend that any servicing or repairs are only carried out by an authorised GIAS service engineer.
European directive 2002/96/EC
This appliance is marked according to the European directive 2002/96/EC on Waste Electrical and Electronic Equipment (WEEE).
By ensuring this product is disposed of correctly, you will help prevent potential negative consequences for the environment and human health, which could otherwise be caused by inappropriate waste handling of this product.
The symbol on the product indicates that this product may not be treated as household waste. Instead it shall be handed over to the applicable collection point for the recycling of electrical and electronic equipment.
Disposal must be carried out in accordance with local environmental regulations for waste disposal.
For more detailed information about treatment, recovery and recycling of this product, please contact your local city office, your household waste disposal service or the shop where you purchased the product.
If the appliance is not running properly or breaks down, switch it off and disconnect the plug from the socket.
Consult GIAS Service for possible repair.
5

40005112Eng.qxd 30/05/2007 11:19 Page 6
Installation
You may be charged for a service call if a problem with your machine is
caused by incorrect installation.
If the mains cord on this appliance is damaged, it must be replaced by a special cord which is ONLY obtainable from the spares service. It must be installed by a competent person.
Electrical requirements
Tumble dryers are supplied to operate at a voltage of 230V, 50 Hz single phase. Check that the supply circuit is rated to at least 16A.
Electricity can be extremely dangerous. This appliance must be earthed.
The socket outlet and the plug on the appliance must be of the same type.
Do not use multiple adapters and/or extension leads.
The plug should be accessible for disconnection after the appliance has been installed.
The wires in the mains lead are coloured in accordance with the following codes:
Blue |
NEUTRAL |
Brown |
LIVE |
Green and Yellow |
EARTH |
CE Appliance complies with European Directive 89/336/EEC, 73/23/EEC and subsequent amendments.
Do not plug the machine in and switch it on at the mains until the installation is completed.
For your safety, this dryer must be correctly installed.
If there is any doubt about installation, call GIAS Service for advice.
Adjusting the feet
Once the machine is in place the feet should be adjusted to ensure that the machine is level.
6
40005112Eng.qxd 30/05/2007 11:19 Page 7
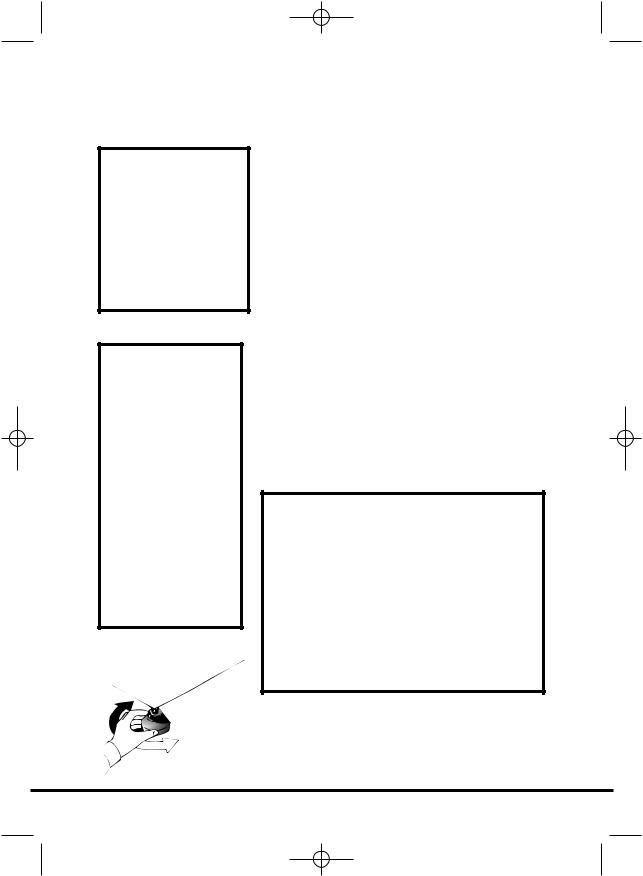
Ventilation
Adequate ventilation must be provided in the room where the tumble dryer is located to prevent gases from appliances burning other fuels, including open fires, being drawn into the room during operation of the tumble dryer.
●Exhaust air must not be discharged into a flue which is used for exhausting fumes from appliances burning gas or other fuels.
●Check regularly that the air flowing through the dryer is not restricted.
●Check the fluff filter after use, and clean, if necessary.
●The inlet and outlets should be kept free from obstructions. To ensure adequate ventilation the space between the bottom of the machine and the floor must not be obstructed. There should be a gap of at least 12mm between the machine and any obstructions.
●Prevent items from falling or collecting behind the dryer as these may obstruct the air inlet and outlet.
●NEVER install the dryer up against curtains.
 AIR INLET VENTS


 AIR OUTLETS
AIR OUTLETS IN THE BASE
7
40005112Eng.qxd 30/05/2007 11:19 Page 8
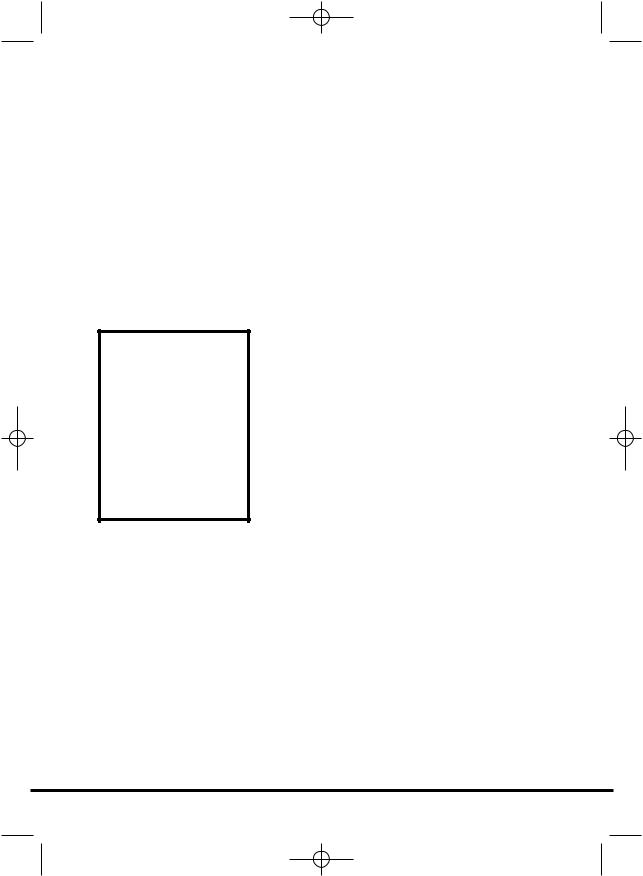
Preparing the load
Do not overload the drum, large items when wet can exceed the maximum admissible clothes load
(for example: sleeping bags, duvets).
Before using the tumble dryer for the first time:
●Please read this instruction book thoroughly.
●Remove all items packed inside drum.
●Wipe the inside of the drum and door with a damp cloth to remove any dust which may have settled in transit.
Clothes preparation
Make sure that the laundry you are going to dry is suitable for drying in a tumble dryer, as shown by the care symbols on each item.
Check that all fastenings are closed and that pockets are empty. Turn the articles inside out. Place clothes loosely in the drum to make sure that they don't get tangled.
Maximum drying weight
●Cottons Max. 8 kg
●Synthetics Max. 4 kg
8
40005112Eng.qxd 30/05/2007 11:19 Page 9
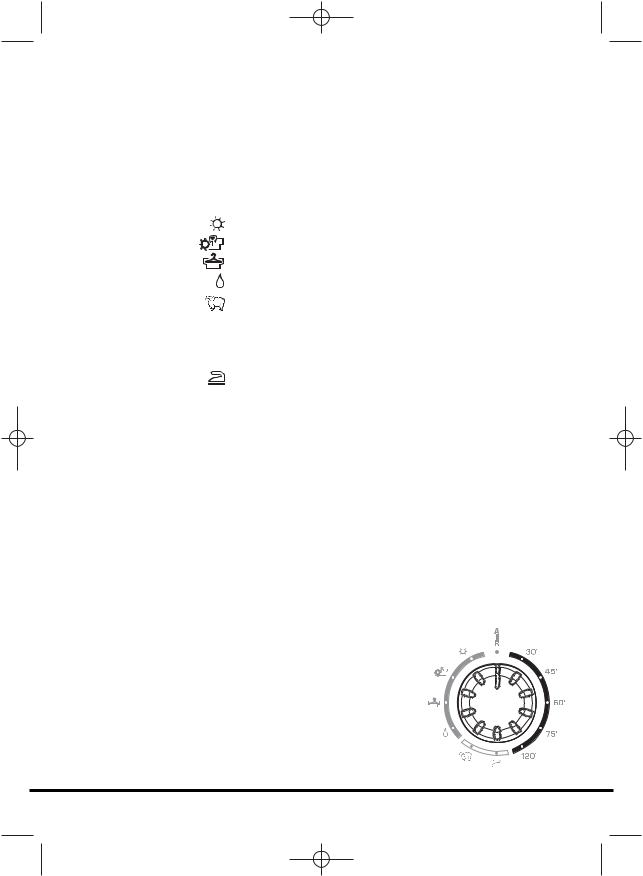
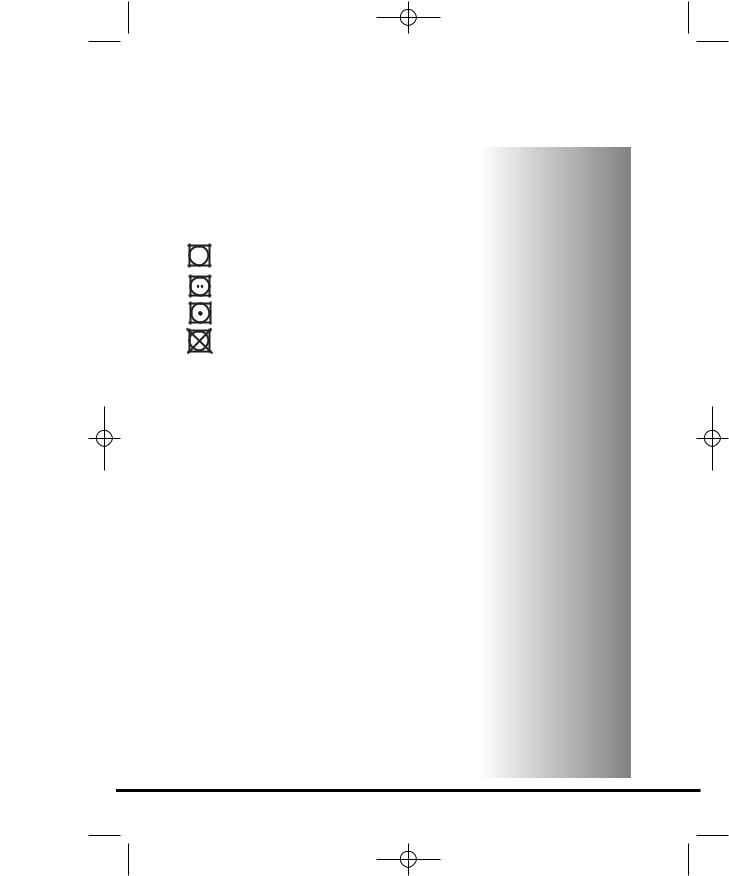
Sort the load as follows:
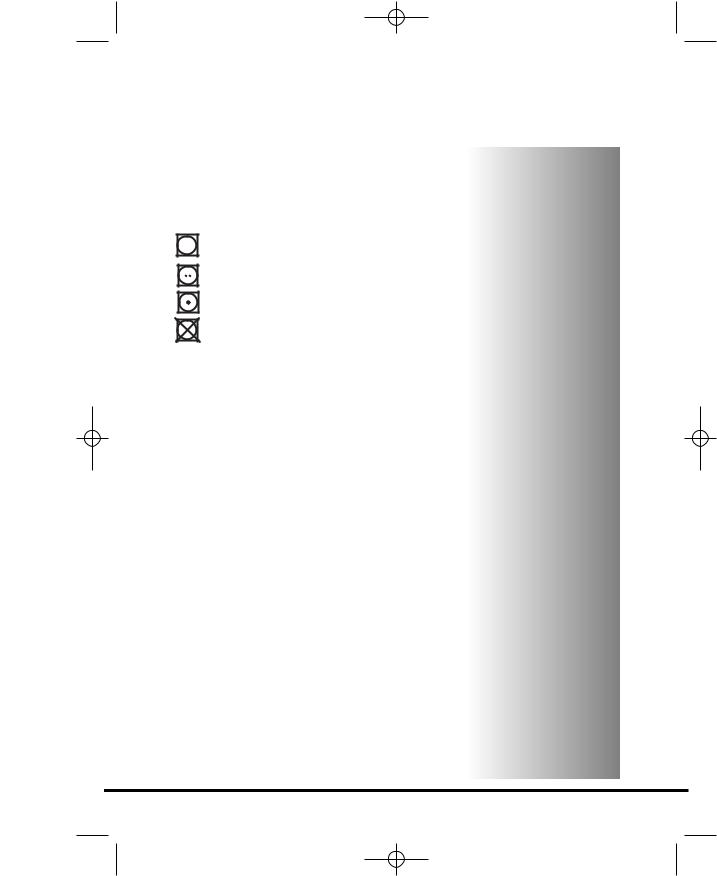
●By care symbols
These can be found on the collar or inside seam:
●
●
Suitable for tumble drying.
Tumble drying at high temperature.
Tumble drying at low temperature only.
Do not tumble dry.
If the item does not have a care label it must be assumed that it is not suitable for tumble drying.
By amount and thickness
Whenever the load is bigger than the dryer capacity, separate clothes according to thickness (e.g. towels from thin underwear).
By type of fabric
Cottons/linen: Towels, cotton jersey, bed and table linen.
Synthetics: Blouses, shirts, overalls, etc. made of polyester or polyamid, as well as for cotton/synthetic mixes.
●By drying level
Sort into: iron dry, cupboard dry, etc. For
delicate articles press the  button to select low drying temperature.
9
40005112Eng.qxd 30/05/2007 11:19 Page 10
Drying advice
IMPORTANT: Do not dry articles which have been treated with a dry cleaning fluid or rubber clothes (danger of fire or explosion).
During the last 15 minutes the load is always tumbled in cool air.
Do not tumble dry:
Woollens, silk, delicate fabrics, nylon stockings, delicate embroidery, fabrics with metallic decorations, garments with PVC or leather trimmings, training shoes, bulky items such as sleeping bags, etc.
Energy saving
Only put into the tumble dryer laundry which has been thoroughly wrung or spin-dried. The drier the laundry the shorter the drying time thus saving electricity.
ALWAYS
●Try to dry the maximum weight of laundry, this will save time and electricity.
●Check that the filter is clean before every drying cycle.
NEVER
●Exceed the maximum weight, this will waste time and electricity.
●Put dripping wet items into the tumble dryer, this may damage the appliance.
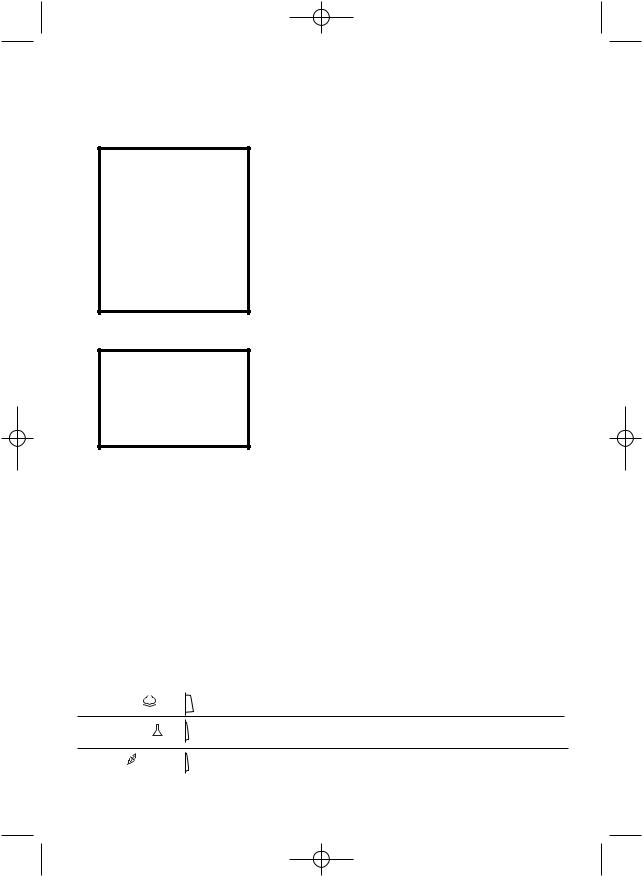
Drying guide
The table shows approximate drying times, depending on the type of fabric and dampness of the clothes.
|
Fabric |
HEAT SETTING |
HEAVY LOAD |
MEDIUM LOAD |
LIGHT LOAD |
|
|
|
|
|
|
|
|
|
COTTON |
HIGH |
140-165 min |
70-80 min |
50-65 min |
|
|
|
|
|
|
|
|
|
SYNTHETICS |
LOW |
– |
70-80 min |
40-55 min |
|
|
|
|
|
|
|
|
|
ACRYLIC |
LOW |
– |
50-65 min |
30-40 min |
|
|
|
|
|
|
|
|
|
|
|
|
|
|
|
10
40005112Eng.qxd 30/05/2007 11:19 Page 11
Controls and indicators
COUNTDOWN DISPLAY |
FILTER CARE |
|
INDICATOR |
||
|
EMPTY |
ACRYLICS/ |
START |
START |
ON/OFF |
PROGRAMME |
WATER |
SYNTHETICS |
BUTTON |
DELAY |
BUTTON |
SELECTOR |
INDICATOR |
BUTTON |
|
BUTTON |
|
|
Control panel and indicator lights
Programme Selector – Select the required programme
On/Off button and indicator  – Press to switch on, the indicator will light
Start – Press Start to commence the selected drying programme. Press for 5 seconds to cancel/reset the programme
Acrylics/Synthetics button  – Press to reduce the heat level for delicate items, the indicator above the button will light up. To change the heat setting the programme must be reset
Low Heat – Indicator light ON |
High Heat – Indicator light OFF |
|
Empty Water indicator |
– lights when the water container is full |
|
Filter Care indicator |
– lights when the filter needs cleaning |
|
Start Delay button |
– Allows the user to delay the start of the drying cycle (see |
|
details of operation page 16)
Display
START – When the dryer is switched On the START indicator will flash, when the programme starts the START indicator will light up
60' – Indicator lights when there is less than 60 minutes left until completion of the programme
15' - Indicator lights when there is less than 15 minutes left until completion of the programme. At this stage of the drying cycle the machine enters the Cool Down phase
STOP - Indicator lights when the programme is finished. 6h - 6 hour start delay (light flashes when in operation) 9h - 9 hour start delay (light flashes when in operation)
11

40005112Eng.qxd 30/05/2007 11:19 Page 12
Door and Filter
Opening the door
Pull on handle to open the door.
To restart the dryer, close the door and press
Start.
WARNING!
When the tumble dryer is in use the drum and door may be VERY HOT. Never stop a tumble dryer before the end of the drying cycle unless all items are quickly removed and spread out so that the heat is dissipated.
Filter
IMPORTANT: To maintain the efficiency of the dryer check that the fluff filter is clean before each drying cycle.
1.Pull the filter upwards.
2.Open filter as shown.
3.Gently remove lint using a soft brush or your fingertips.
4.Snap the filter together and push back into
place.


 Filter Care Indicator
lights when the filter needs cleaning.
If the laundry is not drying check that the filter is not clogged.
12
40005112Eng.qxd 30/05/2007 11:19 Page 13
Water Container
The water removed from the laundry during the drying cycle is collected in a container at the bottom of the dryer.
When the container is full the  indicator on the control panel will light, and the container MUST be emptied. However, we recommend that the container is emptied after each drying cycle.
NOTE: Very little water will collect during the first few cycles of a new machine as an internal reservoir is filled first.
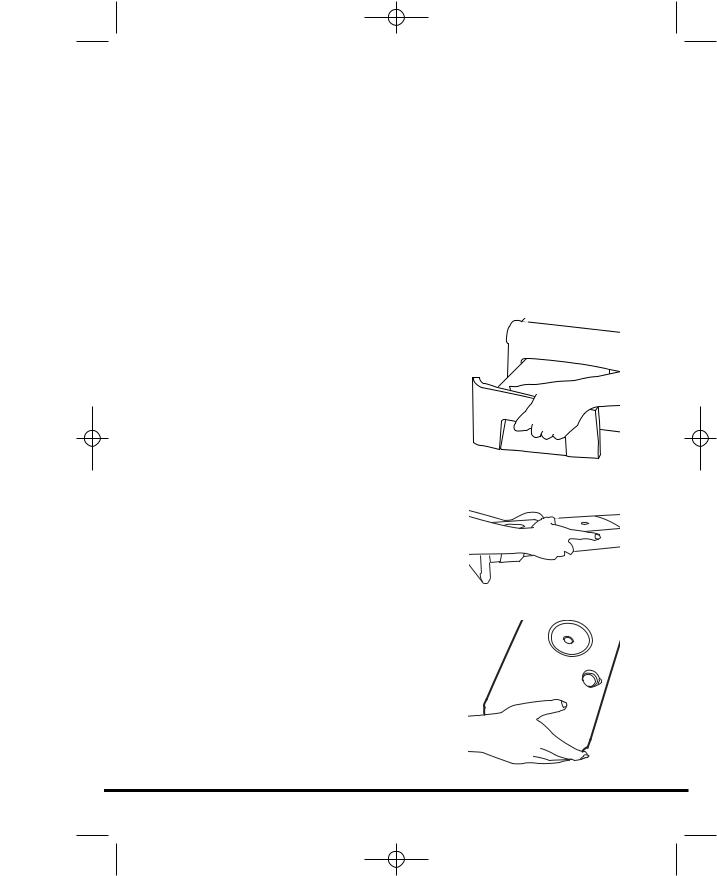
To remove the container
1.Gently pull out the tray until it is completely removed. Support the tray with both hands. When it is full the water container will weigh about 4kg.
2.Tilt the water container to empty the water out through the rear hole. When empty slide the water container back into position. PUSH FIRMLY INTO PLACE.
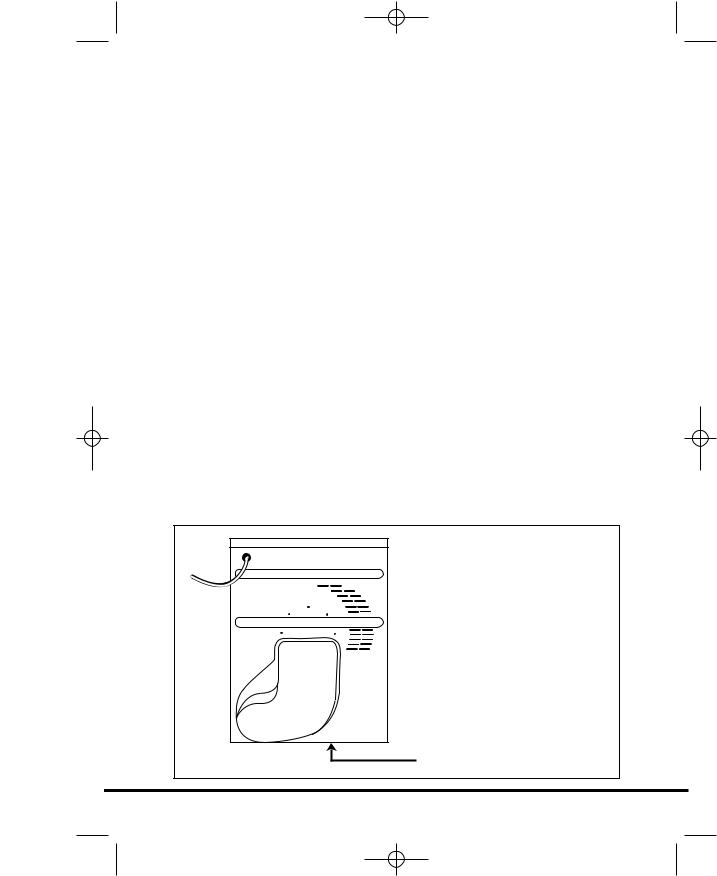
NOTE: If you have the option of drainage near the dryer it is possible to use the discharge kit to provide a permanent drain for the water collected by the dryer. This will remove the need to empty the water tray. All the information for assembly of the kit is contained in the kit envelope.
13
40005112Eng.qxd 30/05/2007 11:19 Page 14
Condenser
Important: Always switch off and remove the plug from the electricity supply before cleaning the condenser.
To maintain the efficiency of the dryer regularly check that the condenser is clean.
To remove the condenser
1. Gently pull the bottom of the kickplate so that it unclips from the dryer. The top section can then be unhinged allowing the kickplate to be completely removed.
2.Turn the two locking levers anti-clockwise and pull out the condenser.
3. Pull out the condenser unit.
4.Gently remove any dust or fluff with a cloth,
then wash the unit by holding it under a running tap turning it so that water flows between the plates, to remove any dust or fluff.
5. Refit the condenser ensuring it is in the correct way (as indicated by the arrow) and pushed firmly into place. Lock the two levers by turning them clockwise.
6. Refit the kickplate.
14
40005112Eng.qxd 30/05/2007 11:23 Page 15
Selecting the Programme
The Sensor Dry machine gives many options for drying the laundry to suit all circumstances.
The table below lists the programmes and the function of each programme.
Programme |
Description |
|
Bone Dry |
Select the degree of dryness that you require. |
|
|
This ranges from Bone Dry for bath towels and |
|
Extra Dry |
||
bathrobes, through Cupboard Dry for items that will be |
||
|
||
Cupboard Dry |
||
put away without ironing, to the programme that leaves |
||
|
||
Iron Dry |
the laundry suitable for ironing. |
|
|
|
|
Wool |
A gentle programme specially created to get woollens |
|
|
softer after air-drying. |
|
|
This delicate warm air cycle, lasting 12 minutes, can also |
|
|
be used to get woollens 'refreshed' after being stored in |
|
|
the wardrobe. |
|
Fast Iron |
The Fast Iron programme provides a conditioning and |
|
|
anticrease function. The dryer will heat the load for |
|
|
9 minutes followed by a 3 minute cool down period and |
|
|
is especially good for garments which may have been left |
|
|
for some time prior to ironing, in a linen basket for |
|
|
example. Garments may also become stiffened when |
|
|
dried outside on a washing line or inside on radiators. |
|
|
The Fast Iron process relaxes the creases in the fabric |
|
|
making ironing quicker and easier. |
|
|
|
|
120' |
120 minutes of drying |
|
|
|
|
75' |
75 minutes of drying |
|
60' |
60 minutes of drying |
|
45' |
45 minutes of drying |
|
30' |
30 minutes of drying |
|
AIR |
Tumbling of laundry in cool air for 30 minutes |
|
|
|
Note: The sensor may not detect a small load of small articles. For small loads and separate items or pre-dried fabrics with low moisture content, use the timed programmes. Set the programme between 30 and 75 minutes depending on the load size and dryness required, and select high or low heat depending upon the fabric type.
If the sensor does not detect the item the dryer will only operate for 10 minutes before going into cooldown.
If the load is too large or too wet to tumble dry the dryer will automatically go into cooldown after 185 minutes.
15

40005112Eng.qxd 30/05/2007 11:19 Page 16
Operation
1.Open the door and load the drum with laundry. Ensure that garments do not hinder closure of the door.
2.Gently close the door pushing it slowly until you hear the door 'click' shut.
3.Press the  button to switch on the dryer. The indicator will light up and the START indicator will flash.
4.Turn the Programme Selector dial to select the required drying program (see Programme Guide).
5.If drying synthetics, acrylics or delicate items, press the  button to reduce the heat level.
The light above the push button will light up when the machine is in low heat setting. To deselect this status when the drying cycle has started it is necessary to reset the machine.
6.Press the Start button. The dryer will start automatically and the START indicator will be continuously lit.
7.The  display will show the drying progress in terms of time remaining.
8.If the door is opened during the programme to check the laundry, it is necessary to press Start to recommence drying after the door has been closed.
9.When the 15' indicator is lit the machine will enter the cool down phase, the clothes will be tumbled in cool air allowing the load to cool down.
10.When the programme is complete the STOP indicator will light.
Cancelling and resetting the programme
To cancel a programme press the Start button for 5 seconds. The machine will indicate that it has been reset by the START indicator flashing. It is possible to change the programme within the first 10 minutes without using the cancel and reset function.
Start Delay
The Delay Start Function  allows the user to delay the start of the drying cycle by 6 or 9 hours.
When the function is first selected the display will show a delay of 6 hours, a subsequent press of the button will increase the delay to 9 hours.
16
40005112Eng.qxd 30/05/2007 11:19 Page 17
To commence the programme press Start and the appliance will complete the drying cycle at the end of this time. The 6 or 9 hour indicator light will flash to indicate that the start delay is in progress.
WARNING!
The drum, door and load may be very hot.
Cleaning and Routine
Maintenance
Cleaning the dryer
●Clean the filter and empty the water container after every drying cycle.
●Regularly clean the condenser.
●After each period of use, wipe the inside of the drum and leave the door open for a while to allow circulation of air to dry it.
●Wipe the outside of the machine and the door with a soft cloth.
●DO NOT use abrasive pads or cleaning agents.
●To prevent the door sticking or the build up of fluff periodically clean the inner door and gasket with a damp cloth.
Technical specifications
Drum capacity |
115 litres |
Maximum load |
8 kg |
Height |
85cm |
Width |
60cm |
Depth |
60cm |
Energy Label Band |
B |
IMPORTANT
Always switch off and remove the plug from the electricity supply before
cleaning this appliance.
For electrical data refer to the rating label on the front of the dryer cabinet (with the door open).
17
40005112Eng.qxd 30/05/2007 11:19 Page 18
Troubleshooting
What might be the cause of...
Defects you can remedy yourself
Before calling GIAS Service for technical advice please run through the following checklist. A charge will be made if the machine is found to be working or has been installed incorrectly or used incorrectly. If the problem persists after completing the recommended checks, please call GIAS Service, they may be able to assist you over the telephone.
Drying time is too long/clothes are not dry enough…
●Have you selected the correct drying time/programme?
●Were the clothes too wet? Were the clothes thoroughly wrung or spindried?
●Does the filter need cleaning?
●Does the condenser need cleaning?
●Is the dryer overloaded?
●Are the inlets, outlets and base of the dryer free from obstructions?
●Has the  option been selected from a previous cycle?
The dryer does not operate…
●Is there a working electricity supply to the dryer? Check using another appliance such as a table lamp.
●Is the plug properly connected to the mains supply?
●Is there a power failure?
●Has the fuse blown?
●Is the door fully closed?
●Is the dryer switched on, both at the mains supply and at the machine?
●Has the drying time or the programme been selected?
●Has the machine been switched on again after opening the door?
●Has the dryer stopped operating because the water tray is full and needs emptying?
The dryer is noisy…
●Switch off the dryer and contact GIAS Service for advice.
The Filter Care Indicator is on…
●Does the filter need cleaning?
●Does the condenser need cleaning?
Empty Water Indicator is on…
●Does the water container need emptying?
18
40005112Eng.qxd 30/05/2007 11:19 Page 19
Customer Service
Should there still be a problem with your dryer after completing all the recommended checks, please call GIAS Service for advice. They may be able to assist you over the telephone or arrange for a suitable appointment for an engineer to call under the terms of your guarantee. However, a charge may be made if any of the following applies to your machine:
●Is found to be in working order.
●Has not been installed in accordance with the installation instructions.
●Has been used incorrectly.
Spares
Always use genuine spares, available direct from GIAS Service.
GIAS Service
For service and repairs call your local GIAS Service engineer.
The manufacturer declines all responsibility in the event of any printing mistakes in this booklet. The manufacturer also reserves the right to make appropriate modifications to its products without changing the essential characteristics.
19
40005112Dan.qxd 30/05/2007 11:25 Page 20
Introduktion . . . . . . . . . . . . . . . . . . . . . . . . . . . . . . . . . . . . . . . . . . . . . . 21 Leveringsoplysninger . . . . . . . . . . . . . . . . . . . . . . . . . . . . . . . . . . . . . . . . . . . . 21 Udpakning af produktet . . . . . . . . . . . . . . . . . . . . . . . . . . . . . . . . 21 Sikkerhedspåmindelser. . . . . . . . . . . . . . . . . . . . . . . . . . . . . . . . . . 22 Installation . . . . . . . . . . . . . . . . . . . . . . . . . . . . . . . . . . . . . . . . . . . . . . . . . . . . 22 Anvendelse. . . . . . . . . . . . . . . . . . . . . . . . . . . . . . . . . . . . . . . . . . . . . . . . . . . . 22 Vasketøjet . . . . . . . . . . . . . . . . . . . . . . . . . . . . . . . . . . . . . . . . . . . . . . . . . . . . 22 Miljøhensyn . . . . . . . . . . . . . . . . . . . . . . . . . . . . . . . . . . . . . . . . . . . . . . . . . . . 23 GIAS Service . . . . . . . . . . . . . . . . . . . . . . . . . . . . . . . . . . . . . . . . . . . . . . . . . . . 23 Installation. . . . . . . . . . . . . . . . . . . . . . . . . . . . . . . . . . . . . . . . . . . . . . . . 24 Elektriske krav . . . . . . . . . . . . . . . . . . . . . . . . . . . . . . . . . . . . . . . . . . . . . . . . . 24 Justering af fødder . . . . . . . . . . . . . . . . . . . . . . . . . . . . . . . . . . . . . . . . . . . . . 24 Ventilation . . . . . . . . . . . . . . . . . . . . . . . . . . . . . . . . . . . . . . . . . . . . . . . . 25
Forberedelse af ilægning af tøj. . . . . . . . . . . . . . . . . . . . . . . . . 26
Klargøring af tøj . . . . . . . . . . . . . . . . . . . . . . . . . . . . . . . . . . . . . . . . . . . . . . . 26 Sortering af vasketøj . . . . . . . . . . . . . . . . . . . . . . . . . . . . . . . . . . . . . . . . . . . . 27 Gode råd om tørring. . . . . . . . . . . . . . . . . . . . . . . . . . . . . . . . . . . . . 28 Må ikke tørres i tørretumbler . . . . . . . . . . . . . . . . . . . . . . . . . . . . . . . . . . . . . 28 Energibesparelse . . . . . . . . . . . . . . . . . . . . . . . . . . . . . . . . . . . . . . . . . . . . . . . 28 Tørrevejledning . . . . . . . . . . . . . . . . . . . . . . . . . . . . . . . . . . . . . . . . . . . . . . . . 28
Knapper og indikatorer
Låge og filter . . . . . . . . . . . . . . . . . . . . . . . . . . . . . . . . . . . . . . . . . . . . . 30 Åbning af lågen . . . . . . . . . . . . . . . . . . . . . . . . . . . . . . . . . . . . . . . . . . . . . . . . 30 Filter. . . . . . . . . . . . . . . . . . . . . . . . . . . . . . . . . . . . . . . . . . . . . . . . . . . . . . . . . 30 Filterplejeindikator . . . . . . . . . . . . . . . . . . . . . . . . . . . . . . . . . . . . . . . . . . . . . 30 Vandbeholder . . . . . . . . . . . . . . . . . . . . . . . . . . . . . . . . . . . . . . . . . . . . 31 Sådan aftages beholderen. . . . . . . . . . . . . . . . . . . . . . . . . . . . . . . . . . . . . . . . 31 Kondensator. . . . . . . . . . . . . . . . . . . . . . . . . . . . . . . . . . . . . . . . . . . . . . 32 Sådan udtages kondensatoren . . . . . . . . . . . . . . . . . . . . . . . . . . . . . . . . . . . . 32 Valg af program. . . . . . . . . . . . . . . . . . . . . . . . . . . . . . . . . . . . . . . . . . 32 Betjening. . . . . . . . . . . . . . . . . . . . . . . . . . . . . . . . . . . . . . . . . . . . . . . . . . 34 Annullering og genindstilling af program. . . . . . . . . . . . . . . . . . . . . . . . . . . . 34 Forsinket start . . . . . . . . . . . . . . . . . . . . . . . . . . . . . . . . . . . . . . . . . . . . . . . . . 34
Rengøring og løbende vedligeholdelse. . . . . . . . . . . . . . . . 35
Rengøring af tørretumbleren . . . . . . . . . . . . . . . . . . . . . . . . . . . . . . . . . . . . . 35 Tekniske specifikationer. . . . . . . . . . . . . . . . . . . . . . . . . . . . . . . . . . . . . . . . . . 35 Fejlfinding . . . . . . . . . . . . . . . . . . . . . . . . . . . . . . . . . . . . . . . . . . . . . . . . 36 Service . . . . . . . . . . . . . . . . . . . . . . . . . . . . . . . . . . . . . . . . . . . . . . . . . . . . 37 Reservedele . . . . . . . . . . . . . . . . . . . . . . . . . . . . . . . . . . . . . . . . . . . . . . . . . . . 37 GIAS Service . . . . . . . . . . . . . . . . . . . . . . . . . . . . . . . . . . . . . . . . . . . . . . . . . . . 37
20
40005112Dan.qxd 30/05/2007 11:25 Page 21
Introduktion
Læs venligst denne instruktionsbog grundigt igennem og følg anvisningerne. Denne instruktionsbog giver dig nogle vigtige retningslinjer angående sikker anvendelse, installation, vedligehold samt gode råd om hvordan, du opnår de bedste resultater med din maskine.
Opbevar alle papirer et sikkert sted, så du har dem når du skal bruge dem igen, eller hvis du sælger maskinen.
Leveringsoplysninger
Kontrollér at følgende ting fulgte med maskinen:
●Instruktionsbog
●Garantibevis
●Energietiket
Kontrollér at maskinen ikke er beskadiget, når du modtager den. Hvis den er, skal du ringe til GIAS.
Følges ovenstående ikke kan maskinen tage skade. Du kan komme til at betale for reparation, hvis der opstår problemer med din maskine, og dette skyldes misbrug.
Udpakning af produktet
Tag maskinen ud af emballagen, så tæt som muligt på der, hvor den skal stå.
1. Skær forsigtigt rundt om den underste kant af emballagen og op langs et af hjørnerne.
2.Tag polythenbeklædningen af og løft tørretumbleren af polystyrenfoden.
Bortskaf emballagen på sikker vis.
Opbevares utilgængeligt for børn.
21
40005112Dan.qxd 30/05/2007 11:25 Page 22
Sikkerhedspåmindelser
Installation
●Kontroller at produktet ikke viser tegn på beskadigelse – før det tages i brug. Er det beskadiget må det ikke bruges og GIAS Service skal kontaktes.
●Der må ikke anvendes adaptere, flere stikdåser og/eller forlængerledninger.
●Tørretumbleren må aldrig installeres opad gardiner, og genstande skal forhindres i at falde ned bag ved eller samles bag tørretumbleren.
●Maskinen må ikke installeres bag en dør, der kan låses, bag en skydedør eller bag en dør, hvor hængslet sidder i modsatte side af tørretumblerens hængsel.
Anvendelse
●Maskinen er ikke beregnet til at blive benyttet af personer (herunder også børn) med mindskede fysiske, sensoriske eller mentale evner, eller af personer, der mangler erfaring og viden, medmindre den person, der er ansvarlig for deres sikkerhed har observeret dem eller har instrueret dem i, hvordan maskinen benyttes.
●Børn skal være under opsyn af en voksen for at sikre, at de ikke leger med maskinen.
●ADVARSEL Misbrug af tørretumbleren kan medføre brandfare.
●Maskinen er kun til husholdningsbrug, dvs. til at tørring af tekstilvarer og tøj i en husholdning.
●Denne maskine må kun anvendes til det tilsigtede formål som beskrevet i denne håndbog. Husk at alle instruktioner vedr. installation og anvendelse skal både læses og forstås før maskinen tages i brug.
●Undgå at røre ved maskinen med fugtige eller våde hænder og fødder.
●Man må ikke læne sig op af lågen, når der lægges tøj i maskinen, eller bruge lågen til at løfte eller flytte maskinen.
●Børn må ikke lege med maskinen og dens knapper.
●ADVARSEL Produktet må ikke bruges hvis fnugfilteret sidder forkert eller er beskadiget; fnug kan antændes.
●ADVARSEL Der hvor symbolet for varm overflade er placeret  , kan temperaturen, under tumbling, overstige 60 grader C.
●Tag stikket ud at kontakten. Tag altid stikket ud før apparatet rengøres.
●Maskinen må ikke anvendes, hvis den virker defekt.
●Bomuldsfibre og fnug må ikke ophobes på gulvet omkring maskinen.
●Tromlens inderside kan være meget varm. Lad altid tørretumbleren fuldføre afkølingsperioden før tøjet tages ud.
Vasketøjet
●Unlad at tørre uvaskede ting i tørretumbleren.
●ADVARSEL Man må ikke tørretumble tørt stof behandlet med kemiske rensevæsker.
●ADVARSEL Skumgummimateriale kan, under visse omstændigheder, selvantænde, hvis det bliver for varmt. Skumgummi (latex skum), badehætter, vandafvisende tekstiler, materialer med gummibehandlet bagside og tøj eller puder med
22
40005112Dan.qxd 30/05/2007 11:26 Page 23
skumgummi fyld MÅ IKKE tørres i tørretumbleren.
●Kontroller altid vaskemærkerne, om tøjet tåler tørretumbling.
●Tøjet skal centrifugeres eller vrides omhyggeligt, før det lægges i tørretumbleren. Tøj, der er drivvådt, må IKKE lægges i tørretumbleren.
●Lightere og tændstikker må ikke efterlades i lommer, og der må ALDRIG anvendes brandfarlige væsker i nærheden af maskinen.
●Glasfibergardiner MÅ IKKE lægges i maskinen. Der kan opstå hudirritation, hvis andre beklædningsgenstande kontamineres med glasfibre.
●Tøj, der er blevet snavset af stoffer som madolie, acetone, alkohol, benzin, petroleum, pletfjerner, terpentin, voksprodukter og voksfjerner, bør vaskes i varmt vand tilsat ekstra meget vaskemiddel, før det tørres i tørretumbleren.
●Skyllemidler eller lignede produkter skal anvendes i overensstemmelse med skyllemidlets brugervejledning.
Miljøhensyn
●Den anvendte emballage er miljøvenlig og genanvendelig. Bortskaf emballagen med tanke for miljøet. Hent vejledning til bortskaffelse af emballagen hos din lokale kommune.
●For at sikre sikker bortskaffelse af en gammel tørretumbler, skal du tage stikket ud af væggen, skære ledningen og stik af og smide dem ud. Bræk hængslerne af lågen eller ødelæg låsen, så det undgås at børn kommer til at lukke sig selv inde i maskinen.
GIAS Service
●For at sikre apparatets fortsatte sikre og effektive drift anbefaler vi, at eventuel service eller reparation kun udføres af en autoriseret GIAS servicetekniker.
Europæisk direktiv 2002/96/EC
Denne maskine er markeret i overensstemmelse med det europæiske direktiv 2002/96/EC vedrørende elektrisk affald og elektronisk udstyr
(WEEE).
Ved at sikre, at dette produkt bortskaffes korrekt, bidrager du til at forhindre eventuelle skadelige konsekvenser for miljøet og helbredet, som ellers kan forårsages af uhensigtsmæssig bortskaffelse af dette produkt.
Symbolet på produktet angiver, at dette produkt ikke må bortskaffes som husholdningsaffald. I stedet bør det overdrages til en genbrugsstation med henblik på genanvendelse af elektrisk og elektronisk udstyr.
Bortskaffelse bør ske i henhold til de lokale miljømæssige regler.
Du kan få yderligere oplysninger om håndtering, genskabelse og genanvendelse af dette produkt ved at kontakte dit lokale rådhus, genbrugsstationen eller den forhandler, du købte produktet af.
Hvis maskinen ikke kører ordentligt eller går i stykker, så sluk for den og tag stikket ud af stikkontakten. Kontakt GIAS Service mht. eventuel reparation.
23
40005112Dan.qxd 30/05/2007 11:26 Page 24
Installation
Du kan komme til at betale for reparation, hvis der opstår problemer med din maskine, der skyldes ukorrekt installation.
Hvis hovedledningen til denne maskine er beskadiget, skal den udskiftes med en særlig ledning, som KUN fås hos reservedelsforhandleren. Den skal installeres af en kvalificeret person.
Elektriske krav
Tørretumblere kan køre på 230V, 50 Hz enfaset. Kontrollér at strømkredsen er klassificeret til mindst 16A.
Elektricitet kan være meget farligt. Dette apparat skal være jordforbundet.
Stikkontakten og maskinens stik skal passe sammen.
Der må ikke anvendes flere adaptere og/eller forlængerledninger.
Stikket skal være tilgængeligt til afbrydelse efter, at apparatet er blevet installeret.
Ledningerne i netledningen er farvede i overensstemmelse med følgende koder:
Blå |
NUL |
Brun |
STRØMFØRENDE |
Grøn og gul |
JORDFORBINDELSE |
Dette apparat opfylder kravene i EU direktiverne 89/336/EØF, 73/23/EØF og efterfølgende ændringer.
Du må ikke sætte stikket i og tænde for maskinen, før installationen er fuldført.
Af hensyn til din egen sikkerhed skal denne tørretumbler være installeret korrekt.
Hvis der er nogen tvivl om installation, skal du ringe til GIAS Service for rådgivning.
Justering af fødder
Når maskinen er på plads, skal fødderne justeres, så maskinen står vandret.
24

40005112Dan.qxd 30/05/2007 11:26 Page 25
Ventilation
Der skal være tilstrækkelig ventilation i det rum, hvor tørretumbleren placeres, så det undgås at gasser fra andre apparater, eller åben ild, trækkes ind i rummet under tørretumbling.
●Udsugningsluft må ikke afledes i en trækkanal, der er beregnet til aftræk af røggasser fra apparater, der kører på gas eller anden brændsel.
●Kontrollér regelmæssigt at luften, der strømmer gennem tørretumbleren, ikke hæmmes.
●Kontrollér fnugfiltret efter brug og rengør det om nødvendigt.
●Indløb og udløb skal holdes fri for tilstopninger. For at sikre tilstrækkelig ventilation må mellemrummet mellem maskinens bund og gulvet ikke tilstoppes. Der skal være mindst 12 mm fri luft mellem maskinen og ting, der kan blokere.
●Genstande skal forhindres i at falde ned og samles mellem tørretumblerens sider og bagside, da disse kan tilstoppe luftindsugning og -udsugning.
●Tørretumbleren må ALDRIG installeres op mod gardiner.
LUFTINDSUGNINGS-
KANALER
LUFTUDSUGNINGS-
KANALER
LUFTUDSUGNINGS-
KANALER I BUNDEN
25
40005112Dan.qxd 30/05/2007 11:26 Page 26
Forberedelse af ilægning af tøj
Tromlen må ikke overfyldes, større, våde ting, kan overstige den maksimalt tilladte vægt
(f.eks.: soveposer og dyner).
Før tørretumbleren anvendes første gang:
●Læs venligst denne instruktionsbog grundigt.
●Fjern alle genstande som er lagt ind i tromlen.
●Aftør tromlens inderside og låge med en fugtig klud for at fjerne eventuelt støv, som har sat sig under transporten.
Klargøring af tøj
Du skal sikre, at det vasketøj, du skal til at tørre, egner sig til tørring i en tørretumbler, som vist på vaskemærker på hver genstand.
Kontroller at alle lukninger er lukkede, og at lommerne er tomme. Vend vrangen ud på genstandene. Læg tøjet løst i tromlen for at sikre, at det ikke filtrer sig sammen.
Maksimal tørrevægt
●Bomuld, maks. 8 kg
●Syntetiske stoffer, maks. 4 kg
26
40005112Dan.qxd 30/05/2007 11:26 Page 27
Sorter tøjet, der skal lægges i, som følger:
●Efter vaskemærker
De findes i kraven eller på en indvendig søm:
●
●
Egnet til tørring i tumbler.
Tørring i tumbler ved høj temperatur.
Kun tørring i tumbler ved lav temperatur.
Må ikke tørres i tørretumbler.
Hvis der ikke findes noget vaskemærke, må det betragtes som uegnet til tørretumbling.
Efter antal og tykkelse
Når det tøj, der skal lægges i, overstiger tørretumblerens kapacitet, skal tøjet adskilles i overensstemmelse med tykkelse (f.eks. håndklæder fra tyndt undertøj).
Efter stoftype
Bomuld/linned: Håndklæder, bomuldsjersey, sengelinned og duge.
Syntetiske stof: Skjortebluser, skjorter, overalls, osv., fremstillet af polyester eller polyamid samt efter bomulds/syntetiske blandinger.
●Efter tørringsniveau
Sorter tøjet i: Strygetørt, Skabstørt, osv. For
sarte genstande tryk på knappen  for at vælge lav tørretemperatur.
27
40005112Dan.qxd 30/05/2007 11:26 Page 28
Gode råd om tørring
VIGTIGT: Tør ikke genstande som er behandlet med kemisk rensevæske eller gummitøj (fare for brand eller eksplosion).
I de sidste 15 minutter tørres tøjet altid i kold luft.
Må ikke tørres i tørretumbler:
Uld, silke, sarte stoffer, nylonstrømper, sart broderi, stof med metaldekoration, beklædningsgenstande med PVC eller læderkanter, gummisko, pladskrævende genstande, som f.eks. soveposer, osv.
Energibesparelse
Læg kun vasketøj i tørretumbleren som er blevet grundigt vredet eller centrifugeret. Jo mere tørt vasketøj er, jo kortere vil tørretiden være og derved spare elektricitet.
ALTID
●Prøv altid at tørre vasketøj så meget vasketøj som maskinen tillader, dette sparer både tid og elektricitet.
●Det skal altid kontrolleres, at filtret er rent før hver tørrecyklus.
ALDRIG
●Den maksimale vægt må aldrig overskrides, dette vil spilde tid og elektricitet.
●Læg aldrig drivvåde genstande i tørretumbleren, dette kan beskadige apparatet.
Tørrevejledning
Tabellen viser omtrentlige tørretider afhængig af stoftype og tøjets fugtighed.
|
|
|
STOR |
MEDIUM |
LILLE |
|
|
Stof |
VARMEINDSTILLING |
MÆNGDE |
MÆNGDE |
MÆNGDE |
|
|
BOMU\LD |
HØJ |
140-165 min |
70-80 min |
50-65 min |
|
|
SYNTETISKE |
LAV |
– |
70-80 min |
40-55 min |
|
|
|
|
||||
|
STOFFER |
|
|
|||
|
|
– |
|
|
|
|
|
AKRYL |
LAV |
50-65 min |
30-40 min |
|
|
|
|
|
||||
|
|
|
|
|
|
|
|
|
|
|
|
|
|
28
 Loading...