


DKE 995 F
de Gebrauchsanleitung
en Instructions for Use
fr Mode d´emploi
nl Gebruiksaanwijzing
it Instruzioni sull´uso
es Instrucciones demanejo
pt Instruções de Serviçio
sv Bruksanvisning
no Bruksanvisning
fi Käyttöohje
da Brugsanvisning
DKE 995 F
Internet: http://www.bosch-hausgeraete.de
Bosch Info-Team: de Tel. 01 80/5 30 40 50 (E 0,14/Min. DTAG)

8
Appliance description Operating mode
This low air pressure can be obtained,
provided combustion air can escape
through non-lockable openings, e.g. in
doors, windows, air-intake/exhaust-air wall
boxes or by other technical procedures,
such as reciprocal interlocking, etc.
An air-intake/exhaust-air wall box by itself is
no guarantee that the limiting value will not
be exceeded.
Note: When assessing the air pressure, the
entire ventilation system in the house/apartment must be taken into account. If using
cooking appliances, e.g. hob and/or gas
cooker, this rule does not apply.
Government regulations must be observed
for the conveyance of exhaust air.
Lighting
Light / fan
switches
Filter grille
Chimney panellingGlass panel
Operating mode
Exhaust-air mode:
❑ The extractor-hood fan extracts the
kitchen vapours and conveys them
through the grease filter into the
atmosphere.
❑ The grease filter absorbs the solid
particles in the kitchen vapours.
❑ The kitchen is kept almost free of grease
and odours.
D
If the extractor hood is in exhaust-air
mode and a flue-type heater is running
at the same time (e.g. gas, oil or solid-fuel
heaters, continuous-flow heaters, water
heaters), ensure that the fireplace has an
adequate air supply for combustion.
Safe operation requires that the low air
pressure in the room in which the fireplace
is located does not exceed 4 Pa (0.04
mbar).
Before using for the first time
Important notes:
This extractor hood complies with all
relevant safety regulations.
Repairs should only be carried out by
qualified specialists.
Improperly executed repairs can give
rise to significant hazards for the user.
The appliance is not intended for use
by young children or infirmed persons
without supervision.
Young children should be supervised to
ensure they do not play with the appliance.
The appliance should only be
connected up to the mains and taken into
use by a qualified specialist.
Dispose of packaging materials
properly (see Installation instructions).
Light bulbs must always be fitted when
the extractor hood is in use.
Defective bulbs should be replaced
immediately to prevent the remaining bulbs
from overloading.
9
Before using for the first time
Never operate the extractor hood
without a grease filter.
Overheated fat or oil can easily catch
fire.
If you are cooking with fat or oil, e.g. chips,
etc., never leave the cooker unattended.
Do not flambé food directly under the
extractor hood.
Risk of grease filter catching fire due
! to flames.
Restrictions apply to the use of the
extractor hood over a solid-fuel burner
(coal, wood, etc.). (See Installation
instructions).
Gas hobs / gas cookers
Always use gas hobs in a proper and
safe manner.
Important:
The flames from the gas hob must always
be covered by pots or pans.
The intense heat generated by the gas
flames could cause damage to the
! extractor hood.
❑ The heat load of all the hotplates which
is produced during operation must not
exceed 11.3 kW, irrespective of the
installed nominal output.
❑ Exception:
The hotplates may be operated briefly
(max. 15 minutes) at a heat load up to
13.5 kW if at least fan setting 2 has been
permanently switched on.
(Otherwise, there is a risk of burns if the
housing surfaces are touched).
Operating procedure
The most effective method of removing
vapours produced during cooking is to:
❑ Switch the ventilator ON
as soon as you begin cooking.
❑ Switch the ventilator OFF
a few minutes after you have finished
cooking.
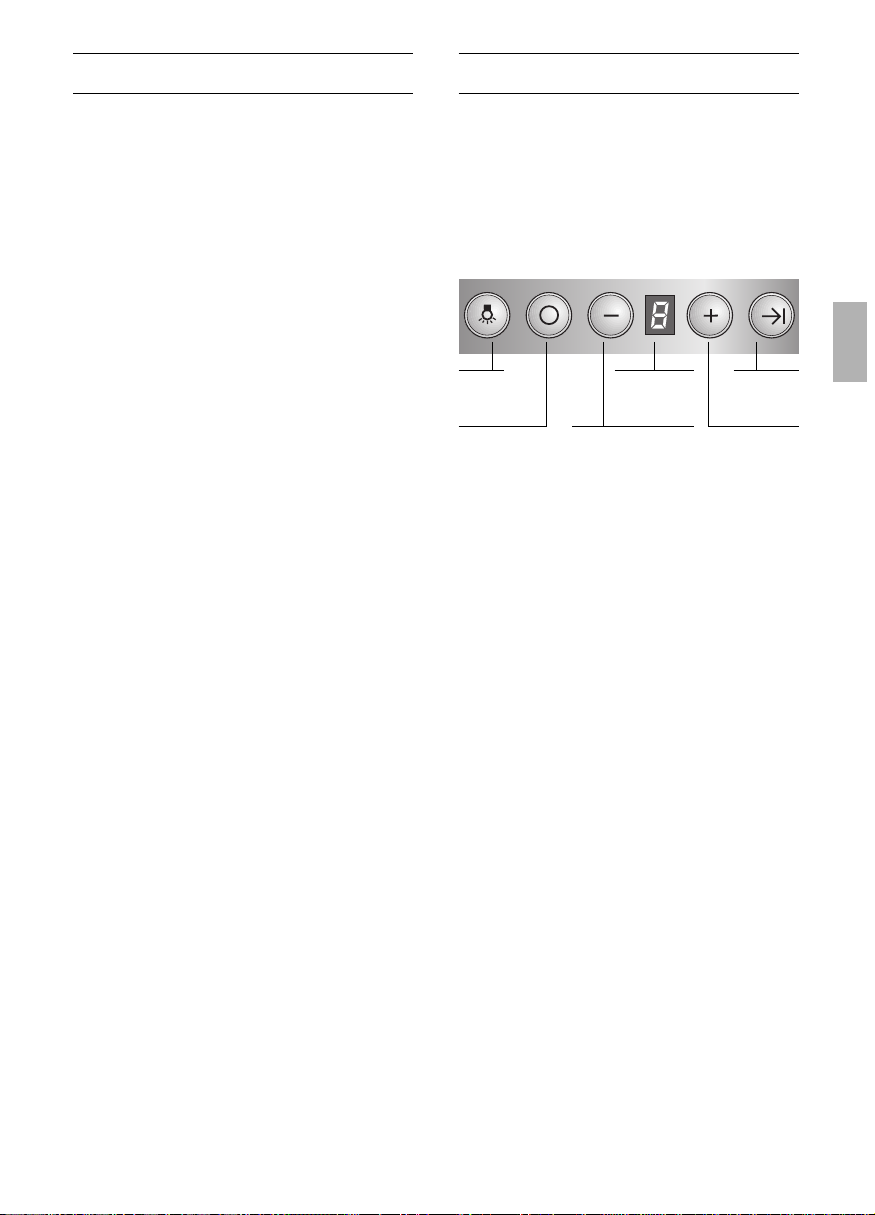
Light
Fan OFF Reduce fan speed Fan ON and
increase
speed
Display for
fan setting
Fan
follow-on
Acoustic signal:
❑ When a button is pressed, this is verified
by an acoustic signal.
Switching off the acoustic signal:
❑ Simultaneously press buttons 0 and +
until a signal is emitted after approx. 3
seconds.
Switching on the acoustic signal:
❑ Repeat the process.
Switching the fan ON
❑ Press the + button.
Setting the required fan speed:
❑ Press the + button.
The fan speed is increased by one step.
❑ Press the – button.
The fan speed is reduced by one step.
Switching the fan OFF:
❑ Press the 0 button.
The displayed
{ goes out shortly
afterwards.
Or:
❑ Keep pressing the – button until the fan
switches off.
The displayed
{ goes out shortly
afterwards.
10
Operating procedure
Intensive setting:
Maximum power is obtained at the
intensive setting. It is only required for short
intervals.
❑ Keep pressing the + button until a
ç
appears in the display.
❑ If the intensive setting is not cancelled by
hand, the fan will automatically switch
back to step
} after 10 minutes.
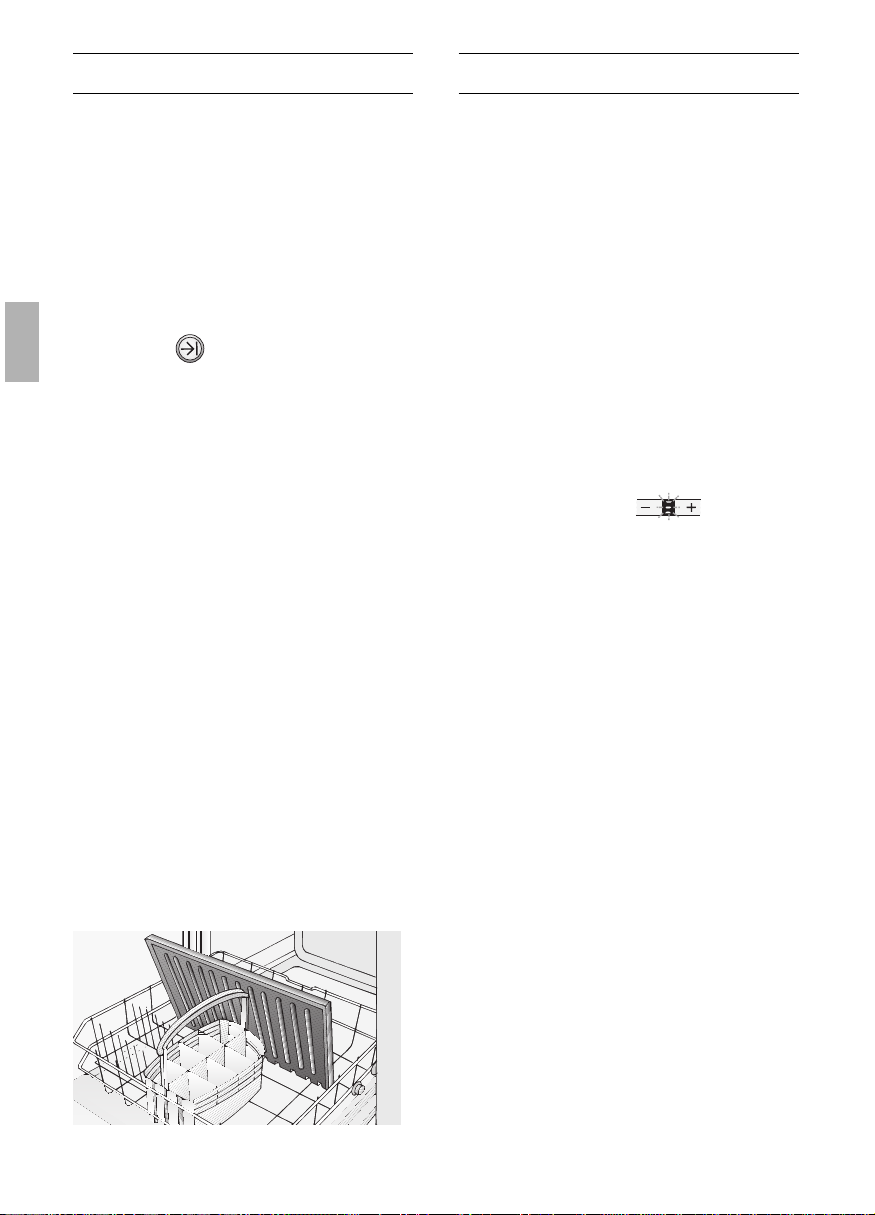
Fan follow-on:
❑ Press the button.
The fan continues to run at step
| for 10
minutes, and at the same time a dot
flashes in the display. After this period
the fan switches off automatically.
Lighting:
❑ Briefly press the
a button to switch the
light on and off.
❑ The light can be switched on at any
time, even though the fan is switched off.
❑ Adjusting the brightness:
Hold down the
a button until the
desired brightness is obtained.
Switching on the light automatically, e.g.
via a timer:
❑ Fan and light must be switched off.
Switching on:
Simultaneously press the – and
!
buttons.
❑ After approx. 3 seconds the light
switches on to acknowledge the setting.
Switching off:
Repeat the process with the light switched
on.
❑ After approx. 3 seconds the light
switches off to acknowledge the setting.
Grease filter:
two metal grease filters are inserted to
soak up the fatty remains of the kitchen
steam.
The filters are made of non-inflammable
metal.
Caution:
As the filter becomes more and more
saturated with grease, not only does the
risk of it catching fire increase but the
efficiency of the extractor hood can also be
adversely affected.
Important:
Danger of fire, which can occur through
the accumulation of heat when deep frying
or roasting, can be prevented by timely
cleaning.
Saturation indicator:
When the grease filters reach saturation
point, an acoustic signal is sounded for 10
seconds after the fan has switched off, and
an #appears in the display. The grease
filters should be cleaned straight away.
Cleaning the grease filter:
❑ The filters can be cleaned in a dish-
washer. It is however possible that they
will become slightly discoloured.
❑ Insert the outer filter so that the hooking-
in holes are at the bottom and the rinsing
water can run off.
Important:
Do not clean very soiled grease filters
together with dishes.
❑ When cleaning the filters by hand, soak
them in hot soapy water first of all.
Then brush the filters clean, rinse them
thoroughly and leave the water to drain off.
Cancel the
#
in the display.
❑ Press the 0 button.
Filters and maintenance
11
Filters and maintenance
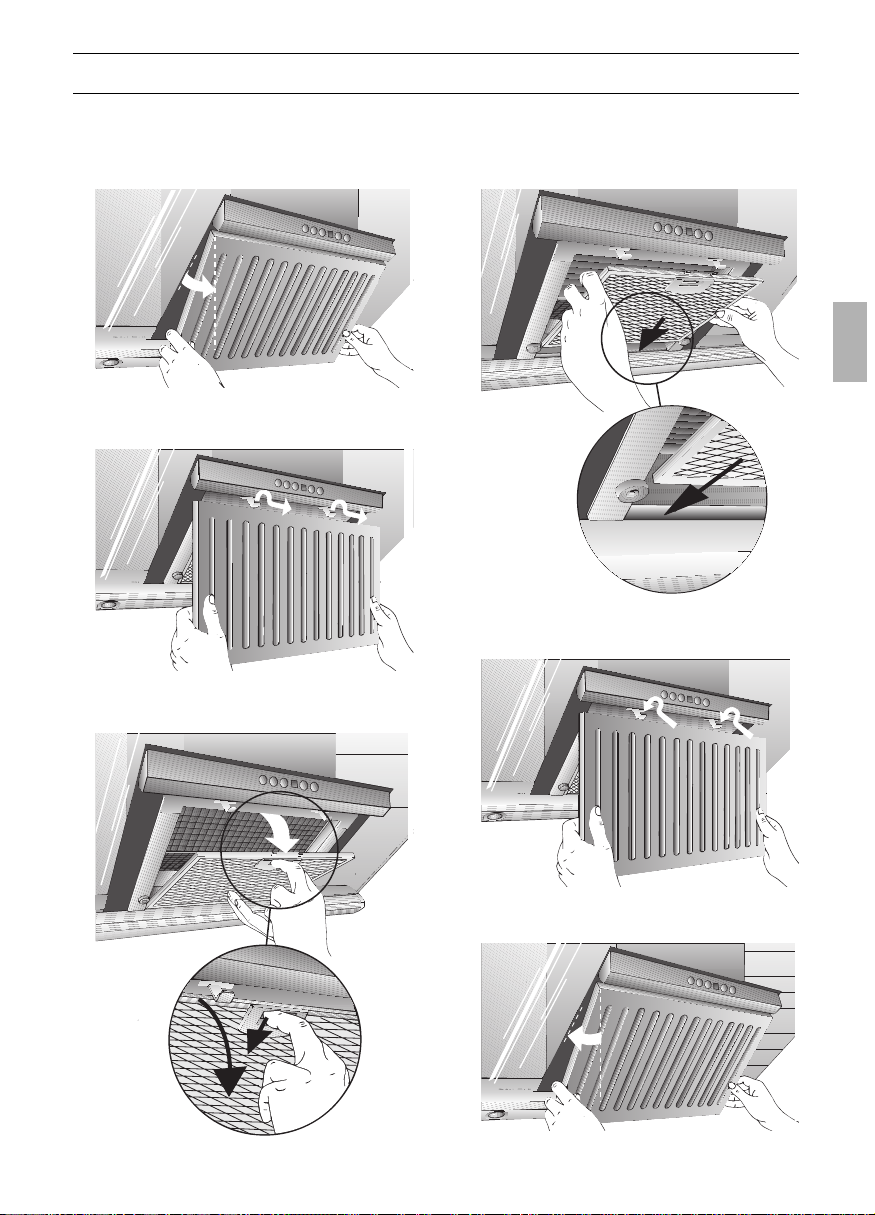
Removing the grease filter:
1. Pull the bottom of the most outer filter
until it comes away from the magnets.
2. Unhook the filter in a vertical position
from the top.
3. Press the notch on the inner filter and
fold the filter down.
Inserting the grease filter:
1. Insert the inner filter at the back and fold
the filter upwards.
2. Hook in the outer filter in a vertical
position.
3. Press the filter to the back, until the
magnets take hold.
2.
1.
 Loading...