


iPod Shuffle - 3rd generation
Table of contents
 Loading...
iPod shuffle
User Guide

2
2
Contents
Chapter 1 3 About iPod shuffle
Chapter 2 4 iPod shuffle Basics
4
iPod shuffle at a Glance
5
Using the iPod shuffle Controls
6
Connecting and Disconnecting iPod shuffle
8
Charging the Battery
Chapter 3 10 Setting Up iPod shuffle
10
About iTunes
11
Importing Music into Your iTunes Library
14
Organizing Your Music
15
Adding Music to iPod shuffle
Chapter 4 20 Listening to Music
20
Playing Music
22
Using the VoiceOver Feature
Chapter 5 26 Storing Files on iPod shuffle
26
Using iPod shuffle as an External Disk
Chapter 6 28 Tips and Troubleshooting
31
Updating and Restoring iPod shuffle Software
Chapter 7 32 Safety and Handling
32
Important Safety Information
34
Important Handling Information
Chapter 8 35 Learning More, Service, and Support
Index 38
1
3
1
About iPod shuffle
Congratulations on purchasing iPod shuffle. Read this
chapter to learn about the features of iPod shuffle, how
to use its controls, and more.
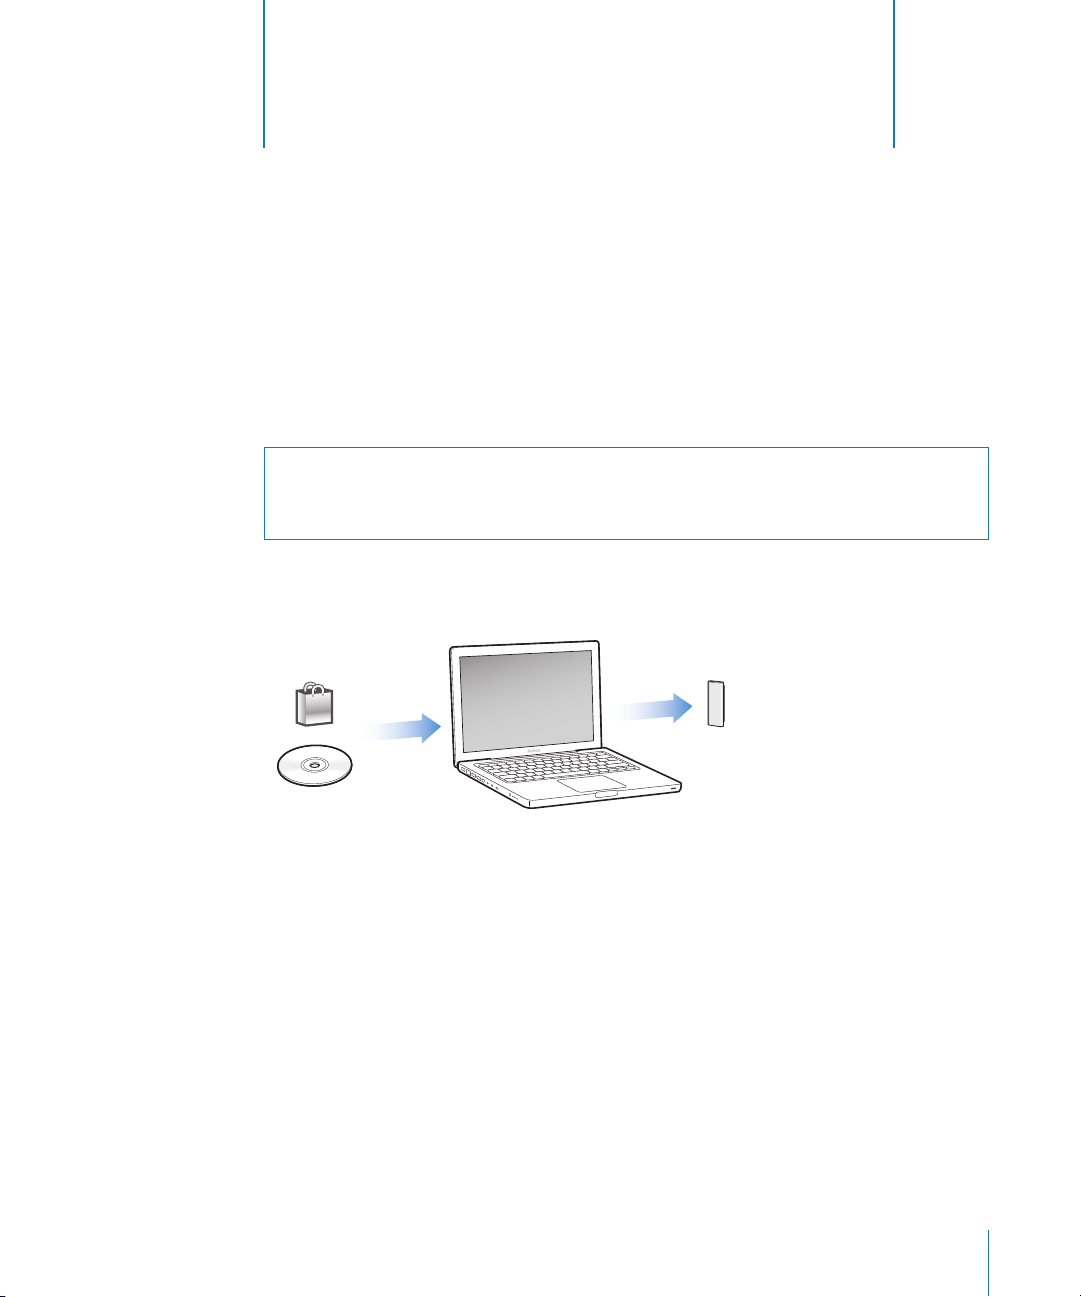
To use iPod shuffle, you put songs and other audio files on your computer and then
sync them with iPod shuffle.
Use iPod shuffle to:
Â
Sync songs and playlists for listening on the go
Â
Listen to podcasts, downloadable radio-style shows, delivered over the Internet
Â
Listen to audiobooks purchased from the iTunes Store or audible.com
Â
Store or back up files and other data, using iPod shuffle as an external disk
What’s New in iPod shuffle
Â
Apple Earphones with Remote to control iPod shuffle easily while you’re on the go
Â
Support for multiple playlists and audiobooks
Â
New VoiceOver feature that announces the song and artist names, a menu of your
playlists, audiobooks, and podcasts, and battery status and other messages
Â
Improved flexibility with syncing music and other content in iTunes
±
WARNING:
To avoid injury, read all operating instructions in this guide and
the safety information in “Safety and Handling” on page 32 before using
iPod shuffle.
2
4
2
iPod shuffle Basics
Read this chapter to learn about the features of
iPod shuffle, how to use its controls, and more.
Your iPod shuffle package includes iPod shuffle, the Apple Earphones with Remote, and
a USB 2.0 cable to connect iPod shuffle to your computer.
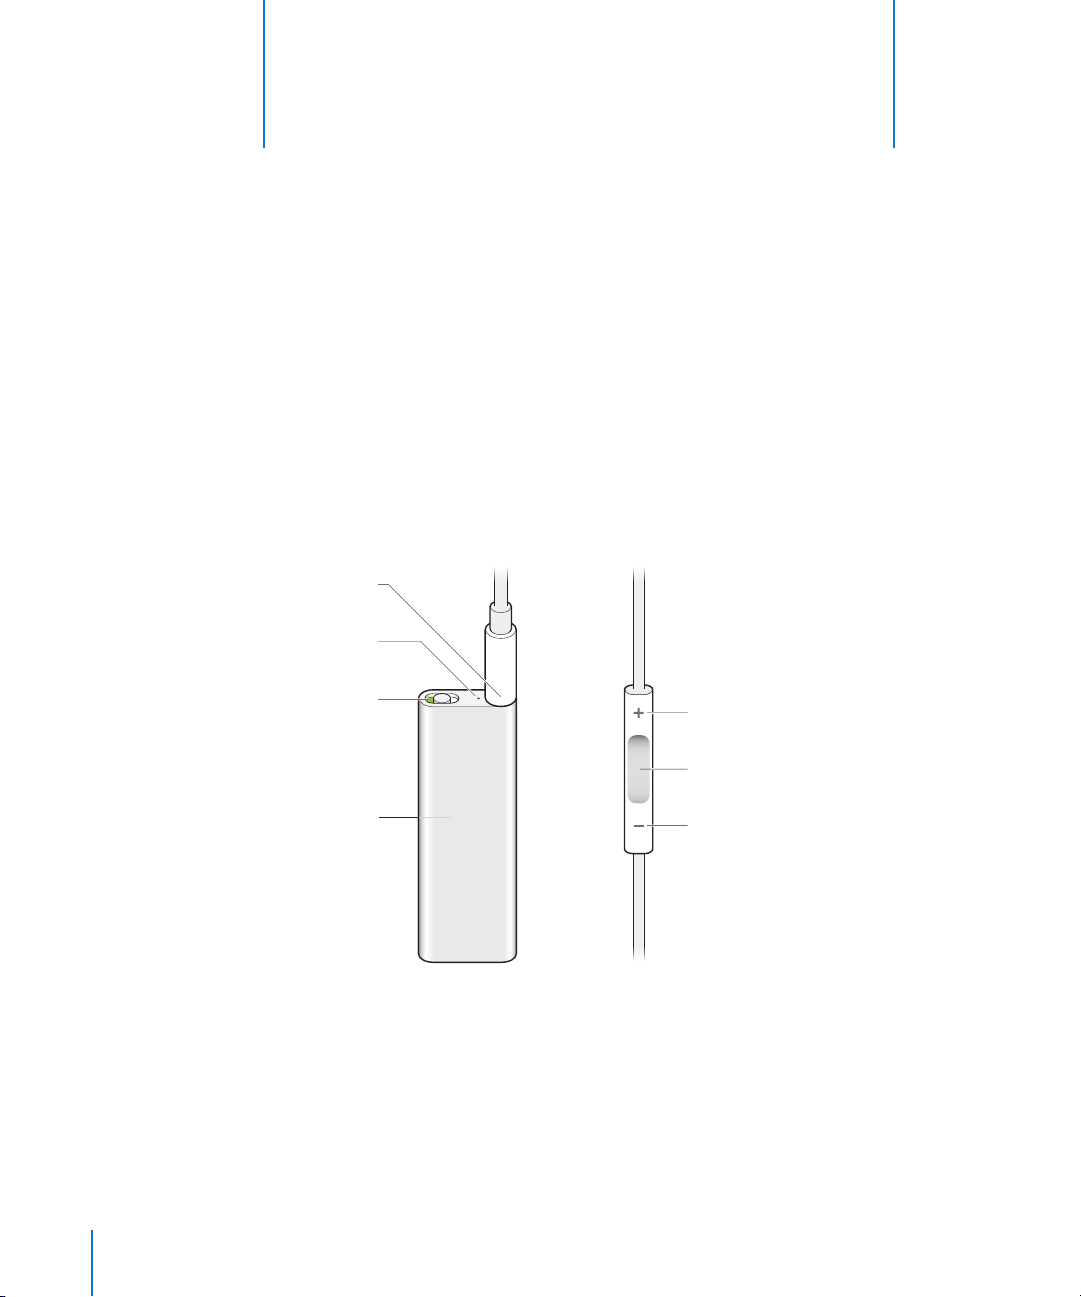
iPod shuffle at a Glance
Clip (in back)
Volume up
Center button
Volume down
Earphone port
Status light
Three-way switch

Chapter 2
iPod shuffle Basics
5
To use the Apple Earphones with Remote:
m
Plug the earphones into the earphone port on iPod shuffle. Then place the earbuds
in your ears as shown. Use the buttons on the remote to control playback.
You can purchase other accessories, such as the Apple In-Ear Earphones with Remote
and Mic, and the Apple Earphones with Remote and Mic, at
www.apple.com/ipodstore. The microphone capability isn’t supported on iPod shuffle.
Using the iPod shuffle Controls
The simple three-way switch (OFF, play in order ⁄
, or shuffle ¡
) on iPod shuffle and
the buttons on the earphone remote make it easy to play songs, audiobooks, and
audio podcasts on iPod shuffle, as described below.
WARNING:
Read all safety instructions about avoiding hearing damage on page 33
before use.
The earphone
cord is adjustable
.
Remote
To Do this on iPod shuffle
Turn iPod shuffle on or off
Slide the three-way switch (green shading on switch indicates
iPod shuffle is on).
Set the play order
Slide the three-way switch to play in order (⁄
) or shuffle (¡
).
Reset iPod shuffle
(if iPod shuffle isn’t responding or
the status light is solid red)
Disconnect iPod shuffle from the computer. Turn iPod shuffle off,
wait 10 seconds, and then turn it back on again.
Find the iPod shuffle serial
number
Look under the clip on iPod shuffle. Or, in iTunes (with
iPod shuffle connected to your computer), select iPod shuffle
under Devices in iTunes and click the Summary tab.
6 Chapter 2
iPod shuffle Basics
Connecting and Disconnecting iPod shuffle
Connect iPod shuffle to your computer to sync songs and other audio files, and to
charge the battery. Disconnect iPod shuffle when you’re done.
Important:
Use only the USB 2.0 cable that came with iPod shuffle to connect it to your
computer.
Connecting iPod shuffle
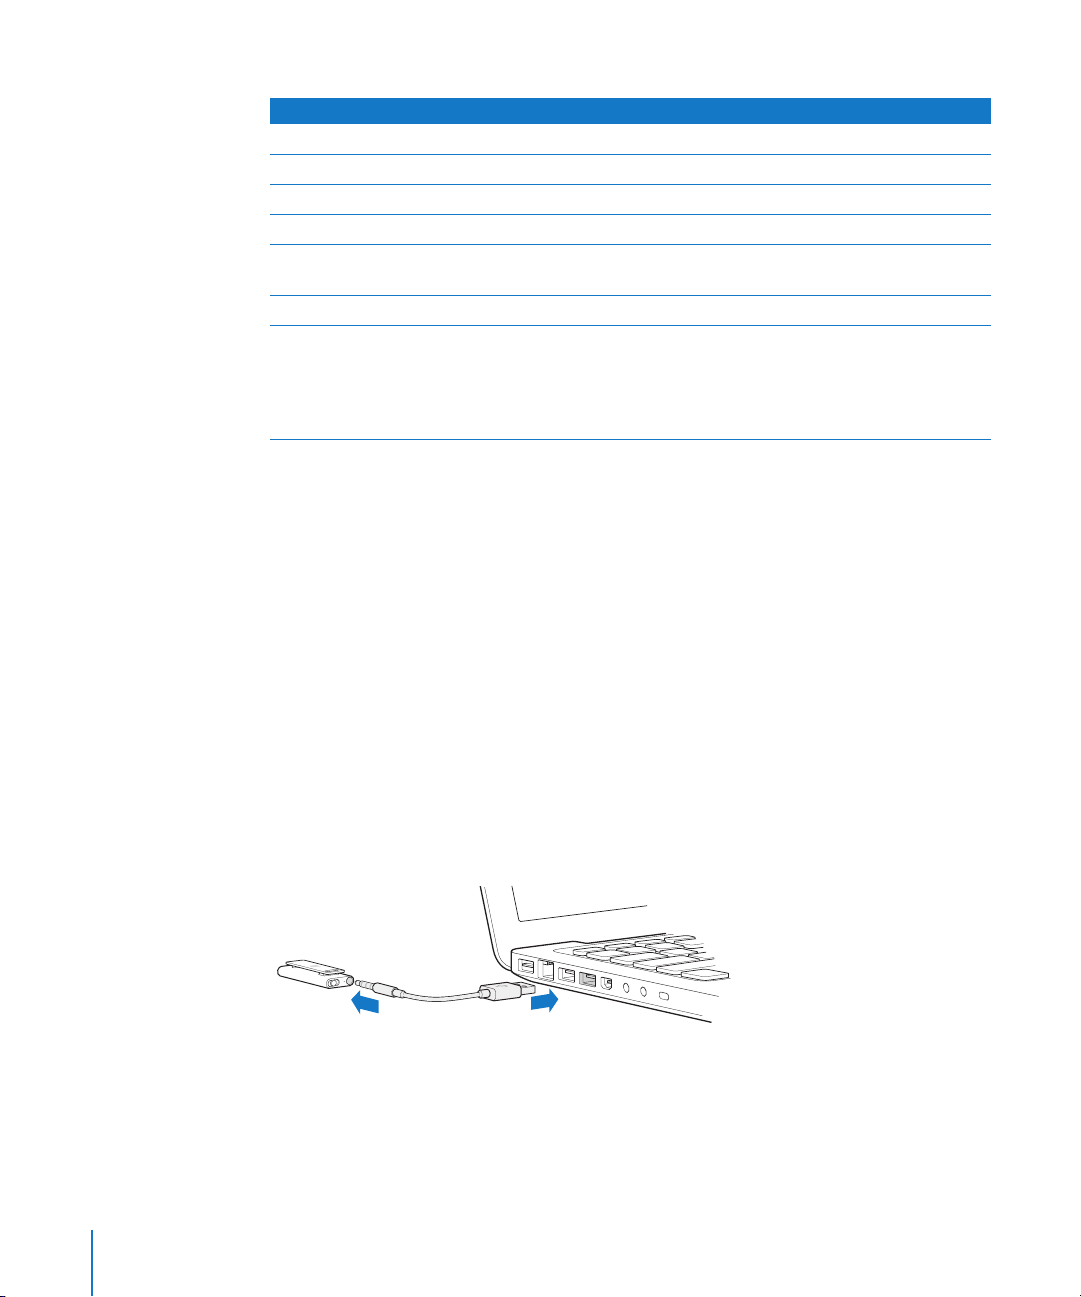
To connect iPod shuffle to your computer:
m
Plug one end of the included USB cable into the earphone port of iPod shuffle, and the
other end into a USB 2.0 port on your computer.
Note:
Charging or syncing iPod shuffle is faster if you connect it to a high-power USB
2.0 port. On most keyboards, the USB port doesn’t provide enough power to charge at
optimal speed.
A longer USB cable is available separately at www.apple.com/ipodstore.
To Do this with the earphone remote
Play or pause
Click the Center button.
Change the volume
Click the Volume Up (∂
) or Volume Down (D
) button.
Go to the next track
Double-click the Center button.
Fast-forward
Double-click and hold the Center button.
Go to the previous track
Triple-click the Center button within 6 seconds of the track
starting. Triple-clicking after 6 seconds restarts the current track.
Rewind
Triple-click and hold the Center button.
Hear song titles, artist names,
and playlist names
To hear the current song title and artist name, click and hold the
Center button. To listen to your playlist names, keep holding, and
release when you hear a tone; then click to select the playlist you
want. For more information, see “Using the VoiceOver Feature” on
page 22.

Chapter 2
iPod shuffle Basics
7
The first time you connect iPod shuffle to your computer, iTunes helps you configure
iPod shuffle and sync it with your iTunes library. By default, iTunes automatically syncs
songs on iPod shuffle when you connect it to your computer. When iTunes is finished,
you can disconnect iPod shuffle. You can sync songs while your battery is charging.
If you connect iPod shuffle to a different computer and iPod shuffle is set to sync music
automatically, iTunes prompts you before syncing any music. If you click Yes, the songs
and other audio files already on iPod shuffle will be erased and replaced with songs
and other audio files on the computer iPod shuffle is connected to. For information
about adding music to iPod shuffle and using iPod shuffle with more than one
computer, see Chapter 4, “Listening to Music,” on page 20.
Disconnecting iPod shuffle
It’s important not to disconnect iPod shuffle from your computer while audio files are
syncing or when iPod shuffle is being used as an external disk. It’s OK to disconnect
iPod shuffle if the status light is not blinking orange, or if you see the “OK to
disconnect” message at the top of the iTunes window.
Important:
If you see the “Do not disconnect” message in iTunes or if the status light
on iPod shuffle is blinking orange, you must first eject iPod shuffle before
disconnecting it. Failing to do so may damage files on iPod shuffle and require you to
restore iPod shuffle in iTunes. For information about restoring, see “Updating and
Restoring iPod shuffle Software” on page 31.
If you enable iPod shuffle for disk use (see page 26), you must always eject iPod shuffle
before disconnecting it.
To eject iPod shuffle:
m
Click the Eject (C
) button next to iPod shuffle in the list of devices in iTunes.
If you’re using a Mac,
you can also eject iPod shuffle by dragging the iPod shuffle icon
on the desktop to the Trash.
If you’re using a Windows PC,
you can also eject iPod shuffle in My Computer or by
clicking the Safely Remove Hardware icon in the Windows system tray and selecting
iPod shuffle.
To disconnect iPod shuffle:
m
Detach the USB cable from iPod shuffle and from the computer.

8 Chapter 2
iPod shuffle Basics
Charging the Battery
iPod shuffle has an internal battery that is rechargeable and not user-replaceable. For
best results, the first time you use iPod shuffle, let it charge for about three hours to
fully charge it. The battery is 80-percent charged in about two hours and fully charged
in about three hours. If iPod shuffle isn’t used for a while, the battery might need to be
recharged.
You can sync music while the battery is charging. You can disconnect and use
iPod shuffle before it’s fully charged.
In iTunes, the battery icon next to your iPod shuffle name shows the battery status. The
icon displays a lightning bolt when the battery is charging and a plug when the battery
is fully charged.
You can charge the iPod shuffle battery in two ways:
Â
Connect iPod shuffle to your computer.
Â
Use the Apple USB Power Adapter, available separately.
To charge the battery using your computer:
m
Connect iPod shuffle to a high-power USB 2.0 port on your computer using the
included USB cable. The computer must be turned on and not in sleep mode.
When the battery is charging, the status light on iPod shuffle is solid orange. When the
battery is fully charged, the status light turns green.
If iPod shuffle is being used as an external disk or is syncing with iTunes, the status light
blinks orange to let you know that you must eject iPod shuffle before disconnecting it.
In this case, your battery may be either still charging or fully charged. You can check
the status by viewing the battery icon next to your iPod shuffle name in the list of
devices in iTunes.
If you don’t see the status light, iPod shuffle might not be connected to a high-power
USB 2.0 port. Try another USB 2.0 port on your computer.
If you want to charge the battery when you’re away from your computer, you can
connect iPod shuffle to an Apple USB Power Adapter. To purchase iPod shuffle
accessories, go to www.apple.com/ipodstore.
To charge the battery using the Apple USB Power Adapter:
1
Connect the AC plug adapter to the power adapter (they might already be connected).
2
Plug the USB connector of the USB cable into the power adapter.
3
Connect the other end of the USB cable to iPod shuffle.

Chapter 2
iPod shuffle Basics
9
4
Plug the power adapter into a working power outlet.
Rechargeable batteries have a limited number of charge cycles. Battery life
and number of charge cycles vary by use and settings. For information, go to
www.apple.com/batteries.
Checking the Battery Status
You can check the battery status of iPod shuffle when it’s connected to your computer
or disconnected. The status light tells you approximately how much charge is in the
battery.
If iPod shuffle is on and not connected to a computer, check the battery status without
interrupting playback by quickly turning iPod shuffle off and then on again. You can
also use VoiceOver to hear battery status information.
WARNING:
Make sure the power adapter is fully assembled before plugging it into a
power outlet. Read all safety instructions about using the Apple USB Power Adapter
on page 33 before use.
Apple USB Power Adapter
(your adapter may look different)
iPod shuffle USB cable
Status light when connected
Solid green Fully charged
Solid orange Charging
Blinking orange
Do not disconnect (iTunes is syncing, or iPod shuffle is enabled for
disk use); may be still charging or may be fully charged
Status light when disconnected VoiceOver
Solid green Good charge “Battery full”
“Battery 75%”
“Battery 50%”
Solid orange Low charge “Battery 25%”
Solid red Very low charge “Battery low”

3
10
3
Setting Up iPod shuffle
To set up iPod shuffle, you use iTunes on your computer
to import, buy, and organize your music, audio podcasts,
and audiobooks. Then you connect iPod shuffle to your
computer and sync it to your iTunes library.
Read on to learn more about the steps in this process, including:
 Getting music from your CD collection, hard disk, or the iTunes Store (part of iTunes
and available in some countries only) into the iTunes application on your computer
 Organizing your music and other audio into playlists
 Syncing songs, audiobooks, and podcasts (free downloadable radio-style shows) in
your iTunes library with iPod shuffle
 Listening to music or other audio on the go
About iTunes
iTunes is the software application you use to sync music, audiobooks, and audio
podcasts with iPod shuffle. To download iTunes version 8.1 or later (required for
iPod shuffle), go to www.apple.com/ipod/start. After you install iTunes, it opens
automatically when you connect iPod shuffle to your computer.
This chapter explains how to use iTunes to download songs and other audio to your
computer, create personal compilations of your favorite songs (called playlists), sync
iPod shuffle, and adjust iPod shuffle settings.
iTunes also has a feature called Genius, which creates instant playlists of songs from
your iTunes library that go great together. You can create Genius playlists in iTunes and
sync them to iPod shuffle. To learn how to set up Genius in iTunes, see “Using Genius in
iTunes” on page 14.
iTunes has many other features. You can burn your own CDs that play in standard CD
players (if your computer has a recordable CD drive); listen to streaming Internet radio;
watch videos and TV shows; rate songs according to preference; and much more. For
information about using these features, open iTunes and choose Help > iTunes Help.
Chapter 3 Setting Up iPod shuffle 11
If you already have iTunes installed on your computer and you’ve set up your iTunes
library, you can skip to the next section, “Adding Music to iPod shuffle” on page 15.
Importing Music into Your iTunes Library
To listen to music on iPod shuffle, you first need to get that music into your iTunes
library on your computer.
There are three ways to get music and other audio into your iTunes library:
 Purchase music and audiobooks or download podcasts online from the iTunes Store.
 Import music and other audio from audio CDs.
 Add music and other audio that’s already on your computer.
Buying Songs and Downloading Podcasts Using the iTunes Store
If you have an Internet connection, you can easily purchase and download songs,
albums, and audiobooks online using the iTunes Store. You can also subscribe to and
download free radio-style audio podcasts. Video podcasts can’t be synced to
iPod shuffle.
To purchase music online using the iTunes Store, you set up an Apple account in
iTunes, find the songs you want, and then buy them. If you already have an Apple
account, or if you have an America Online (AOL) account (available in some countries
only), you can use that account to sign in to the iTunes Store and buy songs.
You don’t need an iTunes Store account to download or subscribe to podcasts.
To sign in to the iTunes Store:
m Open iTunes and then:
 If you already have an iTunes account, choose Store > Sign In, and then sign in.
 If you don’t already have an iTunes account, choose Store > Create Account and follow
the onscreen instructions to set up an Apple account or enter your existing Apple or
AOL account information.

12 Chapter 3 Setting Up iPod shuffle
You can browse or search the iTunes Store to find the album, song, or artist you’re
looking for. Open iTunes and click iTunes Store in the list on the left.
 To browse the iTunes Store, choose a category (for example, Music) on the left side of
the iTunes Store home page. You can choose a genre, look at new releases, click one
of the featured songs, look at Top Songs and more, or click Browse under Quick Links
in the main iTunes Store window.
 To browse for podcasts, click the Podcasts link on the left side of the iTunes Store
home page.
 To search the iTunes Store, type the name of an album, song, artist, or composer in the
search field. Press Return or choose an item from the list that appears.
 To narrow your search results, choose an item from the pop-up menu in the upper left
(the default is All Results). For example, to narrow your search to songs and albums,
choose Music from the pop-up menu.
 To search for a combination of items, click Power Search in the Search Results page.
 To return to the home page of the iTunes Store, click the Home button in the status line
at the top of the page.
To buy a song, album, or audiobook:
1 Select iTunes Store, and then find the item you want to buy.
You can double-click a song or other item to listen to a portion of it and make sure it’s
what you want. (If your network connection is slower than 128 kbps, choose iTunes
Preferences, and in the Store pane, select “Load complete preview before playing.”)
2 Click Buy Song, Buy Album, or Buy Book.
The item is downloaded to your computer and charged to the credit card listed in your
Apple or AOL account.
To download or subscribe to a podcast:
1 Select iTunes Store.
2 Click the Podcasts link on the left side of the home page in the iTunes Store.
3 Browse for the podcast you want to download.
 To download a single podcast episode, click the Get Episode button next to the
episode.
 To subscribe to a podcast, click the Subscribe button next to the podcast graphic.
iTunes downloads the most recent episode. As new episodes become available,
they’re automatically downloaded to iTunes when you connect to the Internet.
Adding Songs Already on Your Computer to Your iTunes Library
If you have songs on your computer encoded in file formats that iTunes supports, you
can easily add the songs to iTunes.
Loading...