


iPod nano 3rd generation
Table of contents
 Loading...
iPod nano
Features Guide

Contents
2
Chapter 1 4 iPod nano Basics
5
iPod nano at a Glance
5
Using iPod nano Controls
8
Disabling iPod nano Controls
9
Using iPod nano Menus
10
Connecting and Disconnecting iPod nano
14
About the iPod nano Battery
Chapter 2 17 Music Features
17
About iTunes
18
Importing Music into Your iTunes Library
22
Organizing Your Music
22
Adding Music and Podcasts to iPod nano
26
Playing Music
31
Watching and Listening to Podcasts
32
Listening to Audiobooks
32
Listening to FM Radio
Chapter 3 33 Video Features
33
Purchasing or Renting Videos and Downloading
Video Podcasts
34
Converting Your Own Videos to Work with iPod nano
35
Adding Videos to iPod nano
37
Viewing and Listening to Videos
Chapter 4 40 Photo Features
40
Importing Photos
43
Viewing Photos
Chapter 5 46 Extra Features and Accessories
46
Using iPod nano as an External Disk
47
Using Extra Settings
51
Syncing Contacts, Calendars, and To-Do Lists
53
Storing and Reading Notes
2

54
Recording Voice Memos
54
Learning About iPod nano Accessories
Chapter 6 56 Tips and Troubleshooting
56
General Suggestions
61
Updating and Restoring iPod Software
Chapter 7 62 Safety and Cleaning
62
Important Safety Information
64
Important Handling Information
Chapter 8 65 Learning More, Service, and Support
Index 68
Contents
3

iPod nano Basics
1
1
Congratulations on purchasing iPod nano. Read this chapter
to learn about the features of iPod nano, how to use its
controls, and more.
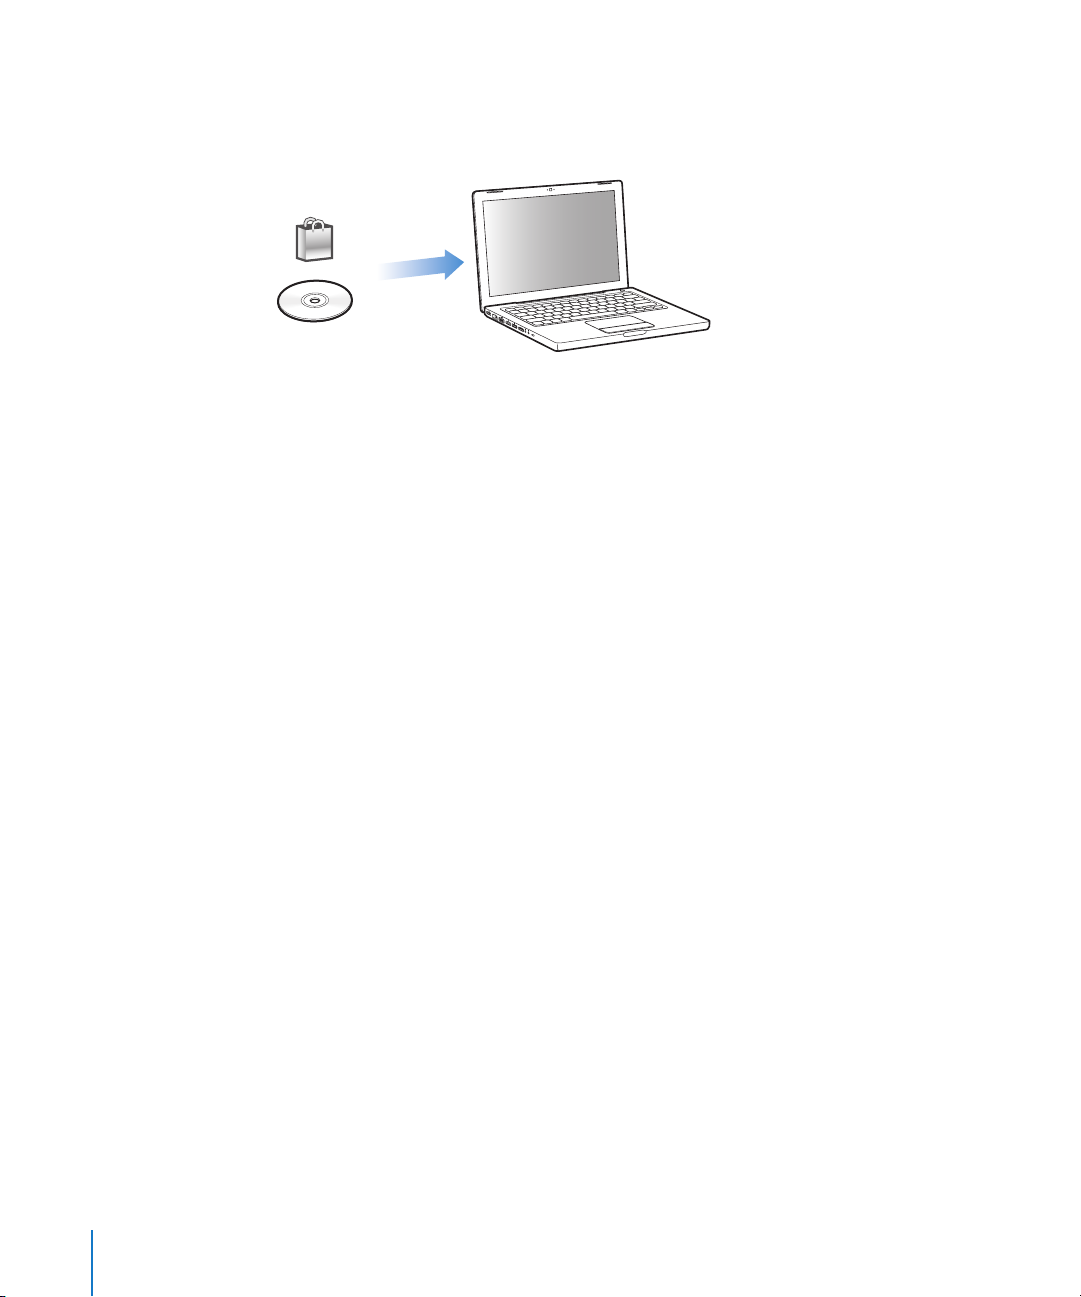
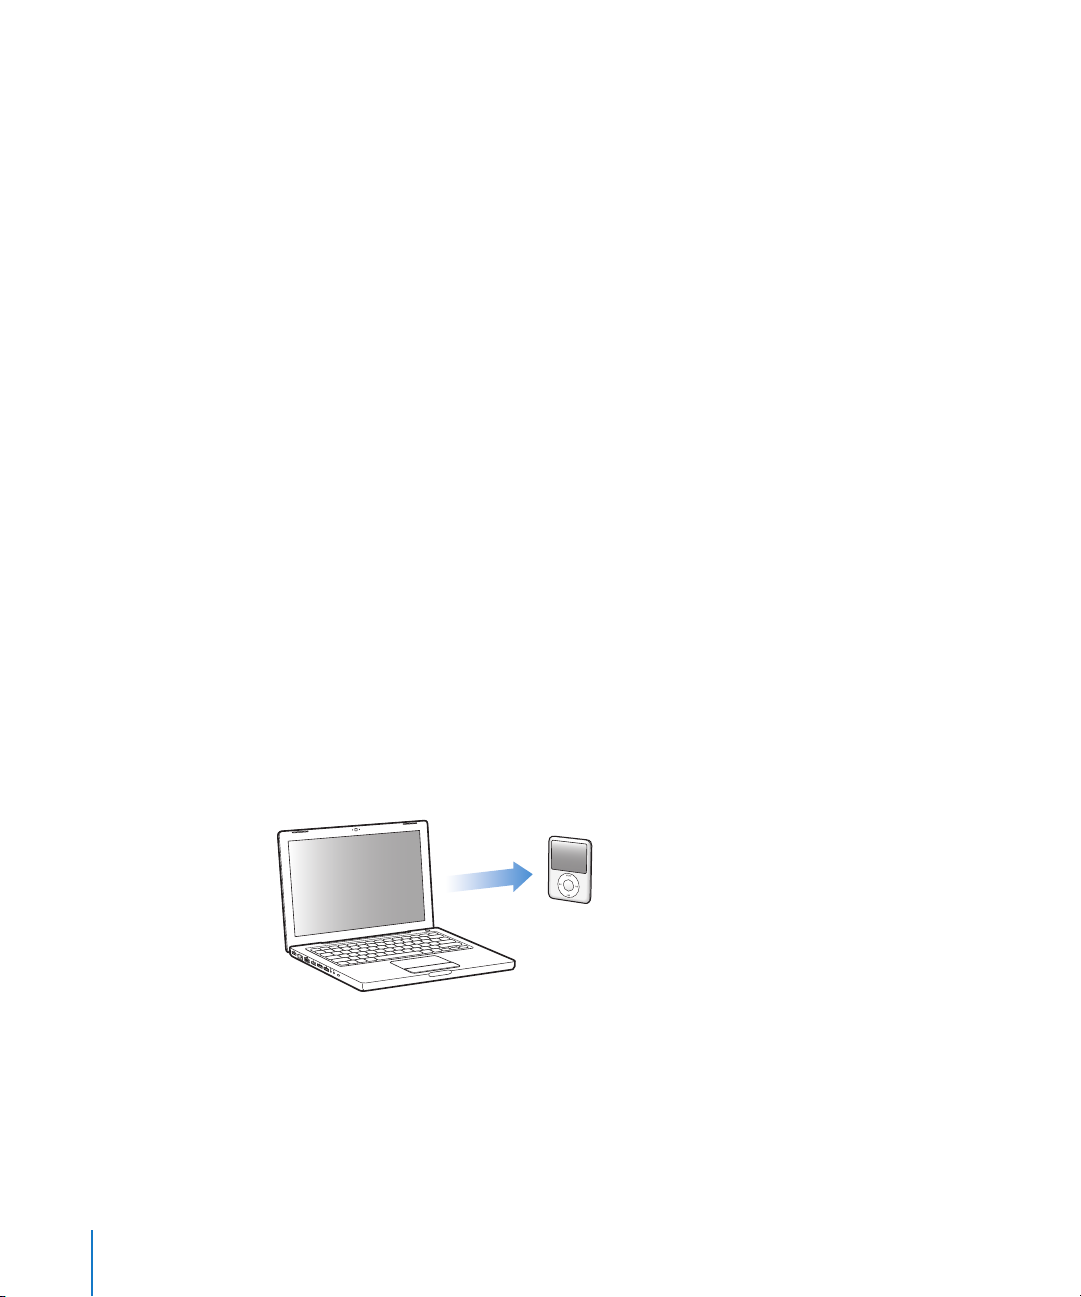
To use iPod nano, you put music, videos, photos, and other files on your computer and
then add them to iPod nano.
iPod nano is a music player and much more. Use iPod nano to:
Â
Sync songs, videos, and digital photos for listening and viewing on the go
Â
Listen to podcasts, downloadable audio and video shows delivered over the Internet
Â
View video on iPod nano, or on a TV using an optional cable
Â
View photos as a slideshow with music on iPod nano, or on a TV using an optional
cable
Â
Listen to audiobooks purchased from the iTunes Store or audible.com
Â
Store or back up files and other data, using iPod nano as an external disk
Â
Sync contact, calendar, and to-do list information from your computer
Â
Play games, store text notes, set an alarm, and more
4
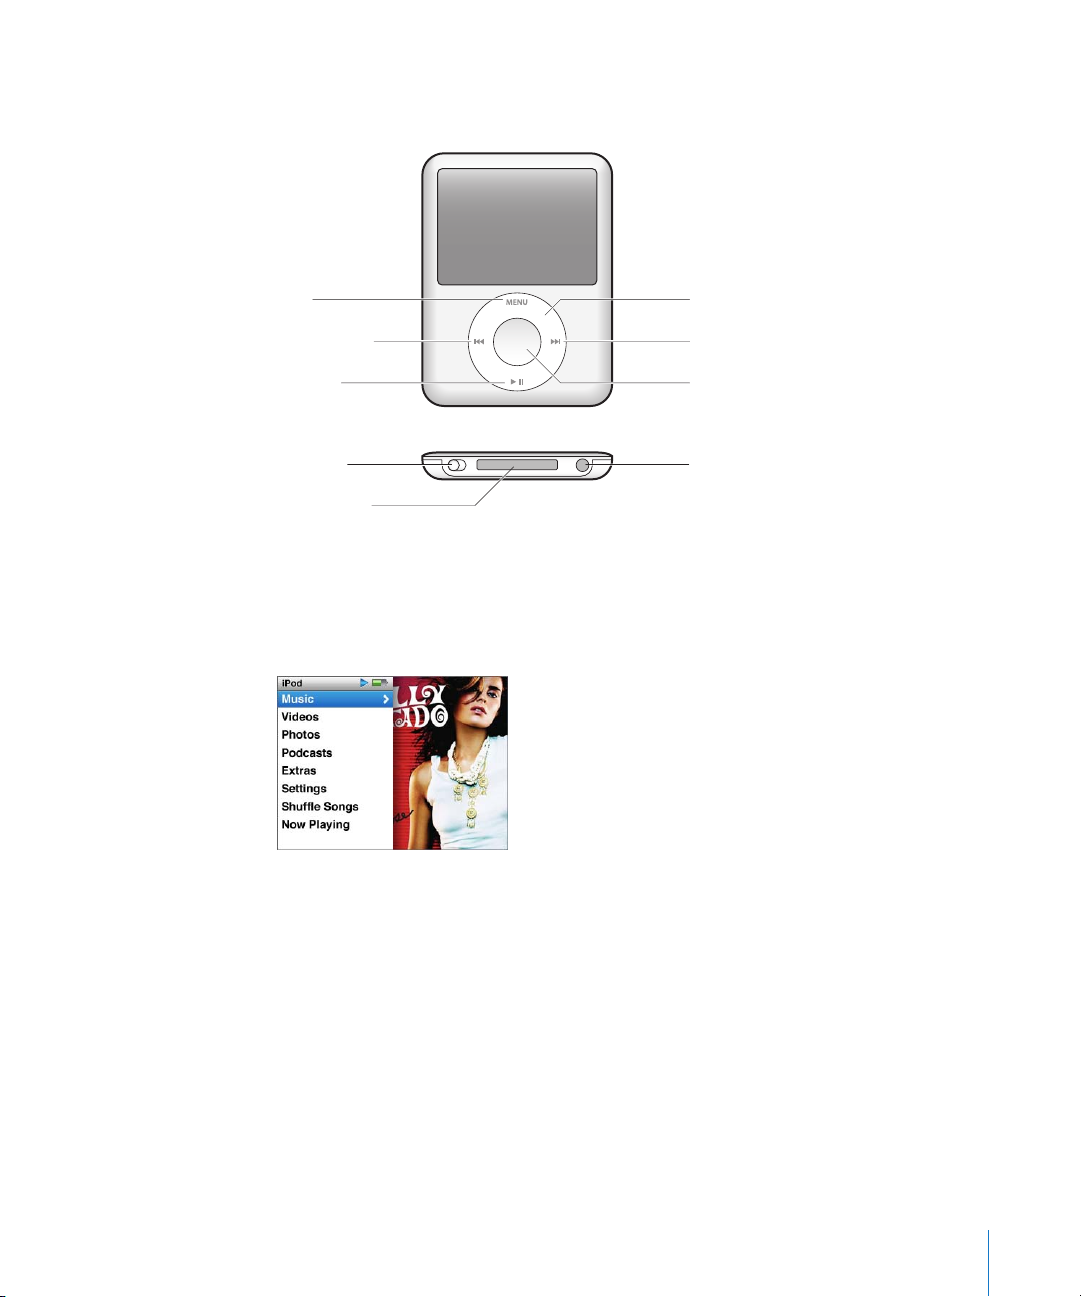
iPod nano at a Glance
Get to know the controls on iPod nano:
Menu
Previous/Rewind
Play/Pause
Hold switch Headphones port
Dock connector
Click Wheel
Next/Fast-forward
Center button
Using iPod nano Controls
The controls on iPod nano are easy to find and use. Press any button to turn on
iPod nano. The main menu appears.
Use the Click Wheel and Center button to navigate through onscreen menus,
play songs, change settings, and view information. Move your thumb lightly around
the Click Wheel to select a menu item. To choose the item, press the Center button.
To go back to the previous menu, press Menu on the Click Wheel.
Chapter 1
iPod nano Basics
5

Here’s what else you can do with iPod nano controls.
To Do this
Turn on iPod nano
Turn off iPod nano
Turn on the backlight
Disable the iPod nano controls
(so nothing happens if you press
them accidentally)
Reset iPod nano
(if it isn’t responding)
Choose a menu item
Go back to the previous menu
Go directly to the main menu
Browse for a song
Browse for a video
Play a song or video
Pause a song or video
Change the volume
Play all the songs in a playlist
or album
Play all songs in random order
Skip to any point in a song or
video
Skip to the next song or
chapter in an audiobook or
podcast
Start a song or video over
Play the previous song or
chapter in an audiobook or
podcast
Fast-forward or rewind a song
Add a song to the On-The-Go
playlist
Find the iPod nano serial
number
Press any button.
Press and hold Play/Pause (’).
Press any button or use the Click Wheel.
Slide the Hold switch to HOLD (an orange bar appears).
Slide the Hold switch to HOLD and back again. Press the Menu and
Center buttons at the same time for about 6 seconds, until the
Apple logo appears.
Scroll to the item and press the Center button.
Press Menu.
Press and hold Menu.
From the main menu, choose Music.
From the main menu, choose Videos.
Select the song or video and press the Center or Play/Pause (’)
button. iPod nano has to be ejected from your computer to play
songs and videos.
Press Play/Pause (’) or unplug your headphones.
From the Now Playing screen, use the Click Wheel.
Select the playlist or album and press Play/Pause (’).
From the main menu, choose Shuffle Songs. You can also shuffle
songs from the Now Playing screen.
From the Now Playing screen, press the Center button to show the
scrubber bar (a diamond icon on the bar shows the current
location), and then scroll to any point in the song or video.
Press Next/Fast-forward (‘).
Press Previous/Rewind (]).
Press Previous/Rewind (]) twice.
Press and hold Next/Fast-forward (‘) or Previous/Rewind (]).
Select a song in a playlist, and then press and hold the Center
button until the song title flashes.
From the main menu, choose Settings > About and press the
Center button until you get to the serial number, or look on the
back of iPod nano.
6 Chapter 1
iPod nano Basics

Browsing Music Using Cover Flow
You can browse your music collection using Cover Flow, a visual way to flip through
your library.
To use Cover Flow:
1
From the Music menu, choose Cover Flow.
2
Use the Click Wheel to move through your album art or press the Next/Fast-forward
and Previous/Rewind buttons.
3
Select an album and press the Center button.
4
Use the Click Wheel to select a song and press the Center button to play it.
Scrolling Quickly Through Long Lists
If you have more than 100 songs, videos, or other items, you can scroll quickly through
a long list by moving your thumb quickly on the Click Wheel.
Note:
Not all languages are supported.
To scroll quickly:
1
Move your thumb quickly on the Click Wheel, to display a letter of the alphabet on the
screen.
2
Use the Click Wheel to navigate the alphabet until you find the first letter of the item
you’re looking for. This takes you to the first item in the list beginning with that letter.
Items beginning with a symbol or number appear before the letter “A.”
3
Lift your thumb momentarily to return to normal scrolling.
4
Use the Click Wheel to finish navigating to the item you want.
Searching Music
You can search iPod nano for songs, playlists, album titles, artist names, audio podcasts,
and audiobooks. The search feature doesn’t search videos, notes, calendar items,
contacts, or lyrics.
Note:
Not all languages are supported.
To search iPod nano:
1
From the Music menu, choose Search.
2
Enter a search string by using the Click Wheel to navigate the alphabet and pressing
the Center button to enter each character.
iPod nano starts searching as soon as you enter the first character, displaying the
results on the search screen. For example, if you enter “b,” then iPod nano displays all
music items containing the letter “b.” If you enter “ab,” iPod nano displays all items
containing that sequence of letters.
To enter a space, press the Next/Fast-forward button.
Chapter 1
iPod nano Basics
7

To delete the previous character, press the Previous/Rewind button.
3
Press Menu to display the results list, which you can now navigate.
Items appear in the results list with icons identifying their type: song, video, artist,
album, audiobook, or podcast.
To return to Search (if Search is highlighted in the menu), press the Center button.
Turning off the Click Wheel Sound
When you scroll through menu items, you can hear a clicking sound through the
iPod nano internal speaker. If you like, you can turn the Click Wheel sound off.
To turn off the Click Wheel sound:
m
Choose Settings and set Clicker to Off.
To turn the Click Wheel sound on again, set Clicker to On.
Disabling iPod nano Controls
If you don’t want to turn iPod nano on or activate controls accidentally, you can make
them inactive using the Hold switch.
m
Slide the Hold switch to HOLD (so you can see the orange bar).
8 Chapter 1
iPod nano Basics
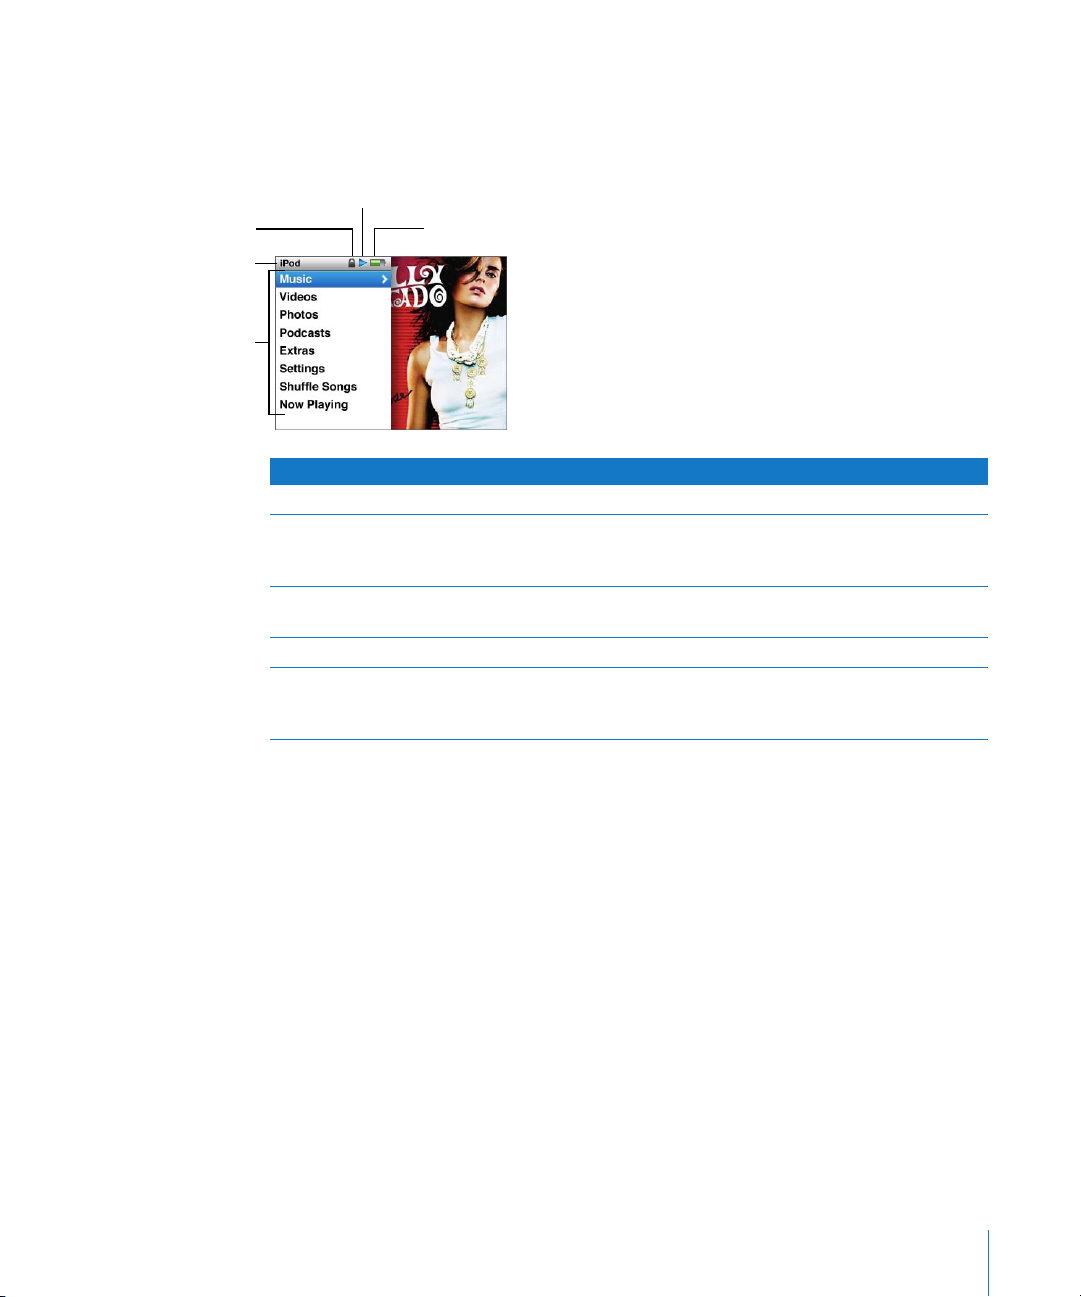
Using iPod nano Menus
When you turn on iPod nano, you see the main menu. Choose menu items to perform
functions or go to other menus. Icons along the top of the screen show iPod nano
status.
Lock icon
Menu title
Menu items
Play status
Display item Function
Menu title Displays the title of the current menu.
Lock icon The Lock icon appears when the Hold switch (on the bottom of
Play status The Play (
Battery status The Battery icon shows the approximate remaining battery charge.
Menu items Use the Click Wheel to scroll through menu items. Press the Center
Battery status
iPod nano) is set to HOLD. This indicates that the iPod nano
controls are disabled.
) icon appears when a song, video, or other item is
playing. The Pause (
“
button to choose an item. An arrow next to a menu item indicates
that choosing it leads to another menu or screen.
) icon appears when the item is paused.
1
Adding or Removing Items from the Main Menu
You might want to add often-used items to the iPod nano main menu. For example,
you can add a Songs item to the main menu, so you don’t have to choose Music before
you choose Songs.
To add or remove items from the main menu:
1 Choose Settings > Main Menu.
2 Choose each item you want to appear in the main menu. A checkmark indicates which
items have been added.
Setting the Backlight Timer
You can set the backlight to turn on and illuminate the screen for a certain amount of
time when you press a button or use the Click Wheel. The default is 10 seconds.
m Choose Settings > Backlight Timer, and then choose the time you want. Choose “Always
On” to prevent the backlight from turning off.
Chapter 1
iPod nano Basics
9

Setting the Screen Brightness
You can adjust the brightness of the iPod nano screen by moving a slider.
m Choose Settings > Brightness, and then use the Click Wheel to move the slider. Moving
it to the left dims the screen; moving it to the right increases the screen brightness.
You can also set the brightness during a slideshow or video. Press the Center button to
bring up or dismiss the brightness slider.
Setting the Language
iPod nano can be set to use different languages.
m Choose Settings > Language, and then choose a language from the list.
Getting Information About iPod nano
You can get details about your iPod nano, such as how much space is available, how
many songs, videos, photos, and other items you have, and the serial number, model,
and software version.
To get information about iPod nano:
m Choose Settings > About, and press the Center button to cycle through the screens of
information.
Resetting All Settings
You can reset all the items on the Settings menu to their default setting.
m Choose Settings > Reset Settings, and then choose Reset.
Connecting and Disconnecting iPod nano
You connect iPod nano to your computer to add music, videos, photos, and files, and to
charge the battery. Disconnect iPod nano when you’re done.
Connecting iPod nano
To connect iPod nano to your computer:
m Plug the included iPod Dock Connector to USB 2.0 cable into a high-powered USB 2.0
port on your computer, and then connect the other end to iPod nano.
If you have an iPod Dock, you can connect the cable to a USB 2.0 port on your
computer, connect the other end to the Dock, and then put iPod nano in the Dock.
10 Chapter 1 iPod nano Basics

Note: The USB port on most keyboards doesn’t provide enough power. You must
connect iPod nano to a USB 2.0 port on your computer, unless your keyboard has a
high-powered USB 2.0 port.
By default, iTunes syncs songs on iPod nano automatically when you connect it to your
computer. When iTunes is finished, you can disconnect iPod nano.
Note: You can sync songs while your battery is charging.
If you connect iPod nano to a different computer and it’s set to sync music
automatically, iTunes prompts you before syncing any music. If you click Yes, the songs
and other audio files already on iPod nano will be erased and replaced with songs and
other audio files on the computer iPod nano is connected to. For more information
about adding music to iPod nano and using iPod nano with more than one computer,
see Chapter 2, “Music Features,” on page 17.
Chapter 1 iPod nano Basics 11
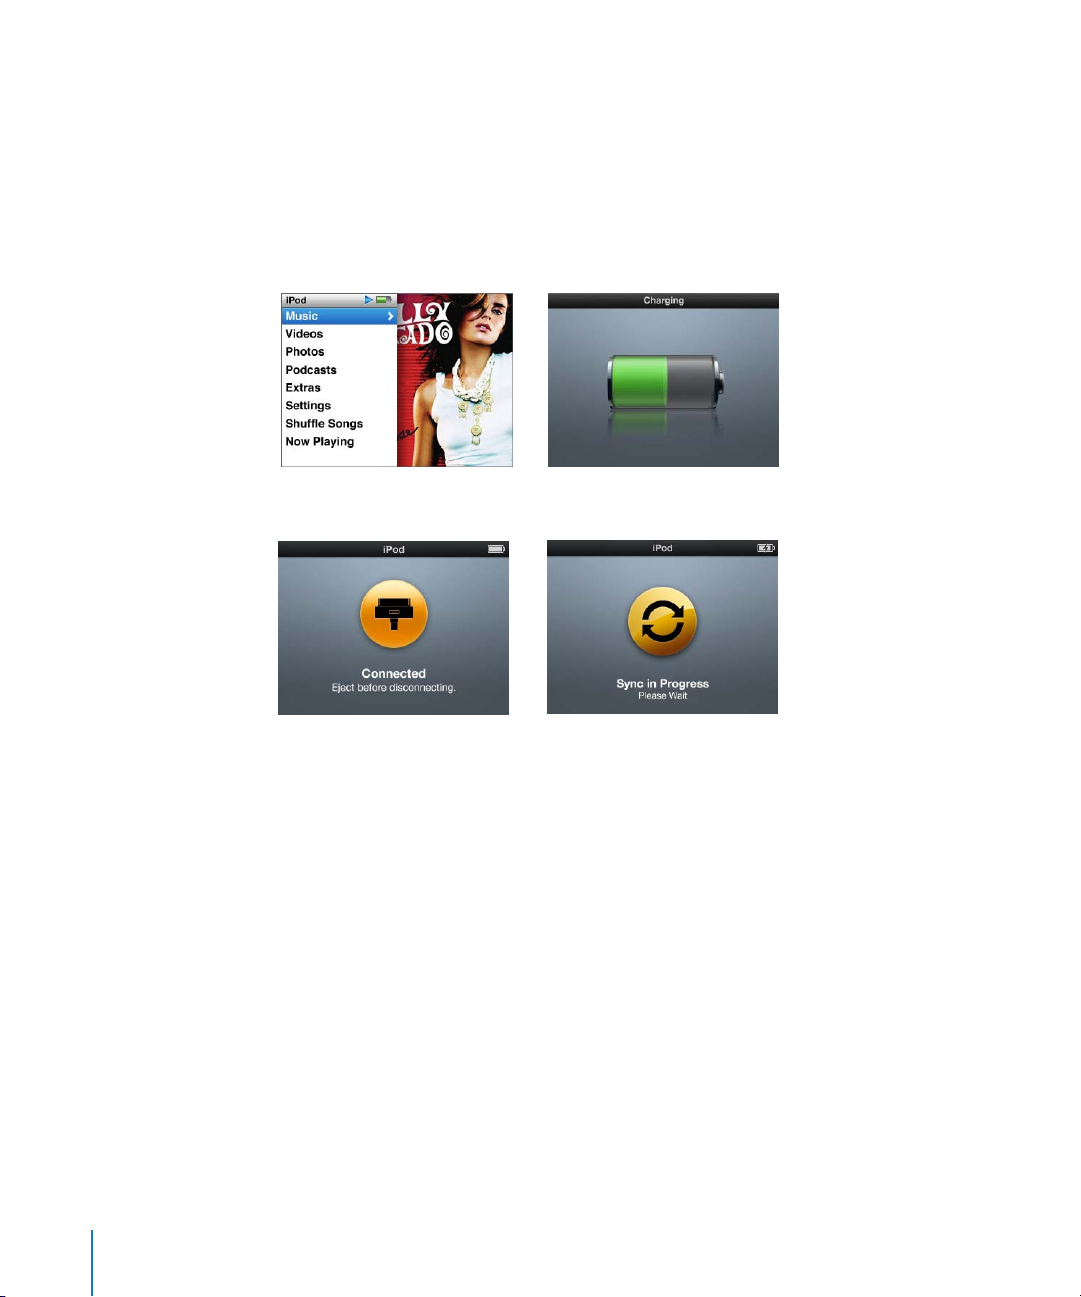
Disconnecting iPod nano
It’s important not to disconnect iPod nano from your computer while music is being
synced. You can easily see if it’s OK to disconnect iPod nano by looking at the
iPod nano screen.
Important: Don’t disconnect iPod nano if you see the “Connected” or “Sync in Progress”
messages. You could damage files on iPod nano. If you see one of these messages, you
must eject iPod nano before disconnecting it.
If you see the main menu or a large battery icon, you can disconnect iPod nano.
Important: If you see one of these messages, you must eject
iPod nano before disconnecting it.
If you set iPod nano to manage songs manually (see “Managing iPod nano Manually”
on page 24) or enable iPod nano for disk use (see “Using iPod nano as an External Disk”
on page 46), you must always eject iPod nano before disconnecting it.
12 Chapter 1 iPod nano Basics
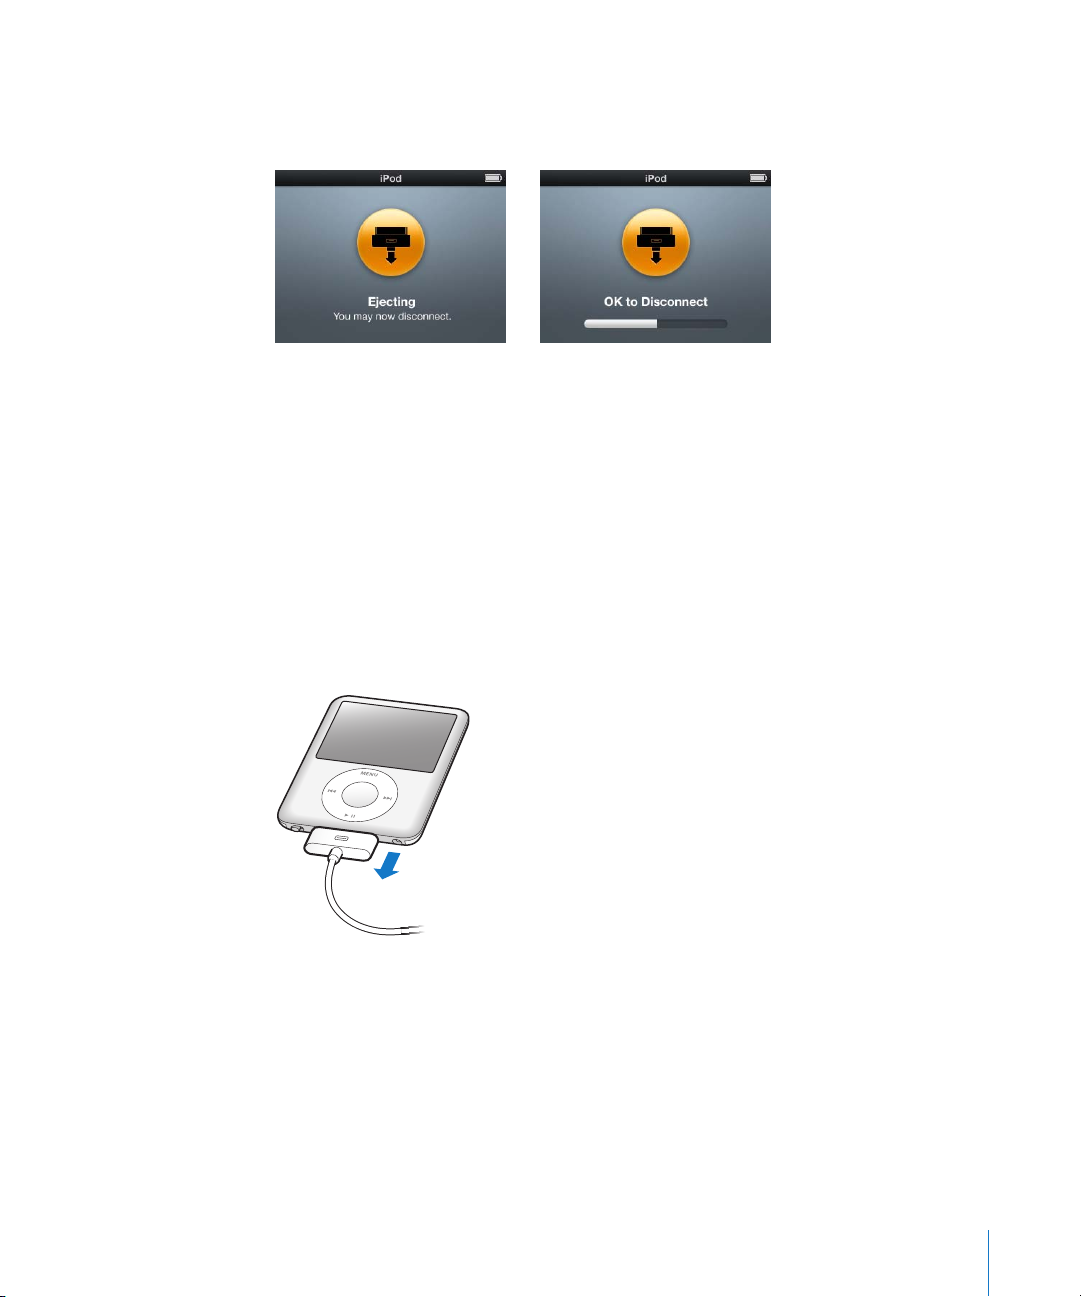
To eject iPod nano:
m Click the Eject (C) button next to iPod nano in the list of devices in the iTunes source
list.
You can safely disconnect iPod nano while either of these messages is displayed.
If you’re using a Mac, you can also eject iPod nano by dragging the iPod nano icon on
the desktop to the Trash.
If you’re using a Windows PC, you can also eject iPod nano in My Computer or by
clicking the Safely Remove Hardware icon in the Windows system tray and selecting
iPod nano.
To disconnect iPod nano:
1 Unplug the headphones if they’re attached.
2 Disconnect the cable from iPod nano. If iPod nano is in the Dock, simply remove it.
If your Dock connector is larger than the one shown, squeeze both sides of the
connector while removing.
Chapter 1 iPod nano Basics 13

About the iPod nano Battery
iPod nano has an internal, non-user-replaceable battery. For best results, the first time
you use iPod nano, let it charge for about three hours or until the battery icon in the
status area of the display shows that the battery is fully charged. If iPod nano isn’t used
for a while, the battery might need to be charged.
The iPod nano battery is 80-percent charged in about 1.5 hours and fully charged in
about three hours. If you charge iPod nano while adding files, playing music, viewing
videos, or viewing a slideshow, it might take longer.
Charging the iPod nano Battery
You can charge the iPod nano battery in two ways:
 Connect iPod nano to your computer.
 Use the Apple USB Power Adapter, available separately.
To charge the battery using your computer:
m Connect iPod nano to a USB 2.0 port on your computer. The computer must be turned
on and not in sleep mode (some Mac models can charge iPod nano while in sleep
mode).
If the battery icon on the iPod nano screen shows the Charging screen, the battery is
charging. If it shows the Charged screen, the battery is fully charged.
If you don’t see the charging screen, iPod nano might not be connected to a
high-power USB port. Try another USB port on your computer.
14 Chapter 1 iPod nano Basics

Important: If a “Charging, Please Wait” or “Connect to Power” message appears on the
iPod nano screen, the battery needs to be charged before iPod nano can communicate
with your computer. See “If iPod nano displays a “Connect to Power” message” on
page 58.
If you want to charge iPod nano when you’re away from your computer, you can
purchase the Apple USB Power Adapter.
To charge the battery using the Apple USB Power Adapter:
1 Connect the AC plug adapter to the power adapter (they might already be connected).
2 Connect the iPod Dock Connector to USB 2.0 cable to the power adapter, and plug the
other end of the cable into iPod nano.
3 Plug the power adapter into a working electrical outlet.
AC plug adapter
(The plug on your Power Adapter may look different.)
iPod Dock Connector to USB 2.0 Cable
USB Power Adapter
WARNING: Make sure the power adapter is fully assembled before plugging it into an
electrical outlet.
Chapter 1 iPod nano Basics 15

Understanding Battery States
When iPod nano isn’t connected to a power source, a battery icon in the top-right
corner of the iPod nano screen shows approximately how much charge is left.
Battery less than 20% charged
Battery about halfway charged
Battery fully charged
If iPod nano is connected to a power source, the battery icon changes to show that the
battery is charging or fully charged.
Battery charging (lightning bolt)
Battery fully charged (plug)
You can disconnect and use iPod nano before it’s fully charged.
Note: Rechargeable batteries have a limited number of charge cycles and might
eventually need to be replaced. Battery life and number of charge cycles vary by use
and settings. For more information, go to www.apple.com/batteries.
16 Chapter 1 iPod nano Basics

2 Music Features
2
With iPod nano, you can take your music and audio collection
with you wherever you go. Read this chapter to learn about
adding music and listening to iPod nano.
You use iPod nano by importing songs, audiobooks, movies, TV shows, music videos,
and podcasts into your computer and then adding them to iPod nano. Read on to learn
more about the steps in this process, including:
 Getting music from your CD collection, hard disk, or the iTunes Store (part of iTunes
and available in some countries only) into the iTunes application on your computer
 Organizing your music and other audio into playlists, if you want
 Adding playlists, songs, audiobooks, videos, and podcasts to iPod nano
 Listening to music or other audio on the go
About iTunes
iTunes is the software application you use with iPod nano. iTunes can sync music,
audiobooks, podcasts, and more with iPod nano. When you connect iPod nano to your
computer, iTunes opens automatically.
This guide explains how to use iTunes to download songs and other audio and video to
your computer, create personal compilations of your favorite songs (called playlists),
add them to iPod nano, and adjust iPod nano settings.
iTunes also has many other features. You can make your own CDs that play in standard
CD players (if your computer has a CD-recordable drive); listen to streaming Internet
radio; watch videos and TV shows; rate songs according to preference; and much more.
For information about using these iTunes features, open iTunes and choose
Help > iTunes Help.
17
Importing Music into Your iTunes Library
To listen to music on iPod nano, you first need to get that music into iTunes on your
computer.
There are three ways of getting music and other audio into iTunes:
 Purchase music, audiobooks, and videos, or download podcasts online from the
iTunes Store.
 Import music and other audio from audio CDs.
 Add music and other audio that’s already on your computer to your iTunes library.
Purchasing Songs and Downloading Podcasts Using the iTunes Store
If you have an Internet connection, you can easily purchase and download songs,
albums, audiobooks, and videos online using the iTunes Store. You can also subscribe
to and download podcasts.
To purchase music online using the iTunes Store, you set up an Apple account in
iTunes, find the songs you want, and then buy them. If you already have an Apple
account, or if you have an America Online (AOL) account (available in some countries
only), you can use that account to sign in to the iTunes Store and buy songs.
Note: You don’t need an iTunes Store account to download or subscribe to podcasts.
To sign in to the iTunes Store:
m Open iTunes and then:
 If you already have an iTunes account, choose Store > Sign In.
 If you don’t already have an iTunes account, choose Store > Create Account and follow
the onscreen instructions to set up an Apple account or enter your existing Apple
account or AOL account information.
18 Chapter 2 Music Features

To find songs, audiobooks, videos, and podcasts:
You can browse or search the iTunes Store to find the album, song, or artist you’re
looking for. Open iTunes and select iTunes Store in the source list.
 To browse the iTunes Store, choose a category (for example, Music) on the left side of
the main page in the iTunes Store. You can choose a genre, look at new releases, click
one of the featured songs, look at Top Songs and more, or click Browse under Quick
Links in the main iTunes Store window.
 To browse for podcasts, click the Podcasts link on the left side of the main page in the
iTunes Store.
 To browse for videos, click the Movies, TV Shows, or Music Videos link on the left side
of the main page in the iTunes Store.
 To search the iTunes Store, type the name of an album, song, artist, or composer in the
search field.
 To narrow your search, type something in the search field, press Return or Enter on
your keyboard, and then click links in the Search Bar at the top of the results page.
For example, to narrow your search to songs and albums, click the Music link.
 To search for a combination of items, click Power Search in the Search Results window.
 To return to the main page of the iTunes Store, click the Home button in the status line
at the top of the window.
To buy a song, album, movie, TV show, music video, or audiobook:
1 Select iTunes Store in the source list, and then find the item you want to buy.
You can double-click a song or other item to listen to a portion of it and make sure it’s
what you want. You can view movie trailers or TV show previews. (If your network
connection is slower than 128 kbps, choose iTunes > Preferences, and in the Store pane,
select the “Load complete preview before playing” checkbox.)
2 Click Buy Song, Buy Album, Buy Movie, Buy Episode, Buy Video, or Buy Book.
Some items have other options, such as TV shows that let you buy a season pass for all
episodes.
The song or other item is downloaded to your computer and charged to the credit card
listed on your Apple or AOL account.
To download or subscribe to a podcast:
1 Select iTunes Store in the source list.
2 Click the Podcasts link on the left side of the main page in the iTunes Store.
3 Browse for the podcast you want to download.
 To download a single podcast episode, click the Get Episode button next to the
episode.
Chapter 2 Music Features 19

 To subscribe to a podcast, click the Subscribe button next to the podcast graphic.
iTunes downloads the most recent episode. As new episodes become available, they
are automatically downloaded to iTunes when you connect to the Internet.
For more information, see “Adding Podcasts to iPod nano” on page 25 and “Watching
and Listening to Podcasts” on page 31.
Adding Songs Already on Your Computer to Your iTunes Library
If you have songs on your computer encoded in file formats that iTunes supports, you
can easily add the songs to iTunes.
To add songs on your computer to your iTunes library:
m Drag the folder or disk containing the audio files to Library in the iTunes source list (or
choose File > Add to Library and select the folder or disk). If iTunes supports the song
file format, the songs are automatically added to your iTunes library.
You can also drag individual song files to iTunes.
Note: Using iTunes for Windows, you can convert nonprotected WMA files to AAC or
MP3 format. This can be useful if you have a library of music encoded in WMA format.
For more information, open iTunes and choose Help > iTunes Help.
Importing Music From Your Audio CDs Into iTunes
Follow these instructions to get music from your CDs into iTunes.
To import music from an audio CD into iTunes:
1 Insert a CD into your computer and open iTunes.
If you have an Internet connection, iTunes gets the names of the songs on the CD from
the Internet (if available) and lists them in the window.
If you don’t have an Internet connection, you can import your CDs and, later, when you’re
connected to the Internet, choose Advanced > Get CD Track Names. iTunes will bring in
the track names for the imported CDs.
If the CD track names aren’t available online, you can enter the names of the songs
manually. For more information, see “Entering Song Names and Other Details” on
page 21.
With song information entered, you can browse for songs in iTunes or on iPod by title,
artist, album, and more.
2 Click to remove the checkmark next to any song you don’t want to import.
3 Click the Import button. The display area at the top of the iTunes window shows how
much time it will take to import each song.
Note: By default, iTunes plays songs as they are imported. If you’re importing a lot of
songs, you might want to stop the songs from playing to improve performance.
20 Chapter 2 Music Features

4 To eject the CD, click the Eject (C) button.
You cannot eject a CD until the import is done.
5 Repeat these steps for any other CDs with songs you want to import.
Entering Song Names and Other Details
To enter CD song names and other information manually:
1 Select the first song on the CD and choose File > Get Info.
2 Click Info.
3 Enter the song information.
4 Click Next to enter information for the next song.
5 Click OK when you finish.
Adding Lyrics
You can enter song lyrics in plain text format into iTunes so that you can view the song
lyrics on iPod nano while the song is playing.
To enter lyrics into iTunes:
1 Select a song and choose File > Get Info.
2 Click Lyrics.
3 Enter song lyrics in the text box.
4 Click Next to enter lyrics for the next song.
5 Click OK when you finish.
For more information, see “Viewing Lyrics on iPod nano” on page 30.
Adding Album Artwork
Music you purchase from the iTunes Store includes album artwork, which your
iPod nano can display. You can add album artwork for music you’ve imported from CDs,
if you have the album art on your computer.
To add album artwork to iTunes:
1 Select a song and choose File > Get Info.
2 Click Artwork.
3 Click Add, navigate to the artwork file, and click Choose.
4 Use the slider to adjust the size of the artwork.
5 Click Next to add artwork for the next song or album.
6 Click OK when you finish.
For more information, see “Viewing Album Artwork on iPod nano” on page 31.
Chapter 2 Music Features 21
Organizing Your Music
Using iTunes, you can organize songs and other items into lists, called playlists, in any
way you want. For example, you can make playlists with songs to listen to while
exercising, or playlists with songs for a particular mood.
You can also make Smart Playlists that update automatically based on rules you define.
When you add songs to iTunes that match the rules, they automatically get added to
the Smart Playlist.
You can make as many playlists as you like using any of the songs in your iTunes library.
Adding a song to a playlist or later removing it doesn’t remove it from your library.
To make a playlist in iTunes:
1 Click the Add (+) button or choose File > New Playlist.
2 Type a name for the playlist.
3 Click Music in the Library list, and then drag a song or other item to the playlist.
To select multiple songs, hold down the Shift key or the Command (x) key on a Mac,
or the Shift key or the Control key on a Windows PC, as you click each song.
To make a Smart Playlist:
m Choose File > New Smart Playlist and define the rules for your playlist.
Note: To make playlists on iPod nano when iPod nano isn’t connected to your
computer, see “Making On-The-Go Playlists on iPod nano” on page 27.
Adding Music and Podcasts to iPod nano
After your music is imported and organized in iTunes, you can easily add it to
iPod nano.
To set how music is added from your computer to iPod nano, you connect iPod nano to
your computer, and then use iTunes preferences to choose iPod nano settings.
22 Chapter 2 Music Features
Loading...