


MacBook Pro 15" Core 2 Duo Models A1226 and A1260 SSD Dual Drive Installation
MacBook Pro 15" Core 2 Duo Models
A1226 and A1260 SSD Dual Drive
Installation
Written By: iRobot
INTRODUCTION
There are many benefits to adding a second hard drive to your laptop such as improved speeds, greater storage space, and less heartache when installing new software. Use this guide to install one using our optical bay hard drive enclosure.
Some drive bays have a height of 7 mm, while others have a height of 9.5 mm. Depending on the size of your drive bay, you may need to use a spacer to make your SSD fit properly.
 TOOLS:
Phillips #00 Screwdriver (1)
Spudger (1)
T6 Torx Screwdriver (1)
 PARTS:
9.5 mm SATA Optical Bay SATA Hard Drive Enclosure (1)
SSD Upgrade Kit (1)
© 2013 |
guides.crucial.com |
Page 1 of 12 |

MacBook Pro 15" Core 2 Duo Models A1226 and A1260 SSD Dual Drive Installation
Step 1 — Battery
 Use your fingers to push both battery release tabs away from the battery, and lift the battery out of the computer.
Step 2 — RAM Shield
 Remove the three identical 2mm Phillips screws from the memory door.
 Lift the memory door up enough to grip it and slide it toward you, pulling it away from the casing.
© 2013 |
guides.crucial.com |
Page 2 of 12 |
MacBook Pro 15" Core 2 Duo Models A1226 and A1260 SSD Dual Drive Installation
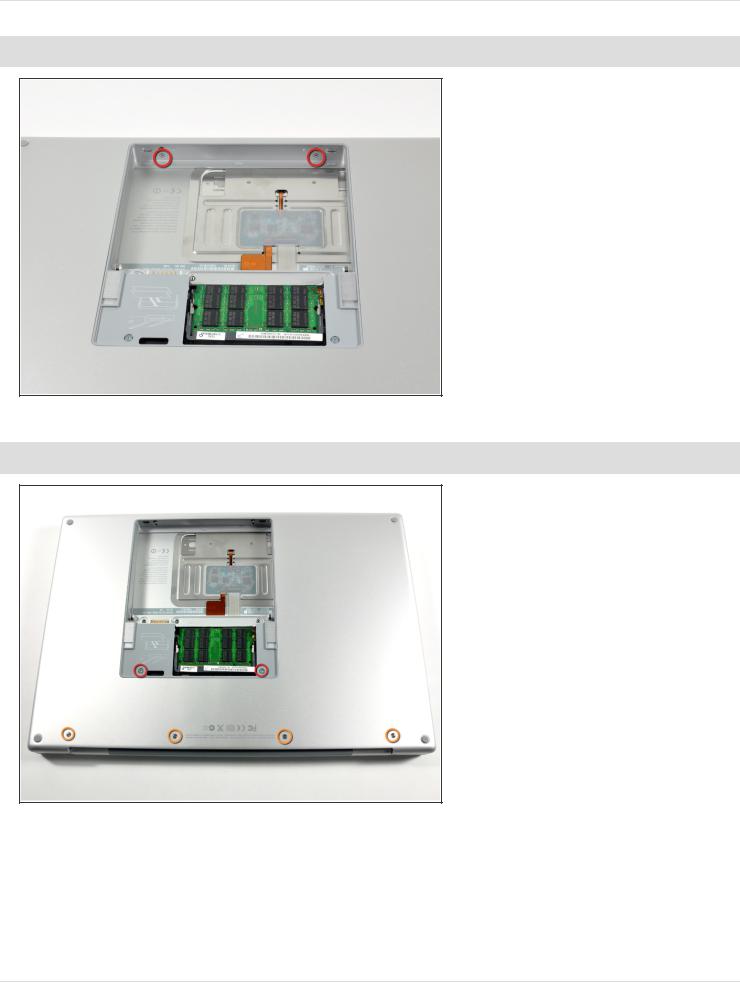
Step 3 — Upper Case
Step 4
 Remove the two 2.8 mm Phillips screws in the battery compartment near the latch.
 Remove the following 6 screws:
 Two 10 mm T6 Torx screws on either side of the RAM slot.
 Four 14.5 mm Phillips screws along the hinge.
© 2013 |
guides.crucial.com |
Page 3 of 12 |
MacBook Pro 15" Core 2 Duo Models A1226 and A1260 SSD Dual Drive Installation
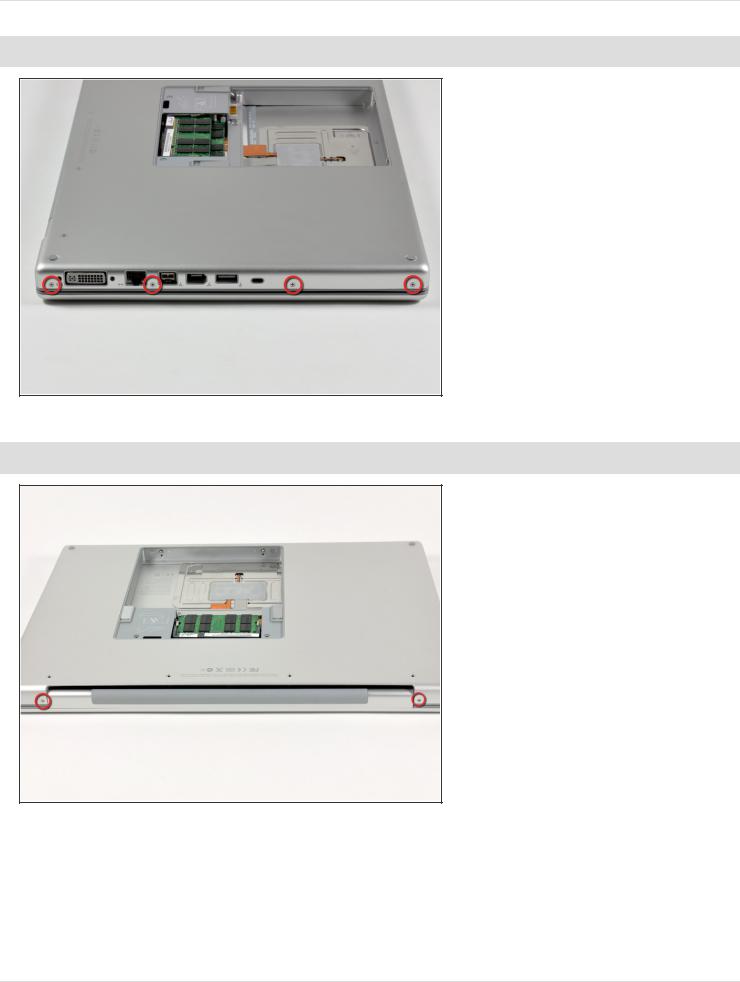
Step 5
Step 6
 Remove the four 3.2 mm Phillips screws on the port side of the computer.
 Rotate the computer 90 degrees and remove the two 3.2 mm Phillips screws from the rear of the computer.
© 2013 |
guides.crucial.com |
Page 4 of 12 |
 Loading...