


 Loading...
CHAPTER 1: INTRODUCTION
Quick Description
The iDM02 includes over 230 high-fidelity drum/percussion sounds and a library of preset rhythm Patterns prepared by professional drummers.
It also has 11 external trigger inputs to which you can connect your external triggers. Inputs 1-9 will accept drum pad trigger signals. Inputs 10-11 will accept switch-type inputs (usually from foot pedals). Please consult the Quickstart Guide for information on connecting your kit’s triggers.
The iDM02 offers two main modes, Perform (for playback) and Compose (for recording).
The Pattern/Song Recording Method
When recording with a drum machine, it's often easier to divide a song into shorter individual Patterns and work on these rather than record an entire song. After perfecting these Patterns, Song mode offers two ways to create a song:
Program a list of Patterns, in the order in which they are to be played.
Select Patterns in real time, and the iDM02 will remember your performance.
The iDM02 stores up to 100 User-programmable Songs.
The Four Different Types of Patterns
Preset Patterns provide a variety of rock, jazz, pop, and other rhythms programmed by professional drummers.
User Patterns are Patterns you can program, edit, and save. The Preset/User button selects between these two master banks of Presets.
There are 50 of each type of Pattern, numbered 00-49. However, each numbered Pattern actually contains four different "sub-Patterns":
A pair of independent Main Patterns (A and B, selected by their respective buttons).
A pair of associated Fill Patterns (A Fill and B Fill, selected by pressing the FILL button when either A or B is selected). The Fills primarily provide transitional Patterns between Main Patterns, which makes for more realistic drum parts.
The reason for pairing the two different A and B Patterns together is simply so that you can switch back and forth between them rapidly in live performance or while improvising. However, A and B Patterns can be treated as completely independent Patterns if desired and can have different lengths, Drum Sets, etc.
Always think of the Main Pattern and its associated Fill as a unit. For example, if you copy a Main Pattern to another Main Pattern, its Fill will travel along with it.
Note that even though there are "only" 50 Patterns, the A and B variations double that to 100 Patterns, and the Fills double that again to 200 Patterns. Added to the Preset Patterns, 400 total Patterns are available.
Velocity Sensitivity
Each pad is velocity-sensitive: the harder you hit the pad, the louder the drum sound assigned to the pad will play. Thanks to the dynamic articulation techniques mentioned earlier, the timbre will often change as well, just like "real" drums.
There are eight levels of pad volume resolution, from soft to loud. However, when using the iDM02’s external trigger inputs, it responds to all 127 MIDI volume levels.
1

Physical Layout
The iDM02 includes seven main types of controls, along with a group of connectors (located on the back panel). The control groups (see diagram) are:
1.Display. The display informs you of the instrument's status, and also prompts you for data from time to time. A detailed description of the display follows shortly.
2.Volume knob. This controls the volume of the headphone and main outputs.
3.Pads (play buttons). Tapping each button triggers an iDM02 voice.
4.Playback buttons. These control playback and stop, and work similarly to a tape recorder.
5.Pattern select buttons. These choose between the A, B, and Fill variations for a Pattern.
6.Mode buttons. These choose between Pattern and Song modes, Perform (playback) and Compose (record) modes, and the Preset and User patterns.
7.Function buttons. These six buttons select various functions, some of which include multiple "pages" of options.
8.Tempo/Page buttons. These alter the tempo and also select different "pages" present in the Drum Set, Record Setup, MIDI Setup, and Backup functions.
9.Data entry buttons. The data entry buttons include number entry buttons (0-9) and up arrow (increment, or INC) and down arrow (decrement, or DEC). The latter increase or decrease parameter values on step at a time.
2

Display Layout
Name, "Dialog" box, Real time Song/Pattern readout, beat counter
Pattern/Song readout (also drum set edit)
Selected Function |
Play/ |
Press Play |
|
|
|||
Swing |
Record |
Page number |
|
|
|||
Compose and Tempo |
|||
Quantize |
|||
Click |
Perform |
display |
|
|
|||
The LCD is divided into several "windows." Each window contains information that helps you monitor the iDM02's status, and/or indicates what type of data should be entered.
Name, "dialog" box, real time Song/Pattern readout, beat counter. This shows Pattern and Song names, the beat counter if a Pattern or Song is playing, and the Pattern (including A/B/Fill/Preset or User designators) that is currently playing in Song mode. When acting as a "dialog box," it lists parameters and the value to be edited (e.g., MIDI channel and the channel number).
Pattern/Song readout (also Drum Set edit and drum pad readout). This shows the selected Song or Pattern number; with Patterns, the A/B/Fill/Preset or User designators are also shown. If you have edited a Drum Set to which a particular Pattern was assigned, the display also shows DRUMSET EDITED. In operations that require selecting a drum pad, this window displays the drum pad number.
Press PLAY. For some operations, it is necessary to press the PLAY button to confirm a particular operation, such as copy or erase. This portion of the display will say PRESS PLAY if it is necessary to press PLAY to complete an operation.
Page number and tempo display. When stopped or running, this shows the current tempo and includes a visual metronome block that flashes on the beat. For functions that have multiple "pages" of parameters (Drum Set, Record Setup, MIDI Setup, and Backup), this portion of the display shows the currently selected page number.
Compose/Perform. This indicates whether the iDM02 is in Compose or Perform mode.
Click. In Compose mode, shows the current click rhythm in standard music notation (or OFF if click is off).
Quantize. In Compose mode, shows the current quantization rhythm in standard music notation (or OFF if quantization is off).
Selected function. This shows which function is currently selected: Drum Set, Record Setup, MIDI Setup, Backup, or Step Edit.
Swing. In Compose mode, shows the current swing rhythm, expressed as a percentage (or OFF if swing is off).
Play/Record. If the iDM02 is playing and in Compose mode, this will say RECORDING. If the iDM02 is playing and in Perform mode, this will say PLAYING.
3

How to Communicate With the iDM02
Numeric Keypad
If a value to be edited is a two-digit number, you must enter a two-digit number. If the number is a three-digit number, you must enter a three-digit number. If necessary, enter a leading 0 to fill out the required number of digits.
The INC/DEC Buttons
The two small buttons with the up arrow and down arrow symbols (next to the number keys) are called the INC/DEC buttons respectively. Pressing the INC button once increases the value of the entire number by one. Pressing the DEC button once decreases the value by one.
These buttons, and the TEMPO/PAGE buttons, also have a "scroll" feature. If you press and hold a button, after a short pause the display will either increment or decrement at a rapid rate.
Buttons that Toggle
The Mode buttons, FILL button, and several function buttons (DRUM SET, RECORD SETUP, MIDI SETUP, and UTIL) "toggle" between two states. Each button press sets the switch to its alternate state. Example: Press the PATTERN/SONG button once to change from Pattern to Song; press again to change from Song to Pattern.
4
Instant Gratification (Setup & Checkout)
1.Connect the Main outputs (either left or right for a mono monitoring system, or both for stereo) to an amplifier or PA. The amp and iDM02 volume controls should be all the way down (counter-clockwise).
2.Plug the iDM02's AC adapter into the wall. The smaller plug inserts in the 9V AC Power jack on the back.
3.Turn on the rear panel On/Off switch, then turn on the amplifier.
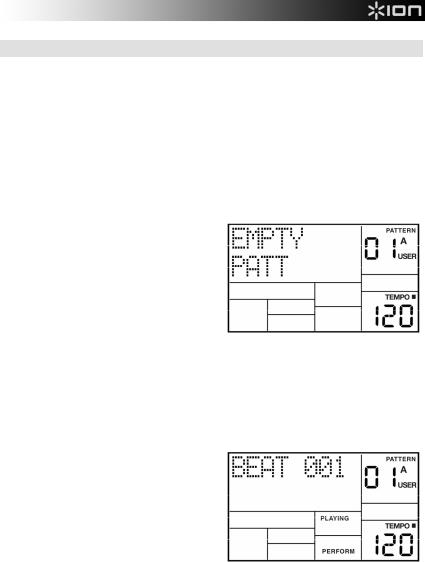
4.The upper right of the display should say PATTERN and not SONG; if it shows SONG, press the PATTERN/SONG button.
5.Start tapping the pads. Adjust the volume control for a comfortable listening level, and check out the sounds.
6.To hear the built-in demo, hold down the PATTERN/SONG button and press PLAY. To stop the demo, press STOP. If you want to play along with the demo, feel free to bash away on the pads.
7.Press PLAY, and you'll hear a Preset Pattern. (In case the iDM02 has already been played with, make sure that the display shows PERFORM and does not show USER before continuing. To choose Perform mode, press the PERFORM/COMPOSE button until the Perform/Compose section of the display shows PERFORM). To choose Preset rather than User Patterns, press the PRESET/USER button until the display does not show USER. If USER is not showing, then Preset Patterns are selected.
8.Try the following:
Enter a two-digit number between 00-49 using the number keys, then press PLAY.
Press the INC (up arrow) button to select the next higher-numbered Preset Pattern. It will play at the end of the current Pattern.
Press the DEC (down arrow) button to select the next lower-numbered Preset Pattern.
Press the B button to select the B variation of the selected Pattern.
Press the A button to select the A variation of the selected Pattern.
Press FILL briefly while a Main (A or B) Pattern is playing. Note how the Main Pattern switches from either A to B or B to A after the Fill has played.
Press FILL and hold it down until after the Fill has played. If the FILL button is held down past the next downbeat, the Fill's associated Main Pattern (A or B) continues to play rather than switch from A to B or B to A.
Press the TEMPO/PAGE buttons to change the tempo.
5
CHAPTER 2: RECORD SETUP
Several parameters are often adjusted prior to recording a Pattern, such as metronome, Pattern length, etc. General instructions are:
1.Press the RECORD SETUP button.
2.Use the PAGE (up and down) buttons to select different "pages" of functions. These pages are described below.
3.Adjust values on pages, if necessary, as described for each page.
4.After making all needed changes, press RECORD SETUP again to exit, or choose another page.
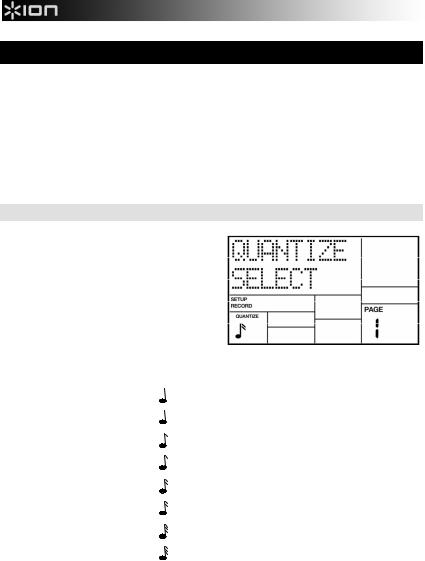
Page 1: Select The Quantization Value (Quantize Select)
The display shows QUANTIZE SELECT and a note icon in the lower left Quantize window.
The note icon displays the quantization value in standard rhythmic notation. Enter the desired quantization value with the INC/DEC or number buttons:
KEYPAD |
|
NOTE VALUE |
DISPLAY |
|
NOTE NAME |
|
1 |
= |
1/4 |
= |
|
= |
QUARTER NOTE |
2 |
= |
1/6 |
= |
3 |
= |
QUARTER NOTE TRIPLET |
3 |
= |
1/8 |
= |
|
= |
EIGHTH NOTE |
4 |
= |
1/12 |
= |
3 |
= |
EIGHTH NOTE TRIPLET |
5 |
= |
1/16 |
= |
|
= |
16th NOTE |
6 |
= |
1/24 |
= |
3 |
= |
16th NOTE TRIPLET |
7 |
= |
1/32 |
= |
|
= |
32nd NOTE |
8 |
= |
1/48 |
= |
3 |
= |
32nd NOTE TRIPLET |
|
|
|
|
|
|
|
9, 0 |
= |
1/384 |
= |
off |
= |
384th NOTE |
Quantization shifts your playing to the specified beat while you play, so choose the desired value before tapping out your rhythms. Remember that you can also change quantization while recording if, for example, you want to record snare with eighth note quantization but high-hats with 16th note quantization.
Note: The quantize value also sets the step length in Step Edit mode.
Background As you record a Pattern, quantization shifts all drum events to the nearest selected rhythmic value to eliminate small timing errors. Example: With a quantize value of 1/16, all drum events you play will be shifted to the nearest 16th note.
6

Page 2: Select The Swing Value (Swing Select)
The display shows SWING SELECT; the
Swing window shows the swing value.
Enter the desired swing percentage with the INC/DEC or number buttons (1 = 54%, 2 = 58%, 3 = 62%, 4-0 = Swing Off).
Swing shifts notes as specified while you record, so choose the desired value before tapping out your rhythms.
Background Swing affects the timing of pairs of equal-value notes. Each note normally defaults to taking up 50% of the total duration of both notes; adding swing lengthens the first note of the pair, and to keep the total duration of both notes the same, shortens the second note of the pair. This imparts the kind of feel found in shuffles and some jazz tunes. Example: With Swing set to 62%, the first note of the pair takes up 62% of the total duration of the pair of notes, while the second note takes up 38% of the total duration.
Page 3: Enable Click (Metronome) And Set Rhythm (Click Select)
The display shows CLICK SELECT; the Click window shows the click's rhythmic value.
Enter the click value with the INC/DEC or number buttons (1 = quarter note, 2 = quarter note triplet, 3 = 8th note, 4 = 8th note triplet, 5 = 16th note, 6 = 16th note triplet, 7- 0 = Click Off).
The click is audible only in Compose mode.
Page 4: Set Click (Metronome) Volume (Click Vol)
The display shows CLICK VOL and a twodigit number representing click volume (00 = inaudible, 99 = maximum volume). Enter the desired click level with the INC/DEC or number buttons.
7

Page 5: Adjust Velocity Response (Velocity)
There are 11 ways in which a pad's output level can respond to the force with which you tap it: soft, medium, loud, and eight fixed responses.
The display says VELOCITY. To select the desired dynamic response, use the INC/DEC or number buttons (1 = Fixed 1, 2 = Fixed 2, 3 = Fixed 3, 4 = Fixed 4, 5 = Fixed 5, 6 = Fixed 6, 7 = Fixed 7, 8 = Fixed 8, 9 = Soft, and 0 = Loud). Medium can be selected only with the INC/DEC buttons.
Background This feature accommodates players with a heavier or lighter touch. Referring to the diagram, soft response weights the response toward softer sounds; with medium response, the level is directly proportional to how hard you tap the pad; loud response weights the response toward louder sounds.
louder
VOLUME
softer
softer |
TAP FORCE |
harder |
Fixed volume plays back the associated drum sound at one of eight possible volume levels. With Fixed Volume 1, all drums assume the level of the softest possible tap, regardless of how hard you tap the pads. With Fixed Volume 8, all drums assume the level of the loudest possible tap, regardless of how hard you tap the pads. Fixed Volumes 2-7 provide the levels between the softest and loudest extremes, with lower numbers giving softer levels.
Page 6: Add/Remove Beats From Pattern End (Length)
This option either adds beats to, or subtracts beats from, the end of the Pattern. Changing a Pattern's length also changes the length of the associated Fill Pattern.
The display says ### BEAT and LENGTH. This indicates a Pattern's length in beats (quarter notes). Enter the desired length with the INC/DEC or number buttons (this must be a three digit number; enter leading zeroes if necessary). To prevent accidental length alteration, you must press PLAY before the iDM02 will store the new Pattern length.
8
Page 7: Add/Remove Beats From Pattern Beginning (Start)
This option either adds beats to, or subtracts beats from, the beginning of the Pattern. Shortening a Pattern's start point erases any drum events that fall outside the remaining part of the Pattern; lengthening a Pattern's start point adds silence at the beginning of a Pattern.
The display says ### BEAT and START. This indicates a Pattern's length in beats (quarter notes). Enter the desired length with the INC/DEC or number buttons (this must be a three digit number; enter leading zeroes if necessary).
Page 8: Offset A Pattern Or Drum Part
Offset shifts a Pattern or individual drum parts ahead of or behind the beat in 1/384th note increments to allow for altering the "feel" of a piece. This only affects alreadyrecorded parts.
1.The iDM02 should be in Pattern mode and stopped. The display says OFFSET, which will be 00/384 (no offset).
2.Press the pad to be offset (as confirmed by the display). If you don't select a pad, offset affects the entire Pattern.
3.Enter the two-digit offset value with the INC/DEC or number buttons. Positive numbers shift events ahead of the beat (lead), negative numbers shift events behind the beat (lag). The default is positive numbers; to enter a negative number with the number buttons, press DEC first. Example: To offset a part 1/16th note later, enter -24 as the offset value since 24 sub-beats equals a 1/16th note.
4.Press PLAY to enter this number into the iDM02. To apply the same amount of offset to additional pads, press the next pad then press PLAY.
Notes: The display counter resets after you exit the function. Therefore, it does not keep track of the total amount of offset, but only changes in offset.
Drums offset to before the first beat "wrap around" to the end of the Pattern; drums offset past the end of the last beat "wrap around" to the beginning of the Pattern.
9
Loading...