


OPERATION MANUAL
Thank you very much for purchasing the ZOOM  .
.
Please read this manual carefully to learn about all the functions of the  so that you will be able to use it fully for a long time.
Keep this manual in a convenient place for reference when necessary.
Contents
Usage and Safety Precautions… …………… 2 Introduction… ………………………………… 3 Terms Used in This Manual………………… 3 Part Names… ………………………………… 4 Turning the Power ON………………………… 6 Adjusting the Tone and Volume… …………… 8 Adjusting Effects… …………………………… 10 Using the Boost Function… ………………… 15 Using the Anti-Feedback Function…………… 16 Selecting and Saving Patch Memories……… 18
Changing Patch Memories…………………… 20 Changing Various Settings… ………………… 22 Using the Tuner………………………………… 28 About the Firmware…………………………… 30
Restoring the  to its Factory
Default Settings… ………………………… 32 Effect Types and Parameters… ……………… 33 Troubleshooting… …………………………… 42 Specifications… ……………………………… 43
© 2013 ZOOM CORPORATION
Copying or reproduction of this document in whole or in part without permission is prohibited.
Precautions Safety and Usage
Usage and Safety Precautions
SAFETY PRECAUTIONS
In this manual, symbols are used to highlight warnings and cautions that you must read to prevent accidents. The meanings of these symbols are as follows:
Something that could cause serious injury Warning or death.
Something that could cause injury or Caution damage to the equipment.
Other symbols
 Required (mandatory) actions.
 Prohibited actions.
Battery handling
 Install the batteries with the correct +/- orientation.
Use a specified battery type. Do not mix new and old batteries or different brands or types at the same time. When not using the unit for an extended period of time, remove the batteries from the unit.
 If a battery leak should occur, wipe the battery compartment and the battery terminals carefully to remove all battery residue.
Connecting cables with input and output jacks
 Always turn the power OFF for all equipment before connecting any cables.
Always disconnect all connection cables and the AC adapter before moving the unit.
Volume
 Do not use the product at a loud volume for a long time.
 Warning
Operation using an AC adapter
 Use only a ZOOM AD-16 AC adapter with this unit.
 Do not use do anything that could exceed the ratings of outlets and other electrical wiring equipment. Before using the equipment in a foreign country or other region where the electrical voltage differs from that indicated on the AC adapter, always consult with a shop that carries ZOOM products beforehand and use the appropriate AC adapter.
Operation using batteries
 Use 4 conventional 1.5-volt AA batteries (alkaline or nickel-metal hydride).
 Read battery warning labels carefully.
 Always close the battery compartment cover when using the unit.
Alterations
 Never open the case or attempt to modify the product.
 Precautions
Product handling
 Do not drop, bump or apply excessive force to the unit.
 Be careful not to allow foreign objects or liquids to enter the unit.
Operating environment
 Do not use in extremely high or low temperatures.
 Do not use near heaters, stoves and other heat sources.
 Do not use in very high humidity or near splashing water.
 Do not use in places with excessive vibrations.
 Do not use in places with excessive dust or sand.
AC adapter handling
 When disconnecting the AC adapter from an outlet, always pull the body of the adapter itself.
 During lightning storms or when not using the unit for a long time, disconnect the power plug from the AC outlet.
Usage Precautions
Interference with other electrical equipment
In consideration of safety, the has been designed to minimize the emission of electromagnetic radiation from the device and to minimize external electromagnetic interference. However, equipment that is very susceptible to interference or that emits powerful electromagnetic waves could result in interference if placed nearby. If this occurs, place the and the other device farther apart. With any type of electronic device that uses digital control, including the
 , electromagnetic interference could cause malfunction, corrupt or destroy data and result in other unexpected trouble. Always use caution.
Cleaning
Use a soft cloth to clean the panels of the unit if they become dirty. If necessary, use a damp cloth that has been wrung out well. Never use abrasive cleansers, wax or solvents, including alcohol, benzene and paint thinner.
Malfunction
If the unit becomes broken or malfunctions, immediately disconnect the AC adapter, turn the power OFF and disconnect other cables. Contact the store where you bought the unit or ZOOM service with the following information: product model, serial number and specific symptoms of failure or malfunction, along with your name, address and telephone number.
Copyrights
•Windows®, Windows Vista® , Windows® 7 and Windows® 8 are trademarks or registered trademarks of Microsoft®.
•Macintosh® and Mac OS® are trademarks or registered trademarks of Apple Inc.
•All other trademarks, product names and company names mentioned in this documentation are the property of their respective owners.
Note: All trademarks and registered trademarks mentioned in this manual are for identification purposes only and are not intended to infringe on the copyrights of their respective owners.
2

Introduction
Acoustic modeling restores body tone
Presets for 16 body types and 28 model types simulate the sonic characteristics of a variety of acoustic guitars with different body shapes and material properties. By choosing a body and model according to the guitar that you are using, you can share the original rich and beautiful tone of your acoustic guitar with audiences when you perform live.
High-quality preamp can be used with both pickups and mics
The preamp was designed especially for acoustic guitars and can be used with piezoelectric, magnetic and passive pickups. In addition, you can connect a condenser microphone to the XLR mic input, which can provide phantom power, and mix that signal with the pickup signal to shape the sound. This acoustic guitar preamp offers a full array of features. The 3-band EQ can be used to adjust the tone according to the environment. The BALANCE knob can be used to set the ratio of the original sound (DRY) and the sound after the effects (WET). The super low noise design provides a 120dB S/N ratio and a –100dBm noise floor.
40 types of acoustic guitar effects
The 40 effects, which have a focus on chorus, delay, reverb and other spatial effects, can make acoustic tones even more beautiful. Other effects include a compressor that suppresses input peaks and evens the volume level, an air effect that simulates the sense of space from room tone and a detuning effect that creates a sound like a 12-string guitar. You can use any 2 of these effects together as you like.
Anti-feedback function with minimal effect on tone quality
The Anti-feedback function can quickly and effectively eliminate feedback during a performance. Just step on the Anti-feedback switch to automatically detect the frequency that is causing feedback and surgically apply a steep filter to cut that frequency band. The Antifeedback function can handle up to 3 different frequencies that are causing feedback.
Clean boost of up to 12 dB
The Boost function can reduce the volume differences of fingerpicking, strumming chords and other guitar playing techniques, as well as increase amplification during solos. You can also adjust the sound when the boost is active with the TONE parameter.
Terms Used inThis Manual
Patch memory
The ON/OFF status and the parameter settings of each effect are stored as ”patch memories”. The can store 20 patch memories.
Introduction
3

Names Part
Part Names
Left Panel
Headphones
OUTPUT jacks 
USB connector
PA system
Top Panel
Body type selector
Equalizer knobs
Balance knob 
Master level knob 
Parameter
knobs
Anti-feedback
footswitch
Anti-feedback 
switch
Effect footswitch 
Rear Panel
DC9V AC
adapter jack
Computer
Microphone 
input jack

 Microphone
ZOOM AC adapter (AD-16)
4
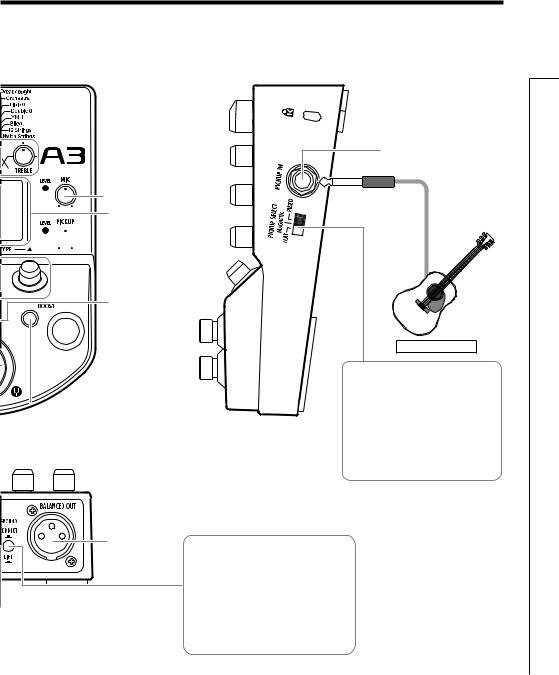
Right Panel
 Mic gain knob
Display
 Pickup gain knob
Effect switch
 Boost footswitch
 Boost switch
BALANCED
OUT connector
 POWER (eco) switch
Pickup input jack
Acoustic Guitar
Pickup type selection switch
Use to set the best input characteristics for the type of pickup used.
Set it to PIEZO when using an acoustic guitar with a piezoelectric pickup or MAGNETIC when using a magnetic pickup. You can also set it to FLAT if you do not want any pickup adjustment.
GROUND switch
Use this switch to connect or disconnect the BALANCED OUT connector with the ground.
Set it to “LIFT” (pushed in) to separate the signal path from the grounding pin. Set it to “CONNECT” (not pushed in) to connect it to the grounding pin.
Names Part
5
ON Power the Turning
Turning the Power ON
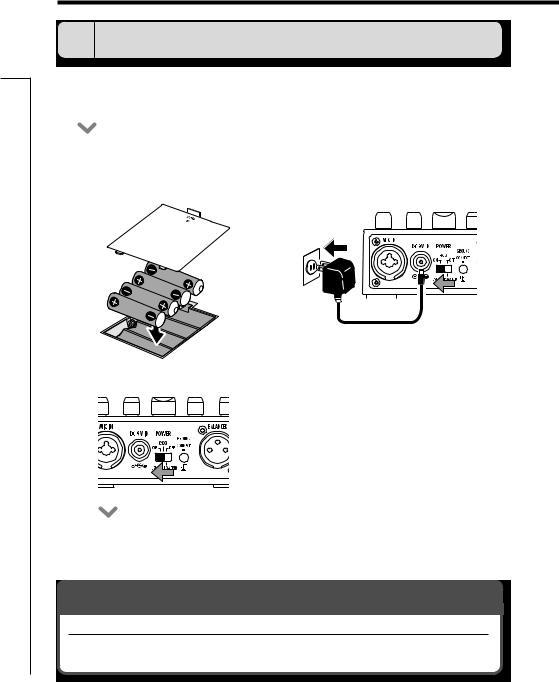
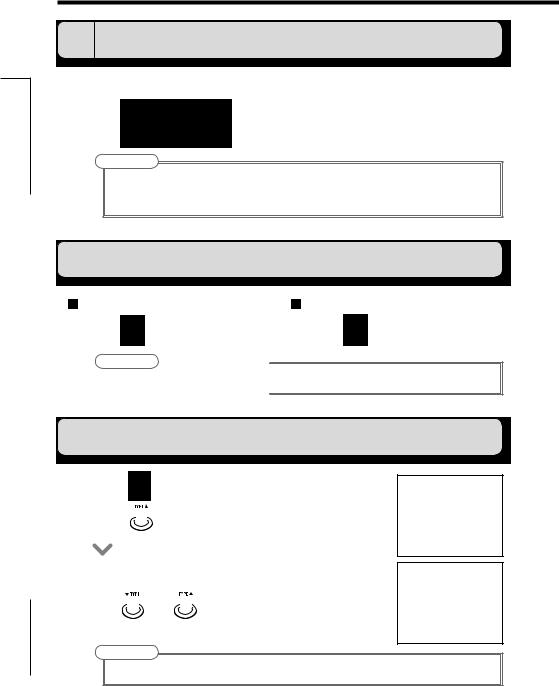
1 To turn the power ON
•Lower the volume of any connected amplifier or other audio equipment all the way.
|
When using batteries |
|
When using an adapter |
||||||||||
|
|
||||||||||||
|
Open the cover on the bottom of the unit |
|
Connect an AD-16 adapter. |
||||||||||
|
and insert batteries in the compartment. |
|
|
|
|
|
|
|
|
|
|
|
|
|
|
|
|
|
|
|
|
|
|
|
|
|
|
|
|
|
|
|
|
|
|
|
|
|
|
|
|
|
|
|
|
|
|
|
|
|
|
|
|
|
|
|
|
|
|
|
|
|
|
|
|
|
|
|
|
|
|
|
|
|
|
|
|
|
|
|
|
|
|
|
|
|
|
|
|
|
|
|
|
|
|
|
|
|
|
|
|
|
|
|
|
|
|
|
|
|
|
|
|
|
|
|
|
|
|
|
|
|
|
|
|
Bottom of the unit
•Turn the connected amplifier or other audio equipment ON and raise its volume.
Using the POWER switch eco setting
When set to eco, if the  is not used for 10 hours, its power will automatically turn off.
If you want to keep it on all the time set the POWER switch to ON.
6
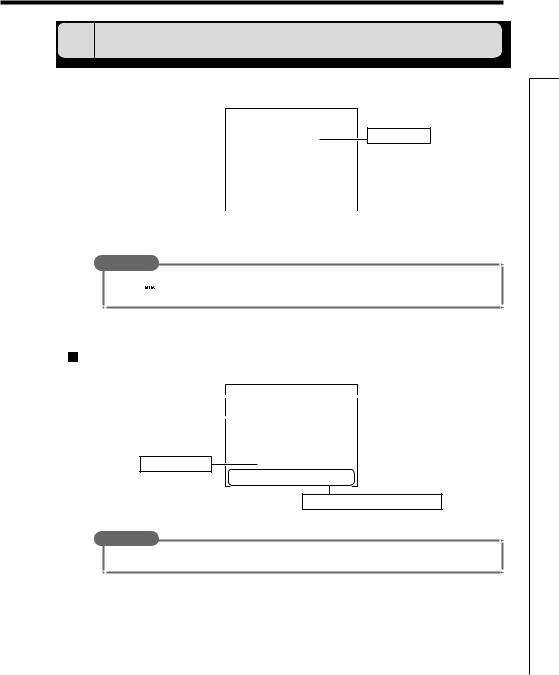
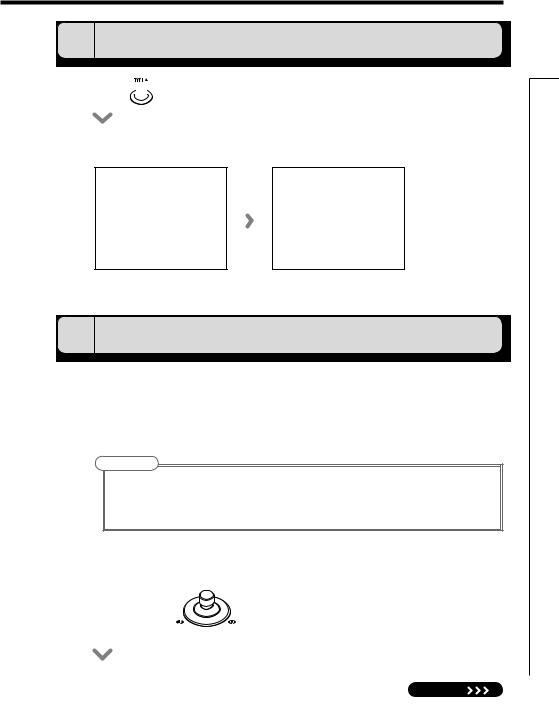
2 Display information
 The Home Screen shows the current effect
Virtual knob
|
|
|
|
|
|
|
|
|
|
|
|
|
|
|
|
|
|
|
|
|
Position of the selected effect in order |
|
|
Graphic for selected effect |
|||
|
|
|
|
|
|
|
HINT
•The positions of the virtual knobs change with the parameter values.
•Press to return to the Home Screen when any other screen is open.
Edit Screen shows parameters being edited
|
Effect type |
|
|
|
Page tabs |
|
|
|
|
|
|
|
|
|
|
|
|
|
|
|
|
|
|
|
Parameter names |
|
|
|
|
|
|
|
|||
|
|
|
|
|
|
Parameter values
Function of the parameter knob below
HINT
• If there are 4 or more parameters that can be adjusted, multiple page tabs will be shown.
ON Power the Turning
7
Volume and Tonethe Adjusting
8
Adjusting theTone and Volume
1 To select the body type
Choose the body type that matches your guitar.
• Turn 


 .
.
NOTE
•This has no effect on the mic input.
•This is not saved with patch memories.
•See page 33 for information about the body types that can be selected.
2 To adjust the input sensitivity
For the pickup input |
For the mic input |
||
• Turn |
. |
• Turn |
. |
NOTE
• Set so the LEVEL indicator does not blink red.
3 To select the model type
• Press  on the Home Screen.
• Press  to select Effect 1.
•The model type appears on the Home Screen.
•Use  and
and  to select the model type.
NOTE
• For details about the model types, see page 34.
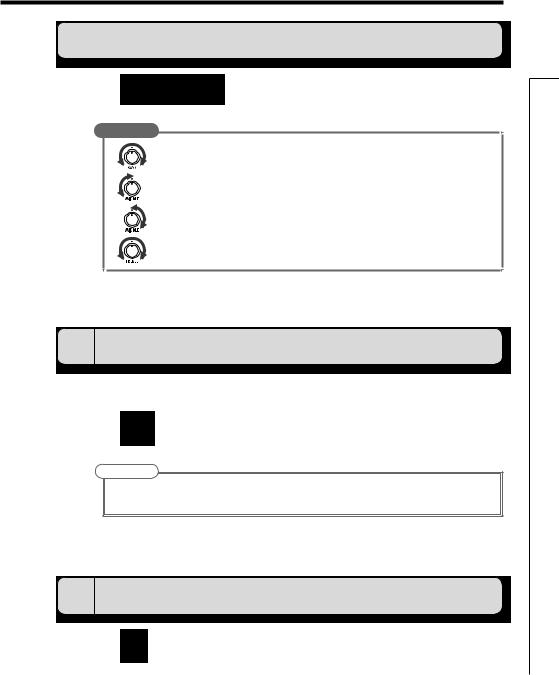
4 To adjust the equalization
• Turn |
. |
HINT |
|
• |
: Adjust to boost or cut low frequencies (around 60Hz) by up to ±12dB. |
• |
: Adjust to cut middle frequencies (around 700Hz) by up to –12dB. |
• |
: Adjust to boost middle frequencies (around 400Hz) by up to 12dB. |
• |
: Adjust to boost or cut high frequencies (around 8kHz) by up to ±12dB. |
5 To adjust the amount of the original sound
Adjust the balance between original (DRY) and effected (WET) signals.
• Turn  .
.
NOTE
•The effected signal is the sound created by the pickup selection, preamp, effect, boost and equalizer settings.
6 To adjust the master level
• Turn  .
.
Volume and Tonethe Adjusting
9
Effects Adjusting
Adjusting Effects
Confirm that the Home Screen is shown.
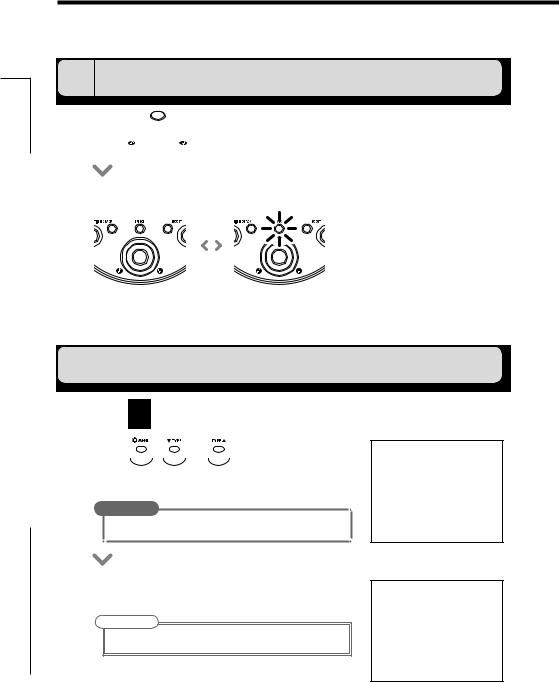
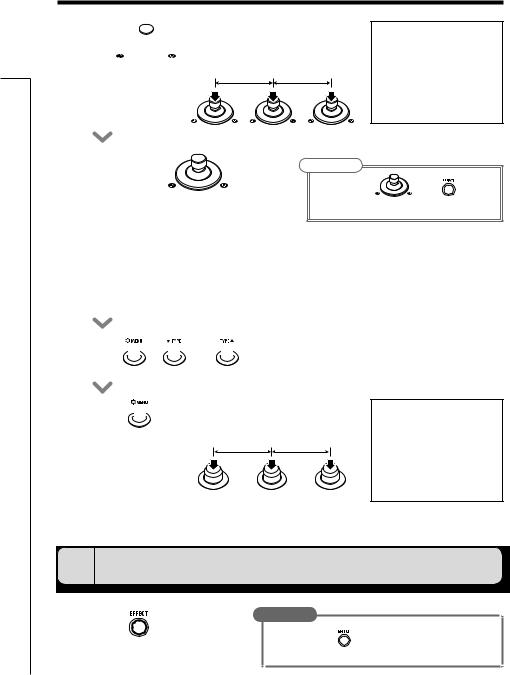
1 To turn an effect ON and OFF
•Press  .
.
•This switches the effect shown on the display ON and OFF.
OFF |
|
ON |
|
|
|
2 To select the effect to adjust
•Press  .
.
•Press  ,
,  or
or  to select the effect to adjust.
HINT
•Effects that are OFF appear gray.
•The selected effect appears on the Home Screen.
NOTE
• Effect 1 is dedicated to model types. (See page 34.)
10
EDIT
3 To select an effect type
• Press  or
or  .
.
• The effect type changes.
HINT
• See the section starting on page 34 for information about effect types and parameters.
NOTE
• A model type can only be selected for Effect 1.
Effect processing capacity
The allows you to combine 3 effects as you like. However, if you combine effect types that require great amounts of processing power, the available processing capacity might not be enough. If the processing required for an effect exceeds the available capacity, the effect is bypassed and a ”DSP Full!” message appears. This can be avoided by changing 1 or more of the effect types or setting them to THRU.
NOTE
• An effect requires the same amount of processing power whether it is ON or OFF.
Effects Adjusting
NEXT |
11 |
Effects Adjusting
Adjusting Effects
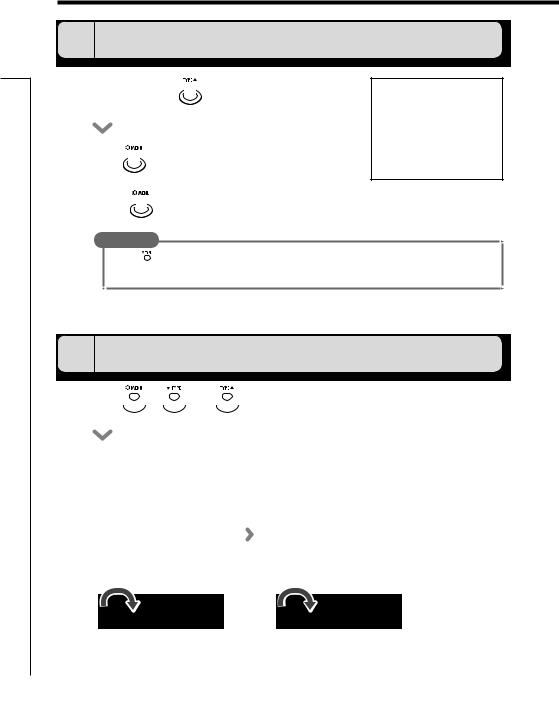
4 To select the effect category
• Press and hold  for 1 second.
• Turn  to choose the category.
• Press  .
.
HINT
•Press  to cancel.
•Effect categories can only be selected for Effects 2 and 3.
5 To adjust parameters
•Turn  ,
,  and
and  .
.
•The editing screen opens where you can adjust parameters.
12
EDIT
6 To change the page
• Press  when the Edit Screen is open.
• The next page opens.
7 To use theTapTempo function
Delay effects and some modulation and filter effects can be synchronized to the tempo. Select an effect that can be synchronized, and set itsTime, Rate or other parameter that can be synchronized to a or
or note value.
The tempo can be set by tapping the footswitch or a knob.
NOTE
•By default, when pressed and held, the footswitch is set to activate theTuner. To tap the tempo with the footswitch, the setting must be changed so that it activates Tap Tempo when pressed and held.
(See page 24.)
•Tempo settings are saved separately for each patch memory.
 To set the tempo by tapping the footswitch
• Press and hold |
for 1 second. |
Effects Adjusting
NEXT |
13 |
Effects Adjusting
Adjusting Effects
•Tap  2 or more times at the desired tempo.
• Press and hold |
for 1 second |
NOTE |
|
|
|
|
|
||
|
|
• If you press |
when |
becomes |
to return to the Home Screen. |
unlit and the effect turns OFF for 1 second. |
|||
|
|
|
||
 To set the tempo with the parameter knobs
• Open an effect that can be synchronized to the tempo. (See page 35.)
• Turn  ,
,  and
and  .
.
• Press  2 or more times at the desired tempo.
8 To return to the Home Screen
• Press |
HINT |
|
. |
|
|
|
• You can press |
on any effect screen to return to the |
|
Home Screen. |
|
14
 Loading...