


ZME3043

Gebrauchs- und Einbauanweisung Istruzioni per l'uso e montaggio
Operating and assembly instructions Gebruiksaanwijzing en inbouwinstrukties
Notice d'utilisation et de montage Brugs- og monteringsanvisning
ZANUSSI
GLASKERAMIK-KOCHFELD D
GLASS CERAMIC HOB GB
PLAN DE CUISSON VITROCÉRAMIQUE F
PIANO DI COTTURA IN VETROVERAMICA I
KERAMISCH KOOKPLATEAU NL
GLASKERAMISKE KOGEPLADER DK
ZME 3043

10
DEAR CUSTOMER GB
We thank you for choosing a ceramic hob of ZANUSSI.
Thus you chose quality, innovation and durability. These
operating and assembly instructions will allow you to
become acquainted with the appliance and to do
everything within its possibilities.

11
CONTENT GB
Unpacking and control ........................................... 12
Preparation for installation ..................................... 12
Electrical connection ............................................. 13
Before the first use ................................................ 14
Description of appliances ...................................... 14
Hot plates ............................................................. 14
Cooking equipment ............................................... 15
Maintenance and cleaning ..................................... 16
Specifications ....................................................... 17
What to do in case of a defect............................... 17
12
UNPACKING AND CONTROL
Please examine the appliance for
any damage sustained during
transportation! If the appliance is
damaged please immediately inform
the forwarding company before the
appliance is connected. The packing
material should be disposed properly.
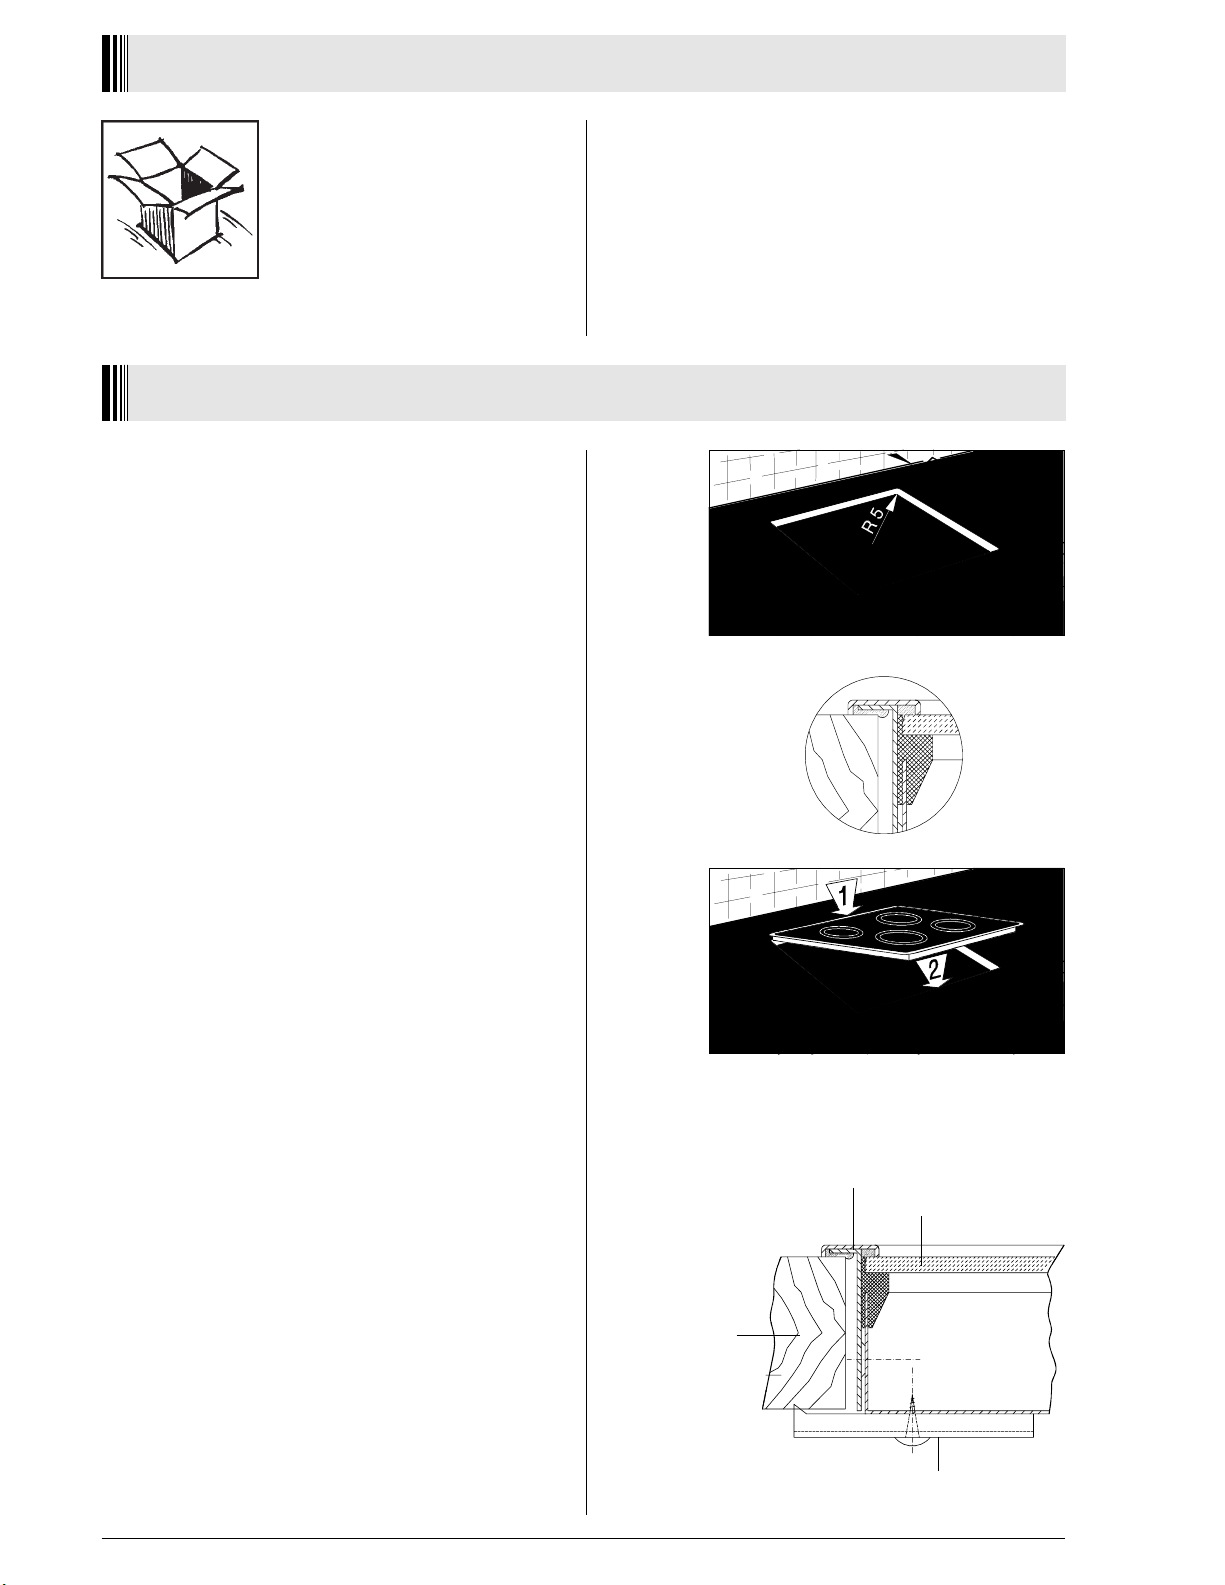
PREPARATION FOR INSTALLATION
Cut out worktop to prescribed measurements or
templates (saw exactly along the scribing).
Check seal for perfect fit and overall cover.
Lower the ceramic hob into place and align correctly.
In terms of fire protection, the appliance conforms to
Type Y (IEC 335-2-6). Only appliances of this type
may be installed on one side of adjacent upright
furniture housings or walls.
Fastening according to Fig. 1
Fasten bracket against the underside of the worktop.
Using a standard or Phillips screwdriver, tighten the
tension clamps evenly starting at the centre and
moving diagonally, until the built-in rim is tight on the
worktop.
Do not overtighten!
Do not use an electric or pneumatic screw driver
without an adjustable safety clutch! (pos. 1 - 1.1 Nm)
Fig. 1
Worktop
Seal
Ceramic
Bracket
 Loading...