


G
DESKTOP AUDIO SYSTEM
SYSTEME AUDIO DESKTOP
TSX-B232
1 |
6 |
M a y |
|
|
|
OWNER’S MANUAL MODE D’EMPLOI BEDIENUNGSANLEITUNG BRUKSANVISNING MANUALE DI ISTRUZIONI MANUAL DE INSTRUCCIONES GEBRUIKSAANWIJZING
ИНСТРУКЦИЯ ПО ЭКСПЛУАТАЦИИ

CAUTION: READ THIS BEFORE OPERATING YOUR UNIT.
1To assure the finest performance, please read this manual carefully. Keep it in a safe place for future reference.
2Install this unit in a well ventilated, cool, dry, clean place - away from direct sunlight, heat sources, vibration, dust, moisture and cold. For proper ventilation, allow the following minimum clearances.
Top: 15 cm (6 in) Rear: 10 cm (4 in) Sides: 10 cm (4 in)
3Locate this unit away from other electrical appliances, motors, or transformers to avoid humming sounds.
4Do not expose this unit to sudden temperature changes from cold to hot, and do not locate this unit in an environment with high humidity (i.e. a room with a humidifier) to prevent condensation inside this unit, which may cause an electrical shock, fire, damage to this unit, and/or personal injury.
5Avoid installing this unit where foreign object may fall onto this unit and/or this unit may be exposed to liquid dripping or splashing. On the top of this unit, do not place:
–Other components, as they may cause damage and/or discoloration on the surface of this unit.
–Burning objects (i.e. candles), as they may cause fire, damage to this unit, and/or personal injury.
–Containers with liquid in them, as they may fall and liquid may cause electrical shock to the user and/or damage to this unit.
6Do not cover this unit with a newspaper, tablecloth, curtain, etc. in order not to obstruct heat radiation. If the temperature inside this unit rises, it may cause fire, damage to this unit, and/or personal injury.
7Do not plug in this unit to a wall outlet until all connections are complete.
8Do not operate this unit upside-down. It may overheat, possibly causing damage.
9Do not use force on switches, knobs and/or cords.
10When disconnecting the power cable from the wall outlet, grasp the plug; do not pull the cable.
11Do not clean this unit with chemical solvents; this might damage the finish. Use a clean, dry cloth.
12Only voltage specified on this unit must be used. Using this unit with a higher voltage than specified is dangerous and may cause fire, damage to this unit, and/or personal injury. Yamaha will not be held responsible for any damage resulting from use of this unit with a voltage other than specified.
13To prevent damage by lightning, keep the power cable disconnected from a wall outlet or this unit during a lightning storm.
14Do not attempt to modify or fix this unit. Contact qualified Yamaha service personnel when any service is needed. The cabinet should never be opened for any reasons.
15When not planning to use this unit for long periods of time (i.e. vacation), disconnect the AC power plug from the wall outlet.
16Be sure to read the “TROUBLESHOOTING” section on common operating errors before concluding that this unit is faulty.
17Before moving this unit, press  to set the system to off, and disconnect the AC power plug from the wall outlet.
18Condensation will form when the surrounding temperature changes suddenly. Disconnect the power cable from the outlet, then leave this unit alone.
19When using this unit for a long time, this unit may become warm. Turn the system off, then leave this unit alone for cooling.
20Install this unit near the wall outlet and where the AC power plug can be reached easily.
21The batteries shall not be exposed to excessive heat such as sunshine, fire or the like. When you dispose of batteries, follow your regional regulations.
–Keep the batteries in a location out of reach of children. Batteries can be dangerous if a child were to put in his or her mouth.
–If the batteries grow old, the effective operation range of the remote control decreases considerably. If this happens, replace the batteries with new one as soon as possible.
–Do not use old batteries together with new ones.
–Do not use different types of batteries (such as alkaline and manganese batteries) together. Read the packaging carefully as these different types of batteries may have the same shape and color.
–Exhausted batteries may leak. If the batteries have leaked, dispose of them immediately. Avoid touching the leaked material or letting it come into contact with clothing, etc. Clean the battery compartment thoroughly before installing new batteries.
–If you plan not to use the unit for a long period of time, remove the batteries from the unit. Otherwise, the batteries will wear out, possibly resulting in a leakage of battery liquid that may damage the unit.
–Do not throw away batteries with general house waste. Dispose of them correctly in accordance with your local regulations.
22Excessive sound pressure from earphones and headphones can cause hearing loss.
This unit is not disconnected from the AC power source as long as it is connected to the wall outlet, even if this unit itself is turned off by  . In this state, this unit is designed to consume a very small quantity of power.
WARNING
TO REDUCE THE RISK OF FIRE OR ELECTRIC SHOCK, DO NOT EXPOSE THIS UNIT TO RAIN OR MOISTURE.
CAUTION
Danger of explosion if battery is incorrectly replaced. Replace only with the same or equivalent type.
There is a chance that placing this unit too close to a CRTbased (Braun tube) TV set might impair picture color. Should this happen, move this unit away from the TV set.
i En
CONTENTS
NAMES OF PARTS AND THEIR FUNCTIONS ........ |
2 |
Disconnecting a Bluetooth connection ......................... |
11 |
Top panel / Front panel.................................................. |
2 |
LISTENING TO FM STATIONS .............................. |
11 |
Front panel display......................................................... |
3 |
Selecting an FM station................................................ |
11 |
Rear panel...................................................................... |
3 |
Presetting FM stations (remote control only) ............... |
12 |
Remote control............................................................... |
4 |
Selecting preset FM stations........................................ |
13 |
TURNING THE SYSTEM ON .................................... |
5 |
ADJUSTING THE CLOCK ........................................ |
5 |
LISTENING TO YOUR iPod...................................... |
6 |
Playing music from your iPod......................................... |
6 |
Using repeat/shuffle playback (remote control only) ...... |
6 |
LISTENING TO CD AND USB DEVICES ................. |
7 |
Listening to a CD............................................................ |
7 |
Listening to a USB device .............................................. |
8 |
Using repeat/shuffle playback (remote control only) ...... |
8 |
LISTENING TO MUSIC FROM YOUR Bluetooth |
|
COMPONENT............................................................ |
9 |
Pairing this unit with your Bluetooth component ............ |
9 |
Listening to a Bluetooth component............................. |
10 |
Connecting an already-paired component |
|
via Bluetooth ................................................................ |
10 |
LISTENING TO EXTERNAL SOURCES ................ |
13 |
USING THE ALARM FUNCTION............................ |
14 |
Setting the alarm .......................................................... |
15 |
Operations while the alarm sound is playing................ |
16 |
USING THE “DTA Controller” APPLICATION FOR |
|
THE iPod touch/iPhone/iPad ................................ |
16 |
USING THE SLEEP TIMER .................................... |
17 |
ADJUSTING THE TONE (remote control only).... |
17 |
ADJUSTING THE BRIGHTNESS OF THE FRONT |
|
PANEL DISPLAY (remote control only) ............... |
17 |
TROUBLESHOOTING ............................................ |
18 |
NOTES ON DISCS AND USB DEVICES................ |
21 |
SPECIFICATIONS................................................... |
22 |
Features
•Play back music from external devices such as your iPod/iPhone/iPad, audio/data CDs, USB devices, or external devices via the AUX, and listen to the FM.
•By the Bluetooth technology, you can enjoy clear sound without wire connections.
•Use your favorite music or a beep tone as an alarm. When the set time arrives, the music you select is played at the volume that you specify, giving you the ideal start to your day (IntelliAlarm function) ( P. 14).
•By using the free “DTA Controller” application for the iPod touch/iPhone/iPad, you can control this unit and take advantage of more sophisticated alarm functionality ( P. 16).
•You can easily store and recall 30 of your favorite FM stations.
•Bass, middle, and treble can be adjusted to your taste.
About this manual
•References to the iPod appearing in this manual also include the iPhone.
•If an operation can be performed using either the buttons on the unit itself or from the remote control, the explanation will focus on operation using the main unit.
• indicates precautions for use of the unit and its feature limitations.
• indicates supplementary explanations for better use.
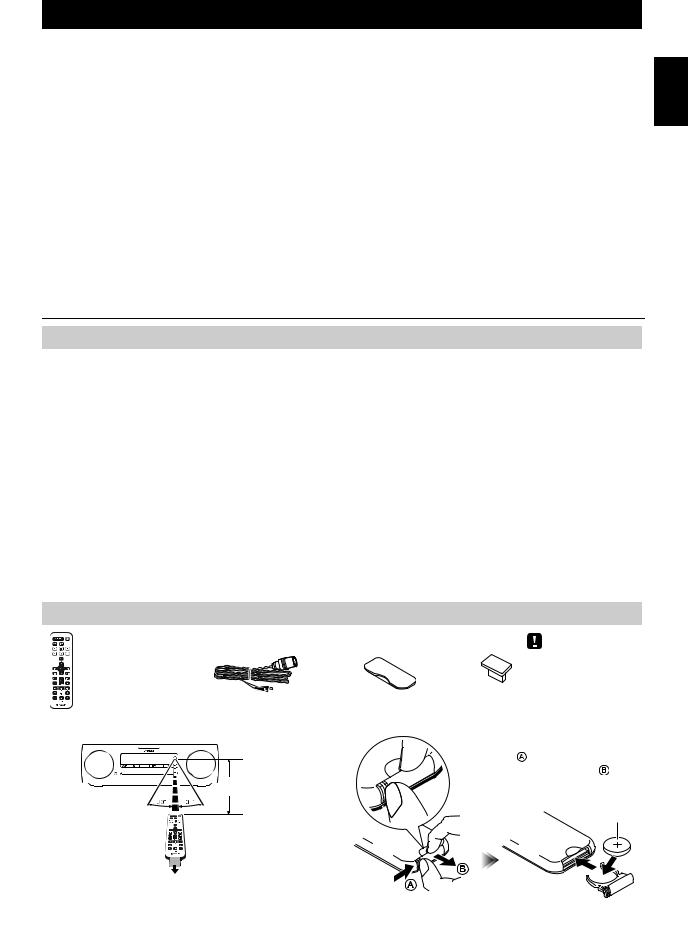
Supplied accessories
Remote control |
FM antenna |
Dock cover |
USB cap |
(uses a CR2032 type Lithium Battery)
Keep the USB cap out of reach of children so as to ensure that it is not mistakenly swallowed.
How to use the remote control |
Replacing the battery in the remote control |
|
While pushing the release tab in |
|
direction , slide out the |
|
battery holder in direction . |
Within 6 m (20') |
|
|
CR2032 type |
|
Lithium Battery |
Battery insulation sheet: |
|
Remove before using. |
|
English
1 En
NAMES OF PARTS AND THEIR FUNCTIONS
Top panel / Front panel |
|
|
|
|
12 |
3 |
4 |
5 6 7 |
8 9 |
q |
p |
o |
n mlkj |
|
aVOLUME –/+ |
|
|
hPRESET |
/ |
Adjust the volume. |
|
Use these buttons to select a FM station (preset) that |
||
b (Power) |
|
you’ve stored ( P. 13). |
||
iTUNING / |
||||
Press to turn the system on/off ( P. 5). |
||||
cSource buttons |
|
Tune the FM ( P. 11). |
||
jFront panel display |
||||
Switch the audio source to be played. |
||||
If you press one of these while the system is off, the |
|
The clock and other information is displayed here |
||
system will turn on and then switch the audio source. |
|
( P. 3). |
||
diPod dock |
kENTER |
|||
Connect your iPod here (refer to “Placing your iPod in |
|
Confirm a selected item or value. |
||
the iPod dock” below). |
lDisc slot |
|||
eAudio control buttons |
|
Insert a CD here ( P. 7). |
||
Use these to operate the iPod/CD/USB device. |
m |
EJECT |
||
: |
Stop |
|
Eject the CD. |
|
: |
Play/Pause |
n–/+ |
||
/ |
: Skip, Search backward/forward (press and |
|
Select an item or value when setting the clock or the alarm. |
|
|
hold down) |
oSET |
||
fSNOOZE/SLEEP |
||||
|
Set the alarm ( P. 15). |
|||
Set the sleep timer or switch the alarm to snooze mode |
pALARM |
|||
( P. 16, 17). |
||||
|
Switch the alarm on/off ( P. 16). |
|||
gUSB port |
|
|||
q |
(Headphone jack) |
|||
Connect your USB device / iPod / iPhone / iPad here |
||||
( P. 8). |
Connect headphones here. |
|
When the USB device is not in use, put the USB cover in place to protect the connector.
Placing your iPod in the iPod dock
Your iPod will be recharged while it is connected to the dock. However if USB is selected as the source, the iPod will not be recharged.
Dock |
• Be sure to use a dock adaptor that is compatible with your iPod. If you do not use the adaptor or the adaptor is |
adaptor |
|
|
not compatible, the connection could be loose or poor, which could cause damage to the connector. For details |
|
on dock adaptor information, please visit Apple’s official website. |
• If an iPod in a protective case is forcibly connected, the connector may be damaged. Remove the protective case before connection.
• When the iPod is not in use, put the iPod dock cover in place to protect the connector.
2 En
NAMES OF PARTS AND THEIR FUNCTIONS
Front panel display
1 |
2 |
3 |
4 |
|
5 |
English |
|
|
|
|
~ ~ ~ ~ ~ ~ |
|
|
|
|
|
|
|
|
|
|
|
|
|
~ ~ ~ ~ ~ ~ |
|
|
8 7 6
aIllumination sensor
Detect ambient lighting. Do not cover this sensor.
bAlarm time
This indicates the alarm time.
cRepeat/shuffle indicator
Display the playback mode ( P. 6, 8).
dMulti-function indicator
Display various information, including the clock time, information about the currently-playing track, and the frequency of the FM station.
eRemote control signal receiver
Make sure that this sensor is not obstructed ( P. 1).
fSleep indicator
Turn on if the sleep timer has been set ( P. 17).
gAlarm indicator
Turn on if the alarm has been set ( P. 16).
hWeekly alarm indicator
Shows alarm information specified using the free “DTA Controller” application for the iPod touch/iPhone/iPad ( P. 16).
Rear panel
CLOCK |
AUX |
ON |
FM ANT |
SET


 OFF
OFF
1 2 3
aCLOCK switch
Sets the clock and specifies whether the clock will be displayed ( P. 5).
SET: Set the clock.
ON: Even when the system is off, the clock will be displayed and the alarm function will be available.
OFF: When the system is off, the clock will not be displayed, and the alarm function will not be available.
bAUX
Use a commercially available 3.5 mm mini-plug cable to connect your external device here ( P. 13).
cFM antenna connector
Connect the FM antenna here.
FM ANT
Be sure to stretch out the antenna.
•If reception is poor, try changing the height or direction of the antenna, or move the unit to find a location that has better reception.
•If you use a commercially available outdoor antenna instead of the supplied antenna, reception may be better.
3 En

NAMES OF PARTS AND THEIR FUNCTIONS
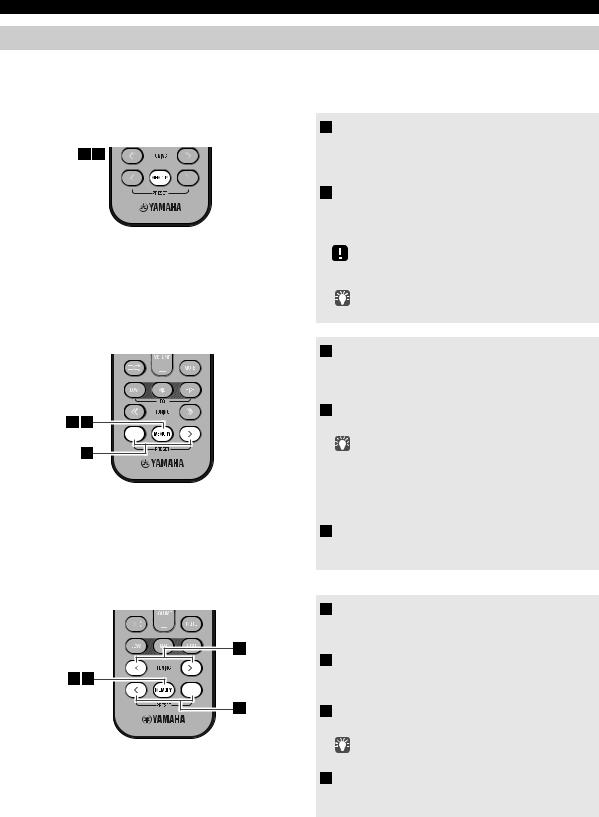
Remote control
|
|
|
|
|
|
|
|
|
|
|
|
|
|
|
|
|
|
|
|
|
|
|
|
|
|
|
|
aRemote control signal transmitter |
||
1 |
|
|
|
|
|
|
|
|
|
|
|
|
|
|
|
|
|
|
|
|
|
|
|
|
|
|
b |
(Power) |
||
|
|
|
|
|
|
|
|
|
|
|
|
|
|
|
|
|
|
|
|
|
|
|
|
|
|
|
|
|
Press to turn the system on/off ( P. 5). |
|
2 |
|
|
|
|
|
|
|
|
|
|
|
|
|
|
|
|
|
|
|
|
|
|
|
|
|
|
cSNOOZE/SLEEP |
|||
3 |
|
|
|
|
|
|
|
|
|
|
|
|
|
|
|
|
|
|
|
|
|
|
|
|
|
|
|
|
Set the sleep timer or switch the alarm to snooze mode |
|
|
|
|
|
|
|
|
|
|
|
|
|
|
|
|
|
|
|
|
|
|
|
|
|
|
|
|
|
( P. 16, 17). |
||
|
|
|
|
|
|
|
|
|
|
|
|
|
|
|
|
|
|
|
|
|
|
|
|
|
|
|
|
|||
4 |
|
|
|
|
|
|
|
|
|
|
|
|
|
|
|
|
|
|
|
|
|
|
|
|
|
|
r |
dALARM |
|
|
|
|
|
|
|
|
|
|
|
|
|
|
|
|
|
|
|
|
|
|
|
|
|
|
|
|
|
Switch the alarm on/off ( P. 16). |
|||
|
|
|
|
|
|
|
|
|
|
|
|
|
|
|
|
|
|
|
|
|
|
|
|
|
|
|
|
|
||
|
|
|
|
|
|
|
|
|
|
|
|
|
|
|
|
|
|
|
|
|
|
|
|
|
|
|
|
eSource buttons |
||
5 |
|
|
|
|
|
|
|
|
|
|
|
|
|
|
|
|
|
|
|
|
|
|
|
|
|
|
|
|
Switch the audio source to be played. |
|
|
|
|
|
|
|
|
|
|
|
|
|
|
|
|
|
|
|
|
|
|
|
|
|
|
|
|
|
|||
|
|
|
|
|
|
|
|
|
|
|
|
|
|
|
|
|
|
|
|
|
|
|
|
|
|
|
|
If you press one of these while the system is off, the |
||
|
|
|
|
|
|
|
|
|
|
|
|
|
|
|
|
|
|
|
|
|
|
|
|
|
|
|
|
|
||
|
|
|
|
|
|
|
|
|
|
|
|
|
|
|
|
|
|
|
|
|
|
|
|
|
|
|
|
|
system will turn on and then switch the audio source. |
|
|
|
|
|
|
|
|
|
|
|
|
|
|
|
|
|
|
|
|
|
|
|
|
|
|
|
|
|
|
||
|
|
|
|
|
|
|
|
|
|
|
|
|
|
|
|
|
|
|
|
|
|
|
|
|
|
|
|
|
||
6 |
|
|
|
|
|
|
|
|
|
|
|
|
|
|
|
|
|
|
|
|
|
|
|
|
|
|
|
fMENU |
|
|
|
|
|
|
|
|
|
|
|
|
|
|
|
|
|
|
|
|
|
|
|
|
|
|
|
|
|
|
Switch the iPod menu item / Return to the previous |
||
|
|
|
|
|
|
|
|
|
|
|
|
|
|
|
|
|
|
|
|
|
|
|
|
|
|
|
|
|||
7 |
|
|
|
|
|
|
|
|
|
|
|
|
|
|
|
|
|
|
|
|
|
|
|
|
|
|
|
menu ( P. 6). |
||
|
|
|
|
|
|
|
|
|
|
|
|
|
|
|
|
|
|
|
|
|
|
|
|
|
|
gFOLDER / |
||||
8 |
|
|
|
|
|
|
|
|
|
|
|
|
|
|
|
|
|
|
|
|
|
|
|
|
|
|
||||
|
|
|
|
|
|
|
|
|
|
|
|
|
|
|
|
|
|
|
|
|
|
|
|
|
|
|
|
|
Switch the playback folder when playing music on data |
|
9 |
|
|
|
|
|
|
|
|
|
|
|
|
|
|
|
|
|
|
|
|
|
|
|
|
|
|
|
|
CDs or USB devices ( P. 7, 8). |
|
|
|
|
|
|
|
|
|
|
|
|
|
|
|
|
|
|
|
|
|
|
|
|
|
|
|
|
|
|||
|
|
|
|
|
|
|
|
|
|
|
|
|
|
|
|
|
|
|
|
|
|
|
|
|
|
|
|
|
Select items or edit numerical values ( P. 6, 17). |
|
|
|
|
|
|
|
|
|
|
|
|
|
|
|
|
|
|
|
|
|
|
|
|
|
|
|
|
|
hENTER |
|
|
|
|
|
|
|
|
|
|
|
|
|
|
|
|
|
|
|
|
|
|
|
|
|
|
|
|
|
|
|
||
|
|
|
|
|
|
|
|
|
|
|
|
|
|
|
|
|
|
|
|
|
|
|
|
|
|
|
|
|
||
|
|
|
|
|
|
|
|
|
|
|
|
|
|
|
|
|
|
|
|
|
|
|
|
|
|
|
|
|
Confirm a selected item or value. |
|
|
|
|
|
|
|
|
|
|
|
|
|
|
|
|
|
|
|
|
|
|
|
|
|
|
|
|
q |
iAudio control buttons |
||
|
|
|
|
|
|
|
|
|
|
|
|
|
|
|
|
|
|
|
|
|
|
|
|
|
|
|
||||
j |
|
|
|
|
|
|
|
|
|
|
|
|
|
|
|
|
p |
|
Use these to operate the iPod/CD/USB device. |
|||||||||||
|
|
|
|
|
|
|
|
|
|
|
|
|
|
|
|
|
||||||||||||||
|
|
|
|
|
|
|
|
|
|
|
|
|
|
|
|
|
|
|
|
|
|
|
|
|
|
|
o |
|
: |
Stop |
|
|
|
|
|
|
|
|
|
|
|
|
|
|
|
|
|
|
|
|
|
|
|
|
|
|
|
|
|||
|
|
|
|
|
|
|
|
|
|
|
|
|
|
|
|
|
|
|
||||||||||||
k |
|
|
|
|
|
|
|
|
|
|
|
|
|
|
|
|
|
|
|
|
|
|
|
|
|
|
|
|
: |
Play/Pause |
|
|
|
|
|
|
|
|
|
|
|
|
|
|
|
|
|
|
|
|
|
|
|
|
|
|
|
|
|
/ : |
Skip, Search backward/forward (press and |
l |
|
|
|
|
|
|
|
|
|
|
|
|
|
|
|
|
|
|
|
|
|
|
|
|
|
|
|
|
|
hold down) |
|
|
|
|
|
|
|
|
|
|
|
|
|
|
|
|
j |
(Repeat)/ (Shuffle) |
|||||||||||||
|
|
|
|
|
|
|
|
|
|
|
|
|
|
|
|
|
|
|
|
|
|
|
|
|
|
|
|
|||
m |
|
|
|
|
|
|
|
|
|
|
|
|
|
|
|
|
|
Play music on an iPod, CD or USB device in repeat/ |
||||||||||||
|
|
|
|
|
|
|
|
|
|
|
|
|
|
|
||||||||||||||||
n |
|
|
|
|
|
|
|
|
|
|
|
|
|
|
shuffle mode ( P. 6, 8). |
|||||||||||||||
|
|
|
|
|
|
|
|
|
|
|
|
|
kEQ: LOW/MID/HIGH |
|||||||||||||||||
|
|
|
|
|
|
|
|
|
|
|
|
|
|
|
|
|
|
|
|
|
|
|
|
|
|
|
|
|||
|
|
|
|
|
|
|
|
|
|
|
|
|
|
|
|
|
|
|
|
|
|
|
|
|
|
|
|
|
Adjust the bass, middle or treble sound quality |
|
|
|
|
|
|
|
|
|
|
|
|
|
|
|
|
|
|
|
|
|
|
|
|
|
|
|
|
|
|
( P. 17). |
|
|
|
|
|
|
|
|
|
|
|
|
|
|
|
|
|
|
|
|
|
|
|
|
|
|
|
|
|
lTUNING |
/ |
|
|
|
|
|
|
|
|
|
|
|
|
|
|
|
|
|
|
|
|
|
|
|
|
|
|
|
|
|
|
Tune the FM ( P. 11). |
|
iPod control buttons |
|
|
|
|
|
|
|
|
|
|
|
|
|
|
mPRESET |
/ |
||||||||||||||
|
|
|
|
|
|
|
|
|
|
|
|
|
|
|
|
|
|
|
|
|
|
|
|
|
|
|
|
|||
Select a FM station (preset) that you’ve stored ( P. 13).
nMEMORY
Store an FM station ( P. 12).
oMUTE
Mute or unmute the sound.
pVOLUME +/–
Adjust the volume.
qDISPLAY
Switch the information shown in the front panel display ( P. 6, 7, 8, 11).
rDIMMER
Adjust the brightness of the front panel display ( P. 17).
4 En
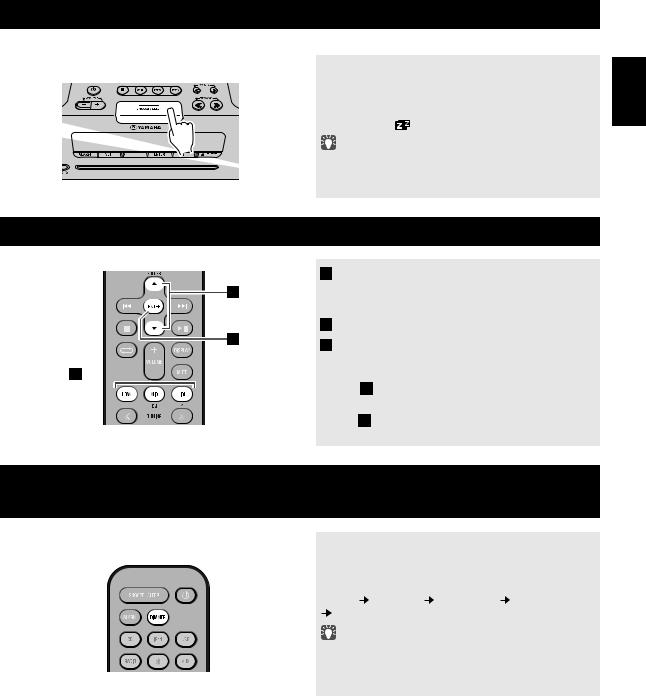
TURNING THE SYSTEM ON
Display (24-hour) when the system is on
1 5 : 3 0 i P o d
Display (24-hour) when the system is off (CLOCK switch: ON)
2 6 A p r
Connect the power cable to an AC outlet, and press  .
.
The system will turn on, and will be ready to play audio sources.
To turn the system off, press  once again.
If you set the rear panel CLOCK switch to the OFF position ( P. 3), the clock will not be displayed when the system is off, reducing the power consumption.
|
Clock display |
Alarm |
Recharging |
|
|
when the |
your iPod in |
||
|
system is off |
|
the iPod dock |
|
|
|
|
|
|
CLOCK switch: ON |
Yes |
Enabled |
Yes |
|
|
|
|
|
|
CLOCK switch: OFF |
No |
Disabled |
Yes |
|
(power-saving) |
||||
|
|
|
ADJUSTING THE CLOCK
1 |
Rear panel |
|
|
|
|
|
CLOCK |
AUX |
|
ON |
|
|
SET |
OFF |
Front panel
2
Rear panel
|
3 |
|
|
|
|
|
CLOCK |
AUX |
|
|
|||
|
|
|
|
|
|
|
|
|
|||||
|
|
|
|
|
|
|
|
ON |
|
|
|
||
|
|
|
|
|
SET |
|
|
|
OFF |
(24-hour) |
|
||
|
|
|
|
|
|
|
|
|
|||||
|
|
|
|
|
|
||||||||
|
|
|
|
|
|
|
|
|
|
|
|
|
|
|
|
|
|
|
|
|
|
|
|
|
|
|
|
|
|
|
|
|
|
|
|
|
|
|
|
|
|
|
|
|
|
|
|
|
|
|
|
|
|
2 6 |
|
|
|
|
|
|
|
|
|
|
|
|
|
A p r |
|
Jan |
|
Feb |
|
Mar |
Apr |
May |
Jun |
||||||
|
|
|
|
|
|
|
|||||||
January |
|
February |
March |
April |
May |
June |
|||||||
Jul |
|
Aug |
|
|
Sep |
Oct |
Nov |
Dec |
|||||
|
|
|
|
|
|
|
|||||||
July |
|
August |
September |
October |
November |
December |
|||||||
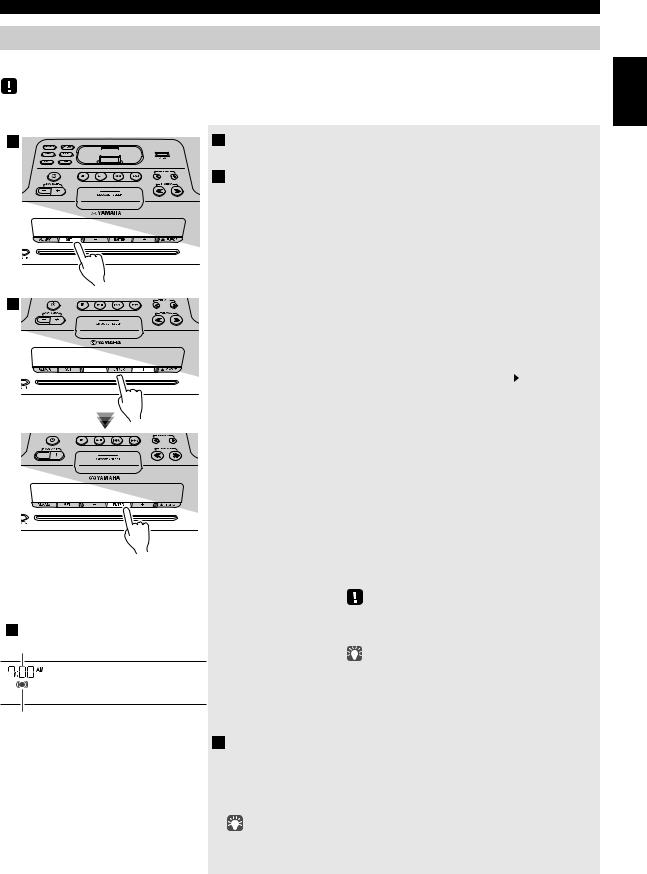
1Set the rear panel CLOCK switch to the SET position.
The display will indicate “CLOCK YEAR,” and the numerical value to be set will blink.
2Set the date and time.
Press the front panel –/+ buttons to edit the values, and press ENTER to confirm the settings.
Set the items in the order of year  month
month  day
day  hour
hour  minute.
When clock setting has finished, the display will indicate “Completed!”
• |
On step |
2 |
, you can copy the time of iPod instead of |
|
|
setting time manually by setting the iPod to the iPod dock. |
|||
|
The time will not be copied if the iPod is already connected. |
|||
• |
On step |
2 |
, by pressing SNOOZE/SLEEP you can select |
|
the time format (12-hour / 24-hour).
3 When you’ve finished making settings, set
the CLOCK switch to the ON position.
The moment you set the switch to the ON position, the clock will start from 0 second.
The time settings will be reset if the unit remains unpowered for more than one week.
English
5 En

LISTENING TO YOUR iPod
Playing music from your iPod
•For details on compatible iPod models, refer to “SPECIFICATIONS” (P. 22).
•Your iPod can also play back music and recharge while connected to the USB port ( P. 8).
1 2
RADIO |
|
|
AUX |
USB |
Dock adaptor |
|
|
|
CD |
iPod |
( P. 2) |
1 Press the iPod source button to switch the audio source to iPod.
2 Set your iPod in the iPod dock ( P. 2).
3 Play the iPod.
Playback can be controlled with either the remote control, iPod or the unit ( P. 2, 4).
•Performing the following operations will automatically switch the audio source to iPod and start playback even if this unit is system-off.
−Connect your iPod in the playback state to the iPod dock.
−Play back the connected iPod.
In some cases, the audio source might not switch automatically if the audio source is USB or if this unit is currently connected
via Bluetooth.
•If USB is selected as the audio source, the iPod will not be charged.
•You can remove the iPod during playback.
•If iPod is selected as the audio source, the system will automatically turn off when 60 minutes have elapsed without a device being connected to the iPod dock nor any operation performed.
iPod menu operations (remote control only)
You can use the remote control to operate your iPod.
MENU: Switch menu items / Return to the previous menu
▲/▼: Move between items in the menu ENTER: Confirm
Display information (remote control only)
If you press DISPLAY on the remote control while a song is playing or paused, the information shown on the front panel display will be switched in the order shown at right.
 Elapsed song playback time
Song name
Album name
Artist name
Using repeat/shuffle playback (remote control only)
The playback status is shown by the repeat/shuffle indicator ( P. 3) in the front panel display.
Repeat playback
Press  (repeat) on the remote control repeatedly to select one of the following playback modes.
No display: Off

 : One
: One 
 : All
: All
Shuffle playback
Press  (shuffle) on the remote control repeatedly to select one of
the following playback modes.
No display: Off
 : Albums
  : Songs
Repeat/shuffle may not operate or be displayed correctly as shown above depending on the type of iPod used.
6 En
LISTENING TO CD AND USB DEVICES
The unit will operate as follows when playing back tracks/files on CD/USB devices. |
|
|
• If the CD/USB device being played back is stopped, the track that was being played back will start playing from the |
|
English |
beginning of the track the next time playback begins. |
|
|
• If you press while playback is stopped, tracks will play as follows the next time playback begins: |
|
|
|
|
|
− Audio CD: Play from the first track of the CD. |
|
|
− Data CD (a CD containing MP3/WMA files) or USB: Play from the first track in the folder containing the song that you last stopped. |
|
|
|
||
• This unit automatically turns off the system if no operation has been performed for 60 minutes after CD/USB device |
|
|
playback is stopped. |
|
|
For details on playable discs and files, refer to “NOTES ON DISCS AND USB DEVICES” (P. 21). |
|
|
|
|
|
Listening to a CD
1
RADIO
AUX USB
CD iPod
1 Press the CD source button to switch the
audio source to CD.
If a CD is already inserted, playback will start.
2 Insert a CD into the disc slot.
Playback starts automatically.
Playback can be controlled with either the remote control or the unit ( P. 2, 4).
Insert the CD with the label side facing upward.
2
Folders and files on a data CD are played in alphabetical order.
Skipping folders (remote control only)
While a data CD is playing, you can use the remote control’s FOLDER ▲/▼ buttons to select the folder.
Display information (remote control only)
The folder number (only for a data CD) or the song/file number is shown for several seconds when starting playback or skipping tracks.
If you press DISPLAY on the remote control while a song is playing or paused, the information shown on the front panel display will be switched in the following order.
Audio CD |
|
|
Data CD |
||
Elapsed song playback time |
|
|
Elapsed song playback time |
||
|
|
||||
|
|
|
|
|
|
Remaining song playback time |
|
|
Song name* |
||
|
|
|
|
|
|
Song name* |
|
|
Album name* |
||
|
|
|
|
|
|
Album name* |
|
|
Artist name* |
||
|
|
|
|
|
|
Artist name* |
|
|
File name |
||
|
|
|
|
|
|
|
|
|
|
Folder name |
|
|
|
|
|
||
* Shown only if this data is included in the song.
7 En
LISTENING TO CD AND USB DEVICES
Listening to a USB device
1 |
2 |
RADIO
AUX USB
CD iPod
Your iPod/iPhone/iPad can also play back music and recharge while connected to the USB port ( P. 6).
1 Press the USB source button to switch the
audio source to USB.
If a USB device is already connected, playback will start.
2 Connect a USB device to the USB port.
Playback starts automatically. Playback can be controlled using either the remote control, the unit, or the USB device ( P. 2, 4).
Folders and files will play in the order in which they were written.
Stop playback before disconnecting the USB device.
Skipping folders (remote control only)
While a USB device is playing, you can use the remote control’s FOLDER ▲/▼ buttons to select the folder.
Display information (remote control only)
The folder/file number is shown for several seconds when starting playback or skipping tracks.
If you press DISPLAY on the remote control while a song is playing or paused, the information shown on the front panel display will be switched in the order shown at right.
* Shown only if this data is included in the song.
 Elapsed song playback time
Song name*
Album name*
Artist name*
File name
Folder name
Using repeat/shuffle playback (remote control only)
The playback status is shown by the repeat/shuffle indicator ( P. 3) in the front panel display.
Repeat playback
Press  (repeat) on the remote control repeatedly to select one of
the following playback modes.
No display: Repeat mode off
: |
1 track |
 : All tracks within the folder (data CD/ USB device only)

 : All tracks
Shuffle playback
Press (shuffle) on the remote control repeatedly to select one of
the following playback modes.
No display: Shuffle mode off
 : All tracks within the folder (data CD/ USB device only)


 : All tracks
8 En
LISTENING TO MUSIC FROM YOUR Bluetooth COMPONENT
This unit provides Bluetooth functionality. You can enjoy wireless music playback from your Bluetooth component (mobile phone, digital audio player, etc.). Please also refer to the owner’s manual of your Bluetooth component.
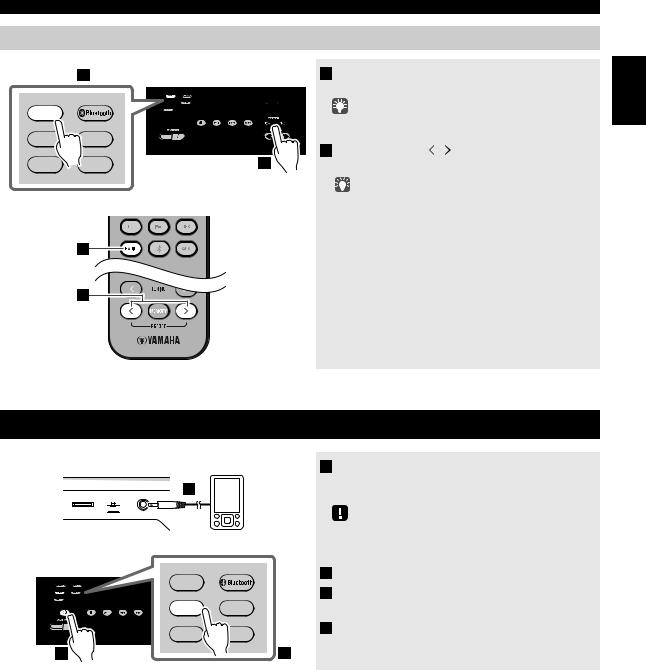
Pairing this unit with your Bluetooth component
Pairing is an operation that registers the communicating component (subsequently called “the other component”) with this unit. You’ll need to perform the pairing operation the first time you use your Bluetooth component with this unit, or if the pairing settings have been deleted. Once pairing has been completed, subsequent reconnection will be easy even after the Bluetooth connection is disconnected. If pairing is not successful, refer to the item “Bluetooth” in “TROUBLESHOOTING” (P. 20).
•This unit can be paired with up to eight other components. When pairing with the ninth component has succeeded, pairing data for the component with the oldest connection date will be deleted.
•If this unit is connected via Bluetooth to another component, hold down 


 source button on this unit or
  on the remote control to disconnect the Bluetooth connection before you perform the pairing operation.
If using an iPod touch/iPhone/iPad
1
RADIO
AUX USB
CD iPod
3
1 5 : 3 |
0 |
B T D T A |
i P h o n e |
If using other than an iPod touch/iPhone/iPad
1 Press the 


 source button to switch the audio source to Bluetooth.
2 On your iPod touch/iPhone/iPad, turn
[Settings]  [General]
  [Bluetooth] on.
The Bluetooth connection list will appear in [Devices].
(This procedure or display may differ depending on the type of your iPod touch/iPhone/iPad.)
3 From the Bluetooth connection list of the other component, choose this unit (TSX-B232
Yamaha).
When pairing has been completed, your iPod touch/ iPhone/iPad will indicate “Connected”.
The front panel display of this unit will indicate “Pairing OK” and show the name of the other component, and the Bluetooth indicator will light.
1
RADIO
AUX USB
CD iPod
3
1 5 : 3 0
B T P a i r i n g O K
1 Press the 


 source button to switch the audio source to Bluetooth.
2 Perform Bluetooth pairing on the other
component.
For details refer to the owner’s manual of the other component.
3 From the Bluetooth connection list of the other component, choose this unit (TSX-B232
Yamaha).
When pairing has been completed, the front panel display of this unit will indicate “Pairing OK”.
If you are asked to enter a password, enter the numerals “0000”.
English
9 En
LISTENING TO MUSIC FROM YOUR Bluetooth COMPONENT
Listening to a Bluetooth component
1
RADIO
AUX USB
CD iPod
1 Press the 


 source button to switch the audio source to Bluetooth.
2 Connect this unit and your other component via Bluetooth.
3 Play back music from your Bluetooth component.
Take care that the volume setting of this unit is not too high. We recommend that you adjust the volume on the other component.
•If you connect via Bluetooth from your other component and play back music while this unit is turned off the system, this unit will automatically turn on the system.
•If you disconnect the Bluetooth connection from your other component while the audio source is set to Bluetooth, this unit will automatically turn off the system.
•If Bluetooth is selected as the audio source, this unit will automatically turn off the system when 60 minutes have elapsed without any Bluetooth connection nor any operation performed.
Connecting an already-paired component via Bluetooth
Once pairing has been completed, connecting a Bluetooth will be easy the next time.
Connecting from this unit
RADIO
AUX USB
CD iPod
1 5 : 3 0
Press the 


 source button to switch the audio source to Bluetooth.
The Bluetooth indicator will blink in the front panel display; this unit will search for the other component that was most recently connected via Bluetooth, and will then establish a connection (You must first turn on the Bluetooth setting of the other component).
When the Bluetooth connection has been established, the Bluetooth indicator will light, and the name of the other component will be displayed.
Yamaha does not guarantee all connections between this unit and
Bluetooth component.
1 5 : 3 |
0 |
B T D T A |
i P h o n e |
Connecting from the other component
1 In the Bluetooth settings of the other component, turn Bluetooth on.
2 From the Bluetooth connection list of the other component, choose this unit (TSX-B232 Yamaha).
The Bluetooth connection will be established, and the front panel display of this unit will indicate the name of the other component.
Bluetooth connections cannot be established from the other component when this unit is in power saving. Turn the system on.
10 En
LISTENING TO FM STATIONS
Disconnecting a Bluetooth connection
If any of the following operations are performed while a Bluetooth connection is being used, the Bluetooth connection will be disconnected.
•Hold down 


 source button on this unit or
  on the remote control.
•Turn the system off.
•Turn off the Bluetooth setting of the other component.
When you connect an iPod touch/iPhone/iPad via Bluetooth, the Bluetooth connection may be disconnected if you switch the audio source to iPod or USB while another iPod/iPhone/iPad is connected.
English
LISTENING TO FM STATIONS
Selecting an FM station
Connect the antenna if you want to listen to the FM ( P. 3).
1 |
|
|
1 Press the RADIO source button to switch |
|
|
|
the audio source to FM. |
RADIO |
|
|
2 Tuning FM stations. |
|
|
|
Automatic tuning: Press and hold TUNING / . |
AUX |
USB |
|
Manual tuning: Press TUNING / repeatedly. |
CD |
iPod |
2 |
If you tune to a station manually while receiving FM, the |
|
|
|
sound will be monaural.
Display information
If you press DISPLAY on the remote control, the information shown on the front panel display will be switched in the following order.
Preset number and frequency 
 Reception status*
* Examples of reception status indication.
TUNED/STEREO: A strong FM stereo broadcast is being received.
TUNED/MONO: Receiving an FM broadcast in monaural (even if the FM broadcast is stereo, reception will be monaural if the signal is weak).
Not TUNED: No broadcast is being received.
Displaying Radio Data System information
If you press DISPLAY on the remote control while Radio Data System information is being received, the information shown on the front panel display will be switched in the order shown at right.
If the signal transmission of the Radio Data System station is too weak, this unit may not be able to receive Radio Data System information completely. In particular, RT (Radio Text) information uses a lot of bandwidth, so it may be less available compared to other types of information.
 PS (Program Service)
PTY (Program Type)
RT (Radio Text)
CT (Clock Time)
Reception status
Preset number and frequency
11 En
LISTENING TO FM STATIONS
Presetting FM stations (remote control only)
Use the preset function to store your favorite 30 stations.
Auto preset
This method tunes automatically, and automatically presets only the stations that have good reception.
1 Press and hold down MEMORY on the remote control.
1 2 |
“AUTO PRESET” will appear and “Press MEMORY” |
|
will blink. |
2 Press MEMORY.
Auto preset will begin.
When presetting has finished, the display will indicate “Completed!”.
When you perform auto preset, all stored stations are cleared and the new stations are stored.
Manual preset
13
2
If you want to stop auto preset before it is completed, press  .
.
1 Select the station that you want to preset,
and press MEMORY.
The display will indicate “PRESET MEMORY.”
2 Press PRESET  /
/  to select the preset number that you want to store.
•The lowest preset number that has not been stored will be selected first.
•If you want to cancel the presetting, press  .
.
•If you select a preset number in which a station has already been stored, it will be overwritten by the new station.
3 Press MEMORY to complete the operation.
The preset will be stored, and the display will indicate “Completed!”.
Deleting a stored preset
2
1 4
3
1 Press MEMORY on the remote control.
The display will indicate “PRESET MEMORY,” and the preset number will blink.
2 Press TUNING  /
/  to select the preset
delete operation.
The display will indicate “PRESET DELETE.”
3 Press PRESET  /
/  to select the preset number that you want to delete.
If you want to cancel the deleting, press  .
.
4 Press MEMORY to complete the operation.
The preset will be deleted, and the display will indicate “Deleted!”.
12 En
LISTENING TO EXTERNAL SOURCES
Selecting preset FM stations
Main unit |
1 |
|
1 Press the RADIO source button to switch |
|
|
|
the audio source to FM. |
RADIO |
|
|
You can also switch the audio source by pressing RADIO on |
|
|
|
|
AUX |
USB |
|
the remote control. |
|
2 Press PRESET / to select the FM station |
||
|
|
2 |
|
CD |
iPod |
that you want to listen. |
You can only select the presets that have been stored.
Remote control
1
2
English
LISTENING TO EXTERNAL SOURCES
Rear panel
1
CLOCK |
AUX |
ON |
|
SET 


 OFF
OFF
RADIO
 AUX USB
CD iPod
2 |
3 |
1Using a commercially available 3.5 mm miniplug cable, connect your external device to the AUX on the rear panel of this unit.
•Turn off the system before connecting the mini-plug cable.
•Turn down the volume of the unit and your external audio device before connection.
2Press  to turn the system on.
3Press the AUX source button to switch the audio source to AUX.
4Start playback on the connected external audio device.
13 En

USING THE ALARM FUNCTION
The unit includes an alarm function (IntelliAlarm) that plays back audio sources or a set of beep (internal alarm sound) at the set time using a variety of different methods. The alarm function has the following features.
3 types of alarms
Select from 3 alarm types, combining music and beep sounds.
|
The selected audio source and beep sound are played at the set time. This mode is recommended for the best |
|
|
possible start to the day. |
|
SOURCE+BEEP |
3 minutes before the set time: |
|
the source music begins to fade in and the volume gradually increases as the alarm time approaches. |
||
|
||
|
Alarm time: |
|
|
a beeping sound also begins playing. |
|
|
|
|
SOURCE |
The selected audio source is played at the set time. The volume fades in gradually and increases to the set |
|
volume. |
||
|
||
BEEP |
The beep sound is played at the set time. |
|
|
|
Various audio sources
The iPod, audio CD, data CD, USB device and radio can be selected. The following playback methods can also be selected depending on the audio source:
Source |
Playback method |
Function |
|
|
|
The unit resumes play from the last track you played. |
|
iPod |
Resume |
If you’ve created a playlist* with the name “ALARM Yamaha DTA” in advance, the |
|
playlist stored on the iPod can be played back repeatedly. |
|||
|
|
When entering the playlist name, use single-byte spaces to separate words, and enter |
|
|
|
single-byte characters, taking care that uppercase/lowercase letters are used correctly. |
|
Audio CD |
Selected track |
The selected track is played repeatedly. |
|
|
|
||
Resume |
The track you listened to last time is played back. |
||
|
|||
|
|
|
|
Data CD/USB device |
Folder |
The selected folder is played repeatedly. |
|
Resume |
The track you listened to last time is played back. |
||
|
|||
|
|
|
|
FM |
Preset station |
The selected preset station is played. |
|
|
|
||
Resume |
The FM station you listened to last time is played back. |
||
|
|||
|
|
|
*For information on creating a playlist, refer to the instructions for your iPod or iTunes.
Snooze
The snooze function can be enabled to replay the alarm after 5 minutes ( P. 16).
14 En
USING THE ALARM FUNCTION
Setting the alarm
Set the alarm time and alarm type
Alarm settings cannot be made when the unit is in power saving. If you want to use the alarm function, set the rear panel CLOCK switch to the ON position.
1
2
3
Alarm time
9 : 1 2 

C o m p l e t e d !
Alarm indicator
1Press SET.
The alarm indicator (


 ) will blink.
2Set the alarm.
Set items 1-5 described below.
Press –/+ to select a numerical value, and press ENTER to confirm it.
Items |
Setting or range |
||
1 ALARM SELECT |
* This can be selected after you’ve used “DTA Controller” |
||
|
to set the alarm ( P. 16). If you’re not using “DTA |
||
|
Controller,” proceed to item 2. |
||
|
ONE DAY: An alarm that sounds only once at the |
||
|
specified time. |
||
|
WEEKLY: An alarm whose time can be specified for |
||
|
each day of the week (settable only using |
||
|
“DTA Controller”) |
||
|
If you’ve chosen WEEKLY, this completes the alarm |
||
|
setting. |
||
|
|
|
|
2 ALARM TIME |
Make settings in the order of hours |
|
minutes. |
|
|||
|
|
|
|
3 ALARM TYPE |
Select from SOURCE+BEEP, SOURCE or BEEP. |
||
|
For details, refer to “3 types of alarms” (P. 14). |
||
|
If you selected BEEP, proceed to item 5. |
||
|
|
|
|
4 ALARM SOURCE |
iPod: Play back music from your iPod (Refer to |
||
(If you selected |
“Various audio sources” (P. 14).) |
||
SOURCE+BEEP or |
The iPod connected via Bluetooth is not |
||
SOURCE as the |
available. Set the iPod in the iPod dock. |
||
ALARM TYPE) |
CD: Play back music from a CD. |
||
|
Specify the track number (data CD: folder |
||
|
number) (RESUME, 1-99). |
||
|
USB: Play back music from a USB device. |
||
|
Specify the folder number (RESUME, 1-999). |
||
|
FM: Play a radio station. |
||
|
Specify the preset number (RESUME, 1-30). |
||
|
If the selected source cannot be played back at the time |
||
|
set for the alarm (e.g., the iPod is not connected), the beep |
||
|
sound is played back. |
||
|
If you choose RESUME when specifying the track/ |
||
|
folder/preset number, the last-played track/folder/station |
||
|
will be played (resume playback). |
||
|
|
|
|
5 ALARM VOLUME |
Specifies the volume (5-60) of the alarm. |
||
|
|
|
|
3 Complete the settings.
When you set the VOLUME for item 5, the display will indicate “Completed!” and your settings will be confirmed. This completes the alarm setting.
The alarm will be turned on and the alarm indicator (


 ) will light.
•By pressing SET during this procedure, you can confirm the alarm settings with the currently-specified values and complete the procedure.
•If you decide to cancel alarm settings mid-way through the procedure, turn the system off.
English
15 En
USING THE “DTA Controller” APPLICATION FOR THE iPod touch/iPhone/iPad
Switching the alarm on/off
Press ALARM to turn the alarm on/off.
When the alarm is on, the alarm indicator (


 ) will light, and the alarm time will be shown.
If you press ALARM again, the alarm indicator ( 

 ) and the alarm will turn off.
When the unit is in power saving, the alarm will not function ( P. 5).
Operations while the alarm sound is playing
When the set time arrives, the selected alarm sound will play. During playback, the following operations are available.
To pause the alarm (Snooze)
Press SNOOZE/SLEEP.
Snooze will stop the alarm and play it again 5 minutes later.
If SOURCE + BEEP is set as the alarm type, you can press SNOOZE/SLEEP once to stop the beep sound, and twice to stop the audio source.
Five minutes after the audio source is stopped, it will start fading in again and the beep sound will resume.
To turn the alarm off
Press ALARM or  .
.
• You can also stop the alarm by holding down SNOOZE/ SLEEP.
• If you don’t stop the alarm, it will stop automatically after 60 minutes and the system will turn off.
• The alarm setting will be saved even if the alarm is turned off. If the alarm is turned on again by pressing ALARM, the alarm will sound with the previous alarm settings.
USING THE “DTA Controller” APPLICATION FOR THE iPod touch/iPhone/iPad
By using the free “DTA Controller” application for the iPod touch/iPhone/iPad, you can control this unit and make detailed alarm settings. For example, for each day of the week, you can specify the alarm time (Weekly Alarm) and adjust the IntelliAlarm as desired.
The front panel display shows information for the Weekly Alarm you’ve set.
MON |
TUE |
WED |
THU |
FRI |
SAT |
SUN |
|
|
|
|
|
|
|
Monday |
Tuesday |
Wednesday |
Thursday |
Friday |
Saturday |
Sunday |
For details of “DTA Controller”, refer to the product information in the Yamaha website.
16 En
USING THE SLEEP TIMER
When the specified time has elapsed, the system will turn off automatically.
Press repeatedly |
Press SNOOZE/SLEEP repeatedly to specify |
|
the time after which the system will turn off. |
||
|
||
|
You can specify 30, 60, 90 or 120 minutes. |
|
|
When you select a time, the sleep timer is turned on, and the |
|
|
sleep indicator ( ) is shown in the front panel display. |
|
|
If you press SNOOZE/SLEEP while the sleep timer is activated, |
|
|
the sleep timer setting will be canceled. |
ADJUSTING THE TONE (remote control only)
2
3
1 
1 During playback, press the LOW, MID, or
HIGH EQ button on the remote control.
Select the tone to be adjusted (LOW, MID, HIGH).
2 Press / to adjust the tone.
3 Press ENTER on the remote control to
complete the operation.
You can also press the EQ button that you pressed in Step 1 to complete the settings.
If you want to adjust another frequency band, return to step 1 and press the EQ button for the frequency band that you want to adjust.
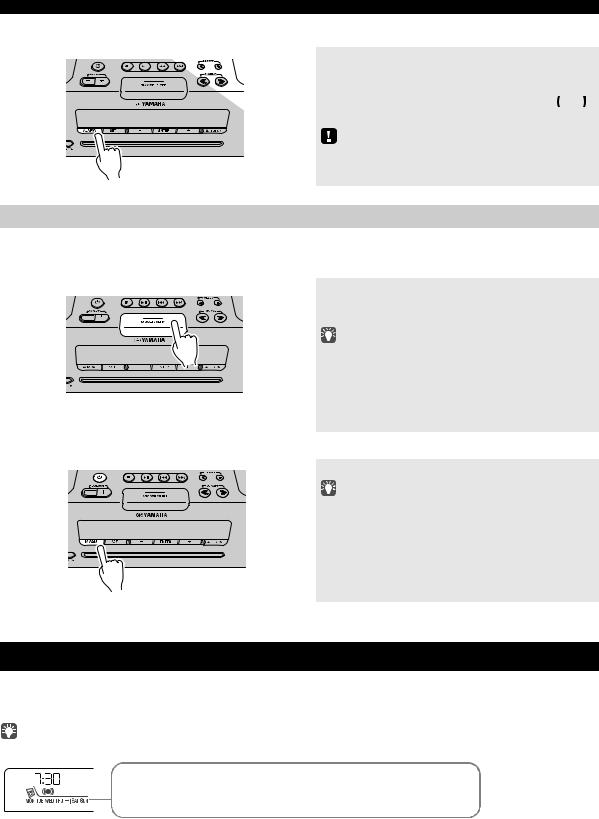
ADJUSTING THE BRIGHTNESS OF THE FRONT PANEL DISPLAY (remote control only)
Press repeatedly |
Press DIMMER repeatedly on the remote |
control. |
|
|
The brightness of the front panel display will change in |
|
the order shown below. |
|
AUTO 1 (bright) 2 (medium) 3 (dim) |
|
back to AUTO |
|
When AUTO is set, the brightness of the front panel display is |
|
adjusted automatically with the Illumination sensor ( P. 3). |
|
Ensure that the sensor is not covered. |
English
17 En

TROUBLESHOOTING
If there is a problem with the unit, check the following list first. If you cannot resolve the problem with the suggested solutions or if the problem is not listed below, turn off and unplug the system, and consult the nearest authorized Yamaha dealer or service center.
General
Problem |
Cause |
Solution |
|
|
|
|
|
The speakers make no sound. |
The volume might be set to the minimum level, |
Adjust the volume level. |
|
|
or muted. |
|
|
|
|
|
|
|
The source may be incorrect. |
Select the correct source. |
|
|
|
|
|
|
The headphones are connected. |
Remove the headphones. |
|
|
|
|
|
|
The volume of a connected external device is not |
Raise the volume of the external device. |
|
|
loud enough. |
|
|
Sound suddenly turns off. |
The sleep timer ( P. 17) may be set. |
Turn the system on and play the source again. |
|
|
|
|
|
Sound is cracked/distorted or |
Input source volume is excessive, or volume of |
Adjust volume with VOLUME, or adjust Bass with EQ |
|
there is abnormal noise. |
this unit is excessive (especially Bass). |
( P. 17). If an external device is playing back, lower the |
|
|
|
volume of the external device. |
|
The unit does not operate |
The unit may have received a strong electrical |
Turn the system off, and disconnect the power cable. Wait |
|
properly. |
shock such as lightning or excessive static |
about 30 seconds, reconnect the power cable, and turn on |
|
|
electricity, or power supply may have dropped. |
the system. |
|
The system turns on but |
|||
|
|
||
immediately shuts off. |
|
|
|
|
|
|
|
A digital or high-frequency |
The unit may be placed too close to the digital or |
Place the unit farther away from the equipment. |
|
equipment produces noises. |
high-frequency equipment. |
|
|
The clock setting has been |
The unit remained unpowered for more than one |
If the power supply is interrupted for about one week, the |
|
cleared. |
week. |
time setting may be reset. If this occurs, please reset the |
|
|
|
clock ( P. 5). |
|
|
|
|
|
The iPod does not play back at |
The iPod is not set in the iPod dock. |
Set the iPod in the iPod dock ( P. 2). |
|
the alarm time even if the alarm |
|
|
|
source is set to iPod. |
|
|
|
|
|
|
|
Clock flashes and the unit cannot |
The CLOCK switch is in the SET position, and |
Set the CLOCK switch to the ON or OFF position. |
|
be operated. |
the clock settings are in progress. |
|
|
|
|
|
|
Alarm does not sound. |
The CLOCK switch is in the OFF or SET |
Set the CLOCK switch to the ON position. |
|
|
position. |
|
|
The front panel display indicates |
|
||
|
|
||
“ALARM not work” and can’t |
|
|
|
set the alarm. |
|
|
|
|
|
|
|
The unit turns the system off |
The automatic system-off function may have |
This unit will turn the system off when 60 minutes have |
|
unexpectedly. |
operated. |
elapsed without any operation being performed after |
|
|
|
stopping playback of the USB device or the CD, or if the |
|
|
|
system has been on for 12 hours or more without any |
|
|
|
operation being performed. |
|
|
|
|
|
Front panel display becomes dim. |
The front panel display’s brightness setting is set |
Change the brightness setting to something other than |
|
|
to AUTO. |
AUTO ( P. 17). Alternatively, ensure that the |
|
|
|
illumination sensor ( P. 3) is not obscured. |
iPod
Problem |
Cause |
Solution |
|
|
|
No sound. |
The iPod is not set in the iPod dock firmly. |
Remove the iPod from the unit, and then set it in the iPod |
|
|
dock again ( P. 2). |
|
|
|
|
The headphones of the iPod are connected. |
Remove the headphones. |
|
|
|
|
The iPod software version has not been updated. |
Download the latest iTunes software to update the iPod |
|
|
software version to the latest. |
The iPod does not charge up. |
The iPod is not set in the iPod dock firmly. |
Remove the iPod from the unit, and then set it in the iPod |
|
|
dock again ( P. 2). |
|
USB is selected as the audio source. |
Select something other than USB as the audio source. |
|
|
|
The front panel display indicates |
The iPod being used is not supported by the unit. |
Use a supported iPod ( P. 22). |
“iPod Unknown” when you |
|
|
connect the iPod. |
|
|
18 En
|
|
TROUBLESHOOTING |
|
|
|
|
|
CD playback |
|
|
|
|
|
|
|
Problem |
Cause |
Solution |
|
|
|
|
|
CD cannot be inserted. |
Another disc is already inserted. |
Unload the disc with EJECT. |
|
|
|
|
|
|
You are attempting to insert a disc that cannot be |
Use a disc supported by the unit ( P. 21). |
|
|
used by this unit. |
|
|
|
|
|
|
Some button operations do not |
The disc loaded into the unit may not be |
Use a disc supported by the unit ( P. 21). |
|
work. |
compatible. |
|
|
|
|
|
|
Playback does not start |
The disc may be dirty. |
Wipe the disc clean. |
|
immediately after pressing |
|
|
|
The disc loaded into the unit may not be compatible. |
Use a disc supported by the unit ( P. 21). |
|
|
(playback stops immediately). |
|
||
|
|
|
|
If the unit was moved from a cold to warm place, |
Wait for an hour or two until the unit adjusts to the room |
|
|
|
|
||
|
condensation may have formed on the disc |
temperature, and try again. |
|
|
reading lens. |
|
|
|
|
|
|
When you insert a disc, the front |
The disc loaded into the unit may not be |
Use a disc supported by the unit ( P. 21). |
|
panel display indicates “No Disc” |
compatible. |
|
|
or “CD Unknown.” |
|
|
|
The disc may be dirty, or a foreign object may |
Wipe the disc clean. Alternatively, remove any foreign |
|
|
|
|
||
|
have adhered to it. |
object that has adhered to the disc. |
|
|
|
|
|
|
The disc does not contain playable files. |
Use a disc containing playable files ( P. 21). |
|
|
|
|
|
|
The disc was inserted upside down. |
Insert the disc with the label facing upward. |
|
|
|
|
|
The front panel display indicates |
The clock/alarm/tone settings are in progress. |
Complete the clock/alarm/tone settings. Alternatively, stop |
|
“no operation”, and a disc cannot |
Alternatively, the alarm is playing. |
the alarm. |
|
be inserted or unloaded. |
|
|
|
|
|
|
|
USB device playback |
|
|
|
|
|
|
|
Problem |
Cause |
Solution |
|
|
|
|
|
MP3/WMA file on the USB |
The USB device is not recognized. |
Turn the system off and disconnect the USB device. |
|
device does not play. |
|
Then turn the system on and reconnect the USB device to |
|
|
|
the unit. |
|
|
|
If the solutions above do not resolve the problem, the USB |
|
|
|
device is not playable on the unit ( P. 21). |
|
|
The USB device does not contain playable files. |
Use a USB device contains playable files ( P. 21). |
|
|
|
|
|
When you connect a USB device, |
An incompatible USB device is connected to the |
Turn the system off and disconnect the USB device. |
|
the front panel display indicates |
unit. Alternatively, the USB device is not connect |
Then turn the system on and reconnect the USB device to |
|
“USB OverCurrent,” and then |
firmly to the unit. |
the unit. |
|
the front panel display goes |
|
If the solutions above do not resolve the problem, the USB |
|
blank. |
|
device is not playable on the unit ( P. 21). |
|
|
|
|
|
English
19 En

TROUBLESHOOTING
Bluetooth
Problem |
Cause |
Solution |
|
|
|
|
|
Cannot make this unit paired |
The other component does not support A2DP. |
Perform pairing operations with a component which |
|
with the other component. |
|
supports A2DP. |
|
|
A Bluetooth adaptor, etc. that you want to pair |
Use a Bluetooth adaptor, etc. whose password is “0000”. |
|
|
with this unit has a password other than “0000”. |
|
|
|
This unit and the other component are too far |
Move the other component closer to this unit. |
|
|
apart. |
|
|
|
There is a device (microwave oven, wireless |
Move this unit away from the device that is emitting radio- |
|
|
LAN, etc.) outputs signals in the 2.4 GHz |
frequency signals. |
|
|
frequency band nearby. |
|
|
|
|
|
|
Can’t establish a Bluetooth |
This unit is not registered on the other |
Perform pairing operations again ( P. 9). |
|
connection. |
component’s Bluetooth connection list. |
|
|
|
|
|
|
No sound is produced or the |
The Bluetooth connection of this unit with the |
Perform Bluetooth connection operations again ( P. 10). |
|
sound is interrupted during |
other component is disconnected. |
|
|
playback. |
|
|
|
This unit and the other component are too far |
Move the other component closer to this unit. |
||
|
|||
|
apart. |
|
|
|
|
|
|
|
There is a device (microwave oven, wireless |
Move this unit away from the device that is emitting radio- |
|
|
LAN, etc.) outputs signals in the 2.4 GHz |
frequency signals. |
|
|
frequency band nearby. |
|
|
|
|
|
|
|
The other component’s Bluetooth function is off. |
Turn on the Bluetooth function of the other component. |
|
|
|
|
|
|
The other component is not set to send Bluetooth |
Check that the Bluetooth function of the other component |
|
|
audio signals to this unit. |
is set properly. |
|
|
|
|
|
|
The pairing setting of the other component is not |
Set the pairing setting of the other component to this unit. |
|
|
set to this unit. |
|
|
|
|
|
|
|
The other component’s volume is set to the |
Increase the volume level. |
|
|
minimum. |
|
|
|
|
|
FM reception
Problem |
Cause |
Solution |
|
|
|
Too much noise. |
The antenna may be connected improperly. |
Make sure the antenna is connected properly ( P. 3) or |
|
|
use a commercially available outdoor antenna. |
|
|
|
|
The antenna is too close to the unit or to an |
Position the antenna as far away as possible from the unit |
|
electronic device. |
or the electronic device. |
|
|
|
Too much noise during stereo |
The radio station you selected may be far from |
Try manual tuning to improve the signal quality ( P. 11) |
broadcast. |
your area, or the radio wave reception is weak in |
or use a commercially available outdoor antenna. |
|
your area. |
|
|
|
|
Even with an outdoor antenna, |
Multipath reflection or other radio interferences |
Change the height, direction, or placement of the antenna. |
radio wave reception is weak. |
may have occurred. |
|
(Sound is distorted.) |
|
|
Remote control
Problem |
Cause |
Solution |
|
|
|
The remote control does not work |
The remote control may be operated outside its |
For information on the remote control operation range, |
properly. |
operation range. |
refer to “How to use the remote control” (P. 1). |
|
The remote control signal receiver on the unit |
Change the lighting or orientation of the unit. |
|
( P. 3) may be exposed to direct sunlight or |
|
|
lighting (inverted fluorescent lamps). |
|
|
|
|
|
The battery may be worn out. |
Replace the battery with new one ( P. 1). |
|
|
|
|
There are obstacles between the remote control |
Remove the obstacles. |
|
signal receiver on the unit ( P. 3) and the |
|
|
remote control. |
|
|
|
|
20 En
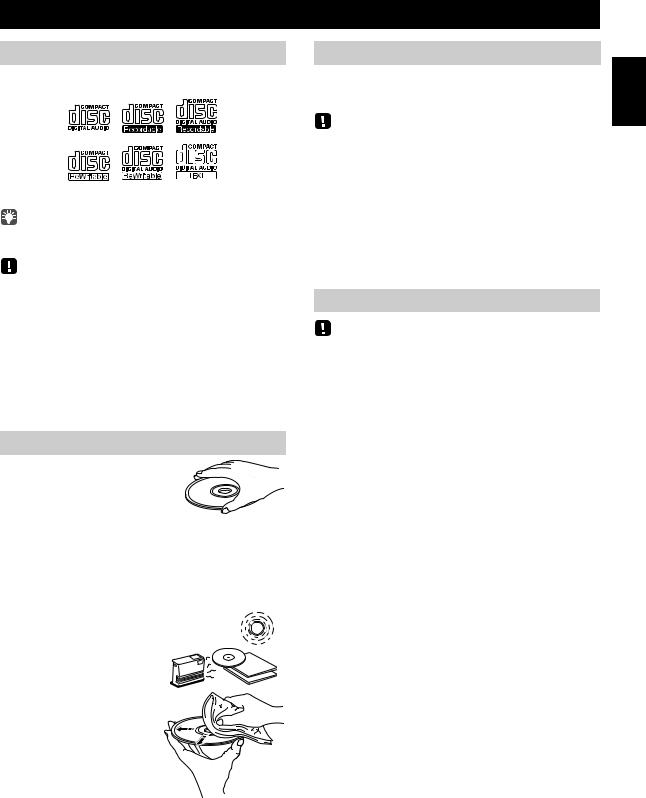
NOTES ON DISCS AND USB DEVICES
CD information
This unit is designed for use with audio CD, CD-R*, and CD-RW* with the logos followings.
* ISO 9660 format CD-R/RW
This unit can play back discs bearing any of the logo marks above. A disc logo mark is printed on the disc and the disc jacket.
•Do not load any other type of disc into this unit. Doing so may damage this unit.
•CD-R/RW cannot be played back unless finalized.
•Some discs cannot be played back depending on the disc characteristics or recording conditions.
•Do not use any non-standard shaped discs such as a heart-shaped disc.
•Do not use discs with many scratches on their surface.
•Do not load a cracked, warped, or glued disc.
•Do not use 8-cm discs.
Handling a disc
• Do not touch the surface of the disc. Hold a disc by its edge (and the center hole).
•Do not use a pencil or pointed marker to write on the disc.
•Do not put a tape, seal, glue, etc., on a disc.
•Do not use a protective cover to prevent scratches.
•Do not load more than one disc into this unit at one time. This can cause damage to both this unit and the discs.
•Do not insert any foreign objects into the disc slot.
• Do not expose a disc to direct sunlight, high temperature,
high humidity, or a lot of dust. Caution
• If a disc becomes dirty, wipe it with a clean, dry cloth from the center out to the edge. Do not use record cleaner or paint thinner.
•To avoid malfunction, do not use a commercially available lens cleaner.
USB device information
This unit supports USB mass storage class devices (e.g., flash memories or portable audio players) using FAT16 or FAT32 format.
•Some devices may not work properly even if they meet the requirements.
•Do not connect devices other than USB mass storage class devices (such as USB chargers or USB hubs), PCs, card readers, an external HDD, etc.
•Yamaha will not be held responsible for any damage to or data loss on the USB device occurring while the device is connected to this unit.
•Playability of and power supply to all kind of USB devices are not guaranteed.
•USB devices with encryption cannot be used.
About MP3 or WMA files
• The unit can play back:
File |
Bitrate (kbps) |
Sampling |
|
frequency (kHz) |
|||
|
|
||
|
|
|
|
MP3 |
8-320** |
16-48 |
|
|
|
|
|
WMA |
16-320** |
22.05-48 |
|
|
|
|
** Both constant and variable bitrates are supported.
• The maximum numbers of files/folders that can be played on the unit are as follows.
|
Data CD |
USB |
Maximum total number of file |
512 |
9999 |
|
|
|
Maximum folder number |
255 |
999 |
|
|
|
Maximum file number per folder |
511 |
255 |
|
|
|
• Copyright-protected files cannot be played back.
English
21 En
SPECIFICATIONS
PLAYER SECTION
iPod (Digital connection) [As of July, 2012]
• Compatible iPod models
..................................... iPod touch (1st, 2nd, 3rd and 4th generations) iPod nano (2nd, 3rd, 4th, 5th and 6th generations)
• Compatible iPhone models
......................... iPhone 4S, iPhone 4, iPhone 3GS, iPhone 3G, iPhone
• Compatible iPad models .............. iPad (3rd generation), iPad 2, iPad
An iPod may not be detected by the unit or some features may not be compatible, depending on the model or software version of the iPod.
Bluetooth SECTION
• Bluetooth version ........................................................... |
Ver. 2.1+EDR |
• Supported protocols...................................................... |
A2DP, AVRCP |
• Supported codecs................................................................ |
SBC, AAC |
• Wireless output......................................................... |
Bluetooth Class 2 |
• Maximum communication distance ......... |
10 m (without obstructions) |
AMPLIFIER SECTION
• Maximum output power .......... |
15 W + 15 W (6 Ω 1 kHz, 10 % THD) |
|
• Headphones ....... |
3.5 mm STEREO mini jack (Impedance 16 to 32 Ω) |
|
CD
• Media ........................................................................... |
CD, CD-R/RW |
• Audio format.................................................. |
Audio CD, MP3, WMA |
LASER
• Type............................................. |
Semiconductor laser GaAS/GaAlAs |
• Wave length............................................................................... |
790 nm |
• Output Power .............................................................................. |
7 mW |
USB
• Audio format.....................................................................MP3, WMA
AUX
• Input connector ........................... 3.5 mm (1/8 in) STEREO mini jack
TUNER SECTION
Tuning range
• FM ...................................................................... 87.50 to 108.00 MHz
GENERAL
• Power supply ............................................................. |
AC 230 V, 50 Hz |
• Power consumption ...................................................................... |
30 W |
• System off consumption |
3.5 W or less/0.5 W or less (Power saving) |
.......................................... |
• Dimensions (W × H × D)
................................ |
370 (14-5/8 in) × 110 (4-3/8 in) × 230 (9 in) mm |
• Weight ......................................................................... |
3.9 kg (8.6 lbs.) |
Specifications are subject to change without notice.
iPod, iPhone, iPad
“Made for iPod”, “Made for iPhone” and “Made for iPad” mean that an electronic accessory has been designed to connect specifically to iPod, iPhone or iPad, respectively, and has been certified by the developer to meet Apple performance standards.
Apple is not responsible for the operation of this device or its compliance with safety and regulatory standards. Please note that the use of this accessory with iPod, iPhone or iPad may affect wireless performance.
iPad, iPhone, iPod, iPod nano, iPod touch and iTunes are trademarks of Apple Inc., registered in the U.S. and other countries.
LASER SAFETY
This unit employs a laser. Due to possible eye injury, only a qualified service person should remove the cover or attempt to service this device.
DANGER
This unit emits visible laser radiation when open. Avoid direct eye exposure to beam. When this unit is plugged into the wall outlet, do not place your eyes close to the opening of the disc tray and other openings to look into inside.
Information for Users on Collection and Disposal of Old Equipment and Used Batteries
These symbols on the products, packaging, and/or accompanying documents mean that used electrical and electronic products and batteries should not be mixed with general household waste.
For proper treatment, recovery and recycling of old products and used batteries, please take them to applicable collection points, in accordance with your national legislation and the Directives 2002/96/EC and 2006/66/EC.
By disposing of these products and batteries correctly, you will help to save valuable resources and prevent any potential negative effects on human health and the environment which could otherwise arise from inappropriate waste handling.
For more information about collection and recycling of old products and batteries, please contact your local municipality, your waste disposal service or the point of sale where you purchased the items.
[Information on Disposal in other Countries outside the European Union]
These symbols are only valid in the European Union. If you wish to discard these items, please contact your local authorities or dealer and ask for the correct method of disposal.
Note for the battery symbol (bottom two symbol examples):
This symbol might be used in combination with a chemical symbol. In this case it complies with the requirement set by the Directive for the chemical involved.
22 En

Bluetooth
•Bluetooth is a technology for wireless communication between devices within an area of about 10 meters (33 ft) employing the 2.4 GHz frequency band, a band which can be used without a license.
•Bluetooth is a registered trademark of the Bluetooth SIG and is used by Yamaha in accordance with a license agreement.
Handling Bluetooth communications
•The 2.4 GHz band used by Bluetooth compatible devices is a radio band shared by many types of equipment. While Bluetooth
compatible devices use a technology minimizing the influence of other components using the same radio band, such influence may reduce the speed or distance of communications and in some cases interrupt communications.
•The speed of signal transfer and the distance at which communication is possible differs according to the distance between the communicating devices, the presence of obstacles, radio wave conditions and the type of equipment.
•Yamaha does not guarantee all wireless connections between this unit and devices compatible with Bluetooth function.
If there should be color blotching or noise when used near a TV, move this unit away from the TV when using it.
Do not use this unit within 22 cm (9 inches) of persons with a heart pacemaker implant or defibrillator implant.
Radio waves may affect electro-medical devices.
Do not use this unit near medical devices or inside medical facilities.
The user shall not reverse engineer, decompile, alter, translate or disassemble the software used in this unit, whether in part or in whole. For corporate users, employees of the corporation itself as well as its business partners shall observe the contractual bans stipulated within this clause. If the stipulations of this clause and this contract cannot be observed, the user shall immediately discontinue using the software.
We, Yamaha Music Europe GmbH hereby declare that this unit is in compliance with the essential requirements and other relevant provisions of Directive 1999/5/EC.
Yamaha Music Europe GmbH
Siemensstr. 22-34 25462 Rellingen, Germany
Tel: +49-4101-303-0
English
23 En

ATTENTION: VEUILLEZ LIRE CE QUI SUIT AVANT D’UTILISER L’APPAREIL.
1Pour utiliser l’appareil au mieux de ses possibilités, lisez attentivement ce mode d’emploi. Conservez-le soigneusement pour référence.
2Installez cet appareil dans un endroit frais, bien aéré, sec et propre - à l’abri de la lumière du soleil, des sources de chaleur, des vibrations, des poussières, de l’humidité et du froid. Pour une aération correcte, tenez compte des distances minimales suivantes.
Au-dessus: 15 cm
À l’arrière: 10 cm Sur les côtés: 10 cm
3Placez l’appareil loin des équipements, moteurs et transformateurs électriques, pour éviter les ronflements parasites.
4N’exposez pas l’appareil à des variations brutales de température, ne le placez pas dans un environnement très humide (par exemple dans une pièce contenant un humidificateur) car cela peut entraîner la condensation d’humidité à l’intérieur de l’appareil qui elle-même peut être responsable de décharge électrique, d’incendie, de dommage
àl’appareil ou de blessure corporelle.
5Evitez d’installer l’appareil dans un endroit où des objets peuvent tomber, ainsi que là où l’appareil pourrait être exposé
àdes éclaboussures ou des gouttes d’eau. Sur le dessus de l’appareil, ne placez pas:
–d’autres appareils qui peuvent endommager la surface de l’appareil ou provoquer sa décoloration.
–des objets se consumant (par exemple, une bougie) qui peuvent être responsables d’incendie, de dommage à l’appareil ou de blessure corporelle.
–des récipients contenant des liquides qui peuvent être à l’origine de décharge électrique ou de dommage à l’appareil.
6Ne couvrez pas l’appareil d’un journal, d’une nappe, d’un rideau, etc. car cela empêcherait l’évacuation de la chaleur. Toute augmentation de la température intérieure de l’appareil peut être responsable d’incendie, de dommage à l’appareil ou de blessure corporelle.
7Ne branchez pas la fiche du câble d’alimentation de l’appareil sur une prise secteur aussi longtemps que tous les raccordements n’ont pas été effectués.
8Ne pas faire fonctionner l’appareil à l’envers. Il risquerait de chauffer et d’être endommagé.
9N’exercez aucune force excessive sur les commutateurs, les boutons et les cordons.
10Pour débrancher la fiche du câble d’alimentation au niveau de la prise secteur, saisissez la fiche et ne tirez pas sur le cordon.
11Ne nettoyez pas l’appareil au moyen d’un solvant chimique, ce qui pourrait endommager la finition. Utilisez un chiffon sec et propre.
12N’alimentez l’appareil qu’à partir de la tension prescrite. Alimenter l’appareil sous une tension plus élevée est dangereux et peut être responsable d’incendie, de dommage à l’appareil ou de blessure corporelle. Yamaha ne saurait être tenue responsable des dommages résultant de l’alimentation de l’appareil sous une tension autre que celle prescrite.
13Pour empêcher tout dommage causé par les éclairs, déconnectez la câble d’alimentation et toute antenne extérieure de la prise murale pendant un orage.
14Ne tentez pas de modifier ni de réparer l’appareil. Consultez le service Yamaha compétent pour toute réparation qui serait requise. Le coffret de l’appareil ne doit jamais être ouvert, quelle que soit la raison.
15Si vous envisagez de ne pas vous servir de l’appareil pendant une longue période (par exemple, pendant les vacances), débranchez la fiche du câble d’alimentation au niveau de la prise secteur.
16Lisez la section intitulée “GUIDE DE DÉPANNAGE” où figurent une liste d’erreurs de manipulation communes avant de conclure que l’appareil présente une anomalie de fonctionnement.
17Avant de déplacer l’appareil, appuyez sur  pour éteindre le système puis débranchez la fiche du câble d’alimentation au niveau de la prise secteur.
18La condensation se forme lorsque la température ambiante change brusquement. En ce cas, débranchez la fiche du câble d’alimentation et laissez l’appareil reposer.
19La température de l’appareil peut augmenter en raison d’une utilisation prolongée. En ce cas, coupez l’alimentation de l’appareil et laissez-le au repos pour qu’il refroidisse.
20Installez cet appareil à proximité de la prise secteur et à un emplacement où la fiche du câble d’alimentation est facilement accessible.
21Les piles ne doivent pas être exposées à une chaleur extrême, par exemple au soleil, à une flamme, etc. Lors de la mise au rebut des piles, suivez vos réglementations locales.
–Conservez les piles hors de portée des enfants. Les piles constituent un danger potentiel si les enfants les mettent en bouche.
–Si les piles sont vieilles, la portée de la télécommande risque de diminuer considérablement. Le cas échéant, remplacez les piles le plus rapidement possible par deux piles neuves.
–N’utilisez pas à la fois des piles neuves et des piles usagées.
–N’utilisez pas non plus des piles de deux types différents (par exemple, des piles alcalines et des piles au manganèse). Lisez les instructions de l’emballage, car ces types de piles peuvent être de forme et de couleur différentes.
–Des piles épuisées risquent de fuir. En cas de fuite, jetez les piles immédiatement. Évitez de toucher le liquide qui a fui et veillez à ce qu’il n’entre pas en contact avec vos vêtements, etc. Nettoyez soigneusement le logement d’insertion des piles avant d’insérer de nouvelles piles.
–Retirez les piles de l’appareil si vous n’avez pas l’intention d’utiliser ce dernier pendant une période prolongée. Sans cela, les piles s’usent et risquent de fuir, ce qui pourrait endommager l’appareil.
–Ne jetez pas les piles avec les ordures ménagères. Mettez-les au rebut conformément aux réglementations locales en vigueur.
22Une pression excessive du son par les écouteurs et le casque d’écoute peut entraîner la perte de l’ouïe.
Cet appareil n’est pas déconnecté du secteur tant qu’il reste branché à la prise de courant, même si l’appareil en soi est éteint par la touche  . Dans cet état, l’appareil consomme une très faible quantité de courant.
AVERTISSEMENT
POUR RÉDUIRE LES RISQUES D’INCENDIE OU DE DÉCHARGE ÉLECTRIQUE, N’EXPOSEZ PAS CET APPAREIL À LA PLUIE OU À L’HUMIDITÉ.
ATTENTION
Danger d’explosion si la pile n’est pas remplacée correctement. La remplacer par une pile de type identique ou équivalent.
Il y a un risque possible de création d’interférences, visibles sur les images en couleurs si cet appareil est placé à côté d’un téléviseur à tube cathodique (tube de Braun). Dans ce cas, éloigner l’unité du téléviseur.
i Fr
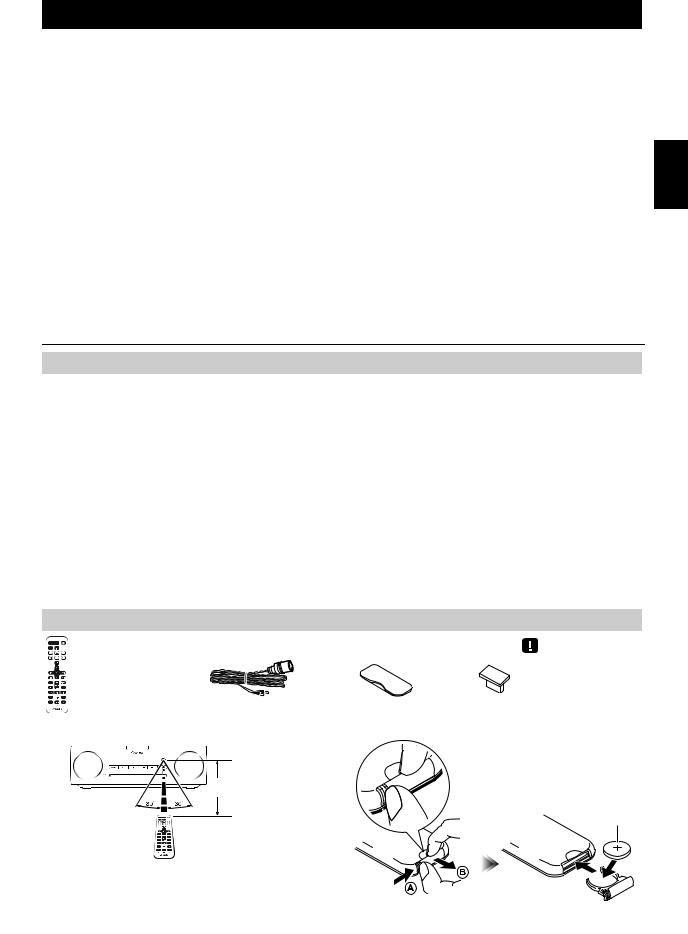
TABLE DES MATIÈRES
NOM ET FONCTIONS DES ÉLÉMENTS.................. |
2 |
Panneau supérieur / panneau avant.............................. |
2 |
Afficheur......................................................................... |
3 |
Panneau arrière ............................................................. |
3 |
Télécommande .............................................................. |
4 |
MISE SOUS TENSION DU SYSTÈME...................... |
5 |
RÉGLAGE DE L’HORLOGE..................................... |
5 |
ÉCOUTER UN iPod .................................................. |
6 |
Écouter la musique d’un iPod ........................................ |
6 |
Utilisation des modes de lecture répétée/aléatoire |
|
(télécommande uniquement) ......................................... |
6 |
ÉCOUTE D’UN CD ET D’APPAREILS USB............. |
7 |
Écoute d’un CD.............................................................. |
7 |
Écoute d’un appareil USB.............................................. |
8 |
Utilisation des modes de lecture répétée/aléatoire |
|
(télécommande uniquement) ......................................... |
8 |
ÉCOUTE DE MUSIQUE D’UN DISPOSITIF |
|
Bluetooth .................................................................. |
9 |
Couplage de cet appareil avec un dispositif Bluetooth ... |
9 |
Écoute d’un dispositif Bluetooth................................... |
10 |
Connexion d’un dispositif déjà couplé via Bluetooth.... |
10 |
Rompre une connexion Bluetooth................................ |
11 |
ÉCOUTE DE STATIONS FM .................................. |
11 |
Sélection d’une station FM........................................... |
11 |
Présélection de stations FM |
|
(télécommande uniquement) ....................................... |
12 |
Sélection de stations FM mémorisées ......................... |
13 |
ÉCOUTE DE SOURCES EXTERNES..................... |
13 |
UTILISATION DE LA FONCTION D’ALARME....... |
14 |
Réglage de l’alarme ..................................................... |
15 |
Opérations disponibles quand l’alarme retentit ............ |
16 |
UTILISATION DE L’APPLICATION “DTA Controller” |
|
POUR iPod touch/iPhone/iPad ............................. |
17 |
UTILISATION DE LA MINUTERIE.......................... |
17 |
RÉGLAGE DE TIMBRE |
|
(télécommande uniquement)................................ |
17 |
RÉGLAGE DE LUMINOSITÉ DE L’AFFICHEUR |
|
(télécommande uniquement)................................ |
17 |
GUIDE DE DÉPANNAGE ....................................... |
18 |
REMARQUES SUR LES DISQUES |
|
ET APPAREILS USB .............................................. |
21 |
CARACTÉRISTIQUES TECHNIQUES ................... |
22 |
Caractéristiques
•Lecture de plages de dispositifs externes tels que iPod/iPhone/iPad, de CD de musique/données, de plages de dispositifs USB ou d’appareils externes raccordés à la prise AUX, et écoute de la radio FM.
•La technologie Bluetooth vous permet de bénéficier d’un son de qualité sans le moindre fil.
•Réveillez-vous avec votre musique préférée ou une sonnerie - ou les deux. À l’heure programmée,la plage choisie est lue au volume prédéfini, pour le meilleur des réveils (fonction IntelliAlarm) ( P. 14).
•Vous pouvez en outre contrôler cet appareil et exploiter d’autres réglages d’alarme plus sophistiqués par le biais de l’application gratuite “DTA Controller” pour iPod touch/iPhone/iPad ( P. 17).
•Mémorisez et rappelez vos 30 stations FM préférées en toute facilité.
•Réglez le grave, le médium et l’aigu comme bon vous semble.
Quelques mots sur ce mode d’emploi
•Les passages de ce manuel faisant référence à l’iPod désignent aussi l’iPhone.
•Pour les fonctions pilotables via les boutons de l’appareil ou les touches de sa télécommande, ce manuel décrit l’utilisation de l’appareil même.
• signale les précautions à prendre concernant l’utilisation de l’unité et les limites de ses fonctions.
• signale des explications supplémentaires permettant une meilleure utilisation.
Accessoires fournis
Télécommande |
Antenne FM |
Couvercle de la |
Capuchon |
|
(requiert une pile de |
|
station d’accueil |
USB |
Tenir le capuchon USB hors |
|
|
|
||
type CR2032) |
|
|
|
de portée des enfants afin |
|
|
|
|
d’éviter qu’il ne soit |
|
|
|
|
malencontreusement avalé. |
Utilisation de la télécommande
 Dans un rayon de 6 m
 Feuille isolante de la pile:
  retirer avant usage.
Remplacement de la pile de télécommande
Tout en poussant la languette de dégagement dans la direction  , faites glisser vers l’extérieur le support de la pile dans la direction
  .
.
Pile de type
CR2032
Français
1 Fr
NOM ET FONCTIONS DES ÉLÉMENTS
Panneau supérieur / panneau avant
12 |
3 |
4 |
5 6 7 |
8 9 |
q p o
aVOLUME –/+
Règle le volume.
b  (Alimentation)
Appuyez sur cette touche pour mettre le système sous tension/hors tension ( P. 5).
cTouches de sélection de source
Changent de source audio de lecture.
Si vous appuyez sur une de ces touches quand le système est hors tension, il se met sous tension et sélectionne la source audio en question.
dStation d’accueil pour iPod
Branchez-y votre iPod (reportez-vous à “Mise en place de votre iPod sur la station d’accueil” ci-dessous).
eTouches de réglage audio
Commandent l’iPod/le CD/le dispositif USB.
: |
Arrêt |
: |
Lecture/pause |
/ |
: Saut, recherche arrière/avant (maintenir enfoncé) |
fSNOOZE/SLEEP
Règle la minuterie ou bascule l’alarme en mode snooze ( P. 16, 17).
gPort USB
Branchez-y votre dispositif USB/iPod/iPhone/iPad ( P. 8).
Lorsque l’appareil USB n’est pas utilisé, mettez le capuchon USB pour protéger le connecteur.
n mlkj |
hPRESET / |
Ces touches permettent de choisir une station FM (présélection) que vous avez mémorisée ( P. 13).
iTUNING  /
/ 
Recherche les stations FM ( P. 11).
jAfficheur
Affiche l’horloge et d’autres informations ( P. 3).
kENTER
Confirme l’option ou la valeur choisie.
lFente pour disque
Insérez-y un CD ( P. 7).
mEJECT
Permet d’éjecter le CD.
n–/+
Permettent de régler les paramètres/valeurs de l’horloge et de l’alarme.
oSET
Permet de régler l’alarme ( P. 15).
pALARM
Permet d’activer/de désactiver l’alarme ( P. 16).
q(Prise casque)
Branchez-y votre casque.
Mise en place de votre iPod sur la station d’accueil
Adaptateur  de station d’accueil
Votre iPod se recharge quand il est branché à sa station d’accueil. Toutefois, si vous avez sélectionné USB comme source, l’iPod ne se rechargera pas.
•Assurez-vous d’utiliser un adaptateur de station d’accueil compatible avec votre iPod. Si vous n’utilisez pas l’adaptateur ou s’il n’est pas compatible, la connexion peut être instable ou insuffisante, ce qui peut endommager le connecteur. Pour en savoir plus sur l’adaptateur de station d’accueil, surfez sur le site web officiel de Apple.
•Si un iPod dans sa housse de protection est connecté en forçant, le connecteur peut être endommagé. Retirez la housse de protection avant la connexion.
•Lorsque l’iPod n’est pas utilisé, mettez le couvercle de la station d’accueil pour iPod en place pour protéger le connecteur.
2 Fr
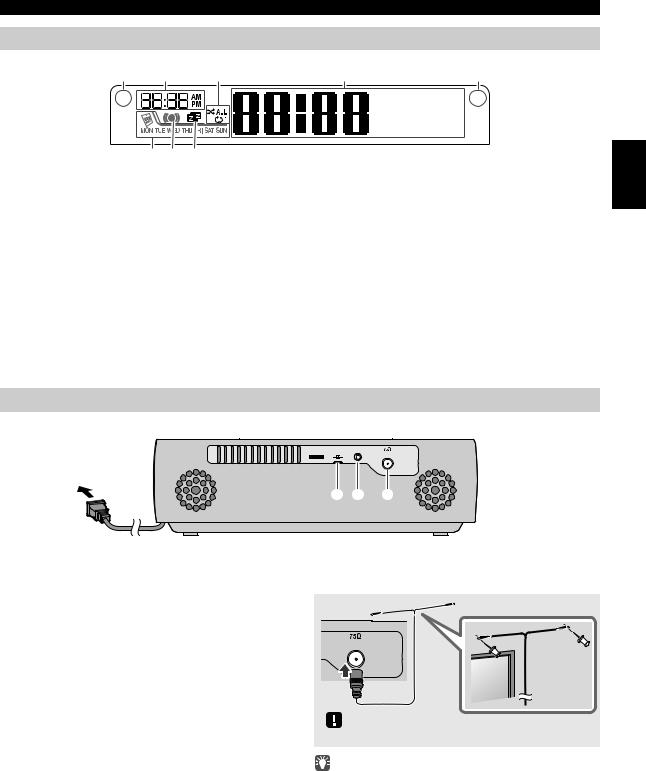
NOM ET FONCTIONS DES ÉLÉMENTS
Afficheur
1 |
2 |
3 |
4 |
5 |
|
|
|
|
~ ~ ~ ~ ~ ~ |
|
|
|
|
~ ~ ~ ~ ~ ~ |
8 7 6
aDétecteur de clarté
Détecte la lumière ambiante. Ne pas couvrir ce capteur.
bHeure du réveil
Affiche l’heure du réveil programmée.
cIndicateur de lecture répétée/aléatoire
Affiche le mode de lecture ( P. 6, 8).
dAffichage multifonction
Affiche diverses informations telles que l’heure, des informations sur la plage en cours de lecture et la fréquence de la station FM.
eCapteur de télécommande
Veillez à ce que ce capteur soit toujours dégagé ( P. 1).
fIndicateur de minuterie
S’allume si la minuterie est activée ( P. 17).
gIndicateur d’alarme
S’allume si l’alarme est activée ( P. 16).
hIndicateur d’alarme hebdomadaire
Affiche les réglages d’alarme effectués avec l’application gratuite “DTA Controller” pour iPod touch/iPhone/iPad ( P. 17).
Français
Panneau arrière
CLOCK |
AUX |
ON |
FM ANT |
SET


 OFF
OFF
1 2 3
aSélecteur CLOCK
Permet de régler l’horloge et de choisir si l’horloge est affichée ou non quand le système est mis hors tension ( P. 5).
SET: Permet de régler l’horloge.
ON: L’horloge est affichée et la fonction d’alarme est disponible même quand le système est hors tension.
OFF: L’horloge n’est pas affichée et la fonction d’alarme n’est pas disponible quand le système est hors tension.
bAUX
Utilisez un câble avec fiches minijack de 3,5 mm disponible dans le commerce pour brancher le dispositif externe à cette prise ( P. 13).
cPrise pour antenne FM
Branchez-y une antenne FM.
FM ANT
Veillez à déployer correctement l’antenne.
•Si la réception laisse à désirer, changez la hauteur ou l’orientation de l’antenne, ou déplacez l’appareil pour essayer d’améliorer la réception.
•Si, au lieu de l’antenne fournie, vous utilisez une antenne extérieure disponible dans le commerce, la réception pourrait s’avérer meilleure.
3 Fr
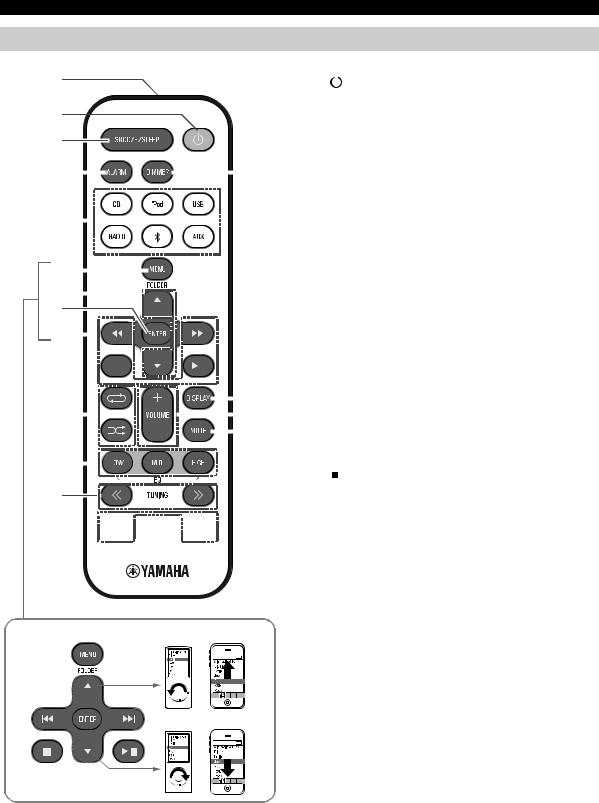
NOM ET FONCTIONS DES ÉLÉMENTS
Télécommande
1
2
3
aÉmetteur de télécommande
b  (Alimentation)
Appuyez sur cette touche pour mettre le système sous tension/hors tension ( P. 5).
cSNOOZE/SLEEP
Règle la minuterie ou bascule l’alarme en mode snooze ( P. 16, 17).
4 |
|
|
|
|
|
|
|
|
|
|
|
|
|
|
|
|
|
|
|
|
|
|
|
r |
dALARM |
|
|
|
|
|
|
|
|
|
|
|
|
|
|
|
|
|
|
|
|
|
|
|
|
|
|||
|
|
|
|
|
|
|
|
|
|
|
|
|
|
|
|
|
|
|
|
|
|
|
|
|
Permet d’activer/de désactiver l’alarme ( P. 16). |
|
5 |
|
|
|
|
|
|
|
|
|
|
|
|
|
|
|
|
|
|
|
|
|
|
|
|
eTouches de sélection de source |
|
|
|
|
|
|
|
|
|
|
|
|
|
|
|
|
|
|
|
|
|
|
|
|
|
|||
|
|
|
|
|
|
|
|
|
|
|
|
|
|
|
|
|
|
|
|
|
|
|
|
|||
|
|
|
|
|
|
|
|
|
|
|
|
|
|
|
|
|
|
|
|
|
|
|
|
Changent de source audio de lecture. |
||
|
|
|
|
|
|
|
|
|
|
|
|
|
|
|
|
|
|
|
|
|
|
|
|
|||
|
|
|
|
|
|
|
|
|
|
|
|
|
|
|
|
|
|
|
|
|
|
|
|
|
Si vous appuyez sur une de ces touches quand le |
|
|
|
|
|
|
|
|
|
|
|
|
|
|
|
|
|
|
|
|
|
|
|
|
|
|
||
|
|
|
|
|
|
|
|
|
|
|
|
|
|
|
|
|
|
|
|
|
|
|
|
|
||
|
|
|
|
|
|
|
|
|
|
|
|
|
|
|
|
|
|
|
|
|
|
|
|
|
système est hors tension, il se met sous tension et |
|
6 |
|
|
|
|
|
|
|
|
|
|
|
|
|
|
|
|
|
|
|
|
|
|
|
|
sélectionne la source audio en question. |
|
|
|
|
|
|
|
|
|
|
|
|
|
|
|
|
|
|
|
|
|
|
|
|
|
|||
7 |
|
|
|
|
|
|
|
|
|
|
|
|
|
|
|
|
|
|
|
|
|
|
|
|
fMENU |
|
|
|
|
|
|
|
|
|
|
|
|
|
|
|
|
|
|
|
|
|
|
|
|
|
Change d’option de menu iPod / retourne au menu |
||
8 |
|
|
|
|
|
|
|
|
|
|
|
|
|
|
|
|
|
|
|
|
|
|
|
|||
|
|
|
|
|
|
|
|
|
|
|
|
|
|
|
|
|
|
|
|
|
|
|
précédent ( P. 6). |
|||
9 |
|
|
|
|
|
|
|
|
|
|
|
|
|
|
|
|
|
|
|
|
|
|
|
|
gFOLDER / |
|
|
|
|
|
|
|
|
|
|
|
|
|
|
|
|
|
|
|
|
|
|
|
|
|
|
Changent de dossier lors de la lecture de musique sur |
|
|
|
|
|
|
|
|
|
|
|
|
|
|
|
|
|
|
|
|
|
|
|
|
|
|
CD de données ou dispositifs USB ( P. 7, 8). |
|
|
|
|
|
|
|
|
|
|
|
|
|
|
|
|
|
|
|
|
|
|
|
|
|
|
||
|
|
|
|
|
|
|
|
|
|
|
|
|
|
|
|
|
|
|
|
|
|
|
|
|
Permettent de sélectionner les options ou de modifier les |
|
|
|
|
|
|
|
|
|
|
|
|
|
|
|
|
|
|
|
|
|
|
|
|
|
q |
valeurs numériques ( P. 6, 17). |
|
|
|
|
|
|
|
|
|
|
|
|
|
|
|
|
|
|
|
|
|
|
|
|
|
hENTER |
|
|
j |
|
|
|
|
|
|
|
|
|
|
|
|
|
|
|
|
|
|
|
|
|
|
|
p |
|
|
|
|
|
|
|
|
|
|
|
|
|
|
|
|
|
Confirme l’option ou la valeur choisie. |
|||||||||||
|
|
|
|
|
|
|
|
|
|
|
|
|
|
|
|
|
|
|
|
|
|
|
|
o |
||
|
|
|
|
|
|
|
|
|
|
|
|
|
|
|
|
|
|
|
|
|
|
|
|
iTouches de réglage audio |
||
|
|
|
|
|
|
|
|
|
|
|
|
|
|
|
|
|
|
|
|
|
|
|
|
|
||
k |
|
|
|
|
|
|
|
|
|
|
|
|
|
|
|
|
|
|
|
|
|
|
|
|
Commandent l’iPod/le CD/le dispositif USB. |
|
|
|
|
|
|
|
|
|
|
|
|
|
|
|
|
|
|
|
|
|
|
|
|
|
|
: |
Arrêt |
l
m


 n
n


Touches de réglage de l’iPod

 : Lecture/pause
 /
/ : Saut, recherche arrière/avant (maintenir enfoncé)
j (répétition)/
 (lecture aléatoire)
Lecture de musique sur iPod, CD ou dispositif USB en mode répété/aléatoire ( P. 6, 8).
kEQ: LOW/MID/HIGH
Règlent le grave, le médium et l’aigu ( P. 17).
lTUNING  /
/ 
Recherche les stations FM ( P. 11).
mPRESET  /
/ 
Sélectionnent une station FM (présélection) que vous avez mémorisée ( P. 13).
nMEMORY
Mémorise une station FM ( P. 12).
oMUTE
Active ou désactive la fonction de coupure du son.
pVOLUME +/–
Règle le volume.
qDISPLAY
Change les informations sur l’afficheur ( P. 6, 7, 8, 11).
rDIMMER
Règle la luminosité de l’afficheur ( P. 17).
4 Fr
 Loading...