


Fiber Converters
yQuick Installation Guide (1)
Fiber Converters /11.15.2012
1. Before You Start
Package Contents
yFiber converter
yMulti-Language Quick Installation Guide
yPower adapter
Minimum Requirements
yTFC-1600 chassis (optional) or sturdy, level surface that can support the weight of the Fiber Converter
y10/100 Mbps Ethernet switch
yFiber cables compatible with the fiber converter's connector and media specifications
yCat. 5, Cat. 5e, or Cat. 6 RJ-45 Ethernet cable
Optional Equipment
yStandard 19” rack
yTFC-1600 chassis (optional)
1
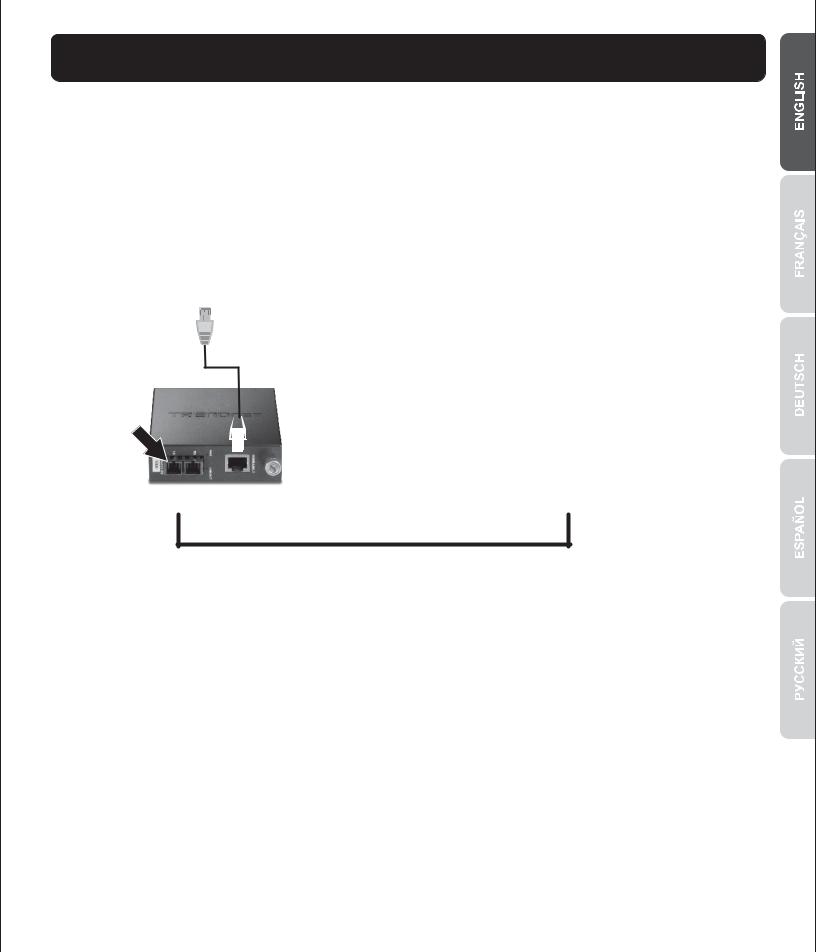
2. Hardware Installation
Installing Two Stand Alone Fiber Converters Together
1.Connect an RJ-45 Ethernet cable from the Ethernet port on the fiber converters to an Ethernet port on your switch (e.g TE100-S24g).
2.Connect the fiber cable to the fiber converters.
3.Connect the power adapter to the fiber converter.
Note:
yFor the TFC-110MM/MST/MSC/110S15/S15i/S30/S30i/S60/S60i/S100, the TX and RX cables must be reversed on the opposite fiber connection
yTFC-15MS100 converts Multi-Mode to Single-Mode fiber, it can be connected to a switch with Multi-Mode SC-type fiber connection (e.g TEG-424WS with fiber modules) to extend the distance up to 15km with Single-Mode fiber.
yCabling
•Multi-Mode Fiber Optic Cable: TFC-110MSC, TFC-110MST, TFC-110MM
•Single-Mode Fiber Optic Cable: TFC-110S15, TFC-110S30, TFC-110S60, TFC-110S100, TFC-110S15i, TFC-110S30i, TFC-110S60i
•Single Strand Fiber Optic Cable: TFC-110S20D3i, TFC-110S20D5i, TFC-110S40D3, TFC-110S40D5, TFC-110S40D3i, TFC-110S40D5i
2

Installing Fiber Converter in a Chassis
1.Unscrew the bay cover from the desired bay on the chassis.
2.Unfasten the thumbscrew and remove the fiber converter from the metal casing.
3. Slide the fiber converter into an available slot and fasten the thumbscrew.
3
 Loading...