


Trendnet TV-NVR2432D4, TV-NVR2432, TV-NVR2208, TV-NVR2216, TV-NVR2208D2 Quick Installation Guide
...
Quick Installation Guide |
TV-NVR2208/TV-NVR2216/TV-NVR2432(V1) |
Table of Content
1English
1.Before you start
2.Installation
3.App

1. Before You Start
Package Contents
ŸNVR (No HDD installed)
ŸCD-ROM (Utility & User's Guide)
ŸPower Adapter or Power Cord (depending on your model)
ŸNetwork cable (1.8 m / 6 ft.)
ŸHDMI cable (1.8 m / 6 ft.)
ŸOptical Mouse
ŸRemote Control
ŸSATA data cable / power cable
ŸQuick Installation Guide
ŸRack mount hardware
Minimum System Requirements
ŸMonitor/TV with VGA or HDMI connection
ŸHard drive
1

2. Installation
Note: Before you install the NVR please ensure that all cameras are configured and available on the network.
2.1 Hard Drive Installation
Note:
ŸStatic Electricity can damage the NVR. Before handling the unit, discharge any static electricity, or use an anti-static wrist strap.
ŸThe NVR supports SATA I and II drives.
1.Remove the retaining screws from the top panel of the NVR.
2. Slide the cover off the unit by pulling the top cover towards the rear panel.
2
3.Attach the SATA data and power cables to the hard disc drive, then connect the SATA cable and the molex connect or the control board.
4.Mount the hard drives to the drive bays of the NVR using the mounting screws, screwing from the underside of the NVR into the hard drive case.
5. Slide the top cover back on the NVR, and reinstall the screws holding the panel in place.
3
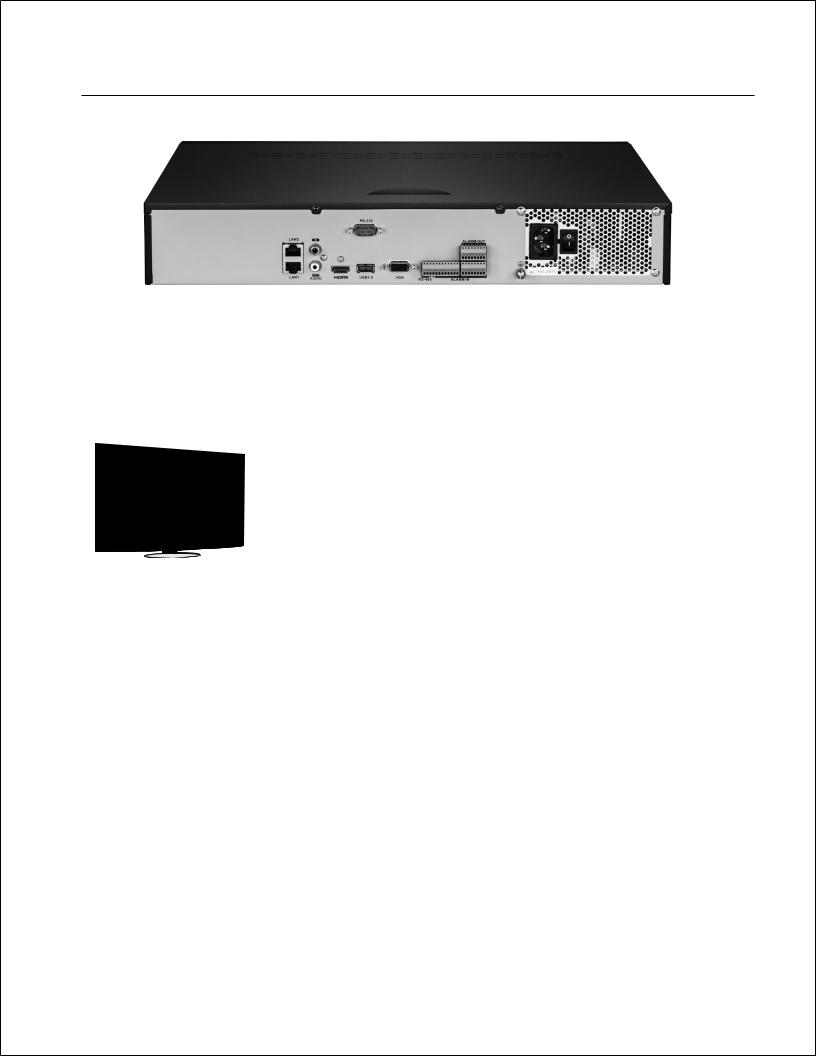
2.2Wiring
1.Connect an HDMI cable or a VGA cable (not included) from your display to the NVR's HDMI or VGA port on the rear panel.
Grounding point
Display |
or |
VGA cable |
Display |
|
|
not included |
|
(Not included)
HDMI |
VGA IN |
|
(Not included)
2.Connect the included mouse to the front or rear USB port on the NVR. For ease of configuration you can also connect a USB keyboard (not included) to the NVR.
4
 Loading...