


CMT-SD3
Table of contents
 Loading...
Compact
Component
System
Operating Instructions
3-864-770-14(1)
f
CMT-SD1
CMT-SD3
©1998 by Sony Corporation

WARNING
To prevent fire or shock hazard, do not
expose the unit to rain or moisture.
To avoid electrical shock, do not open the cabinet.
Refer servicing to qualified personnel only.
Do not install the appliance in a confined space,
such as a bookcase or built-in cabinet.
This appliance is classified
as a CLASS 1 LASER
product. The CLASS 1
LASER PRODUCT
MARKING is located on
the bottom exterior.
IMPORTANT: Never connect two mains
leads into a single mains plug.
– For MDS-SD1 and TC-SD1 –
The mains lead plugs of MDS-SD1 and TC-SD1 are
2-pin type designed to be connected only to
CMT-SD1 or MDS-SD1.
Do not connect this plug to any other system or
mains supply.
2

Table of Contents
Getting Started
Step 1: Hooking up the system............ 4
Step 2: Setting the time ......................... 6
Step 3: Presetting radio stations .......... 7
Saving the power in standby mode ..... 8
Basic Operations
Playing a CD ........................................... 9
Listening to the radio........................... 10
The CD player
Playing the CD tracks in random
order ................................................ 11
Programming the CD tracks ............... 11
Playing the CD tracks repeatedly ...... 12
Using the CD display........................... 13
Labelling a CD ...................................... 14
The Radio
Labelling the preset station................. 16
Using the Radio Data System
(RDS)* .............................................. 17
Timer
Falling asleep to music ........................ 19
Waking up to music ............................. 20
Optional A/V components
Connecting audio components .......... 21
Listening to the sound of connected
components .................................... 23
Recording a CD on an MD/tape........ 23
Connecting outdoor aerials................. 24
Additional Information
Precautions ............................................ 25
Troubleshooting ................................... 26
Messages ................................................ 27
Specifications ........................................ 28
Index........................................ Back cover
* European model only.
Sound Adjustment
Adjusting the sound ............................ 18
Reinforcing the bass sound ................. 18
Selecting the surround effect .............. 19
3
Getting Started
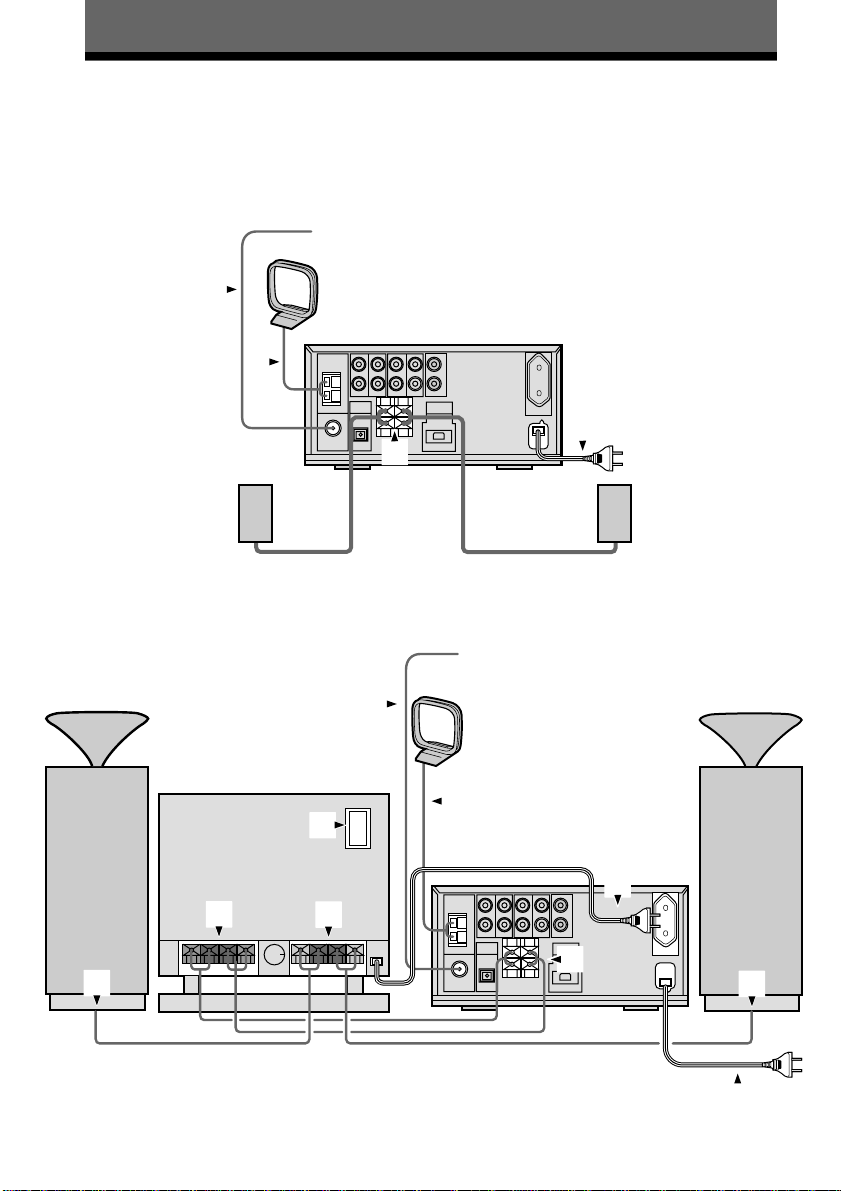
Step 1: Hooking up the system
Perform the following procedures 1 to 5 (2, 4 for CMT-SD3 only) to hook up your system
using the supplied cords and accessories.
The front panel is made of tempered glass. Please remember to handle this unit carefully.
CMT-SD1
3
FM aerial
AM loop aerial
3
5
1
Right speaker
CMT-SD3
FM aerial
Satellite Speaker (Right) Satellite Speaker (Left)
3
AM loop aerial
Left speaker
Sub woofer
3
4
2
1
*
1
* Do not connect the main unit HCD-SD3 to these terminals. This may cause a
malfunction.
4
4
2
1
5

1 Connect the speakers.
+
+
L
R
–
–
Connect the speaker cords to the
SPEAKER terminals as below.
CMT-SD1
Back of the main unit
red lined
clear
Back of the speakers
R
+
–
L
+
–
Insert this
portion
2 (CMT-SD3 only)
Connect the sub woofer using the
speaker cords as below.
Back of the main unit
red
black
Back of the sub woofer
red
+
–
Getting Started
–
+
Insert
the
cord
here
clear
_
+
red lined
CMT-SD3
Back of the sub woofer
+
–
–
+
gray
gray
black
Back of the satellite speaker
gray
Notes
• Keep the speaker cords away from the aerials to
prevent noise.
• Be sure to connect both left and right speakers.
Otherwise, the sound will not be heard.
black
red
black
3 Connect the FM and AM aerials.
Set up the AM loop aerial, then connect it.
AM
AM loop
aerial
C
O
AXIAL
FM
75
Extend the FM aerial
Note
Keep the aerials away from the speaker cords to
prevent noise.
horizontally
4 (CMT-SD3 only)
Connect the mains lead of the sub
woofer to the main unit, then turn
the power switch on the back of the
sub woofer to ON.
When the power switch is in the ON position,
the power of the sub woofer turns on/off
when the power of the main unit turns on/off.
continued
5
Step 1: Hooking up the system
(continued)
Step 2: Setting the
5 Connect the mains lead of the
CMT-SD1/SD3 to a wall outlet after
you complete all the connections.
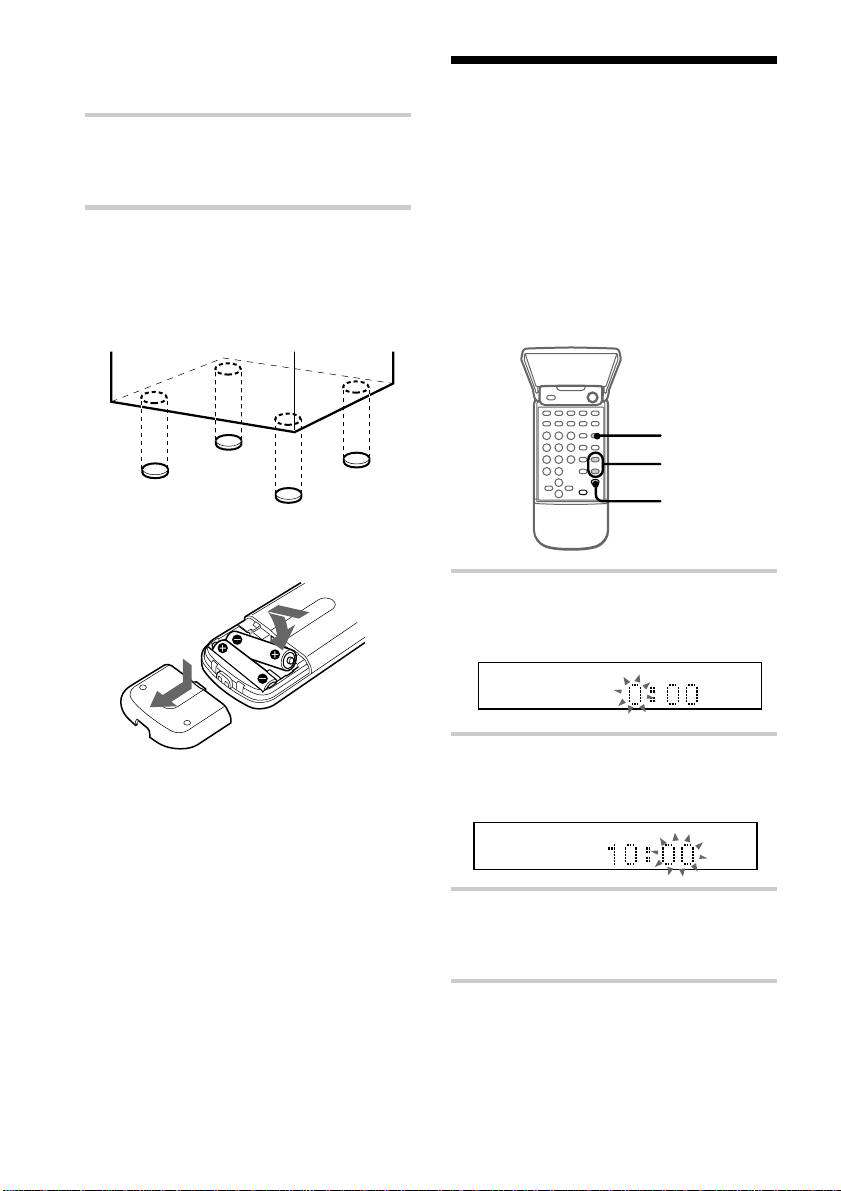
To attach the front speaker pads
(CMT-SD1 only)
Attach the supplied front speaker pads to the
bottom of the speakers to stabilize the
speakers and prevent them from slipping.
Inserting two R6 (size AA)
batteries into the remote
time
You must set the time before you can use the
timer functions.
The clock is on a 24-hour system for the
European model, and a 12-hour system for
other models.
The 24 hour system model is used for
illustration purpose.
Set the time before turning the power on.
1
2,3
2,3
1 Press TIMER SET while the power is
off.
The hour indication flashes.
Tip
With normal use, the batteries should last for about
six months. When the remote no longer operates the
system, replace both batteries with new ones.
Note
If you do not use the remote for a long period of
time, remove the batteries to avoid possible damage
from battery leakage.
Adjusting the reflector colour of
the satellite speaker (CMT-SD3
only)
The reflector of the satellite speaker lights up
when the power is on.
You can change the colour of the light by
turning the R, G or B dials on the bottom of
the back of the satellite speakers.
6
2 Press +/– to set the hour then press
ENTER.
The minute indication flashes.
3 Press +/– to set the minute then
press ENTER.
The clock starts.
To change the time
You can change the preset time while the
power is on.
1 Press TIMER SET.
2 Press +/– repeatedly until “CLOCK SET”
appears then press ENTER.
3 Repeat steps 2 and 3.
Tips
• If you have made a mistake, start again from step
1.
• The built-in clock shows the time in the display
while the power is off. However, the clock is not
displayed in the Power Saving Mode (see page 8).
• The upper dot flashes for the first half of a minute
(0 to 29 seconds), and the lower dot flashes for the
last half of a minute (30 to 59 seconds).
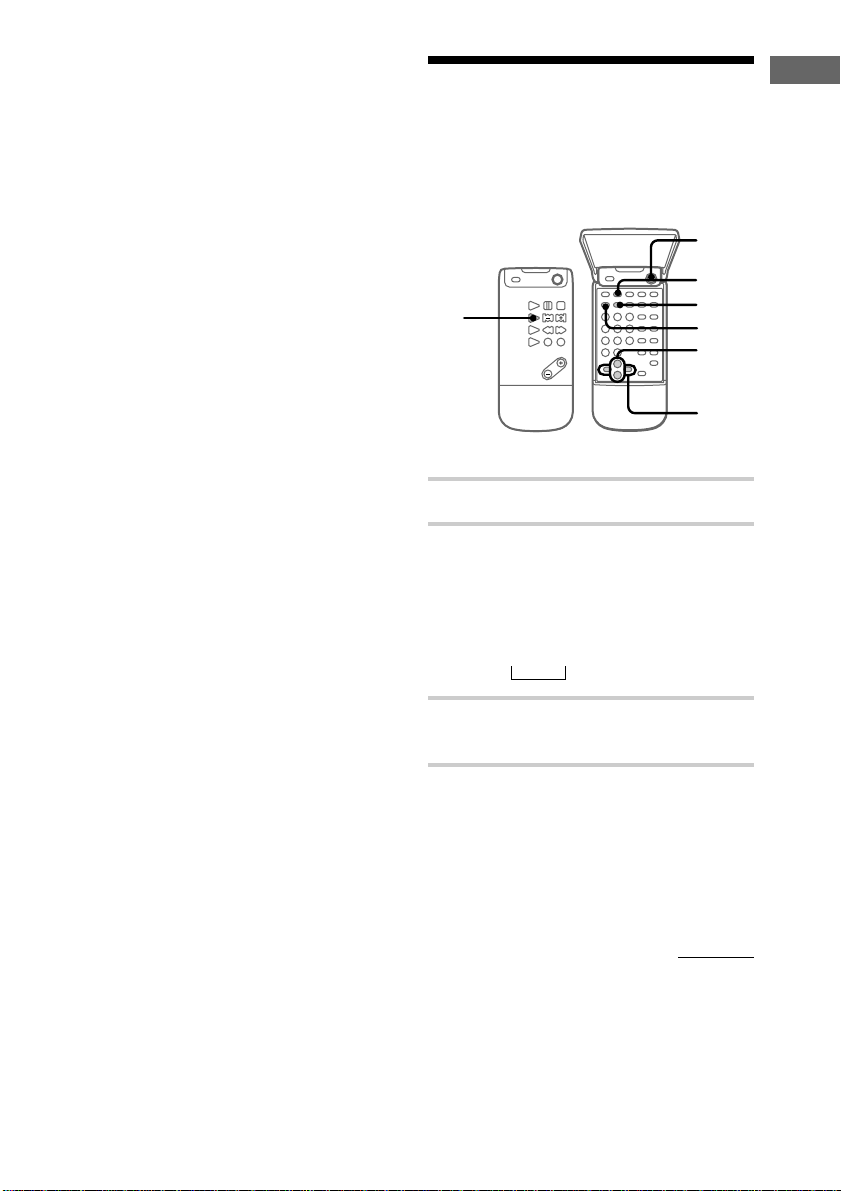
Step 3: Presetting radio stations
You can preset the following number of
stations:
– 20 for FM, 10 for AM.
1
3
5,6
2
5
4,5
6
1 Press 1/u to turn on the power.
2 Press TUNER/BAND repeatedly
until the band you want appears in
the display.
Each time you press the button, the band
changes as follows:
FM n AM
n
Getting Started
3 Press TUNING MODE repeatedly
until “AUTO” appears.
4 Press +/–.
The frequency indication changes and
scanning stops when the system tunes in
a station. “TUNED” and “STEREO” (for
a stereo programme) appear. When you
want to stop scanning, press
TUNING MODE.
continued
7
Step 3: Presetting radio stations
(continued)
Saving the power
5 Press MENU/NO then +/–
repeatedly until “Frq-Memory?”
appears then press ENTER/YES.
The preset number flashes. Proceed to
step 6 while the preset number is
flashing. If the unit is not operated for
more than 16 seconds, the preset number
disappears and the unit returns to the
status of step 3. If this happens, start
over from step 4.
6 Press ? or / on the remote to
select the preset number you want
then press ENTER/YES.
The station is stored.
Select 1 to 20 for FM, and select 1 to 10
for AM.
7 Repeat steps 2 through 6 to preset
other stations.
To tune in the station manually
1 Press TUNING MODE repeatedly until
“MANUAL” appears in step 3.
2 Press +/– repeatedly to tune in the station
and continue from step 5.
To change the preset number
Start again from step 1.
To change the AM tuning interval
(except for European model)
The AM tuning interval is factory-set to
9 kHz (10 kHz in some areas). To change the
AM tuning interval, tune in any AM station
first, then turn off the power. While holding
down the TUNING + button, turn the power
back on. When you change the interval, all
the AM preset stations are erased. To reset
the interval, repeat the same procedure.
Tips
• When a new station is memorized, the station
formerly memorized at that preset number is
erased.
• The preset staions are retained for a week even if
you disconnect the mains lead or if a power failure
occurs.
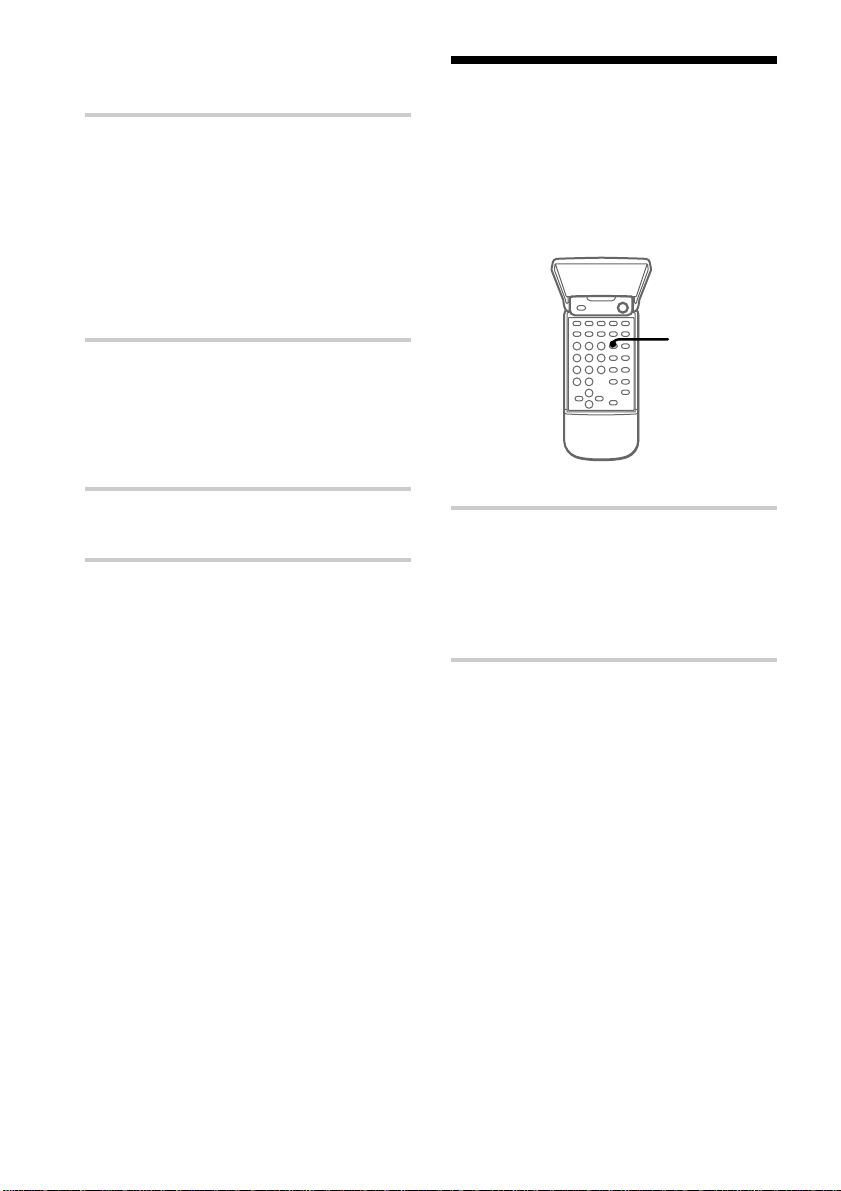
in standby mode
You can lower the power consumption to a
minimum (Power Saving Mode) and save
energy in the standby mode.
DISPLAY
/ Press DISPLAY on the remote or on
the CMT-SD1 when the power is off.
The unit switches to the Power Saving
Mode and the clock display disappears.
The system turns on/off by pressing
1/u.
Tips
• u indicator and timer indicator (when the timer is
set) light up even in the Power Saving Mode.
• The timer work in the Power Saving Mode.
To cancel the Power Saving Mode
Press DISPLAY.
The clock display appears.
8

Basic Operations
Playing a CD
To turn on the system, press 1/u.
1/u
(Power)
≠ ±
π VOLUME
2
0 )
1
CD (
P
=/+
0/)
VOL +/–
2 Press ·∏ (or CD ( on the
remote).
The disc tray closes and play starts.
SHUFFLE PROGRAM REPEAT TUNED STEREO MONO1 SURR
DAILY REC SLEEP
DISC
AUTO
PRESTMANUAL
To
Stop play
Pause
Select a track
Find a point in
a track
Remove CD
Adjust the
volume
Tips
• You can switch from another source to the CD
player and start playing a CD by pressing ·∏
(or CD ( on the remote) (Automatic Source
Selection).
• If you push the disc tray lightly, the disc tray
closes and play starts automatically (Auto Play).
Do this
Press π.
Press ·∏ (or P on the
remote). Press again to
resume play.
Press ≠ or ± (or =/
+ on the remote)
repeatedly until you find the
desired track.
Press and hold 0 or ),
during play and release it at
the desired point.
Press §.
Turn VOLUME (or press
VOL +/– on the remote).
DBFB
kHz
MHz
Basic Operations
1 Press § to open the disc tray and
place a CD.
With the label side up.
When you play a single CD,
place it on the inner circle
of the tray.
To close the disc tray, press § again.
9

Listening to the radio
Preset radio stations in the tuner’s memory
first (see page 7). To turn on the system, press
1/u.
1/u
(Power)
TUNING +/–TUNER/BAND
+/–
1
VOL
+/–
1 Press TUNER/BAND repeatedly
until the band you want appears.
Each time you press the button, the band
changes as follows:
FMn AM
n
SHUFFLE PROGRAM REPEAT TUNED STEREO MONO1 SURR
DAILY REC SLEEP
DISC
AUTO
PRESTMANUAL
VOLUME
2
STEREO/
MONO
3
DBFB
kHz
MHz
2 Press TUNING MODE repeatedly
until “PRESET” appears.
SHUFFLE PROGRAM REPEAT TUNED STEREO MONO1 SURR
DAILY REC SLEEP
DISC
AUTO
PRESETMANUAL
3 Press +/– to select the desired
station’s preset number.
SHUFFLE PROGRAM REPEAT TUNED STEREO MONO1 SURR
DAILY REC SLEEP
DISC
AUTO
PRESET
MANUAL
To Do this
Turn off the radio Press 1/u to turn off the
Adjust the volume Turn VOLUME (or press
To listen to non-preset radio
stations
• Press TUNING MODE repeatedly until
“MANUAL” appears in step 2, then press
TUNING + or – repeatedly to tune in the
desired station (Manual Tuning).
• Press TUNING MODE repeatedly until
“AUTO” appears in step 2, then press
TUNING + or –. The frequency indication
changes and scanning stops when the
system tunes in a station (Automatic
Tuning).
To cancel the Automatic Tuning
Press TUNING MODE.
Tips
• You can switch from another source to the tuner
by pressing TUNER/BAND (Automatic Source
Selection).
• To improve broadcast reception, reorient the
supplied aerials or connect an optional external
aerial.
• When an FM programme has static noise, press
STEREO/MONO until “MONO” appears. There
will be no stereo effect, but the reception will
improve. Press again to restore the stereo effect.
system
VOL +/– on the remote)
DBFB
kHz
MHz
kHz
MHz
10
Loading...