


 Loading...
SI\MSUNG
GalaxyTab A
Usermanual

Tableof contents
Features |
1 |
Camera |
1 |
Night mode |
1 |
Expandable storage |
1 |
Multi window |
1 |
Getting started |
2 |
Device layout |
3 |
Assemble your device |
5 |
Start using your device |
6 |
Use the SetupWizard |
6 |
Lock or unlock your device |
7 |
Accounts |
8 |
Transfer data from an olddevice |
9 |
Navigation |
10 |
Navigation bar |
15 |
Customize your home screen |
17 |
Digital wellbeing |
23 |
Multi window |
24 |
i |
WIF_T510_EN_UM_TN_SCC_041119_FINAL |

Tableofcontents
Enter text |
25 |
Apps |
29 |
Using apps |
30 |
Uninstall or disable apps |
30 |
Search for apps |
30 |
Sort apps |
30 |
Create anduse folders |
31 |
Samsung apps |
31 |
Galaxy Essentials |
31 |
Galaxy Apps |
32 |
Samsung Members |
32 |
Samsung Notes |
33 |
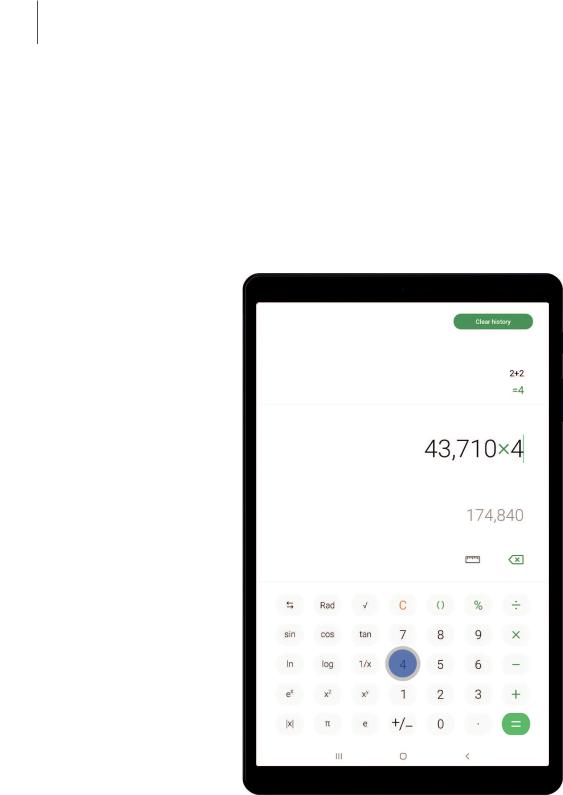
Calculator |
35 |
Calendar |
36 |
Camera |
38 |
Clock |
42 |
Contacts |
46 |
51 |
|
Gallery |
54 |
ii

Tableofcontents
Internet |
58 |
My Files |
61 |
Google apps |
62 |
Chrome |
62 |
Drive |
63 |
Duo |
63 |
Gmail |
63 |
63 |
|
Maps |
63 |
Photos |
63 |
Play Movies& TV |
64 |
Play Music |
64 |
Play Store |
64 |
YouTube |
64 |
Settings |
65 |
AccessSettings |
66 |
Search for Settings |
66 |
Connections |
66 |
Wi-Fi |
66 |
iii

Tableofcontents
Bluetooth |
68 |
Airplane mode |
69 |
Data usage |
69 |
Nearby device scanning |
70 |
Connect to a printer |
70 |
Virtual Private Networks |
71 |
Private DNS |
71 |
Ethernet |
72 |
Sound |
72 |
Soundmode |
72 |
Notification sounds |
73 |
Volume |
73 |
System sounds |
73 |
Dolby Atmos |
74 |
Equalizer |
74 |
Headset audio options |
74 |
Adapt sound |
74 |
Notifications |
75 |
Manage notifications |
75 |
iv

Tableofcontents
Customize appnotifications |
75 |
Smart pop-upview |
75 |
Display |
76 |
Screen brightness |
76 |
Night mode |
76 |
Font size andstyle |
76 |
Screen zoom |
77 |
Screen timeout |
77 |
Screen saver |
77 |
Reduce animations |
77 |
Double tapto wake up |
77 |
Smart stay |
78 |
Device maintenance |
78 |
Quick optimization |
78 |
Battery |
78 |
Storage andmemory card |
79 |
Memory |
80 |
Security |
80 |
Language andinput |
81 |
v

Tableofcontents
Date andtime |
83 |
Troubleshooting |
84 |
Lock screen andsecurity |
87 |
Screen lock types |
87 |
Clock andinformation |
88 |
Google Play Protect |
88 |
FindMy Mobile |
88 |
Security update |
89 |
Install unknown apps |
89 |
Secure Folder |
90 |
Encrypt SD card |
90 |
View passwords |
90 |
Security update service |
91 |
Device administration |
91 |
Credential storage |
91 |
Strong Protection |
91 |
Advancedsecurity settings |
92 |
Location |
92 |
Apppermissions |
93 |
vi

Tableofcontents
Receive marketing information |
93 |
Accounts |
94 |
Samsung Cloud |
94 |
Addan account |
94 |
Account settings |
94 |
Synchronize accounts |
95 |
Remove an account |
95 |
Users |
95 |
Backupandrestore |
96 |
Google settings |
97 |
Accessibility |
97 |
Screen Reader |
97 |
Visibility enhancements |
98 |
Hearing Enhancements |
99 |
Interaction anddexterity |
99 |
Advancedsettings |
100 |
Installedservices |
101 |
Other settings |
101 |
Help |
101 |
vii

Tableofcontents
Daily Board |
101 |
About tablet |
102 |
Learn more |
103 |
Videos |
103 |
Smart Simulator |
103 |
Tips |
103 |
Samsung Care |
103 |
Talk to an agent |
103 |
Legal information |
104 |
Intellectual property |
105 |
Open source software |
105 |
Disclaimer of warranties; exclusion of liability |
106 |
Modification of software |
106 |
Samsung Knox |
107 |
Restricting children’saccessto your mobile device |
107 |
Samsung ElectronicsAmerica, Inc. |
107 |
viii

Features
Features
 Camera
The camera on your device hasseveral unique features. See Camera on page 38.
 Nightmode
Use a darker theme to keepyour eyescomfortable at night. See Nightmode on page 76.
 Expandablestorage
Expandstorage with a supportedmicroSD card. See Memory card on page 79.
 Multiwindow
Multitask by using two applicationsat the same time. See Multi window on page 24.
1
Gettingstarted
Device layout
Assemble your device
Start using your device
2
Getting started
Devicelayout
Front camera
Power key
 Volume keys
microSD card tray
USB charger/ 
Accessory port
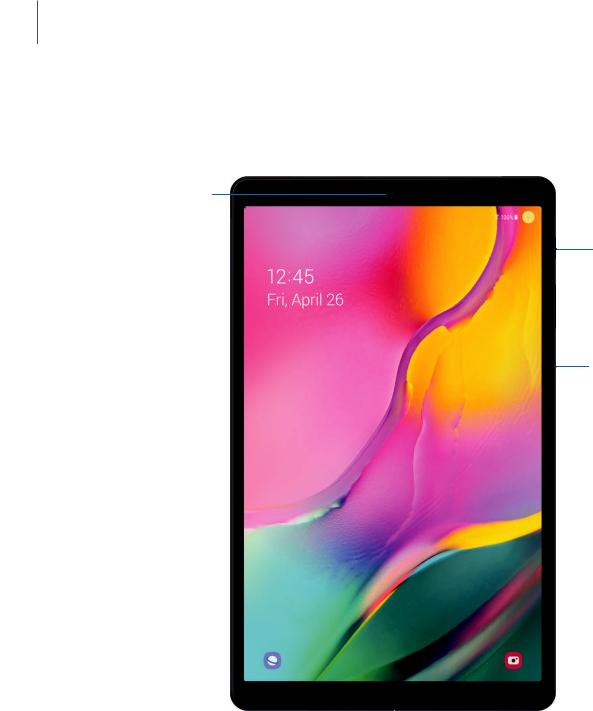
Devicesandsoftwareareconstantlyevolving— theillustrationsyouseeherearefor referenceonly.
3

Getting started
Headset jack
Rear camera
Speaker |
|
|
|
Speaker |
|
|
4

Getting started
Assembleyourdevice
-'A'-
,):(,


 Install microSD card
Slide the optional microSD™ card (sold separately) into the tray with the gold contacts facing down.

 Charge yourdevice
Before turning on your device, charge it fully.
NOTE Use only charging devicesandbatteriesthat are approvedby Samsung. Samsung charging devicesandbatteriesare designedfor your device to maximize battery life. Using other charging devicesandbatteriesmay voidyour warranty andmay cause damage.
_w_
,\j,
NOTE While charging, the device andthe charger may become hot andstop charging. Thisusually doesnot affect the device’slifespan or performance andis in the normal range of operation. Remove the device from the charger andwait for the device to cool down. For more information, visitsamsung.com/us/support /answer/ANS00076952/.
5

Getting started
Startusingyourdevice
Use the Power key to turn your device on or off. Do not use the device if the body is crackedor broken. Use the device only after it hasbeen repaired.
◌Press and hold the Power key.
•To turn the device off, press and hold the Power key, and tap Power off. Confirm when prompted.
•To restart your device, press and hold the Power key, and tap Restart.
Use the Setup Wizard
The first time you turn your device on, the Setup Wizard guides you through the basics of setting up your device.
Follow the prompts to choose a default language, connect to a Wi-Fi® network, set up accounts, choose location services, learn about your device’s features, and more.
6
Getting started
Lock orunlock yourdevice
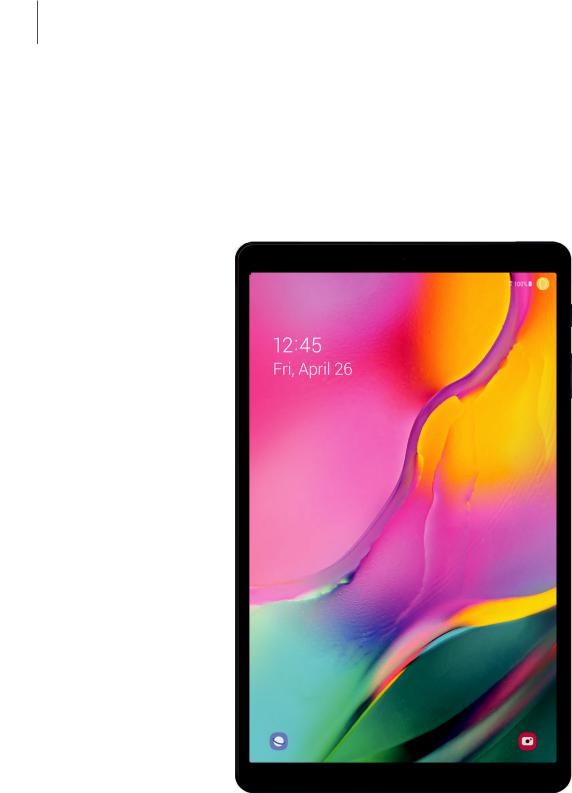
Use your device’sscreen lock featuresto secure your device. By default, the device locksautomatically when the screen timesout. For more information about screen locks, see Lock screen and security on page 87.
 Power key
Press to lock. Press to turn on the screen, and then drag your finger across the screen to unlock.
Devicesandsoftwareareconstantlyevolving— theillustrationsyouseeherearefor referenceonly.
7

Getting started
Accounts
Set upandmanage your email accounts, your Google™ Account, andSamsung account.
-'A'- |
TIP Accountsmay support email, calendars, contacts, andother features. See |
,):(, |
|
|
your carrier for more information. |
AddaGoogle Account
Sign in to your Google Account to accessyour Google cloudstorage, appsinstalled from your account, andmake full use of your device’sAndroid™ features.
1.From Settings, tap Accountsand backup > Accounts.
2.Tap+Add account > Google.
-~- NOTE When yousign in to a Google Account, Factory Reset Protection (FRP) is activated. FRP requiresyour Google Account information when resetting to factory settings. For more information, see Factory resetprotection on page 86.
AddaSamsungaccount
Sign in to your Samsung account to accessexclusive Samsung content andmake full use of Samsung apps.
1.From Settings, tap Accountsand backup > Accounts.
2.Tap+Add account > Samsung account.
-~- TIP To quickly accessyour Samsung account, from Settingstape Samsung account.
Addanemail account
Sign in to one or more of your email accountsto view andmanage email messages.
1.From Settings, tap Accountsand backup > Accounts.
2.Tap+Add account > Email.
8

Getting started
Transferdata from an old device
Use Smart Switch™ to transfer contacts, photos, music, videos, messages, notes, calendars, andmore from your olddevice. Smart Switch can transfer your data via USB cable, Wi-Fi, or computer.
Visit samsung.com/us/support/owners/app/smart-switch to learn more.
1.From Settings, tap Accountsand backup > Smart Switch.
2.Follow the promptsandselect the content to transfer.
Visit samsung.com/smartswitch for more information.
9


Getting started
Zoominandout
Bring your thumbandforefinger together or apart to zoom in andout.
•Bring your thumbandforefinger together on the screen to zoom out.
•Move your thumbandforefinger apart on the screen to zoom in.
Devicesandsoftwareareconstantlyevolving— theillustrationsyouseeherearefor referenceonly.
13


Getting started
 Navigationgestures
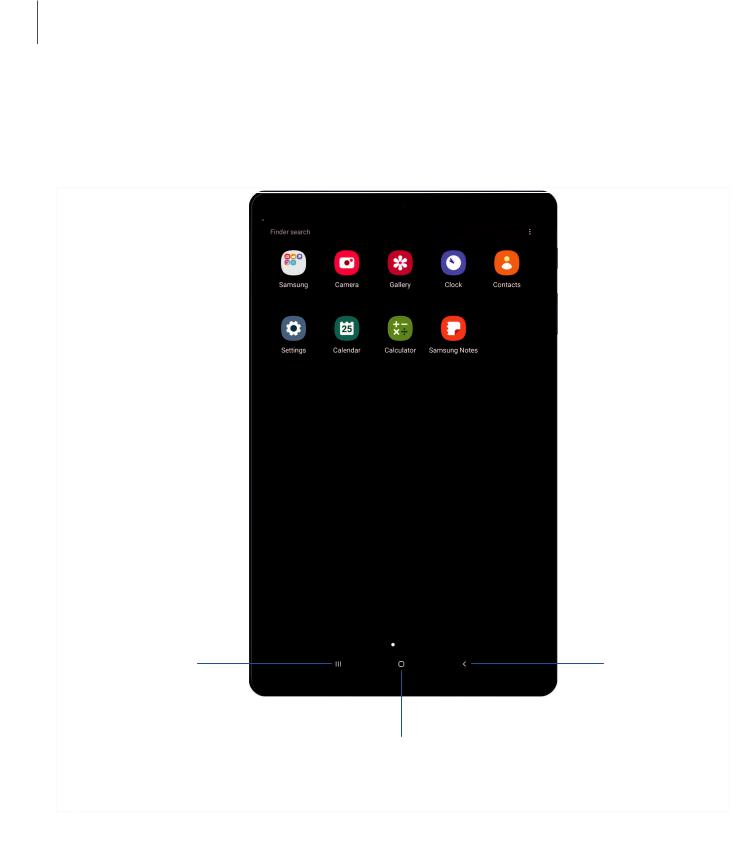
To make more space on the screen, youcan hide the navigation keys, andinsteaduse gesturesto navigate the device. Simply swipe upon the screen where the navigation buttonsusedto display to navigate the device.
◌ From Settings, tap-'I#•- Display > Navigation bar > Full screen gestures.
#I'
•Tap Gesture hints to display linesat the bottom of the screen where gestures must be done for each navigation button.
-'lj- TIP Youcan also quickly switch between navigation gesturesandnavigation buttonsusing the Quick settingsmenu.
Buttonorder
Personalize your device by changing where the Recent appsandBack buttonsdisplay on the Navigation bar.
◌ From Settings, tap-'I#•- Display > Navigation bar, andtapan option under Button
#I'
order.
16

Getting started
Customize yourhome screen
The Home screen isthe starting point for navigating your device. Youcan place your favorite appsandwidgetshere. Youcan set upadditional Home screens, remove screens, change the order of screens, andchoose a main Home screen.
Appicons
Youcan use appiconsto launch an appfrom any Home screen.
◌From Apps, touch andholdan appicon, andtap Add to Home. To remove an icon:
◌Touch andholdan appicon, andtap Remove from Home.
-'¢-
NOTE Removing an icon doesnot delete the app, it just removesthe icon from a Home screen.
Use folders
Organize Appshortcutsin folderson an Apps screen or Home screen.
For more information, see Create and use folders on page 31.
Wallpapers
Youcan change the look of the Home andLock screensby choosing a favorite picture or preloadedwallpaper.
1.From a Home screen, touch andholdthe screen.
2.Tap Wallpapers.
3.Tapan image to choose it.
4.Tap Set aswallpaper, andconfirm when prompted.
17

Getting started
 Widgets
Addwidgetsto your home screensfor quick accessto info or apps.
1.From-a Home screen, touch andholdthe screen.
2.Tap •• Widgets, andthen touch andholda widget, drag it to a Home screen, and release it.
Customize Widgets
Once youhave addeda widget, youcan customize where it'slocatedandhow it functions.
◌From a Home screen, touch andholda widget, andtapan option:
•-ar Remove from Home: Delete a widget from your screen.
•(I Widget settings: Customize the function or appearance of the widget.
•0 App info: Review the widget usage, permissions, andmore.
18

Getting started
 Home screensettings
Customize your Home andAppsscreens.
1.From a Home screen, touch andholdthe screen.
2.Tap 0 Home screen settings to customize:
•Home screen layout: Set your device to have separate Home andApps screens, or only a Home screen where all appsare located.
•Appsbutton: Adda button to the Home screen for easy accessto the Apps screen.
•App icon badges: Enable to show badgeson appswith active notifications. Youcan also choose the badge style.
•Lock Home screen layout: Prevent itemson the Home screen from being removedor repositioned.
•Add appsto Home screen: Automatically addnewly-downloadedappsto the Home screen.
•Quick-open notification panel: Enable thisfeature to open the Notification panel by swiping down anywhere on the Home screen.
•Hide apps: Choose appsto hide from the Home andAppscreens. Return to thisscreen to restore hidden apps. Hidden appsare still installedandcan appear asresultsin Finder searches.
•About Home screen: View version information.
19
Getting started
 Statusbar
The Statusbar providesdevice information on the right side andnotification alertson the left.
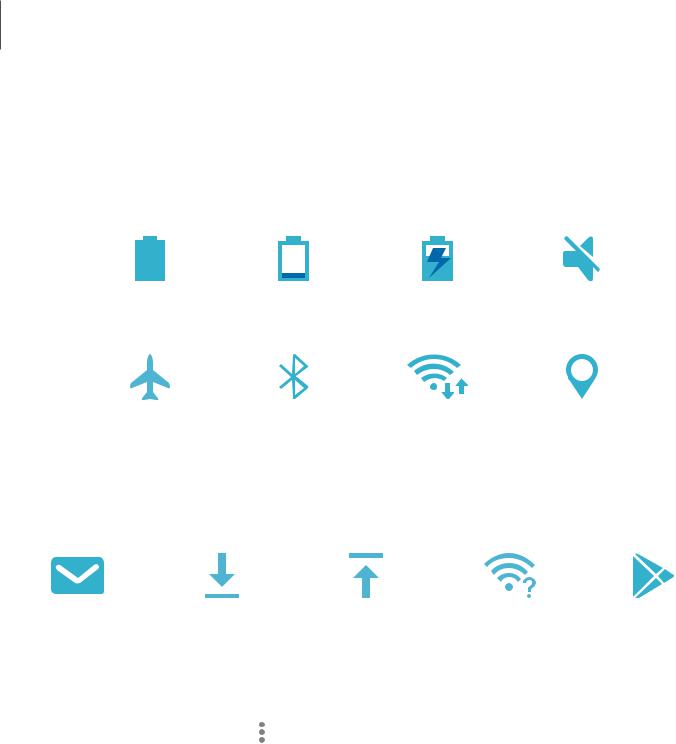
Status icons
Battery full |
Battery□low |
Chargingi |
Mute |
Airplane mode Bluetooth active Wi-Fi active |
Location active |
Notificationicons
-
- t
New email |
Download |
Upload |
Wi-Fi available |
Appupdate |
Configure display optionsfor the Statusbar.
◌ From Quick settings, tap ••• More options > Statusbar for the following options:
•Show notification icons: Choose how to display notification iconson the Statusbar.
•Show batterypercentage: Display the battery charge percentage next to the battery icon on the Status bar.
20

Getting started
 Notificationpanel
For quick accessto notifications, settings, andmore, simply open the Notification panel.
Device settings
Quick settings
View all
all
Notification cards
Devicesandsoftwareareconstantlyevolving— theillustrationsyouseeherearefor referenceonly.
21
Loading...