


 Loading...
ML-166x Series
Mono Laser Printer
User’s Guide
imagine the possibilities
Thank you for purchasing a Samsung product.

copyright
© 2011 Samsung Electronics Co., Ltd. All rights reserved.
This user’s guide is provided for information purposes only. All information included herein is subject to change without notice. Samsung Electronics is not responsible for any direct or indirect damages, arising from or related to use of this user’s guide.
•Samsung and Samsung logo are trademarks of Samsung Electronics Co., Ltd.
•PCL and PCL 6 are trademarks of Hewlett-Packard Company.
•Microsoft, Internet Explorer, Windows, Windows Vista, Windows 7 and Windows 2008 Server R2 either registered trademarks or trademarks of Microsoft Corporation.
•PostScript 3 is a trademark of Adobe System, Inc.
•UFST® and MicroType™ are registered trademarks of Monotype Imaging Inc.
•TrueType, Mac and Mac OS are trademarks of Apple Inc., registered in the U.S and other countries.
•LaserWriter is a trademark of Apple Inc.
•All other brand or product names are trademarks of their respective companies or organizations.
Refer to the 'LICENSE.txt' file in the provided CD-ROM for the open source license information.
REV. 1.02
Copyright_ 2

safety information
These warnings and precautions are included to prevent injury to you and others, and to prevent any potential damage to your machine. Be sure to read and understand all of these instructions before using the machine.
Use common sense for operating any electrical appliance and whenever using your machine. Also, follow all warnings and instructions marked on the machine and in the accompanying literature. After reading this section, keep it in a safe place for future reference.
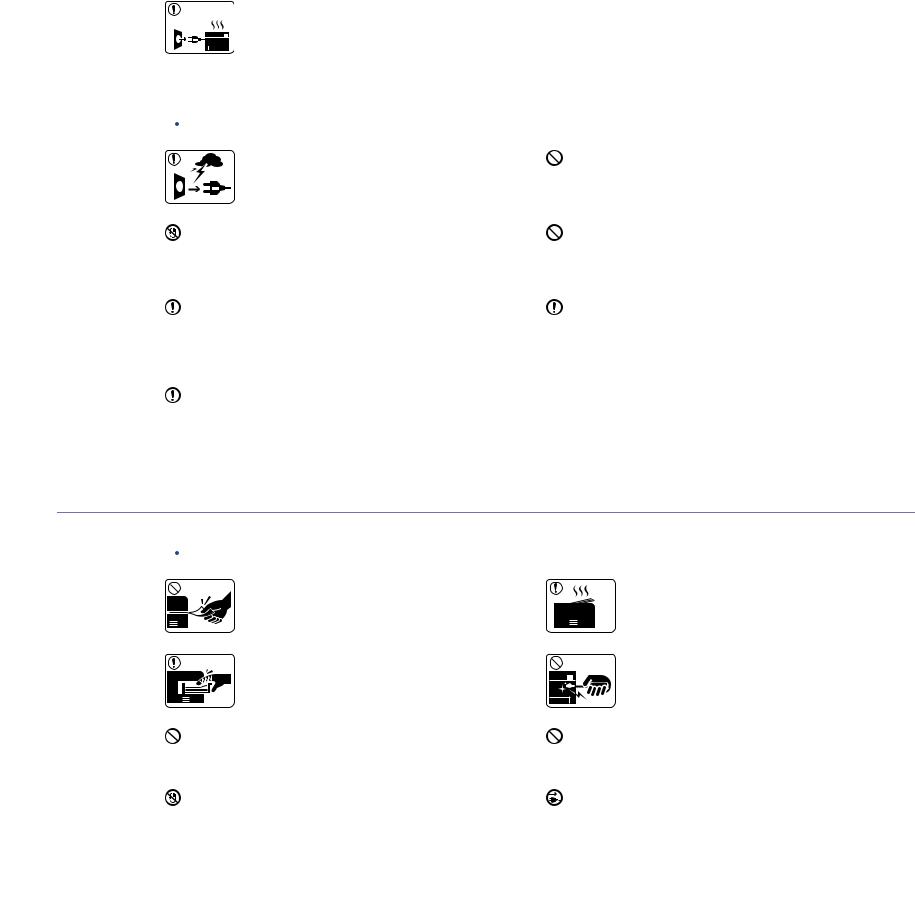
IMPORTANT SAFETY SYMBOLS
This section explains the meanings of all icons and signs in the user's guide. These safety symbols are in order, according to the degree of danger.
Explanation of all icons and signs used in the user’s guide:
Warning Hazards or unsafe practices that may result in severe personal injury or death.
Caution Hazards or unsafe practices that may result in minor personal injury or property damage.
Do not attempt.
Do not disassemble.
Do not touch.
Unplug the power cord from the wall socket.
Make sure the machine is grounded to prevent electric shock.
Call the service center for help.
Follow directions explicitly.
OPERATING ENVIRONMENT
 Warning
Do not use if the power cord is damaged or if the electrical outlet is not grounded.
► This could result in electric shock or fire.
Do not place anything on top of the machine (water, small metal or heavy objects, candles, lit cigarettes, etc.).
► This could result in electric shock or fire.
Do not bend, or place heavy objects on the power cord.
► Stepping on or allowing the power cord to be crushed by a heavy object could result in electric shock or fire.
Do not remove the plug by pulling on the cord; do not handle the plug with wet hands.
► This could result in electric shock or fire.
Safety information_ 3
If the machine gets overheated, it releases smoke, makes strange noises, or generates an odd odor, immediately turn off the power switch and unplug the machine.
► This could result in electric shock or fire.
 Caution
During an electrical storm or for a period of non-operation, remove the power plug from the electrical outlet.
► This could result in electric shock or fire.
Be careful, the paper output area is hot. ► Burns could occur.
If the machine has been dropped, or if the cabinet appears damaged, unplug the machine from all interface connections and request assistance from qualified service personnel.
► Otherwise, this could result in electric shock or fire.
If the machine exhibits a sudden and distinct change in performance, unplug the machine from all interface connections and request assistance from qualified service personnel.
► Otherwise, this could result in electric shock or fire.
If the plug does not easily enter the electrical outlet, do not attempt to force it in.
► Call an electrician to change the electrical outlet, or this could result in electric shock.
Do not allow pets to chew on the AC power, telephone or PC interface cords.
► This could result in electric shock or fire and/or injury to your pet.
If the machine does not operate properly after these instructions have been followed, unplug the machine from all interface connections and request assistance from qualified service personnel.
► Otherwise, this could result in electric shock or fire.
OPERATING METHOD
 Caution
Do not forcefully pull the paper out during printing. ► It can cause damage to the machine.
Be careful not to put your hand between the machine and paper tray.
► You may get injured.
Do not block or push objects into the ventilation opening.
► This could result in elevated component temperatures which can cause damage or fire.
Be care when replacing paper or removing jammed paper. ► New paper has sharp edges and can cause painful cuts.
When printing large quantities, the bottom part of the paper output area may get hot. Do not allow children to touch.
► Burns can occur.
When removing jammed paper, do not use tweezers or sharp metal objects.
► It can damage the machine.
Do not allow too many papers to stack up in the paper output tray.
► It can damage the machine.
This machine's power interception device is the power cord.
► To switch off the power supply, remove the power cord from the electrical outlet.
Safety information_ 4

INSTALLATION / MOVING
 Warning
Do not place the machine in an area with dust, humidity or water leaks.
► This could result in electric shock or fire.
 Caution
Before moving the machine, turn the power off and disconnect all cords.
Then lift the machine:
•If the machine weighs under 20 kg (44.09lbs), lift with 1 person.
•If the machine weighs 20 kg (44.09lbs) - 40kg (88.18lbslbs), lift with 2 people.
•If the machine weighs more than 40 kg (88.18lbs), lift with 4 or more people.
►The machine could fall, causing injury or machine damage.
Do not place the machine on an unstable surface.
► The machine could fall, causing injury or machine damage.
The machine should be connected to
the power level which is specified on the label.
► If you are unsure and want to check the power level you are using, contact the electrical utility company.
Use only No.26 AWGa or larger, telephone line cord, if necessary.
►Otherwise, it can cause damage to the machine.
a. AWG: American Wire Gauge
Do not put a cover over the machine or place it in an airtight location, such as a closet.
► If the machine is not well-ventilated, this could result in fire.
Make sure you plug the power cord into a grounded electrical outlet.
► Otherwise, this could result in electric shock or fire.
Do not overload wall outlets and extension cords.
► This can diminish performance, and could result in electric shock or fire.
Use the power cord supplied with your machine for safe operation. If you are using a cord which is longer than 2 meters (6 feet) with a 140V machine, then the gauge should be 16 AWG or larger.
► Otherwise, it can cause damage to the machine, and could result in electric shock or fire.
MAINTENANCE / CHECKING
 Caution
Unplug this product from the wall outlet before cleaning the inside of the machine. Do not clean the machine with benzene, paint thinner or alcohol; do not spray water directly into the machine.
► This could result in electric shock or fire.
Keep cleaning supplies away from children. ► Children could get hurt.
Safety information_ 5

When you are working inside the machine replacing supplies or cleaning the inside, do not operate the machine.
► You could get injured.
Keep the power cable and the contact surface of the plug clean from dust or water.
► Otherwise, this could result in electric shock or fire.
Do not remove any covers or guards that are fastened with screws.
►The machine should only be repaired by a Samsung service technician.
►Fuser units should only be repaired by a certified service technician. Repair by non-certified technicians could result in fire or electric shock.
Do not disassemble, repair or rebuild the machine by yourself.
► It can damage the machine. Call a certified technician when the machine needs repair.
To clean and operate the machine, strictly follow the user's guide provided with the machine.
► Otherwise, you could damage the machine.
SUPPLY USAGE
 Caution
Do not disassemble the toner cartridge.
► Toner dust can be dangerous if inhaled or ingested.
Do not burn any of the supplies such as toner cartridge or fuser unit.
► This could cause an explosion or uncontrollable fire.
When changing the toner cartridge or removing jammed paper, be careful not to let toner dust touch your body or clothes.
► Toner dust can be dangerous if inhaled or ingested.
When storing supplies such as toner cartridges, keep them away from children.
► Toner dust can be dangerous if inhaled or ingested.
Using recycled supplies, such as toner, can cause damage to the machine.
► In case of damage due to the use of recycled supplies, a service fee will be charged.
When toner gets on your clothing, do not use hot water to wash it.
► Hot water sets toner into fabric. Use cold water.
Safety information_ 6

regulatory information
This machine is designed for a normal work environment and certified with several regulatory statements.
Laser Safety Statement
The printer is certified in the U.S. to conform to the requirements of DHHS 21 CFR, chapter 1 Subchapter J for Class I(1) laser products, and elsewhere is certified as a Class I laser product conforming to the requirements of IEC 60825-1 : 2007.
Class I laser products are not considered to be hazardous. The laser system and printer are designed so there is never any human access to laser radiation above a Class I level during normal operation, user maintenance or prescribed service condition.
WARNING
Never operate or service the printer with the protective cover removed from Laser/Scanner assembly. The reflected beam, although invisible, can damage your eyes.
When using this product, these basic safety precautions should always be followed to reduce risk of fire, electric shock, and injury to persons:
Ozone Safety
During normal operation, this machine produces ozone. The ozone produced does not present a hazard to the operator. However, it is advisable that the machine be operated in a well ventilated area.
If you need additional information about ozone, contact your local Samsung dealer.
Power Save
This printer contains advanced energy conservation technology that reduces power consumption when it is not in active use. When the printer does not receive data for an extended period of time, power consumption is automatically lowered. ENERGY STAR and the ENERGY STAR mark are registered U.S. marks.
For more information on the ENERGY STAR program see http://www.energystar.gov.
Regulatory information_ 7
Recycling
Recycle or dispose of the packaging material for this product in an environmentally responsible manner.
China only
Correct Disposal of This Product (Waste Electrical & Electronic Equipment)
(Applicable in the European Union and other European countries with separate collection systems)
This marking shown on the product, accessories or literature indicates that the product and its electronic accessories (e.g. charger, headset, USB cable) should not be disposed of with other household wastes at the end of its working life. To prevent possible harm to the environment or human health from uncontrolled waste disposal, separate this from other types of wastes and recycle it responsibly to promote the sustainable reuse of material resources.
Household users should contact either the retailer where they purchased this product, or their local government office, for details of where and how they can take this item for environmentally safe recycling.
Business users should contact their supplier and check the terms and conditions of the purchase contract. This product should not be mixed with other commercial wastes for disposal.
The United States of America only
Dispose unwanted electronics through an approved recycler. To find the nearest recycling location, go to our website:www.samsung.com/recyclingdirect Or call, (877) 278 - 0799
Radio Frequency Emissions
FCC Information to the User
This device complies with Part 15 of the FCC Rules. Operation is subject to the following two conditions:
•This device may not cause harmful interference, and
•This device must accept any interference received, including interference that may cause undesired operation.
This equipment has been tested and found to comply with the limits for a Class B digital device, pursuant to Part 15 of the FCC Rules. These limits are designed to provide reasonable protection against harmful interference in a residential installation. This equipment generates, uses and can radiate radio frequency energy and, if not installed and used in accordance with the instructions, may cause harmful interference to radio communications. However, there is no guarantee that interference will not occur in a particular installation. If this equipment does cause harmful interference to radio or television reception, which can be determined by turning the equipment off and on, the user is encouraged to try to correct the interference by one or more of the following measures:
•Reorient or relocate the receiving antenna.
•Increase the separation between the equipment and receiver.
•Connect the equipment into an outlet on a circuit different from that to which the receiver is connected.
•Consult the dealer or experienced radio TV technician for help.
Regulatory information_ 8

Change or modifications not expressly approved by the manufacturer responsible for compliance could void the user's authority to operate the equipment.
Canadian Radio Interference Regulations
This digital apparatus does not exceed the Class B limits for radio noise emissions from digital apparatus as set out in the interference-causing equipment standard entitled “Digital Apparatus”, ICES-003 of the Industry and Science Canada.
Cet appareil numérique respecte les limites de bruits radioélectriques applicables aux appareils numériques de Classe B prescrites dans la norme sur le matériel brouilleur: “Appareils Numériques”, ICES-003 édictée par l’Industrie et Sciences Canada.
Russia only
Yalnızca Türkiye
Germany only
Replacing the Fitted Plug (for UK Only)
Important
The mains lead for this machine is fitted with a standard (BS 1363) 13 amp plug and has a 13 amp fuse. When you change or examine the fuse, you must re-fit the correct 13 amp fuse. You then need to replace the fuse cover. If you have lost the fuse cover, do not use the plug until you have another fuse cover.
Contact the people from you purchased the machine.
The 13 amp plug is the most widely used type in the UK and should be suitable. However, some buildings (mainly old ones) do not have normal 13 amp plug sockets. You need to buy a suitable plug adaptor. Do not remove the moulded plug.
If you cut off the moulded plug, get rid of it straight away.
You cannot rewire the plug and you may receive an electric shock if you plug it into a socket.
Regulatory information_ 9
Important warning:
 You must earth this machine.
The wires in the mains lead have the following color code:
•Green and Yellow: Earth
•Blue: Neutral
•Brown: Live
If the wires in the mains lead do not match the colors marked in your plug, do the following:
You must connect the green and yellow wire to the pin marked by the letter “E” or by the safety ‘Earth symbol’ or colored green and yellow or green.
You must connect the blue wire to the pin which is marked with the letter “N” or colored black. You must connect the brown wire to the pin which is marked with the letter “L” or colored red. You must have a 13 amp fuse in the plug, adaptor, or at the distribution board.
Declaration of Conformity (European Countries)
Approvals and Certifications
The CE marking applied to this product symbolizes Samsung Electronics Co., Ltd. Declaration of Conformity with the following applicable 93/68/EEC Directives of the European Union as of the dates indicated:
Hereby, Samsung Electronics declare that this product is in compliance with the essential requirements and other relevant provisions of: ML-166x Series: Low Voltage Directive (2006/95/EC) and EMC Directive (2004/108/EC).
The declaration of conformity may be consulted at www.samsung.com/printer, go to Support > Download center and enter your printer (MFP) name to browse the EuDoC.
January 1, 1995: Council Directive 2006/95/EC Approximation of the laws of the member states related to low voltage equipment.
January 1, 1996: Council Directive 2004/108/EC (92/31/EEC), approximation of the laws of the Member States related to electromagnetic compatibility.
March 9, 1999: Council Directive 1999/5/EC on radio equipment and telecommunications terminal equipment and the mutual recognition of their conformity. A full declaration, defining the relevant Directives and referenced standards can be obtained from your Samsung Electronics Co., Ltd. representative.
EC Certification
Certification to 1999/5/EC Radio Equipment & Telecommunications Terminal Equipment Directive (FAX)
This Samsung product has been self-certified by Samsung for pan-European single terminal connection to the analogue public switched telephone network (PSTN) in accordance with Directive 1999/5/EC. The product has been designed to work with the national PSTNs and compatible PBXs of the European countries:
In the event of problems, you should contact the Euro QA Lab of Samsung Electronics Co., Ltd. in the first instance.
The product has been tested against TBR21. To assist in the use and application of terminal equipment which complies with this standard, the European Telecommunication Standards Institute (ETSI) has issued an advisory document (EG 201 121) which contains notes and additional requirements to ensure network compatibility of TBR21 terminals. The product has been designed against, and is fully compliant with, all of the relevant advisory notes contained in this document.
Regulatory information_ 10

China only
Regulatory information_ 11

about this user’s guide
This user’s guide provides information about basic understanding of the machine as well as detailed explanation on each step during actual usage. It is a valuable resource for both novice and professional users for the proper installation and use of the machine.
•Read the safety information before using the machine.
•If you have a problem using the machine, refer to the troubleshooting chapter. (See "Troubleshooting" on page 48.)
•Terms used in this user’s guide are explained in the glossary chapter. (See "Glossary" on page 64.)
•Illustrations in this user’s guide may differ from your machine depending on its options or models.
•The procedures in this user’s guide are mainly based on Windows XP.
Convention
Some terms in this guide are used interchangeably, as below:
•Document is synonymous with original.
•Paper is synonymous with media, or print media.
•Machine refers to printer or MFP.
The following table offers the conventions of this guide:
Convention |
Description |
Example |
|
|
|
Bold |
For texts on the display or button names on the machine. |
Cancel |
Note |
Provides additional information or details for the machine function and feature. |
The date format may differ from country |
|
|
to country. |
Caution |
Contains information you can use to protect the machine from possible |
Do not touch the surface of the drum |
|
mechanical damage or malfunction. |
located in the toner cartridge or imaging |
|
|
unit. |
Footnote |
Provides additional information on certain words or a phrases. |
a. pages per minute |
(“Cross-reference”) |
Refers you to additional detailed information. |
(See "Finding more information" on |
|
|
page 13.) |
|
|
|
About this user’s guide_ 12

Finding more information
You can find information about setting up and using your machine in the following resources, either as a print-out or on screen.
Material name |
Description |
|
|
Quick Installation This guide provides information on setting up your machine. This guide is provided in the box with the printer.
Guide
|
|
|
|
|
|
|
|
|
|
|
|
|
|
|
User’s Guide |
|
This guide provides you with step-by-step instructions for using your machine’s full features, maintaining your machine, |
||
|
|
|
|
troubleshooting, and replacing supplies. |
Machine Driver Help |
This help provides you with information about the printer driver and instructions for setting up the options for printing. (See "Using help" |
|
on page 34.) |
|
|
Samsung website |
If you have Internet access, you can get help, support, machine drivers, manuals, and order information from the Samsung website, |
|
www.samsung.com/printer. |
|
|
Downloadable |
You can download useful software programs from the Samsung website. |
software |
• Samsung AnyWeb Print: helps personal users to screen-capture the website screen in Windows Internet Explorer, Windows |
|
Firefox and Macintosh Safari easily. (http://solution.samsungprinter.com/personal/anywebprint) |
About this user’s guide_ 13
features of your new product
Your new machine is equipped with a number of special features that improve the quality of the documents you print.
Special Features
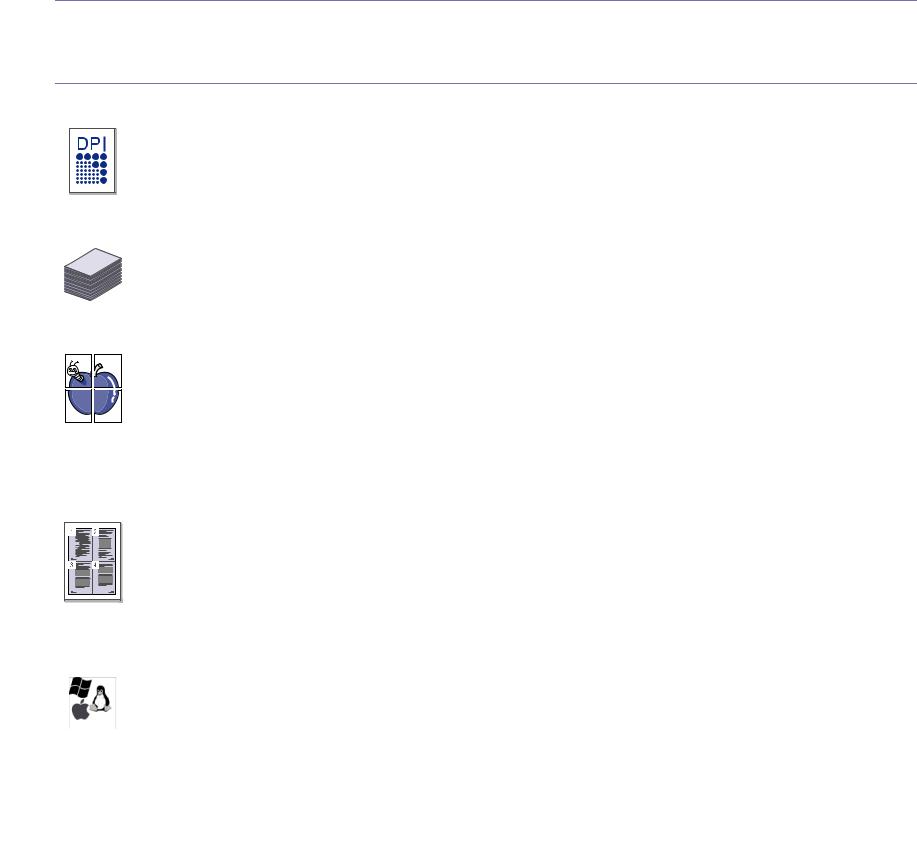
Print with excellent quality and speed
•You can print with a resolution of up to 1,200 x 1200 dpi
effective output.
• Your machine prints A4-sized paper at up to 16 ppm and letter-sized paper at up to 17 ppm.
Handle many different types of printable material
• The 150-sheet tray supports plain paper in various sizes, letterhead, envelopes, labels, custom-sized media, postcards, and heavy paper.
Create professional documents
• Print Watermarks. You can customize your documents with words, such as “Confidential”. (See "Using watermarks" on page 35.)
• Print Posters. The text and pictures of each page of your document are magnified and printed across the sheet of paper and can then be taped together to form a poster. (See "Printing posters" on page 34.)
•You can use preprinted forms and letterhead with plain paper. (See "Using overlays" on page 36.)
Save time and money
• |
• |
• |
To save paper, you can print multiple pages on one single sheet of paper. (See "Printing multiple pages on one sheet of paper" on page 34.)
This machine automatically conserves electricity by substantially reducing power consumption when not in use.
To save paper, you can print on both sides of the paper (Manual). (See "Printing on both sides of the paper (Manual)" on page 34.)
Print in various environments
•You can print with Windows as well as Linux and Macintosh OS systems.
•Your machine is equipped with a USB interface.
Features of your new product_ 14

Features by Model
The machine is designed to support all of your document needs from printing to more advanced networking solutions for your business. Features by models include:
FEATURES |
ML-166x Series |
|
|
High Speed USB 2.0 |
● |
Duplex (2-sided) printing (Manual) |
● |
(●: Included) |
|
Features of your new product_ 15

introduction
This chapter gives you an overview of your machine:
This chapter includes: |
|
|
• |
Machine overview |
• Understanding the status LED |
• |
Control panel overview |
|
Machine overview
Front view
This illustration may differ from your machine depending on its model.
Control panel |
Paper length guide |
|
|
Top cover |
Paper width guides |
|
|
Toner cartridge |
Output support |
|
|
Tray |
Output tray (face down) |
|
|
Introduction_ 16

Rear view
This illustration may differ from your machine depending on its model.
USB port
Power cord receptacle
Introduction_ 17
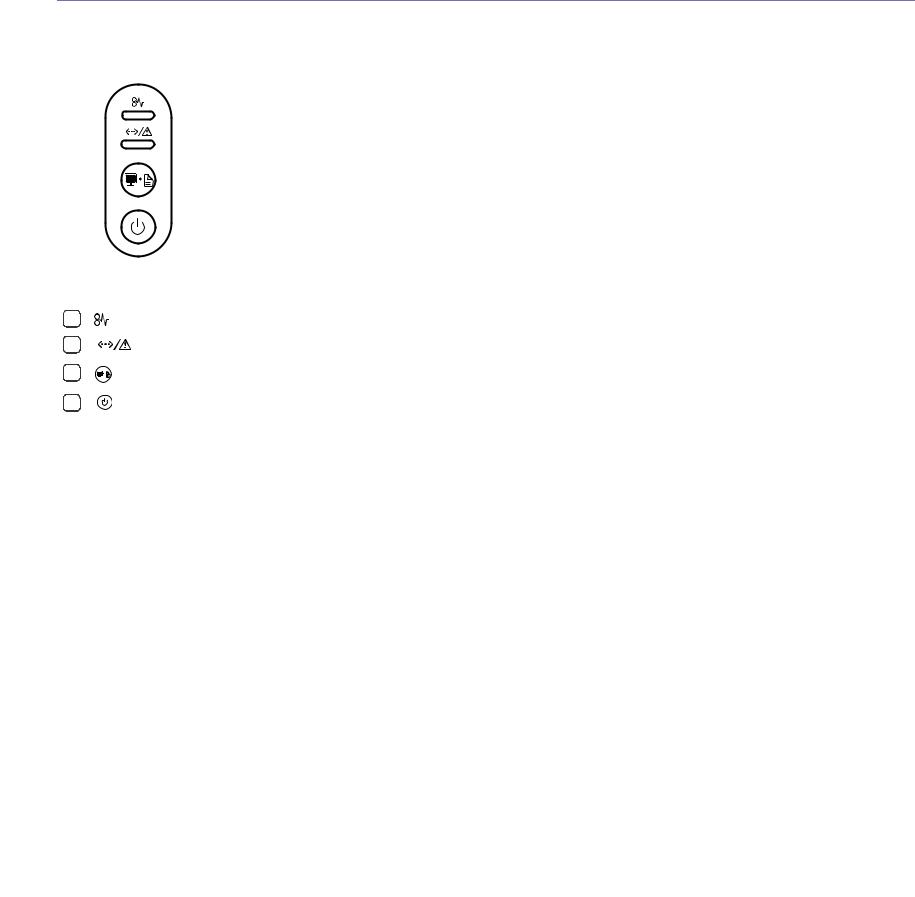
Control panel overview
This control panel may differ from your machine depending on the model.
|
|
Jam |
Shows the status of paper jams in your machine (See "Understanding the status LED" on page 19). |
|
|
|
|
|
|
Online/Error |
Shows the status of your machine (See "Understanding the status LED" on page 19). |
|
|
|
|
|
|
Print Screen |
Prints the displayed screen of your monitor. (See "(Print screen) button" on page 19.) |
|
|
|
|
|
|
Power |
You can turn the power on and off with this button. (See "(Power) button" on page 19.) |
|
|
|
|
Introduction_ 18

Understanding the status LED
The color of the LEDs indicates the machine's current status.
LED |
|
|
Status |
Description |
|
|
|
|
|
|
|
Jam ( |
|
) Orange |
On |
A paper jam has occurred. |
|
|
|
|
|
|
(See "Clearing paper jams" on |
|
|
|
|
|
page 48.) |
|
|
|
|
|
|
Online |
|
|
Off |
|
• The machine is off-line. |
/Error |
|
|
|
|
|
|
|
Green |
On |
• The machine is in power saver |
|
( |
) |
|
|||
|
|
|
mode. |
||
|
|
|
|
|
|
|
|
|
|
|
• The machine is on-line and can |
|
|
|
|
|
receive data from the computer. |
|
|
|
|
|
|
|
|
|
|
Blinking |
• When the LED slowly blinks, the |
|
|
|
|
|
machine is receiving data from the |
|
|
|
|
|
computer. |
|
|
|
|
|
• When the LED rapidly blinks, the |
|
|
|
|
|
machine is printing data. |
|
|
|
|
|
|
|
|
|
Red |
On |
• The cover is opened. Close the |
|
|
|
|
|
cover. |
•There is no paper in the tray. Load paper in the tray.
•The machine has stopped due to a major error.
•Your system has some problems. If this problem occurs, contact a service representative.
•A toner cartridge has almost reached its estimated cartridge lifea. It is recommended to replace the toner cartridge. (See "Replacing the toner cartridge" on page 57.)
Blinking • A minor error has occurred and the machine is waiting for the error to be cleared. When the problem is cleared, the machine resumes printing.
•A small amount of toner is left in the cartridge. The estimated cartridge lifea of toner is close. Prepare a new cartridge for replacement. You may temporarily increase the printing quality by redistributing the toner (See "Redistributing toner" on page 48).
•The machine is printing in manual feed mode or in manual duplex mode.
•The machine is canceling a print job.
a.Estimated cartridge life means the expected or estimated toner cartridge life, which indicates the average capacity of print-outs and is designed pursuant to ISO/IEC 19752. The number of pages may be affected by operating environment, printing interval, media type, and media size. Some amount of toner may remain in the cartridge even when red LED is on and the printer stops printing.
Samsung does not recommend using a non-genuine Samsung toner cartridge such as one that is refilled or remanufactured. Samsung cannot guarantee a non-genuine Samsung toner cartridge's quality. Service or repair required as a result of using non-genuine Samsung toner cartridges will not be covered under the machine warranty.
All printing errors will appear in the Printer Status(Windows) or Smart Panel(Linux, Mac OS X) program window. If the problem persists, contact a service representative.
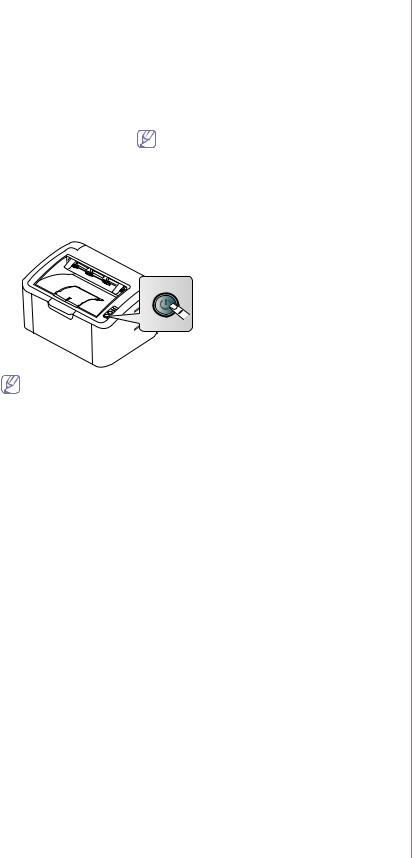
Introducing the useful buttons
 (Print screen) button
By pressing the  , you can:
Function |
Description |
|
|
Printing the active |
Press this button and the green LED will start |
window |
blinking. When the green LED stops blinking, |
|
release the button. |
Printing the whole |
Press this button and the green LED will start |
monitor screen |
blinking. Release the button while it’s blinking. |
Printing a configuration |
In the ready mode, press and hold this button |
sheet |
for about 10 seconds until the green LED |
|
blinks slowly, and release. (See "Printing a |
|
configuration sheet" on page 21.) |
Supplies info report |
In the ready mode, press and hold this button |
|
for about 15 seconds until the green LED |
|
blinks rapidly, and release. |
Manual print |
Press this button each time you load a sheet |
|
of paper in the tray if you have selected |
|
Manual Feeder for Source in your printer |
|
driver. |
|
|
•Print Screen can only be used in the Windows and Macintosh operating systems.
•When printing the active window/whole monitor screen using the print screen button, the machine may use more toner depending on what is being printed.
•You can only use this function if the machine’s Samsung Easy Printer Manager or Smart Panel program is installed.
 (Power) button
By pressing the  , you can:
Introduction_ 19
Function |
Description |
|
|
Power On/Off |
Press this button to turn the power on or off. |
Cancel print job |
During printing, press this button once. The |
|
print job is cleared from both the machine and |
|
the computer and then the machine returns to |
|
the ready mode. This may take some time |
|
depending on the size of the print job. |
|
If you press this button for more than 2 |
|
seconds, the power goes off. |
|
|
Turning on the machine
1.Plug in the power cord.
2.Press  on the control panel.
If you want to turn the power off, press and hold this button for about 2 seconds.
Introduction_ 20
getting started
This chapter gives you step-by-step instructions for setting up the USB connected machine and software.
This chapter includes:
•Setting up the hardware
•Printing a configuration sheet
•Supplied software
Setting up the hardware
This section shows the steps to set up the hardware, as is explained in the Quick Install Guide. Make sure you read the Quick Install Guide first and follow the steps below:
Location
1.Select a stable location.
Select a level, stable place with adequate space for air circulation. Allow extra space for opening cover(s) and tray(s).
The area should be well ventilated and away from direct sunlight or sources of heat, cold, and humidity. Do not set the machine close to the edge of your desk or table.
Printing is suitable for altitudes under 1,000 m (3,281 ft).
Place the machine on a flat, stable surface so that there is no incline greater than 2 mm (0.08 inch). Otherwise, printing quality may be affected.
2.Unpack the machine and check all the enclosed items.
3.Remove tape holding the machine securely.
4.Install the toner cartridge.
5.Load paper. (See "Loading paper in the tray" on page 28.)
6.Make sure that all cables are connected to the machine.
7.Turn the machine on. (See "Turning on the machine" on page 20.)
•System requirements
•Installing USB connected machine’s driver
•Sharing your machine locally
 This machine will not operate when the power main fails.
Printing a configuration sheet
Print a configuration page to make sure that the machine is operating properly.
To print a configuration page:
In the ready mode, press and hold  for about 10 seconds until the green LED blinks slowly, and release.
Supplied software
After you have set up your machine and connected it to your computer, you must install the printer software. If you are a Windows or Macintosh OS user, install the software from the supplied CD and if you are a Linux OS user, download the software from the Samsung website (www.samsung.com/printer) and install.
Machine software is occasionally updated for reasons like the release of new operating system and etc. If needed, download the latest version from the Samsung website (www.samsung.com/printer).
OS |
Contents |
|
|
Windows |
• Printer driver: Use this driver to take full advantage of |
|
your machine’s features. |
|
• Easy Printer Manager: This program combines device |
|
settings as well as printing environments, settings/actions |
|
and launching. All of these features provide a gateway to |
|
conveniently use your Samsung machine. |
|
• Printer Status: This program monitors and informs you |
|
of the machine status. |
Macintosh • Printer Driver: Use this driver to take full advantage of your machine’s features.
•Smart Panel: This program allows you to monitor the machine’s status.
Linux |
• |
Unified Linux Driver: Use this driver to take full |
|
|
advantage of your machine’s features. |
|
• |
Smart Panel: This program allows you to monitor the |
|
|
machine’s status and alerts you when an error occurs |
|
|
during printing. |
Getting started_ 21
Loading...