


 Loading...
AC4065, AC4063, AC4055, AC4053

1

English 6 Indonesia 14
22
Bahasa Melayu 30
38
45
AC4065,AC4063,AC4055,AC4053

English
Introduction
Congratulations on your purchase and welcome to Philips!To fully benefit from the support that
Philips offers, register your product at www.philips.com/welcome.
With this new CleanAir System you breathe cleaner air. For the best results, place the CleanAir System in a room where you spend most of your time, e.g. the living room or bedroom. Wherever there are people, plants or pets, there are airborne particles that can affect your wellbeing, especially if you suffer from allergies. Because of these particles, the air inside a room may be more polluted than the air in a large city.
Normally, particles are invisible and odourless. Nevertheless they can affect your health.The CleanAir System reduces the amount of viruses, bacteria, animal dander and industrial pollutants in the air, which improves the air quality.
Filtration in several stages
The air cleaner has a unique multi-stage filtration system that guarantees the best air quality:
-Stage 1:The pre-filter catches big particles.
-Stage 2:The corona particle charger charges finer particles.
-Stage 3:The ESP particle filter traps charged ultra-fine particles.
-Stage 4:Active oxygen sterilises trapped bacteria and viruses.
-Stage 5:The zeolite gas filter traps a wide range of harmful gases and odours.
-Stage 6:Active oxygen reacts with the zeolite gas filter to clean out the trapped gases and odours, so that the filter rejuvenates.
General description (Fig. 1)
AAir inlet
BAir outlet
CControl panel AC4065/AC4055 1 Standby light
2 SmartAir Control light
3 BoostPower light
4 Speed lights for low, medium and high speed
5 Air quality indicator
6 Function selection button
7 Timer lights (1, 4 or 8 hours)
8 Timer button
DControl panel AC4063/AC4053
1On/off button
2Speed lights for low, medium and high speed
3Speed selection slide
EFront panel
FESP particle filter
GPre-filter
HZeolite gas filter
IBrush
JCorona particle charger
KRecess
LBody of the appliance
MHandle
Important
Read this user manual carefully before you use the appliance and save it for future reference.

English
Danger
-Do not let water or any other liquid or flammable detergent enter the appliance to avoid electric shock and/or a fire hazard.
-Do not clean the appliance with water or any other liquid or a (flammable) detergent to avoid electric shock and/or a fire hazard.
Warning
-Check if the voltage indicated on the bottom of the appliance corresponds to the local mains voltage before you connect the appliance.
-If the mains cord is damaged, you must have it replaced by Philips, a service centre authorised by
Philips or similarly qualified persons in order to avoid a hazard.
- Do not use the appliance if the plug, the mains cord or the appliance itself is damaged.
-This appliance is not intended for use by persons (including children) with reduced physical, sensory or mental capabilities, or lack of experience and knowledge, unless they have been given supervision or instruction concerning use of the appliance by a person responsible for their safety.
-Children should be supervised to ensure that they do not play with the appliance.
-Do not block the air inlet and outlet, e.g. by placing items on the air outlet or in front of the air inlet.
Caution
-This appliance is not a substitute for proper ventilation, regular vacuum cleaning or use of an extractor hood or fan while cooking.
-If the wall socket used to power the appliance has poor connections, the plug of the appliance becomes hot. Make sure you plug the appliance into a properly connected wall socket.
-Always place and use the appliance on a dry, stable, level and horizontal surface.
-Leave at least 10cm free space behind and on both sides of the appliance.
-Avoid knocking against the appliance (the air inlet and outlet in particular) with hard objects.
-Always lift or move the appliance by the handle at the back or the handgrips on both sides.
-Do not insert your fingers or objects into the air outlet or the air inlet.
-Do not use this appliance when you have used indoor smoke-type insect repellents or in places with oily residues, burning incense or chemical fumes.
-Do not use the appliance near gas appliances, heating devices or fireplaces.
-Always unplug the appliance after use and before you clean it.
-Do not use the appliance in a room with major temperature changes, as this may cause condensation inside the appliance.
-Do not use the appliance in a room that is larger or smaller than the recommended size.The recommended room size is 6m² up to 20m² for AC4055/AC4053 and 6m² up to 40m² for
AC4065/AC4063.
-To prevent interference, place the appliance at least 2m away from electrical appliances that use
airborne radio waves such as TVs, radios and radio-controlled clocks.
-The appliance is equipped with a safety device. If you have not placed the ESP particle filter, the
zeolite gas filter and the front panel properly, you cannot switch on the appliance.
-If the indoor air quality is poor (e.g. due to smoking or cooking or after renovation), we strongly advise you to open windows when you use the appliance to improve the air circulation.
-The appliance is only intended for household use under normal operating conditions.
-Do not use the appliance in wet surroundings or in surroundings with high ambient temperatures, such as the bathroom, toilet or kitchen.
-The appliance does not remove carbon monoxide (CO).
Electromagnetic fields (EMF)
This Philips appliance complies with all standards regarding electromagnetic fields (EMF). If handled properly and according to the instructions in this user manual, the appliance is safe to use based on scientific evidence available today.

English
Before first use
Placing the zeolite gas filter
The appliance comes with all filters, except the zeolite gas filter, fitted inside.
Tip:Place the appliance against a wall for more stability when you remove or insert filters. Note:Make sure you insert the filters in the correct position (with the arrow facing upwards).
Note:The appliance is equipped with a safety device.If you have not placed the ESP particle filter,the zeolite gas filter and the front panel properly,you cannot switch on the appliance.
1Place your fingers in the recesses of the side panels. (Fig.2)
2Gently pull the top part of the front panel off the appliance (1) and then lift the panel upwards to remove it (2) (Fig.3).
3To remove the ESP particle filter,grab the filter handles on both sides and gently slide the filter out of the appliance. (Fig.4)
4Remove all packaging material from the zeolite gas filter and slide the filter into the appliance. (Fig.5)
,You can only insert the zeolite gas filter after you have removed the particle filter.
5 To insert the ESP particle filter,slide it into the appliance (‘click’) (Fig.6).
6To reattach the front panel,insert the bottom edge first (1) and then press the top part home (2) (Fig.7).
Using the appliance
AC4065/AC4055
1Put the plug in the wall socket
,The standby light goes on (Fig.8).
2Press the function selection button one or more times to select the required function and setting (Fig.9).
The corresponding light goes on and the standby light goes out.
,SmartAir Control:the built-in air sensor determines the ambient air quality and automatically selects the most appropriate speed.In the first few minutes after you select the SmartAir
Control function,the air quality indicator flashes red to indicate that the air quality sensor is measuring the ambient air quality.After approximately 5 minutes,the air quality indicator lights up green if the air quality is good or lights up red if the air quality is poor (Fig.10).
,BoostPower:the appliance operates at high speed for 30 minutes (BoostPower light is on) and then automatically switches to SmartAir Control (BoostPower light goes out
and SmartAir Control light goes on) (Fig.11).
,Speed:the appliance operates at the speed you select.
- ê = low speed
- ë = medium speed - í = high speed
3 To stop the appliance from operating,press the function selection button until the standby light goes on (Fig.12).
4 Unplug the appliance.
Timer function
1Put the plug in the wall socket and select the required function and setting as described above.
English
2 Press the timer button to set the operating time (1,4 or 8 hours) (Fig.13).
The corresponding timer light goes on.
,To deactivate the timer function,press the timer button and keep it pressed until the timer light goes out.
,When the set time has elapsed,the appliance automatically switches to standby mode.
Note:If you want to stop the air cleaning process before the set time has elapsed,press the function selection button until the standby light goes on.
AC4063/AC4053
1Put the plug in the wall socket
2Press the on/off button to switch on the appliance. (Fig.14)
3 Set the speed slide to the desired speed:low,medium or high (Fig.15).
-ê = low speed
-ë = medium speed
-í = high speed
,The corresponding speed light goes on.
4 Press the on/off button to switch off the appliance and unplug the appliance.
Cleaning and maintenance
Always unplug the appliance before you clean it.
Do not let water or any other liquid or flammable detergent enter the appliance to avoid electric shock and/or a fire hazard.
Do not clean the appliance with water or any other liquid or a (flammable) detergent to avoid electric shock and/or a fire hazard.
Body of the appliance
Regularly clean the inside and outside of the body to prevent dust from collecting on the inside and outside.
1Wipe away dust with a dry,soft cloth from the body of the appliance.
2Clean the air inlet and the air outlet with a dry soft cloth.
Corona particle charger
Never touch the corona particle charger with your fingers.Always clean the corona particle charger with the special soft cleaning brush,which is stored in the front panel.
Be extra careful when you clean the corona particle charger:the wires are very fragile.
1Take the soft cleaning brush out of the front panel.
2Pass the brush gently along the top and bottom of the corona particle charger.
ESP particle filter and zeolite gas filter
1Remove the filters from the appliance (see chapter‘Filter replacement’,section‘Removing the filters’).
2Remove visible dirt with a vacuum cleaner.
Pre-filter
1 Clean the pre-filter with a vacuum cleaner.

10 |
English |
|
|
|
|
|
|
|
|
Filter replacement |
|
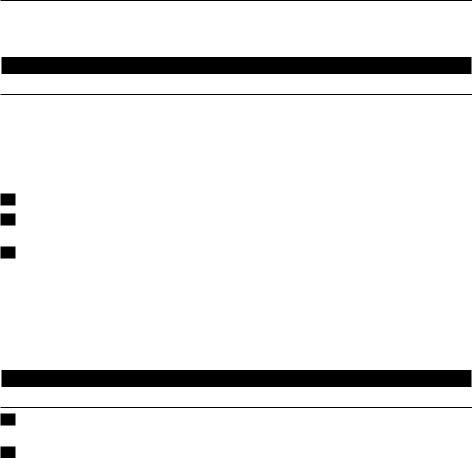
|
number of cigarettes per day |
estimated lifetime of filters |
|
0 |
- 1 |
up to 5 years |
|
5 |
- 10 |
up to 6 to 12 months |
|
20 |
up to 3 - 6 months |
||
ESP particle filter
,In case of normal household use in a non-smoking environment and in case of proper maintenance (see chapter‘Cleaning and maintenance’),the particle filter lasts approx.5 years.
,To check if you have to replace the ESP particle filter you have to remove the front cover and pull out the ESP particle filter with two hands (Fig.4).
,Turn the ESP particle filter upside down (Fig.16).
,Check the pollution between the layers and judge which pollution level applies.Only replace filter in case pollution bridges two layers. (Fig.17)
,A new ESP particle filter is available under the following type numbers:
-AC4107 for CleanAir System AC4055/AC4053
-AC4108 for CleanAir System AC4065/AC4063
Zeolite gas filter
In case of normal household use in a non-smoking environment and in case of proper maintenance
(see chapter‘Cleaning and maintenance’), the zeolite gas filter lasts up to 5 years.
Note:You may need to replace the zeolite gas filter sooner in case of more extreme usage conditions (smoking environment,just renovated room,non-domestic use etc.) and insufficient maintenance.
,Replace the zeolite gas filter when you have to replace the ESP particle filter.
,A new zeolite gas filter is available under the following type numbers:
-AC4117 for CleanAir System AC4055/AC4053
-AC4118 for CleanAir System AC4055/AC4053
Removing the filters
Tip:Place the appliance against a wall for more stability when you remove or insert filters.
1Place your fingers in the recesses of the side panels.Gently pull the top part of the front panel off the appliance (1) and then lift the panel upwards to remove it (2) (Fig.3).
2To remove the ESP particle filter,grab the filter handles at both sides and gently slide the filter out of the appliance. (Fig.4)
3To remove the zeolite gas filter,slide it out of the appliance (Fig.18).
Note:You can only remove the zeolite gas filter after you have removed the ESP particle filter.
4To remove the pre-filter,slide it out of the appliance (Fig.19).
Inserting the filters
Tip:Place the appliance against a wall for more stability when you remove or insert filters. Note:Make sure you insert the filters in the correct position (with the arrow facing upwards).
Note:The appliance is equipped with a safety device.If you have not placed the ESP particle filter,the zeolite gas filter and the front panel properly,you cannot switch on the appliance.
1 Slide the zeolite gas filter into the appliance. (Fig.5)
English 11
2Slide the ESP particle filter into the appliance (Fig.6).
3Slide the pre-filter into the appliance. (Fig.20)
4To reattach the front panel,insert the bottom edge first (1) and then press the top part home (2) (Fig.7).
Guarantee and service
If you need information or if you have a problem, please visit the Philips website at www.philips.com or contact the Philips Consumer Care Centre in your country (you find its phone number in the worldwide guarantee leaflet). If there is no Consumer Care Centre in your country, go to your local
Philips dealer.
Environment
-Do not throw away the appliance with the normal household waste at the end of its life, but hand it in at an official collection point for recycling. By doing this, you help to preserve the environment (Fig. 21).
Troubleshooting
This chapter summarises the most common problems you could encounter with the appliance. If
Problem |
Solution |
|
|
The selected function/ |
The appliance may be in standby mode or may be switched off. |
time mode doesn’t |
|
work. |
|
The appliance doesn’t work.
The clean air doesn’t come smoothly out of the air outlet
There may be a connection problem. Check if the plug is inserted in the wall socket properly.
The appliance may not be switched on.AC4065/AC4055: press the function selection button.AC4063/AC4053: press the on/off button.
The ESP particle filter or the front panel may not be placed properly. Reinsert the filters and reattach the front panel.
The zeolite gas filter is not placed yet. Insert the filter and reattach the front panel.
If you have performed the above checks and the appliance still does not work, it may be malfunctioning. Unplug the appliance and take it to your Philips dealer or an authorised Philips service centre.
The pre-filter may be clogged. Clean the pre-filter (see chapter
‘Cleaning and maintenance’).
Perhaps you forgot to remove the plastic wrapper of a new filter.
Remove the plastic wrapper before you switch on the appliance again.
The air inlet or outlet may be blocked by external objects. Remove the object that blocks the air inlet or outlet.

12 English
Problem |
Solution |
|
Clean the filters and the corona particle charger (see chapter‘Cleaning |
|
and maintenance’). If this does not help, unplug the appliance and take it |
|
to your Philips dealer or an authorised Philips service centre. |
The odours are not |
The zeolite gas filter may be dirty or may have reached the end of its |
removed properly. |
life. Clean the zeolite gas filter (see chapter‘Cleaning and maintenance’) |
|
or replace it (see chapter ‘Filter replacement’). |
|
Perhaps you use the appliance in a room in which the ambient air |
|
quality is very poor. In that case, open windows to improve the air |
|
circulation. |
|
Perhaps you use the appliance in a room that is much bigger than the |
|
room size the appliance is intended for. Put the appliance in a smaller |
|
room.The recommended room size is 6m² up to 20m² for AC4055/ |
|
AC4053 and 6m² up to 40m² for AC4065/AC4063. |
The dust particles are |
The ESP particle filter may have reached the end of its life. Check the |
not removed properly. |
colour of the ESP particle filter (see chapter‘Filter Replacement’). If |
|
necessary, replace the filter. |
|
Perhaps you use the appliance in a room that is much bigger than the |
|
room size the appliance is intended for. Put the appliance in a smaller |
|
room.The recommended room size is 6m² up to 20m² for AC4055/ |
|
AC4053 and 6m² up to 40m² for AC4065/AC4063. |
The fans do not work, |
The appliance may be malfunctioning. Switch off the appliance and |
even though the |
unplug it.Take the appliance to your Philips dealer or an authorised |
appliance is plugged in |
Philips service centre. |
and switched on. |
|
The appliance produces |
The pre-filter may be clogged. Clean the pre-filter (see chapter |
an unusual noise (e.g. a |
‘Cleaning and maintenance’). |
hissing, sizzling or |
|
crackling noise) during |
|
operation. |
|
|
Perhaps you forgot to remove the plastic wrapper of a new filter. |
|
Remove the plastic wrapper before you switch on the appliance again. |
|
The air inlet or outlet may be blocked by external objects. Remove the |
|
object that blocks the air inlet or outlet. |
|
The appliance may be malfunctioning. Switch off the appliance and |
|
unplug it.Take the appliance to your Philips dealer or an authorised |
|
Philips service centre. |
|
Perhaps the mesh of the corona particle charger is not clean. Clean the |
|
corona particle charger (see chapter ‘Cleaning and maintenance’). |
The appliance produces |
The appliance may be malfunctioning. Switch off the appliance and |
a burning smell during |
unplug it.Take the appliance to your Philips dealer or an authorised |
operation |
Philips service centre. |
The appliance gives off |
In case of an unusual smell, contact an authorised Philips service centre. |
an unusual smell during |
|
operation. |
|

|
English 13 |
Problem |
Solution |
The corona particle |
This is not a problem. By brushing the top and bottom of the corona |
charger is still dirty after |
particle charger, you remove enough dirt to make it work properly |
I have cleaned it with |
again.Never touch the corona particle charger with your hands. Always |
the soft cleaning brush. |
clean the corona particle charger with the special soft cleaning brush, |
|
which is stored in the front panel. Be extra careful when you clean the |
|
corona particle charger: the wires are very fragile. |
The appliance produces |
Sometimes small sparks may be produced in the corona particle |
sparks during operation. |
charger.This is quite normal and the result of moisture in the air. |

14 Indonesia
Pendahuluan
Selamat atas pembelian Anda dan selamat datang di Philips! Untuk memanfaatkan sepenuhnya dukungan yang ditawarkan Philips, daftarkan produk Anda di www.philips.com/welcome. Dengan Sistem CleanAir baru ini Anda akan menghirup udara yang lebih bersih. Untuk hasil yang terbaik, letakkan Sistem CleanAir di ruangan di mana Anda lebih banyak menghabiskan waktu, misalnya ruang tamu atau kamar tidur.
Di mana ada manusia, tanaman atau binatang peliharaan, maka terdapat partikel udara yang dapat mempengaruhi kesehatan Anda, terutama jika Anda menderita alergi. Karena partikel-partikel ini, udara dalam ruangan mungkin lebih terpolusi dibandingkan udara di kota besar.
Umumnya, partikel ini tidak nampak dan tidak berbau. Meski demikian partikel ini dapat mempengaruhi kesehatan Anda. Sistem CleanAir mengurangi jumlah virus, bakteri,serpihan kulit ari hewan dan bahan pencemar yang berasal dari industri di udara, yang mempengaruhi kualitas udara.
Penyaringan dalam beberapa tahap
Pembersih udara memiliki beberapa tahap sistem penyaringan yang unik sehingga menjamin kualitas udara terbaik:
-Tahap 1: Pra-filter menangkap partikel besar.
-Tahap 2: Pengisi muatan partikel corona memberi muatan pada partikel yang sangat kecil.
-Tahap 3: Filter partikel ESP menangkap partikel yang telah diberi muatan.
-Tahap 4: Oksigen aktif akan mensterilkan bakteri dan virus yang tertangkap.
-Tahap 5: Filter udara zeolit menangkap berbagai macam gas yang berbahaya dan tidak berbau.
-Tahap 6: Oksigen aktif akan bereaksi dengan filter gas zeolite untuk membersihkan gas dan bau yang tertangkap sehingga filter diremajakan.
Keterangan umum (Gbr. 1)
AMasukan udara
BKeluaran udara
CPanel kontrol AC4065/AC4055 1 Lampu siaga
2 Lampu SmartAir Control
3 Lampu BoostPower
4 Lampu kecepatan untuk kecepatan rendah, sedang dan tinggi
5 Indikator kualitas udara
6 Tombol pemilihan fungsi
7 Lampu timer (1, 4 atau 8 jam)
8 Tombol Timer
DPanel kontrol AC4063/AC4053
1Tombol on/off
2Lampu kecepatan untuk kecepatan rendah, sedang dan tinggi
3Geseran pemilihan kecepatan
EPanel depan
FFilter partikel ESP
GPra-filter
HFilter gas Zeolite
ISikat
JPengisi muatan partikel corona
KLekuk
LBadan alat
MGagang

Indonesia 15
Penting
Baca petunjuk penggunaan ini dengan saksama sebelum menggunakannya dan simpanlah sebagai referensi di masa mendatang.
Bahaya
-Jangan memasukkan air atau cairan lain atau deterjen yang mudah terbakar ke dalam alat untuk menghindari kejutan listrik dan/atau bahaya kebakaran.
-Jangan membersihkan alat dengan air atau cairan apa pun atau deterjen (yang mudah terbakar) untuk menghindari kejutan listrik dan/atau bahaya kebakaran.
Peringatan
-Sebelum menghubungkan alat, periksa apakah tegangan listrik (voltase) yang ditunjukkan pada alat sesuai dengan tegangan listrik setempat.
-Jika kabel listrik rusak, maka harus diganti oleh Philips, pusat servis resmi Philips atau orang yang
mempunyai keahlian sejenis agar terhindar dari bahaya.
-Jangan gunakan alat ini jika steker, kabel listrik atau alatnya sendiri rusak.
-Alat ini tidak dimaksudkan untuk digunakan oleh orang (termasuk anak-anak) dengan cacat fisik, indera atau kecakapan mental yang kurang, atau kurang pengalaman dan pengetahuan, kecuali jika mereka diberikan pengawasan atau instruksi mengenai penggunaan alat oleh orang yang bertanggung jawab bagi keselamatan mereka.
-Anak kecil harus diawasi untuk memastikan mereka tidak bermain-main dengan alat ini.
-Jangan menyumbat jalan masukan dan keluaran udara, misalnya dengan menempatkan benda pada jalan keluaran udara atau di depan jalan masukan udara.
Perhatian
-Alat ini bukan sebagai pengganti ventilasi yang baik, penyedot debu reguler atau digunakan pada tudung ekstraktor atau kipas angin selama memasak.
-Jika sambungan stopkontak dinding yang digunakan untuk mengalirkan listrik ke alat tidak bagus, steker alat menjadi panas. Pastikan Anda memasukkan steker alat ke dalam stopkontak dinding
yang sambungannya berfungsi baik.
-Selalu simpan dan gunakan alat pada permukaan yang stabil, rata dan pada posisi horisontal.
-Sisakan sekurangnya 10 cm ruang kosong di belakang dan pada kedua sisi alat.
-Jangan sampai membenturkan alat (khususnya jalan masukan dan keluaran udara) pada benda keras .
-Selalu angkat atau pindahkan alat pada pegangannya di bagian belakang atau pada genggaman di kedua sampingnya.
-Jangan memasukkan jari Anda atau benda ke dalam jalan keluaran atau masukan udara.
-Jangan gunakan alat ini apabila Anda sudah menggunakan obat nyamuk jenis-asap dalam ruangan atau di tempat yang terdapat residu minyak, dupa bakar, atau uap kimia.
-Jangan gunakan alat dekat peralatan gas, alat pemanas atau perapian.
-Selalu cabut alat setelah alat digunakan dan sebelum Anda membersihkannya.
-Jangan gunakan alat di ruangan yang perubahan suhunya besar, karena hal ini dapat menyebabkan pengembunan di dalam alat.
-Jangan gunakan alat pada ruang yang ukurannya lebih besar atau lebih kecil dari yang direkomendasikan. Ukuran ruang yang direkomendasikan adalah 6 m² hingga 20 m² untuk AC4055/AC4053 dan 6m² hingga 40 m² untuk AC4065/AC4063.
-Untuk mencegah gangguan, tempatkan alat dengan jarak sekurangnya 2m dari peralatan listrik yang menggunakan gelombang radio lewat udara, sepertTV, radio dan jam waktu yang dikendalikan radio.
-Alat ini dilengkapi dengan pengaman. Jika Anda belum menempatkan filter partikel ESP, filter gas
zeolit dan panel depan dengan benar,Anda tidak dapat menghidupkan alat.
-Jika kualitas udara di dalam ruangan buruk, (mis. karena rokok atau memasak, atau setelah renovasi), kami sangat menganjurkan agar Anda membuka jendela sewaktu Anda menggunakan alat untuk meningkatkan sirkulasi udara.
16 Indonesia
-Alat ini hanya untuk penggunaan rumah-tangga di bawah kondisi pengoperasian normal.
-Jangan gunakan alat di lingkungan yang basah atau di lingkungan yang suhu sekitarnya tinggi, seperti di kamar mandi, toilet atau dapur.
-Alat ini tidak menghilangkan karbon monoksida (CO).
Medan elektromagnet (EMF)
Alat Philips ini mematuhi semua standar yang berkenaan dengan medan elektromagnet (EMF). Jika ditangani dengan benar dan sesuai dengan instruksi petunjuk pengguna ini, alat tersebut aman digunakan berdasarkan pada bukti ilmiah yang kini tersedia.
Sebelum menggunakan alat pertama kali.
Menempatkan filter gas zeolit
Alat ini dilengkapi dengan semua filter, kecuali filter gas zeolit, yang sudah terpasang di dalam.
TipTempatkan alat pada dinding agar lebih stabil sewaktu Anda melepaskan atau memasang filter. Catatan:Pastikan Anda memasang filter dalam posisi yang benar (tanda panah menghadap ke atas).
Catatan:Alat ini dilengkapi dengan pengaman.Jika Anda belum menempatkan filter partikel ESP,filter gas zeolit dan panel depan dengan benar,Anda tidak dapat menghidupkan alat.
1Letakkan jariAnda di lekukan panel samping. (Gbr.2)
2Perlahan-lahan tarik bagian atas panel depan hingga terlepas dari alat (1) lalu angkat panel ke atas untuk melepaskannya (2) (Gbr.3).
3Untuk melepaskan filter partikel,genggam pegangan filter pada kedua sisi lalu perlahan-lahan geser filter keluar dari alat. (Gbr.4)
|
|
Lepaskan semua bahan kemasan dari filter gas zeolit dan geser filter ke dalam alat. (Gbr.5) |
4 |
||
, |
Anda hanya dapat memasang filter gas zeolit setelahAnda melepaskan filter partikel. |
|
|
5 |
Untuk memasang filter partikel ESP,geser filter tersebut ke dalam alat (‘klik’) (Gbr.6). |
|
|
Untuk memasang kembali panel depan,sisipkan tepi bawah terlebih dulu (1) kemudian tekan |
6 |
||
|
|
bagian atas di tempatnya (2) (Gbr.7). |
Menggunakan alat
AC4065/AC4055
1Masukkan steker ke stopkontak dinding.
,Lampu siaga akan menyala (Gbr.8).
2Tekan tombol pemilihan fungsi satu atau beberapa kali untuk memilih fungsi dan pengaturan yang diperlukan (Gbr.9).
Lampu yang bersangkutan akan menyala dan lampu siaga padam.
,SmartAir Control:sensor udara yang terpasang menentukan kualitas udara di sekitar dan secara otomatis memilih kecepatan yang paling sesuai.Pada beberapa menit pertama setelahAnda memilih fungsi SmartAir Control,indikator kualitas udara berkedip merah yang menandakan bahwa sensor kualitas udara sedang mengukur kualitas udara di
sekitar.Setelah kurang-lebih 5 menit,indikator kualitas udara menyala hijau jika kualitas udara bagus atau menyala merah jika kualitasnya buruk (Gbr.10).
,BoostPower:alat yang bekerja pada kecepatan tinggi selama 30 menit (lampu BoostPower menyala) kemudian secara otomatis beralih ke SmartAir Control (lampu BoostPower padam dan lampu SmartAir Control menyala) (Gbr.11).
,Kecepatan:alat bekerja pada kecepatan yangAnda pilih.
-ê = kecepatan rendah

Indonesia 17
-ë = kecepatan sedang
-í = kecepatan tinggi
3Untuk menghentikan alat,tekan tombol pemilihan fungsi sampai lampu siaga padam (Gbr.12).
4Cabut steker alat dari listrik.
FungsiTimer
1Masukkan steker ke dalam stopkontak dinding lalu pilih fungsi dan pengaturan yang diperlukan seperti diuraikan di atas.
2Tekan tombol timer untuk menyetel waktu pengoperasian (1,4 atau 8 jam) (Gbr.13).
Lampu timer yang bersangkutan akan menyala.
,Untuk menonaktifkan fungsi timer,tekan terus tombol timer sampai lampu timer padam.
,Setelah waktu yang ditetapkan berlalu,alat secara otomatis beralih ke modus siaga.
Catatan:Jika Anda ingin menghentikan proses pembersihan udara sebelum waktu yang ditetapkan berlalu,tekan tombol pemilihan fungsi sampai lampu siaga padam.
AC4063/AC4053
1Masukkan steker ke stopkontak dinding.
2Tekan tombol on/off untuk menghidupkan alat. (Gbr.14)
3 Setel geseran kecepatan ke kecepatan yang dikehendaki,rendah,sedang atau tinggi (Gbr.15).
-ê = kecepatan rendah
-ë = kecepatan sedang
-í = kecepatan tinggi
,Lampu kecepatan yang bersangkutan akan menyala.
4 Tekan tombol on/off untuk mematikan alat lalu cabut kabel listrik alat.
Membersihkan dan pemeliharaan
Selalu cabut kabel listrik sebelumAnda membersihkan alat ini.
Jangan memasukkan air atau cairan lain atau deterjen yang mudah terbakar ke dalam alat untuk menghindari kejutan listrik dan/atau bahaya kebakaran.
Jangan membersihkan alat dengan air atau cairan apa pun atau deterjen (yang mudah terbakar) untuk menghindari kejutan listrik dan/atau bahaya kebakaran.
Badan alat
Bersihkan bagian dalam dan bagian luar badan alat secara teratur untuk mencegah agar debu tidak menumpuk di bagian dalam dan luar.
1Seka debu dengan kain halus yang kering dari bagian badan alat.
2Bersihkan jalan masukan dan keluaran udara dengan kain lembut.
Pengisi muatan partikel corona
Jangan sentuh pengisi muatan partikel corona dengan jariAnda.Selalu bersihkan pengisi muatan partikel corona dengan sikat pembersih khusus yang lembut yang tersimpan di panel depan.
Anda harus sangat berhati-hati ketika membersihkan pengisi muatan partikel corona:kabel ini sangat mudah rusak.
1 Keluarkan sikat pembersih yang lembut dari panel depan.
Loading...