How it Works
Log In / Sign Up
0
My Files
0
My Downloads
329095
History
Account Settings
Log Out
Buy Points
How it Works
FAQ
Contact Us
Questions and Suggestions
Users
NordicTrack
Loading...
N
NTEL05991
NTEL060112
NTEL082120
NTEL089110
NTEL09814.0
NTEL71315.3
NTEL7506.0
NTEL7706.0
NTEL7906.1
NTEL79063
NTEL89010
NTEL912110
NTEVEL15918
NTEVEL879101
NTEVEL899090
NTEVESY22917
NTEVEX18718
NTEVEX740130
NTEVEX759091
NTEVSR819100
NTEX030091
NTEX03013.0
NTEX03917.0
NTEX048080
NTEX049110
NTEX049111
NTEX05119.0
NTEX4196.0
NTK14940
NTL06907.0
NTL07007.3
NTL07707.0
NTL07707.1
NTL07806.2
NTL079081
NTL079083
NTL09107.0
NTL09707.1
NTL097072
NTL1075.0
NTL10805.0
NTL10842
NTL10850
NTL10905.3
NTL10942
NTL110103
NTL110105
NTL12944
NTL12950
NTL140101
NTL142122
NTL150080
NTL15809.1
NTL16905.0
NTL16920
NTL170110
NTL170120
NTL17950
NTL189050
NTL190106
NTL190110
NTL19117.1
NTL19806.0
NTL19815.0
NTL19920
NTL19921
NTL209090
NTL20909.3
NTL220112
NTL2295 M.0
NTL24950
NTL29016.0
NTL600101
NTL600102
NTL77806.1
NTL77806.2
NTL790111
NTL990103
NTL990106
NTL990113
NTL992120
NTL99953C0
NTM58020
NTMC79280
NTMS0
NTRW59146.0
NTRW59147.0
NTTL09990
NTTL09992
NTTL11900
NTTL15020
NTTL15080
NTTL22900
NTTL99061
NTTL99070
NTW00630
NTXC80182
NTXC8018.3
NTXC80184
NTXC80185
Loading...
Loading...
Nothing found
NTL142122
Owner's Manual
40 pgs
3.44 Mb
0
Table of contents
Loading...
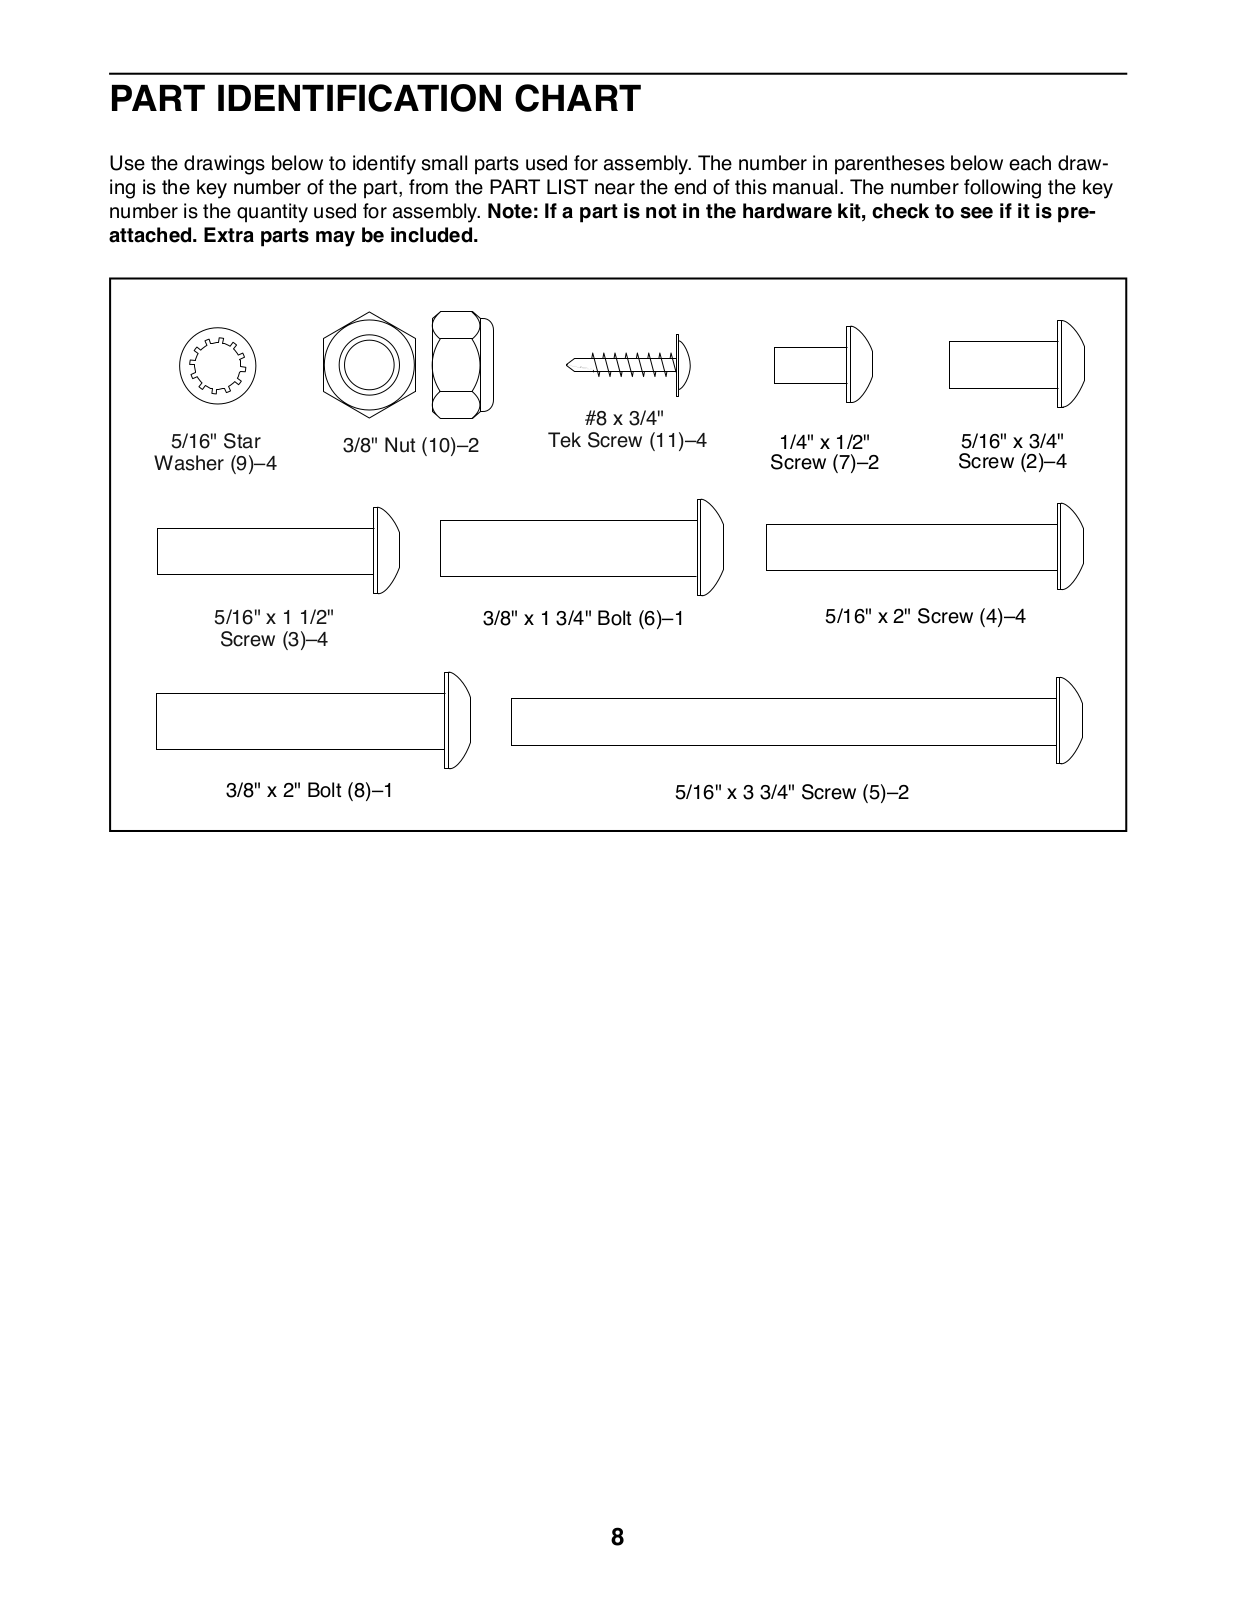
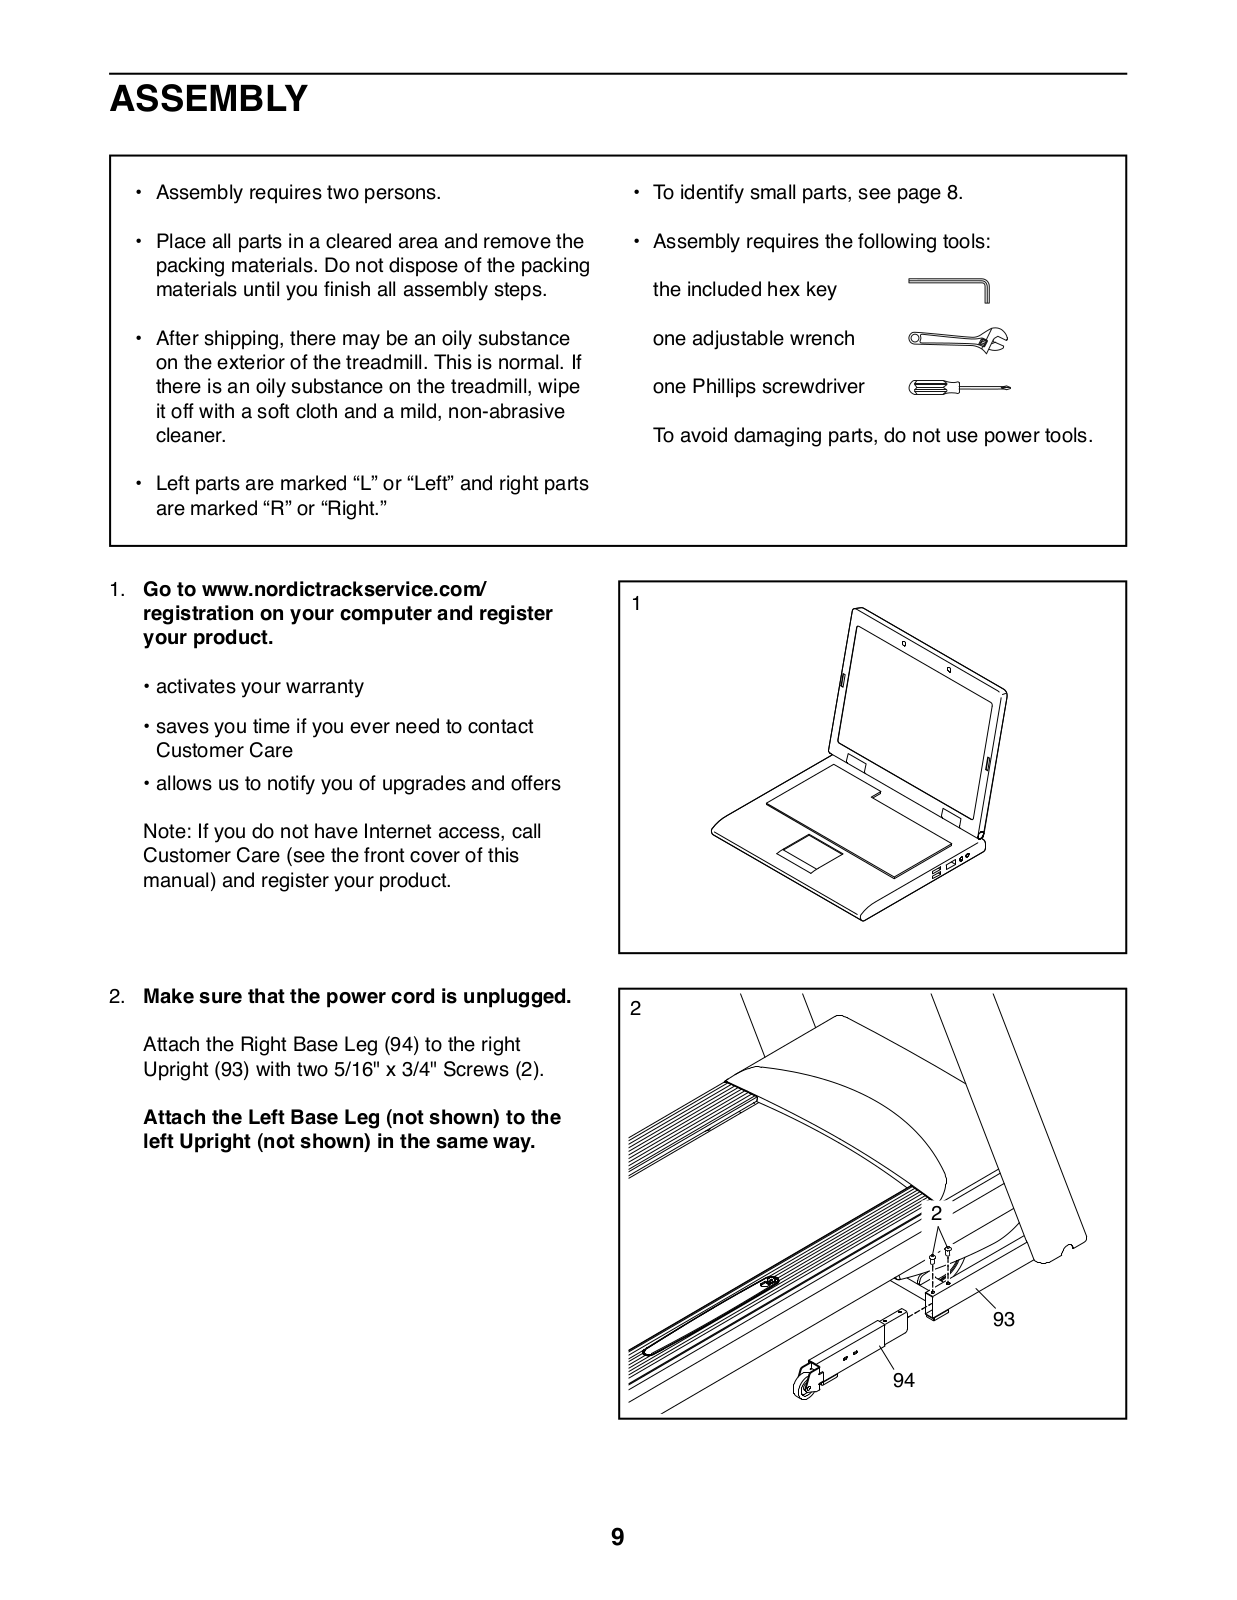
NordicTrack NTL142122 Owner's Manual
...
NordicTrack Owner's Manual
Download
Loading...
+
28
hidden pages
Unhide
You need points to download manuals.
1 point = 1 manual.
You can buy points or you can get point for every manual you upload.
Buy points
Upload your manuals
 Loading...