


 Loading...
En
Quick Start
Guide
Shoot |
pp. 1–8 |
Take pictures for any occasion—just |
|
point and shoot! |
|
Review |
pg. 9 |
View your pictures at a touch of a |
|
button. |
|
Transfer |
pp. 10–27 |
Copy pictures to your computers quickly and easily using Nikon View.
For information on installing
Nikon View, see pages 11–20.
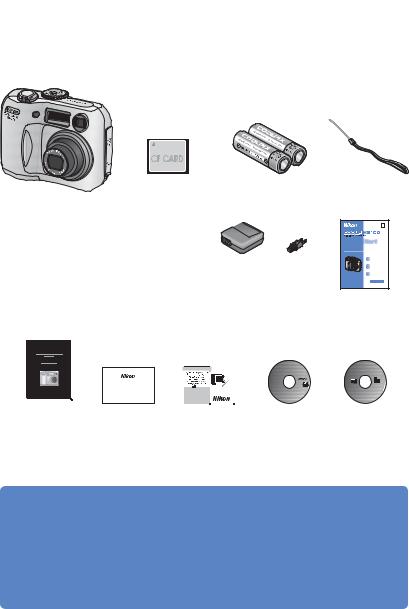
Check the package contents
Check that you have all the items listed below.
|
CompactFlash™ Rechargeable EN-MH1 |
Camera strap |
|
COOLPIX 2100 digital |
memory card |
batteries (× 2) |
|
camera |
|
|
|
|
|
|
En |
|
|
|
Quick Start |
|
|
|
Guide |
|
|
|
Shoot |
|
|
|
Review |
|
|
|
Transfer |
USB interface |
Video cable |
MH-70 battery charger |
Quick Start Guide |
cable |
|
with power cable |
(this guide) |
Guide to Digital Photography with the COOLPIX 2100
Nikon View
Nikon View |
Warranty
Reference Manual
|
|
|
|
|
|
|
|
|
|
|
|
|
|
|
|
|
|
Warranty “Important Infor- |
Nikon View |
Nikon View |
||||||
mation” envelope |
CD-ROM |
Reference Manual |
||||||
|
|
|
|
CD-ROM |
||||
Use Only Nikon Brand Electronic Accessories
Your Nikon COOLPIX digital camera is designed to the highest standards and includes complex electronic circuitry. Only Nikon brand electronic accessories (including AC adapters) certified by Nikon specifically for use with your Nikon digital camera are engineered and proven to operate within the operational and safety requirements of this electronic circuitry.
THE USE OF NON -NIKON ELECTRONIC ACCESSORIES COULD DAMAGE YOUR CAMERA AND MAY VOID YOUR NIKON WARRANTY.
For more information about Nikon brand accessories, contact your local authorized Nikon dealer.
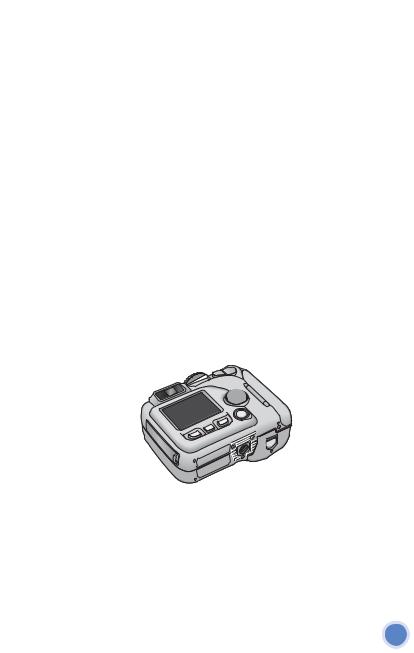
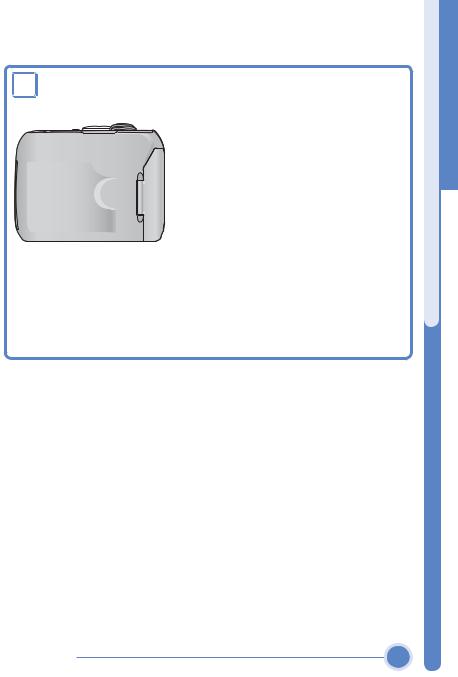
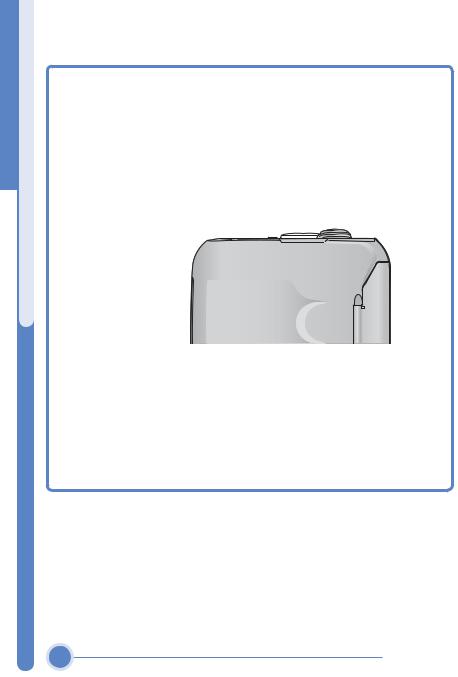
Parts of the Camera
The principle camera parts are listed below. See the Nikon Guide to Digital Photography with the COOLPIX 2100 for more information.
Mode dial |
|
Power-on lamp |
Shutter-release |
|
button |
Eyelet for |
|
camera strap |
Power switch |
Memory card |
|
slot cover |
|
Zoom buttons |
Multi selector |
Viewfinder |
|
|
(play/transfer) |
|
button |
Green (AF) lamp |
|
Interface connector cover
Battery-chamber cover
 2100
2100
Monitor |
Battery-chamber |
|
cover latch |
||
|


 USB/video-out
connector
Parts of the camera |
|
1 |
|
batteries the Charge
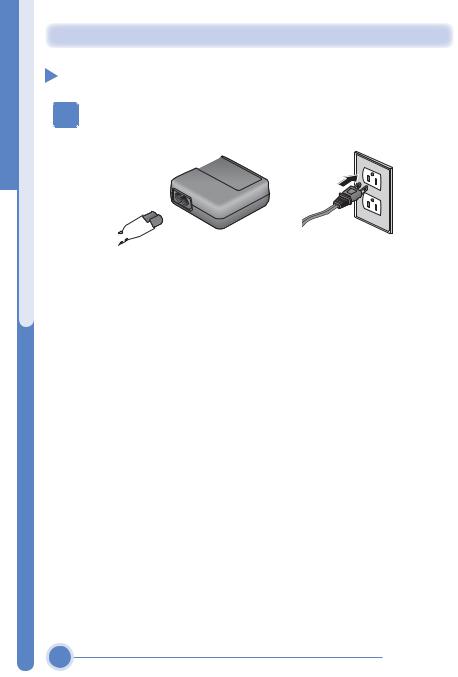
Taking Pictures
Step 1 Charge the batteries
Plug the AC adapter plug into the battery charger. Plug the wall plug into a power outlet. The CHARGE lamp will light.
AC inlet |
CHARGE lamp |
AC adapter plug
Wall plug
Insert a pair of EN-MH1 batteries as indicated on the charger.
 The CHARGE lamp will start to blink.
Charging is complete when the CHARGE lamp stops blinking.
It takes about two and a half hours to charge a pair of batteries once they are fully discharged.
2 |
Taking Pictures |
Replacing Batteries
Turn the camera off and make sure that the power-on lamp has gone out before removing or inserting batteries.
Read Battery Warnings
Read and follow all warnings and instructions supplied by the battery manufacturer.
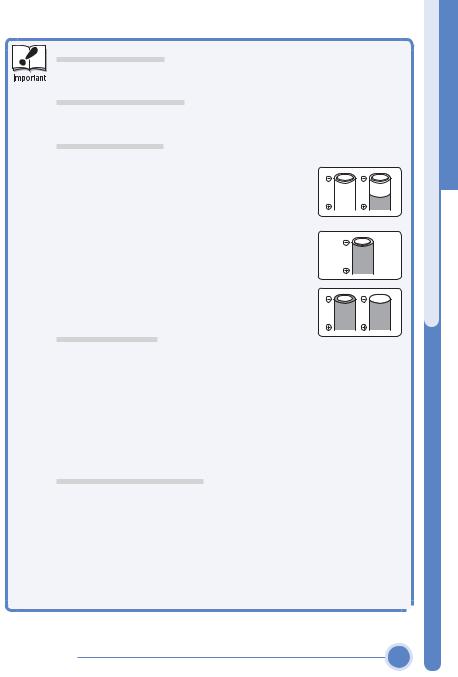
Damaged Batteries
The following batteries can not be used:
•Batteries with peeling or damaged insulation. Using batteries with damaged insulation could result in leakage, overheating, or rupture. Note
that due to manufacturing defects even new batteries may have faulty insulation.
•Batteries with insulation that covers only the sides of the battery and not the area around the negative terminal.
•Batteries with a flat negative terminal. Do not use such batteries even if the insulation adequately covers the area around the negative terminal.
EN-MH1 Batteries
Using an MH-70 battery charger, charge EN-MH1 batteries before first use. Charge each pair of batteries at the same time—do not charge batteries one at a time or mix batteries with different charges. Note that EN-MH1 batteries may discharge quickly immediately after purchase or after the batteries have been left unused for an extended period. This is normal, and the batteries will retain a charge for longer periods after being used and recharged several times. For more information on charging batteries, see the documentation provided with the MH-70.
Alternative Power Sources
•To power the camera continuously for extended periods, use a Nikon EH61 AC adapter (available separately; see the Guide to Digital Photography with the COOLPIX 2100). Do not, under any circumstances, use another make or model of AC adapter. Failure to observe this precaution could result in overheating or in damage to the camera.
•We recommend that you buy CRV3 lithium batteries as a back-up power source.
•The camera can also be used with a pair of ZR6 (AA) nickel-manga- nese batteries or FR6/L91 (AA) lithium batteries. 
batteries the Charge
Taking Pictures |
3 |

batteries the Insert / strap camera the Attach
 Step 2 Attach the camera strap
Attach the camera strap.
 Step 3 Insert the batteries
Open the battery-chamber cover
Pressing the battery-chamber latch ( ), slide the cover out and flip it open ( ).
Insert the batteries
Insert the batteries as shown in the label inside the battery chamber.
Close the battery-chamber cover
Close the battery-chamber cover ( ) and slide it in until it latches ( ). Be sure that the battery-chamber cover is properly latched.
4 |
Taking Pictures |

Step 4 Insert the memory card
Your Nikon digital camera stores pictures on CompactFlash™ memory cards.
Confirm that the camera is off
The power-on lamp should be off.
 Open the memory card slot cover
 Eject button
Direction of 
insertion
Terminals Front
Insert the memory card
Insert the memory card in the direction of the arrow as shown in the label on the underside of the memory card slot cover. The memory card is fully inserted when the eject button is level with the top of the memory card.
Insert the memory card terminals first. Inserting the card upside down or backwards could damage the camera or the card. Check to be sure the card is in the correct orientation.
 Close the memory card slot cover
card memory the Insert
Taking Pictures |
5 |

pictures Take
 Step 5 Take pictures
Turn the camera on. The power-on lamp will light, and a welcome message will be displayed. The camera is ready to shoot when the view through the lens is displayed in the camera monitor.
The first time you use the camera, the date and time will not be set, and the (“date not set”) icon will blink in the top right corner of the monitor.
 Turn the mode dial to
 and confirm that the camera is on.
Mode dial
6 |
Taking Pictures |
 Check indicators in the monitor.
The level of the batteries is shown in the moni-
|
tor as follows: |
|
|
Display |
Camera status |
|
NO ICON |
Camera functions normally. |
|
|
Recharge or replace batteries |
|
|
without delay. |
|
|
|
|
WARNING ! ! Batteries exhausted. Replace |
|
|
BATTERY |
with fresh or fully charged |
|
EXHAUSTED |
batteries. |
Number of exposures remaining
 Frame your subject in the center of the monitor.
Zoom buttons
Press T to zoom in on your subject so that it fills a larger area of the frame. Press W to zoom out, increasing the area visible in the frame.
Zoom out Zoom in
pictures Take
Taking Pictures |
7 |
pictures Take
When the camera focuses, the green (AF) lamp next to the viewfinder and the focus indicator in the monitor will light. If the lamp flickers, the camera is unable to focus on the subject in the center of the monitor. Change your composition and try again.

 Red (
Red ( ) lamp
Green (AF) lamp
Focus indicator
|
On |
Flash will fire when picture is taken. |
|
Red ( ) |
Blinks |
Flash charging. Remove finger briefly from shutter-re- |
|
lamp |
lease button, then try again. |
||
|
|||
|
Off |
Flash off or not required. |
|
Green (AF) |
On |
Subject in focus. |
|
lamp/focus |
|
Camera unable to focus on subject at center of frame. |
|
Flashes |
Using focus lock, focus on another subject at same dis- |
||
indicator |
|||
|
|
tance, then recompose picture and shoot. |
 Press the shutter-release button the rest of the way down to shoot.
The COOLPIX 2100 has a two-stage shutter-release button. Pressing the shutter-release button halfway focuses the camera. Pressing it the rest of the way down releases the shutter to record a picture.
8 |
Taking Pictures |
Loading...