


Nec S3500 series user Manual

1
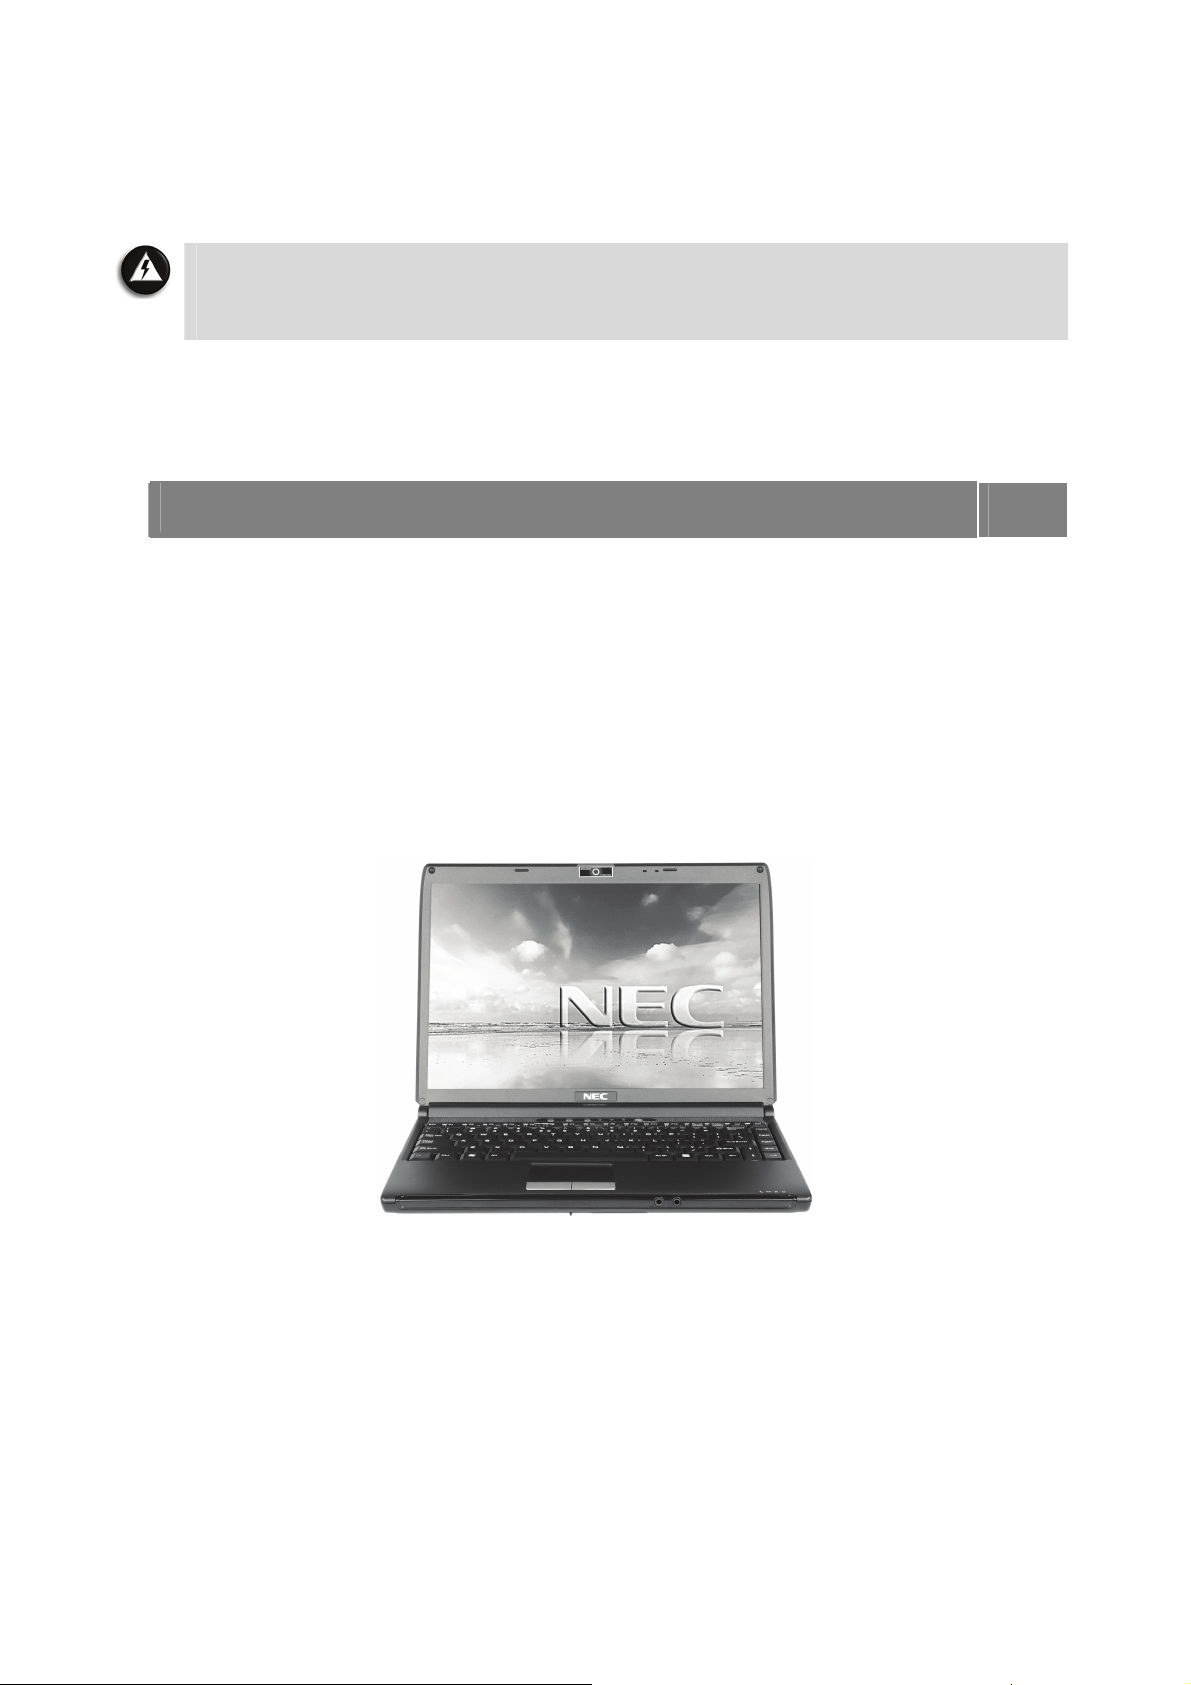
NEC VERSA S3500
Series
Electronic User’s Guide

2
Table of Contents
Page
Notebook Care 5
Introducing Your NEC VERSA 7
Introducing BIOS Setup for Windows Vista
®
23
Introducing BIOS Setup for Windows
®
XP 24
Windows Vista
®
Operating System Introduction (Only applicable to
Windows Vista
®
)
25
Windows
®
XP Operating System Introduction (Only applicable to Windows
®
XP)
32
Notebook Components 45
Applications 46
Using Your NEC VERSA 59
Preparing for Travel 69
Using Peripheral Devices 71
Setting Up a Healthy Work Environment 75
Problem Checklist 81
Recovery Information for Windows Vista
®
only 83
Recovery Information for Windows
®
XP only 88
Frequently Asked Questions 91
Safety Notices 98
Glossary 105
License Agreement 106
Copyright 108
Trademarks 109
Official Name of the Software Used 110

3
About Your Electronic User’s Guide
The illustrations, colours and pictures shown are for descriptive purposes. They may vary
slightly from country to country and the unit you purchase. Please refer to the finished product
for final configurations. Specifications and model names are subject to change without notice.
Note
You may find that your notebook is not supplied with devices/accessories that can be
used with your available slots/connections/ports. This is because the notebook you
have purchased has been fitted with a wide range of slots/connections/ports, to
allow you greater flexibility and options should you decide later on to use external or
optional devices/accessories.
Text Setup
To make this document as easy to use as possible, additional texts will appear throughout. The
following details the layout and meaning of these additional texts.
Note
Notes give particularly important information about an item being described.
CAUTION
Cautions indicate situations that can damage the notebook hardware or software.
WARNING
Warnings alert you to situations that could result in serious personal injury or even
loss of life.
* *For specific models only
Items marked with an asterisk (*) denotes optional items only supplied for specific
models. If the items are not found in the packaging box, it means that they are not
applicable to the notebook you have just purchased, hence they are not included for
you in the notebook.
Electronic User’s Guide
This Electronic User’s Guide aims to help you familiarise yourself with your new notebook. It
contains more information on your notebook, the devices and applications associated with it,
setting up a healthy work environment, safety notices and Windows
®
.
Visit our website at www.nec-computers-ap.com regularly to download the most up-to-date
Electronic User’s Guide and print it for your reference.
Note
We recommend that you print this documentation. It will then be easily accessible
even when your notebook is shut down. To print the Electronic User’s Guide, click
“File” on the top menubar, and then click “Print” from the dropdown menu. You must
have a printer installed and connected to be able to print.
Print in small booklets using recycled paper. Make two-sided prints and copies using the
“duplex” function, print multiple images/page per page, and print only the quantity you need
at the time you need it. This gives you a handy way to store the booklet nearby and saves
paper.

4
Basic Care and Handling Tips
Protect the notebook from extremely low or high
temperatures. Let the notebook warm (or cool) to room
temperature before using it.
Keep the notebook away from magnetised areas (some airline
tray tables are magnetic; do not set your notebook on top of
them). Doing so may damage the data on your hard drive.
Keep the notebook dry.
Do not wipe the notebook with a wet cloth or pour fluid onto
it.
Protect the notebook from strong physical contact, such as
being bumped or dropped.
Check the notebook for condensation.
If condensation is present, allow it to evaporate before
switching on the notebook.
Keep the notebook away from dust, sand and dirt.
Note
For information on the specifications of your notebook, please refer to the System
Configuration Label on the packaging box that comes with your system.
CAUTION
Before you connect or disconnect the power cords at the AC port of your notebook,
please ensure that the power plug is disconnected from the AC power outlet.
WARNING
Do not place this notebook on your lap and/or allow it to be in contact with any part
of your body while operating.

5
Notebook Care
Follow these guidelines to maintain the condition and performance of your notebook.
CAUTION
Immediately turn off and unplug the notebook under the following conditions:
• The power cord has been damaged or frayed.
• Liquid has spilled on or into the notebook.
• The notebook has been dropped or its casing has been damaged.
Precautions for Notebook Use
Take these precautions when using your notebook and AC adaptor:
• Be aware that your notebook may radiate heat when used for an extended period of time.
• Avoid dropping or bumping the notebook, or the AC adaptor.
• Do not stack heavy objects on the notebook, the AC adaptor, or the battery packs.
• Do not place items near the notebook that could block its air vents and cause overheating.
• Avoid moving the notebook during operation, especially while the hard disk, floppy disk, or
optical disc drive is being accessed.
• When using the AC adaptor, make sure the power source falls within the notebook's
compatibility range. Never use the AC adaptor if the voltage falls outside this range. Watch
for this when travelling to other countries.
• Shut down the notebook before attaching or removing non-plug-and-play devices.
• Disconnect the notebook from its AC power outlet if it is not going to be used for a long
time. This will avoid damage from transient over-voltage.
• Do not attempt to disassemble the notebook.
• Do not push any foreign objects into the notebook bays, connectors or slots.
• Keep the notebook away from magnetised areas (some airline tray tables are magnetic; do
not set your notebook on top of them). Doing so may damage the data on your hard drive.
• Avoid using the notebook or AC adaptor for extended periods under direct sunlight.
• Do not use the notebook in humid or dusty environments.
• Keep liquids and food away from the notebook.
• Turn notebook power off before cleaning it.
• Avoid exposing the notebook or AC adaptor to extreme changes in temperature or
humidity. If it is unavoidable, allow your notebook to adjust to room temperature before
use.
• When cleaning the notebook, use a soft, clean, dry cloth. Avoid wiping the display surface
with abrasive material, including rough fabric. Do not use a cleaning solution; this may
damage the notebook's plastic surface.
• If the AC adaptor becomes extremely hot, unplug the adaptor and let it cool.
Be sure to follow these power cord safety tips:
• Unplug by gripping the plug only; do not pull on the cable.
• Place the power cord such that it cannot be tripped or stepped on, and do not place items
directly on the power cord.
• Use an AC power outlet that is as close as possible to the notebook.

6
Storage Requirements
Store the notebook and AC adaptor in an environment that meets the following
conditions:
Should the temperature of the notebook suddenly rise or fall (for example, when you move the
notebook from a cold place to a warm place), vapour may condense inside the notebook.
Turning on the notebook under such conditions can damage the internal notebook
components.
Before turning on the notebook, wait until the notebook's internal temperature stabilises with
the new environment and any internal moisture has evaporated.
• Operate and store your notebook within the recommended temperatures and humidity
levels.
For more information, please refer to: Safety Notices → Product Storage
Environment Guidelines.
Page
104
• Keep the storage area free from vibration and magnetic fields.
• Keep the notebook and its components away from organic solvents or corrosive gases.
• Avoid leaving the notebook and its components under direct sunlight or near heat sources.
Routine Cleaning
CAUTION
Never use harsh solutions, household cleaners, or spray cleaners that contain caustic
materials on the notebook. These cleaners are usually high in alkalinity, making
them very corrosive. Using these cleaners can cause the notebook’s plastic surface
to crack or discolour.
Clean or dust your notebook as follows:
• LCD screen - carefully wipe the LCD screen with a soft cloth or special screen wipes
designed for cleaning LCD screens. Special screen wipes are available from your local
notebook dealer.
• Notebook case - we recommend that you carefully wipe the case with a slightly damp, soft
cloth.
7
Introducing Your NEC VERSA
Getting to Know Your Notebook
WARNING
Prolonged or improper use of a computer workstation may pose a risk of serious
injury. To reduce your risk of injury, set up and use your notebook in the manner
described in the section on “Setting Up a Healthy Work Environment”.
To get started, do the following:
• Read the section on “Setting Up a Healthy Work Environment” for guidelines that help you
use your notebook productively and safely. Information includes setting up and using your
notebook while reducing your risk of developing nerve, muscle, or tendon disorders.
For more information, please refer to: Setting Up a Healthy Work
Environment.
Page
75
• Read through this Electronic User’s Guide to familiarise yourself with the notebook.
NEC VERSA
The notebook offers you a portable system filled with exciting resources for home, business or
travel.
To settle in comfortably with your notebook, read the following sections and take a tour
around your notebook!

8
The Front View of the Notebook
Item Description
A Array Mic For voice conferencing and voice recording.
B Integrated
Camera
(For specific
models only)
For video conferencing or taking pictures.
The CyberLink YouCam webcam application can be launched by double-
clicking its icon
from the Windows
®
desktop.
C LCD Panel The notebook comes with a high resolution colour LCD display.
D Speakers Provides sound for your multimedia presentations or listening pleasure.
E Keyboard Standard Qwerty - key layout (models purchased may be shipped with
country specific keyboard layouts).
F Touchpad Works like a standard computer mouse. Simply move your fingertip over
the touchpad to control the position of the cursor.
G LEDs
A panel of several LEDs which indicate various system conditions.
For more information, please refer to: Introducing Your
NEC VERSA → LED Behaviour.
Page
14

9
Item Description
H ECO Button Press the button to change the notebook into power saving mode.
I YouCam
Launch
Button
Press the button to launch the Cyberlink YouCam application.
The Cyberlink Youcam allows the end user to incorporate dynamic effects
to live-instant message conversations.
J WIFI/
Bluetooth
®
wireless
technology
Button
Press to enable/disable WIFI/ Bluetooth
®
wireless technology.
K LEDs
A panel of several LEDs which indicate various system conditions.
For more information, please refer to: Introducing Your
NEC VERSA → LED Behaviour.
Page
14
L Power
Button with
LED
Press the button to power on / off the system.
Item Description
M Array Mic For voice conferencing and voice recording.
N Microphone In Jack Allows you to connect an external microphone.
O Headphones Out
Jack
Allows you to plug in the headphones or the external
speakers.

10
The Back View of the Notebook
Item Description
A Battery Bay Equipped with a rechargeable battery.
The Left Side View of the Notebook
Item Description
A Security Cable Slot Allows you to attach an anti-theft device to your notebook.
B VGA Port Use this 15-pin port to attach on external monitor to your
notebook.
C LAN Port This port can be used to connect your notebook to a network.
D
USB Port Each Universal Serial Bus (USB) port allows you to connect
USB-equipped peripheral devices (such as printers, monitors,
scanners) to your notebook.
E
Optical Drive This slot houses an optical drive. The optical drive that
comes with your system depends on the notebook
configurations you purchase.

11
The Right Side View of the Notebook
Item Description
A Memory Card
Reader
This port allows you to access five different types of
memory card. (For SD, SDHC, MS, MS Pro, MMC)
B
ExpressCard
™
Slot Allows you to insert an ExpressCard
™
.
C USB Port Each Universal Serial Bus (USB) port allows you to connect
USB-equipped peripheral devices (such as printers, monitors,
scanners) to your notebook.
D Modem Port
(For specific models
only)
Use this port to connect the system to an analog telephone line
for access to the internet.
E USB Port Each Universal Serial Bus (USB) port allows you to connect
USB-equipped peripheral devices (such as printers, monitors,
scanners) to your notebook.
F High-Definition
Multimedia
Interface
The High-Definition Multimedia Interface (HDMI) is designed
for transmitting digital television audiovisual signals from DVD
players, set-top boxes and other audiovisual sources to
television sets, projectors and other video displays.
HDMI can carry high quality multi-channel audio data and all
standard and high-definition consumer electronics video
formats. Content protection technology is available.
G Ventilator Allows your system to cool properly and maintain a safe
operating environment.
WARNING
Do not block the ventilator while the notebook is in use.
H AC Power Port Lets you attach notebook to the AC Power source using the AC
adapter that comes with your system. Keep the system
connected to AC power whenever possible.

12
The Bottom View of the Notebook
Item Description
A Battery Release
Latch
Releases the battery from the battery bay.
For more information, please refer to: Introducing
Your NEC VERSA → Replacing the Battery.
Page
20
B Battery Security
Lock
Secures the battery inside the battery bay.
For more information, please refer to: Introducing
Your NEC VERSA → Replacing the Battery.
Page
20
C Battery Bay Equipped with a rechargeable Lithium-Ion (Li-Ion) battery.

13
Keyboard
The keyboard is equipped with many features. However the outlook of the keyboard may be
slightly different from your actual unit. These include:
• Function Keys (A) - function keys are available on the notebook keyboard. These keys
work together with the Fn key to activate special functions. Function keys are application-
driven. For more information, please refer to the note on “Function Keys”.
• Numeric Keypad (B) - pressing Fn+Num Lock on the keyboard activates the numeric
keypad numbers and functions printed in blue at the bottom right corner of the keys. The
keypad lets you type numbers and mathematical operators (+, -) as you would on a
calculator. The keypad is ideal for entering long lists of numbers. When you press
Fn+Num Lock again, the keys revert to their normal functions as typewriter keys.
• Control keys (C) - Ctrl, Alt, Fn and Shift are controls used in conjunction with other
keys to change their functions. To use control keys, press and hold down the control key
while pressing another key. For example, "Press Ctrl+c" means to hold down the Ctrl key
and press the c key. Key combinations are specific to the application you are running.
• Windows
®
keys (D) - use the following two keys to facilitate your work.
Shortcut/Application key - provides quick access to shortcut
menus. (This key acts like a mouse’s right-click button.)
Floating Windows
®
key - displays the Start menu. (The
outlook of the Floating Windows
®
key depends on the
notebook you purchase.)
• Cursor Control keys (E) - cursor control keys let you position the cursor on the screen.
On the screen, the cursor is a blinking underline, block, or vertical bar depending on the
application. The cursor indicates where the next typed character/text will be inserted.

14
LED Behaviour
Item Description
Num Lock
LED Indicator
Yellow When Num Lock is activated.
Caps Lock
LED
Indicator
Yellow When Caps Lock is activated.
Scroll Lock
LED Indicator
Yellow When Scroll Lock is activated.
Blue When system is Powered On.
Power Button
LED Indicator
Blinks Blue When system is in Standby mode.
Green When system is Powered On.
Power Status
LED Indicator
Blinks
Green
When system is in Standby mode.
Off The battery is not charging.
Green The battery is charging.
Red Battery capacity (low).
Battery
Charge
LED Indicator
CAUTION
Before you connect or disconnect the power cable at
the AC port of your notebook, please ensure that the
power plug is disconnected from the wall outlet .
Note
Connect the AC adaptor cable into the power port on
the notebook when the battery is in warning or low
status.
Green WIFI is enabled.
WIFI/
Bluetooth
®
wireless
technology
LED Indicator
Blue Bluetooth
®
wireless technology is enabled.
IDE Access
LED Indicator
Blinks Red When the notebook accesses the hard disk drive or
optical disk drive.

15
Function Keys
Function keys are available on the notebook keyboard. These keys work together with Fn key
to activate special functions.
Function keys are application-driven.
The following function key combinations are pre-programmed for the notebook.
Function Key Description
Fn + F2 Display toggle.
Fn + F3 Enables / Disables the touchpad.
Fn + F4 Brightness down.
Fn + F5 Brightness up.
Fn + F7 Volume down.
Fn + F8 Volume up.
Fn + F9 Sound mute.
Fn + F12 Sleep.
Power Button
Use the Power button in the following ways:
• Press the Power button to power on.
• Press the Power button to move from Standby mode and to proceed with normal
operations.
• Press and hold the Power button in place for 4 or more seconds to initiate power override
(powers off the notebook). Only use this option if you cannot power off your notebook
using the normal procedure.
Put the unit in Standby mode when you need to be away from your notebook for a short period
of time and want to return to where you left off. Standby mode shuts down all devices in the
notebook while retaining data and notebook status.
For more information, please refer to: Windows Vista
®
Operating System
Introduction → Managing System Power.
Page
29
Optional Accessories
For more information on accessories, please refer to or contact to the local sales
representative near you.

16
Using the Touchpad
The touchpad is an easy way to control the cursor with your finger. Lightly glide your
finger across the touchpad and the cursor will replicate your movement on the screen.
To use the touchpad, you can:
• Single tap the touchpad, or single click on the left button, equivalent to a single click of
the primary mouse button.
• Double tap the touchpad, or double click on the left button, equivalent to a double click
of the primary mouse button.
• Click the left button and hold, then drag your finger across the touchpad, equivalent to a
click and drag of the primary mouse button.
Item Description
A Touchpad This device replaces the mouse and is for positioning the cursor
on a notebook display screen.
B Left Button This is the primary button. Clicking it usually selects the item
your cursor is pointing at.
C Right Button Clicking this button usually opens a menu of options available for
the item currently selected.
If you find the double tap difficult to use, go to the next section for general directions about
adjusting the touchpad properties.
Note
If you install another mouse driver over the shipping default, the double-tap
capability may be lost.
Touchpad Tips
Follow these basic ergonomic tips while working:
• Use a light touch on the touchpad surface.
• Set up the notebook with your keyboard and touchpad at a comfortable height. Keep
your forearms parallel to the floor. Your wrists should be relaxed and straight.
• While using the keyboard and touchpad, keep your shoulders and arms as relaxed as
possible.
• Take regular breaks from the notebook to rest your eyes. Perform stretching exercises
to relax your fingers, hands, wrists, forearms and shoulders.

17
Power Sources
The notebook can be powered using two different sources, making it a truly portable system.
Operate your notebook just about anywhere using one of the following power sources:
• The AC adaptor connected to an AC power outlet (usually on a wall).
• The battery pack.
For more information, please refer to: Introducing Your NEC VERSA → Using
the Battery.
Page
18
Read the following sections for specific information about using the power sources.
AC Adaptor
Use the AC adaptor and power cable that come with your notebook to run your notebook on
AC power, or to recharge the battery pack. Use the AC adaptor whenever an AC power outlet
is nearby.
Keep the adaptor connected whenever possible. The AC adaptor charges the battery when it is
connected, whether the notebook is powered on or off.
Note
The power cable may vary from country to country.
Note
Consult your dealer or the local electrical authorities if you are unsure of the type of
power cord to use in your country. Failure to use the correct power cord/cable may
result in electrical shock.
WARNING
Do not attempt to disassemble the AC adaptor. The AC adaptor has no user-
replaceable or serviceable parts inside. Dangerous voltage in the AC adaptor can
cause serious personal injury or death. The AC adaptor is intended for use with a
notebook and must meet EN609050 standards.
18
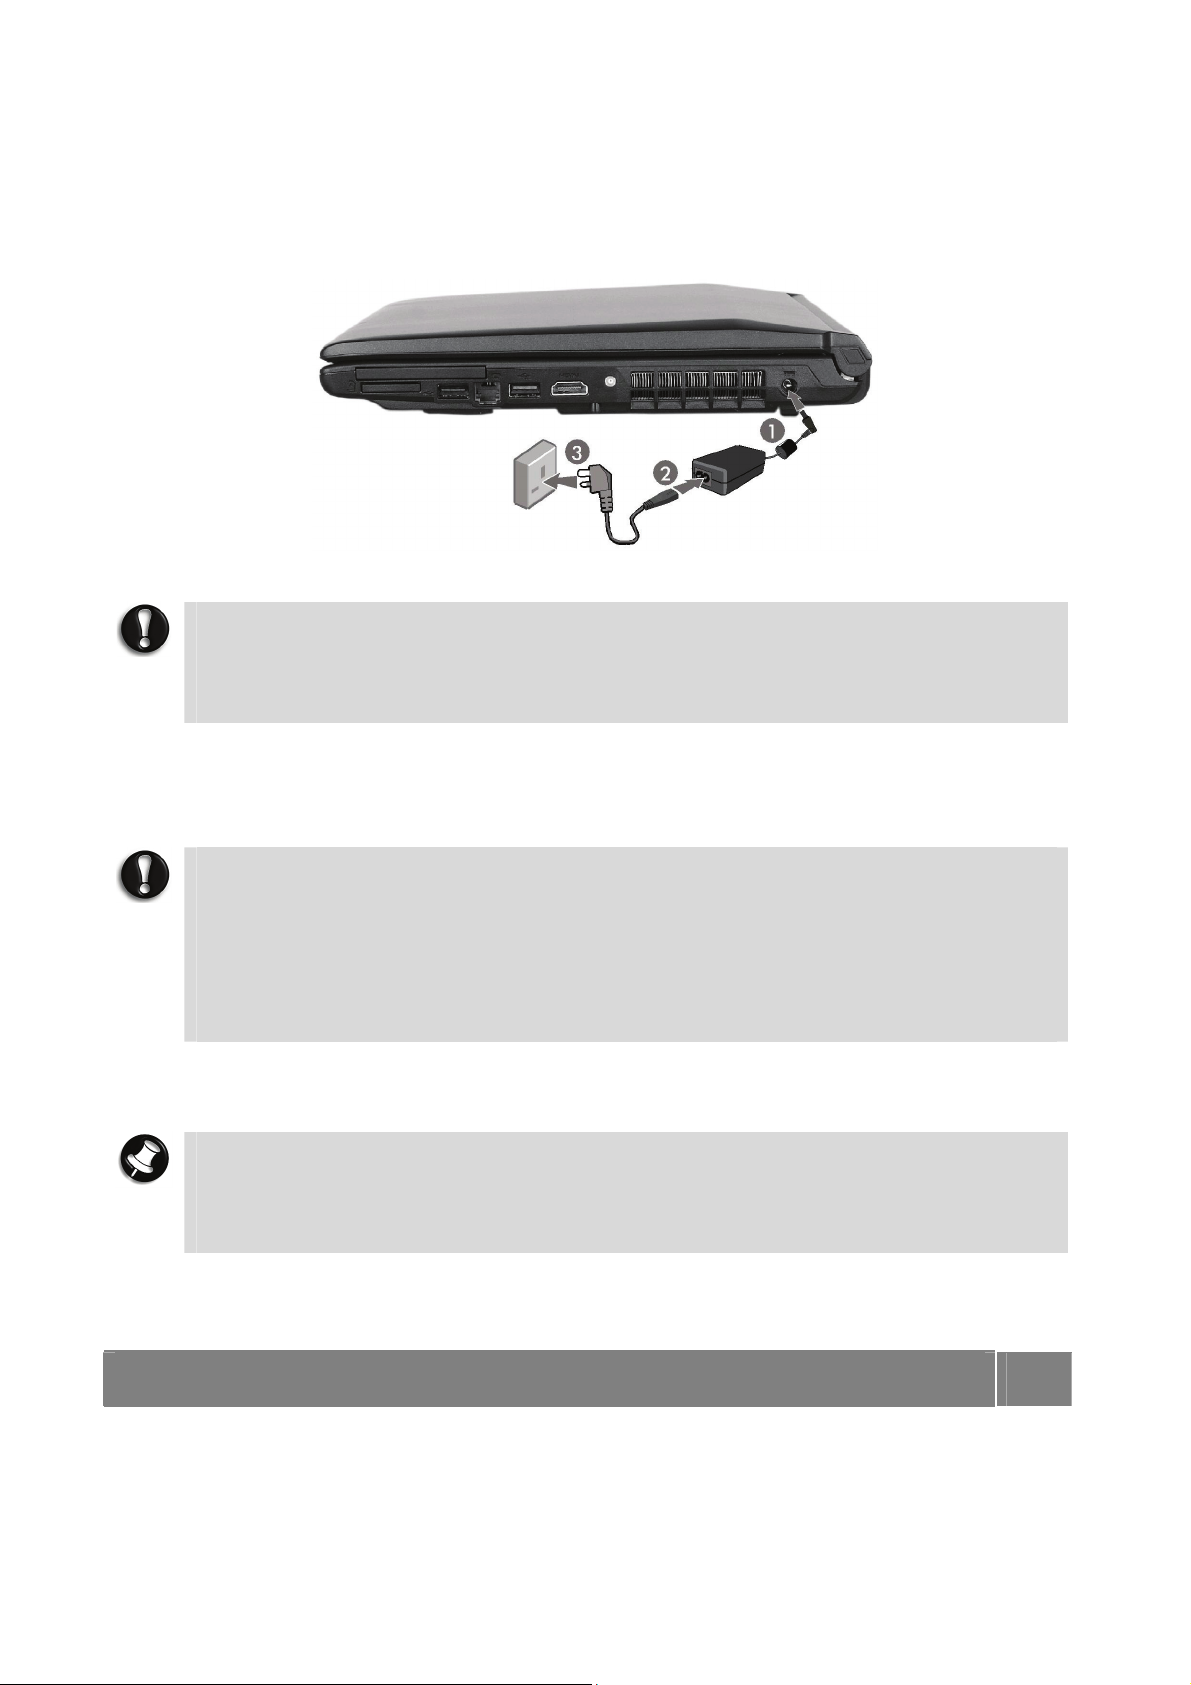
Connecting the AC Adaptor
Connect the AC adaptor as follows:
1. Connect the AC adaptor cable into the power port on the notebook.
2. Plug one AC adaptor cable into the adaptor.
3. Connect the AC adaptor cable to grounded 100- or 240-volt, 50- or 60-Hz AC power outlet.
CAUTION
• Do not cover or place objects on the AC adaptor. Keeping the adaptor clear of
objects lets the adaptor cool properly during use.
• Only use the AC adaptor that comes with your notebook. Although other
adaptors look similar, using them can damage your notebook.
Powering The Notebook On and Off
To power on, locate the power button (or switch) and press or switch it on.
CAUTION
This equipment uses an ungrounded power cable. Replace the cord if it becomes
damaged. The cord must be rated for at least 250VAC at 10 amps, and must
indicate international safety agency approval. The plug must be a type appropriate
for the country where it is used. Check with your local dealer for HAR
(Harmonisation certification mark) type 18 AWG (American Wire Gauge), 2
conductor cord, or better. Obtain replacement cords at an authorised service centre.
The replacement must be of the same type and voltage rating as of the original cord.
Using the Battery
Note
Although the battery is fully charged at the factory, transit and shelf time may
reduce the initial battery charge. We recommend that the first time you use your
notebook, you connect it to AC power using the AC adaptor. This also recharges your
battery.
When the battery capacity is low, always respond by immediately saving your data, and
connecting your notebook to the AC adaptor. If an AC adaptor is not available, change the
battery using the battery replacement procedure.
For more information, please refer to: Introducing Your NEC VERSA → Replacing
the Battery.
Page
20
If you do not take any action, the notebook will automatically go into Hibernation (Save To
File) mode.

19
WARNING
To prevent accidental battery ignition or explosion, adhere to the following:
• Keep the battery away from extreme heat.
• Keep metal objects away from the battery terminals to prevent a short circuit.
• Make sure the battery is properly installed in the battery bay.
• Read the precautions printed on the battery (if any).
• Remember to unplug the AC adaptor cable from the power port on the notebook
and from the grounded AC power outlet after your notebook is fully charged,
when your notebook is not in use or when you know that your notebook will be
unattended for long hours.
• Do not disassemble the battery.
Charging the Battery
Charge time depends on whether or not you are using the notebook.
For maximum battery performance, fully discharge the battery before recharging it. To do so,
unplug the AC adaptor, turn off power management features (through BIOS Setup and
Windows
®
power management), and turn on the notebook. Once the battery is fully
discharged, plug in the AC adaptor and recharge the battery.
Precautions for Recharging the Battery
• Adhere to the following precautions when recharging the battery.
• Use only the battery charger designed for your notebook battery type. Different NEC
VERSA models require different batteries and battery chargers.
• Charge the battery for the specified charge time only.
• During charging, keep the environmental temperature between 5°C and 35°C.
• Read the instructions that come with the battery charger before charging the battery.
Low Battery Power
When battery power gets low, connect your notebook to the AC adaptor.
If no AC adaptor is available, change the battery using the battery replacement procedure.
For more information, please refer to: Introducing Your NEC VERSA → Replacing
the Battery.
Page
20
Conserving Battery Power
The battery performance is affected by the following conditions:
• When it is new and fully charged.
• When no peripherals are connected to your notebook.
• When you have no options installed.
While on the road, it is important to be aware of the simple things you can do to extend the
life of the notebook's main battery. For instance, turning down the screen brightness (specific
function key) extends battery life.
Power Management Features
Enabling power management features increases battery life.
The Hibernate power management state, also known as Save-To-File (STF), saves the
notebook's current working environment to the notebook's hard drive, then powers down the
notebook to conserve battery power. You can configure your power management settings to
enter hibernation when your notebook reaches a critical low battery stage.
For more information, please refer to: Windows Vista
®
Operating System
Introduction → Managing System Power.
Page
29

20
Battery Precautions
To prevent accidental battery ignition, rupture, or explosion, adhere to the following
precautions.
WARNING
There is a danger of explosion if the battery is incorrectly replaced. Replace only
with the same or equivalent type recommended by the manufacturer. Discard used
batteries according to the manufacturer's instructions.
To avoid personal injury and property damage, read these battery precautions on
handling, charging and disposing batteries:
• Keep the battery away from heat sources including direct sunlight, open fires,
microwave ovens and high-voltage containers. Temperatures over 60ºC may
cause damage.
• Do not drop or impact the battery.
• Do not solder the battery.
• Do not puncture the battery.
• Do not use a battery that appears damaged or deformed, has any rust on its
casing, is discoloured, overheats, or emits a foul odour.
• Keep the battery dry and away from water.
• Keep metal objects away from battery terminals. Metal objects in contact with
the connectors can cause a short circuit and subsequently damage the battery.
If the battery leaks:
• If the battery leaks onto skin or clothing, wash the area immediately with clean
running water. Battery fluid can cause skin rashes and damage fabric.
• If battery fluid gets into the eyes, DO NOT RUB. Rinse with clean water
immediately and seek professional medical assistance.
• Take extra precautions to keep a leaking battery away from fire. There is a
danger of ignition or explosion.
Replacing the Battery
This section describes how to remove and replace the primary battery.
WARNING
To prevent accidental battery ignition or explosion, strictly adhere to the following:
• Keep the battery away from extreme heat.
• Keep metal objects away from the battery terminals to prevent a short circuit.
• Make sure the battery is properly installed in the battery bay.
• Read the precautions printed on the battery (if any).

21
Removing the Battery in your Notebook
CAUTION
Be sure to save your data before replacing the battery pack or connecting the AC
adaptor. Failure to do so can result in data loss.
Note
Place your notebook in this position and follow the steps stated to remove the
battery.
1
Save your files, exit Windows
®
,
and turn off system power.
2
Close the LCD panel and turn the
system over.
CAUTION
Be extra careful to avoid damage
to your notebook
3
Unlock the battery security lock.
4
Hold the latch to the "Unlock"
position.
5
Slide the battery outwards to
remove the battery.
Installing the Battery in your Notebook
Note
Place your notebook in this position and follow the steps stated to install the battery.
Insert the new battery as follows:
1
Turn the notebook over.
CAUTION
Be extra careful to avoid damage
to your notebook.
2
Make sure you unlock the battery
security lock.
3
Align the battery with the battery
bay slot and connector.
4
Place the battery into the battery
bay. Carefully press and secure
the battery into the battery bay.
5
Make sure you lock the battery
security lock.

22
Handling the Battery
Review the following before handling the notebook battery.
CAUTION
Only use the type of battery specifically designed for the notebook. Using other NEC
VERSA batteries, other manufacturer's batteries, or using a combination of very old
and new batteries can cause battery and equipment performance to deteriorate.
Turn off the notebook power after use.
• Clean the battery connectors with a dry cloth if they get dirty.
• When not in use, store the battery in a cool dry area.
The following symptoms indicate that battery life is nearing an end. Discard batteries that
display these symptoms:
• Shorter work times.
• Discolouration, warping.
• Hot to the touch.
• Strange odour.
Disposing of the Battery
Before disposing of the battery, put adhesive tape on the connectors. Contact your local waste
management officials for information regarding environmentally sound collection, recycling and
disposal of batteries.

23
Introducing BIOS Setup for Windows Vista
®
A hardware program called BIOS Setup allows you to view and set system parameters. BIOS
Setup also allows you to set password features that protect your notebook from unauthorised
use.
Use BIOS Setup to:
• Set the current time and date.
• Customise your operating system to reflect your notebook hardware.
• Secure your notebook with a password.
• Balance your performance needs with power conservation.
Entering BIOS Setup
The BIOS Setup can be accessed during the startup or booting of your notebook. Just press
<F2> when the following prompt appears.
“Press <F2> to run CMOS Setup or <F12> to Boot on Network”
When you press <F2> to enter BIOS Setup, the system interrupts the Power-On Self-Test
(POST) and displays the current complementary metal-oxide semiconductor (CMOS) RAM
settings.
If the system detects an error during POST, it prompts you with a double beep and the
message: "Press <F1> to resume." If you press <F2>, the system enters BIOS Setup
automatically. If you want to fix the error, carefully read the error message that appears
above the prompt (taking notes if you want), and press <F2>. You will see this message if
your system’s CMOS battery (which provides power to maintain system configuration settings)
has become fully discharged.
BIOS Setup Menus
The BIOS Setup features five menus, which are listed on the menu bar at the top of the
screen.
Main - use this menu for basic system configuration.
Advanced - use this menu to control system ports and components.
Security - use this menu to establish system passwords and protect the boot sector of the
hard disk drive against infection by certain virus types.
Boot - use this menu to set the boot sequence.
Exit - use this menu to exit BIOS Setup with various save or discard options.
Use the keys listed in the legend bar on the bottom of the Setup menu to make the selections
or exit the current menu.
The exact menu may be different from the notebook you purchase depending on the
mainboard type.

24
Introducing BIOS Setup for Windows
®
XP
A hardware program called BIOS Setup allows you to view and set system parameters. BIOS
Setup also allows you to set password features that protect your notebook from unauthorised
use.
Use BIOS Setup to:
• Set the current time and date.
• Customise your operating system to reflect your notebook hardware.
• Secure your notebook with a password.
• Balance your performance needs with power conservation.
Entering BIOS Setup
The BIOS Setup can be accessed during the startup or booting of your notebook. Just press
<F2> when the following prompt appears.
“Press <F2> to Enter BIOS Setup - <F8> to Display Boot Order”
When you press <F2> to enter BIOS Setup, the system interrupts the Power-On Self-Test
(POST) and displays the current CMOS RAM settings.
If the system detects an error during POST, it prompts you with a double beep and a message:
"Press <F1> to resume." If you press <F2>, the system enters BIOS Setup automatically. If
you want to fix the error, carefully read the error message that appears above the prompt
(taking notes if you want), and press F2. You will see this message if your CMOS battery has
become fully discharged.
BIOS Setup Menus
The BIOS Setup features five menus, which are listed on the menu bar at the top of the
screen.
Main - use this menu for basic system configuration.
Advanced - use this menu to control system ports and components.
Security - use this menu to establish system passwords and protect the boot sector of the
hard disk drive against infection by certain virus types.
Exit - use this menu to exit BIOS Setup with various save or discard options.
Use the keys listed in the legend bar on the bottom of the Setup menu to make the selections
or exit the current menu.
The exact menu may be different from the notebook you purchase depending on the
mainboard type.
Updating the BIOS
Please note that these settings are rarely changed by the common user as factory settings are
usually updated, and should only be accessed or changed by an experienced user.
The BIOS is the code transmitted onto your notebook's Flash ROM. As indicated in this chapter,
you use the BIOS Setup utility to configure your notebook's software and hardware features.
Only update your notebook’s BIOS using the update files specific to your notebook’s model.
CAUTION
You only need to update the BIOS if significant improvements or fixes have been
made to the current system BIOS. Your authorised dealer or Support Services
representative can help you determine this.

25
Windows Vista
®
Operating System Introduction
*
Only applicable to Windows Vista
®
The operating system is the most important program that runs on a computer. Every computer
must have an operating system to run other programs. Operating systems perform basic
tasks, such as recognising input from the keyboard, sending output to the display screen,
keeping track of files and directories on the disk, and controlling peripheral devices such as
disk drives and printers.
Your notebook comes pre-installed with a version of the Windows
®
operating system.
Windows Vista
®
Operating Systems
The Windows Vista
®
operating systems provide a means of running applications, navigating
through your file structure, and using your notebook. Each operating system offers its own
look and tools through an easy-to-use graphical interface.
Windows Vista
®
Operating System Setup
For Windows Vista
®
operating system setup
When you switch on the notebook, the message “
©
Microsoft Corporation” will be displayed.
Please wait a while for the First page of set up Windows
®
screen to be displayed.
Note
The procedure described below applies to systems featuring LAN capabilities. Some
of these screens may otherwise not appear.
1: Initial Windows
®
setup screen.
Choose your appropriate Country or Region, Time and Currency, and Keyboard Layout.
Then click the Next button at the lower right corner.
2: The End User License Agreement screen.
Carefully read the license agreement and click in the relevant check box to accept its
terms. Click the Next button.
3: Username and picture selection screen.
Enter a username and password (optional) and also choose a picture at the bottom of the
screen to represent your user account. Click the Next button.
4: Notebook name and desktop background selection screen.
Enter a notebook name then choose a desktop background from 6 options available at the
bottom of the screen. Click the Next button.
5: Helping protect Windows
®
automatically screen.
There are 3 options available; read each description and click your preferred option.
6: Time and date settings screen.
Choose and set appropriate Time Zone, Date and Time. Click the Next button.
7: Notebook’s current location screen.
This page only appears if your notebook is connected to a network. There are 3 options
available; read each description and click your preferred option.
8: Thank you! screen.
Click the Start button to complete the Windows Vista
®
operating system installation.

26
Dual Boot (2 languages)
*For Hong Kong dual boot models only
There are 2 language versions of the Windows Vista
®
operating system available on this
notebook, that is, in English and Traditional Chinese. When you start your notebook for the
first time, you are required to choose either one of the operating system languages you prefer
(please refer to the screen illustration below). Please select the language you prefer carefully
as this can only be done once.
You will see the message "
©
Microsoft Corporation” displayed on your screen. Please wait for a
moment while the initial Windows
®
setup screen loads.
For more information, please refer to: Windows Vista
®
Operating System
Introduction → Windows Vista
®
Operating System Setup.
Page
25
IMPORTANT
Windows
®
Language Selection
*This option is applicable to Hong Kong dual boot models only.
CAUTION
Once you have selected the language you prefer, your operating system will be
installed with the selected language permanently. You will not be able to change this
selection for the operating system language.
Referring to the guide provided above, please follow the on screen instructions accordingly.

27
Windows Vista
®
Operating System
Windows Vista
®
operating system features include a Desktop with room to manoeuvre, a
taskbar for quick access to a variety of system functions, state-of-the-art plug and play
support, powerful system utilities, enhanced entertainment features and a fully integrated
Internet experience.
Among the new features are:
Windows
®
Explorer – Windows
®
Explorer has also had its functionality expanded. Explorer
windows now are 3-paned, with extra information and functionality in the middle window.
Preview Applet – For viewing and editing images. An enhanced Preview Applet is included
that lets you view, zoom in and out, rotate, print, save (as), and delete images. This is
supported by the Windows
®
Bitmap, JPEG, GIF, TIF and PNG formats.
Desktop Icons
With Windows Vista
®
, the following icons* are installed on your Desktop:
Recycle Bin – Gives you a container in which to put and discard unwanted files or allows you
to restore these same files back to their original location.
Taskbar Icons
With Windows Vista
®
, a number of icons appears on the taskbar. Use the cursor to hover over
the icon and display its function. Right-click on the icon to display its menu options, or double-
click on the icon to launch it.
Right click an empty area of the taskbar and select Properties to recognise the taskbar.
For more information, please refer to: Windows Vista
®
Operating System
Introduction → Tips for Using Windows Vista
®
.
Page
31
The quick launch on the left hand side of the taskbar can be hidden or active. The notification
area on the right hand side of the taskbar can be easily configured, for instance, to hide icons
that are not used frequently. Some hardware items or software titles will place a small icon in
this area, allowing you to easily recognise and control their settings or status (examples are
virus scanners, printers, PC cards).
The following icons* normally appear in the notification area:
Time Clock – Allows you to adjust the time and date, select your time zone, and offers the
option to automatically synchronise the time with an internet time server.
For more information about the Desktop and taskbar icons, refer to the Windows Vista
®
online
help. To do this, click on Start button
, and select Help and Support.
Depending on the version of Windows Vista
®
installed on your notebook or if you have
deactivated certain programs, the icons described here may differ slightly and/or may be
accompanied by others.

28
Start Menu
The Start menu features a whole new look and feel. The Windows
®
Internet Explorer icon has
a prominent place now. You will also notice that Windows Vista
®
places your frequently used
programs in the white area of the Start menu. It is safe to remove an item from this list by
right-clicking the icon and selecting Remove from this list, as the software program itself will
not be deleted.
You can access your installed software and other Windows
®
programs by selecting All
Programs. Recently installed programs are highlighted.
Technical Support Information
Technical support information is available in Windows Vista
®
.
Click the Start button
, right-click on Computer and select Properties.

29
Managing System Power (Windows Vista
®
Operating System)
In the Windows Vista
®
operating system environment, your notebook manages its power
resources using the Advanced Configuration and Power Interface (ACPI) while the notebook is
powered on using AC or battery (DC) power. ACPI enables the operating system to manage
the power given to each attached device and to turn off a device when not in use.
Take advantage of the opportunity to manage power on your notebook to:
• Minimise battery drain.
• Preserve the life of your notebook.
• Save time. When you return from that urgent call or meeting, you don’t have to reboot,
just press the Power button to resume notebook operation.
Windows Vista
®
Operating System Power Options Properties
In Windows Vista
®
operating system, most ACPI power management settings are controlled
through Windows
®
Power Options, not through the BIOS Setup utility, unless otherwise noted.
To access Windows
®
Power Options, click the Start button , Control Panel, select
Performance and Maintenance, double click Power Options.
The Power Options Properties are broken down as follows:
Power Plan
Use the Power Schemes tab options to define the appropriate power scheme for your
notebook, and to set timeouts for standby, monitor, and hard disk.
Parameter Options Description
Power Plan VERSA
Balanced
Power Saver High Performance
Defines the most appropriate power
scheme for your notebook.
Turn off monitor
(plugged in)
½/3/5/10/15/25/30/45
minutes
½/3/4/5 hours
Never
Selects the time delay before your
LCD panel turns off.
Turn off monitor
(running on batteries)
½/3/10/15/20/25/30/45
minutes
½/3/4/5 hours
Never
Selects the time delay before your
LCD panel turns off.
Turn off hard disks
(plugged in)
3/5/10/15/20/25/30/45
minutes
½/3/4/5 hours
Never
Selects the time delay before your
hard disk(s) power down.
Turn off hard disks
(running on batteries)
3/5/10/15/20/25/30/45
minutes
½/3/4/5 hours
Never
Selects the time delay before your
hard disk(s) power down.
System Sleep (plugged
in)
½/3/5/10/15/20/25/30/45
minutes
2/3/4/5 hours
Never
Selects the system sleep timeout
period for your notebook when
running under AC power.

30
System Sleep (running
on batteries)
½/3/5/10//20/25/30/45
minutes
½/3/4/5 hours
Never
Selects the system sleep timeout
period for your notebook when
running under DC power.
System Hibernates
(plugged in)
Never Selects the system hibernation
timeout period for your notebook
when running under AC power.
System Hibernates
(running on batteries)
Never Selects the system hibernation
timeout period for your notebook
when running under DC power.
Default settings are shown in red.
Alarms
Use the Alarms tab to define the point at which the battery alarm activates. Define the alarm
to either sound, display a warning message, or invoke Standby, Hibernate or Shutdown.
Parameter Options Description
Low battery alarm 10%
0-100%
Allows you to define a low
battery alarm percentage,
notification, and system
action.
Notification Display message
Sound alarm
Allows you to define whether
the alarm is visual or auditive.
Alarm Action Sleep
Hibernate
Shut down
Do nothing
Allows you to define which
action is taken by the
notebook when the alarm goes
off.
Critical battery alarm 3%
0-100%
Allows you to define a critical
battery alarm percentage,
notification, and system
action.
Notification Display message
Sound alarm
Allows you to define whether
the alarm is visual or auditive.
Alarm Action
Sleep
Hibernate
Shut down
Allows you to define which
action is taken by the
notebook when the alarm goes
off.
Default settings are shown in red.
Advanced
The Advanced tab allows you to select the power-saving settings you want to use.
Parameter Options Description
Always show icon on taskbar Checked
Unchecked
Determines whether or not
the Power Meter icon displays
on the taskbar.
 Loading...